manuals.online logo
Brands
  1. Home
  2. •
  3. Brands
  4. •
  5. Little Cottage
  6. •
  7. Garden House
  8. •
  9. Little Cottage Value Gable Shed Installation guide

Little Cottage Value Gable Shed Installation guide

LITTLE COTTAGE CO.




© 2020 Little Cottage Co.

 
- Cordless Drill (12 V Or Higher)
- #2 Square Drive Bit
- Hammer
- 6’ Step Ladder
- Tape Measure
- Square Utility Knife With
Blade & Hook Blade
- Speed Square
Sizes: 8’x8’, 8’x10’, 8’x12’, 8’x14’, 8’x16’, 10’x10’, 10’x12’, 10’x14’,
10’x16, ’10’x18’, 10’x20, ’12’x12’, 12’x14’, 12’x16’, 12’x18’, 12’x20’, 12’x24’

- Shingles
- Drip Edge
- Paint
See the Kit Packing
List Included For
Quantities


2

© 2020 Little Cottage Co.

5. Set OSB sheeting in place, using the speed square,
make sure the OSB is ush with the 2x4 on both sides.
6. Secure the OSB sheeting in place by fastening it with
2” nails to the 2x4’s every 6-8 inches.
1.

If you have any questions during construction please
call us at 330-893-4212. You will nd all the components
necessary to build your storage shed. Refer to your buy
list for specic contents which will vary by unit.
 Using the oor diagram layout sheet, locate your rim
and oor joist and lay them out.
Note: A 10x14 workshop shed was used for the pictures
shown, your layout may vary.
. Start at the corner and use the square to make sure
the corner is ush and fasten with 3” nails.
4. Next square up the oor. To square the oor, use a tape
measure to nd the distance from one corner to the other, then
measure the diagonal between the remaining 2 corners. If the
two measurements are the same, then your oor is already
squared. If they aren’t, adjust the oor until the measurements
are the same.


3

© 2020 Little Cottage Co.

7. Using the wall diagram layout sheet, locate the 2x4
wall plates for the wall section as show.
 To create the wall interior, fasten the 2x4 studs with 3”
nails, in between the 2x4 top and bottom plates.
 Next place the 2x4’s for the windows if you have
purchased a workshop and fasten with 3” nails.
10. Install the 2x4 header and fasten with 3” nails.
11. Next locate the Smartside siding. Place the siding on
top of the 2x4 studs.
 Make sure the corners of the siding are ush with the
corners of the 2x4 studs, as shown.


4

© 2020 Little Cottage Co.

Next make sure the top of the siding is ush with 2x4
studs.
14. Make sure the outside corners are ush as shown
before fastening with the 2” nails.
Note: There will be a
3” skirt at the bottom.
15. Continuing with Smartside siding installation, place
the header piece into place.
17. Next install door stops as shown. Keep ush with the
top of 2x4 (not the Smartside) and secure with 2” nails.
Install the trim block in the center of the header and
secure with 2” nails.
16. Fasten the header piece with 2” nails as shown.


5

© 2020 Little Cottage Co.

. Install the 2 3/4” trim around the door. Secure the
trim with 2” nails, staying at least 1 1/4” in from the inside
edge, so they do not interfere with the hinge screws
later.
 Lay wall to side as shown.
 Using the wall layout diagram sheet build the next
wall as shown.
 Install the Smartside siding, making sure the siding is
ush with the 2x4 top plate and end stud.
 Continue installing the Smartside siding. Note: There
will be a 3” skirt at the bottom.
 Continue installing, keeping the top-side ush.

This manual suits for next models

1

Other Little Cottage Garden House manuals

Little Cottage Hunting Blind User manual

Little Cottage

Little Cottage Hunting Blind User manual

Little Cottage Classic Saltbox User manual

Little Cottage

Little Cottage Classic Saltbox User manual

Little Cottage Star Barn User manual

Little Cottage

Little Cottage Star Barn User manual

Little Cottage Atlanta Chicken Coop User manual

Little Cottage

Little Cottage Atlanta Chicken Coop User manual

Popular Garden House manuals by other brands
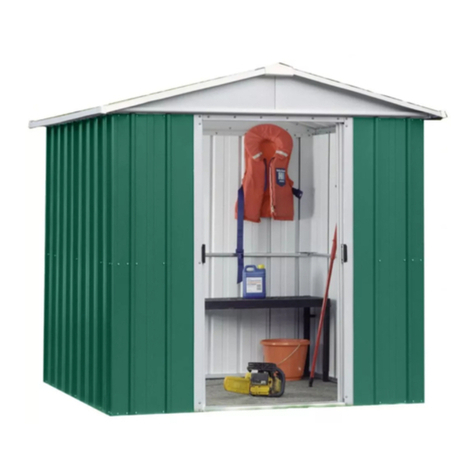
Yardmaster 66 ZGEY Assembly instructions

Yardmaster

Yardmaster 66 ZGEY Assembly instructions

Mercia Garden Products 0628LOG181-V4 manual

Mercia Garden Products

Mercia Garden Products 0628LOG181-V4 manual

Lemeks Palmako PA120-5930-6 Assembly, installation and maintenance manual

Lemeks

Lemeks Palmako PA120-5930-6 Assembly, installation and maintenance manual

Rion Hobby Gardener Assembly instructions

Rion

Rion Hobby Gardener Assembly instructions

Select ISAAC E9682 Assembly manual

Select

Select ISAAC E9682 Assembly manual

Palmako Saale installation manual

Palmako

Palmako Saale installation manual

Palmako Roger FR44-5953-2 installation manual

Palmako

Palmako Roger FR44-5953-2 installation manual

Lemeks Palmako Grace PM56-4529 Assembly, installation and maintenance manual

Lemeks

Lemeks Palmako Grace PM56-4529 Assembly, installation and maintenance manual

Mercia Garden Products 03WES0808-V1 General instructions

Mercia Garden Products

Mercia Garden Products 03WES0808-V1 General instructions

Mercia Garden Products 03DTSHHP1206HGD4MW-V1 General instructions

Mercia Garden Products

Mercia Garden Products 03DTSHHP1206HGD4MW-V1 General instructions

Shire Salcey Assembly

Shire

Shire Salcey Assembly

Pergola kits USA PREMIUM VINYL PAVILION Assembly manual

Pergola kits USA

Pergola kits USA PREMIUM VINYL PAVILION Assembly manual

G21 Boston 882 manual

G21

G21 Boston 882 manual

Mercia Garden Products 05DTMBPN0503DD-V1 Assembly instructions

Mercia Garden Products

Mercia Garden Products 05DTMBPN0503DD-V1 Assembly instructions

Rutland County Burley 6ft Assembly instructions
Rutland County

Rutland County Burley 6ft Assembly instructions

Palmako Roger 27,7 installation manual
Palmako

Palmako Roger 27,7 installation manual

Mercia Garden Products 01PTOSBA0306DDNW-V1 General instructions

Mercia Garden Products

Mercia Garden Products 01PTOSBA0306DDNW-V1 General instructions

Gartenhaus-King Valery manual

Gartenhaus-King

Gartenhaus-King Valery manual

manuals.online logo
manuals.online logoBrands
  • About & Mission
  • Contact us
  • Privacy Policy
  • Terms and Conditions

Copyright 2025 Manuals.Online. All Rights Reserved.