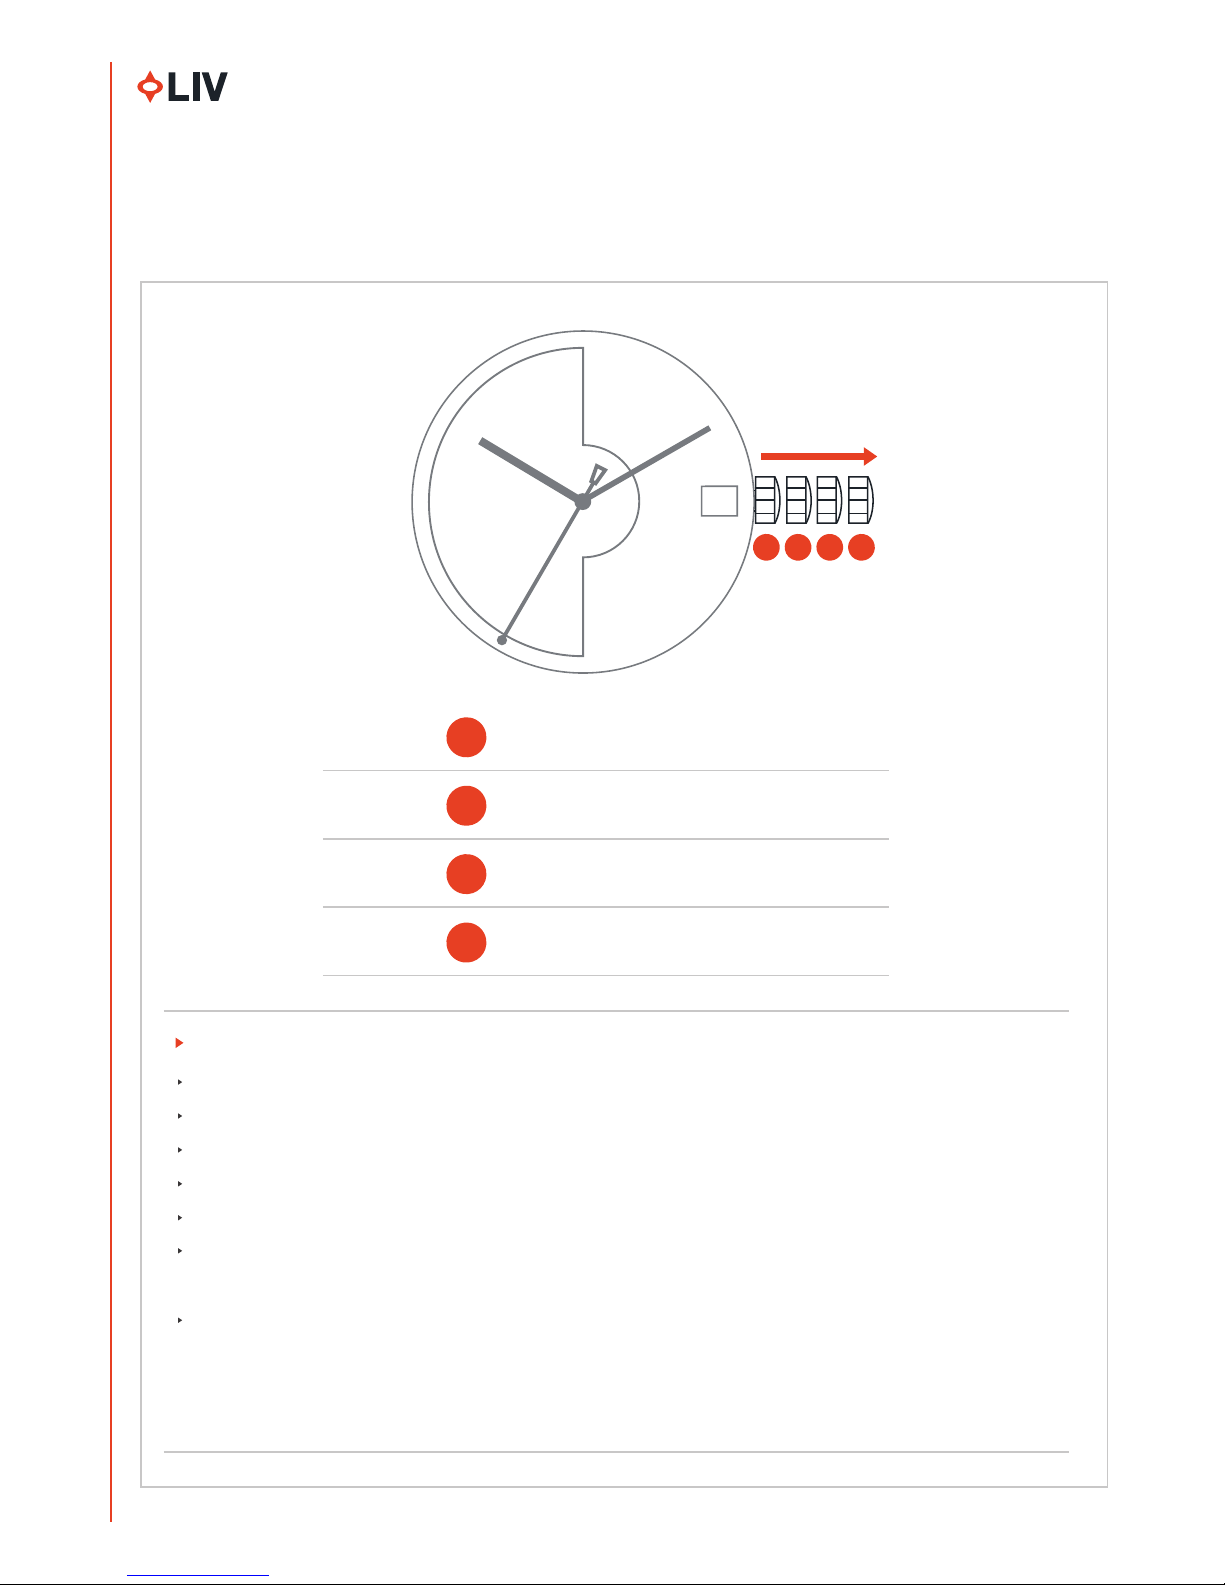
THE MOVEMENT
DESCRIPTION:
Made in Switzerland
Features precision Swiss Quartz Analog
Movement (RONDA powertech Caliber 515)
Powered by a battery
PERFORMANCE:
Standard battery life of 45 months
DISPLAY:
Hours-minutes-seconds
Date window
User’s Manual
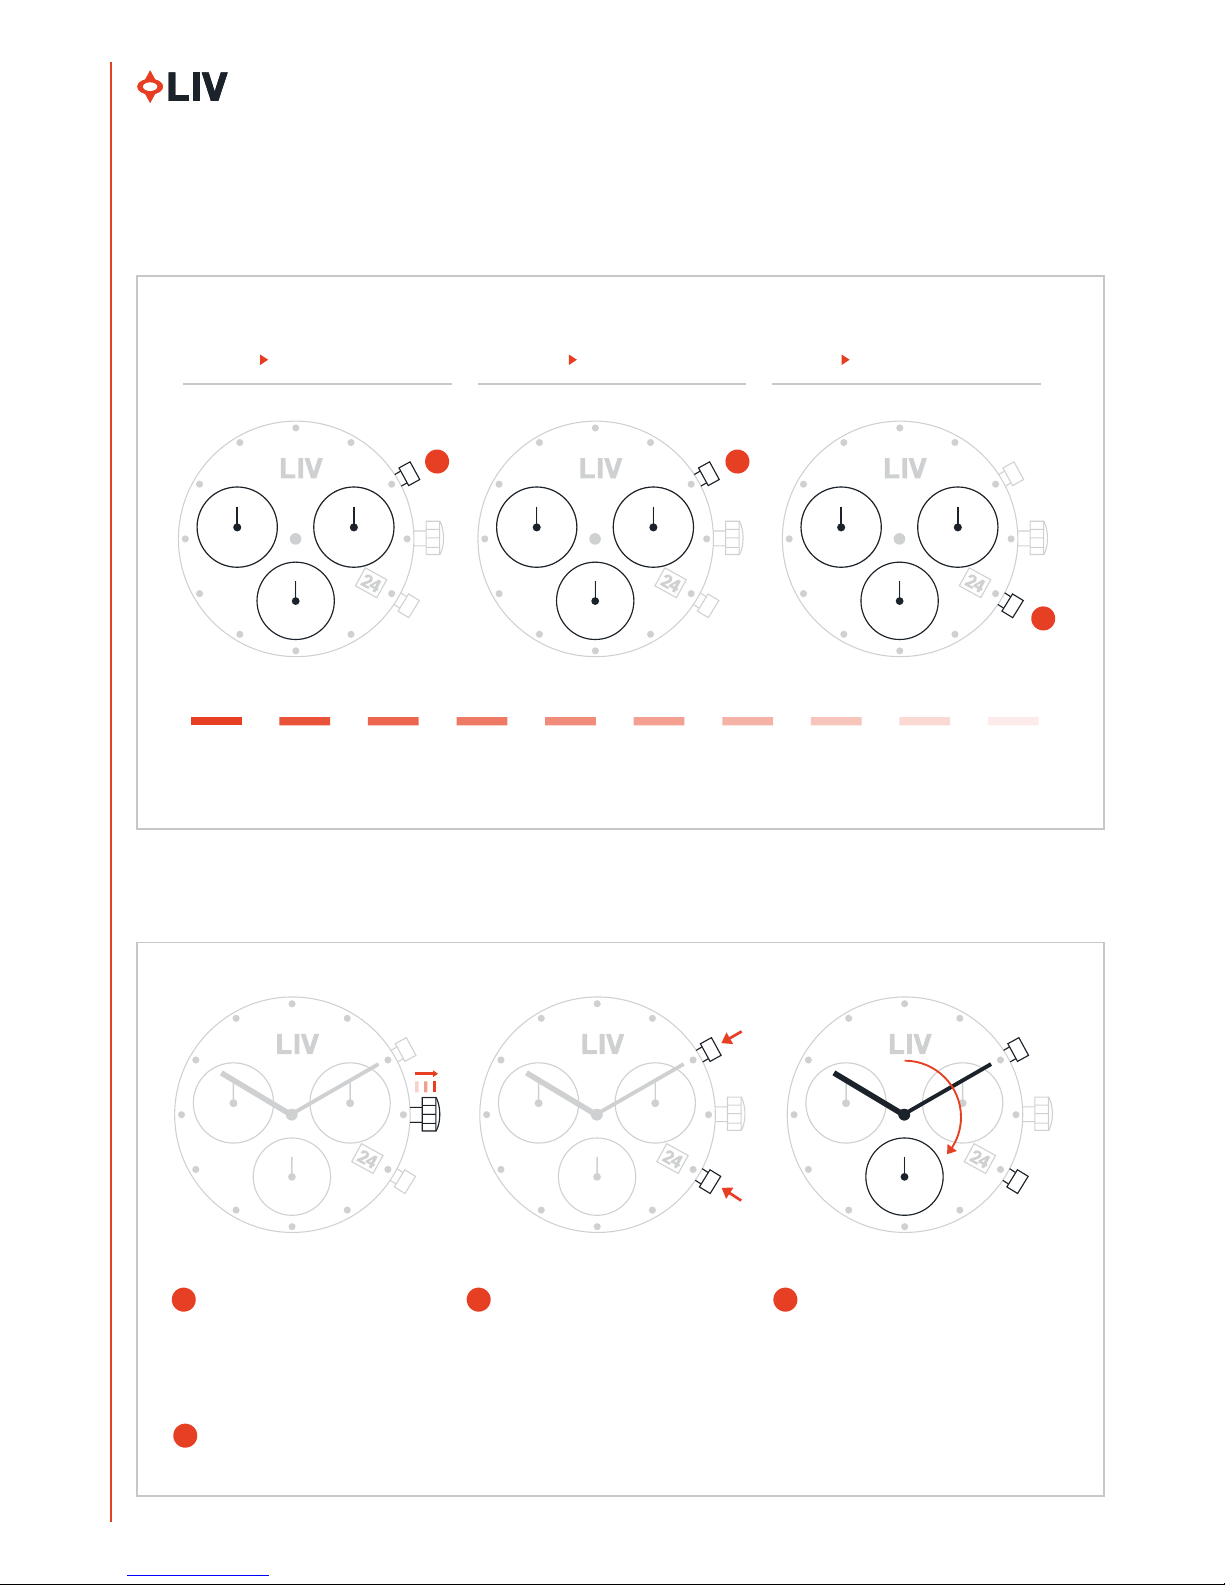
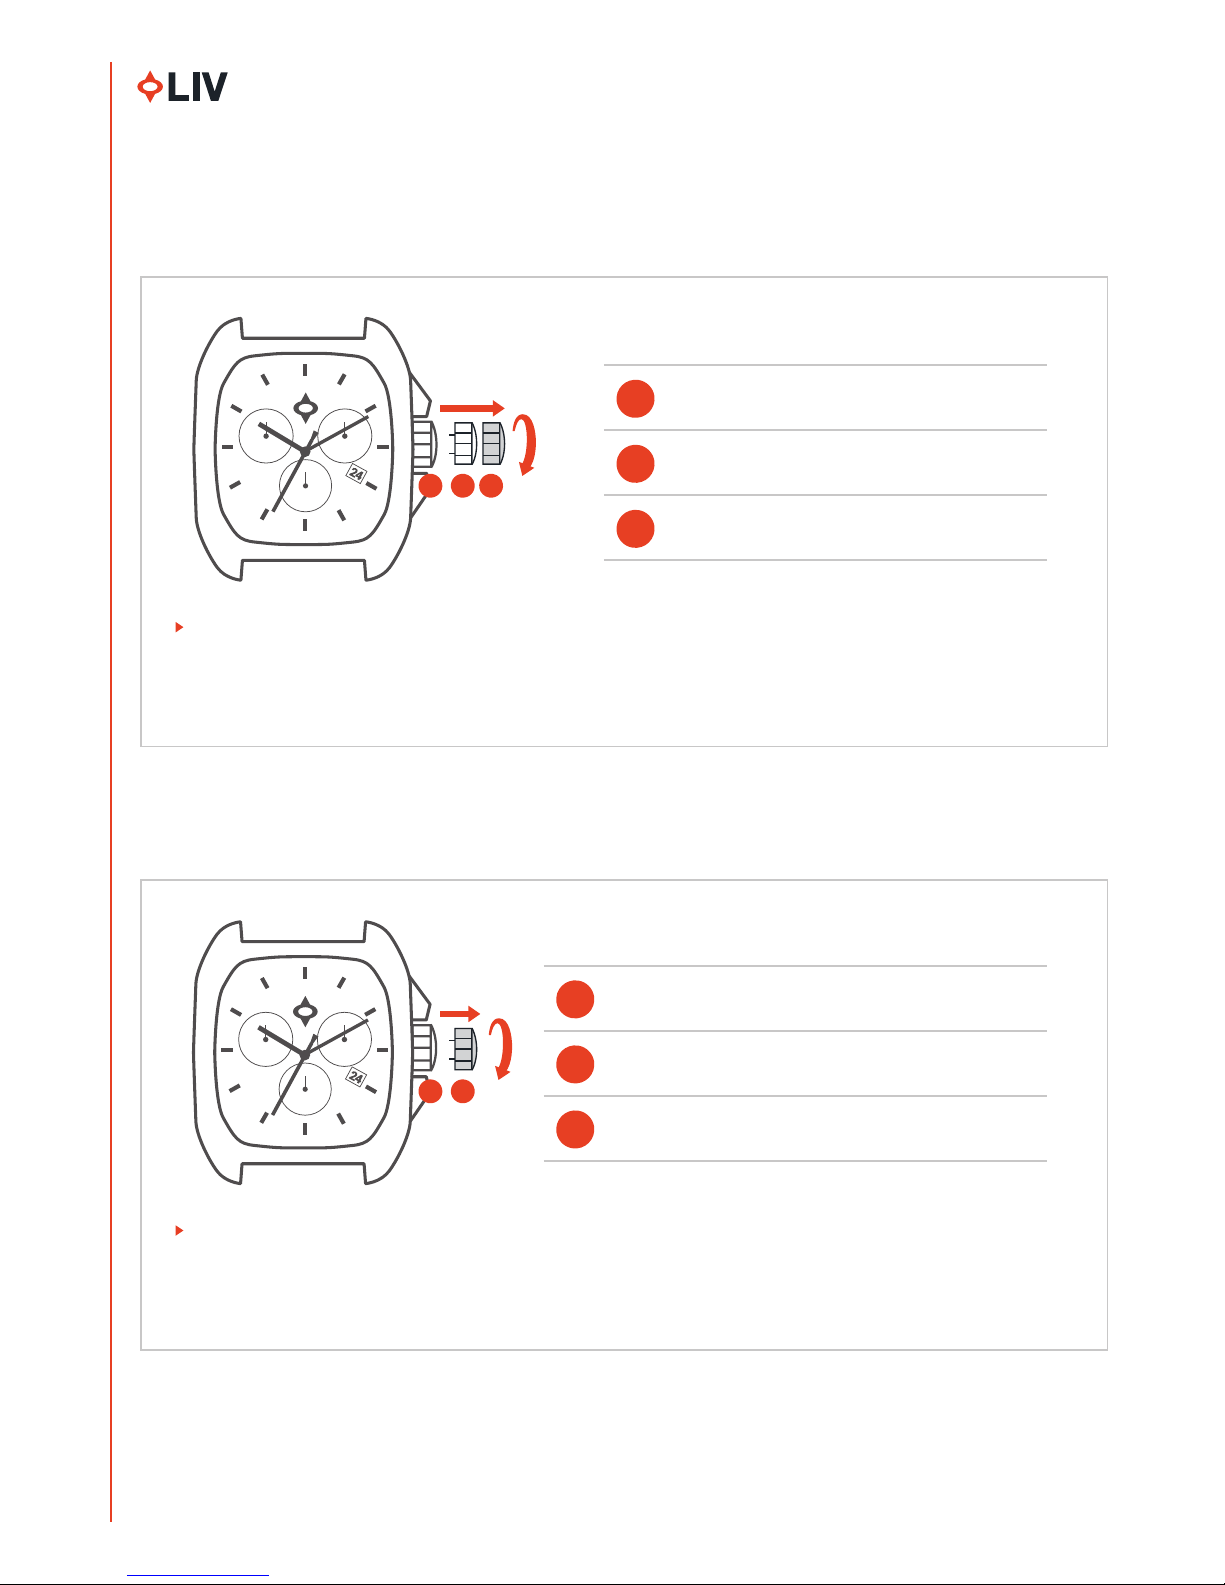
SETTING THE TIME
Position of rest (watch running)I
Quick-change correction for date
- The date can also be corrected during the day-changing
phase between 10 pm and midnight.
- The date of the following day has to be set, because no
automatic date change takes place at midnight.
- Pull the crown out to position II (watch still running).
- Turn the crown clockwise until the required date appears.
II
Setting the time
- Pull the crown out to position III (watch stopped).
- Turn the crown, until the current time is displayed
(remember the 24-hour cycle).
- Push and screw down the crown back into position I.
III
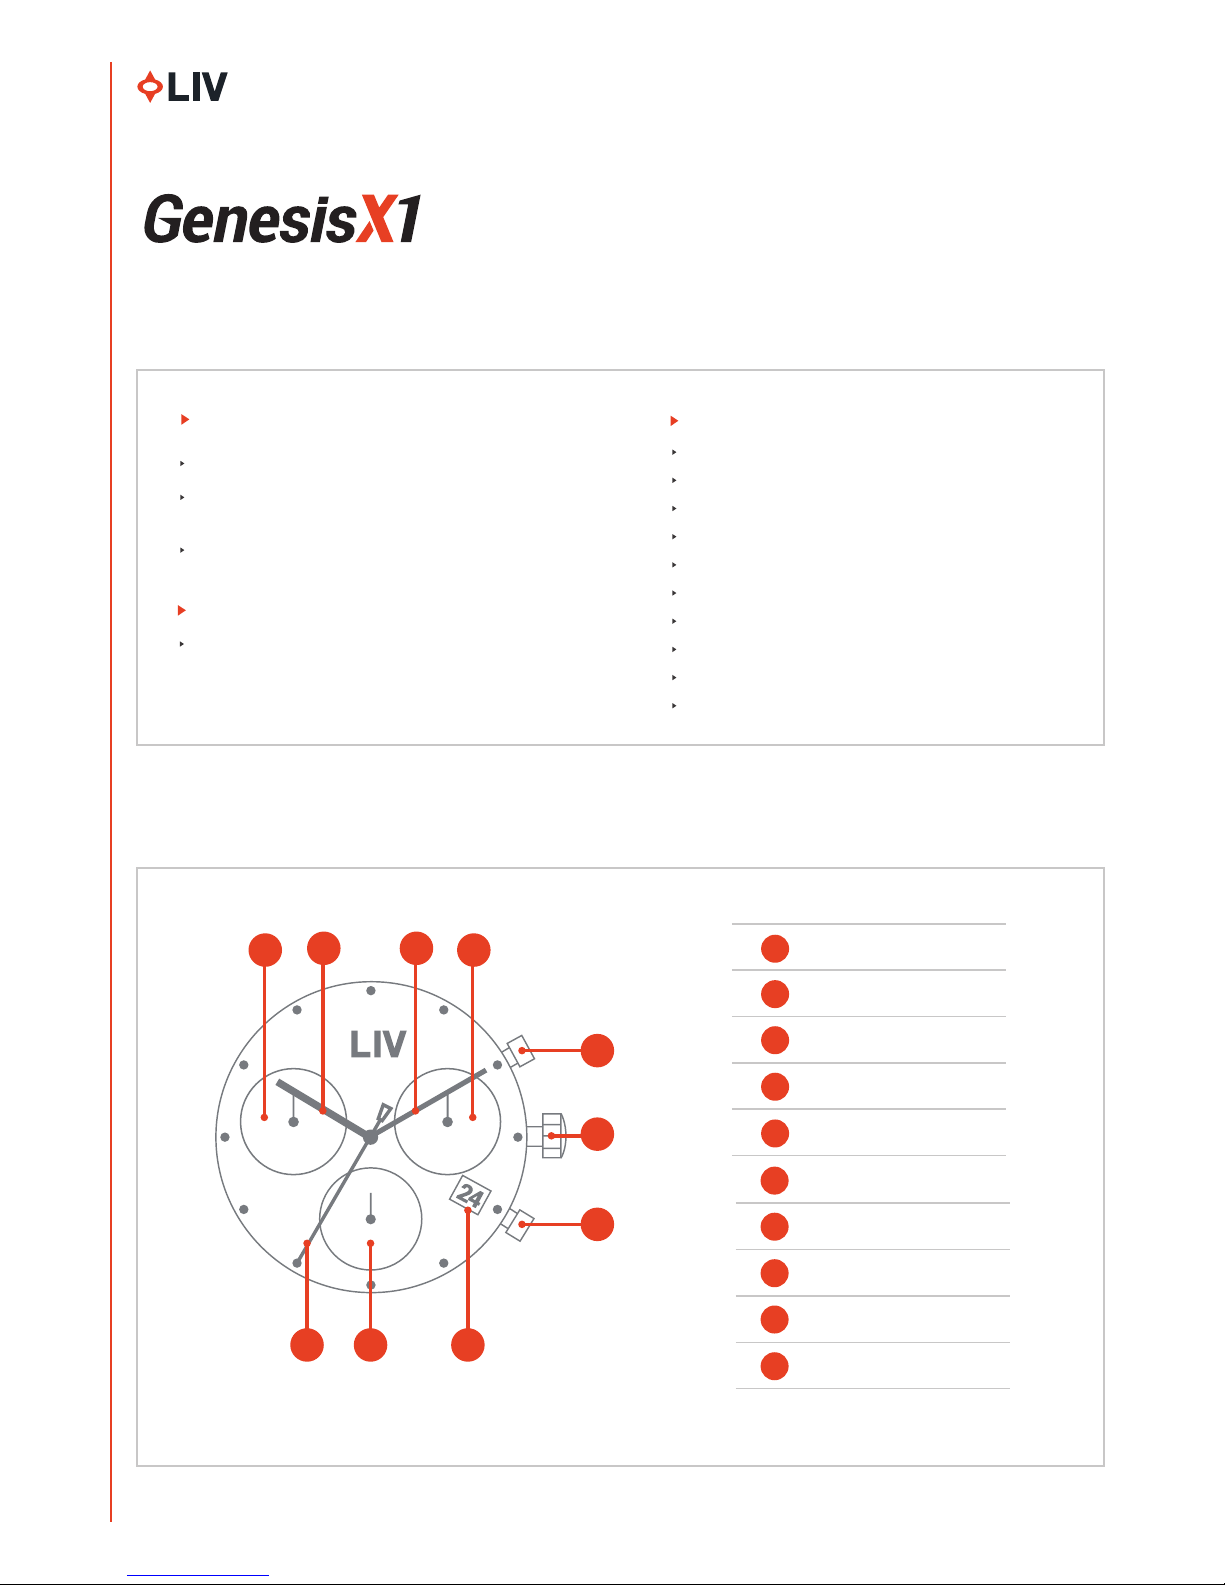
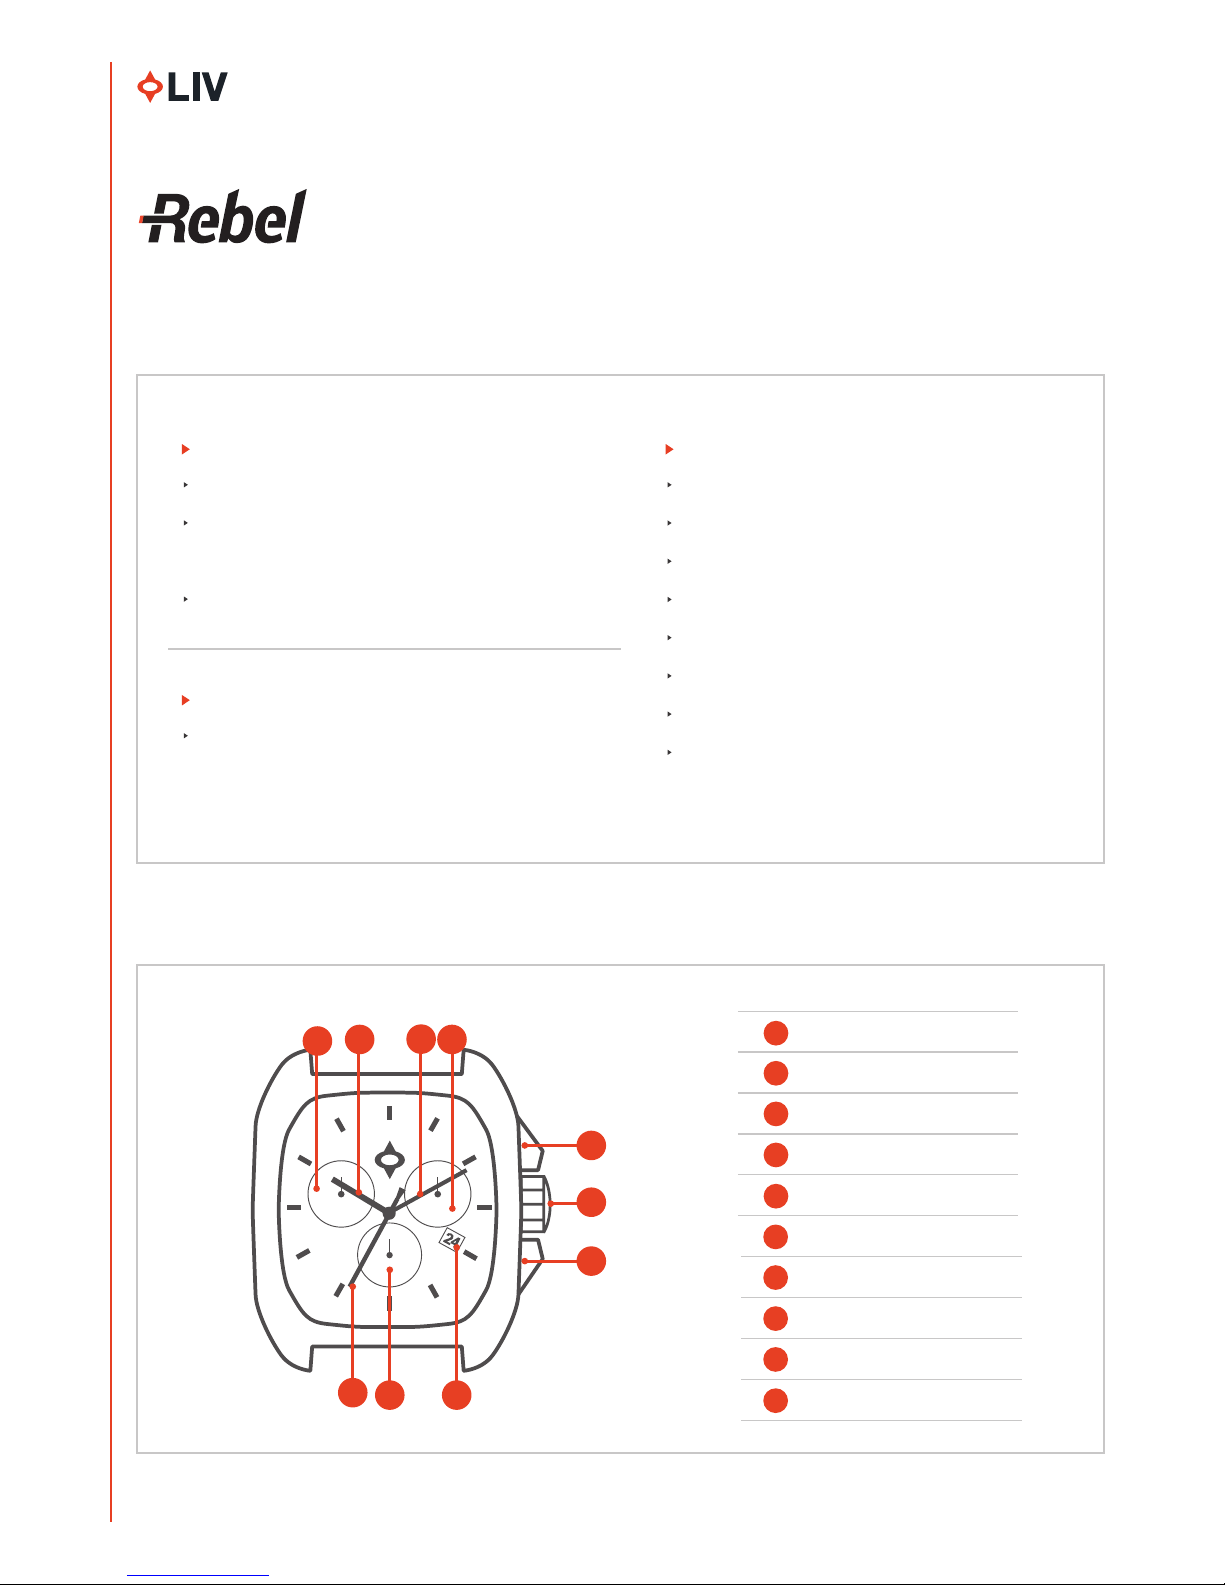
PARTS OF YOUR NEW WATCH
E
B
A
C
D
Hour handA
Minute hand
B
Second hand
C
Date display
D
Crown
E
3
User’s Manual