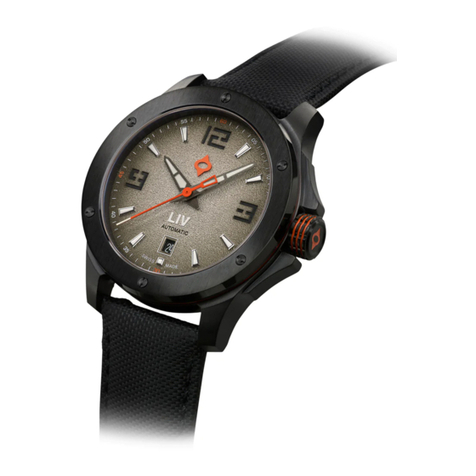
LIV Ronda 515 User manual

User’s Manual
DARE TO LIV

TABLE OF CONTENTS
User’s Manual
Caliber 10 Ronda 515
PAGE 3
Caliber 11 Sellita SW200-1/ETA 2824-2
PAGE 4
Caliber 12 Sellita SW500/ETA 7750
PAGE 6
Caliber 14 Ronda 4120.B
PAGE 10
Caliber 15 Ronda 515.24H GMT
PAGE 12
Caliber 16 Ronda Z60
PAGE 14
Caliber 17 Sellita SW280-1
PAGE 19
Caliber 18 Ronda 5040.D
PAGE 21
Caring for your LIV Swiss Watch PAGE 24
FAQ PAGE 28
2

3
User’s Manual
THE MOVEMENT
POSITION 1 - Normal position
POSITION 2 - Setting the date
POSITION 3 - Setting the time
Unscrew the crown and pull it to
position 2 and turn clockwise to set
the date. Once date is set, return to
position 1.
Important: Only change date
between 2am and 10pm. Rapid date
correction outside this period could
damage the calendar mechanism.
Pull crown to position 3 and turn to
desired time. Once time is set, push
crown back to position 1.
DESCRIPTION:
Made in Switzerland
Ronda Powertech Caliber 515
Powered by a battery
PERFORMANCE:
Standard battery life of 45 months
DISPLAY:
Hours-minutes-seconds
Date window
PARTS OF YOUR NEW WATCH
2
5
Hour hand
Minute hand
Second hand
Date display
Crown, screw down
SETTING YOUR WATCH
Caliber 10 User’s Manual
4
1
3
2
1
3
2
5
4
1
3
2
1
3
Important: Always screw your crown down
completely to preserve water resistance.

4
User’s Manual
THE MOVEMENT
DESCRIPTION:
Made in Switzerland
Sellita Caliber SW200-1/ETA Caliber 2824-2
Functions without a battery; powered
automatically with the movement of your arms
PERFORMANCE:
Balance frequency of 28,800
vibrations per hour (4 Hz)
Power reserve of 38 hours
DISPLAY:
Hours-minutes-seconds
Date window
PARTS OF YOUR NEW WATCH
2
5
Hour hand
Minute hand
Second hand
Date display
Crown, screw down
Caliber 11 User’s Manual
4
1
3
2
5
4
1
3

5
POSITION 1 - Normal position
POSITION 2 - Winding your watch
POSITION 3 - Setting the date
Unscrew crown and pull to position 2.
With the crown in position 2, wind the
watch about 30 times. This will power
the mainspring of your watch. The
rotor will continue to wind the watch
as you wear it and keep the watch
going. The watch has a power reserve
of about 40 hours.
Turn crown clockwise to set the date.
Warning: Only change date between
2am and 10pm. Rapid date correction
outside this period could damage the
calendar mechanism.
SETTING YOUR WATCH
2
1
3
2
1
3
4
POSITION 4 - Setting the time
Turn crown to desired time.
Important: To preserve your watch’s
water-resistance, always push or
screw down the crown to position 1
when done.
* When a mechanical self-winding
watch is not worn for a certain amount
of time, its power reserve (in this case,
38 hours) is exhausted and the watch
stops. To restart it, unscrew the crown
to position II and wind the movement
manually by turning the crown 30- 40
times. This will give it a sucient
power reserve to function normally.
4
User’s Manual
CONTINUED
Caliber 11 User’s Manual

6
User’s Manual
THE MOVEMENT
DESCRIPTION:
Made in Switzerland
Sellita Caliber SW500/ETA Caliber 7750
Functions without a battery; powered automatically with
the movement of your arms
PERFORMANCE:
Balance frequency of 28,800 vibrations per hour (4 Hz)
Power reserve of 48 hours
DISPLAY:
Hours-minutes-seconds
60-second chronograph
30-minute counter
12-hour counter
Date and day in window
or date in window -
varies by model
PARTS OF YOUR NEW WATCH
2
5
Hour hand
Minute hand
Chronograph
Second hand
Date display
Crown, screw down
Caliber 12 User’s Manual
4
1
3
2
5
4
1
3
WATCH FUNCTIONS
Continuous
running seconds
30-minute counter
12-hour counter
Start / stop button
Zero reset button
1
3
2
5
4
1
3
CHRONOGRAPH FUNCTIONS
2
5
4

7
POSITION 1 - Normal position
POSITION 2 - Winding your watch
POSITION 3 - Setting the date
When a mechanical self-winding
watch is not worn for a certain
amount of time, its power reserve (in
this case 44 hours) is exhausted. To
restart, unscrew and pull the crown
to position 2 and wind manually by
turning the crown 30-40 times.
Turn crown clockwise to set the date.
Warning: Do not change date between
8pm and 2am. Rapid date correction
during this period could damage the
calendar mechanism.
SETTING YOUR WATCH
2
1
3
2
1
3
4
POSITION 4 - Setting the time
Turn crown to desired time.
Important: To preserve your watch’s
water-resistance, always push or
screw down the crown to position 1
when done.
4
User’s Manual
CONTINUED
Caliber 12 User’s Manual
Caution: Before each timing, the
hands must be at zero. If necessary,
press button B.
Start: button A (START)
Stop: button A (STOP)
> Time read-out
SINGLE TIMING
2
1
3
Reset to zero: button B
4
A
B

8
CUMULATIVE TIMING
User’s Manual
CONTINUED
Caliber 12 User’s Manual
This function measures several con-
secutive times, adding them to give
the total measured time.
Caution: Before each timing, the
hands must be at zero. If necessary,
press button B.
Start 1st time: button A (START)
CHRONOGRAPH DISPLAY
2
1
3
Stop 1st time: button A (STOP)
> Read 1st time
4
A
B
Start 2nd time: button A (START)
Start 2nd time: button A (STOP) Read
1st and 2nd times, etc
Reset to zero: button B
5
6
7
STARTS TOP RESET
2
1
3
TS

Quick Start Guide
PARTS OF YOUR NEW WATCH
2
5
Hour hand
Minute hand
Crown, screw down
Date display
Caliber 14 User’s Manual
4
2
5
4
1
3
1
3
Alarm Button
THE MOVEMENT
DESCRIPTION:
Made in Switzerland
Ronda startech Caliber 4120.B Analog Alarm
Powered by a battery
PERFORMANCE:
Standard battery life of 50 months
DISPLAY:
2 eyes
Multifunction
Alarm
Big date
Small seconds in subdial
9

THE ALARM
POSITION 1 - Normal position
POSITION 2 - Setting the date
POSITION 3 - Setting the time
Screw crown out and pull once to
position 2 and turn to set the date.
Important: The date of the following
day must be set in the calendar
changing phase between 9pm and
12am.
Pull crown to position 3 and turn to
desired time. Important: To set time
to the exact second, pull crown to
position 3 when the second hand is
at “60”. Once the hour and minute
hands have been set, push the crown
back to position 1 and screw down to
preserve the water resistance.
SETTING YOUR WATCH
2
1
3
2
1
3
Setting Alarm - 1. Activate alarm mode by holding button A for 2 seconds until the small
minute hand in the Alarm Reference subdial jumps forward 1 minute. 2. Short presses
advance alarm time by a minute. Long presses advance alarm time until the button is released.
IMPORTANT: After setting alarm, it takes 5 seconds for alarm to beep twice to notify you that
it has been set.
Turning Alarm ON/OFF - Briefly press button A to turn alarm on/off.
2 beeps: Alarm is on 1 beep: Alarm is off
Quick Start Guide
Caliber 14 User’s Manual
CONTINUED
10

Pull out the crown to position III
(Second hand stops. The display
changes from alarm time to refer-
ence time.)
Activating the setting mode
Short press (less than 1 second):
Press the push-button for at least 2
seconds. As soon as the small minute
hand jumps forwards one minute this
mode is active.
The reference time moves forward by
the minute.
SETTING THE REFERENCE TIME
2
1
3
2
1
What is the reference time?
The current time is displayed by means of the hour and minute hand.
Parallel to the current time, the reference time runs in the background; the alarm time refers itself to this reference time. Thus,
resetting the time also requires correction of the reference time.
If the reference time is not synchronized with the current time, the alarm signal will sound at a different time than the set
alarm time.
Quick Start Guide
Caliber 14 User’s Manual
CONTINUED
11
3
4
Medium press (1-2 seconds):
The reference time moves forward
by the hour.
Long press (Longer than 2 seconds):
The reference time moves forward
until the push-button is released.
Push the crown back into position I
The display changes from reference
time to alarm time.
A 1-beep signal indicates that the
alarm is switched off.
3
Please note:
The referece time must display the same time as the current
time. This means that resetting the current time also reqires
correction of the reference time. Afterwards, the alarm time
has to be reset.
I II III
I II III
I II III
Referece
Time
Referece
Time
Referece
Time

Quick Start Guide
Caliber 15 User’s Manual
THE MOVEMENT
DESCRIPTION:
Made in Switzerland
RONDA powertech Caliber 515.24H
Powered by a battery
PERFORMANCE:
Standard battery life of 45 months
DISPLAY:
Hours-minutes-seconds
Date window
24 hour hand – GMT function
12
PARTS OF YOUR NEW WATCH
2
5
Hour hand
Minute hand
Second counter
Date display
Crown
4
1
3
2
5
4
1
3
6
GMT Hand
6

POSITION 1 - Normal position
POSITION 2 - Setting the date
POSITION 3 - Setting the time
Pull crown to position 2 and turn
clockwise to set the date. Once date is
set, return to position 1.
Important: The date can be corrected
during the day-changing phase
between 10pm and 12am. The date
of the next day must be set because
no automatic date change takes place
at midnight.
Quick-change correction
for 24-hour display
- Pull the crown to position 2
then turn counterclockwise until
the desired time appears.
- Push the crown back into position 1.
Turn crown forward or backward to
desired correction. Return to position
1when done.
SETTING YOUR WATCH
2
1
3
2
1
3
Quick Start Guide
Caliber 15 User’s Manual
CONTINUED
13

Quick Start Guide
Caliber 16 User’s Manual
THE MOVEMENT
DESCRIPTION:
Made in Switzerland
RONDA xtratech Caliber Z60
Powered by a battery
PERFORMANCE:
Standard battery life of 50 months
DISPLAY:
3 eyes
Chronograph
Center stop second (1/1 sec)
30 minute counter
ADD and SPLIT functions
Day indicator
Date
Small second in subdial
14
PARTS OF YOUR NEW WATCH
2
5
Hour hand
Minute hand
Chronograph
seconds hand
Date display
Crown
4
1
3
2
5
4
1
3
WATCH FUNCTIONS
Day indicator
Continuous running
Seconds
30 minute counter
Start / stop button
Zero reset button
1
3
2
5
4
1
3
CHRONOGRAPH FUNCTIONS
2
5
4

15
POSITION 1 - Normal position
POSITION 2 - Setting the date
Pull crown to position 2 and turn
counterclockwise to set the date.
Important: During the date changing
phase if the time is between 09:45 pm
and 12:00 pm; the date must be set to
the date of the next day.
SETTING YOUR WATCH
2
1
3
2
3
POSITION 3 - Setting the time
Pull crown to position 3 and turn to
desired time. Important: To set time
to the exact second, pull crown to
position 3 when the second hand is
at “60”. Once the hour and minute
hands have been set, push the crown
back to position 1.
User’s Manual
CONTINUED
Caliber 16 User’s Manual
1

Pull out the crown to position III (the
watch stops).
Turn the crown clockwise until yester-
day’s day of the week WED appears.
Push the crown to position II.
SETTING THE DATE, DAY OF OF THE WEEK, & TIME
2
1
3
Turn anti-clockwise to get to yester-
day’s date.
4
Example:
- Date / time on the watch: 17 / 01:25 /MON
- Present date / time: 23 / 20:35 /THU
* Please observe the AM/PM clock rhythm
Pull out the crown to position III
(the watch stops).
Turn the crown anticlockwise until the
correct date 23 and day of the week
THU appears.
Continue to turn the crown anti-
clockwise until the correct time 8:35
PM appears
Push the crown back into position I.
5
8
6
7
16
User’s Manual
CONTINUED
Caliber 16 User’s Manual
2
3
1
Start: Press push-button A
Stop: To stop the timing, press
push-button A once more and read
the chronograph counters; for exam-
ple, 20 min/38 sec.
SINGLE TIMING
2
1
3
Zero positioning: Press push-button
B. The chronograph hands will be
reset to their zero positions.
A
B

17
User’s Manual
CONTINUED
Caliber 16 User’s Manual
ACCUMULATED TIMING
Start: Push button A (start timing)
2
1
3
Stop: Push button A again to see the
time; e.g. 15 min 5 sec following.
4
A
B
Restart: Push button A again and
timing is resumed.
Stop: Push button B to stop timing.
The accumulated measured time
is shown.
Reset to zero: Press and hold
button B. The chronograph hands are
returned to their zero positions.
Please note: Following step 4, the
accumulation of the timing can
be continued by pressing button A
(Restart / Stop, Restart / Stop, …)
5
INTERMEDIATE OR INTERVAL TIMING
Start: Press button A, start timing.
2
1
3
Display interval: Press button A, and
the interval time is displayed; e.g. 20
minutes 17 seconds. Timing continues
in the background.
4
A
B
Making up the measured time:
Press button A, and the chronograph
hands are quickly advanced to the
ongoing measured time.
Stop: Press button B, and the final
time is displayed.
Reset: Press button B again. The chrono-
graph hands are returned to
their zero position.
Please note: Following step 3, further in-
tervals or intermediates can be displayed
by pressing button B (display interval /
makeup measured time, ...)
5

1 2 3
4
Unscrew crown and
pull it twice to position III.
Hold both top and bottom
buttons until the second
hand of the chronograph
does a complete turn indicating
you are in set up mode.
Use the top button to adjust
any of the chronograph hands.
Use the bottom button to switch
between the different hands.
To leave set up mode, push the crown back to position I and tightly screw it back in.*
*Failure to tightly screw it back in mayresult in water damage.
ADJUSTING THE CHRONOGRAPH HANDS
18
User’s Manual
CONTINUED
Caliber 16 User’s Manual
2
1
3
4

19
User’s Manual
THE MOVEMENT
DESCRIPTION:
Made in Switzerland
Sellita Caliber SW 280-1
PERFORMANCE:
Self winding
Frequency - 28,800 vibrations per hour
DISPLAY:
Hours-minutes-seconds
Instantaneous date and moonphase indicators
in window with quick corrector
PARTS OF YOUR NEW WATCH
2
5
Hour hand
Minute hand
Second hand
Date display
Crown
Caliber 17 User’s Manual
4
1
3
2
5
4
1
3
Moonphase
6
6

POSITION 1 - Normal position
POSITION 2 - Setting the date &
moonphase
POSITION 3 - Setting the time
Pull crown to position 2 and turn
clockwise to set the date. Once date is
set, return to position 1.
Important: The date can be corrected
during the day-changing phase
between 10pm and 12am. The date
of the next day must be set because
no automatic date change takes place
at midnight.
In position 2, turn the stem until the
full moon appears in the middle of the
opening. Determine the date of the
last full moon with a calendar showing
the moon phases. Then make one
jump of moon phase indicator for each
elapsed day since the last full moon.
Pull crown to position 3 and turn to
desired time. Once time is set, push
crown back to position 1.
SETTING YOUR WATCH
2
1
3
2
1
3
20
User’s Manual
CONTINUED
Caliber 17 User’s Manual
This manual suits for next models
7
Other LIV Watch manuals