For HELP, call In-Touch™at 727.490.5353
Page 5
Lock the cover on your hot tub when not in use.
Persons with infectious diseases should not use a hot tub.
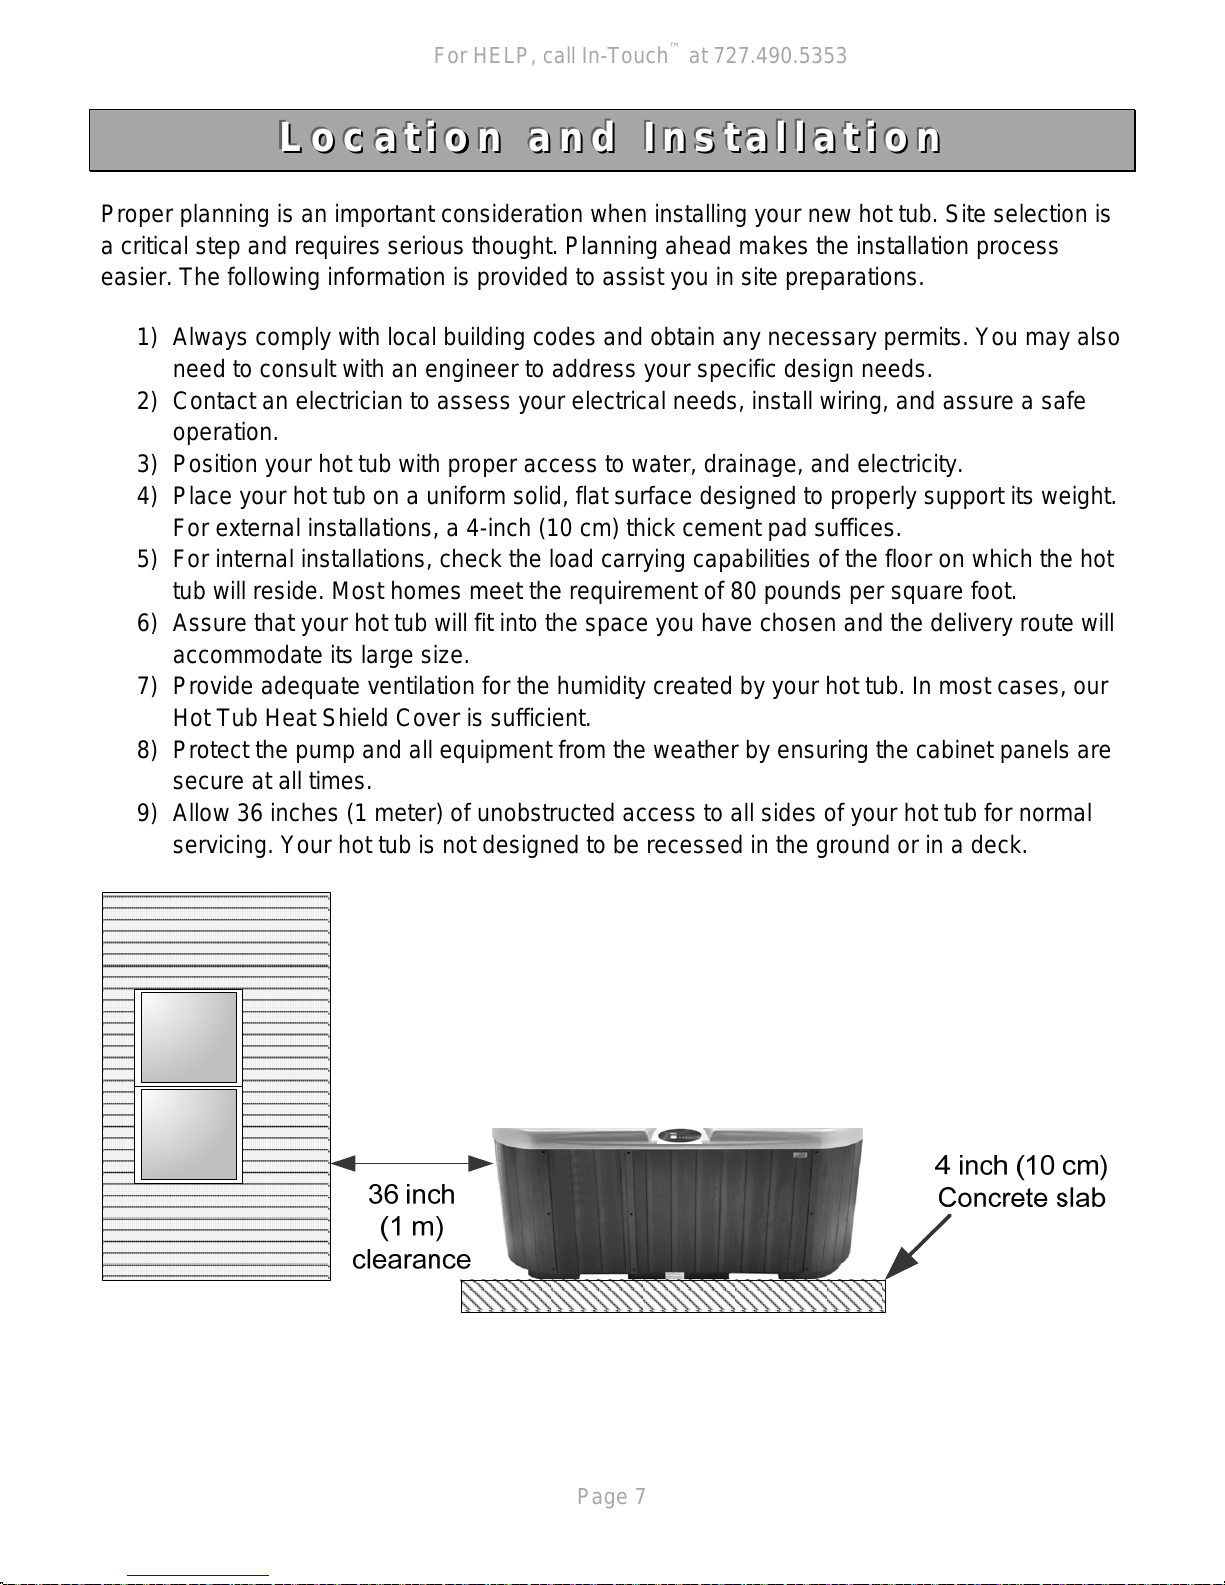
Persons under the influence of medication, drugs, or alcohol should not be allowed into
your hot tub.
Replace audio components only with identical components.
Do not leave the CD access door open on the stereo (if equipped).
Some types of hair dye can react with the sanitizers in your hot tub water causing your
hair to change color. Use your hot tub at your own risk.
Water normally splashes out of a hot tub during typical use. Install an adequate perimeter
that provides sound footing and adequate handrails thereby helping to avoid falls, slips,
and accidents while preventing damage to fine floors and wood finishes.
Do not turn your hot tub on or off for normal everyday use from a wall switch, ground fault
circuit interrupter, circuit breaker, fuse, or by plugging/unplugging it. Remove all jewelry,
metal, and watches from your person before entering your hot tub.
Keep all breakables away from the hot tub area.
Maintain water chemistry/balance in accordance with manufacturer’s instructions.
W
W
Wa
a
ar
r
rn
n
ni
i
in
n
ng
g
g
S
S
Si
i
ig
g
gn
n
n
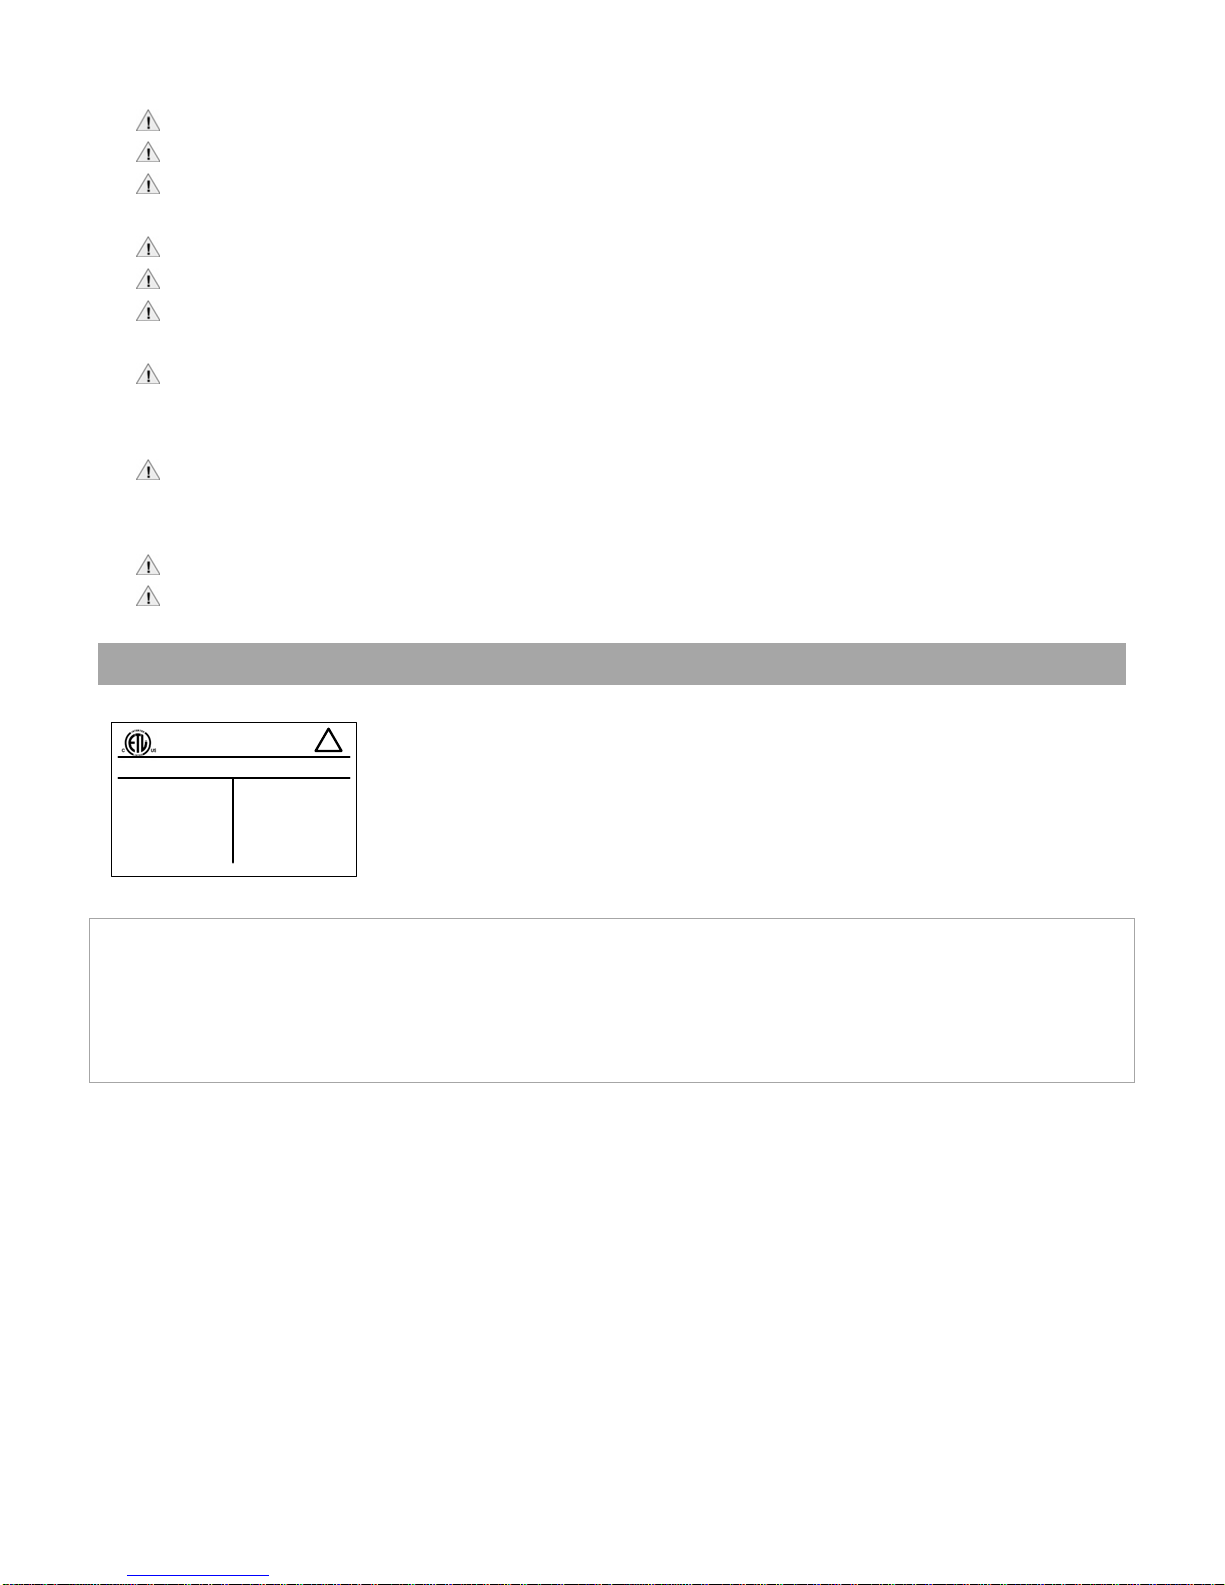
WARNING
DURING PREGNANCY, SOAKING IN HOT TUB MAY CAUSE DAMAGE TO THE FETUS
LIMIT USE TO 10 MINUTES AT A TIME
PREVENT DROWNING
SPA HEAT SPEEDS UP EFFECTS OF
ALCOHOL, DRUGS OR MEDICINE AND
CAN CAUSE UNCONSCIOUSNESS.
LEAVE SPA IMMEDIATELY IF
UNCOMFORTABLE OR SLEEPY.
PREVENT CHILD DROWNING
WATER ATTRACTS CHILDREN.
ALWAYS ATTACH A SPA COVER
AFTER EACH USE.
ADDITIONAL COPIES OF THE OWNER’S
MANUAL MAY BE REQUESTED 24/7
AT 727.573.9888
!Warning Sign Must Be Posted – The red WARNING sign like the
one shown is packed with your new hot tub. This sign must be
posted in a prominent place in close proximity to the hot tub
installation site immediately upon completion of hot tub installation.
Important: It is extremely important that this sign be permanently placed in clear view of
persons using the hot tub. Occasional hot tub users may not be aware of some of the dangers
hot water poses to pregnant women, small children, seniors, and people under the influence of
alcohol. If you did not receive a warning sign or your sign has become damaged, please call
your local dealer for a replacement.


 owner's manual")