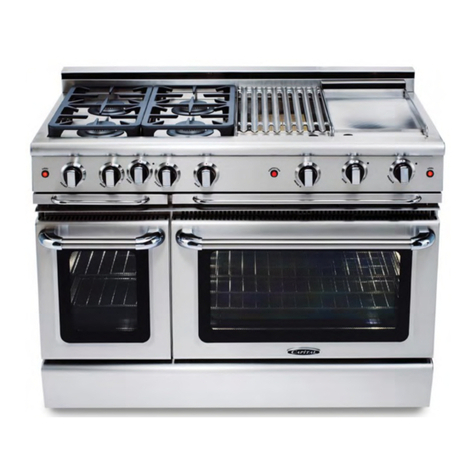
Lofra MWSD48MMG700 User manual

FOR INSTALLER ONLY
THIS RANGE IS FOR RESIDENTIAL USE ONLY
INSTALLATION AND SERVICE MUST BE PERFORMED BY A
QUALIFIED INSTALLER.
Company reserves the right to modify data and characteristics at any time for technical production needs.
WARNING:
This appliance has to be installed by a qualified installer.
Improper installation, adjustment, alteration, services, or
maintenance can cause injury or property damage. Consult a
qualified installer, service agent, or the gas supplier.

2
CHECKING THE ANTI TIP DEVICE
To check the installation of the anti-tipping safety system, we
recommend that you view the installation of the bracket under
the kitchen (in the visible part between the feet, see illustration).
WARNING:
-This range can tip. Injury to person could result.
-Install anti-tip device shipped with range.
-See installation Instructions.
IMPORTANT: SAVE FOR LOCAL ELECTRICAL INSPECTOR’S USE.
READ AND SAVE THERE INSTRUCTIONS FOR FUTURE REFERENCE.
OBSERVE ALL GOVERNING CODES AND ORDINANCES.
WARNING: If the information in this manual is not followed exactly, a fire or
explosion may result causing property damage, personal injury or death.
Do not store or use gasoline or other flammable vapors and liquids in the vicinity of
this or any other appliance.
WHAT TO DO IF YOU SMELL GAS
-Do not light any appliance.
-Do not touch any electrical switch.
-Do not use any phone in your building.
-Immediately call your gas supplier from a neighbour’s phone. Follow the gas
supplier’s instructions.
-If you cannot reach your gas suppliers , call the fire department.
Installation and service must be performed by a qualified installer service agency or
the gas supplier.
WARNING:
A child or adult can tip the range and be killed.
Installing the anti-tip device to the structure and/or the appliance.
Engage the range to the anti-tip device by using the four supplied
screws.
Re-engaged the anti-tip device if the range is moved.
See installation instructions for details.
Failure to do so can result in death or serious burns to children or
adults.

3
IMPORTANT - PLEASE READ AND FOLLOW
Before beginning, please read these instructions completely and carefully.
Do not remove permanently affixed labels, warnings, or plates from the product. This
may void the warranty
Please observe all local and national codes and ordinances.
Please ensure that this product is properly grounded.
The installer should leave these instructions with the consumer who should retain for
local inspector’s use and for future reference.
For an installation at altitudes above 2000 ft (610 mt) contact the Service Centre.
IMPORTANT INSTRUCTION
To check the installation of the anti-tipping safety system, we recommend that you view
the installation of the bracket under the kitchen (in the visible part between the feet,
see illustration).
Installation must conform with local codes or in the absence of codes, the National Fuel
Gas Code ANSIZ223.1/NFPA 54- Iatest edition. Electrical installation must be in
accordance with the National Electrical Code, ANSI/NFPA70 - latest edition and/or local
codes.
IN CANADA:
The installation must conform with local codes or, in the absence of local codes, with
the Natural Gas Propane Installation Code, CSA B149.1.
GENERAL INFORMATION
1. Installation must conform with local codes or, in the absence of local codes, with the
National Fuel Gas Code, ANSI Z223.1-Latest Edition.
2. Installation in manufactured (mobile) home: installation must conform with the
Manufactured Home Construction and Safety Standard, Title 24 CFR, Part 3280 [formerly
the Federal Standard for Mobile Home Construction and Safety, Title 24, HUD (Part 280)]
or, when such standard is not applicable, the Standard for Manufactured Home
Installations, ANSI/NCSBCS A225.1, or with local codes where applicable.
3. Installation in Recreational Park Trailers: installation must conform with state or other
codes or, in the absence of such codes, to the Standard for Recreational Park Trailers,
ANSI A119.5.
The pressure stated shall be at least 1 in wc (249 Pa) above the manufacturer’s specified
manifold pressure.

4
TOOLS NEEDED FOR INSTALLATION (not supplied with the appliance)
Suitable protective
gloves Protective glasses Pencil Tape measure
2 - Wrench Hammer Adjustable
wrench Adjustable pliers
T – handle wrench Screwdriver Drill
IMPORTANT NOTES TO THE INSTALLER
1. Read all instructions contained in these installation instructions before installing range.
2. Remove all packing material from the oven and the drawer compartments before
connecting the gas and electrical supply to the range.
3. Observe all governing codes and ordinances.
4. Be sure to leave these instructions with the consumer.
5. Installation of this appliance requires basic mechanical skills.
6. Proper installation is the responsibility of the installer.
7. Product failure due to improper installation is not covered under the Warranty.
To promote safety and minimize problems, read this manual thoroughly before starting the
installation. Leave this manual with the user.
Write the appliance’s model/serial numbers in this manual for service/maintenance
reference.
The user have to keep this manual for personal reference and for that of inspectors, service
personnel, etc.

5
The appliance should not be installed with a ventilation system that blows air downward
toward the appliance. This type of ventilation system may cause ignition and combustion
problems with the gas cooking appliance resulting in personal injury or unintended
operation.
An air curtain or other overhead range hood, which operates by blowing a downward airflow
onto a range, shall not be used in conjunction with a range.
CAUTION:
Cold temperature can damage the electronic control.
When using the appliance for the first time, or when the
appliance has not been used for an extended period, be
certain the unit has been in temperatures above 32°F
(0°C) for at least 3 hours before turning on the power to
the appliance.
CUSTOMER SERVICE INFORMATION
The serial number can be found on the inner side of door trim.
IMPORTANT SAFETY INSTRUCTIONS
Make sure the wall coverings around the range can withstand the heat generated by
the range.
Before installing the range in an area covered with linoleum or any other synthetic
floor covering, make sure the floor covering can withstand heat at least 90°F above
room temperature without shrinking warping or discolouring. Do not install the range
over carpeting unless you place an insulating pad or sheet of ¼ (0,6 cm) thick plywood
between the range and carpeting.
Do not obstruct the flow of combustion air at the oven vent nor around the base or
beneath the lower front panel of the range. Avoid touching the vent openings or
nearby surfaces as they may become hot while the oven is in operation. This range
requires fresh air for proper burner combustion.
If the range is pulled out away from the wall for any reason, make sure the anti-tip
device is reengaged after the range has been pushed back into place.
Learn where and how to shut off the valve that feeds gas to the product.
Do not let children sit/stand on the product or play with any of its parts. Do not leave
children unattended in the kitchen when the product is in use.
Do not keep objects of interest to children on or around the product.

6
Remove all packaging before operating the product to keep this material from catching
fire. Keep all packaging away from children. Properly dispose of packaging as soon as
the product is unpacked.
Do not operate the product if it is damaged in any way, if it malfunctions, or is missing
parts.
Do not use the product as a space heater. This product is to be used for cooking
purposes only.
Do not use oven cleaners or oven liners in or around any part of the oven.
Do not use the product to heat unopened food containers.
Do not strike the oven glass.
When disposing of the range, cut off the power cord and remove the door.
Unplug the product before service/maintenance.
FIRE SAFETY
Do not store/place/use combustible materials (e.g., paper, plastic, pot holders, linens,
gasoline, alcohol) near the product.
Do not douse a grease fire with water. Instead, turn off the heat source, and smother
the fire with a tight-fitting lid, or use a multi-purpose, dry-chemical or foam
extinguisher.
If a grease fire should occur in the oven, turn off the oven by putting the handle in the
OFF position.
Do not wear loose fitting or hanging garments while using the product.
Use only dry potholders: moist or damp potholders on hot surfaces may result in
burns from steam. Do not let potholder touch hot heating elements. Do not use a
towel or other bulky cloth.
WARNING:
NEVER use this appliance as a space heater to heat or warm
the room. Doing so may result in carbon monoxide poisoning
and overheating of the oven.

7
Do not let potholders or other flammable material touch a heating element. Do not use
a towel or other bulky cloth item as a pot holder.
Use proper pan size: this appliance is equipped with one or more surface units of
different size. Select utensils having flat bottoms large enough to cover the surface
unit-heating element. The use of undersized utensils will expose a portion of the
heating element to direct contact and may result in ignition of clothing. Proper
relationship of utensil to burner will also improve efficiency.
Glazed cooking utensils: only certain types of glass, glass/ceramic, ceramic,
earthenware, or other glazed utensils are suitable for range-top service without
breaking due to the sudden change in temperature.
Never leave surface units unattended at high heat settings: broilover causes smoking
and greasy spillovers that my ignite.
Do not soak removable heating elements: heating elements should never be immersed
in water.
Keep oven vent ducts unobstructed, to avoid grease build up, regularly clean the vents.
Use care when opening door: let hot air or steam escape before removing or replacing
food.
Keep the oven door closed until the fire goes out. If necessary, use a multipurpose dry
chemical or foam-type fire extinguisher.
Do not heat unopened food containers: build – up of pressure may cause container to
burst and result in injury.
GAS SAFETY
If you smell gas:
Close the valve and do not use the product.
Do not light a match, candle, or cigarette.
Do not turn on any gas or electric appliances.
Do not touch any electrical switch or plug in a power cord.
Do not use any phone in your building.
Evacuate everyone from the building.
Immediately call your gas supplier from a neighbor’s phone. Follow the gas supplier’s
instructions.

8
If you cannot reach your gas supplier, call the fire department.
Checking for gas leaks
Leak-testing the appliance must be done according to the manufacturer’s
instructions. Do not use a flame to check for gas leaks. Use a brush to spread a soap-
and-water solution around the area you are checking. If there is a gas leak, small
bubbles will appear in the solution. When not sure, call for professional help.
The appliance must be isolated from the gas supply piping system by closing its
individual manual shut-off valve during any pressure testing of the gas supply piping
system at test pressures equal to or less than ½ psi (3.5 KPa).
Do not attempt to operate the oven during a power failure.
ELECTRICAL AND GROUNDING SAFETY
Do not use an adapter or an extension cord.
Do not use a damaged power plug, power cord, or loose power outlet.
Do not modify the power plug, cord, or outlet.
Do not put a fuse in a neutral or ground circuit.
Do not connect the ground wire to plastic plumbing lines, gas lines, or hot water pipes.
This product must be grounded. If the range malfunctions or breaks down, grounding
reduces the risk of electric shock by providing a safe path for the current. This range's
power cord has a grounding plug, which must be firmly plugged into an outlet that is
properly installed and grounded according to local regulations. If you are not sure your
electrical outlet is properly grounded, have it checked by a licensed electrician.
The range is supplied with a 4-pronged grounded plug. This cord must be plugged into
a mating, grounded 4-prong outlet that meets all local codes and ordinances.
The product owner shall ensure that the proper electrical service is provided for the
product.

9
INSTALLATION SAFETY
This product should be installed and properly grounded by a qualified installer, as
specified in the Installation Instructions. Adjustments and service should be performed
only by qualified gas range installer or service technician.
Do not try to service/modify/replace the product or any part of it unless specifically
recommended in this manual. All other service should be performed by a qualified
technician.
Use only new, flexible connectors when installing the product.
Due to the size and weight of the range, have two or more people move the range.
Remove all tape and packaging materials.
Make sure no parts came loose during shipping.
After unpacking the product, remove all accessories from inside and around it.
(Cautiously handle the heavy grates).
Make sure the product is correctly installed/adjusted by a qualified service technician
or installer for the type of gas (natural or Propane) you will use. For the range to use
Propane gas, the installer must replace every surface burner orifices with the provided
Propane orifice set, and reverse the GPR adapter. These adjustments must be made by
a qualified technician according to manufacturer instructions and local regulations. The
qualified agency performing this work shall be responsible for the gas conversion.
LOCATION SAFETY
This range is for indoor household use only. Do not install the range outdoors or
anywhere that it will be exposed to weather/water or wind/ strong drafts.
Select a level, well-constructed floor that can support the range’s weight. Synthetic
flooring, such as linoleum, must withstand 180 °F (82 °C) temperatures without
shrinking, warping, or discolouring. Do not install the range directly over interior
kitchen carpeting unless a sheet of . inch plywood or a similar insulator is placed
between the range and carpeting.
Do not hang paper blinds on a window near the range; do not hand long curtains that
could be blown over/onto the range.
For proper ventilation, the range needs sufficient space below and all around the
chassis. Vents in the chassis exhaust heat and fumes so the range can operate
properly.

10
Make sure the wall coverings around the range can withstand heat up to 194 °F (90 °C)
generated by the range.
Cabinet storage above the surface of the range should be avoided. If cabinet storage
above the range is necessary: allow a minimum clearance of 30 inches (76.2 cm)
between the cooking surface and the bottom of cabinets; or install a range hood that
projects horizontally a minimum of 5 inches (12.7 cm) beyond the bottom of the
cabinets.
COOKTOP SAFETY
Before igniting, make sure all burner caps are properly in place and all burners are
level.
Make sure all burners are OFF when not in use.
Do not leave burners unattended on medium or high heat settings.
When you set a burner to simmer, do not turn the knob quickly. Make sure the flame
stays on.
If ignition fails, turn the knob to OFF, and wait a few minutes for the gas to dissipate.
Do not place any objects other than cookware on the cooktop.
Before removing or changing cookware, turn off the burners.
Remove food and cookware immediately after cooking.
Make sure all cooktop burners are off and all surfaces have completely cooled before
removing the grates and disassembling the burners.
Before self-cleaning the oven: remove broiler pan and other utensils.
After cleaning the burner head, make sure it is completely dry before re-assembling.
To avoid carbon monoxide poisoning, do not pour water or other liquids into the
cooktop during cleaning.
Do not clean door gasket: the door gasket is essential for a good seal. Care should be
taken not to rub, damage, or move the gasket.
Do not use oven cleaners: no commercial oven cleaner or oven liner protective coating
of any kind should be used in or around any part of the oven.
Clean only parts listed in manual.

11
Select cookware that is designed for cooktops and that is large enough to cover the
grates. Burner flames should not extend beyond the bottom of the cookware.
To avoid cookware discoloration, deformity, and/or carbon monoxide poisoning, do
not use cookware that is exceedingly larger than the grate.
Do not use aluminium foil to line the grates or any part of the cooktop.
Always use a minimum amount of oil for any type of frying. Always thaw food before
frying, and do not frying food that is overly cold or that has clumps of ice attached to it.
When frying, always heat the oil slowly, and monitor the oil as it heats. When frying
foods at high heat, monitor the oil throughout the cooking process. If combining fats or
oils for frying, mix them together before heating. Stand at a safe distance while frying
to avoid hot spatter.
Use a deep-fry thermometer when possible to avoid heating the oil beyond its smoke
point. (Know the smoke point of the oil you are using.)
Always let the oil/fat in the cookware to cool to room temperature before moving the
cookware.
To avoid delayed-eruptive boiling, let hot oil/fat stand at least 20 seconds after turning
off the burner so the temperature can stabilize. In the event of scalding, follow these
first-aid instructions:
1. Immerse the scaled area in cool or lukewarm water for at least 10 minutes.
2. Do not apply any creams, oils, or lotions.
3. Cover with a clean, dry cloth.
OVEN SAFETY
Do not use the oven for non-cooking purposes such as drying clothes or storage. Use
the oven for cooking purposes only.
Do not leave plastic items inside the oven.
Do not use aluminium foil or foil liners anywhere in the oven. Do not use aluminium
foil or like material to cover any holes or passages in the oven bottom or to cover an
oven rack.
When repositioning the oven racks, make sure the oven is completely cool.
Make sure the oven racks are placed on the same level on each side.
Do not damage, move, or clean the door gasket.
Stand away from the oven when opening the oven door.

12
To avoid damaging the burner control knobs or oven control, always bake and/or broil
with the oven door closed.
Do not broil meat too close to the broil element. Trim excess fat from meat before
cooking.
When using cooking or roasting bags in the oven, follow the manufacturer’s
directions.
Keep the oven free from grease build up.
Do not spray water on the oven glass while the oven is on or just after you have turned
it off.
Do not use harsh abrasive cleaners or sharp metal scrapers to clean the oven door
glass. They can scratch the surface which may result in the glass shattering.
CAUTION:
Do not attempt to operate the oven during a power failure.
If the power fails, always turn the oven off. If the oven is not turned off and the power
returns, the oven may begin to operate again. Food left unattended could catch fire or
spoil.
CAUTION:
Stepping, leaning or sitting on the door or drawers of this range can result in serious
injuries and can also cause damage to the range.
Do not store items of interest to children in the cabinets above the range. Children
could be seriously burned climbing on the range to reach items.
To eliminate the need to reach over the surface burners, cabinet storage space above
the burners should be avoided.
Adjust surface burner flame size so it does not extend beyond the edge of the cooking
utensil. Excessive flame is hazardous.
Do not use the oven as a storage space. This creates a potentially hazardous situation.
Never use your range for warming or heating the room. Prolonged use of the range
without adequate ventilation can be dangerous.
Do not store or use gasoline or other flammable vapors and liquids near this or any
other appliance. Explosions or fires could result.
WARNING:
Never leave children alone or unattended in the area where
an appliance is in use. As children grow, teach them the
proper, safe use of all appliances. Never leave the oven door
open when the range is unattended.

13
In the event of an electrical power outage, the surface burners can be lit manually.to
light a surface burner, hold a lit match to the burner head and slowly turn the Surface
Control knob to LITE. Use caution when lighting surface burners manually.
Reset all control to the “off“ position after using a programmable timing operation.
To avoid breakage: Do NOT handle or manipulate the unit by the cooktop.
Electrical and gas equipment with moving parts can be dangerous. The important safety
instructions in this manual are intended to minimize the risk of property damage, personal
injury, and death. Be sure to read them.
Keep this manual in a handy place so you can refer to it as needed.
CABINET CONSTRUCTION
Caution: To eliminate the risk of burns or fire by reaching over heated surface units, do not
have cabinet storage space above the range.
COUNTERTOP PREPARATION
The cooktop sides of the range fit over the cut-out edge of your countertop.
Countertop must be level. Place a level on the countertop, first side to side, then front to
back. If the countertop is not level, the range will not be level. The oven must be level for
satisfactory baking results. Cooktop sides of range fit over edges of countertop opening.
REPLACEMENT PARTS
Only authorized replacement parts may be used in performing service on the range.
Replacement parts are available from factory authorized parts distributors. Contact the
nearest parts distributor in your area.

14
PRODUCT SPECIFICATION
NOTE: do not pinch the power supply cord or the flexible gas conduit
between the range and the wall.
Do not seal the range to the side cabinets.
For all other information about the appliance, see the labels on the back of the appliance.

15
36” COOKER
30in(76.2cm)minimumclearancebetweenthetopofthecookingsurfaceandthebottomofanunprotectedwoodor
metalcabinet;orIfno30in(76.2cm)minimumclearance,24in(61cm)minimumwhenthebottomofthewoodor
metalcabinetisprotectedbynotlessthan0.25in(0.64cm)flame‐retardantmillboardcoveredwithnotlessthanno.
28MSGsheetsteel,0.015in(0.038cm)stainlesssteel,0.024in(0.061cm)aluminium,or0.020in(0.051cm)copper.
6in(45.7cm)minimumbetweenthecountertopandtheadjacentcabinetbottom.

16
Zero clearance between
adjacent combustible
construction below the
countertop surface and the
back and sides of the
appliance.
MEASURES FOR BUILT - IN
A 36” 91,50 cm
B Min. 25” – Max. 31” Min. 63,50 cm – Max. 78,74 cm
C Max. 13” Max. 33,00 cm
D Min. 18” Min. 45,70 cm
E 35” ½ or 37” ¼ 90,20 cm or 94,60 cm
F Min. 6” Min. 15,20 cm

17
48” COOKER
30in(76.2cm)minimumclearancebetweenthetopofthecookingsurfaceandthebottomofanunprotectedwoodor
metalcabinet;orIfno30in(76.2cm)minimumclearance,24in(61cm)minimumwhenthebottomofthewoodor
metalcabinetisprotectedbynotlessthan0.25in(0.64cm)flame‐retardantmillboardcoveredwithnotlessthanno.
28MSGsheetsteel,0.015in(0.038cm)stainlesssteel,0.024in(0.061cm)aluminium,or0.020in(0.051cm)copper.
6in(45.7cm)minimumbetweenthecountertopandtheadjacentcabinetbottom.

18
Zero clearance between
adjacent combustible
construction below the
countertop surface and the
back and sides of the
appliance.
MEASURES FOR BUILT - IN
A 48” 121,90 cm
B Min. 25” – Max. 31” Min. 63,50 cm – Max. 78,74 cm
C Max. 13” Max. 33,00 cm
D Min. 18” Min. 45,70 cm
E 35” ½ or 37” ¼ 90,20 cm or 94,60 cm
F Min. 6” Min. 15,20 cm

19
60” COOKER
30in(76.2cm)minimumclearancebetweenthetopofthecookingsurfaceandthebottomofanunprotectedwoodor
metalcabinet;orIfno30in(76.2cm)minimumclearance,24in(61cm)minimumwhenthebottomofthewoodor
metalcabinetisprotectedbynotlessthan0.25in(0.64cm)flame‐retardantmillboardcoveredwithnotlessthanno.
28MSGsheetsteel,0.015in(0.038cm)stainlesssteel,0.024in(0.061cm)aluminium,or0.020in(0.051cm)copper.
6in(45.7cm)minimumbetweenthecountertopandtheadjacentcabinetbottom.

20
Zero clearance between
adjacent combustible
construction below the
countertop surface and the
back and sides of the
appliance.
MEASURES FOR BUILT - IN
A 60” 152,40 cm
B Min. 25” – Max. 31” Min. 63,50 cm – Max. 78,74 cm
C Max. 13” Max. 33,00 cm
D Min. 18” Min. 45,70 cm
E 35” ½ or 37” ¼ 90,20 cm or 94,60 cm
F Min. 6” Min. 15,20 cm
This manual suits for next models
1
Table of contents
Other Lofra Range manuals