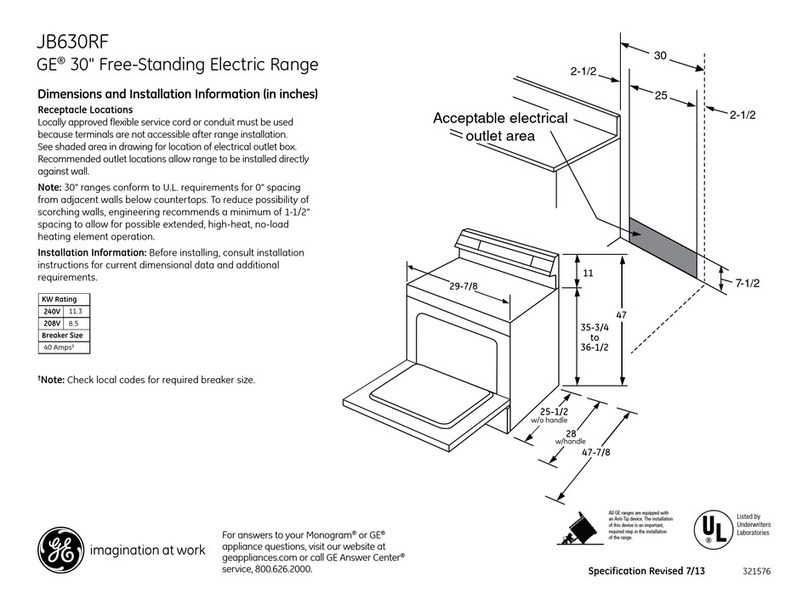
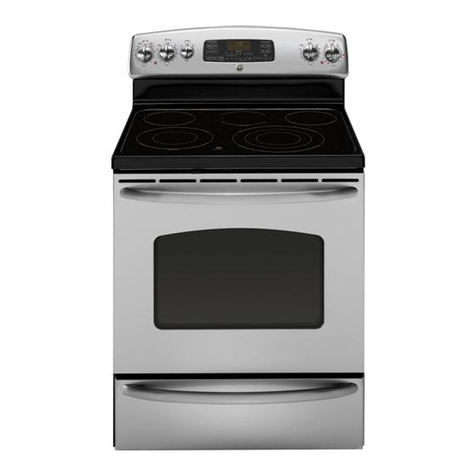
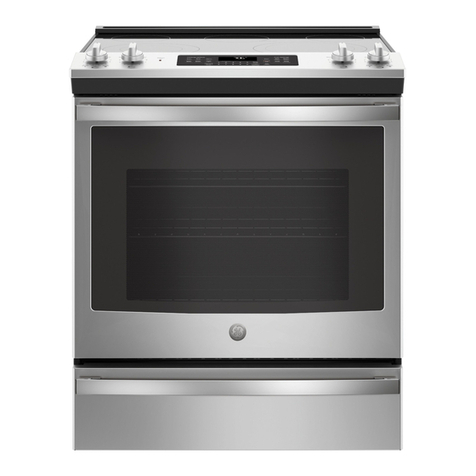
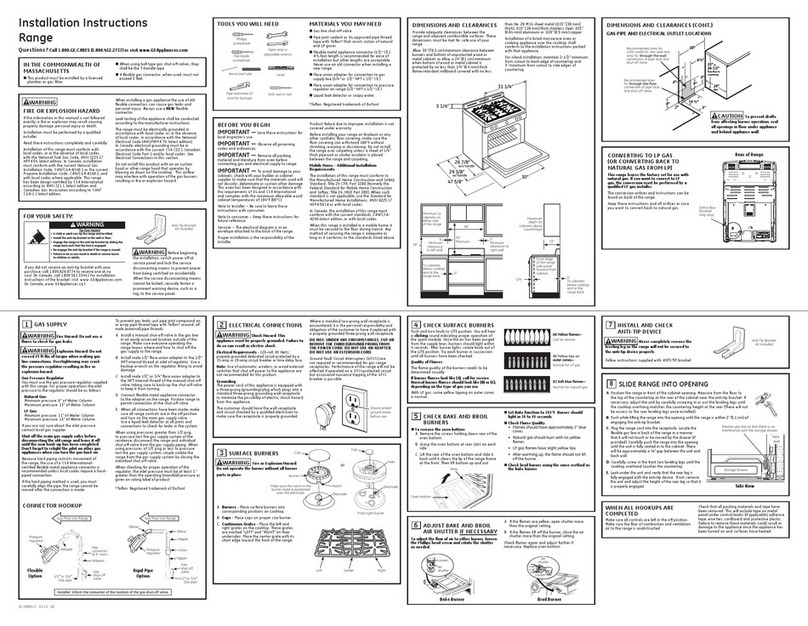
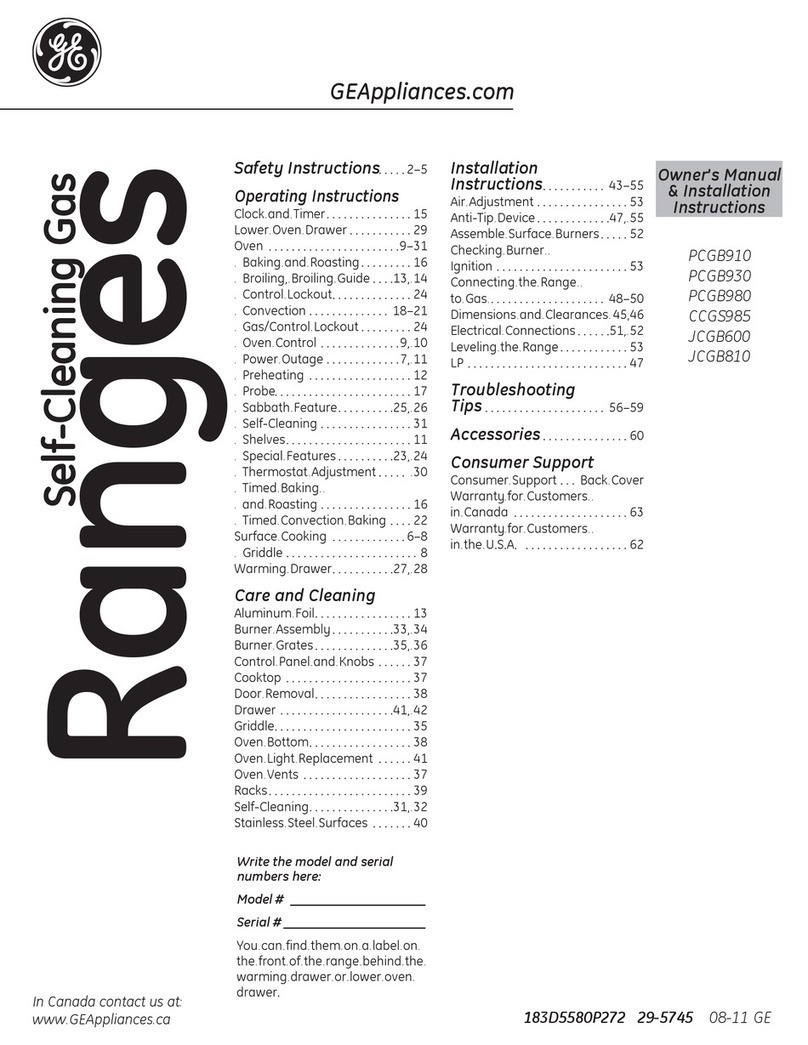
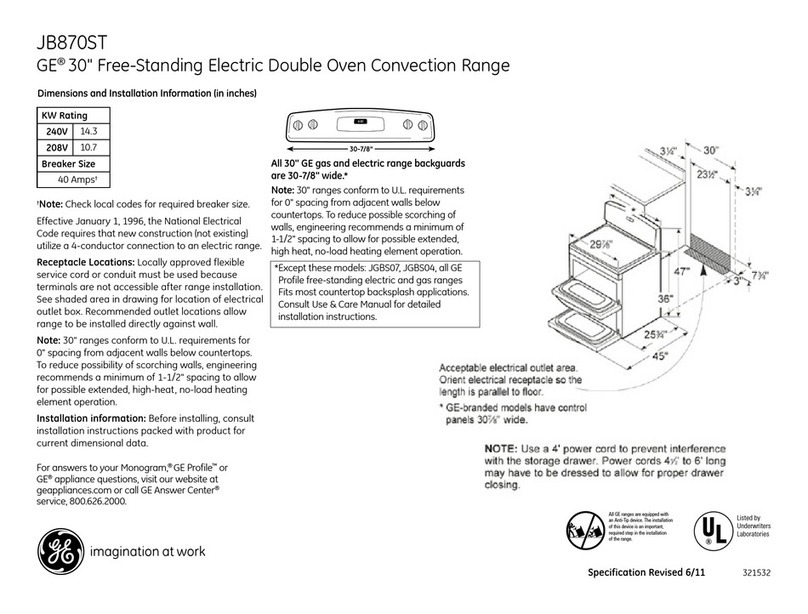
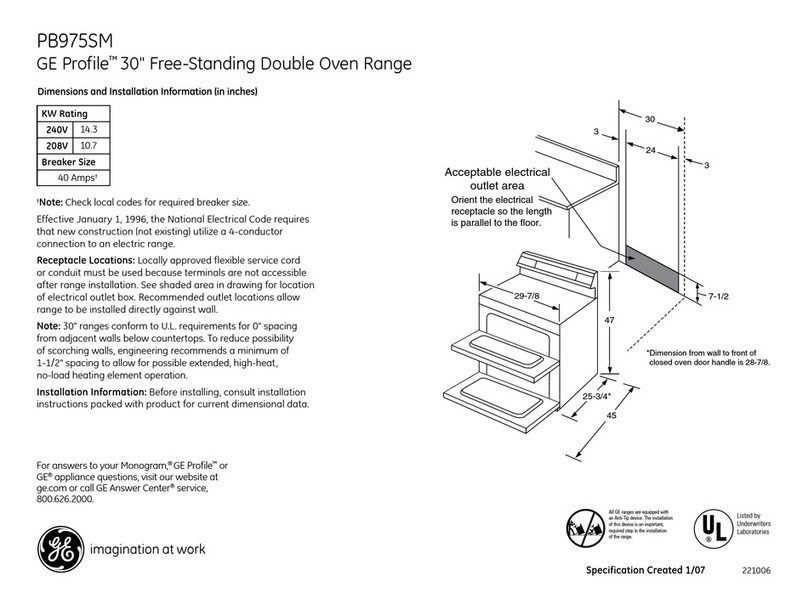
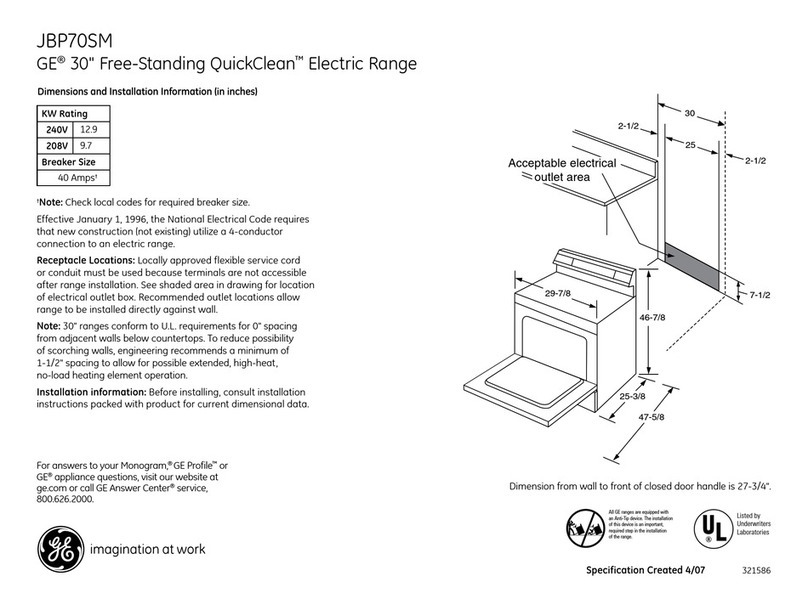
GE Quickset III User manual

GEAppliances.com
.4-.J
LF)
I
L_.
14_
U
_mL_
.4-.J
U
CD
Iii
For a Spanish version of this
manual, visit our Website at
GEAppliances.com.
Para consultar una version
en espafiol de este manual de
instrucciones, visite nuestro sitio
de internet GEAppliances.com.
In Canada contact us at:
www.GEAppliances.ca
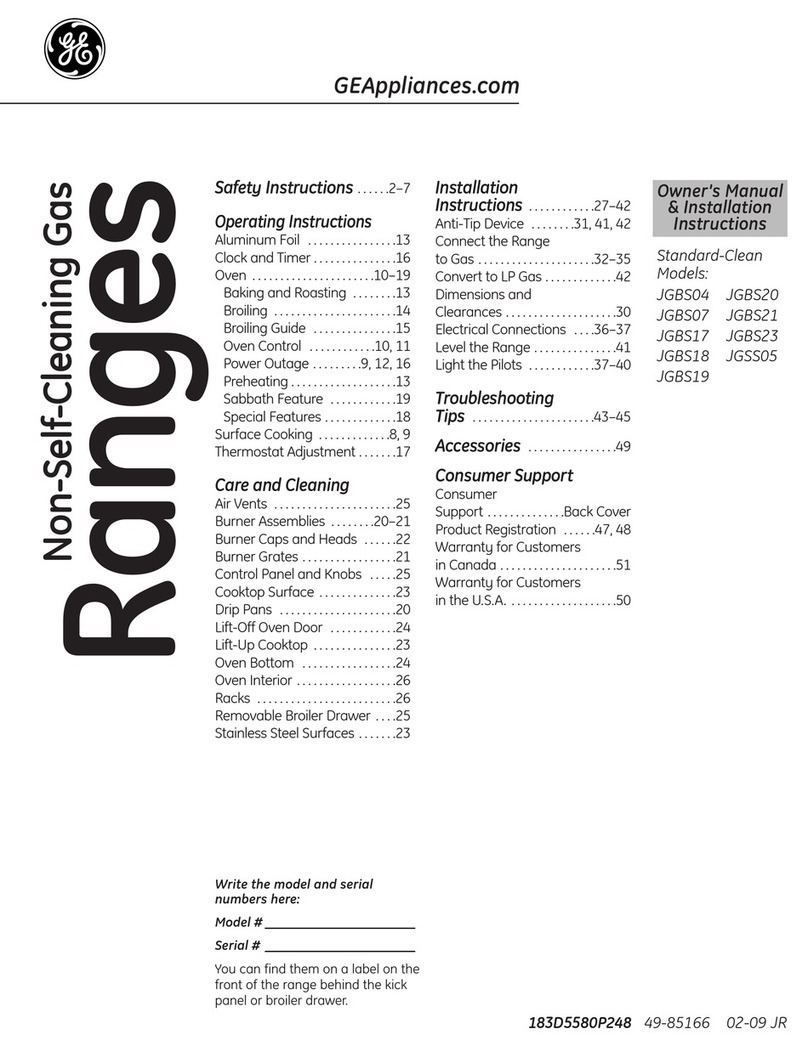
Safety Instructions ......... 2-6
Operating Instructions
Clock and Timer ................... 18
Control Lock Out .................. 20
EnergySaverMode ............... 20
Oven .......................... 11-24
AdJustthe OvenThermostat ..... 20
Aluminum Foil .................... 14
Broiling, Broiling Guide ........... 14
Controls ...................... 11, 12
ConvectionOven................. 15
LowerOvenDrawer .............. 17
Power Outage ................... 12
Sabbath Feature ................. 21
Self-Cleaning................. 22, 23
SpecialFeatures ................. 20
SteamCleaning .................. 24
Timed Baking .................... 19
Warming Drawer ................ 16
SurfaceUnits ................... 7-10
Care and Cleaning
Coil Surface Units ................. 32
Control Knobs .................... 25
Drip Pans ......................... 32
Glass Cooktop ................ 30, 31
Lift-Off Oven Door ................ 27
Lift-Up Cooktop ................... 32
Light .............................. 29
Oven Heating Elements ........... 28
Racks ............................. 28
Removable Lower Oven
Drawer Pan ....................... 26
Removable Warming
Drawer Pan ....................... 26
Standard-Clean Oven Interior .... 26
Storage Drawer ................... 28
Vent .............................. 26
Troubleshooting Tips .... 33-36
Accessories .................... 37
Consumer Support
Consumer Support ...... Back Cover
Warranty ......................... 39
Write the model and serial
numbers here:
Model #
Serial #
You can find them on a label
behind the drawer or behind the
lower oven door on the front of
the range frame.
Quickset III and
Quickset IV Models
@
Printed on
Recycled Paper
49-80591-2 08-10 GE

IMPORTANTSAFETYINFORMATION.
READALL INSTRUCTIONSBEFOREUSING.
I WARNINGI
Read all safety instructions before using the product. Failure to follow these instructions may result in fire, electric
shock, serious injury or death.
ANTI-TIP DEVICE
•All ranges can tip.
•BURNS or other SERIOUS
INJURIES can result.
• INSTALL and CHECK the
ANTI-TIP bracket following
the instructions supplied
with the bracket.
To reduce the risk of tipping the range, the range must
be secured by a properly installed anti-tip bracket. See
installation instructions shipped with the bracket for
complete details before attempting to install.
For Freestanding Ranges:
To check if the bracket is installed and engaged properly,
remove the storage drawer or kick panel and look
underneath the range to see that the leveling leg is engaged
in the bracket. On models without a storage drawer or kick
panel, carefully tip the range forward. The bracket should
stop the range within 4 inches. If it does not, the bracket
must be reinstalled. If the range is pulled from the wall for
any reason, always repeat this procedure to verify the range
is properly secured by the anti-tip bracket.
Never completely remove the leveling legs or the range will
not be secured to the anti-tip device properly.
ForSlide-In Ranges:
To check if the bracket is installed and engaged properly,
remove the storage drawer or kick panel and look
underneath the range to see that the leveling leg is engaged
in the bracket.
For Drop-In Ranges:
To check if the bracket is installed and engaged properly,
lower the oven door and gently apply medium force at
the handle end until movement of the range isdetected.
Continue pressing until the anti-tip bracket is engaged
and movement stops. A small amount of movement is
acceptable at the back of the range top, but it should be
stable and not tip once the anti-tip bracket isengaged.
If it does not, the bracket must be reinstalled.
If you did not receive an anti-tip bracket with your purchase,
call 1.800.626.8774 to receive one at no cost (inCanada, call
1.800.561.3344). For installation instructions of the bracket,
visit GEAppliances.com (in Canada, GEAppliances.ca).
WARNING IIMPORTANT SAFETY NOTICE
TheCaliforniaSafe DrinkingWater and Toxic EnforcementAct requiresthe Governorof Californiato publish a
listof substances known to the state to cause cancer,birth defectsor other reproductive harm, and requires
businessesto warn customers of potential exposureto such substances.
Thefiberglass insulationin self-clean ovensgivesoff a very smallamount of carbon monoxide during the
cleaning cycle.Exposurecan be minimized by venting with an open window or using a ventilation fan or hood.
2

GEAppliances.com
WARNING I GENERAL SAFETY INSTRUCTIONS
Use this appliance for its intended purpose as
described in this Owner's Manual.
Be sure your appliance is properly installed and
grounded by a qualified installer in accordance with
the provided installation instructions.
Do notattempttorepairorreplaceany partofyour
rangeunlessitisspecificallyrecommended inthis
manual.Allotherservicingshouldbe referredto
a qualifiedtechnician.
Before performing any service, unplug the range
or disconnect the power supply at the household
distribution panel by removing the fuse or switching
off the circuit breaker.
Do not leave children alone-children should not
be left alone or unattended in an area where an
appliance is in use. They should never be allowed
to climb, sit or stand on any part of the appliance.
CAUTION: Do not store items of interest to
children above a range or on the backguard of a
range-children climbing on the range to reach
items could be seriously injured.
Use only dry pot holders-moist or damp pot
holders on hot surfaces may result in burns from
steam. Do not let pot holders touch hot surface
units or heating elements. Do not use a towel or
other bulky cloth in place of pot holders.
Never use your appliance for warming or heating
the room.
iiiiiiiiiiiii!
Do not touch the surface units, the heating
elements or the interior surface of the oven.
These surfaces may be hot enough to burn even
though they are dark in color. During and after use,
do not touch, or let clothing or other flammable
materials contact the surface units, areas nearby
the surface units or any interior area of the oven;
allow sufficient time for cooling first. Other surfaces
of the appliance may become hot enough to cause
burns. Potentially hot surfaces include the cooktop,
areas facing the cooktop, oven vent opening,
surfaces near the opening and crevices around the
oven door.
Do not heat unopened food containers. Pressure
could build up and the container could burst,
causing an injury.
Do not use aluminum foil to line drip pans or
anywhere in the oven, except as described in this
manual. Foilcan trap heat or melt, resulting in
damage to the product and a shock or fire hazard.
Avoid scratching or impacting glass doors, cook
tops or control panels. Doing so may lead to glass
breakage. Do not cook on a product with broken
glass. Shock, fire or cuts may occur.
Cook meat and poultry thoroughly-meat to at least
an internal temperature of 160°F and poultry to at
least an internal temperature of 180°R Cooking to
these temperatures usually protects against
foodborne illness.
I-AWARNING
THERANGE. IKEEPFLAMMABLE MATERIALSAWAY FROM
Do not store or use flammable materials in an oven
or near the cooktop, including paper, plastic, pot
holders, linens, wall coverings, curtains, drapes and
gasoline or other flammable vapors and liquids.
Never wear loose-fitting or hanging garments while
using the appliance. These garments may ignite if
they contact hot surfaces causing severe burns.
Donot let cooking grease or other flammable
materialsaccumulate in or near the range.Grease
in the oven oron the cooktop mayignite.
Clean ventilating hoods frequently. Grease should
not be allowed to accumulate on the hood or filter.
3
IMPORTANTSAFETYINFORMATION.
READALL INSTRUCTIONSBEFOREUSING.
IA WARNING I IN THEEVENTOFA FIRE,TAKETHEFOLLOWING
STEPSTOPREVENTTHEFIREFROMSPREADING:
Do not use water on grease fires. Never pick up
a flaming pan. Turn the controls off. Smother a
flaming pan on a surface unit by covering the
pan completely with a well-fitting lid, cookie sheet
or flat tray. Use a multi-purpose dry chemical or
foam-type fire extinguisher.
If there is afire in the oven during baking, smother
the fire by closing the oven door and turning the
oven off or by using a multi-purpose dry chemical
or foam-type fire extinguisher.
If there is a fire in the oven during self-clean,
turn the oven off and wait for the fire to go out.
Do not force the door open. Introduction of fresh
air at self-clean temperatures may lead to a burst
of flame from the oven. Failure to follow this
instruction may result in severe burns.
I-&WARNING I COOKTOPSAFETYINSTRUCTIONS
Never leave the surface units unattended at
medium or high heat settings. Boilovers cause
smoking and greasy spillovers that may catch
on fire.
Never leave oil unattended while frying. If allowed
to heat beyond its smoking point, oil may ignite
resulting in fire that may spread to surrounding
cabinets. Use a deep fat thermometer whenever
possible to monitor oil temperature.
Toavoid oilspilloverand fire, usea minimum
amount of oil when shallow pan-frying and avoid
cooking frozen foods with excessiveamounts of ice.
Use proper pan size--select cookware having flat
bottoms large enough to cover the surface heating
element. The use of undersized cookware will
expose a portion of the surface unit to direct
contact and may result in ignition of clothing.
Proper relationship of cookware to surface unit
will also improve efficiency.
Only certain types of glass, glass/ceramic,
earthenware or other glazed containers are suitable
for cooktop service; others may break because of
the sudden change in temperature.
To minimize the possibility of burns, ignition of
flammable materials and spillage, the handle of a
container should be turned toward the center of the
range without extending over nearby surface units.
When preparing flaming foods under a hood, turn
the fan on.

GEAppliances.com
WARNINGI
(Somemodels)
RADIANT COOKTOP SAFETY INSTRUCTIONS
Use cure when touching the cooktop. The glass
surface of the cooktop will retain heat after the
controls hove been turned off.
Do not cook on a broken cooktop. If glass cooktop
should break, cleaning solutions and spillovers may
penetrate the broken cooktop and create a risk of
electric shock. Contact a qualified technician
immediately.
Avoid scratching the glass cooktop. The cooktop
can be scratched with items such us knives, sharp
instruments, rings or other jewelry, and rivets on
clothing.
Do not place or store items that can melt or catch
fire on the gloss cooktop, even when it is not being
used. If the cooktop is inadvertently turned on, they
may ignite. Heat from the cooktop or oven vent
after it is turned off may cause them to ignite also.
iiiiiiiiiiiii!
iiiiiiiiiiiii!
Use CERAMABRYTE®ceramic Cooktop Cleaner and
CERAMABRYTE®Cleaning Pad to clean the cooktop.
Wait until the cooktop cools and the indicator light
goes out before cleaning. A wet sponge or cloth
on a hot surface can cause steam burns. Some
cleaners can produce noxious fumes if applied to
a hot surface. Note: Sugar spills are an exception.
They should be scraped off while still hot using an
oven mitt and a scraper. See the Cleaning the glass
cooktop section for detailed instructions.
Read and follow all instructions and warnings on
the cleaning cream label.
WARNINGI
(Some models)
COILCOOKTOP SAFETY INSTRUCTIONS
Do not immerse or soak the removable surface
units. Do not put them in a dishwasher. Do not self-
clean the surface units in an oven. Doing so may
cause them to fail presenting a burn or fire hazard.
To avoid the possibility of a burn or electric shock,
always be certain that the controls for all surface
units are at the OFF position and all coils are cool
before attempting to lift or remove a coil surface unit.
Be sure the drip pans are not covered and are in
place. Their absence during cooking could damage
range parts and wiring.
Do not use aluminum foil to line drip pans. Foil can
trap heat or melt, resulting in damage to the
product and a shock or fire hazard.
I-AWARNING l OVEN SAFETY INSTRUCTIONS
Stand away from the range when opening the oven
door. Hot air or steam which escapes can cause
burns to hands, face and/or eyes.
Keep the oven vent unobstructed.
Keep the oven free from grease buildup. Grease
in the oven may ignite.
Place oven racks in desired location while oven
is cool. If rack must be moved while oven is hot,
do not let pot holder contact hot heating element
in oven.
When using cooking or roasting bags in the oven,
follow the manufacturer's directions.
Pull the oven rack to the stop-lock position when
loading and unloading food from the oven. This
helps prevent burns from touching hot surfaces
of the door and oven walls.
Do not leave items such as paper, cooking utensils
or food in the oven when not in use. Items stored in
an oven can ignite.
Do not use aluminum foil to line the oven bottom.
Foil can trap heat or melt, resulting in damage to
the product and a shock or fire hazard.
5

IMPORTANTSAFETYINFORMATION.
READALL INSTRUCTIONSBEFOREUSING.
WARNINGI
(Somemodels)
SELF-CLEANINGOVENSAFETY'INSTRUCTIONS
The seIFcleaning feature operates the oven at temperatures high enough to burn away food soils in the
oven. Follow these instructions for safe operation.
Before operating the self-clean cycle, remove pans,
shiny metal oven racks and other utensils from the
oven. Only gray porcelain-coated oven racks may
be left in the oven. Do not use self-clean to clean
other parts, such as drip pans or bowls.
Before operating the self-clean cycle, wipe grease
and food soils from the oven. Excessive amount of
grease may ignite leading to smoke damage to
your home.
If the self-cleaning mode malfunctions, turn the
oven off and disconnect the power supply. Have it
serviced by a qualified technician.
Do not clean the door gasket. The door gasket is
essential for a good seal. Care should be taken not
to rub, damage or move the gasket.
Do not use oven cleaners. No commercial oven
cleaner or oven liner protective coating of any kind
should be used in or around any part of the oven.
WARNING IWARMINGDRAWER/LOWER OVEN DRAWER
SAFETYINSTRUCTIONS Isomemode_sl
The purpose of the warming drawer is to hold hot
cooked foods at serving temperature. Bacteria will
grow in food while it is below 140°R Do not put cold
food in warming drawer. Do not heat food for more
than 2 hours. Failure to follow these instructions
may result in foodborne illness.
Do not leave paper products, plastics, canned food
or combustible materials in the drawer. They may
ignite.
Do not touch the heating element or the interior
surface of the drawer. These surfaces may be hot
enough to cause burns.
Use care when opening the drawer. Open the
drawer a crack and let hot air or steam escape
before removing or replacing food. Hot air or
steam that escapes can cause burns to hands,
face and/or eyes.
Do not use aluminum foil to line the lower drawer.
The foil will trap heat below, and upset the
performance of the oven. Foil can melt and
permanently damage the drawer bottms.

Using the surface units. Ionsome models) GEAppliances.com
IZ WARNING I IRE HAZARD: Never leave the range unattended with the cooktop on mediumor high settings. Keep flammable items away from the cooktop. Turn off all
controls when done cooking. Failure to follow these instructions can result in
fire, serious injury or death.
Throughout this manual, features and appearance may vary from your model.
At both OFF and HI the
control clicks into position.
Youmay hear slight clicking
sounds during cooking,
_ndlcatlngthe control ts
maintaining your desired
setting.
Be sure you turn the control
knob to OFFwhen you finish
cooking.
How to Set
Pushthe knob in and turn in either
direction to the setting you want.
Forglass cooktop surfaces:
AHOTCOOKTOP indicator light will glow
when any radiant element isturned on,
and will remain on untilthe surface is
cooledto approximately 150°R
Indicator light will:
come on when the unit is turned on or
hot to the touch.
stay on even after the unit is turned off.
glow until the unit is cooled to
approximately 150°F.
Forcoil cooktop surfaces:
A surface unit ONindicator light will glow
when any surface unit ison.
OFF
REAR
TheWM (worm)setting (on some models)
on the right REARsurface unit keeps
already heated food warm until ready to
serve.
i Z ¸
SMALL LARGE
BURNER _BURNER
OFF
;,P.,,,.-Jrl _._
On some models.
SMALL LARGE
BUFINEROFF BURNER
H| • _ @HI
°6
LO 2
On some models.
Dual and Triple Surface Units
and Control Knobs (onsome models)
Thesurface unit has 2 or :3cooking sizes
to selectfrom soyou can match the size
of the unit to the sizeof the cookware you
are using.
Models with o Td-Ring surface
element only.

Usingthe surface units.
Throughout this manual, features and appearance may vary from your model.
Temperature Limiter on Radiant Glass Cooktops
Every radiant surface unit has a
temperature limiter.
Thetemperature limiter protects the glass
cooktop from getting too hot.
Thetemperature limiter may cyclethe
units off for a time if:
the pan boilsdry.
the pan bottom is not flat.
:: the pan isoff-center.
there isno pan on the unit.
Models with u bridge burner only.
FRONT BRIDGE
BURNER _BURNER
Using the Bridge Burner (onsomemodels)
Tousethe bridge burner,turn the left-front
control knob to the BRIDGEBURNER
settings.
Forfull bridge surface unit operation, also
turn on the left-rear surface unit.
Touseonly the front surface unit, turn
the control knobto the FRONTBURNER
settings.
i!i
FRONT
Warming Zone
MFB
Using the Warming Zone
I WARNING I
FOODPOISONHAZARD:Bacteria may
grow in food at temperatures below 140°F.
Alwaysstart with hot food. Donot use
warm setting to heat cold food.
Do not usewarm setting for more than
2 hours.
Failureto follow these instructions may
result in foodborne illness.
TheWARMINGZONE,located in the back
center ofthe glasssurface,will keephot,
cooked food at servingtemperature.
Alwaysstart with hotfood. Donot useto
heat cold food. Placinguncooked or cold
food on the WARMINGZONEcould result
in foodborne illness.
Pushand turn the control knob to any
desired setting.
Forbest results,allfoods on the WARMING
ZONEshouldbe covered with a lid or
aluminum foil.When warming pastries
or breads,the cover shouldbe vented
to allow moistureto escape.
Usethe lowest setting for breads
and pastries. Usea medium setting for
vegetables, sauces,stews, cream soups,
butter and chocolate. Usethe highest
setting for soups (liquid)and hot beverages.
Theseinitial suggested settings are for
reference only. Thetemperature, type and
amount of food, type of pan, andthe time
held will affect the quality of the food.
Always usepot holdersor ovenmitts when
removing food from the WARMINGZONE,
since cookware and plateswill be hot.
NOTE:Thesurface warmer will not glow
red likethe cooking elements.

GEAppliances.com
The following information will help you choose cookware which will give good performance on glass cooktops.
Home Canning Tips
Be surethe conner iscentered over
the surface unit.
Hakesurethe canner isflat onthe bottom.
Toprevent burns from steam or heat,
usecaution when canning.
Use recipesand procedures from
reputable sources.Theseare available
from manufacturers such as Ball®and
Kerr and the Deportment of Agriculture
ExtensionService.
Flat-bottomed conners are recommended.
Useof water bath conners with rippled
bottoms may extend the time required
to bring the water to a boil.
Cuisson sur
,,#
_JeverCOOKJirect y on me g ass
Alwa_s use COOKware.
Always place the pan in the center of
the surface unit you are cooking on.
For Models With a Radiant Glass Cooktop
beneatha smoothglasssurface.
NOTE:A slightodorisnormalwhen
a new cooktop isusedfor the first time.
It iscaused bythe heating of new parts
and insulating materials and will disappear
in a short time.
NOTE'.On models with light-colored glass
cooktops,it is normal for the cooking zones
to change color when hot or cooling down.
This istemporary and will disappear as the
glasscools to room temperature.
Thesurface unit will cycleon and off to
maintain your selected control setting.
It issafe to place hot cookware on the
glasssurface even when the cooktop
iscool.
Evenafter the surface units are turned off,
the glass cooktop retains enough heat to
continue cooking.Toavoid overcooking,
remove pansfrom the surface units when
the food is cooked.Avoid placing anything
on the surface unit until it has cooled
completely.
Do not slide cookware across the cooktop because
it can scratch theglass-the glass isscratch-resistant,
not scratehproo£
, Water stains (mineraldeposits)are
removable usingthe cleaning cream or
full-strength white vinegar.
, Useof window cleaner may leavean
iridescentfilm on the cooktop. The
cleaning cream will remove this
discoloration.
Don't store heavy items above the
cooktop. Ifthey drop onto the cooktop,
they can cause damage.
Do not usethe surfaceas a cutting
board.

Selecting types of cookware for radiant glass cooktop models.
The following information will help you choose cookware which will give good performance on glass cooktops.
I :II I
Check pans for flat bottoms by
using a straight edge.
Pans with rounded, curved, ridged
or warped bottoms are not
recommended.
Stainless Steel:
recommended Porcelain Enamel on Cast Iron:
recommended ifbottom of pan iscoated
Aluminum:
heavy weight recommended
Good conductivity. Aluminum residues
sometimes appear as scratches on the
cooktop but can be removed ifcleaned
immediately. Becauseof its low melting
point, thin weight aluminum should not
be used.
Copper Bottom:
recommended
Coppermay leaveresidueswhich can
appear asscratches. Theresiduescan
be removed, as long asthe cooktop is
cleaned immediately. However,do not let
these pots boil dry. Overheated metal can
bond to glass cooktops.An overheated
copper bottom pot will leavea residue
that will permanently stain the cooktop
if not removed immediately.
Porcelain Enamel on Steel'.
not recommended
Heating empty panscan cause permanent
damage to cooktop glass.Theenamel can
melt and bond to the ceramic cooktop.
Glass-ceramic:
not recommended
Poor performance. Will scratch the surface.
Stoneware:
not recommended
Poor performance. May scratch the
surface.
Cast Iron:
not recommended-unless designed
specificallyfor glasscooktops
Poorconductivity and slow to absorb heat.
Willscratch the cooktop surface.
NOTE:Followall cookware manufacturer's recommendations when usingany type of
cookwore on the ceramic cooktop.
m
Do not place wet pans
on the glass cooktop.
Dana: use woks with support
rings on the gloss cooktop
Use flat-bottomed woks
10 Onthe glass cooktop_
For Best Results
Placeonly dry pans on the surface
elements. Do not place lids on the
surface elements, particularly wet lids.
i:, Do not use woks that hove support
rings. This type of wok will not heat
on gloss surface elements.
We recommend that you use only u
flat-bottomed wok. They are available
at your local retail store. The bottom
of the wok should hove the some
diameter us the surface element
to ensure proper contact.
Some special cooking procedures
require specific cookwure such us
pressure cookers or deep-fat fryers.
All cookwure must hove flat bottoms
and be the correct size.

Usingtheovencontrolclock
and timerfeatures and settings.
Throughout this manual, features and appearance may vary from your model
GEAppliances.com
Temp Recall
On/Off
Bake/Tamp Recoil Pad
Touch this pod to selectthe bakefunction.
Bake Light
Flasheswhile inedit mode-you canchangethe oven
temperature at this point. Glowswhen theoven isin
bakemode.
Start/On Pad
Mustbetouched to start anycooking or cleaning
function.
Display
Showsthe time of day, oven temperature
and the times set for the timer or automatic
ovenoperations.The displaywill show PrEwhile
preheating.When the oven reachesthe selected
temperature, the oven control will beep and the
display will show the oventemperature.
If "F-" and o number or letter flash inthe display
and the oven control signals,this indicateso
function error code.
Ifyour oven was set for o timed oven operation
and o power outage occurred, the clock and oil
programmed functions must be reset.
Thetime of day will flash in the display when there
has been o power outage. Resetthe clock.
If the function error codeappears during the self-
cleaning cycle,checkthe oven door latch.Thelatch
handle may have been moved,even if onlyslightly,
from the latched position. Hake sure the latch is
moved to the right asfor asit will go.
Touch the Clear/Offpad. Allow the oven to cool
for one hour.Putthe oven back into operation. If the
function error code repeats,disconnect the power
to the range and coilfor service.
Kitchen Timer On/Off
or Timer On/Off Pad
Touch this pod to selectthe timer feature.
Then press+ and - pads to adjust time.
Timer Light
Flasheswhile inedit mode-you canchangethe set
time at this point.Glowswhenthe timer hasbeen
activated.Flashesagain whenthe time has runout
untilthe controlis reset.
Clock Pad
Toset the clock, pressthis pod twice and then
press the + and - pods.Thetime of day will flash in
the display when the oven isfirst
turned on.
oStart Time Pad
_Sturt-']
_ime_ Usealong with the Cooking Time
or SelfClean pads to set the oven
to start and stop automatically
at o time you set.
Start Time Light
Flasheswhilein edit mode-you can changethe start
time at this point. Glowswhenthe function hasbeen
activated.
• Cooking Time Pad
_ooki_ Touch this pod and then touch the
_._Time _ + or- pads to setthe amount of
time you wont your food to cook.
The ovenwill shut off when the
cooking time hasrun out.
Cooking Time Light
Flasheswhilein edit mode-you can changethe set
time at this point. Glowswhenthe function hasbeen
activated.Flashesagain whenthe time hasrun out
untilthe control isreset.
•®Automatic Oven Light
oki torQ
_ Time.[.._Time _ Thislights onytime
- the oven has been
®AutomaticOven programmed usingthe
Cooking Time or Start
Time functions.
('-oven-'_ oven Light On/Off Pad
[,. LightJ Touch this pod to turn the oven light
antOff on or off.
-Pad
Shorttops to this pod will decrease
the time or temperature by small
amounts. Touch and hold the
pod to decrease the time or
temperature by larger amounts.
+Pad
Shorttops to this pod will increase
the time or temperature by small
amounts. Touch and hold the pod
to increasethe time or temperature
by larger amounts.
11

Usingtheovencontrolclock
and timerfeatures and settings.
Throughout this manual, features and appearance may vary from your model.
0
(_Self-_
L_geonJ
SelfCleanPad
Touch this pad to selectthe self-cleaningfunction.
Seethe Usingthe self-cleaningoven section.
SelfCleanLight
Flasheswhile in edit mode-you can change the
length oftime for the self-cleancycle at this point.
Glowswhen the oven isin the self-clean cycle.After
the self-clean cycle,the light will turn off. Unlatch
the door.
Indicator Lights
EDITmode lasts severalseconds after the last pad
press.Start Time On/Off and Cooking Time On/Off
will be the only padslit ifeither of these options
isselected.(Example:Start Time isselectedwith
Bake-the Start Time pad will remain lit until the
clock reaches the programmed time, at which point
it will turn off and the Bake/Temp Recall pad light
will light up.)
_nvect _
/Bake|
Temp Rec_
I%eo '/
MeonJ
Lor_j
CBro!l-_
Hi/Lo
ConvectionBake/TempRecall
Touch this pad to selectbaking with the convection
function.
Steam Cleon
Touch this pad for easier cleaning,light soiling
of the oven cavity or door.
Clear/OffPad
Touch this pad to cancelALL oven operations
except the clock and timer.
Broil Hi/Lo Pad
Touch this pad to selectthe broil function.
BroilLight
Flasheswhile in edit mode-you can switchfrom
Hi to Lo Broil at this point. Glowswhen the oven
is in broil mode.
Power Outage
If a flashing time isin the display,you have
experienced a power failure. Resetthe clock. Toreset the clock, touch the Clock pad.Enterthe
correct time of day bytouching the + or - pads.
Touch the Start/On pad.
Using the oven.
To avoid possible burns, place the racks in the desired position before you turn the oven on.
B
, i
Number of rack positions vary by
model.
12
Before you begin...
Therackshavestop-locks,sothat whenplaced
correctlyontheracksupports,theywillstop
beforecomingcompletelyoutandwillnottilt.
Whenplacingand removingcookware,pull
therackouttothebumponthe racksupport.
Toremovearack, pullittowardyou,tilt the
frontendupandpullitout.
Toreplace,placetheendofthe rack
(stop-locks)onthesupport,tilt upthefront
andpushthe rackin.
[-&CAUTION
Whenyouareusingtherackinthelowest
position(A),youwillneedto usecautionwhen
pullingtherackout.Werecommendthatyou
pulltherackoutseveralinchesandthen,using
two potholders,pullthe rackoutbyholding
thesidesofit.Therackislowandyoucouldbe
burnedifyouplaceyourhandinthemiddleof
therackandpullallthewayout.Beverycareful
notto burnyourhandonthedoorwhenusing
therackinthelowestposition(A).

Using the oven. GEApUioncescom
To avoid possible burns, place the racks in the desired position before you turn on the oven.
Preheating and Pan Placement
Do not place foods or baking stone
directly on the oven floor.
Preheattheoveniftherecipecallsfor it.
Preheatingisnecessaryfor goodresultswhen
bakingcakes,cookies,pastriesandbreads.
Thedisplaywillshow"PrE"whilepreheating.
Whentheovenreachestheselected
temperature,theovencontrolwillbeepandthe
displaywillshowtheoventemperature.
Ifbakingfourcakelayersatthesametime,
placetwo layersonrackCandtwo layerson
rackE.Staggerpansontheracksoone
isnotdirectlyabovetheother.
Bakingresultswillbebetterifthefoodis
centeredintheovenasmuchaspossible.
AngelFoodcakeistheexceptionandshould
beplacedonthebottomovenrack(positionA).
Followpackagedirectiononprepackagedand
frozenfoodsforpanplacement.Pansshould
nottoucheachotherorthewallsoftheoven.
Ifyouneedto usetwo racks,staggerthepans
sooneisnotdirectlyabovetheother.Leave
approximately:].½1_betweenpansandfrom
thefront,backandsidesofovenwall.
How to Set the Oven for Baking
r_ TouchtheBakepad.
[]
%
Touchthe+ or- padsuntilthedesired
temperatureisdisplayed.
TouchtheStartYOnpad.Theovenwill
startautomatically.Thedisplaywillshow
PrEwhilepreheating.Whentheoven
reachestheselectedtemperature,the
ovencontrolwillbeepseveraltimesand
thedisplaywillshowtheoven
temperature.
TochangetheoventemperatureduringBAKE
cycle,touchtheBakepadandthenthe+or-
padstogetthenewtemperature.
r_ Checkfoodfordonenessat minimum
timeonrecipe.Cooklongerifnecessary.
[] TouchtheClear/Offpadwhenbakingis
finishedandthenremovethefoodfrom
theoven.
Aluminum Foil
Do not usealuminum foilto line oven
bottoms. Thefoil willtrapheat below,and
upset the performance of the oven. Foil
can melt and permanently damage the
oven bottom. Damage from improper use
of aluminum foil isnot covered bythe
product warranty.
Foilmay be usedto catch spillsby placing
a sheet on a lower rack,several inches
belowthe food. do not use morefoil than
necessar,and never entirely cover an oven
rack with aluminum foil. Keepfoil at least J_
1/2" from the oven walls to prevent poor
heat circulation.
The type of margarine will affect baking performance!
Mostrecipesfor baking have been developed using high-fat products such as butter or margarine (80%fat). Ifyou
decrease the fat, the recipe may not givethe same results aswith a higher-fat product.
Recipefailure can result if cakes,pies,pastries,cookiesor candies are made with low-fat spreads.Thelower the fat content
of a spread product, the more noticeable these differences become.
Federalstandardsrequireproductslabeled"margarine"to containat least80%fat byweight.Low-fat spreads,onthe otherhand,
contain lessfat and morewater.Thehigh moisturecontentofthese spreadsaffectsthe textureand flavor ofbakedgoods.For
best resultswith your oldfavoriterecipes,usemargarine,butter or stickspreadscontainingat least70%vegetableoil. 13

Using the oven.
Door Positioning During Broiling:
For models JSS28 and JDS28:
For all other models:
How to Set the Oven for Broiling
UseLo Broil to cook foods such as poultry
or thick cuts of meat thoroughly without
overbrowning them.
Placethe food on a broiler grid
[Z] in a broiler pan designedfor broiling.
Followsuggested rack positions
[_ in the BroilingGuide.
r3] Touchthe Broil Hi/Lo pad once
for Hi Broil.
Tochange to Lo Broil, touch the Broil
Hi/Lo pad again.
[] Touchthe Start pad.
[] When broiling isfinished,touch
the Clear/Off pad.
Leave the door open to the broil
stop position. The door stays open
by itself, yet the proper temperature
is maintained in the oven.
The size,weight, thickness,
starting temperature
and your preference
of doneness will affect
broiling times. This guide
is based on meats at
refrigerator temperature.
?The U.S. Department of
Agriculture says "Rare beef is
popular, but you should know
that cooking it to only lz_O°F
means some food poisoning
organisms may survive." (Source:
Safe Food Book. Your Kitchen
Guide. USDA Rev.June 1985.)
Broiling Guide
Preheatthe broiler for 2 minutes to improve performance.
Type or
Food Thickness Rack Position* Comments
Beef Steaks - Eor F (foodshould be 1"
1" thick to 3" from broil element)
Chicken
Doneness
Rare (140°F)
Medium (160°F)
Well Done (170°F)
Steaks - E(food should be3"
3/4" to 1" thick to 4" from broil element)
D or E(foodshould be 3"
to 5" from broil element)
Steaks -
3/4" to 1" thick
or Ground
Beef Patties
Breast, boneless
Breast, bone-in
C (foodshould be8"
to 9" from broil element)
C (foodshould be 7"
to 8" from broil element)
Steakslessthan 1"thick
are difficult to cook
rare. Theycookthrough
before browning.
To prevent curling of
meat, slash fat at 1"
intervals.
Broil skin-side-down
first.
Fish Fillets 1/2" to 1'thick D or E(foodshould be 3" Handle and turn very
to 6" from broil element) carefully.
Pork Chops Well Done (170°F) 5/4" thick D (food should be 6" To prevent curling of
to 7" from broil element) meat, slash fat at 1"
intervals.
*Use rack position Afor the smaller 2-rack position oven.
Ifyour range is connected to 208 volts, rare steaks may be broiled by preheating the
broiler and positioning the oven rack one position higher.
1/#

Using the convection oven. (onsomemodels) GEAppliances.corn
In aconvection oven, afan circulates
hot air over,under and around the
food.This circulating hot air is evenly
distributed throughout the oven
cavity. Asaresult, foods are evenly
cooked and browned - often in less
time than with regular heat.
Convection Baking
Ideal for evenly browned baked foods
cooked on multiple shelves.
• Good for large quantities of baked
foods.
Good results with cookies, biscuits,
brownies, cupcakes, cream puffs, []
sweet rolls, angel food cake and
bread. The convection fan circulates []
the heated air evenly over and
around the food.
The Convection Fan
DuringConvectionBake,thefanwilloperate
continuously.Thefanwillstopwhen theoven
doorisopened,butthe heatwillnotturn off. FS-]
Thefanwill resumeoperationwhenthedoor
isclosed.Duringpreheating(PrE)thefan will
comeon for 10secondsandthen shutoff. [-_
Auto Temp Conversion
When convection baking, the Auto Temp
Conversion feature automatically
reduces the set regular baking
temperature by 20°F.
Increase the Convection Baking
temperature setting 20°F higher
for faster cooking of large cuts
of meat and poultry.
How to Set the Oven for
Convection Baking
F-f] Touch the Convection Bake pad.
[] Touch the + or- pads until the
desired temperature is displayed.
Touch the Start/On pad.
The oven will start automatically.
The display will show PrE while
preheating. When the oven reaches
the selected temperature, the oven
control will beep several times and
the display will show the oven
temperature.
Check food for doneness
at the minimum time on the recipe.
Cook longer if necessary.
Touch the Clear/Offpad when
baking isfinished, and then remove
the food from the oven.
Tochange the oven temperature during
Convection Bake, touch the Convection
Bake pod and then the + or- pads
to set the new temperature.
When baking cookies,you will get
the best results if you use o flat
cookie sheet instead of o pan with
low sides.
Cookware for Convection
Cooking
Before using your convection oven,
check to see if your cookwure leaves
room for air circulation in the oven. If
you are baking with several pans, leave
space between them. Also, be sure the
pans do not touch each other or the
walls of the oven.
Paper and Plastic
Heat-resistant paper and plastic
containers that are recommended for
use in regular baking can also be used
for convection baking but should not be
used at temperatures higher than the
temperature recommended by the
cookware manufacturer. Plastic
cookware that is heat-resistant to
temperatures of 400°F can also be used.
Metal and Glass
Any type of cookwore will work in your
convection oven; however, metal pans
heat the fastest and ore recommended
for convection baking.
• Darkened or matte-finished pans will
bake faster than shiny pans.
• Glass or ceramic pans cook more
slowly.
For recipes like oven-baked chicken,
use o pan with low sides. Hot air cannot
circulate well around food in o pan with
high sides.
15

Using the warming drawer, somemode s
WARNING Food POISON HAZARD: Bacteria may grow in food at temperatures below 140°F.
• Always start with hot food. Do not use warm settings to heat cold food.
• Do not warm food for more than 2 hours.
Failure to follow these instructions may result in foodborne illness.
The warming drawer will keep hot, cooked foods at serving temperature. Always start with hot food.
Do not use to heat cold food other than crisping crackers, chips or dry cereal.
WARMI NO DRAWEI When Using the Warming Drawer
Pushand turn the control knob to any
desired setting.
Thewarming drawerwill keephot, cooked
foodswarm.
Donot line the warming drawer or pan
with aluminum foil. Foilisan excellent heat
insulator and will trap heat beneath it. This
will upsetthe performance of the drawer
and could damage the interior finish.
Allow approximately 25 minutes for the
warming drawer to preheat.
, Donot put liquidorwater in thewarming
drawer.
, Allfoodsplacedinthe warming drawer
shouldbecoveredwith a lidor aluminum
foil.Whenwarming pastriesor breads,the
covershouldbeventedto allow moisture
to escape.
, Foodshouldbe kepthot in itscooking
containeror transferredto a heat-safe
servingdish.
NOTE:Plasticcontainersor plasticwrap will
melt if indirect contact with the drawer,pan
or a hot utensil.Melted plasticmay not be
removableand isnotcoveredunderyour
warranty.
, Removeservingspoons,etc.,before
placingcontainersin warming drawer.
Temperature Selection Chart
Tokeepseveraldifferentfoodshot,setthe
controltothefoodneedingthehighestsetting.
Thetemperature,type andamount of food,
and thetime heldwillaffect thequalityof
thefood.
, Repeatedopeningofthe drawerallows
the hotair toescapeandthefood to cool.
With largeloadsitmay be necessaryto use
a higherwarming drawersettingand cover
someofthe cookedfood items.
, Donotuseplasticcontainersorplasticwrap.
Food Type Control Setting
Casserole HED
Chili HI
Pizza HED
Potatoes,baked HI
TortillaChips LO
Waffles LO
To Crisp Stale Items
Placefood in low-sideddishesor pans.
, Preheaton LOsetting. , Checkcrispnessafter/45minutes.Addtime
asneeded.
To Warm Serving Bowls and Plates
CAUTION
Disheswill behot. Usepotholdersor mitts
when removinghotdishes.
Towarm servingbowlsand plates,setthe
control on LO.
:Useonlyheat-safedishes.
, Ifyou want to heatfine china,pleasecheck
with the manufacturerof thedishesfor
their maximum heattolerance.
, Youmay warm emptyservingdishes
whilepreheatingthe drawer.
J6

Using the lower oven drawer. (onsomemodels) GEAppliances.com
The lower oven drawer may be used to bake foods using the same times and temperatures as a standard oven.
Foods ideal for baking in the lower oven drawer include pizza, frozen foods, casseroles, biscuits, rolls and many
desserts.
LOWER
OVEN
®
To Use the Lower Oven Drawer
[] Pushinand turn the loweroven
drawer knob to any desiredsetting. NOTES:
WARM t
2_ [] Allow the lower ovendrawer to
preheat.
2_ 4_0 TheONsignallight islocated abovethe
3003_o•4°° knoband glows when the knob isinthe
,,_T_NGe ONposition. Itremains ONuntil the knob _
ismoved to the OFFposition.
Push in and turn the lower oven
drawer knob to any desired
setting.
The"Heating"signal light islocated below
the knob and glowswhen the heating
elements are active. Preheatis complete
after the "Heating"signal hasturned
off for the first time after the knob is
turned on.
Always usethe includeddrawer rack
when usingthe lower oven drawer.
Thelower oven drawer cannot be used
during a self-cleancycle of the upper
oven.
iiiiiiii_
iiiiiiii_
Donot put food, foil or cookware directly
on the bottom of the lower oven drawer.
Always usethe includeddrawer rack.
Iffoods require a cover,useonly
foil or lidsable to withstand baking
temperatures. Do not use plastic.
Maximum height of foods that can be
baked inthe lower oven drawer is31/2''
Donot put liquid or water in the lower
oven drawer.
Never placeplastics,paper,canned
foods or combustible material in the
lower ovendrawer.
Thelower ovendrawer useslessenergy than the upper oven.
Allowthe following approximate times for preheating:
Desired Lower Preheat
Oven Temperature Time
WARM 10 minutes
350°F 15 minutes
425°F 25 minutes
When Using the Lower Oven Drawer Warm Setting
TheWARMSETTINGof the lower oven
drawer can be usedto keephotcooked
foods at servingtemperatures.Always start
with hot food. Donot usethe WARM
SETTINGto heat coldfood other than
crisping crackers,chips or dry cereal.
Pushin and turn the control knobto
the warm setting.
NOTE:The beginning temperature of the
food, the amount of food, the type of food,
the container and the amount of time the
food is inthe drawer will affect the quality
and ending temperature of the food.
17

Usingthe clock and timer.
Not all features are on all models.
To Set the Clock
Stort
__On _J
Make sure the clock is set to the
correct time of day.
Theclock must be setto the correct time
of day for the automatic oven timing
functions to work properly.Thetime of day
cannot be changed during a delayed
cooking or a delayed self-cleaningcycle.
[Z] Touch the Clock pad twice.
[] Touch the + or- pads.
Ifthe + or - pads are nottouched within
one minute after you touch the Clock pad,
the display revertsto the original setting.
Ifthis happens,touch the Clock pad twice
and reenter the time of day.
[] Touch the Start/On pad until the time
of day shows in the display.This
enters the time and startsthe clock.
Tocheckthe time of day when the display
isshowing other information, simply touch
the Clock pad.Thetime of day shows until
another pad istouched.
To Turn Off the Clock Display
If you have several clocks inyour kitchen,
you may wish to turn off the time of day
clock display on your range.
[Z] Touch the Clock pad onceto turn
off the time of day display.Although
you will not be able to see it, the clock
maintains the correct time of day.
[_ Touch the Clock pad twice to recall
the clockdisplay.
NOTE:If the clock cannot be recalledor it
will not stay permanently displayed,the
EnergySaver IVlodefeature ison.Toturn
the feature off,seethe EnergySaverMode
section.
.0
tche
LTime
On/Off
The timer is a minute timer only.
The Clear/Off pad does not affect
the timer.
To Set the Timer
The timer does not control oven operations.
The maximum setting on the timer is
9 hoursand 59 minutes.
[TJ Touch the Kitchen Timer On/Off pad.
Touch the + or - pads untilthe
amount of time you want shows in
the display.Themaximum time that
can be entered in minutes isS9.
Timesmore than 59 minutes should
be changed to hoursand minutes.
If you make a mistake,touch the Kitchen
Timer On/Off pad and begin again.
[]
%
Touch the Start/On pad.Thetime will
start counting down, although the
display doesnot change until one
minute has passed.
When the timer reaches :00, the
control will beep 3 times followed by
one beep every 6 seconds until the
Kitchen Timer On/Off pad istouched.
To Reset the Timer
Ifthe display isstill showing the time
remaining,you may change it bytouching
the Kitchen Timer On/Off pad,then
touching the + or - pads untilthe time you
want appears in the display.
If the remaining time isnot in the display
(clock,start time or cooking time are in
the display),recallthe remaining time by
touching the Kitchen Timer On/Off pad
and then touching the + or - pads to
enter the new time you want.
18
To Cancel the Timer
Touch the Kitchen Timer On/Off
pad twice.

Usingthe timed baking feature, ionsomemode sl GEAppliances.com
Do not lock the oven door with the latch during timed cooking. The latch is used for self-cleaning only.
NOTE: Foods that spoil easily-such as milk, eggs, fish, stuffings, poultry and pork-should not be allowed to sit
for more than 1 hour before or after cooking. Room temperature promotes the growth of harmful bacteria. Be
sure that the oven light is off because heat from the bulb will speed harmful bacteria growth.
i i i _ i
How to Set an Immediate Start and Automatic Stop
f- _'_[ Bake J Theovenw turnon mmedateyandcook [] Touch theStart/On pad.
ReJ for a selectedlength oftime. At the end of
the cooking time,the ovenwill turn off
automatically.
[] Touch the Bake pad.
[] Touch the + or - padsto set the
oven temperature.
l Stort--'l
l_off )
Thedisplay showseither the oven
[] Touch the Cooking Time pad.
NOTE:If your recipe requires preheating,
you may need to add additional time
to the length of the cooking time.
[4--1Touch the + or - padsto set the
baking time.
Thecooking time that you entered will be
displayed.(Ifyou selectCookingTime first
and then adjust the BakeTemperature,
the oven temperature will be displayed
instead.)
temperature that you set or the cooking
time countdown. (Thedisplay starts with
PrE if showing the oventemperature.)
Theoven will continue to cook for the
programmed amount of time,then turn
off automatically.
[] Touch the Clear/Off pad to cancel
if necessary.
Remove the food from the oven.
Remember, even though the oven shuts off
automatically, foods continue cooking after
controls are off.
Temp Recell
®
LTime )
®
kSim%J
kOnj/
¢-C,oor
k_offJ
How to Set a Delayed Start and Automatic Stop
Theoven will turn on at the time of day you
set, cook for a specific length of time and
then turn off automatically.
Hake surethe clock shows the correct
time of day.
IfJ Touch the Bake pad.
r21 Touch the + or - pads to set the
oventemperature.
[-_ Touch the Cooking Time pad.
[] Touch the + or - pads to set the
desiredlength of cooking time.
[] Touch the Start Time pad.
[] Touch the + or - pads to set the time
of dayyou want the oven to turn on
and start cooking.
[] Touch the Start/On pad.
NOTE:Ifyou would liketo check thetimes
you have set,touch the Start Time pad to
check the start time you haveset or touch
the Cooking Time pad to checkthe length
of cooking time you have set.
When the oventurns on at the time of day
you haveset, the display will show PrEuntil
it reachesthe selectedtemperature, then it
will display the oventemperature.
At the end of cookingtime, the oven
will turn off and the end-of-cycle tone
will sound.
[] Touch the Clear/Off pad to cancel
ifnecessary.
Removethe food from the oven.
Remember,eventhough the ovenshuts off
automatically, foods continue cooking after
controls are off.
NOTE:An attention tone will sound ifyou
are using timed baking and do not touch
the Start/On pad.
19

Special featuresof your oven control.
Energy Saver Mode Ion somemodels)
To save energy, you can turn off the time
of day clock and the display when the
range is not in use.
Pressand hold the + and- pads at the
same time to enable or disable this
feature. This will turn the display on or off.
NOTE:The display will reset after a power
outage.
CONTROLLOCK/UNLOCK
PRESS+AND -AND HOLDFOR3 SECONDS
Control Lockout Ionsomemodels)
Your control will allow you to lock out the
touch pads so they cannot be activated
when touched.
To lock/unlock the controls:
[Z] Touch the + and - pads at the same
time for 3 seconds, until the display
shows LOCON.
[] Tounlockthecontrol,touch the+ and -
padsat the sametime for :3seconds,
untilthe displayshowsLOCOFF.
When this feature is on and the touch
pads are touched, the control will beep
and show LOCON.
• The control lockout mode affects all
touch pads. No touch pads will work
when this feature isactivated.
• The adjustment will retained in memory
aftra power failure
Your new touch pad control has additional features that you may choose to use. The following are the features
and how you may activate them.
The special feature modes can only be activated while the display is showing the time of day. They remain in the
control's memory until the steps are repeated.
When the display shows your choice, touch the Sturt/On pad. The special features will remain in memory after
a power failure.
NOTE: The Sabbath feature and the Thermostat Adjustment feature are also Special Features, but they are
addressed separately in the following sections.
Temp Recall
fqtort-"/
_ On _
]2 Hour Shutoff
With thisfeature,shouldyou forget and leave
theovenon,the controlwill automaticallyturn
off the ovenafter 12hoursduring baking
functionsor after 3 hoursduringa broil
function.
If you wish to turn OFFthis feature, follow
the steps below.
[Z] TouchtheBake andBroil Hi/Lo padsat
thesametime untilthe displayshowsSF.
Touch the Clock pad.Thedisplay will
show ON (12hour shutoff).Touch the
Clock pad repeatedly until the display
showsOFF(noshutoff).
[-_ Touch the Start/On pad to activate
the no shut-off and leavethe control
set in this special features mode.
Adjust the oven thermostat--Do it yourself!
Youmay find that your new oven cooksdifferently than the one it replaced. Useyour new oven for a few weeksto become
more familiar with it.Ifyou still think your new oven istoo hot or too cold,you can adjust the thermostat yourself.
Do not use thermometers, such as those found in grocery stores, to check the temperature setting ofyour oven.
These thermometers may vary 20-40 degrees.
NOTE: This adjustment will not affect the broiling or the self-cleaning temperatures. Theadjustment will be
retained in memory after a power failure.
Temo Recult HalLo
®
0o,e)
Temp Recall
f_Start -'_
20 k°°J
To Adjust the Thermostat
E_ Touch the Bake and Broil Hi/Lo pads
at the same time until the display
shows SF.
Touch the Bake pad.A two-digit
number shows in the display.
[_ Theoventemperature can be adjusted
up to (+)35°Fhotter or (-) 35°Fcooler.
Touch the + pad to increase the
temperature in 1-degree increments.
Touch the - pad to decreasethe
temperature in 1-degree increments.
[] When you have made the adjustment,
touch the Start/On pad to go back to
the time of day display.Useyour oven
asyou would normally.
NOTE:Thisadjustment will not affect the
broiling or self-cleaningtemperatures.It will
beretained in memory after a power failure.
This manual suits for next models
1
Table of contents
Other GE Range manuals