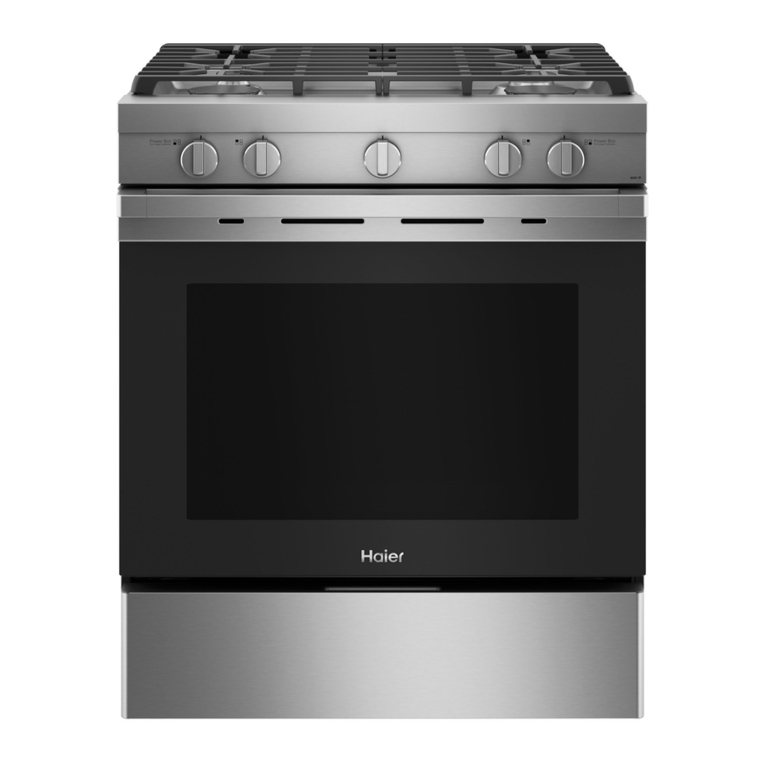
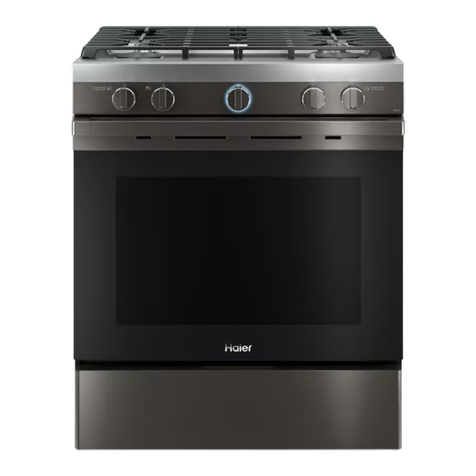
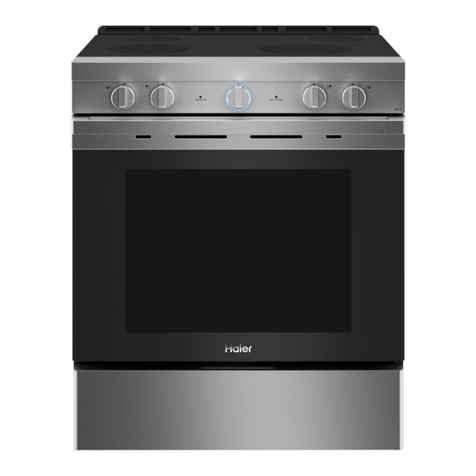
Haier QAS740 User manual

UserManual
Manualdelusuario
QAS740
ElectricCompactRanges
CocinaEléctricascompactas
49-88074-1 09-18 GEA


49-88074-1 3
ENGLISH
RECORDKEEPING
ThankyouforpurchasingthisHaierproduct.Thisusermanual
willhelpyougetthebestperformancefromyournewrange.
Forfuturereference,recordthemodelandserialnumber
locatedonthefrontbehindtherangestoragedrawer,andthe
dateofpurchase.
Stapleyourproofofpurchasetothismanualtoaidin
obtainingwarrantyserviceifneeded.
____________________________________________________
Modelnumber
____________________________________________________
Serialnumber
____________________________________________________
Dateofpurchase
TABLEOFCONTENTS
SAFETYINFORMATION ............................................................................................4
USINGTHERANGE ................................................................................................8
SurfaceUnits ..........................................................................................................8
OvenControls .........................................................................................................9
SabbathMode ........................................................................................................10
CookwareGuidelines..................................................................................................11
CookingModes .......................................................................................................11
OvenRacks...........................................................................................................12
OvenAirVents........................................................................................................12
AluminumFoilandOvenLiners ........................................................................................12
CookingGuide........................................................................................................13
CAREANDCLEANING ............................................................................................14
Oven.................................................................................................................14
Cooktop..............................................................................................................14
DoorandDrawer......................................................................................................16
OvenLight............................................................................................................17
OvenDoor............................................................................................................17
TROUBLESHOOTINGTIPS ........................................................................................18
WARRANTY..................................................................................................... 20
ACCESSORIES .................................................................................................. 21
HAIER WEBSITE
Havea question orneedassistancewith your appliance?TrytheHaier Website 24hoursaday, any dayoftheyear! You
canalso shop formoregreatHaier products andtakeadvantageof all ouron-linesupportservices designed foryour
convenience.In the US:Haierappliances.com

449-88074-1
ENGLISH
READ AND SAVE THESE INSTRUCTIONS
IMPORTANT SAFETY INFORMATION
READ ALL INSTRUCTIONS BEFORE USING THE APPLIANCE
WARNING Readall safety instructionsbeforeusingthe product. Failuretofollowthese instructions mayresultinfire,
electricalshock, serious injuryordeath.
SAFETYINFORMATION
ANTI-TIP DEVICE Toreduce theriskoftippingthe range,therange must
besecured byaproperlyinstalledanti-tip bracket.See
installationinstructions shippedwiththebracketfor
completedetails beforeattemptingtoinstall.
For Free-Standing Ranges
Tocheck ifthebracketisinstalled, ensurethereis no
cookwareon topoftherangeand allsurfacesare cool
tothe touch.Carefullyslideoutthe rangefromthe wall
approximatelythree inches.Lookbehindtherange to
seeif thereisametalbracket attachedtothe flooror
thewall. Tocheckifthebracket isinstalledcorrectly,
graspthe backoftherange,being carefulnotto graborbendtherear trimpiece.Tilt therangeforwardslightlyand confirm
theanti-tip bracketengagesthebackof therange,limiting theforwardtipofthe range.Ifthe
anti-tipbracket doesnotengagetherange andpreventit fromtipping,verifytheanti-tip bracket
hasbeen properlyinstalled.Ifthisdoes notsolvethe problemortheanti-tipbracket isnot
present,call 800.626.8774intheUSor 800.561.3344inCanada.
Ifthe range ispulledfromthe wall foranyreason,always repeat thisproceduretoverify the
rangeis properly securedbytheanti-tip bracket.
Nevercompletely removethelevelinglegsor therangewill notbesecuredtothe anti-tip
deviceproperly.
Anti-Tip
Bracket
Free-StandingRanges
$FKLOGRUDGXOWFDQWLSWKHUDQJHDQGEHNLOOHG
9HULI\WKHDQWLWLSEUDFNHWKDVEHHQSURSHUO\
LQVWDOOHGDQGHQJDJHG
(QVXUHWKHDQWLWLSEUDFNHWLVUHHQJDJHGZKHQ
WKHUDQJHLVPRYHG
'RQRWRSHUDWHWKHUDQJHZLWKRXWWKHDQWLWLSEUDFNHW
LQSODFHDQGHQJDJHG
)DLOXUHWRGRVRFDQUHVXOWLQGHDWKRUVHULRXVEXUQV
WRFKLOGUHQRUDGXOWV
7LS2YHU+D]DUG
:$51,1*

49-88074-1 5
ENGLISH
READ AND SAVE THESE INSTRUCTIONS
IMPORTANT SAFETY INFORMATION
READ ALL INSTRUCTIONS BEFORE USING THE APPLIANCE
SAFETYINFORMATION
WARNING GENERAL SAFETY INSTRUCTIONS
• Usethis appliance onlyforitsintended purpose as
describedin this Owner’sManual.
•FIRE HAZARD: Neverleave the rangeunattendedwith
thecooktop ON aboveaLosetting. Keep flammable
itemsaway from thecooktop.Turnoff all controlswhen
donecooking. Failure tofollowtheseinstructions can
resultin fire, seriousinjuryordeath.
• Besure your applianceisproperlyinstalled and
groundedby a qualifiedinstallerinaccordance with the
providedinstallation instructions.
• Donot attempt torepairorreplace any partofyour
rangeunless it isspecificallyrecommendedin this
manual.All other servicingshouldbetransferred to a
qualifiedtechnician.
• Beforeperforming any service,unplugtherange
ordisconnect the powersupplyatthe household
distributionpanel by removingthefuseor switching off
thecircuit breaker.
• Donot leave childrenalone—childrenshouldnot be left
aloneor unattended inanareawhere an applianceisin
use.They should neverbeallowedto climb, sitorstand
onany part oftheappliance.
•CAUTION Donot store itemsofinterestto
childrenabove a rangeoronthe backguard ofarange—
childrenclimbing on therangetoreach items couldbe
seriouslyinjured.
• Useonly dry potholders—moistordamp pot holders
onhot surfaces mayresultinburns from steam.Do
notlet pot holderstouchhotsurface units orheating
elements.Do not useatowelor other bulkyclothin
placeof pot holders.
• Neveruse your applianceforwarmingor heating the
room.
• Donot touch thesurfaceunits,the heating elementsor
theinterior surface oftheoven.These surfaces maybe
hotenough to burneventhoughthey are darkincolor.
Duringand after use,donottouch, or letclothingor
otherflammable materials contactthesurfaceunits,
areasnearby the surfaceunitsorany interior areaof
theoven; allow sufficienttimeforcooling first. Other
surfacesof the appliancemaybecomehot enough
tocause burns. Potentiallyhotsurfacesinclude the
cooktop,areas facing thecooktop,ovenvent opening,
surfacesnear the openingandcrevicesaround the oven
door.
• Donot heat unopenedfoodcontainers.Pressure could
buildup and thecontainercouldburst, causing aninjury.
• Donot use anytypeoffoil or linertocoverthe oven
bottomor anywhere intheoven,except as describedin
thismanual. Oven linerscantrapheat or melt,resulting
indamage to theproductandrisk of shock,smokeor
fire.
• Avoidscratching or impactingglassdoors,cook tops or
controlpanels. Doing somayleadto glass breakage.Do
notcook on aproductwithbroken glass. Shock,fireor
cutsmay occur.
• Cookfood thoroughly tohelpprotectagainst
foodborneillness. Minimum safefoodtemperature
recommendationscan be foundatIsItDoneYet.gov and
fsis.usda.gov.Use a foodthermometertotake food
temperaturesand check severallocations.
WARNING KEEP FLAMMABLE MATERIALS AWAY FROM THE OVEN
Failure to do so may result in fire or personal injury.
• Donot store oruseflammablematerials in anovenor
nearthe cooktop, includingpaper,plastic,pot holders,
linens,wall coverings, curtains,drapesandgasoline or
otherflammable vapors andliquids.
• Neverwear loose-fitting orhanginggarmentswhile
usingthe appliance. Thesegarmentsmayignite if they
contacthot surfaces causingsevereburns.
• Donot let cookinggreaseorother flammable materials
accumulatein or neartherange.Grease in theovenor
onthe cooktop mayignite.
• Cleanventilating hoods frequently.Greaseshouldnot
beallowed to accumulateonthehood or filter.

649-88074-1
ENGLISH
SAFETYINFORMATION
IMPORTANT SAFETY INFORMATION
READ ALL INSTRUCTIONS BEFORE USING THE APPLIANCE
READ AND SAVE THESE INSTRUCTIONS
WARNING IN THE EVENT OF A FIRE, TAKE THE FOLLOWING STEPS TO PREVENT
INJURY AND FIRE SPREADING
•
Donotusewaterongreasefires.Never pickupaflamingpan.
Turnthecontrolsoff.Smotheraflamingpan onasurfaceunit
bycoveringthepancompletelywithawell-fitting lid,cookie
sheetorflattray.Useamulti-purposedry chemicalorfoam-
typefireextinguisher.
• Ifthere isafire inthe ovenduring baking,smother the
fireby closingtheoven doorand turningthe ovenoff or
byusing amulti-purposedry chemicalor foam-typefire
extinguisher.
• Ifthere isafire inthe ovenduring self-clean,turn theoven
offand waitforthe fireto goout. Donot forcethedoor
open.Introduction offreshair atself-clean temperatures
maylead toaburst offlame fromthe oven,Failure to
followthis instructionmayresult insevere burns.
WARNING COOKTOP SAFETY INSTRUCTIONS
•Neverleave thesurfaceunits unattendedwith thecooktop
ONabove aLosetting. Boiloverscause smokingand
greasyspillovers thatmaycatch onfire.
• Alwaysbe presentatthe rangewhen cookingwith oilor
grease.Surface cookingisan "attended"activity.
• Neverleaveoilunattendedwhilefrying.Ifallowed toheat
beyonditssmokingpoint,oilmayigniteresulting infirethatmay
spreadtosurroundingcabinets.Useadeepfat thermometer
wheneverpossibletomonitoroiltemperature.
• Toavoid oilspilloverand fire,use aminimum amountof oil
whenshallow pan-fryingandavoid cookingfrozen foods
withexcessive amountsofice.
• Useproper pansize—selectcookware havingflat bottoms
largeenough tocoverthe surfaceheating element.The
useof undersizedcookwarewill exposea portionof the
surfaceunit todirectcontact andmay resultin ignitionof
clothing.Proper relationshipofcookware tosurface unit
willalso improveefficiency.
• Onlycertain typesofglass, glass/ceramic,earthenware or
otherglazed containersaresuitable forcooktop service;
othersmay breakbecauseof thesudden changein
temperature.
• Tominimize thepossibilityof burns,ignition offlammable
materialsand spillage,thehandle ofa containershould be
turnedtoward thecenterof therange withoutextending
overnearby surfaceunits.
• Whenpreparing flamingfoodsunder ahood, turnthe fan
on.
• Ifpower islostto anelectric cooktopwhile asurface unit
isON, thesurfaceunit willturn backon assoon aspower
isrestored. Intheevent ofpower loss,failure toturn
allsurface unitknobsto theOFF positionmay resultin
ignitionof itemsonor nearthe cooktop,leading toserious
injuryor death.
WARNING RADIANT COOKTOP SAFETY INSTRUCTIONS
•Usecare whentouchingthe cooktop.The glasssurface of
thecooktop willretainheat afterthe controlshave been
turnedoff.
•
Donotcookon abrokencooktop. Ifglasscooktopshould
break,cleaningsolutionsand spilloversmaypenetrate the
brokencooktopandcreate ariskof electricshock.Contacta
qualifiedtechnicianimmediately.
•
Avoidscratching theglasscooktop.The cooktopcanbe
scratchedwithitemssuch asknives,sharp instruments,
ringsorotherjewelry, andrivetson clothing.
• Donot placeorstore itemsthat canmelt orcatch fireon
theglass cooktop,evenwhen itis notbeing used.If the
cooktopis inadvertentlyturnedon, theymay ignite.Heat
fromthe cooktoporoven ventafter itis turnedoff may
causethem toignitealso.
• UseCERAMA BRYTE®ceramicCooktopCleaner and
CERAMABRYTE®Cleaning Padtoclean thecooktop. Wait
untilthe cooktopcoolsand theindicator lightgoes out
beforecleaning. Awetsponge orcloth ona hotsurface can
causesteam burns.Somecleaners canproduce noxious
fumesif appliedtoa hotsurface. NOTE: Sugarspills arean
exception.They shouldbescraped offwhile stillhot using
anoven mittanda scraper.See theCleaning theglass
cooktopsection fordetailedinstructions.
• Readand followallinstructions andwarnings onthe
cleaningcream label.

49-88074-1 7
ENGLISH
READ AND SAVE THESE INSTRUCTIONS
IMPORTANT SAFETY INFORMATION
READ ALL INSTRUCTIONS BEFORE USING THE APPLIANCE
SAFETYINFORMATION
WARNING OVEN SAFETY INSTRUCTIONS
• Standaway from therangewhenopening the oven
door.Hot air orsteamwhichescapes can causeburns
tohands, face and/oreyes.
•
Donot usetheovenifa heatingelementdevelopsa
glowingspot duringuseorshowsother signsofdamage.
Aglowing spotindicatestheheatingelement mayfail
andpresent apotentialburn,fire,or shockhazard.Turn
theoven offimmediatelyandhavethe heatingelement
replacedby aqualifiedservicetechnician.
• Keepthe oven ventunobstructed.
• Keepthe oven freefromgreasebuildup. Grease inthe
ovenmay ignite.
• Placeoven racks indesiredlocationwhile oven iscool.
Ifrack must bemovedwhileoven is hot,donotlet pot
holdercontact hot heatingelementinoven.
• Whenusing cooking orroastingbagsin the oven,follow
themanufacturer’s directions.
• Pullthe oven racktothestop-lock position when
loadingand unloading foodfromtheoven. This helps
preventburns from touchinghotsurfacesof the door
andoven walls.
• Donot leave itemssuchaspaper, cooking utensilsor
foodin the ovenwhennotin use. Itemsstoredinan
ovencan ignite.
• Neverplace cooking utensils,pizzaorbaking stones,
orany type offoilorliner on theovenfloor.These
itemscan trap heatormelt,resulting in damagetothe
productand risk ofshock,smokeor fire.

849-88074-1
ENGLISH
USINGTHERANGEUSINGTHERANGE
SURFACE UNITS
WARNING FIREHAZARD:Neverleavetherange
unattendedwiththecooktopONaboveaLosetting.Keep
flammableitemsawayfromthecooktop.Turnoffallcontrols
whendonecooking.Failuretofollowtheseinstructionscan
resultinfire,seriousinjuryordeath.
Throughoutthis manual, featuresandappearancemay vary
fromyour model.
How to Set
Pushthe knob inandturnin either directiontothesetting
youwant.
Asurface ON indicatorlightwillglow when anysurfaceunit
ison.
For glass cooktop surfaces:
AHOT COOKTOP indicatorlight will:
• comeon when theunitishot to thetouch.
•
stayon evenaftertheunitis turnedoff.
•
stayon untiltheunitiscooled toapproximately150°F.
Coil Cooktops
Eachcoil surfaceunituses"SENSI-TEMPTECHNOLOGY" to
reducethe riskofcooktopoiland greasefires.This feature
islocated inthecenterofeach surfaceunit.Power tothe
surfaceunit istemporarilyinterruptedwhena potorpan
exceedsexpected cookingtemperatures.Evenafterthe
surfaceunits areturnedoff,thesurface unitretainsenough
heatto continuecooking.Toavoidovercooking, removepans
fromthe surfaceunitswhenthefood iscooked.Avoid placing
anythingon thesurfaceunituntilit hascooledcompletely.
Cookware for Coil Cooktops
Thefollowing information willhelpyouchoose cookware
whichwill give goodperformanceoncoil cooktops.
NOTE:Followallcookware manufacturer’srecommendations
whenusinganytype ofcookwareon thecoilcooktop.
Recommended
Stainless Steel
Thinunclad stainless steelwillgivepoor performance.
Aluminum
Heavyweight recommended.
Goodconductivity. Because ofitslowmelting point, thin
weightaluminum should notbeused.
Copper Bottom
Enamel(painted)onCastIron
Cast Iron
Avoid/NotRecommended
Enamel (painted) on Steel
Glass-ceramic
Poorperformance.
Stoneware
Poorperformance.
Atboth OFF andHI the controlclicksinto position.You mayhear slight
clickingsounds duringcooking, indicatingthecontrol ismaintaining your
desiredsetting.
Besure youturn thecontrolknob toOFF when youfinish cooking.

49-88074-1 9
ENGLISH
USINGTHERANGEUSINGTHERANGE
SURFACE UNITS (Cont.)
Radiant Glass Cooktop
Theradiant cooktopfeaturesheatingunitsbeneath asmooth
glasssurface.
NOTE:Aslightodor isnormalwhen anewcooktopisused
forthe firsttime.Itiscaused bytheheatingofnew partsand
insulatingmaterials andwilldisappearina shorttime.
NOTE:Onmodelswith light-coloredglasscooktops, itis
normalfor thecookingzonestochange colorwhenhotor
coolingdown. Thisistemporaryandwill disappearasthe
glasscools toroomtemperature.
Thesurface unitwillcycleonand offtomaintainyour
selectedcontrol setting.
Itis safetoplacehotcookware ontheglasssurfaceeven
whenthe cooktopiscool.
Evenafter thesurfaceunitsareturned off,theglass
cooktopretains enoughheattocontinuecooking. Toavoid
overcooking,remove pansfromthesurfaceunits whenthe
foodis cooked.Avoidplacinganythingon thesurfaceunit
untilit hascooledcompletely.
• Waterstains (mineral deposits)areremovableusing the
cleaningcream or full-strengthwhitevinegar.
•
Useof windowcleanermayleavean iridescentfilmonthe
cooktop.The cleaningcreamwillremovethis film.
•
Don’tstore heavyitemsabovethecooktop. Iftheydrop
ontothe cooktop,theycancausedamage.
•
Donot usethesurfaceasa cuttingboard.
Temperature Limiter on Radiant Glass
Cooktops
Everyradiant surface unithasatemperature limiter.
Thetemperature limiter protectstheglasscooktop from
gettingtoo hot.
Thetemperature limiter maycyclethesurface units offfora
timeif:
• thepan boils dry.
• thepan bottom isnotflat.
• thepan is off-center.
• thereis no panontheunit.
Nevercook directlyon theglass.
Alwaysuse cookware. Alwaysplace thepanin the
centerof thesurface unityouare
cookingon.
Donot slidecookware acrossthecooktop becauseit canscratch the
glass—theglass isscratch-resistant, notscratchproof.

10 49-88074-1
ENGLISH
USINGTHERANGE
SURFACE UNITS (Cont.)
Cookware for Radiant Glass Cooktops
Thefollowing informationwillhelpyouchoose cookware
whichwill givegoodperformanceonglass cooktops.
NOTE:Followallcookware manufacturer’srecommendations
whenusing anytypeofcookwareon theceramiccooktop.
Recommended
Stainless Steel
Aluminum
Heavyweight recommended.
Goodconductivity. Aluminum residuessometimesappear
asscratches on thecooktopbutcan be removedifcleaned
immediately.Because of itslowmeltingpoint, thin weight
aluminumshould not beused.
Copper Bottom
Coppermay leave residueswhichcanappear as scratches.
Theresidues can beremoved,aslong as thecooktopis
cleanedimmediately. However, donotletthese pots boil
dry.Overheated metal canbondtoglass cooktops. An
overheatedcopper bottom potwillleavea residue thatwill
permanentlystain the cooktopifnotremoved immediately.
Enamel(painted)onCastIron
Recommendedif bottom ofpaniscoated.
Avoid/NotRecommended
Enamel (painted) on Steel
Heatingempty panscancausepermanentdamage tocooktop
glass.The enamelcanmeltandbond totheceramic cooktop.
Glass-ceramic
Poorperformance. Will scratchthesurface.
Stoneware
Poorperformance. May scratchthesurface.
Cast Iron
Notrecommended—unless designed specificallyforglass
cooktops.
Poorconductivity and slowtoabsorbheat. Will scratchthe
cooktopsurface.
More about Cookware
• Placeonly dry pansonthesurface elements. Donotplace
lidson the surfaceelements,particularlywet lids. Wet
pansand lids maysticktosmooth surface whencool.
• Donot use woksthathavesupport rings. Thistypeofwok
willnot heat onthecooktop.
• Werecommend that youuseonlya flat-bottomed wok.
Theyare available atyourlocalretail store. Thebottom
ofthe wok shouldhavethesame diameter asthesurface
elementto ensure propercontact.
• Somespecial cooking proceduresrequirespecific
cookwaresuch as pressurecookersordeep-fat fryers. All
cookwaremust have flatbottomsandbe the correctsize.
3DQVZLWKURXQGHGFXUYHG
ULGJHGRUZDUSHGERWWRPVDUH
QRWUHFRPPHQGHG
'RQRWSODFHZHWSDQVRQ
WKHJODVVFRRNWRS
'RQRWXVHZRNVZLWKVXSSRUW
ULQJVRQWKHJODVVFRRNWRS
8VHIODWERWWRPHGZRNV
RQWKHJODVVFRRNWRS
&KHFNSDQVIRUIODWERWWRPVE\XVLQJ
DVWUDLJKWHGJH<RXVKRXOGQRWEH
DEOHWRSDVVD86QLFNHOFRLQXQGHU
WKHVWUDLJKWHGJH

49-88074-1 11
ENGLISH
USINGTHERANGE
SURFACE UNITS (Cont.)
Home Canning Tips
Besure the canneriscenteredover the surfaceunit.
Makesure the cannerisflaton the bottom.
Toprevent burns fromsteamorheat, use cautionwhen
canning.
Userecipes and proceduresfromreputablesources. These
areavailable from manufacturerssuchasBall® and Kerr®and
theDepartment of AgricultureExtensionService.
Flat-bottomedcanners are recommended.Useofwater bath
cannerswith rippled bottomsmayextendthe time required
tobring the watertoaboil.
OVEN CONTROLS
Oven Mode Selector Knob
Turnthe Oven ModeSelectorknobto the modeyouwant.
Youroven has thefollowingcookingmodes: Bake Broiland
ConvectionBake. See CookingModessectionand Steam
Cleanfor more information.
• Bake
• Broil
• ConvectionBake
• SteamClean
Oven Temperature Knob
Turnthe Oven Temp knob tothesettingyou want until
Oven/Cyclelight turns off.
TheOven/Cycle light comesonwhenthe burner ison.Itwill
cycleon and offduringcooking.
To Adjust the Thermostat:
1. Pullthe Oven Temp knob offtherangeand look
atthe back side.Tomakean adjustment, loosen
(approximatelyone turn),butdo notcompletelyremove,
thetwo screws onthebackof the knob.
2. Withthe back oftheknobfacing you, holdtheouter
edgeof the knobwithonehand and turnthefrontof the
knobwith the otherhand.
Toincrease the oventemperature,movethe top screw
towardthe right. You’llhearaclick for eachnotchyou
movethe knob.
Todecrease the oventemperature,movethe top screw
towardthe left.
Eachclick will changetheoventemperature
approximately10°F. (Range isplusorminus 30°F from
thearrow.) We suggestthatyoumake the adjustment
oneclick from theoriginalsettingand check oven
performancebefore making anyadditionaladjustments.
3. Afterthe adjustment ismade,retightenscrews so they
aresnug, but becarefulnotto overtighten.
4. Replacethe knob, matchingtheflatarea of theknobto
theshaft, and checkperformance
OvenMode SelectorKnob (knobappearancemay vary)
L
O
O
S
E
N
S
C
R
E
W
S
T
O
R
O
T
A
T
E
M
A
K
E
C
O
O
L
E
R
M
A
K
E
H
O
T
T
E
R
Frontof OVENTEMP knob
(knobappearance mayvary) Back ofOVENTEMP knob
(knobappearance mayvary)

12 49-88074-1
ENGLISH
USINGTHERANGE
OVEN CONTROLS (Cont.)
Timer/Clock Display
1. Timer/Clock:Worksasa countdowntimerand aclock.
Toset the countdowntimer,pressthe Timer/Clock pad
anduse the +and-padstoset the timeinhoursand
minutes.After seeing thetime,pressthe Timer/Clock
padagain and the":"willstop blinking indicatingthe
timerhas started. Tocancelthetimer, press theTimer/
Clock padto ensure the":"isblinking. Then changethe
timeto 0:00 andpresstheTimer/Clock pad changing it
backto the clocktime.
Toset the clock,pressandhold the Timer/Clock pad
severalseconds and usethe+and-pads to setthe
clock.After changing thetime,hitthe Timer/Clock pad
tofinalize the clocktime.
2. Oven Light:Turns the ovenlightonor off.
3. - Pad:Use to decreasetimeforthe countdown timer
andclock. Short tapstothispad will decreasethetime
bysmall amounts. Holdingthepaddown will decrease
thetime by largeamounts.
4. + Pad:Use to increasetimeforthe countdown timer
andclock. Short tapstothispad will increasethetimeby
smallamounts. Holding thepaddownwill increase the
timeby large amounts.
5. Lock Out:Locks out thetimerandclock display so
thatpressing any ofthepadswill be disabled.Press
andhold the Lock Out padforthreeseconds to lockor
unlockthe display.
SABBATH MODE
Certainmodels comply withtheStar-KJewish Sabbath
requirementsfor use duringtheSabbathand holidays. For
thelatest list ofmodels,seestar-k.org.
Start Baking
Tostart baking, simplyturnthethermostat knob tothe
desiredtemperature. Because athermostatmodelwill
respondwith a clickingsoundwhenthe thermostat knobis
usedto turn ontheoven,this operation shouldtakeplace
beforethe Sabbath orHolidaysbegin.
Adjusting the Temperature
Toadjust the oventemperaturewhilein compliance with
Sabbathrequirements, the usermustobservethe oven ON
indicatorlight:
• Toadjust the oventemperaturetoa higher value,theuser
mustfirst confirm the"OVENON"light is on.Onlythen,
canthe user turntheknobto a highertemperaturethan
waspreviously set.
•
Toadjust theoventemperaturetoa lowervalue,theuser
mustfirst confirmthe"OVENON"light isoff.Onlythen,
canthe userturntheknobto alowertemperaturethanwas
previouslyset
.
Stop Baking
Tostop baking, simplyturnthethermostat knob totheoff
position.Because a thermostatmodelwillrespond with a
clickingsound when thethermostatknobis used toturnoff
theoven, this operationshouldtakeplace after theSabbath
orHolidays end.
Oven Light Operation
Theoven light canbesetto either onoroffprior to thestart
ofthe Sabbath ortheholiday.Opening and closingofthe
doorwill not changethestateof the ovenlight.
Sabbath Mode Power Outage Note
Ifa power outageoccursduringa Sabbath bake,theunitwill
returnto Sabbath bakemodewhenpower is restoredand
theoven will returntothesame temperature asbeforethe
outage,without any interventionfromtheuser.

49-88074-1 13
ENGLISH
USINGTHERANGE
COOKWARE GUIDELINES
Thematerial, finish, andsizeofcookware affect baking
performance.
Dark,coated anddullpansabsorbheat morereadilythanlight,
shinypans. Pansthatabsorbheatmore readilycanresultin
abrowner, crisperandthickercrust.If usingdarkandcoated
cookwarecheck foodearlierthantheminimum cooktime.If
undesirableresults areobtainedwiththistype ofcookware
considerreducing oventemperatureby25ºF nexttime.
• Shinypans can producemoreevenlycooked baked goods
suchas cakes andcookies.
• Glassand ceramic pansheatslowlybut retain heatwell.
Thesetypes of pansworkwellfor dishes suchaspiesand
custards.
• Airinsulated pans heatslowlyandcan reduce bottom
browning.
• Keepcookware clean topromoteevenheating.
COOKING MODES
Yournew oven hasavarietyof cooking modestohelpyou
getthe best results.Thesemodesare described below.
Referto the CookingGuidesectionfor recommendations
forspecific foods. Remember,yournewoven may perform
differentlythan the ovenitisreplacing.
Bake
Thebake mode isforbakingand roasting. Whenpreparing
bakedgoods such ascakes,cookiesand pastries, always
preheatthe oven first.Tousethis mode turnthethermostat
knobto the desiredtemperature.
Convection Bake Multi Rack
TheConvection Bake modeisintendedfor baking on
multipleracks at thesametime.This mode usesair
movementfrom the convectionfantoenhance cooking
evenness.Lower the temperature25degrees.Always
preheatwhen using thismode.Bakingtimes may beslightly
longerfor multiple racksthanwhatwould be expectedfor
asingle rack. Tousethismode turn yourOvenModeKnob
toConvection Bake and Oven TemperatureKnobtothe
recommendedtemperature setting.
Warm (on some models)
Warmmode is designedtokeephot foods hot.Coverfoods
thatneed to remainmoistanddo not coverfoodsthat
shouldbe crisp. Preheatingisnotrequired. Do notuseWarm
toheat cold food.Itisrecommended that foodnotbekept
warmfor more than2hours.To use thismodeturnthe
thermostatknob to Warm.
Convection Bake
TheConvection Bake modeisintendedfor baking on
multipleracks at thesametime.This mode usesair
movementfrom the convectionfantoenhance cooking
evenness.Lower the temperature25degrees.Always
preheatwhen using thismode.Bakingtimes may beslightly
longerfor multiple racksthanwhatwould be expectedfor
asingle rack. Tousethismode turn yourOvenModeKnob
toConvection Bake andOvenTemperatureKnob to the
recomendedtemperature setting.
Broil
Alwaysbroilwiththeovendoor and drawer closed. Monitor
foodcloselywhilebroiling.Usecaution when broiling on
theupperrackpositionsasplacing food closer to the broil
burnerincreasessmoking,splattering,andthe possibility of
fatsigniting.
Trybroiling foods thatyouwouldnormally grill. Adjustrack
positionsto adjust theintensityofthe heat tothefood.
Placefoods closer tothebroilburner when asearedsurface
andrare interior isdesired.Thickerfoods and foodsthat
needto be cookedthroughshouldbe broiled onalowerrack
position.To use thismodeturnthe thermostat knobtothe
Broilsetting.

14 49-88074-1
ENGLISH
USINGTHERANGE
OVEN RACKS
Rack Positions
Youroven hasfourrackpositionsin theoven.Recommended
rackpositions for varioustypesoffoods are providedin
theCooking Guide. Adjustingtherackposition is oneway
toimpact cooking results.Forexample,if you wouldprefer
darkertops on cakes,muffinsorcookies, try movingfood
onerack position higher.Ifyoufind foods aretoobrownon
top,try moving themdownnexttime.
Whenbaking with multiplepansandon multiple racks,ensure
thereis sufficient spacebetweenpansto allow airtoflow.
Thismay improve cookingevenness.
Removing and Replacing Flat Racks
Whenplacing and removingcookware,pullthe rack outto
thebump (stop position)ontherack support.
Toremove a rack,pullittoward you untilitreachesthe stop
position,tilt up thefrontofthe rack andpullitout.
Toreplace a rack,
placethe curved end
ofthe rack ontothe
racksupports. Tilt up
thefront of therack
andpush the rackin
untilit stops. Thenlay
therack flat andpush
itin until itisallthe
wayinto the oven.
Racksmay become
difficultto slide.
Toimprove sliding
conditions,use a soft
clothor paper towel
torub vegetable oil
onthe left andright
edgesof the racks
and/orrack supports.
NOTE: Remove
unusedracks when
usingthe oven for
fasterpreheat,
improvedefficiency,
andoptimal cooking
performance.
ALUMINUM FOIL AND OVEN LINERS
CAUTION Donotuseanytype offoilorovenlinerto
covertheovenbottom.These itemscantrapheatormelt,
resultingindamagetothe productandriskofshock,smoke
orfire.Damagefromimproper useoftheseitemsisnot
coveredbytheproductwarranty.
Foilmay be usedtocatchspills by placingasheeton a lower
rack,several inches belowthefood.Do not usemorefoil
thannecessary and neverentirelycoveran oven rackwith
aluminumfoil. Keep foilatleast1-1/2” from ovenwallsto
preventpoor heat circulation.
Rackpositions
Removingracks
Replacingracks
Rackstop
position

49-88074-1 15
ENGLISH
FOODTYPE RECOMMENDED
MODE(S) RECOMMENDEDRACK
POSITION(S) ADDITIONALSUGGESTIONS
BakedGoods
Layercakes,sheetcakes,
bundtcakes,muffins,quick
breadsonaSingleRack Bake 2 Useshinycookware.
Layercakes*onMultiple
Racks Bake
ConvectionBake 1and3 Ensureadequateairflow(seeillustrationbelow).
Chiffoncakes(angelfood) Bake 1 Useshinycookware.
Cookies,biscuits,sconeson
aSingleRack Bake 3 Useshinycookware.
Cookies,biscuits,sconeson
MultipleRacks ConvectionBake
Bake 2and4 Ensureadequateairflow.Switchfoodlocation partiallythroughcooking
formoreevencookingresults.
Beef&Pork
Hamburgers Broil 4 Useabroilpan;movefooddownformoredoneness/lesssearing.Watch
foodcloselywhen broiling.Centerfoodunderburner.
Steaks&Chops Broil 4 Useabroilpan;movefooddownformoredoneness/lesssearing.Watch
foodcloselywhen broiling.Centerfoodunderburner.
Roasts Bake 1or2 Leaveuncovered,usealowsidedpansuchasabroilpan.
Preheatingisnotnecessary.
Poultry
Wholechicken Bake 2 Leaveuncovered,usea lowsided pansuchasabroilpan.
Bone-inchickenbreasts,
legs,thighs Broil
Bake 1or2 IfbreadedorcoatedinsauceavoidBroilmodes.Broilskinsidedown
first.Watchfoodcloselywhenbroiling.
Bonelesschickenbreasts Broil
Bake 1or2 Movefooddownformoredoneness/lesssearingandupforgreater
searing/browningwhenbroiling.
Wholeturkey Bake 1or2 Leaveuncovered,usea lowsided pansuchasabroilpan.
TurkeyBreast Bake 1or2 Leaveuncovered,usealowsidedpansuchasabroilpan.
Fish Broil 4 Watchfoodcloselywhenbroiling.
Casseroles Bake 2or3
FrozenConvenienceFoods
Pizza,potatoproducts,
chickennuggets,appetizers
onaSingleRack Bake 3 Useshinycookware.
*Whenbaking four cakelayersata time, staggerthepans
asshown to therightsothat one panisnotdirectly above
another.
Cookfood thoroughly tohelpprotectagainst foodborne
illness.Minimum safe foodtemperaturerecommendations
forfood safety canbefoundat IsItDoneYet.gov. Makesure
touse a foodthermometertotake food temperatures.
NOTE:Removeunusedracks whenusingthe ovenforfaster
preheat,improvedefficiencyand optimalcookingperformance.
USINGTHERANGE
COOKING GUIDE
5DFNSRVLWLRQIRUEDNLQJOD\HUFDNHV

16 49-88074-1
ENGLISH
CAREANDCLEANING
OVEN
Besure allcontrolsare offand allsurfaces arecool before
cleaningany partofthe oven.
Oven Interior
Theinterior ofyournew ovencan becleaned manuallyor by
usingthe SteamCleanfeature.
Spillageof marinades,fruitjuices, tomatosauces andbasting
liquidscontaining acidsmaycause discolorationand shouldbe
wipedup assoonas hotsurfaces cool,then cleanand rinse.
Manual Cleaning
Donotuseovencleaners,strongliquid cleansers,steelwool, or
scouringpadsontheinteriorofthe oven.Forsoils ontheoven
bottomandotherenameledsurfaces,usea gentleabrasive
containingoxalicacid,suchasBarKeepers Friend®,witha non-
scratchsponge.Takecarenottoapply anyabrasivecleaners or
spongestothedoorglass,asit willscratchthe reflectivecoating.
Theoveninterioranddoorglassmay becleanedusing asoft
clothwithamildsoapandwater, orvinegarand watersolution.
Aftercleaning,rinsewithcleanwaterand drywitha softcloth.
Steam Clean
TheSteamCleanfeature isforcleaning lightsoilfromyouroven.
Touse theSteamClean feature:
1. Startwith theovenat roomtemperature.
2. Wipeexcess greaseandsoils fromthe oven.
3. Pour1/2 cupofwater ontothe bottomof theoven.
4. Closethe door.
5. Turnboth yourOvenMode Knoband OvenTemperature
Knobto Steam Clean Setting.
Donot openthedoor duringthe SteamCleaning cycle.At the
endof theSteamClean cycle,soak upthe remainingwater, and
wipethe moisture-softenedsoilfrom theoven wallsand door.
Oven Exterior
Donotuseovencleaners,abrasivecleansers, strongliquid
cleansers,steelwool,plasticscouringpadsor cleaningpowders
ontheinteriororexteriorofthe oven.Cleanwith amildsoapand
waterora50/50solutionofvinegar andwater.Rinse withclean
wateranddrywithasoftcloth. Whencleaningsurfaces, make
surethattheyareatroomtemperature andnotin directsunlight.
Spillageof marinades,fruitjuices, tomatosauces andbasting
liquidscontaining acidsmaycause discolorationand shouldbe
wipedup assoonas hotsurfaces cool,then cleanand rinse.
Oven Racks
Alloven racksmaybe cleanedby handwith anabrasive cleaner
orsteel wool.
Aftercleaningtheracks,useasoft clothorpaper toweltoruba
smallamountofvegetableoilonthe leftandright edgesoftherack.
Thiswillensuretheracksareeasy toslidein andoutofthe oven.
COOKTOP
Control Panel and Knobs
Wipethe controlpanelafter eachuse ofthe ovenwith adamp
cloth.For cleaning,usemild soapand wateror a50/50 solution
ofvinegar andwater.Rinse withclean water.Polish drywith a
softcloth.
Donot useabrasivecleansers, strongliquid cleansers,plastic
scouringpads orovencleaners onthe controlpanel—they will
damagethe finish.
Stainless Steel Surfaces (on some models)
Donot useasteel woolpad; itwill scratchthe surface.
Toclean thestainlesssteel surface,use warmsudsy wateror
astainless steelcleaneror polish.Always wipethe surfacein
thedirection ofthegrain. Followthe cleanerinstructions for
cleaningthe stainlesssteelsurface.
Cleanerswith oxalicacidsuch asBar KeepersFriend Soft
Cleanser™willremove surfacerust, tarnishand smallblemishes.
Useonly aliquidcleanser freeof gritand rubin thedirectionof
thebrush lineswitha damp,soft sponge.
Toinquire aboutpurchasingcleaning productsincluding
stainlesssteel appliancecleaneror polish,see theAccessories
andConsumer Supportsectionsat theend ofthis manual.
Foreasier cleaning,thecontrol knobsmay beremoved by
pullingthem directlyoutwardsonce theknobs arein theOFF
position.Do notpullknobs upor downor hangobjects on
them.This candamagethe gasvalve shaft.When removingthe
tri-ring(on somemodels)and thedual-oval (onsome models)
burnerknobs, remembertheirlocation. Whileall otherknobs
areinterchangeable, theseknobsmust beplaced inthe same
locationafter cleaning.Seethe SurfaceBurner sectionfor a
detailedview oftheseknobs. Theknobs canbe washedby hand
withsoap andwateror ina dishwasher.
Toreplace knobsafter
cleaning,align thehole
onthe knobbackside
withthe gasvalveshaft
andpush inwarduntil
theknob issecurely
fastened.All knobsare
interchangeable.
Cooktop Surface
Donot useovencleaners, abrasivecleansers, strongliquid
cleansers,steel wool,plasticscouring pads,or cleaningpowders
onthe cooktopsurface.Clean witha mildsoap andwater ora
50/50solution ofvinegarand water.Rinse withclean waterand
drywith asoftcloth. Whencleaning surfaces,make surethat
theyare atroomtemperature andnot indirect sunlight.
Spillageof marinades,fruitjuices, tomatosauces andbasting
liquidscontaining acidsmaycause discolorationand shouldbe
wipedup assoonas hotsurfaces cool,then cleanand rinse.
Ifyour modelhasa stainlesssteel cooktopsurface, referto the
StainlessSteel Surfacecleaninginstructions featuredin the
ControlPanel andKnobssection.
Surfaceburner knob

49-88074-1 17
ENGLISH
GLASS COOKTOP
Normal Daily Use Cleaning
ONLYuse CERAMA BRYTE®CeramicCooktopCleaner on
theglass cooktop. Othercreamsmaynot be aseffective.
Tomaintain and protectthesurfaceof your glasscooktop,
followthese steps:
1. Beforeusing the cooktopforthefirst time, cleanitwith
CERAMABRYTE® Ceramic CooktopCleaner.Thishelps
protectthe top andmakescleanupeasier.
2. Beforeusing the cooktopforthefirst time, cleanitwith
CERAMABRYTE® Ceramic CooktopCleaner.Thishelps
protectthe top andmakescleanupeasier.
3. Shakethe cleaning creamwell.Applya few dropsof
CERAMABRYTE® Ceramic CooktopCleanerdirectlyto
thecooktop.
4. Usea paper towelor
CERAMABRYTE® Cleaning
Padfor Ceramic Cooktops
toclean the entirecooktop
surface.
5. Usea dry clothorpaper
towelto remove allcleaning
residue.No need torinse.
NOTE: Itis very importantthat
youDO NOT heatthecooktop
untilit has beencleaned
thoroughly.
Burned-On Residue
NOTE: DAMAGEto your glasssurfacemayoccur if youuse
scrubpads other thanthoserecommended.
1. Allowthe cooktop tocool.
2. Spreada few dropsofCERAMABRYTE® Ceramic
CooktopCleaner on theentireburnedresidue area.
3. Usingthe included CERAMABRYTE®CleaningPad
forCeramic Cooktops, rubtheresiduearea, applying
pressureas needed.
4. Ifany residue remains,repeatthesteps listed aboveas
needed.
5. Foradditional protection, afterallresiduehas been
removed,polish the entiresurfacewithCERAMA
BRYTE®Ceramic Cooktop Cleanerandapaper towel.
Heavy, Burned-On Residue
1. Allowthe cooktop tocool.
2. Usea single-edge razorbladescraperat approximately a
45°angle against theglasssurfaceand scrape thesoil.It
willbe necessary toapplypressureto the razorscraper
inorder to removetheresidue.
3. Afterscraping with therazorscraper,spread a fewdrops
ofCERAMA BRYTE® CeramicCooktopCleaneron the
entireburned residue area.UsetheCERAMA BRYTE®
CleaningPad to removeanyremainingresidue.
4. Foradditional protection, afterallresiduehas been
removed,polish the entiresurfacewithCERAMA
BRYTE®Ceramic Cooktop Cleanerandapaper towel.
Metal Marks and Scratches
1. Becareful nottoslidepotsand pansacrossyour cooktop.
Itwill leavemetalmarkingsonthe cooktopsurface.
Thesemarks are removableusingtheCERAMA BRYTE®
CeramicCooktop Cleaner withtheCERAMABRYTE®
CleaningPad for CeramicCooktops.
2. Ifpots with athinoverlayof aluminum orcopper
areallowed to boildry,theoverlay may leaveblack
discolorationon the cooktop.
Thisshould be removedimmediatelybeforeheating
againor the discolorationmaybepermanent.
NOTE: Carefullycheck the bottomofpansfor roughness
thatwould scratch thecooktop.
CAREANDCLEANING
Cleanyour cooktopafter each
spill.Use CERAMABRYTE®
CeramicCooktop Cleaner.
ÞöèäÌÎÛÊÖÊËÛâÝήCleaningPad forCeramic Cooktops.
ÝëèÌÎÛÊÖÊËÛâÝήCeramic Cooktop Scraper andall
recommendedsuppliesareavailablethrough our Parts Center.
Seeinstructionsunder“ToOrder Parts” section on next page.
NOTE: Donotuseadull or nicked blade.

18 49-88074-1
ENGLISH
CAREANDCLEANING
GLASS COOKTOP (Cont.)
Damagefrom Sugary Spills andMelted Plastic
Specialcareshouldbetakenwhen removing hot substances
to avoid permanent damage of the glass surface.Sugary
spillovers(suchasjellies,fudge,candy, syrups) or melted
plasticscancausepittingofthe surface of your cooktop
(notcoveredbythewarranty)unless the spill is removed
whilestillhot.Specialcareshould be taken when removing
hotsubstances.
Besure to useanew,sharp razor scraper.
Donot use adullornicked blade.
1. Turnoff all surfaceunits.Removehot pans.
2. Wearingan oven mitt:
a. Usea single-edge razorbladescraper(CERAMA
BRYTE®Ceramic Cooktop Scraper)tomovethe spill
toa cool areaonthecooktop.
b. Removethe spill withpapertowels.
3. Anyremaining spillover shouldbeleftuntil the surfaceof
thecooktop has cooled.
4. Don’tuse the surfaceunitsagainuntil all oftheresidue
hasbeen completely removed.
NOTE: Ifpitting or indentationintheglass surface has
alreadyoccurred, the cooktopglasswillhave to bereplaced.
Inthis case, servicewillbenecessary.
DOOR AND DRAWER
Cleaning the Oven Door
Cleaning the Door Interior
Donot allow excesswatertorun into anyholesorslots in the
door.
Wipedish soap overanybaked-onspatters on theglass.Use
asingle sided safetyrazorbladeto clean itoff.Thenwipe
overthe glass withasoapycloth to removeanyresidueand
dryoff.
Thearea outside thegasketcanbe cleaned withasoap-filled
plasticscouring pad. Donotrubor clean thedoorgasket- it
hasan extremely lowresistancetoabrasion.
Ifyou notice thegasketbecomingworn, frayed ordamaged
inany way orifithas become displacedonthedoor, you
shouldhave it replaced.
Cleaning the Door Exterior
Ifa stain onthedoorvent trim ispersistent,usea mild
abrasivecleaner and asponge-scrubberforbest results.
Donot use thismethodonany other surface.
Stainless Steel Surfaces (on some models)
Donot use asteelwoolpad; it willscratchthesurface.
Toclean the stainlesssteelsurface,use warm sudsywateror
astainless steel cleanerorpolish.Always wipe thesurfacein
thedirection of thegrain.Followthe cleaner instructionsfor
cleaningthe stainless steelsurface.
Toinquire aboutpurchasingcleaningproductsincluding
stainlesssteel appliancecleanerorpolish,see theAccessories
andConsumer Supportsectionsattheend ofthismanual.
Removable Storage Drawer
Thestorage drawer isagoodplace to storecookwareand
bakeware.Do not storeplasticsorflammable material in
thedrawer.
Thestorage drawer mayberemovedfor cleaning under
therange. Clean thestoragedrawerwith a dampclothor
sponge.Never use harshabrasivesorscouring pads.
Yourstorage drawer mayhaveplasticslides (shown to
theright) or metalrails.Followthe respective removaland
replacementinstructions for yourmodel’sconfiguration.
Removing the Storage Drawer
1. Pulldrawer straight outuntilitstops.
2. Continueto pull thedraweruntilit is detachedfrom
theoven.
Replacing the Storage Drawer
1. Restthe left drawerrailaroundthe inner leftrailguide
andslide it inslightly.
2. Placethe right drawerrailaroundthe inner rightrail
guideand slide itinslightly.
3. Slidethe drawer allthewayin.

49-88074-1 19
ENGLISH
CAREANDCLEANING
OVEN LIGHT
WARNING SHOCK OR BURN HAZARD: Before
replacingoven light bulb,disconnecttheelectrical power to
therange at themainfuseor circuit breakerpanel.Failureto
doso may resultinelectricshock or burn.
CAUTION BURN HAZARD: Theglass cover andbulb
shouldbe removed whencool.Touchinghot glass withbare
handsor a dampclothcancause burns.
Oven Light Replacement
Besure to letthelightcover and bulbcoolcompletely.
To remove the cover:
1. Holda hand underthecoverso it doesn’tfallwhen
released.With fingers ofthesamehand, firmly push
backthe wire coverholder.Liftoff the cover.
Donot remove anyscrewstoremove the cover.
2. Replacebulb with a40-wattappliancebulb.
To replace the cover:
1. Placeit intogrooveofthelight receptacle.Pullwire
forwardto thecenterofthecover untilitsnaps intoplace.
2. Connectelectrical power totherange.
OVEN DOOR
Thedoor is veryheavy.Becareful when removingandlifting
thedoor. Do notliftdoorby the handle.
To Remove the Door:
1. Fullyopen the door.
2. Pullthe hinge locksupandaway from therangeframeto
theunlocked position.
3. Firmlygrasp both sidesofthedoor near thetop.
4. Closedoor until thetopofthe door isapproximately6”
fromthe range frame.
5. Liftdoor up andawayfromthe range untilbothhinge
armsare clear oftheslotsin the rangeframe.
To Replace the Door:
1. Firmlygrasp both sidesofthedoor near thetop.
2. Withthe door atthesameangle as theremovalposition,
restthe notch ontheundersideof the lefthingearmon
thebottom edge ofthelefthinge slot. Thenotchinthe
hingearm must befullyseatedinto the bottomofthe
slot.Repeat for therightside.
3. Fullyopen the door.Ifthedoor will notfullyopen,the
notchesin the bottomsofthehinge arms havenot
seatedcorrectly in thebottomedgeof the slot.Liftthe
dooroff the rangeandrepeatprevious step.
4. Pushthe hinge lockstowardtherange cavity anddown
tothe locked position.
5. Closethe oven door.
Pushhinge locksdown tolockRestnotch onbottom edge
ofhinge slot
Notch
Bottom
edgeof
slot
Hingearm
RemovalpositionPullhinge locksup tounlock
Wirecover holder

20 49-88074-1
ENGLISH
Problem Possible Cause What To Do
My new oven doesn't
cook like my old one.
Is something wrong
with the temperature
settings?
Yournewovenhasa different cooking system
fromyouroldovenand therefore may cook
differentlythanyouroldoven.
Forthefirstfewuses, follow your recipe times
andtemperaturescarefullyanduse rack positions
recommendedintheCookingGuide. If you still think
yournewovenistoo hot or too cold, youcanadjustthe
temperatureyourselftomeetyour specific cooking
preference.SeetheOvenControls section.
Food does not bake
properly Ovencontrolsimproperlyset. Seethe Cooking Modes section.
Rackpositionisincorrector rack is not level. See theCookingModessectionandCooking Guide.
Incorrectcookwareorcookwareof improper size
beingused. SeetheCookwaresection.
Oventemperatureneedsadjustment. Seethe Oven Controls section.
Food does not broil
properly Ovencontrolsimproperlyset. Makesure you select the appropriate broilmode.
Improperrackpositionbeingused. See Cooking Guide for rack locationsuggestions.
Cookwarenotsuitedforbroiling. Use a pan specifically designed forbroiling.
Aluminumfoilonthebroil pan has not been fitted
properlyorslittodrain grease.
Ifusingaluminumfoilonbroil pan, wrap tightly and add slits
conformingtothoseinthepan to allow grease to drain.
Oven temperature
too hot or too cold Oventemperatureneedsadjustment. Seethe Oven Controls section.
Oven appears not to
work Afuseinyourhome may be blown or thecircuit
breakertripped. Replacethefuseor reset the circuit breaker.
Ovencontrolsimproperlyset. Seethe Using the Oven section.
OvenisinSabbathMode. Verify, that the oven is notinSabbathMode.Seethe
SabbathModesection.
“Crackling” or
“popping” sound Thisisthesoundof the metal heating and cooling
duringboththecookingand cleaning functions. This is normal.
Why is my range
making a "clicking"
noise when using my
oven?
Yourrangehasbeendesigned to maintain a tighter
controloveryouroven'stemperature. You may
hearyouroven'sheatingelements "click" on and
offmorefrequentlythanin older ovens to achieve
betterresultsduringbaking,broiling, and self-
cleancycles.
Thisisnormal.
Sometimes the
oven takes longer to
preheat to the same
temperature
Cookware,food,and/ornumberof racks in oven. Cookware, food, andracksintheovenwill cause
differencesinpreheattimes.Remove excess items to
reducepreheattime.
Oven lightdoes not
work Lightbulbislooseordefective. Tightenorreplacebulb.SeetheOvenLightsectionfor
instructionsonhowtoreplacethebulb.
Savetime and money!Reviewthecharts on thefollowingpagesfirst and youmaynotneed to callforservice.
TROUBLESHOOTINGTIPS
Table of contents
Other Haier Range manuals

Haier
Haier HCR6250AGS User manual

Haier
Haier HCR6250ACS User manual

Haier
Haier QGSS740 User manual

Haier
Haier HCR2250AES User manual

Haier
Haier QCGSS740RNSS User manual

Haier
Haier QSS740 User manual

Haier
Haier CHER203AAWW User manual

Haier
Haier GE CGS986EEL Installation guide

Haier
Haier QCAS70 User manual

Haier
Haier HCR2250ADS User manual
Popular Range manuals by other brands

Frigidaire
Frigidaire FGF316A Factory parts catalog

Siemens
Siemens HX9S5IH40Y instruction manual

Bartscher
Bartscher 700 Series Installation, use and maintenance

Laney
Laney Lionheart L5-Studio manual

KitchenAid
KitchenAid KDRS463VSS00 installation instructions

Frigidaire
Frigidaire GLGFM96FP Factory parts catalog