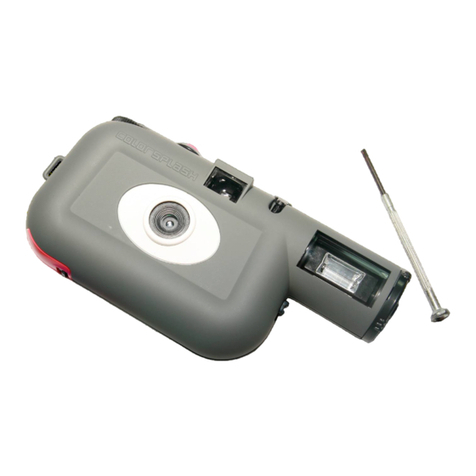
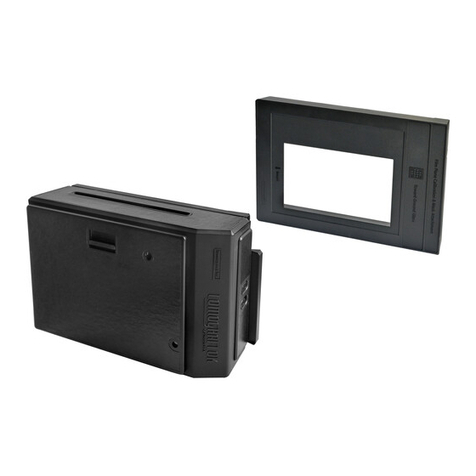
Lomography Spinner Motorizer User manual

Spinner Motorizer – User Manual
The Spinner Motorizer is a device which allows you to motorize and remotely control your
Spinner 360° camera. First you need to take your Lomography Spinner 360° camera (sold
separately), simply attach the camera to the Motorizer Base, and press the remote control
button for breathtaking and smooth photos - even at night or indoors!
The device can also be used for experimenting with creative photographic techniques
including time scans, endless images, or any other ways you can think of!
Attaching your Spinner 360° (sold separately) onto the Spinner Motorizer Base:
Here’s how to detach the Spinner 360°’s handle:
- Take your Spinner 360° camera (sold separately)
- Loosen the rubber band <11> by pulling it off from the small pulley <12>.
- Detach the Spinner 360°’s core body from the handle by pulling them apart.
Attaching the Spinner 360° body onto the Motorizer Base:
- Place the rubber band around the motor pulley <2>.
- Take the Spinner 360’s main body. Firstly fit the small pulley (under the body) <10> into
the rubber band <11>. Secondly, match the hole <12> with the brass connector <3> on the
motor base, and then plug it in.
Battery Supplies:
Both the Spinner Motorizer Base and the Remote Control need batteries to work. The Spinner
Motorizer Base needs at least 4 x AA batteries; the Spinner Remote needs 1xAA battery.
Inserting Batteries into the Spinner Motorizer:
- Turn the bottom cover <1> of Spinner Motorizer Base anti-clockwise to open the battery
chamber.
- You will see 4 cavities (in total 8 chambers) <4> where you can insert your AA batteries,
with + /- signs indicating the correct battery installation position. Insert the batteries correctly
according to the signs printed.
- It's suggested that you install all 8 batteries to achieve the best stability and operation time.
However the Spinner Motorizer Base also works with just 4 AA batteries. If you only have 4
batteries, then install batteries into the four cavities separately.
- Now you should match the white dot <5> on the bottom cover and the Motorizer Base, turn
the bottom cover <1> clockwise to lock it again.

Inserting the Battery into the Remote Control:
- Turn the remote control’s bottom <7> cover anti-clockwise to open the battery chamber.
- Insert 1x AA battery into the battery chamber, following the positive/negative indication.
- Reattach the bottom cover <7> and turn it clockwise to lock it again.
- The remote control is now ready to use.
Film Loading and Basic Operation:
After installing the batteries, your motorized Spinner 360° is ready to go.
- Switch the ON/OFF switch <6> to make your Spinner Motorizer Base ready to use. You
should see a blue light if the batteries have been installed correctly.
- Choose "Continuous" "Single Spin" mode on your remote control to load the film.
1. Open the camera’s Rear Door <13> by pulling down the Door Lock <14>.
2. Pull up the Rewind Crank <15>, insert your film into the left side and push the
Rewind Crank back down to lock it in place.
3. Pull out your film leader and place it into the slit of the Take Up Spool <16>. Press
the remote control button <7> (under continuous mode) to drive the spool a little bit if you
cannot see it in the chamber. The little tooth on the Take Up Spool <16> should grab your
film leader. Take care that the Black Flap <17> stands like a wall between the Take Up Spool
<16> and the Exposure Slit. When everything is in place, try to wind a little bit of the film
with the Rear Door <13> still open by simply pressing the remote control button <8> (while
in continuous mode). The film should feed correctly from the roll.
4. Now close the Rear Door <13> and press the remote control button <8> to advance
the exposed film a bit. Your film is now properly loaded and you are ready to shoot.
- To shoot photos, simply press the blue button <7> on the Remote Control. You'll see the
signal light <6> turn red and the camera will begin to spin.
- If the blue signal light <6> is flashing while spinning, it's time for you to change batteries.
Change all of the batteries at once and don't mix used batteries.
CONTINUOUS mode and SINGLE SPIN mode:
- You'll see "Continuous" and "Single Spin" printed on your Remote Control <9>. These are
the two modes that decide how the camera spins exactly.
Continuous Mode: Single Spin Mode: Camera turns as long as the blue release button <8> is
pressed down – you can keep shooting as long as you want.
Single Spin Mode: Continnuous Mode: Camera turns approx. 1.5 rotations after the button
<8> has been pressed once. You do not need to hold the button down for the whole rotation.

How to Expose the Film Correctly:
The Spinner Motorizer is specially designed for low-light situations, for example indoor/in
shadow. The relative shutter speed of the Spinner Motorizer is 1/4 second. That means:
- If you are using ISO 400 film, f/8 (cloudy aperture), your film will exposure correctly under
LV6 -- ordinary indoor situations.
- If you are using ISO 100 film, f/16 (sunny aperture, your film will exposure correctly under
LV10 -- outdoor shadow situation.
To make it simple:
- Use ISO400 or higher sensitivity film if you want to shoot indoors or in very dim situations
e.g. night shots.
- Use ISO100 or lower sensitivity film if you are shooting outdoor shadows during daytime.
When in sunny conditions, it's recommended that you use your original Spinner 360° handle,
as this is perfectly designed for daytime shooting.
In case you want to shoot in sunny weather with the Spinner Motorizer, you may buy a
52mm ND filter and place it in front of the Camera Lens <19> for best result.
Rewinding the Film:
1. Switch the Aperture Setting <18> to “R” (“R” stands for rewind mode).
2. Detach the Rubber Band <11> from the camera. (Optional)
3. Wind the Rewind Crank <15> clockwise until the pressure slackens. Don’t stop turning
until you feel the tension completely drop off. Only then you can make sure that your film is
safely stored in its container.
4. Now open the camera’s Rear Door <13> by pulling down the Door Lock <14>, pull up the
Rewind Crank <15> and take your film out.
5. Insert a new film, set the Aperture <18> back to “sunny” or “cloudy” and re-attach the
Rubber Ring <11> to the camera if it has been detached.
Working Distance:
- The Spinner Motorizer works up to a remote distance of around 5-8m in an unobstructed
area without interference (e.g. somewhere with heavy density metal around).
Using More Than One Spinner Motorizer:
- One Spinner Remote Control is able to control more than one Spinner Motorizer at the same
time, as long as they are all in working distance. This opens up a lot of creative possibilities
for you to experiment with!

Remove Batteries when Not Being Used:
- It's suggested that you remove all batteries from the chamber <4> when storing the camera
for a long period of time.
Specifications:
Battery Supply: Motor Base – 8 x 1.5V / 4 x 1.5V (AA), Remote Control -- 1x1.5V (AA)
Equivalent Sutter speed: 1/4 Second
Workable Remote Distance: 5-8m
Spinning Modes: Continuous/Single Spin
FCC STATEMENT:
1. This device complies with Part 15 of the FCC Rules.
Operation is subject to the following two conditions:
(1) This device may not cause harmful interference, and
(2) This device must accept any interference received, including interference that may
cause undesired operation.
2. Changes or modifications not expressly approved by the party responsible for compliance
could void the user's authority to operate the equipment.
Spinner 360° Motorizer:
1 = Motorizer Base Bottom Cover
2 = Motor Pulley
3 = Brass Connector
4 = Motorizer Base 8 Battery Chambers
5 = White Marker Dots
6 = Motorizer ON/OFF Switch and Signal Light
7 = Remote Control Cover
8 = Shutter Release Button
9 = Shooting Mode Selector
Spinner 360° Camera (Sold Separately)
10 = Small Pulley
11 = Rubber Band
12 = Small Hole
13 = Rear Door
14 = Door Lock
15 = Rewind Crank
16 = Take Up Spool
17 = Black Flap
18 = Aperture Switch
19 = Lens
Table of contents
Other Lomography Camera Accessories manuals
Popular Camera Accessories manuals by other brands

Profoto
Profoto B2 250 AirTTL user guide

Duracell
Duracell Alkaline-Manganese Dioxide Battery MN21 Specification sheet

Panasonic
Panasonic AG-CVF15G operating instructions

SCANGRIP
SCANGRIP Multimatch R Replacement guide

Fantasea
Fantasea FSB 800 instruction manual

Kodak
Kodak RING LIGHT MINI RM001 user manual