
Directory
Matters need pay attention to
I Safe driving of motorcycle
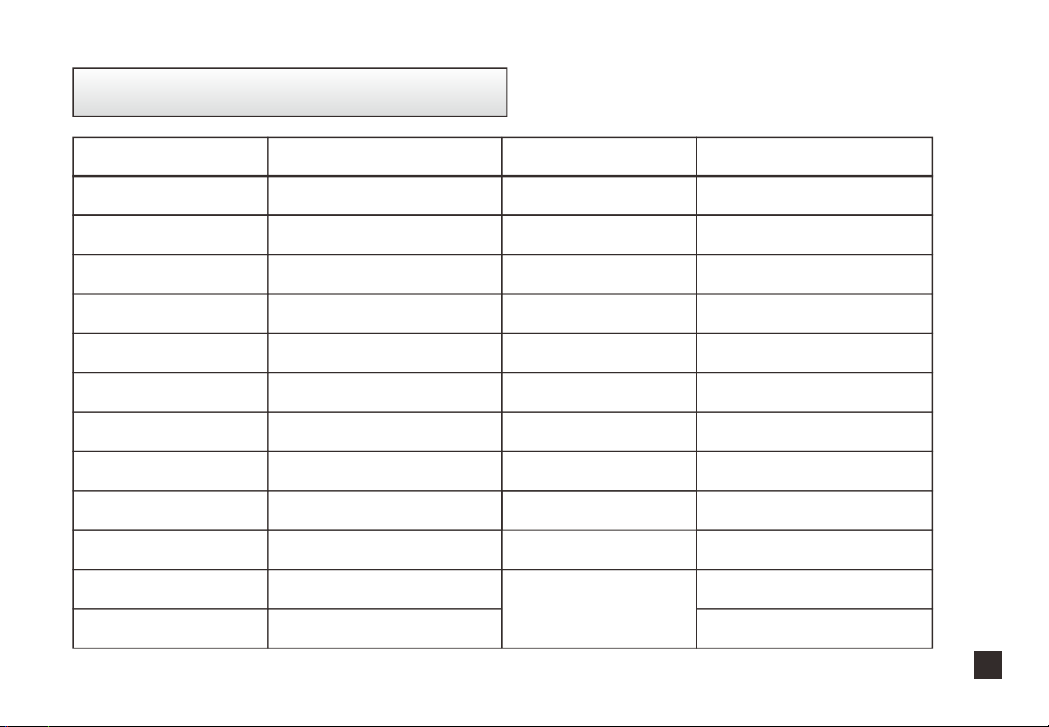
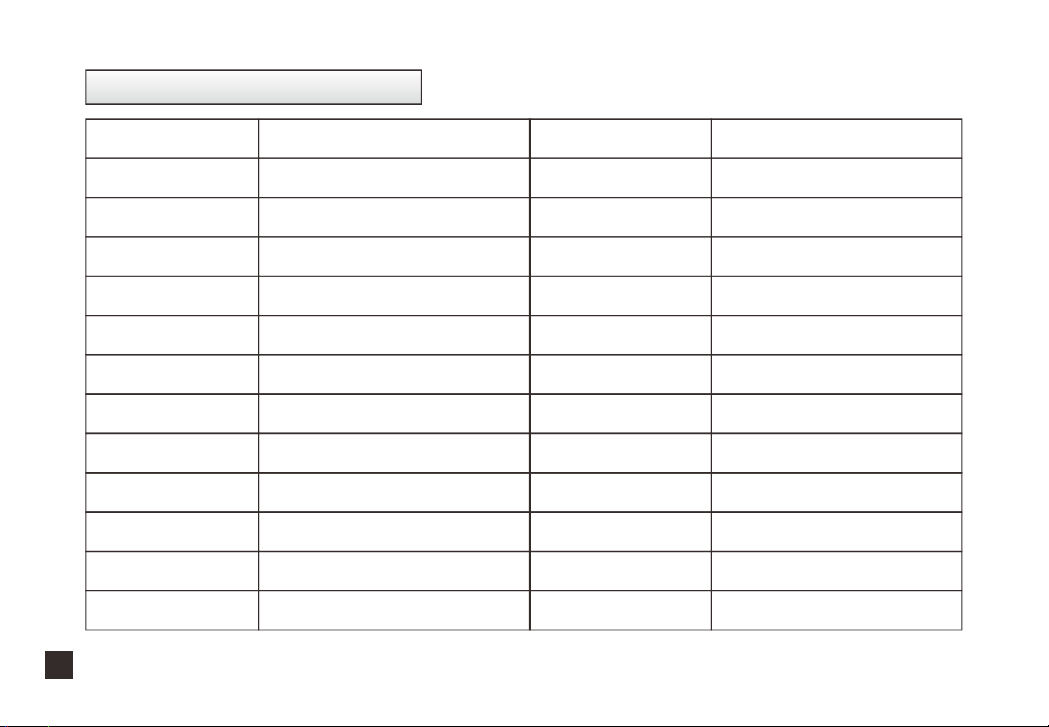
II Main technological parameter
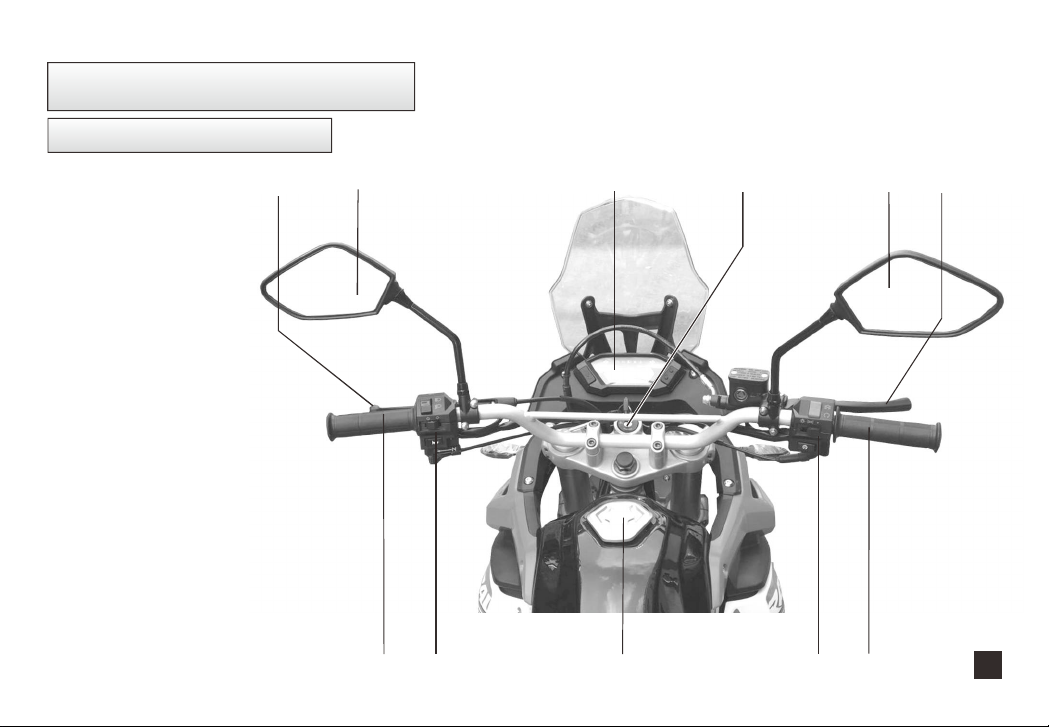
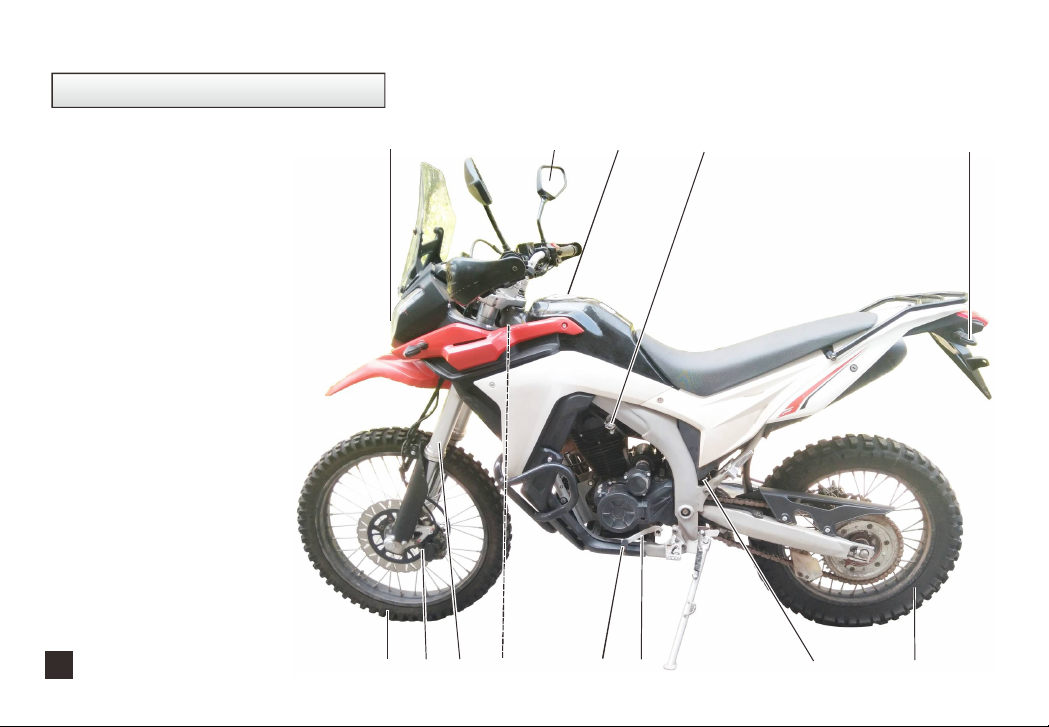
III Structure of motorcycle 7
Name of each part
IV Operation 1
Power source switch 1
Fuel switch 1
Engine starting 2
Engine running-in 2
Right switch assy 3
Left switch assy 4
Method of gear-shifting 5
V Matters need pay attention during driving 16
VI Checking, adjustment and maintenance 17
Machine Oil checking 17
Replacement of machine oil 17
Cleaning of Machine Oil Tank 18
Checking of spark plug 18
Checking and replacement of air filter 19
.........................................
.................................................
..........................................
.................................2
1
7
Meter indication lamp 10
Adjustment of throttle cable 0
. ............................................2
. .....................................5
.............................................
. .................................................................1
...........................................1
..........................................................1
....................................................1
................................................1
................................................1
...................................................1
.......................................1
. ................
. .................
..........................................
................................
.............................
........................................
.................
.
....................................
.............2
...........................................2
........................................................2
...........
...........................
.
...................................3
. ..............................3
Electrical schematic diagram....................................
Adjustment of carburetor 20
1
Adjustment of clutch 2
Parking rack 2
28
Periodic table for Maintenance 28
VIII
1
IX Introduction of electrical starting 2
X. 33
Checking and adjustment of valves clearance
Specification table of torque for fastening parts
..................................2
.............2
................................2
.................................2
.............................................
...........................................
...................................................................
............................................
.........................................
. ................................................
.......................3
...............................................3
Adjustment of brake pedal 2
3
Adjustment on driving chain 5
Adjustment of brake switch 5
Checking of battery 26
Replacement of fuse 26
Tyres 27
Air pressure in tyres 27
Replacement of bulbs 27
VII Motorcycle washing 30
Maintenance during parking period 1
Storage and maintenance
Recovery of using 2
Repair and maintenance of Fr.&Rr.Disc brake


 Supplementary service manual")


