LOWE'S G37018 User manual

G37018
Metal Garden Shed 4'X6'FT
Metal Garden Shed 4'X6'FT G37018

Outdoor Furniture
Always.
We are a professional furniture provider
with top-notch factories and outstanding
designs, Our mission is to provide consumers
with new lifestyles. By collecting consumer
feedback, we constantly improve our products
and create more choices for consumers.
If you want to create your space, We are
an ideal choice.
2

1. If there is any damage, please kindly send clear photos of damaged parts to us as
attachment, we will check and offer you best solution soon.
2. We attach great importance to the customer experience of our products. If there's
any concern,please contact us at any time, we will provide effective solutions.
3. lt is recommended to finish assembling by more than two people, so that it will be
easier and also save your time.
Thank you for your purchase our product.
Please read this instruction carefully before installation and strictly follow it during
installation. Ensure that there will be no problems in the future due to installation
errors.
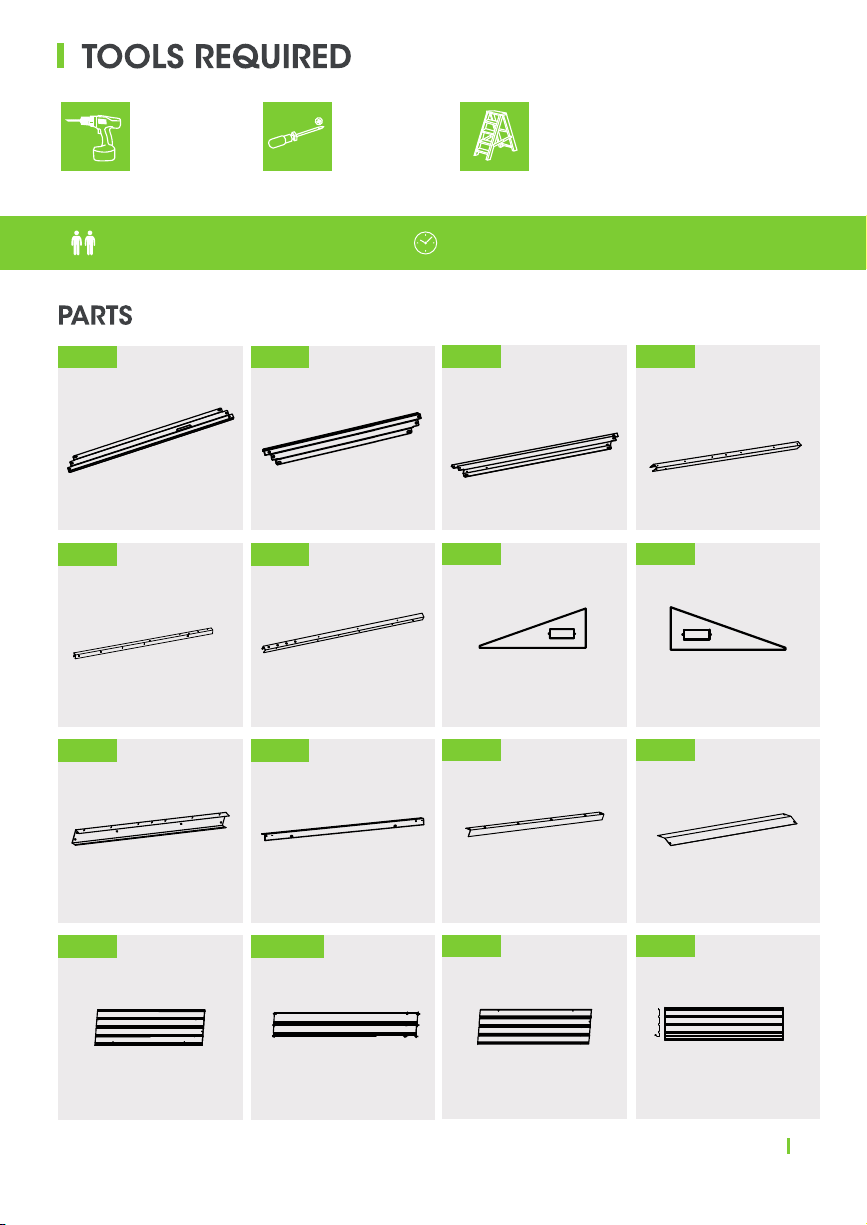
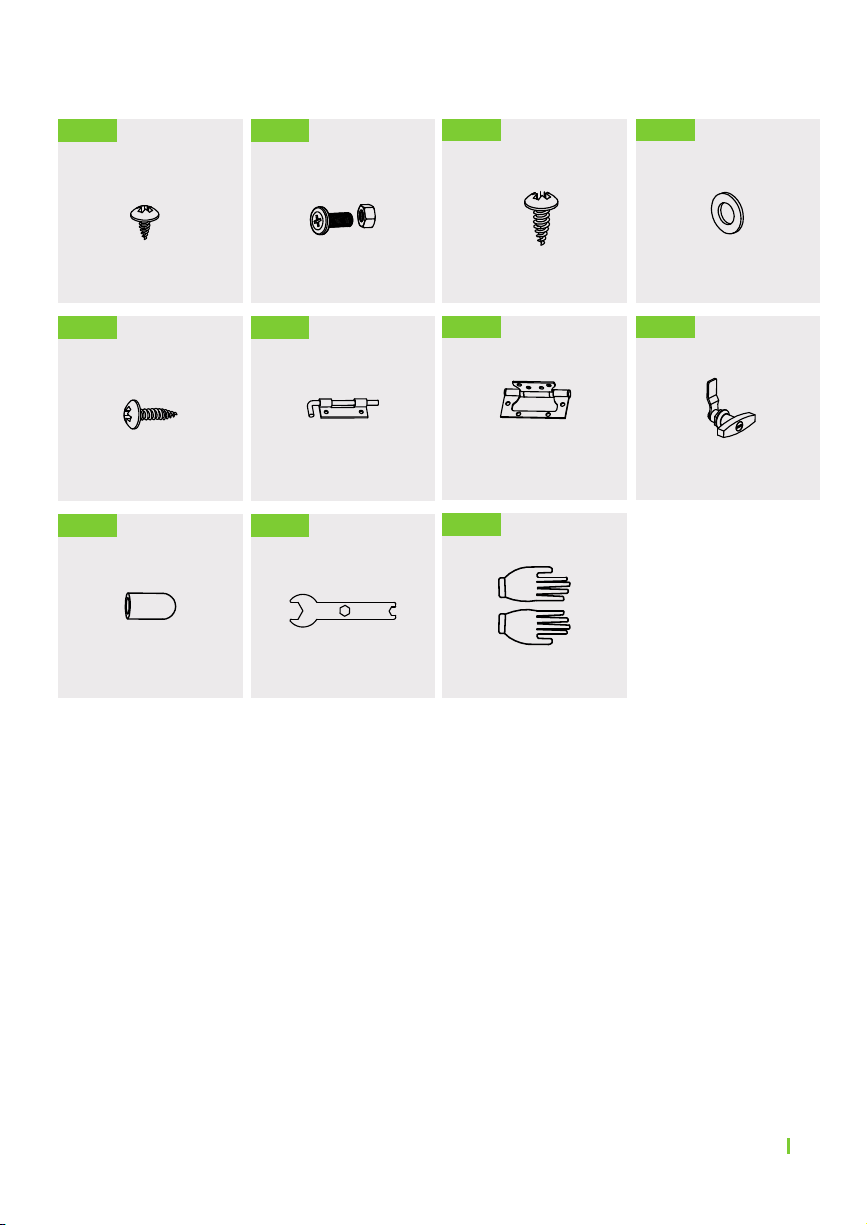
Please check the quantity of all parts before installation (Please refer to the Parts Lists)
and the appearance of the products. Please make sure the product is correct before
installation. If there is any problem, please contact us directly.
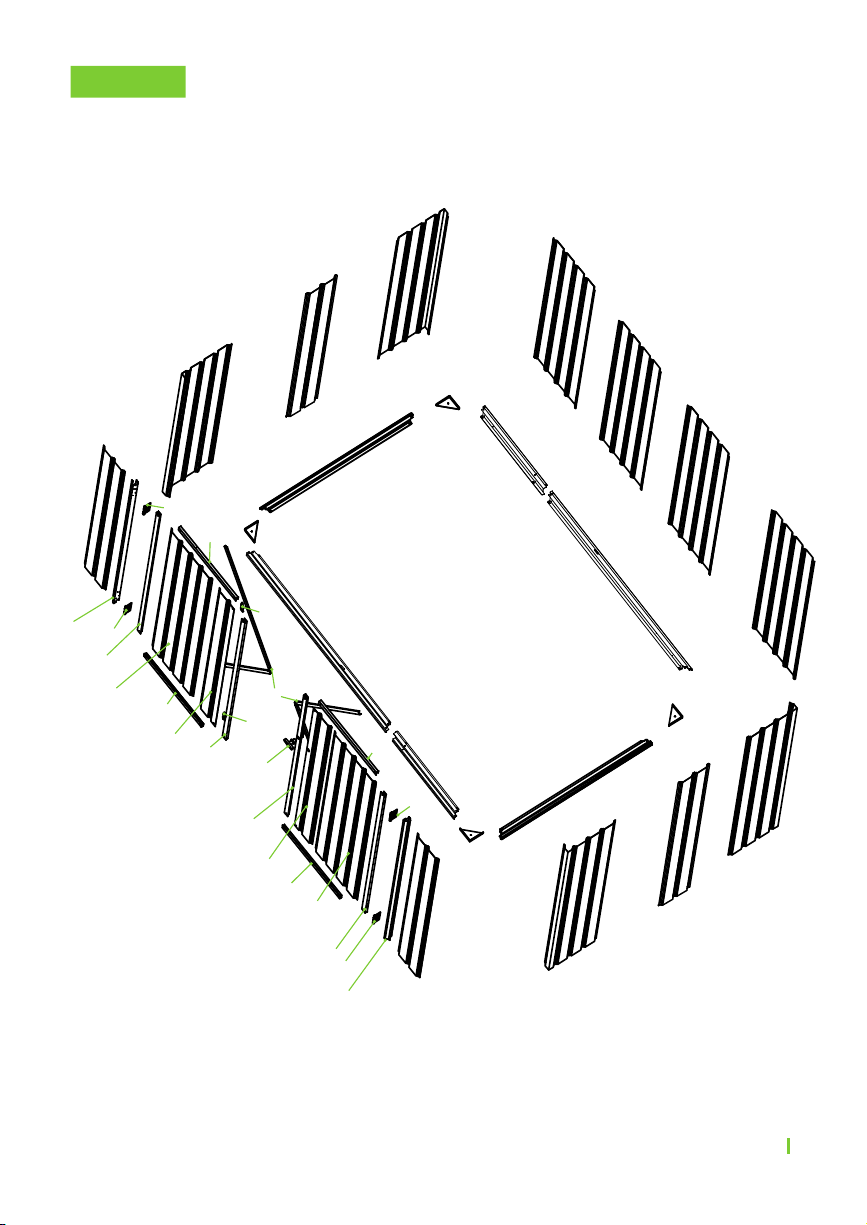
Make sure the colored panels are facing outwards and all the holes match. The panels
are textured,please install the panels in the order specified in the instructions. All lines
and holes must be accurately matched to make the storage shed more stable. Please
ensure that all screws are tightened to prevent the product from falling apart.
There is a protective film on the surface to protect the product, please tear it off after
installation to get the final presentation. lf you do not damage the film during
installation, it can also remain on the product to protect the product.
Please place the product on a flat ground to prevent leaning and collapse. If the
ground is uneven, the door may can't be closed.
1.We recommend two adults to complete the installation.Two adults installed together
will make the installation process easier and safer.
2.The gloves must be carried to prevent hand cuts during installation.
3.Take care when using power tools near water the use of a residual current
device(RCD) is advised.
4.Please use the electric driver carefully during screwing to prevent the screw from
slipping and hurting your hand.(We recommend that beginners use a manual
screwdriver for installation.)
3. Be careful not to fall when installing the roof. Please steady the ladder and make
sure the product placed on a flat ground.
Safety Precautions
Installation Notes
Attention
3

CALIFORNIA PROPOSITION 65
WARNING: This product can expose you to Carbon monoxide, which is known to the
State of California to cause birth defects or other reproductive harm. For more
information go to www.P65Warnings.ca.gov
For your safety concern,please do not stand under the metal shed in heavy
wind or snow days.
For safety, please use expansion screws to reinforce the posts to the ground.
In extreme weather conditions,you can use a rope to pull the four corners of
the gazebo to keep it stable.
Please clear the snow off the roof in time for the heavy snowfall. Make sure all
screws are tightened before use.
Repeat to confirm all screws, buckles and straps every 90 days. Please keep
all screws loose during the assembly process and tighten them after
completing the installation.
Do not use or store objects in the Metal Shed with open flames or flammable
chemicals.
Please note that some parts have sharp edges and should be handled with
gloves.
If any parts are missing, broken, damaged or worn, discontinue use of the
product until repairs are made or factory replacement parts are installed.
Installation of the product in a manner that does not conform to the
manufacturer's instructions may result in the loss of the warranty policy for this
product.
4

PARTS Before installation, please place the parts in the position as shown
in the figure below.
5
K46-5R
GF
GF
K68-4L
K46-4R
K36-3 C2
C2
C2
C2
K36-6
K36-6
C3
C3
C3
C3
K46-5L
K46-5R
K46-4R
K68-4L
GF GF
K36-3
K46-5L
K46-8
K46-8
GC
K36-9
GC
K46-8
K46-8
GC
GC
K36-9
K46-7L
K46-7R
K36-10
GE
GE
K46-7R
K46-7L
K66-7MM
K66-7MM

Before installation, please place the parts in the position as shown
in the figure below.
PARTS
W5-C
W5-C
W5 W5
W5
W5
W5
W5-C
W5
W5-C
W3
W3
K35-2T-F
K35-2
T-F
T-F
T-F
K68-1R K46-1L
K46-1L K68-1R
UA
DH
DA
DH
DDA
W5-K
DDA
W2-HR
DRA
GL
DLA
W2-HL
DDA
W5-K
DA
DH
UA
DC
DC
DBA
DDA
DH
6

Before installation, please place the parts in the position as shown
in the figure below.
PARTS
W3
W5-K
W2-HL
W2-HR
W5-K
W3
W5-CW3W5-C
W5
W5
W5
W5
K46-7R K66-7MM K46-7L
7
W5-CW3W5-C

2-4 Persons Assembly Up to 120 Minutes For Assembly
Electeic
Screwdriver
+Manual
Screwdriver Landder
2 PCS
K46-1L K68-1R
2 PCS
K35-2
2 PCS
K36-3
2 PCS
2 PCS
K68-4L K46-4R
2 PCS
K46-5L
2 PCS
K46-5R
2 PCS
2 PCS
K36-6 K46-8
4 PCS
K36-9
2 PCS
K36-10
1 PC
2 PCS
K46-7L K66-7MM K46-7R
2 PCS 4 PCS2 PCS
W5-C
8

4 PCS
W5 W3
4 PCS
W5-K
2 PCS
W2-HL
1 PC
1 PC
W2-HR UA
2 PCS
DA
2 PCS
DLA
DRA DDA
4 PCS
DBA C3
1 PC
1 PC 4 PCS 4 PCS
GC GE
2 PCS
GF T-F
4 PCS 4 PCS 4 PCS
C2
4 PCS
9

HARDWARE
230 PCS
F1 F2
39 PCS
F3
32 PCS
V2
72 PCS
4 PCS
F4 DC
2 PCS
DH
4 PCS
GL
SL M20
1 PC
ST
1 PC
18 PCS 2 PCS
10

Link the two”K46-1L” ”K68-1R” and” K35-2” to each other,and reinforce the four
corners with “T-F”.
1
K68-1R
K68-1R K46-1L
K35-2
K35-2
K46-1L
K68-1R K46-1L
K35-2 K35-2
K68-1R
K46-1L
T-F T-F
T-F T-F
Note:The larger hole is always covered over the small
hole.
Note:Please pay attention to the ground level when
installing.
K46-1L 2
2
2
K68-1R
K35-2
T-F 4
30
F1
F1
F1
F1
F1
11

Shed Side Panels Assemble Mount the 4 "W5-C on the Shed Base Frame
Assemble as shown.
2
K46-1L K68-1R
K46-1L
K68-1R
W5-C
W5-C W5-C
W5-C
W5-C 4
12
F1
W5-C
K46-1L
K68-1R
K35-2
K46-1L
K68-1R
W5-C
W5-C
W5-C
W5-C
W5-C
W5-C
K46-1L
K46-1L K68-1R
K4 6-1L
K46-1L
K68-1R
K3 5-2
K3 5-2
K6 8-1R
F1
12
K35-2
K35-2
K35-2
K35-2
K35-2

3
K36-3 2
2
2
K68-4L
K46-4R
C2 4
36
F1
K46-4R K68-4L
K68-4L K46-4R
K36-3 K36-3
1.Connect the tting “K46-4R” and tting “K68-4L” with F1 screws.
2.Install two "K36-3" on "W5-C" as shown Link "K46-4R" and “K68-4L” with"K36-3"
using 4 "C2”.
3.Note:Install "C2" on"K36-3" rst.
K36-3
UP
Down K68-4L
UP
Down
K46-4R
K36-3
K46-4R
K68-4L
K36-3
K46-4R
K68-4L
K36-3
K68-4L
F1
F1
C2
13
F1

Install Two “W3” on “K36-3”.
4
W3 2
12
F1
Install Two “W5” on “K36-3”.
5
4
F2
F2
K46-4R
K68-4L
W5-C
W5
W5-C
W5-C
W5-C
W5
W5
K36-3
F1
W5 4
34
F1
5
F2
F2
14
K46-4R K68-4L
K36-3 K36-3
W5-C
W5-C
W3
W5-C
W3
W5-C
K68-4L K46-4R
F1
W5 W5 W5
K36-3
K68-4L
K46-4R

Install Two “W5” on “K36-3”.
Install “UA” on the Left/Right side of the door frame.
6
7
W3 2
8
F1
2
F2
UA 2
8
F1
2
F2
W5 W5 W5 W5
W5
W5
W5-C
W5-C
W5-C
W5-C
W3 W3
W3
W3
F1
F2
F1
W5 W5 W5 W5
W5
W5
W5-C
W5-C
W3 W3
UA
UA
W5-C
W5-C
F2
F1
F1 F1
15
K46-4R K68-4L
K68-4L K46-4R
K36-3K36-3
K46-4R K68-4L
K68-4L K46-4R
K36-3K36-3

Install the"GF" window in the position shown in the gure.
Put "K46-5L" and "K46-5R" together as shown in the picture, and then install
4pieces of"C3" in the designated position, and use "F2" screws to x.
8
K46-5L 2
2
4
K46-5R
GF
C3 4
12
F2
GF
F2
F2
K46-5R
K46-5L
K46-5L K46-5R
F2
C3
C3
C3
F2
F2
16

9
F2
K36-6 2
6
F2
K36-6 x2
K36-6
F2
F2
K36-6
Combine Two"K36-6"into beams.
Fix the beams install them in the position shown in the picture.
17

Install The Shed Top frame as shown.
10
V2
12
F1
12
F1 V2
Note:Two Adults Are Required.
F1
V2
18

Install Shed Top Panels in the order shown.
11
K46-7L 2
2
K66-7MM
F1 36
V2
K46-7R 2
36
Note:Please steady the ladder make sure the
product placed on a at ground.
K46-7L K66-7MM K46-7R
F1
V2
19
F1
V2
F1
V2
K46-7R
K66-7MM
K46-7L
K46-7L
K46-7R
K66-7MM
F1
V2
V2
F1

12 Install“K46-8"and"K36-9"around the roof.2.Install "K36-10" at the highest part
of the roof, and install "GE" at the front and rear.3,Install corner"GC" on the
four corners of the roof.
K46-8 4
2
1
K36-9
K36-10
GE 2
20
F1
24
V2
K46-8 K46-8
GE GC
GC
K36-9
K36-9
GC K46-8 K46-8
GC
GE
K36-10
4
GC 4
F4
F4
V2
F1
V2
F1
V2
K46-8
K36-10
GE
K46-8
K36-9
K46-8
K46- 8
K36 -9
K36 -9
K36 -9
K46-8
F1
V2
F1
V2
GC
F1
V2
F1
V2
GC
20
GC
Table of contents
Popular Outdoor Storage manuals by other brands

Arrow Storage Products
Arrow Storage Products CO1014-C1 Owner's manual & assembly instructions

OLT
OLT GS84-S-Plywood Assembly manual

USP
USP Duramaxx SideMate 06625-2 owner's manual

Palram
Palram Skylight Shed-6x5 Assembly instructions

Duratuf
Duratuf PL43 Assembly instructions

Mercia Garden Products
Mercia Garden Products 10PTDRK0806-V2 manual