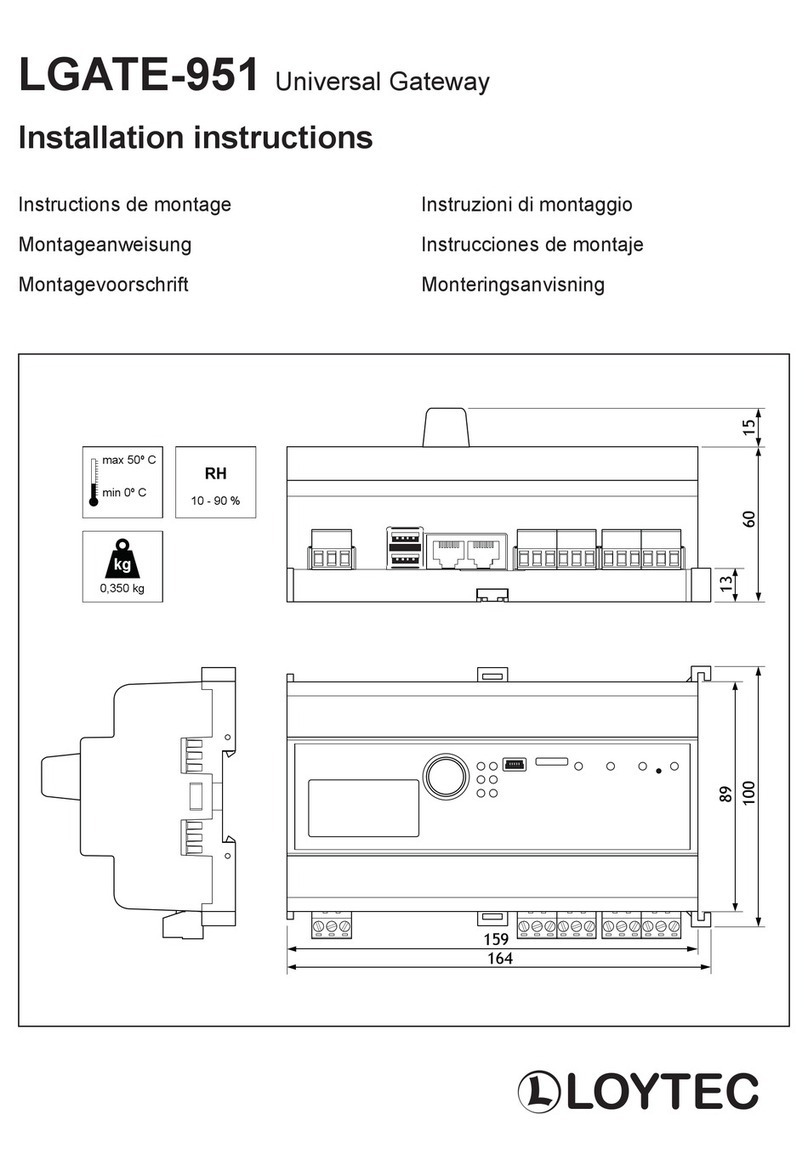
LOYTEC L-Proxy User manual

L-Proxy
CEA-709 Gateway
User Manual
LOYTEC electronics GmbH

Contact
LOYTEC electronics GmbH
Blumengasse 35
A-1170 Vienna
AUSTRIA/EUROPE
http://www.loytec.com
Version 3.1
Document №88065706
LOYTEC MAKES AND YOU RECEIVE NO WARRANTIES OR CONDITIONS,
EXPRESS, IMPLIED, STATUTORY OR IN ANY COMMUNICATION WITH YOU,
AND
LOYTEC SPECIFICALLY DISCLAIMS ANY IMPLIED WARRANTY OF
MERCHANTABILITY OR FITNESS FOR A PARTICULAR PURPOSE. THIS
PRODUCT IS NOT DESIGNED OR INTENDED FOR USE IN EQUIPMENT
INTENDED FOR SURGICAL IMPLANT INTO THE BODY OR OTHER
APPLICATIONS INTENDED TO SUPPORT OR SUSTAIN LIFE, FOR USE IN
FLIGHT CONTROL OR ENGINE CONTROL EQUIPMENT WITHIN AN
AIRCRAFT, OR FOR ANY OTHER APPLICATION IN WHICH IN THE FAILURE
OF SUCH PRODUCT COULD CREATE A SITUATION IN WHICH PERSONAL
INJURY OR DEATH MAY OCCUR.
No part of this publication may be reproduced, stored in a retrieval system, or transmitted,
in
any form or by any means, electronic, mechanical, photocopying, recording, or otherwise,
without the prior written permission of LOYTEC.
LC3020™, L-Chip™, L-Core™, L-Dali™, L-Gate™, L-INX™, L-IP™, LPA™, L-Proxy™,
L-Switch™, L-Term™, L-Vis™and L-Web™are trademarks of LOYTEC electronics
GmbH.
LonTalk®, LONWORKS®, Neuron®, LONMARK®, LonMaker®, i.LON®, and LNS®are
trademarks of Echelon Corporation registered in the United States and other countries.

L-Proxy User Manual 3 LOYTEC
Version 3.1 LOYTEC electronics GmbH
Contents
1Introduction ................................................................................................11
1.1 Overview ............................................................................................................11
1.2 Scope...................................................................................................................12
2Quick-Start Guide ......................................................................................13
2.1 Hardware Installation.......................................................................................13
2.2 Configuration with LNS-based Tools.............................................................. 13
3Hardware Installation................................................................................17
3.1 Enclosure ...........................................................................................................17
3.1.1 LP-33E100...............................................................................................17
3.2 Product Label ....................................................................................................18
3.3 Mounting............................................................................................................18
3.4 LED signals........................................................................................................18
3.4.1 Power LED ..............................................................................................18
3.4.2 Status LED...............................................................................................18
3.4.3 FT Activity LED......................................................................................19
3.4.4 Ethernet Link LED...................................................................................19
3.4.5 Ethernet Activity LED ............................................................................. 19
3.4.6 CNIP LED ...............................................................................................19
3.4.7 Config LED .............................................................................................20
3.4.8 Wink Action.............................................................................................20
3.5 Status Button .....................................................................................................20
3.6 DIP Switch Settings...........................................................................................20
3.7 Terminal Layout and Power Supply ...............................................................20
3.8 Wiring ................................................................................................................21
4Console Interface........................................................................................22
4.1 Console Connection...........................................................................................22
4.2 Self Test..............................................................................................................22
4.3 L-Proxy Device Main Menu .............................................................................23
4.3.1 Option 1 – Show device information.......................................................23
4.3.2 Option 2 – Serial firmware upgrade.........................................................24
4.3.3 Option 3 – System configuration .............................................................24
4.3.4 Option 4 – CEA-709 configuration .........................................................24
4.3.5 Option 5 – IP configuration .....................................................................24
4.3.6 Option 6 – CEA-852 Device Configuration ............................................24
4.3.7 Option 8 – Reset configuration (factory defaults) ...................................24

L-Proxy User Manual 4 LOYTEC
Version 3.1 LOYTEC electronics GmbH
4.3.8 Option 9 – Device statistics..................................................................... 24
4.3.9 Option 0 – Reset Device.......................................................................... 25
4.3.10 Option a – Data Points ............................................................................ 25
4.4 System Configuration Menu............................................................................ 25
4.4.1 Option 1 – Configure Date/Time............................................................. 25
4.4.2 Option 2 – Configure Earth Position....................................................... 26
4.4.3 Option 7 – FTP server, 8 – FTP server port ............................................ 26
4.4.4 Option 9 – Web server, 0 – Web server port........................................... 26
4.4.5 Option a – Telnet server, b – Telnet server port...................................... 26
4.5 CEA-709 Configuration Menu ........................................................................ 26
4.6 IP Configuration Menu.................................................................................... 27
4.6.1 Option 1 – DHCP .................................................................................... 27
4.6.2 Option 2 – IP Address, 3 – IP Netmask, 4 – IP Gateway........................ 28
Option 5 – Hostname, 6 – Domainname ............................................................ 28
4.6.3 Option 7 – DNS Servers.......................................................................... 28
4.6.4 Option 9 – MAC Address........................................................................ 28
4.6.5 Option 0 – NTP Servers .......................................................................... 28
4.6.6 Option b – Link Speed & Duplex............................................................ 28
4.7 CEA-852 Device Configuration Menu............................................................ 29
4.7.1 Option 2 – Config server address, 3 – Config server port....................... 29
4.7.2 Option 4 – Config client port .................................................................. 29
4.7.3 Option 5 – Device name.......................................................................... 29
4.7.4 Channel Mode ......................................................................................... 30
4.7.5 SNTP server, channel timeout................................................................. 30
4.7.6 Option 6 – Escrow timeout...................................................................... 30
4.7.7 Option 7 – Aggregation Timeout ............................................................ 30
4.7.8 Option 8 – MD5 authentication............................................................... 30
4.7.9 Option 9 – MD5 secret ............................................................................ 30
4.7.10 Option 0 – Location string ...................................................................... 30
4.7.11 Option a – NAT Address......................................................................... 30
4.7.12 Option b – Multicast Address.................................................................. 31
4.8 Reset configuration (load factory defaults) .................................................... 31
4.8.1 Option 1 – Reset everything to factory defaults...................................... 31
4.8.2 Option 3 – Reset all passwords ............................................................... 31
4.8.3 Option 4 – Clear data point configuration............................................... 31
4.9 Device Statistics Menu...................................................................................... 32
4.9.1 Option 1 – CEA-852 device statistics ..................................................... 32
4.9.2 Option 2 – CEA-709 Application Statistics ............................................ 33
4.9.3 Option 4 – IP statistics ............................................................................ 34

L-Proxy User Manual 5 LOYTEC
Version 3.1 LOYTEC electronics GmbH
4.9.4 Option 6 – Enhanced Communications Test............................................36
4.10 Data Point Menu ...............................................................................................36
4.10.1 Option 1 – List Data Points......................................................................37
4.10.2 Option 2 – Get Value............................................................................... 37
4.10.3 Option 3 – Set Value................................................................................ 37
5Web Interface .............................................................................................38
5.1 Device Information and Account Management .............................................38
5.2 Device Configuration ........................................................................................40
5.2.1 System Configuration ..............................................................................40
5.2.2 IP Configuration ......................................................................................41
5.2.3 Backup and Restore .................................................................................43
5.2.4 CEA-709 Configuration...........................................................................43
5.2.5 CEA-852 Device Configuration ..............................................................44
5.2.6 Data Points...............................................................................................45
5.3 Device Statistics ................................................................................................. 47
5.3.1 IP Statistics ..............................................................................................47
5.3.2 CEA-852 Statistics...................................................................................48
5.3.3 Enhanced Communications Test.............................................................. 49
5.3.4 CEA-709 Statistics...................................................................................50
5.3.5 System Log ..............................................................................................50
5.4 Reset, Contact, Logout .....................................................................................51
6Concepts ......................................................................................................52
6.1 What is a Proxy? ...............................................................................................52
6.1.1 Update-Update Use Case .........................................................................53
6.1.2 Poll-Poll Use Case ...................................................................................53
6.1.3 Update-Poll Use Case ..............................................................................53
6.1.4 Poll-Update Use Case (Active Poll) ........................................................53
6.1.5 Use Case Combinations ...........................................................................54
6.1.6 Poll Cache................................................................................................55
6.1.7 SNVT Conversion ...................................................................................56
6.2 Network Interfaces on the L-Proxy.................................................................57
6.3 Data Points.........................................................................................................58
6.3.1 Overview..................................................................................................58
6.3.2 Timing Parameters................................................................................... 59
6.3.3 Default Values .........................................................................................59
6.3.4 Persistency ...............................................................................................59
6.3.5 Behavior on Value Changes ....................................................................60
6.3.6 Custom Scaling ........................................................................................ 60
6.4 Connections .......................................................................................................61

L-Proxy User Manual 6 LOYTEC
Version 3.1 LOYTEC electronics GmbH
6.5 CEA-709 Technology........................................................................................ 61
6.5.1 CEA-709 Data Points .............................................................................. 61
6.5.2 Static Interface Changes.......................................................................... 62
6.5.3 Connections............................................................................................. 63
7The L-Proxy Configurator ........................................................................ 64
7.1 Installation......................................................................................................... 64
7.1.1 Software Installation ............................................................................... 64
7.1.2 Registration as a Plug-In ......................................................................... 64
7.1.3 Operating Modes ..................................................................................... 66
7.1.4 Language Selection ................................................................................. 66
7.2 Data Point Manager ......................................................................................... 66
7.2.1 Folder List ............................................................................................... 67
7.2.2 Data Point List......................................................................................... 68
7.2.3 Property View ......................................................................................... 68
7.2.4 CEA-709 Properties ................................................................................ 70
7.3 Project Settings ................................................................................................. 71
7.3.1 General .................................................................................................... 71
7.3.2 Data Point Naming Rules........................................................................ 71
7.3.3 CEA-709 Settings.................................................................................... 72
7.4 Workflows for the L-Proxy.............................................................................. 73
7.4.1 Involved Configuration Files .................................................................. 73
7.4.2 Configure with LNS and Dynamic NVs ................................................. 73
7.4.3 Configure with LNS and Static NVs....................................................... 75
7.4.4 Configure without LNS using Static NVs............................................... 77
7.4.5 Change an Existing Configuration with LNS.......................................... 78
7.4.6 Change an Existing Configuration without LNS..................................... 79
7.4.7 Replace an L-Proxy................................................................................. 80
7.5 Adding L-Proxy ................................................................................................ 81
7.6 Creating Functional Blocks/Virtual Interfaces.............................................. 86
7.7 Dynamic Network Variables............................................................................ 88
7.7.1 Creating a Dynamic Network Variable ................................................... 89
7.8 Replace an L-Proxy .......................................................................................... 94
7.9 Using the L-Proxy Configurator ................................................................... 100
7.9.1 Starting as an LNS Plug-In.................................................................... 100
7.9.2 Starting Stand-Alone ............................................................................. 100
7.9.3 Uploading the Configuration................................................................. 101
7.9.4 Scanning for Network Variables ........................................................... 102
7.9.5 Importing Network Variables................................................................ 103
7.9.6 Scanning NVs Online From the Network ............................................. 104

L-Proxy User Manual 7 LOYTEC
Version 3.1 LOYTEC electronics GmbH
7.9.7 Select and Use Network Variables ........................................................106
7.9.8 Change the NV Allocation.....................................................................106
7.9.9 Create Static NVs...................................................................................107
7.9.10 Create External NVs ..............................................................................108
7.9.11 Configuration Download .......................................................................110
7.9.12 Exchange the Port Interface Definition..................................................112
7.9.13 Build XIF for Port Interface...................................................................113
7.9.14 Enable Legacy NM Mode...................................................................... 113
7.9.15 Upload Dynamic NVs from Device.......................................................114
7.9.16 Repair LNS Database from Device........................................................114
7.9.17 Deleting Connected Data Points ............................................................ 115
7.10 Advanced CEA-709 Configuration................................................................116
7.10.1 Working with Configuration Properties ................................................116
7.10.2 Upload the System Log..........................................................................117
7.11 Connections .....................................................................................................118
7.11.1 Create a New Connection ......................................................................118
7.11.2 Auto-Create Connections for NVs......................................................... 119
7.11.3 Generate and Connect from NVs...........................................................119
7.11.4 Create Connections from a CSV File.....................................................121
7.11.5 Modify Connections ..............................................................................121
7.11.6 Connection Overview ............................................................................122
8Application Scenarios...............................................................................123
8.1 Address Table Extension ................................................................................123
8.1.1 Saving Entries in the Address Table......................................................123
8.1.2 Saving a Group Address ........................................................................125
8.2 Binding across Domains .................................................................................127
8.3 Poll-Update Proxy...........................................................................................130
8.4 Poll-On-Startup Proxy....................................................................................132
8.5 SNVT Translation ........................................................................................... 132
9Operating Interfaces ................................................................................134
9.1 CEA-709 Interface ..........................................................................................134
9.1.1 NV Import File.......................................................................................134
9.1.2 Node Object ........................................................................................... 135
9.1.3 Gateway Objects....................................................................................136
10 Network Media .........................................................................................137
10.1 FT .....................................................................................................................137
11 L-Proxy Firmware Update ......................................................................138
11.1 Firmware Update via the L-Proxy Configurator......................................... 138
11.2 Firmware Update via the Console .................................................................140

L-Proxy User Manual 8 LOYTEC
Version 3.1 LOYTEC electronics GmbH
11.3 Firmware Update via the CEA-709 Network............................................... 141
12 Troubleshooting........................................................................................142
12.1 All port LEDs are flashing red ...................................................................... 142
12.2 LonMaker Warning appears during installation ........................................ 142
12.3 NL220 Warning appears during installation ............................................... 143
12.4 Move L-Proxy into a new LNS project......................................................... 143
12.5 Node does not respond to poll request .......................................................... 144
12.6 L-Proxy doesn’t forward packets after commissioning .............................. 144
12.7 Technical Support .......................................................................................... 145
13 Application Notes .....................................................................................146
13.1 The LSD Tool.................................................................................................. 146
13.2 Use of Static, Dynamic, and External NVs on a Device .............................. 146
14 Firmware Versions ...................................................................................147
15 Specifications ............................................................................................148
15.1 L-Proxy............................................................................................................ 148
15.1.1 Physical Specifications.......................................................................... 148
15.1.2 Resource Limits..................................................................................... 148
16 References .................................................................................................149
17 Revision History .......................................................................................150

L-Proxy User Manual 9 LOYTEC
Version 3.1 LOYTEC electronics GmbH
Abbreviations
100Base-T...........................100 Mbps Ethernet network with RJ-45 plug
Aggregation ........................Collection of several CEA-709 packets into a single CEA-852
packet
BOOTP ...............................Bootstrap Protocol, RFC 1497
CC .......................................Configuration Client, also known as CN/IP Device
CEA-709 .............................Protocol standard for LONWORKS networks
CEA-852 .............................Protocol standard for tunneling CEA-709 packets over IP
channels
CN.......................................Control Network
COV ....................................Change-of-Value
CP........................................Configuration Property
CR .......................................Channel Routing
CS........................................Configuration Server that manages CEA-852 IP devices
DHCP..................................Dynamic Host Configuration Protocol, RFC 2131, RFC 2132
DNS ....................................Domain Name Server, RFC 1034
DST.....................................Daylight Saving Time
GMT....................................Greenwich Mean Time
IP.........................................Internet Protocol
LSD Tool ............................LOYTEC System Diagnostics Tool
MAC ...................................Media Access Control
MD5 ....................................Message Digest 5, a secure hash function, see Internet
RFC 1321
NAT ....................................Network Address Translation, see Internet RFC 1631
NV.......................................Network Variable
RTT.....................................Round-Trip Time
SCPT...................................Standard Configuration Property Type
SL........................................Send List
SMTP ..................................Simple Mail Transfer Protocol
SNTP...................................Simple Network Time Protocol
SNVT..................................Standard Network Variable Type
UCPT ..................................User-defined Configuration Property Type
UI ........................................User Interface
UNVT .................................User-defined Network Variable Type
XML....................................eXtensible Markup Language


L-Proxy User Manual 11 LOYTEC
Version 3.1 LOYTEC electronics GmbH
1 Introduction
1.1 Overview
The L-Proxy is a high performance network infrastructure component for CEA-709
networks. It is the first device that allows network variable bindings across multiple
domains, SNVT translation, address table expansion for CEA-709 nodes, firewall security
etc. The L-Proxy provides five communication ports and it translates packets between
these ports. Available ports are two FT ports, and three IP-852 ports. The three IP-852
ports are connecting to an IP-852 backbone channel. The L-Proxy’s unique architecture
very much supports well defined interfaces between various subsystems like HVAC,
lighting, and security in a typical building. Easy to understand diagnostic LEDs allow
installers and system integrators to install and troubleshoot this device without expert
knowledge and dedicated troubleshooting tools.
The basic operation of L-Proxy is to take an input network variable (NV) or configuration
property (CP) on one side, interpret the data in the variable and transmit a corresponding
output network variable on the other side. This concept is used to solve a great amount of
today’s communication problems in CEA-709 networks as explained in the following
chapters. The device is fully compliant with ANSI/CEA-709, and ANSI/CEA-852-A,
EN 14908.
Network variables (NVs) in the CEA-709 network can also be operated as “external NVs”.
External NVs are polled or explicitly written to without allocating static or dynamic NVs
on the L-Proxy. In this case, address information is supplied by the configuration software
by importing e.g., a CSV file. User-defined network variable types (UNVTs) can be used
as dynamic or external NVs. Configuration properties (CPs) on other devices can be
accessed through file transfer. To transfer CPs, the device supports both the LONMARK file
transfer and the read memory access method. For CPs, the standard SCPTs and user-
defined UCPTs are supported.
L-Proxy is configured over the network with an easy-to-use configuration tool. This
configuration tool can be used as a plug-in for LNS-based network installation tools or as a
standalone tool.
The built-in Web server allows convenient device configuration through a standard Web
browser such as the Internet Explorer or Firefox. The Web interface also provides statistics
information for system installation and network troubleshooting.
The L-Proxy is used for:
•Binding of network variables (NVs) across multiple domains (up to 5 with a single
device),
•mapping configuration properties (CPs) to network variables (NVs),

L-Proxy User Manual 12 LOYTEC
Version 3.1 LOYTEC electronics GmbH
•using static, dynamic, or external (polled) network variables,
•supporting standard (SNVT, SCPT) and user-defined (UNVT, UCPT) types,
•translation between different SNVT types,
•overcoming the 15 destination addresses limit by expanding the address table in
Neuron Chip based network nodes (up to 512 address table entries on each port),
•saving group addresses by breaking up groups into individual NV updates,
•a firewall for CEA-709 networks,
•supporting up to 512 network variables on each port,
•supporting up to 512 alias-network variables on each port,
•supporting up to 512 address table entries on each port,
•browsing data points on the Web interface,
•communicating on CEA-709 with either FT or IP-852 (IP channel on the
Intranet/Internet).
1.2 Scope
This document covers L-Proxy devices with firmware version 3.1 and the L-Proxy
Configurator 3.1 and higher. See Section 14 for differences between the different L-Proxy
firmware versions. For L-Proxy devices with firmware versions before 3.0 please refer to
L-Proxy User Manual version 2.2 [2]. Also note, that firmware and configuration files of
L-Proxy 3.0 and higher are not compatible with 2.2.

L-Proxy User Manual 13 LOYTEC
Version 3.1 LOYTEC electronics GmbH
2 Quick-Start Guide
This Chapter shows step-by-step instructions on how to configure the L-Proxy for a simple
network architecture, mapping CEA-709 network variables from different ports of the
L-Proxy.
2.1 Hardware Installation
Connect power (12-35 VDC or 12-24 VAC), the CEA-709 network, and the Ethernet cable
as shown in Figure 1. More detailed instructions are shown in Chapter 3.
Important: Do not connect terminal 17 with Earth-ground!
Ethernet
Power Supply
Figure 1: Basic Hardware Installation
2.2 Configuration with LNS-based Tools
This section describes a quick start scenario for the L-Proxy. In this scenario network
variables are created on Port 1 (FT) and Port 2 (FT). The two ports can be in different LNS

L-Proxy User Manual 14 LOYTEC
Version 3.1 LOYTEC electronics GmbH
databases and different domains. Then NVs are connected on L-Proxy by creating internal
connections.
First, install the L-Proxy Configurator Software from the “setup.exe”. This file can be
downloaded from www.loytec.com. In your LNS-based tool, register the L-Proxy
Configurator as LNS plug-in.
Open an LNS database and add an L-Proxy device for Port 1 (FT) using the device
template, which has been created for the L-Proxy (e.g., L-Proxy_V3_0_FT-10.xif). Then
create dynamic NVs on that L-Proxy port, e.g., “nviTemp” and “nvoSwitch”. Close the
LNS database. For detailed information on how to create dynamic NVs in LNS-based tools
refer to Section 7.7.
Open another LNS database and add an L-Proxy device for Port 2 (FT) using the device
template, which has been created for the L-Proxy (e.g., L-Proxy_V3_0_FT-10.xif). Then
create dynamic NVs on that L-Proxy port, which are opposite to the NVs on port 1, e.g.,
“nvoTemp” and “nviSwitch”.
To Create the Internal Connections
1. Open one of the two databases.
2. In LonMaker right-click on the L-Proxy device and select Configure … to launch the
L-Proxy Configurator as plug-in.
3. This opens the data point manager screen of the software as shown in Figure 2. Note
that the device status is displayed as “Configured” on the right-hand side below the
speed button bar.
Figure 2: L-Proxy Configurator plug-in main screen.
4. Click on the Upload Configuration speed button as marked by the red rectangle in
Figure 2.
5. This uploads all dynamic NVs from all ports of the L-Proxy. Figure 3 shows an
example result of the upload.

L-Proxy User Manual 15 LOYTEC
Version 3.1 LOYTEC electronics GmbH
Figure 3: Example result of synced dynamic NVs.
6. Click the magic wand button Auto-create connections for auto-connecting the
NVs. This creates internal connections for the NVs with the same base name. The
prefix “nvi” and “nvo” are ignored. Therefore, two connections are created in our
example, one named “nviTemp”, and one named “nviSwitch”.
7. Click on the Connections tab and view the generated connections as shown in Figure
4.
Figure 4: Generated connections.
8. Click on the Download Configuration button in the tool bar as indicated by the red
rectangle in Figure 4. This opens the configuration download dialog as shown in
Figure 5.

L-Proxy User Manual 16 LOYTEC
Version 3.1 LOYTEC electronics GmbH
Figure 5: Download the configuration to the L-Proxy.
9. Click on Start to initiate the download process. The dialog shows the currently
executed tasks.
10. Click OK when the download is finished and close the download dialog. It is
recommended to save the L-Proxy project to a disk file.
11. Select File ÆSave As … and enter a suitable file name in the file requestor. The
project file is stored as an ‘.lprxy’ file.
After the configuration process, the NVs from Port 1 and Port 2 are connected over the
internal connections. Any updates on the NVs of the devices connected to Port 1 are then
propagated to Port 2 and vice-versa.

L-Proxy User Manual 17 LOYTEC
Version 3.1 LOYTEC electronics GmbH
3 Hardware Installation
3.1 Enclosure
3.1.1 LP-33E100
The L-Proxy enclosure is 6 TE (1 TE = 17.5 mm) wide for DIN rail mounting, following
DIN 43 880 (see Figure 6).
4 5 6
Status
Button and LED
105
off
on
1 2 3 4 5 6 7
DIP Switch
60
55
85
Console
Connector Power
LED
Ethernet
Status LEDs
Ethernet
100Base-T
Ethernet
11
15 16 17
CEA709
Status LDEs
1 2 3
Figure 6: L-Proxy Enclosure (dimensions in mm).

L-Proxy User Manual 18 LOYTEC
Version 3.1 LOYTEC electronics GmbH
3.2 Product Label
The product label on the side of the L-Proxy contains the following information (see Figure
7):
•L-Proxy order number with bar-code (e.g., LP-33E100),
•serial number with bar-code (Ser#),
•unique node ID and virtual ID of each port (NID1, VID1) with bar-code,
•Ethernet MAC ID with bar-code (MAC1).
Figure 7: L-Proxy product label
Unless stated otherwise, all bar codes are encoded using “Code 128”. An additional label is
also supplied with the L-Proxy for documentation purposes. A virtual ID (VID) is a Node
ID on the IP channel.
3.3 Mounting
The device comes prepared for mounting on DIN rails following DIN EN 50 022. The
device can be mounted in any position. However, an installation place with proper airflow
must be selected to ensure that the device’s temperature does not exceed the specified
range (see Chapter 15).
3.4 LED signals
3.4.1 Power LED
The L-Proxy power LED lights up green when power is supplied to terminals 16 and 17.
3.4.2 Status LED
The L-Proxy is equipped with a red status LED (see Figure 6). This LED is normally off.
During boot-up the status LED is used to signal error conditions (red). If the fall-back
image is executed the status LED flashes red once every second.

L-Proxy User Manual 19 LOYTEC
Version 3.1 LOYTEC electronics GmbH
3.4.3 FT Activity LED
The FT port on the L-Proxy has a three-color LED (green, red, and orange, see Figure 6).
Table 1 shows different LED patterns of the port and their meaning.
Behavior Description Comment
GREEN flashing fast Traffic
GREEN flashing at 1Hz The L-Proxy’s port is unconfigured
RED permanent Port damaged
RED flashing fast Traffic with high amount of errors
RED flashing at 1 Hz
(all ports)
Firmware image corrupt Please upload new firmware.
ORANGE permanent Port disabled e.g., using LSD Tool
ORANGE flashing fast Traffic on port configured as management port e.g., using LSD Tool
Table 1: CEA-709 Activity LED Patterns
3.4.4 Ethernet Link LED
The Ethernet Link LED lights up green whenever an Ethernet cable is plugged-in and a
physical connection with a switch, hub, or PC can be established.
3.4.5 Ethernet Activity LED
The Ethernet Activity LED lights up green for 6 ms whenever a packet is transmitted or
received or when a collision is detected on the network cable.
3.4.6 CNIP LED
The CNIP LED is a three color LED that indicates different operating states of the
L-Proxy’s CEA-852 device.
Green: The CEA-852 device is fully functional and all CEA-852 configuration data
(channel routing info, channel membership list, send list) are up-to-date.
Green flicker: If a valid CEA-709 packet is received or transmitted over the IP channel the
CNIP LED turns off for 50 ms. Only valid CEA-709 IP packets sent to the IP address of
the L-Proxy can be seen. Stale packets or packets not addressed to the L-Proxy are not
seen.
Yellow: Device is functional but some configuration data is not up-to-date (device cannot
contact configuration server but has configuration data saved in Flash memory)
Red: Device is non-functional because it was rejected from the CEA-852 IP channel or
shut-down itself due to an internal error condition.
Off: Device is non-functional because the CEA-852 device has not started. This can be the
case if the L-Proxy uses DHCP and it has not received a valid IP configuration (address)
from the DHCP server.
Flashing red at 1 Hz: Device is non-functional because the CEA-852 device is started but
has not been configured. Please add the device to a CEA-852 IP channel (register in
configuration server).
Flashing green or orange at 1 Hz: The L-Proxy’s CEA-709 side of the gateway has not
been commissioned yet. The color indicates the CEA-852 IP channel status as described
above.

L-Proxy User Manual 20 LOYTEC
Version 3.1 LOYTEC electronics GmbH
3.4.7 Config LED
This LED is green, if the L-Proxy is running with a valid proxy configuration.
3.4.8 Wink Action
If the L-Proxy receives a wink command on any of its network ports, it shows a blink
pattern on the CNIP and the CEA-709 activity LEDs. The CEA-709 activity and the CNIP
LED turn green/orange/red (each 0.15 s). This pattern is repeated six times. After that, the
CNIP LED flashes orange six times if the wink command was received on the IP channel
or the CEA-709 activity LED flashes orange six times if the wink command was received
on the CEA-709 channel. After that the L-Proxy LEDs resume their normal behavior.
3.5 Status Button
The L-Proxy is equipped with a status button (see Figure 6). When pressing the status
button shortly during normal operation of the L-Proxy, it sends a “Service Pin Message” on
the active CEA-709 network port (FT or CEA-852). As an alternative to pressing the status
button, a service pin message can be sent via the Web interface (see Section 5.1).
The status button can also be used to switch the device back to factory default state. Press
the service button and power-cycle the device. Keep the button pressed until the port LEDs
illuminate orange permanently. Release the button within five seconds from that time on to
reset the device to factory defaults. Alternatively, the device can be switched back to
factory defaults over the console UI (see Section 4.3.7).
3.6 DIP Switch Settings
The DIP switch assignment for the L-Proxy is shown in Table 2. Please leave all switches
at default state.
DIP Switch # Function Factory Default
1 Must be OFF OFF
2 Must be OFF OFF
3 Must be ON ON
4 Must be OFF OFF
5 Must be OFF OFF
6 Must be OFF OFF
7 Must be OFF OFF
Table 2: DIP Switch Settings for L-Proxy
3.7 Terminal Layout and Power Supply
The L-Proxy provides screw terminals to connect to the network as well as to the power
supply. The screw terminals can be used for wires of a maximum thickness of
1.5 mm2/AWG12. The device can either be DC or AC powered.
Table of contents
Other LOYTEC Gateway manuals