Lumens TS20 TapShare User manual
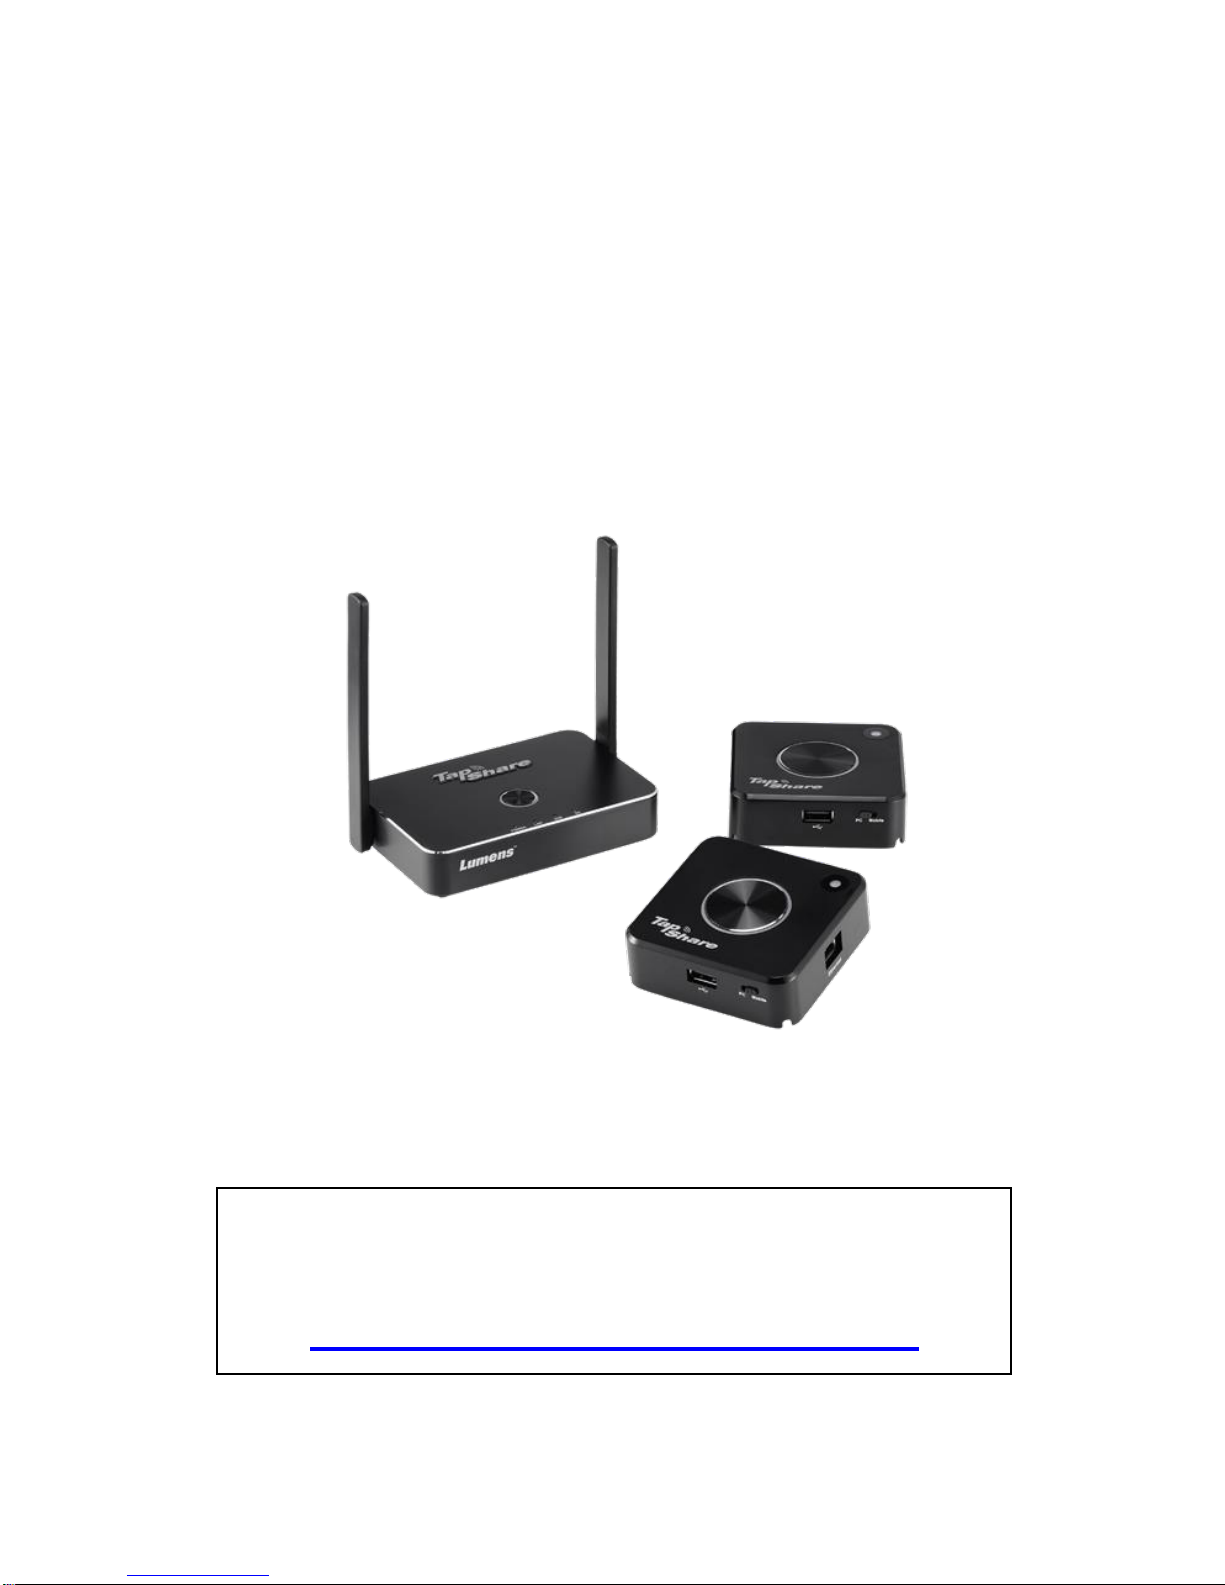
TS20
TapShare
[Important]
User Manual-English
To download the latest version of the Quick Start
Guide, multilingual user manual, software, or driver,
etc., please visit Lumens
http://www.MyLumens.com/support.php

English- 1
Table of Contents
Copyright Information.......................................................................................2
Chapter 1 Safety Instructions ..........................................................................3
Chapter 2 Package Contents............................................................................6
Chapter 3 Product Overview............................................................................7
3.1 TapShare Box Overview.....................................................................7
3.2 TapShare Pod Overview.....................................................................7
3.3 Description of LED indicator...............................................................8
3.4 TapShare Pod Keypad .......................................................................9
3.5 TapShare Box Splash Screen...........................................................10
Chapter 4 Installation and Connection .........................................................12
4.1 Connect TapShare Box to a TV........................................................13
4.2 Connect TapShare Pod to a Laptop or Mobile Device.....................13
4.3 Pairing ..............................................................................................15
4.4 Connect TapShare Box to a LocalArea Network.............................15
Chapter 5 Description of Major Functions....................................................18
5.1 I would like to project........................................................................18
5.2 I would like to set up split screens....................................................18
5.3 I would like to enable the host control feature..................................18
5.4 I would like to stream content via AirPlay.........................................19
5.5 I would like to load a factory default.................................................20
Chapter 6 Web page........................................................................................21
6.1 Splash Screen Introduction ..............................................................21
6.2 Web Page Introduction.....................................................................22
6.3 Setting Menu ....................................................................................25
6.4 Description of Web Page Setting .....................................................27
Chapter 7 Troubleshooting.............................................................................30

English- 2
Copyright Information
Copyrights © Lumens Digital Optics Inc. All rights reserved.
Lumens is a trademark that is currently being registered by Lumens Digital Optics
Inc.
Copying, reproducing or transmitting this file is not allowed if a license is not
provided by Lumens Digital Optics Inc. unless copying this file is for the purpose
of backup after purchasing this product.
In order to keep improving the product, Lumens Digital Optics Inc. hereby
reserves the right to make changes to product specifications without prior notice.
The information in this file is subject to change without prior notice.
To fully explain or describe how this product should be used, this manual may
refer to names of other products or companies without any intention of
infringement.
Disclaimer of warranties: Lumens Digital Optics Inc. is neither responsible for any
possible technological, editorial errors or omissions, nor responsible for any
incidental or related damages arising from providing this file, using, or operating
this product.

English- 3
Chapter 1 Safety Instructions
Please use the product following the safety instructions below:
1 Operation
1.1 Please use the product in the recommended operating environment.
1.2 Do not place Light Engine in tilted position.
1.3 Do not place the product on an unstable trolley, stand or table.
1.4 Do not use this product near water or source of heat.
1.5 Use attachments only as recommended.
1.6 Use the type of power source indicated on this Product. If you are not
sure of the type of power available, consult your dealer or local electricity
company for advice.
1.7 Always take the following precautions when handling the plug. Failure to
do so may result in sparks or fire.
Ensure the plug is free of dust before inserting it into a socket.
Ensure that the plug is inserted into the socket securely.
1.8 Do not overload wall sockets, extension cords or multi-way plug boards to
avoid potential risks.
1.9 Do not block slots and openings in the case of this product as poor
ventilation may lead to overheating of this product.
1.10Except as specifically instructed in this User Manual, do not attempt to
open or remove covers by yourself. It may expose you to electric shock or
other hazards. Refer all servicing to licensed service personnel.
1.11Unplug the HD Camera from the wall outlet and refer servicing to licensed
service personnel when the following situations happen:
If the power cord or plug becomes damaged or frayed.
If liquid is spilled into the Product or the Product has been exposed to
rain or water.
2 Installation
2.1 Do not install this product in the embedded way unless there is proper
ventilation device.
3 Cleaning
3.1 Unplug all the cables before cleaning. Use a damp cloth for cleaning. Do
not use liquid or aerosol cleaners.

English- 4
FCC Statement
This equipment has been tested and found to comply with the limits for a Class B
digital device, pursuant to part 15 of the FCC Rules. These limits are designed to
provide reasonable protection against harmful interference in a residential
installation. This equipment generates, uses and can radiate radio frequency
energy and, if not installed and used in accordance with the instructions, may
cause harmful interference to radio communications. However, there is no
guarantee that interference will not occur in a particular installation. If this
equipment does cause harmful interference to radio or television reception, which
can be determined by turning the equipment off and on, the user is encouraged to
try to correct the interference by one or more of the following measures:
Reorient or relocate the receiving antenna.
Increase the separation between the equipment and receiver.
Connect the equipment into an outlet on a circuit different from that to which the
receiver is connected.
Consult the dealer or an experienced radio/TV technician for help.
RF exposure warning
This equipment complies with FCC RF radiation exposure limits set forth for an
uncontrolled environment. & This device and its antenna(s) must not be
co-located or conjunction with any other antenna or transmitter.
This Wireless LAN radio device has been evaluated under FCC Bulletin OET 65
and found compliant to the requirements as set forth in CFR 47 Sections 2.1091,
2.1093, and 15.247 (b) (4) addressing RF Exposure from radio frequency devices.
The radiated output power of this Wireless LAN device is far below the FCC radio
frequency exposure limits. Nevertheless, this device shall be used in such a
manner that the potential for human contact during normal operation is minimized.
When nearby persons has to be kept to ensure RF exposure compliance, in order
to comply with RF exposure limits established in the ANSI C95.1 standards, the
distance between the antennas and the user should not be less than 20 cm.
Caution
Any changes or modifications not expressly approved by the party responsible for
compliance could void the user's authority to operate the equipment.
English- 5
EN55032 (CE Radiation) Warning
Operation of this equipment in a residential environment could cause radio
interference.
Operating Frequency
5180MHz~5240MHz /
5745MHz~5805MHz
Number of Channel
CH36~CH48, CH149~CH161
CHANNEL OF SPACING
10M
RF OUTPUT POWER
13 dBm (max:802.11a/CCK)
MODULATION TYPE
QAM/QPSK/BPSK/CCK/DSSS
DUTY CYCLE
10%
MODE OF OPERATION
DUPLEX
BIT RATE OF TRANSMISSION
6/9/12/18/24/36/48/54Mbps
ANTENNA TYPE
Dipole antenna
ANTENNA GAIN
4dBi
TEMPERATURE RANGE
0~40°C

English- 6
Chapter 2 Package Contents
TapShare Box
TapShare Pod
Instruction for
installation
(For download of other
language versions, please
visit Lumens website)
Adapter
TapShare Box
HDMI Cable
(100cm)
TapShare Pod
HDMI Cable
(30cm)
Appearance may vary
depending on
country/region
TapShare Pod
DP Cable
(30cm)

English- 7
Chapter 3 Product Overview
3.1 TapShare Box Overview
Top
1.DC IN
2.Power
3.Reset
4.USB Port
5.Ethernet Port
6.HDMI Out
Back
7.Pairing Button/LED
8.State LED
3.2 TapShare Pod Overview
Top
1.Main Button/LED
2.Side Button/LED
English- 8
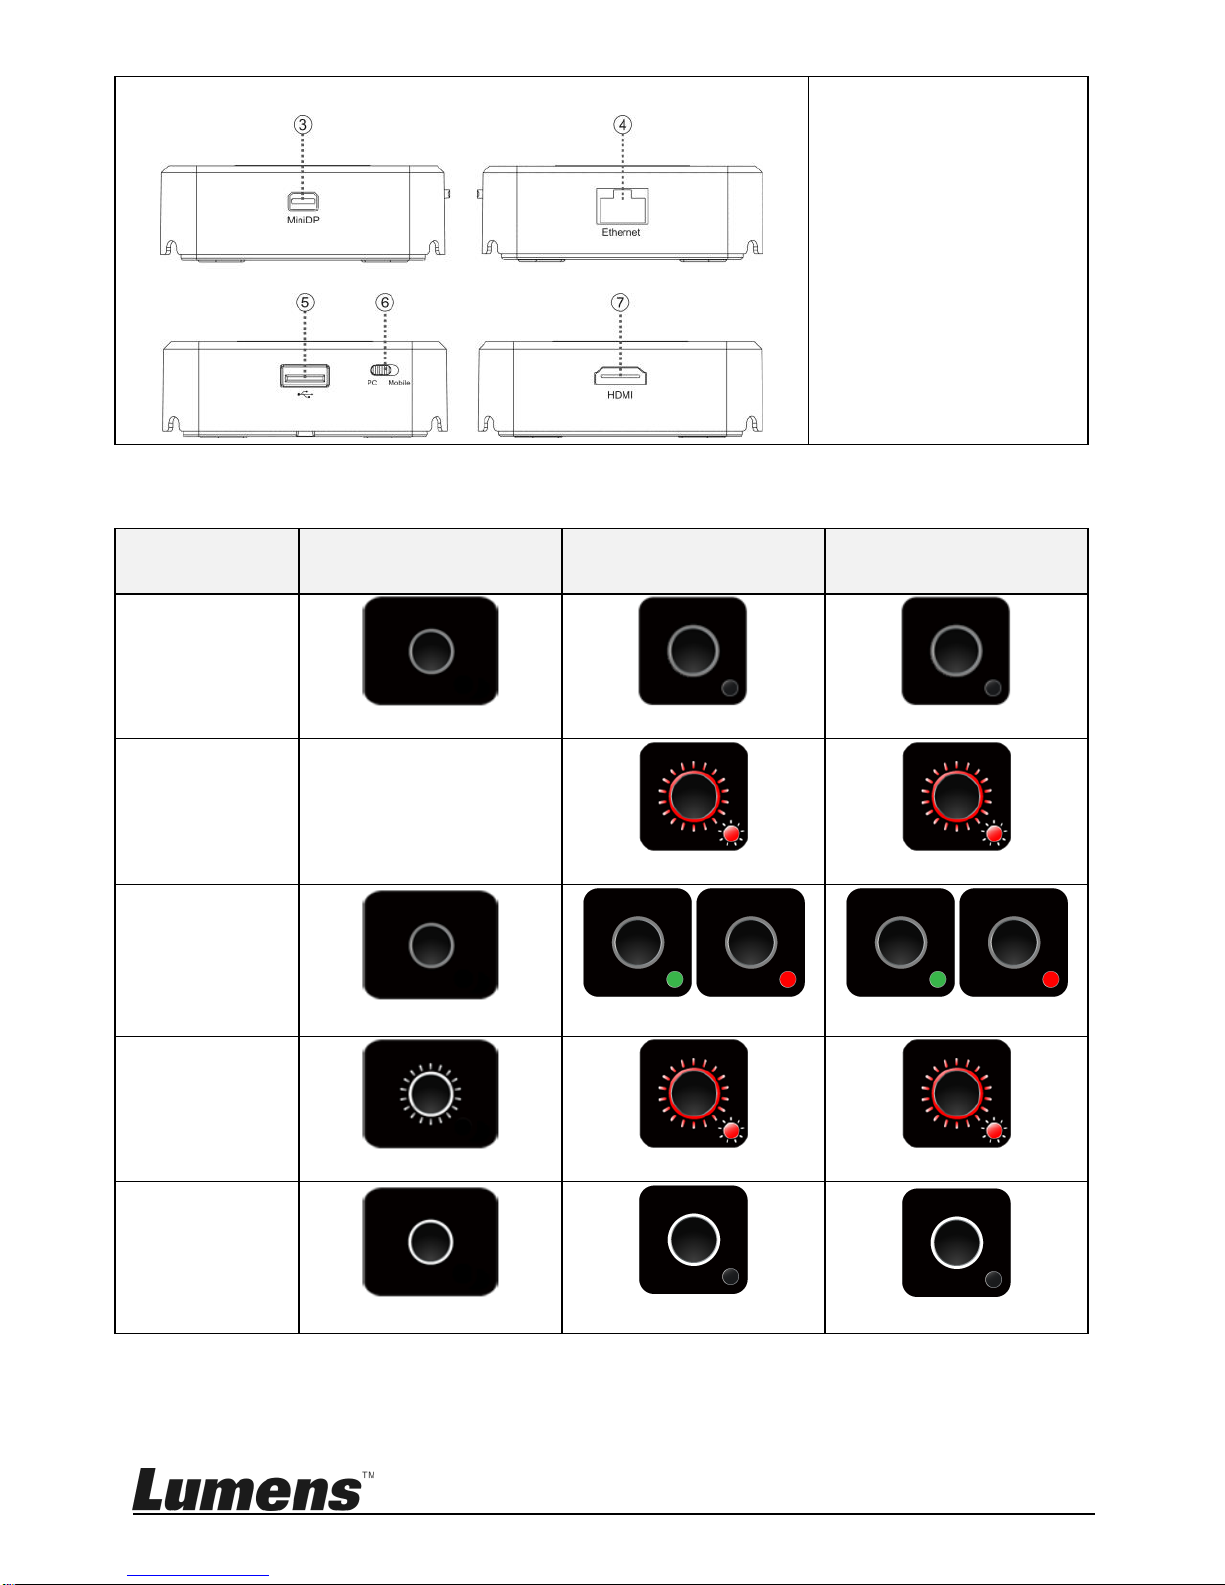
Side
3. Mini Display Port
4.Ethernet Port
5.USB Port
6.PC / Mobile Switch
7. HDMI Port
3.3 Description of LED indicator
Status
TapShare BOX
Pairing LED
TapShare POD
Main LED
TapShare POD
Side LED
Power off
No Light
No Light
No Light
Startup in
progress
NA
Red Light Blink
Red Light Blink
Power on /
TX no single
No Light
No Light
Green / Red Light on
Pairing
White Light Blink
Red Light Blink
Red Light Blink
Pairing done
White Light on
White Light on
No Light

English- 9
Status
TapShare BOX
Pairing LED
TapShare POD
Main LED
TapShare POD
Side LED
Host standby
without
projecting
NA
Red Light on
Green Light on
Guest
standby
without
projecting
NA
Red Light on
Red Light on
Activate host
& in
projecting
NA
White Light on
Green Light on
Host
received
request of
projection
NA
White / Red Light on
Green Light Blink
3.4 TapShare Pod Keypad
Action
TapShare Pod Main Button
TapShare Pod
Side Button(Host)
Host
Guest
Click
Start / Stop a
projection
Request a
projection / stop a
projection
Allow a projection from
Guest
Double Click
Stop all
projections
NA
Reject a projection
from Guest
Long Press
Full screen
projections
Request a
projection in full
screen
Allow a projection in
full screen from Guest

English- 10
3.5 TapShare Box Splash Screen
1. TapShare Box SSID
2. TapShare Box Wifi Password
3. TapShare Box IPAddress
4. TapShare Box Function and Link State
* Outbound link can select only one of Wi-Fi and RJ45 wire line (LAN).
Airplay activated after web setting. (Default is off)
TapShare Box has been powered on, however, there is
neither TapShare Pod nor device linked.
Complete pairing or connection, the number showed
total TapShare Pod or Device linked.
RJ45 wire line disconnected.

English- 11
RJ45 wire line connected and IP acquired.
IP conflict or other network error.
Outbound Wi-Fi disconnected.
Shift in 3, outbound Wi-Fi is connecting.
Outbound Wi-Fi connected with the router name shown
underline.
Wi-Fi connection Fail, Invalid password or other Errors.
English- 12
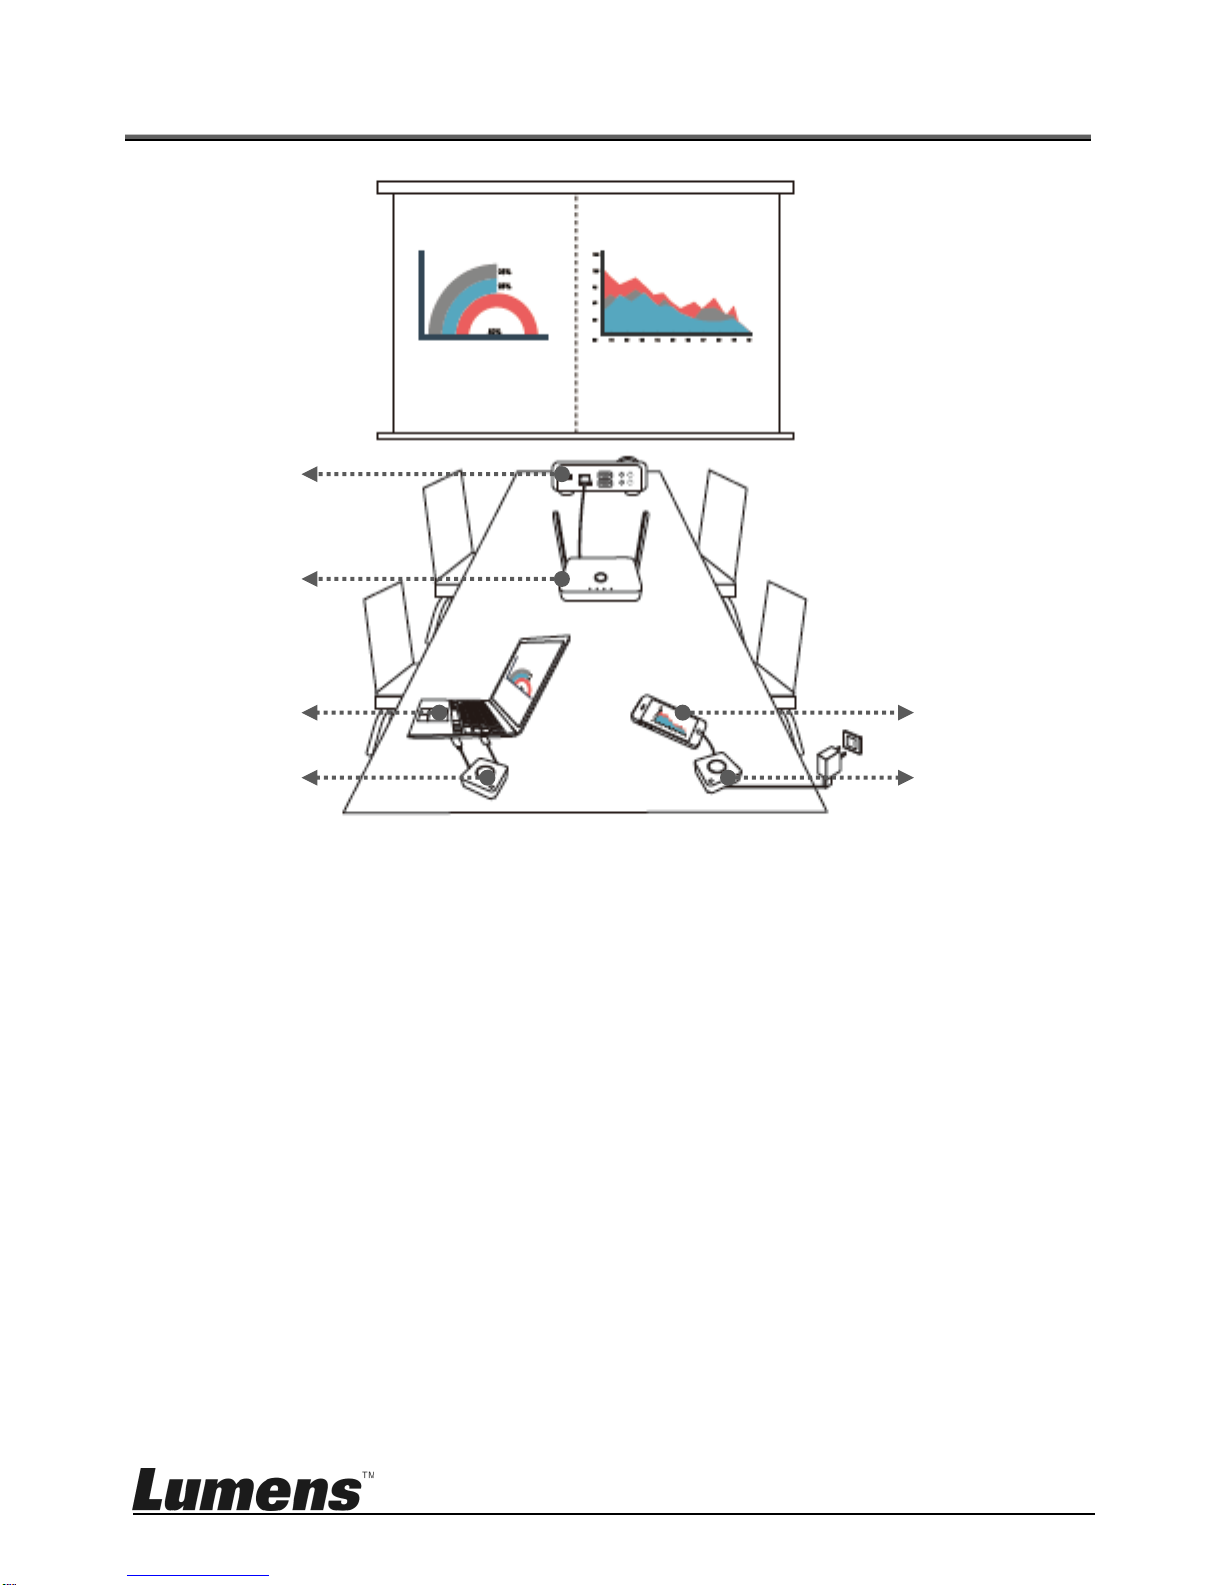
Chapter 4 Installation and Connection
Projector
TapShare Box
Notebook
TapShare Pod
TapShare Pod
Mobile

English- 13
4.1 Connect TapShare Box to a TV
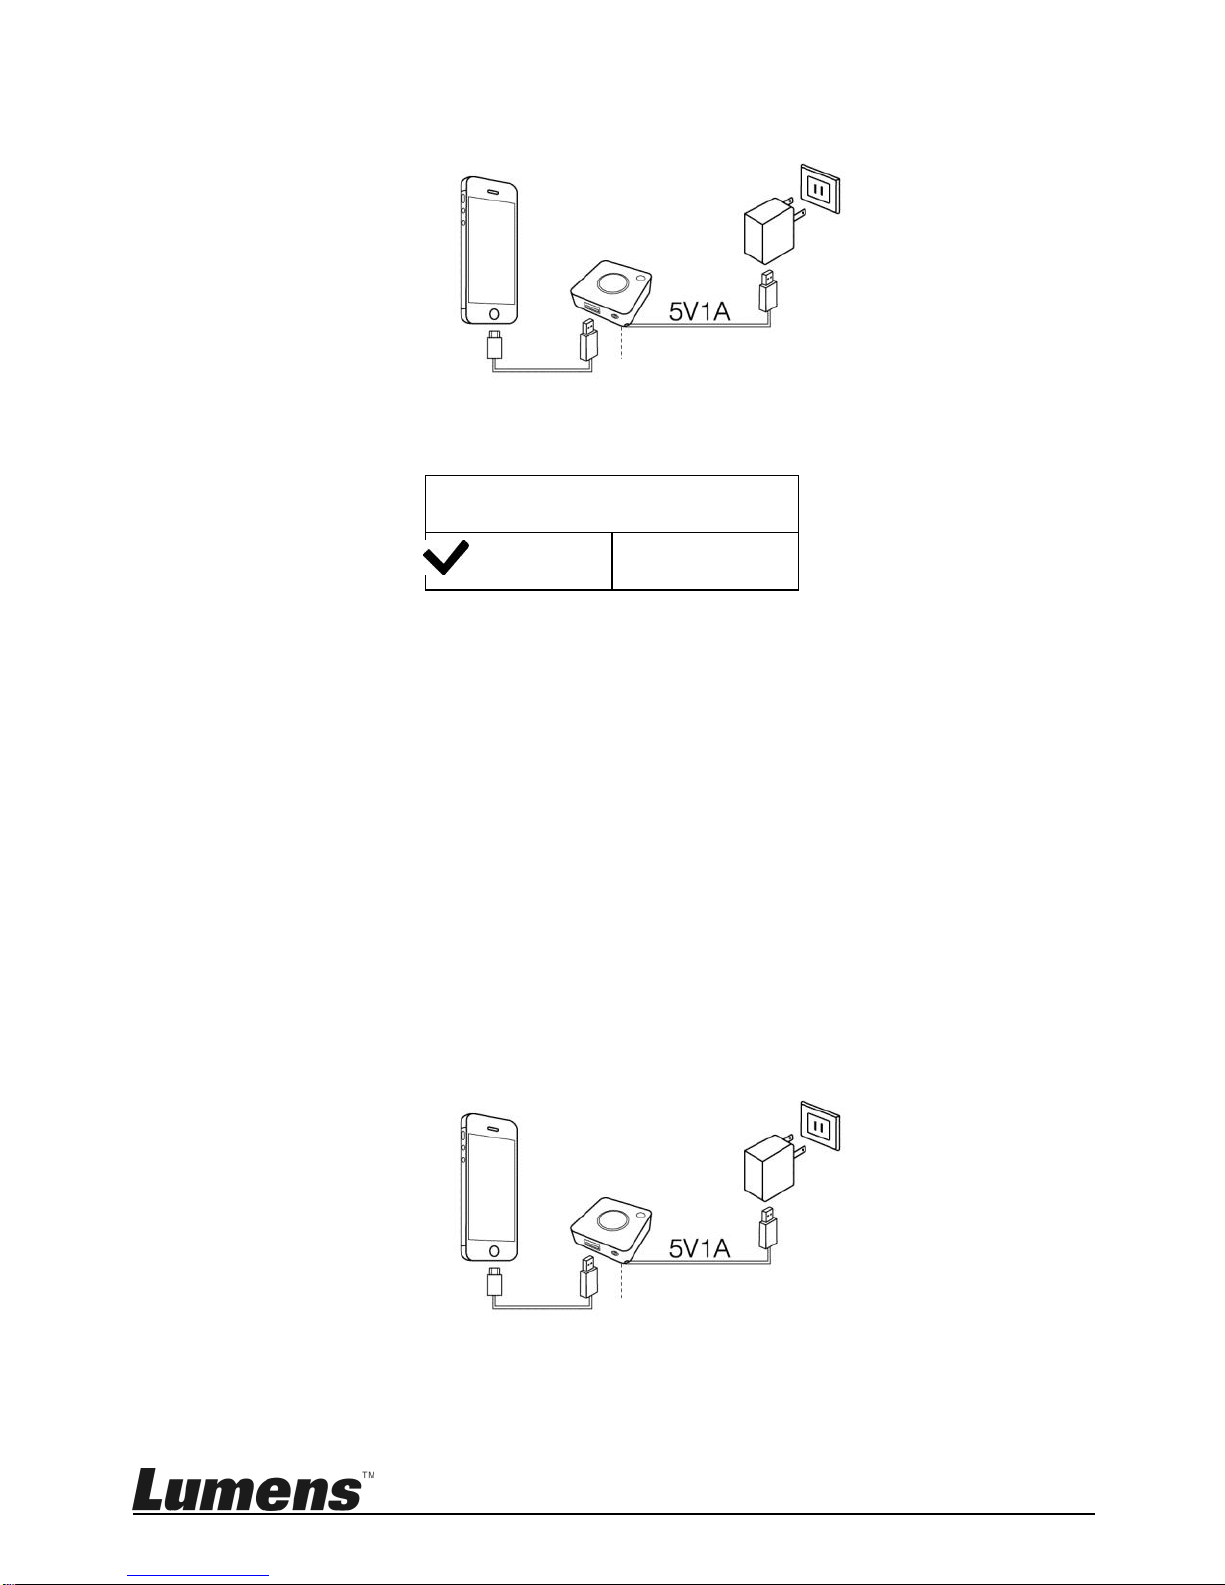
4.2 Connect TapShare Pod to a Laptop or Mobile Device
4.2.1 Connect to a laptop
Switch to PC
English- 14
4.2.2 Connect to an iPhone or iPad
Please press Truston the screen
Trust This Computer?
Trust
Dont Trust
4.2.3 Connect to an Android mobile device
Please enable USB debugging before using.
Go to[Setting][System][About Phone]
Click Build Number for 7 timers to enable
Go to Developer Option USB Debugging On
Plug to TapShare Pod transmitter and Allow USB debug
[Note] Please select MTP or File Transferring in the notifications
when USB is connected.
[Remark] Adifferent version of Android has a different operation; please refer
to its user manual for details.
Switch to Mobile
Switch to Mobile

English- 15
4.3 Pairing
Pairing for any new TapShare Pod or using Ethernet connection.
1. Adjust the switch of the TapShare Pod to PC
2. Plug TapShare Pod USB cable onto TapShare Boxs USB port.
3. TapShares LED will start blinking while pairing
4. After the pairing is done, the TapShares main LED will turn to white.
4.4 Connect TapShare Box to a Local Area Network
Use this connection for software updates or other specific
requirements. Confirm local area network (LAN) configurations with
your LAN engineer or IT staff before connecting.
4.4.1 Wireless connection
Switch to PC
English- 16
1. Connect TapShare Box via a mobile device
Go to [Settings] on a mobile device and scan for wireless
network devices (e.g. TapShare_DF6EC0E5)
Enter the Wi-Fi password (e.g. 96825190)
2. Modify the network configurations on TapShare Box
Start the web browser and enter "192.168.168.1" to log in
webpage
Enter the administrator password (default password is
000000)
Follow the on-screen instructions to change the password.
Once done, log in with the new password (password change is
required only for the first time login)
Select [Network Management] from the top-left menu
Select [Scan 5G SSID and connect] and choose a
wireless device host and then enter the password
Click [OK] to connect
[Remark 1] Request the wireless device's name and
password from IT staff
[Remark 2] Only 5G network connections provided by
wireless network devices can be connected
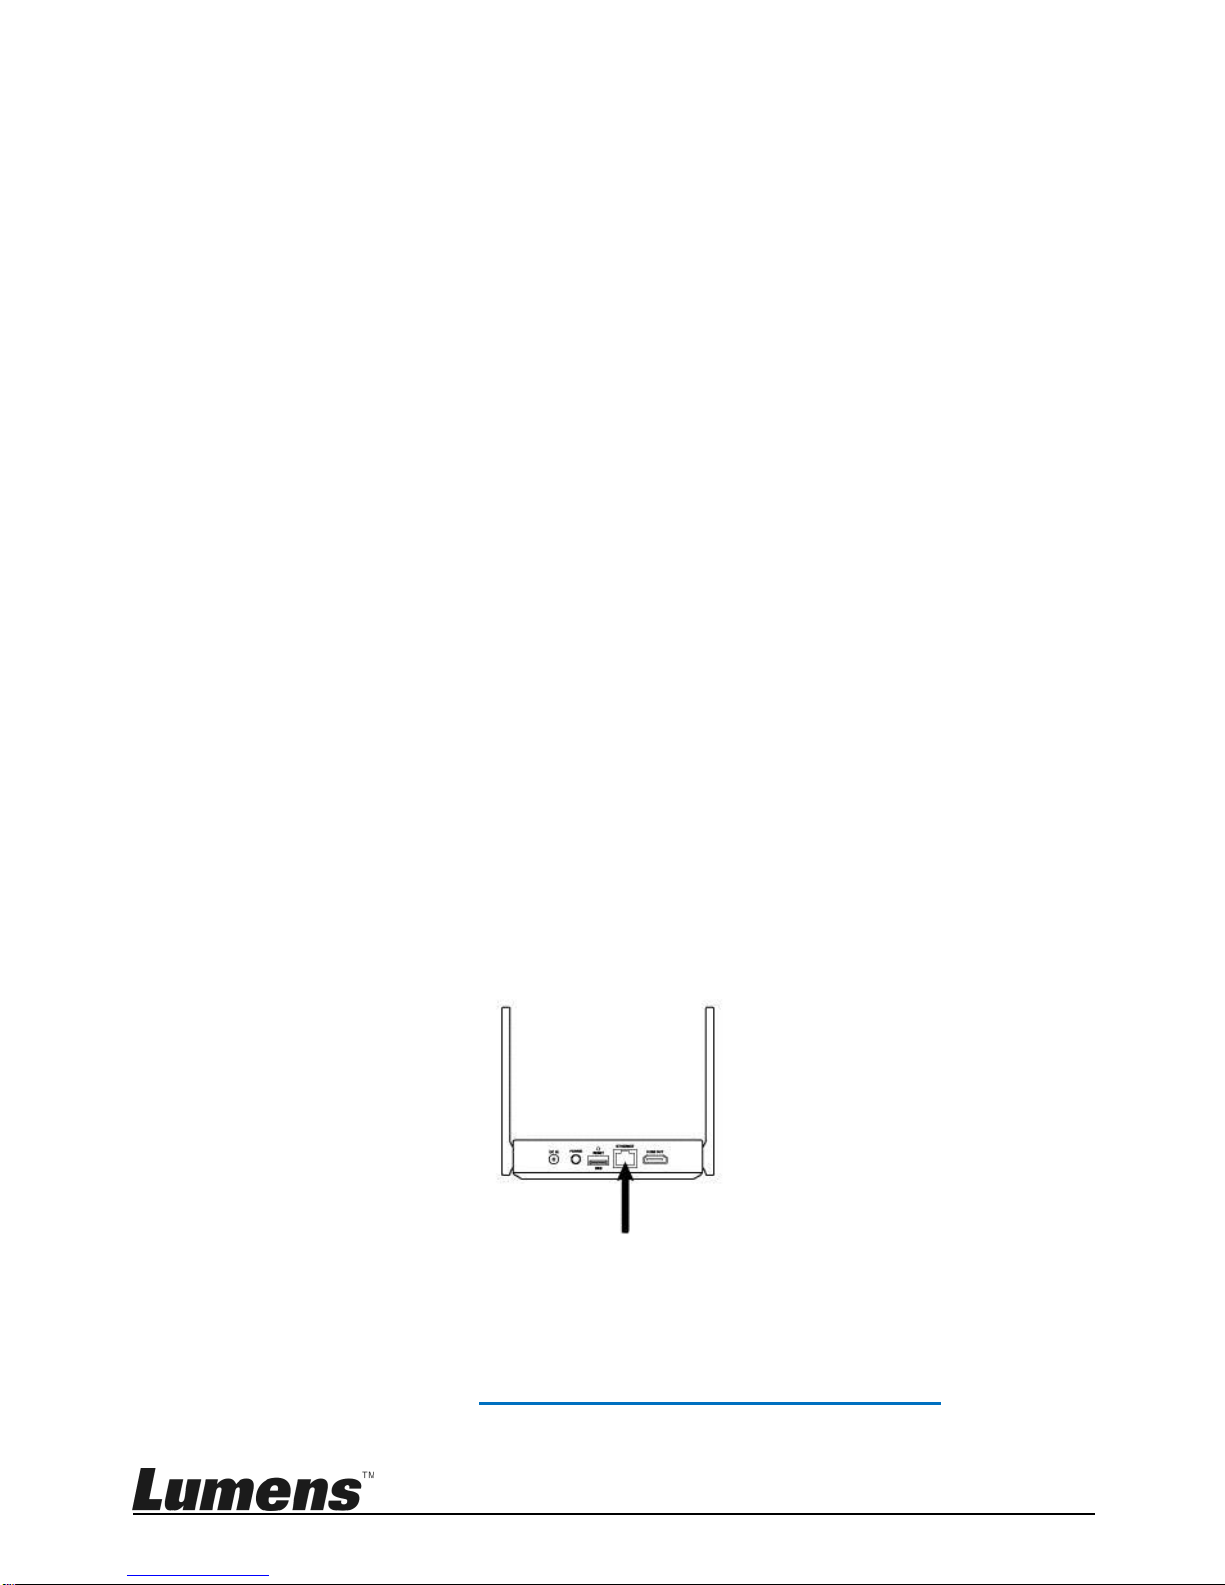
4.4.2 Wired connection - DHCP
Connect the Ethernet cable to TapShare Box. Enter the IP
address found on the bottom right corner and enter the IP
address to log in the webpage setting of TapShare Box.
Please refer to 6.4. Description of Web Page Setting for the
related webpage settings
Network cable

English- 17
4.4.3 Wired connection - static IP address
1. Connect TapShare Box via a mobile device
Go to [Settings] on a mobile device and scan for wireless
network devices (e.g. TapShare_DF6EC0E5)
Enter the Wi-Fi password (e.g. 96825190)
2. Modify the network configurations on TapShare Box
Start the web browser and enter "192.168.168.1" to log in
webpage
Enter the administrator password (default password is 000000)
Follow the on-screen instructions to change the password.
Once done, log in with the new password (password
change is required only for the first time login)
Select [Admin Setting] from the top-left menu
Select [LAN IP Setting]
Follow the information provided by IT staff to proceed the
setting
Click [OK]
3. Connect the Ethernet cable to TapShare Box
Network cable
English- 18
Chapter 5 Description of Major Functions
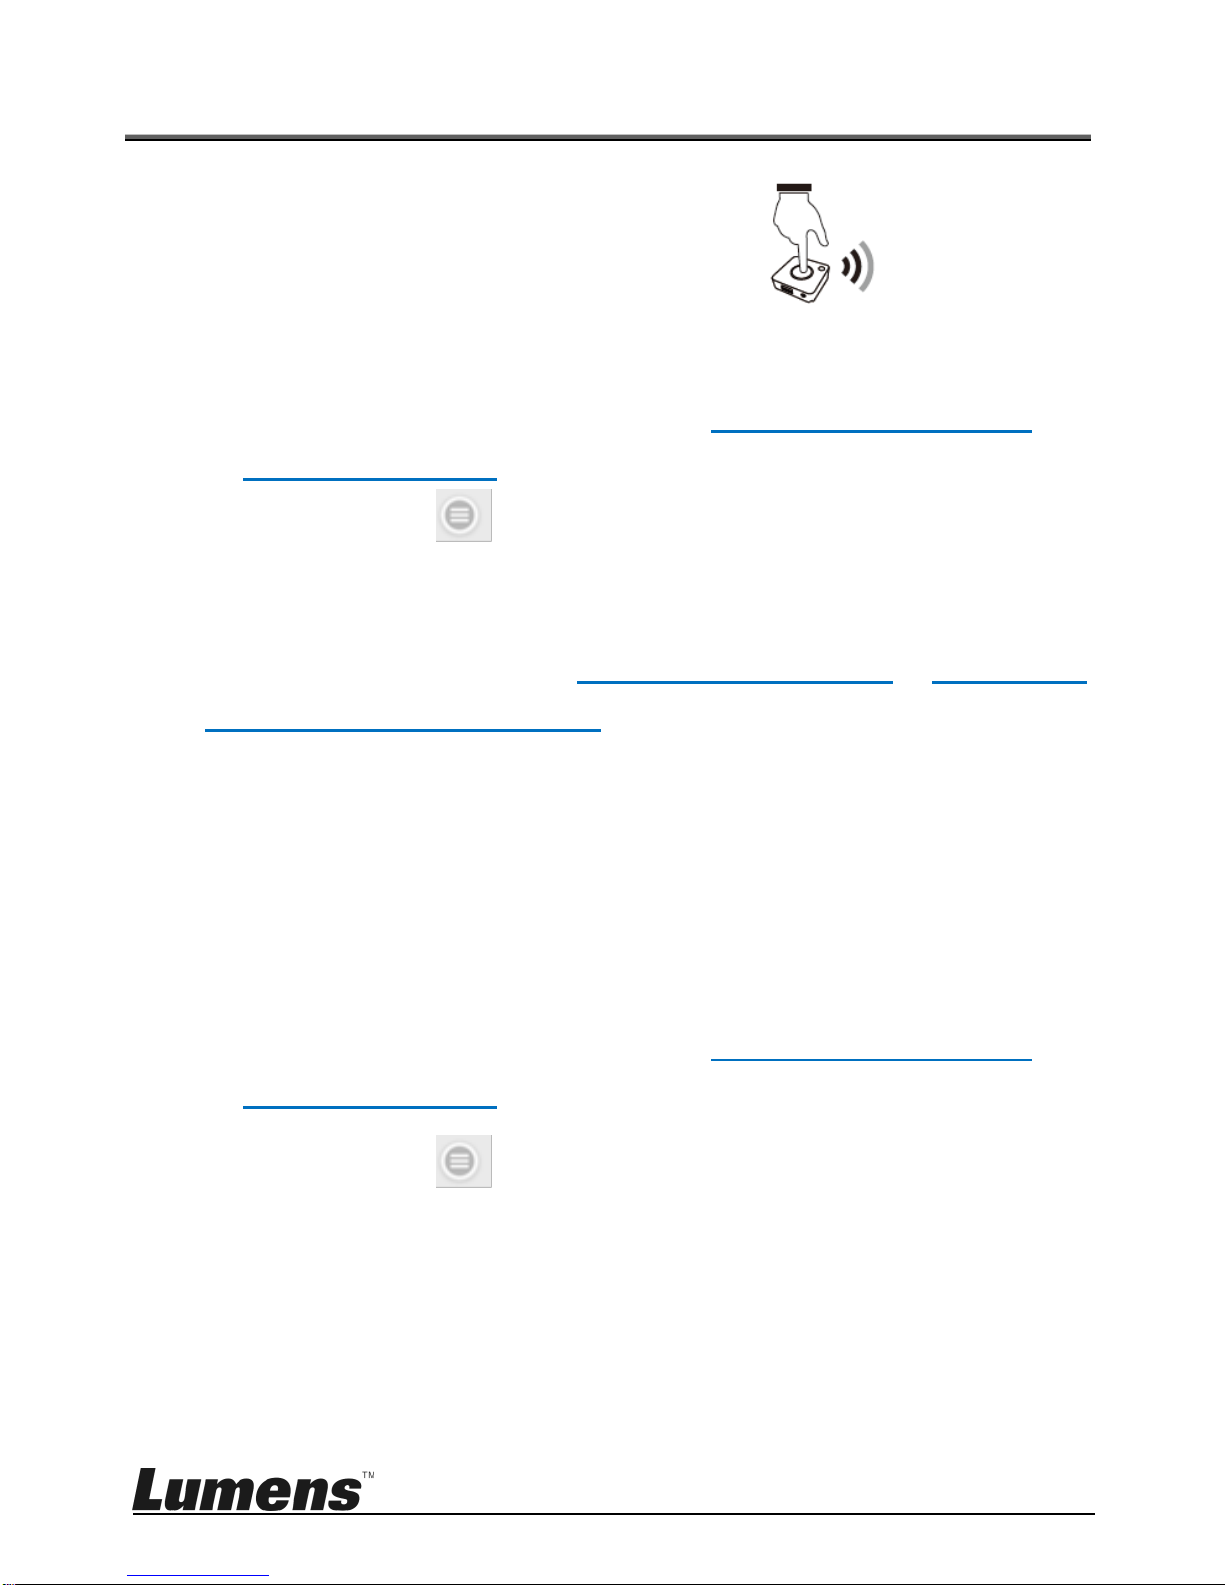
5.1 I would like to project
Tap the main button of the TapShare Pod.
5.2 I would like to set up split screens
5.2.1 Modify the webpage settings of TapShare
1. Connect to TapShare Box. Please refer 6.4.1 Network connection and
6.4.2 Webpage login for connecting and webpage login
2. Click the [Menu] and select [Admin Setting].
3. Go to [Host Control] and change [Share Screen] as [On / Off]
4. Press [OK] and waiting for the reboot of the TapShare Box.
Once done, follow the steps on 5.1 I would like to project or 5.3.2 How to
project with Host Control mode to operate
[Remark] There are up to four split screens.
5.3 I would like to enable the host control feature
<Remark> To enable this feature, two or more TapShare Pod are required
and the projection from guest devices must be approved by the host device
5.3.1 Modify the webpage settings of TapShare
1. Connect to TapShare Box. Please refer 6.4.1 Network connection and
6.4.2 Webpage login for connecting and webpage login
2. Click the [Menu] and select [Admin Setting].
3. Click [Host Control] and change [Share Screen] to [Off].
4. Press [OK] and waiting for the reboot of the TapShare Box.
5.3.2 How to project with Host Control mode
Press the main button (red light) on the guest TapShare Pod,

English- 19
and then press the side button (green light) on the host
TapShare Pod to project content.
[Remark]
Host Side: The side LED indicator is in green
Guest Side: The side LED indicator is in red
5.3.3 Host Control mode instructions
Approve projection request from guest side:
Press the side button on host side
Approve full-screen projection request from guest side:
Press and hold the main button on guest side to send out
projection request
Press the side button on host side
Reject projection request from guest side:
Double-press the main button on host side
Close full-screen projection on guest side:
Press the main button on host side
Close projection on all guests:
Press and hold the main button on host side
5.4 I would like to stream content via AirPlay
To project content via AirPlay, please close video output from TapShare Box
and refer to 6.4.6 I would like to enable AirPlay feature to modify the
Guest
Host
Other manuals for TS20 TapShare
2
Table of contents


