Lumina SL380J User manual

N26968
After Sales Support
Telephone: 1300 762 234
Email: [email protected]
Juice Extractor
Model Number SL380J
INSTRUCTION MANUAL

After Sales Support
Telephone: 1300 762 234
Email: [email protected]
2
Contents
Warranty Details 3
Welcome 4
General Safety Instructions 5
Proper Use of the Appliance 5
Safety Information 5
Parts List 7
Operation 8
Features 8
Tips for Use 8
Before Starting Up Your Appliance for the First Time 9
Preparing Fruit and Vegetables 9
Starting Up Your Appliance for the First Time 9
Shutting Your Appliance Down 12
Serving the Juice 13
Dismantling Your Appliance 13
Frequently Asked Questions 14
Cleaning 15
Cleaning Individual Parts 15
Cleaning the Central Unit Housing 15
Storing Your Appliance 16
Technical Data 16
Disposal Information 16

After Sales Support
Telephone: 1300 762 234
Email: [email protected]
3
Juice Extractor
Warranty Details
The product is guaranteed to be free from defects in workmanship and parts for a period of 36 months from
date of purchase. Defects that occur within this warranty period, under normal use and care, will be repaired,
replaced or refunded at our discretion, solely at our option with no charge for parts and labour. The benefits
conferred by this warranty are in addition to all rights and remedies in respect of the product that the
consumer has under the Competition and Consumer Act 2010 and similar state and territory laws.
W
arranty

After Sales Support
Telephone: 1300 762 234
Email: [email protected]
4
Welcome
Congratulations on choosing to buy a Lumina®Signature product.
All products brought to you by Lumina®Signature are manufactured to the highest standards of
performance and safety and, as part of our philosophy of customer service and satisfaction, are backed by
our comprehensive 3 Year Warranty. We hope you will enjoy using your purchase for many years to come.

After Sales Support
Telephone: 1300 762 234
Email: [email protected]
5
General Safety Instructions
These operating instructions are intended to enable you to use your new appliance with confidence. In order
for you to gain the greatest possible enjoyment from your new product and to derive as much benefit as
possible from it, we recommend that you read these instructions carefully before using the appliance for the
first time. Keep the operating instructions in a safe place so you can refer to them again later.
Proper Use of the Appliance
The appliance is designed exclusively for making juices from fruit and vegetables. Any other use is not
permitted.
This appliance is designed for use in private homes and is not intended for commercial use.
Do not use the appliance outdoors. Only use the appliance in dry indoor areas. Never use the appliance in
damp areas or in the rain.
Only use the inserts in the juice extractor.
The juice extractor cannot process hard and fibrous fruit and vegetables, or hard peel and pips.
This appliance is not intended for use by persons (including children) with restricted abilities or lack of
experience and/or knowledge, unless they are supervised by a person responsible for their safety, or have
received instructions on how the appliance is to be used.
The manufacturer accepts no liability for damage caused by non-intended use.
The symbols in these instructions have the following meaning:
CAUTION! Risk of injur
y
Information about the type and source of the risk.
Follow the instructions for the necessary safety precautions and countermeasures.
A
TTENTION! Damage to appliance
Information about the risk of damage to the appliance.
Follow the instructions for the necessary safety precautions and countermeasures.
Note:
Gives additional important information for the user.
Safety Information
Setting-up your juice extractor:
Place the appliance on a stable, flat and even surface. If necessary, place an underlay under the
appliance in order to protect the surface beneath.
Ensure that the appliance is stable: it must be placed so that it does not wobble or tilt.
Do not operate the appliance near gas appliances.
Keep the appliance and the power cord away from heat sources.
Never cover the appliance, and do not sit or stand on it.

After Sales Support
Telephone: 1300 762 234
Email: [email protected]
6
Mains connection:
Only connect the appliance to sockets with the same AC voltage as indicated on the rating plate
(220-240 V).
Only use the appliance with the power cord supplied.
Only operate the appliance using earthed sockets.
In order to be able to disconnect the appliance from the power supply at any time, the socket to which
the appliance is connected must be freely accessible at all times.
Unplug the appliance from the mains during thunderstorms, or if the appliance is unused for extended
periods of time.
Make sure that the power cord does not cause a trip hazard.
Never use the power cord to carry the appliance.
The appliance may not be operated with an external time switch or separate remote control system.
If the supply cord is damaged, it must be replaced by the manufacturer or the customer service or a
qualified person in order to avoid hazards.
Never connect the cord to the socket if you have wet hands.
Risk of electric shock! Never operate the appliance if the cord is damaged. Do not allow the cord to come
into contact with hot surfaces, naked flames, sharp edges, water or other liquids.
When disconnecting the appliance from the power supply, pull on the plug and not the cord.
Usage conditions and restrictions:
The appliance must only be operated by persons who are familiar with the risks and features of the
appliance.
Ensure that loose-fitting items of clothing and long hair do not get into the feed tube (Part 10 - as seen on
page 7)!
Never operate the appliance when it is empty.
Do not put too many raw ingredients into the feed tube at once.
In the event of a fault, disconnect the appliance from the power supply immediately.
Never leave the appliance to operate unsupervised.
Never immerse the cord and appliance in water.
Never touch an electrical appliance if it has fallen into water. Disconnect the appliance from the power
supply immediately.
Never touch the interior of the appliance during operation.
Only operate the appliance using the accessories supplied. The use of other implements may cause
accidents.
Do not use for juicing frozen fruit or vegetables!
Do not use the appliance if the filter (Part 9 - as seen on page 7) is damaged.
Only compress raw materials using the supplied compressor (Part 11 - as seen on page 7): never use
your fingers or other tools for this purpose.
Do not push the compressor into the feed tube with full force.
Do not leave the appliance switched on in uninterrupted continuous operation for more than a maximum
of 1 minute. Only switch the appliance on again after a five-minute cooling period.
When you have finished using the appliance, clean it and remove or attach accessory parts, or in the
event of a fault, switch the appliance off and disconnect it from the power supply.
Leave the appliance to cool after use and before cleaning.
In order to prevent the risk of electric shock, do not remove the central unit housing under any
circumstances. There are no parts inside that can be repaired by the user. Repairs must only be carried
out by an authorised specialist workshop.
Do not leave any packaging (plastic bags, cardboard, polystyrene, etc.) within reach of children.
Operate the appliance with particular caution if children are present.
Young children should be supervised to ensure they do not play with the appliance. Close supervision is
necessary when appliance is used by or near children.
The appliance is not intended for use by persons (including children) with reduced physical, sensory or
mental capabilities, or lack of experience and knowledge, unless they have been given supervision or
instruction concerning use of the appliance by a person responsible for their safety.
After Sales Support
Telephone: 1300 762 234
Email: [email protected]
7
Parts List
9
8
10 11
7
6
0125
4
12
3
2
1
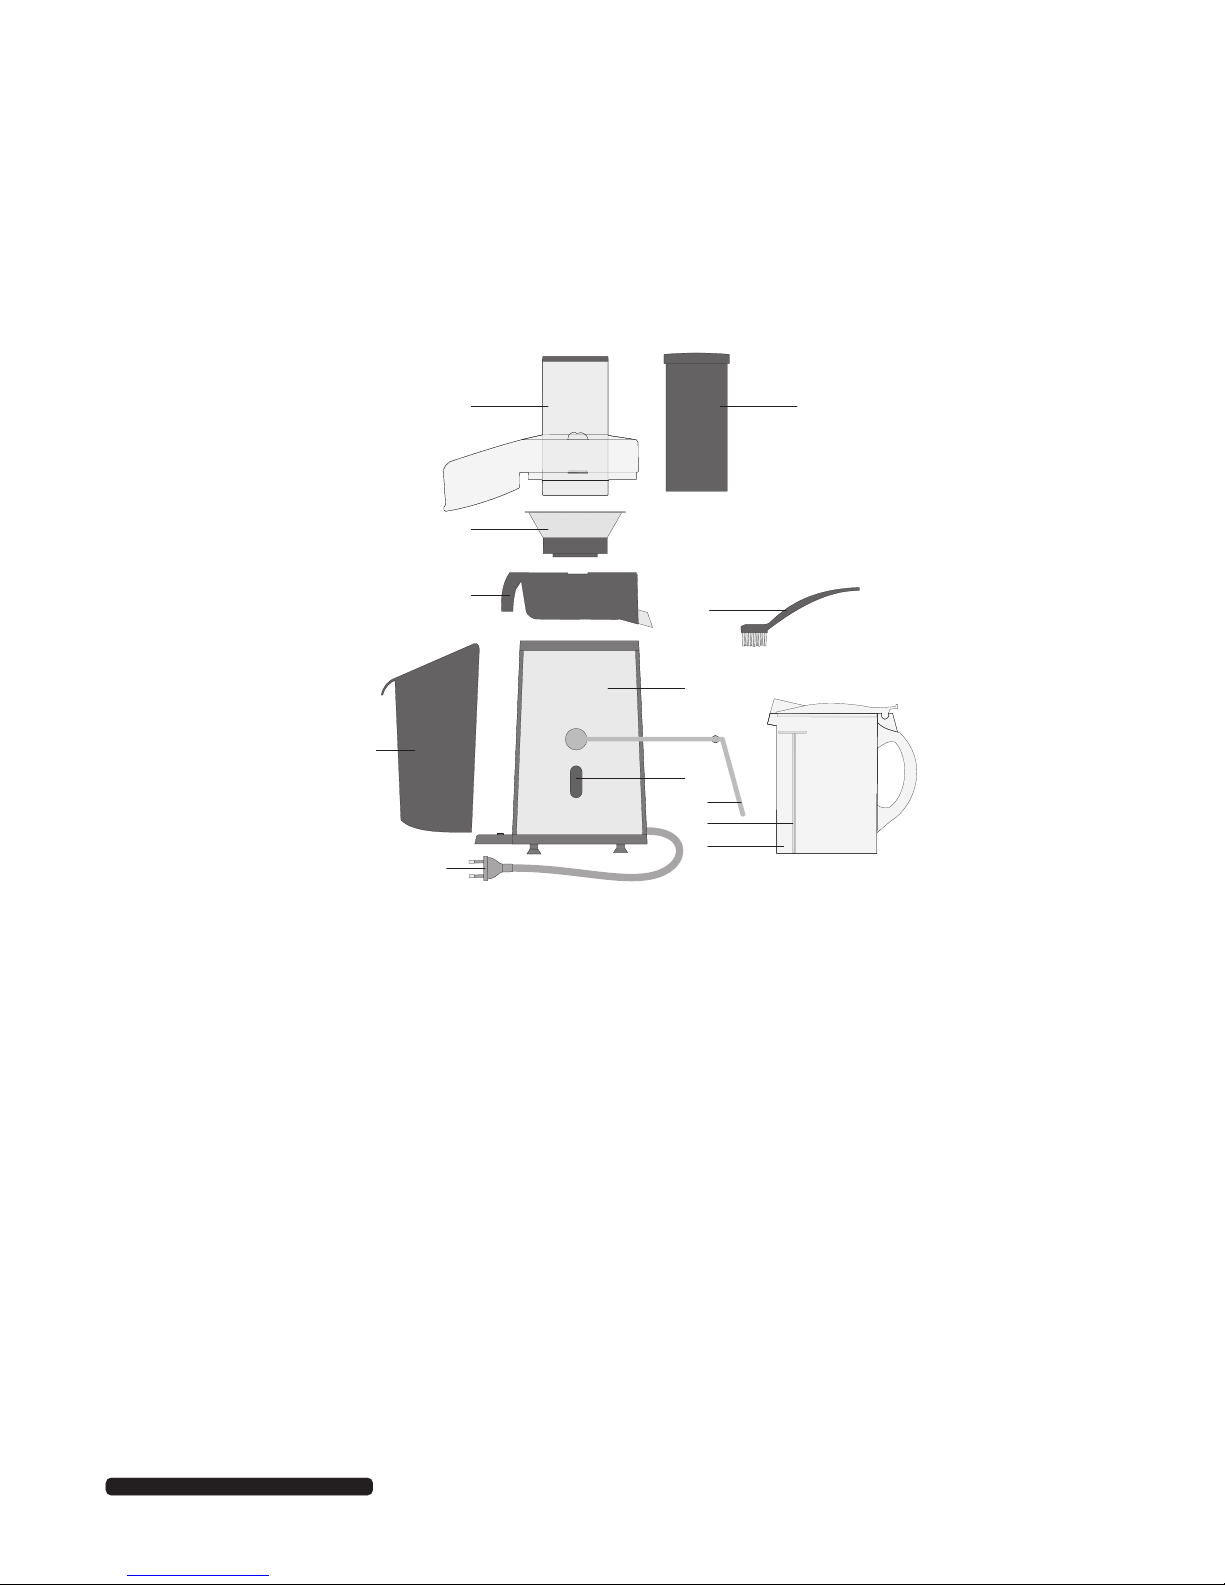
Figure 1: Appliance package contents
1. Mains plug
2. Juice container
3. Separating compartment
4. Safety clip
5. Switch
6. Central unit housing
7. Pulp container
8. Separating insert
9. Filter
10. Feed tube
11. Compressor
12. Brush

After Sales Support
Telephone: 1300 762 234
Email: [email protected]
8
Operation
Features
The appliance can be assembled in just a few steps. The juice extractor can only be operated once the safety
clip (Part 4 - as seen on page 7) has been engaged.
Compress the freshly prepared pieces of fruit and vegetable into the feed tube (Part 10 - as seen on page 7)
using the compressor (Part 11 - as seen on page 7).
The following fruits and vegetables are most suitable for use in the juice extractor: pineapple, apple, melon,
citrus fruits, cucumber, celery, carrot, spinach and tomato. Leafy vegetables (such as cabbage and spinach)
should be shaped into balls before being placed in the appliance.
The following fruits and vegetables are not suitable for use in the juice extractor, as these juices become too
thick: banana, mango and papaya.
Use the switch (Part 5 - as seen on page 7) to start up the appliance. The juice extractor has three operating
modes:
Mode "0": the appliance is switched off
Mode "1": the appliance is switched on, at low speed
Mode "2": the appliance is switched on, at high speed
012
Figure 2: On/off switch
The juice flows out of the appliance via the outlet in the juice container (Part 2 - as seen on page 7) and the
solid fruit and vegetable matter will collect in the pulp container (Part 7 - as seen on page 7).
Tips for Use
Stir the freshly pressed juice well in the juice container.
Keep freshly pressed juice in the fridge if necessary.
Freshly pressed juice loses its vitamins quickly: if possible, it should be consumed immediately after
juicing, or within a few hours.
Juice from dark red vegetables, e.g. beetroot, and from dark green vegetables, e.g. spinach, is very
strong in taste. If necessary, dilute it with water.
Note for diabetics
Fruit juice contains a high proportion of fructose. Diabetics should therefore only drink fruit juice in
permitted amounts.

After Sales Support
Telephone: 1300 762 234
Email: [email protected]
9
Before Starting Up Your Appliance for the First Time
1. Check the contents of the package are complete.
2. Remove the packaging and all protective film.
3. Check the appliance and all accessories for any visible damage. If there is any kind of damage, do not
use the appliance.
4. Before starting up the appliance, carefully read the safety instructions and operating instructions. Only
then can all functions be used safely and reliably.
5. Clean the appliance before using it for the first time, as described in the Cleaning section.
Preparing Fruit and Vegetables
ATTENTION! Damage to appliance
Risk of damage to the appliance from hard peel and pips.
Remove hard peel and pips before juicing fruit and vegetables.
1. Do not use any spoiled food. Only prepare fresh fruit and vegetables.
2. Remove any stones or pips (e.g. from cherries, plums or peaches).
3. Remove any hard and non-edible peel (e.g. from pineapple, melon or potatoes).
4. Wash fruit and vegetables that have a thin skin thoroughly (e.g. carrots or pears).
5. Cut fruit and vegetables into rough pieces, so that they fit into the feed tube.
Starting Up Your Appliance for the First Time
Assembling your appliance
CAUTION! Risk of injury
Risk of injuries caused by swallowing foreign bodies.
Before use, make sure there are no foreign bodies in the filter and the containers.
1. Place the central unit housing (Part 6 - as seen on page 7) on a stable and even surface and make sure
that it is standing securely. The central unit housing is inclined slightly so that the juice can run out better.
2. Attach the pulp container (Part 7 - as seen on page 7). Pay attention to the recess on the base of the pulp
container.
012
Figure 3: Attaching the pulp container

After Sales Support
Telephone: 1300 762 234
Email: [email protected]
10
3. Insert the separating insert (Part 8 - as seen on page 7) into the matching recesses in the central unit
housing. Press the separating insert firmly downwards, in order to make contact with the motor.
012
Figure 4: Inserting the separating insert
CAUTION! Risk of injury
Risk of cutting yourself from the sharp blades in the filter (Part 9 - as seen on page 7).
Only hold the filter by the edges when you are attaching it.
Pay particular attention to ensuring that the filter is completely locked in.
4. Place the filter on the separating insert. Ensure that the filter audibly locks in and is not just resting above
the separating insert.
0
Figure 5: Inserting the filter
5. Firmly attach the feed tube (Part 10 - as seen on page 7). Pay attention to the recesses on the separating
insert.
Figure 6: Attaching the feed tube

After Sales Support
Telephone: 1300 762 234
Email: [email protected]
11
6. Fold the safety clip (Part 4 - as seen on page 7) firmly upwards until it engages in the two recesses on the
feed tube.
Figure 7: Folding the safety clip (4) upwards
7. Open the lid of the juice container (Part 2 - as seen on page 7) and insert the separating compartment
(Part 3 - as seen on page 7).
Figure 8: Inserting the separating compartment (3)
8. Close the lid of the juice container.
9. Place the juice container under the outlet in the central unit housing.
Starting Up Your Appliance for the First Time
Only operate the appliance once it is fully assembled.
The appliance can only be switched on when the safety clip (Part 4 - as seen on page 7) is folded upwards
into the recesses on the feed tube and engages.
CAUTION! Risk of injury
Risk of injury from rotating parts.
Never fold the safety clip (Part 4 - as seen on page 7) downwards during operation.
CAUTION! Risk of injury
Risk of injuries caused by hidden defects.
Should any unexpected noise occur during operation, or if any smoke appears, disconnect the
appliance from the power supply immediately. Contact the dealer (see warranty card).
ATTENTION! Risk of overloading
Risk of overloading of extension cables and sockets.
When using extension cables and sockets, ensure that they are able to bear sufficient load.

After Sales Support
Telephone: 1300 762 234
Email: [email protected]
12
10. Insert the mains plug (Part 1 - as seen on page 7) on the power cord into an earthed 220-240 V/50 Hz
socket.
11. Drop the prepared pieces of fruit and vegetable in the feed tube (Part 10 - as seen on page 7).
CAUTION! Risk of injury
Risk of injuries during compression.
Never use your fingers to compress the fruit or vegetables pieces into the juice extractor!
Only use the compressor (Part 11 - as seen on page 7) and no other objects for this purpose.
12. Attach the compressor. In the feed tube there is a catch, over which the groove of the compressor slides.
The compressor can only be inserted in this way.
Figure 9: Using the compressor
13. Set the switch (Part 5 - as seen on page 7) to mode "1" to turn the appliance on. Set the switch to mode
"2" to increase the speed of the motor. Use mode "1" for soft fruits and vegetables and mode "2" for hard
fruits and vegetables.
ATTENTION! Damage to appliance
Risk of overheating and damage to the motor during continuous operation.
Do not leave the appliance switched on in uninterrupted continuous operation for more than a
maximum of 1 minute. Only switch the appliance on again after a five-minute cooling period.
14. Press the compressor gently into the feed tube. If too much pressure is applied, the quantity of juice
produced will be reduced and the appliance may be damaged.
The juice flows out of the appliance via the outlet in the juice container and the solid fruit and vegetable
matter collects in the pulp container.
15. Repeat steps 11 to 14 until the desired quantity of juice is produced.
Shutting Your Appliance Down
1. Switch the appliance off. Set the switch (Part 5 - as seen on page 7) to mode "0".
CAUTION! Risk of injury
Risk of injury from rotating parts.
Only fold the safety clip downwards once the motor and the rotating inserts have completely
stopped moving.
2. Make sure you leave the motor and the rotating parts to come to a complete standstill!
3. Disconnect the appliance from the power supply.
After Sales Support
Telephone: 1300 762 234
Email: [email protected]
13
Serving the Juice
1. Remove the juice container (Part 2 - as seen on page 7).
2. Open the lid of the juice container and remove the separating compartment (Part 3 - as seen on page 7).
3. Stir the freshly pressed juice well with a spoon.
4. Observe the Tips for Use and serve the juice.
Dismantling Your Appliance
1. After use, leave the appliance to come to a complete standstill and cool down before taking it apart.
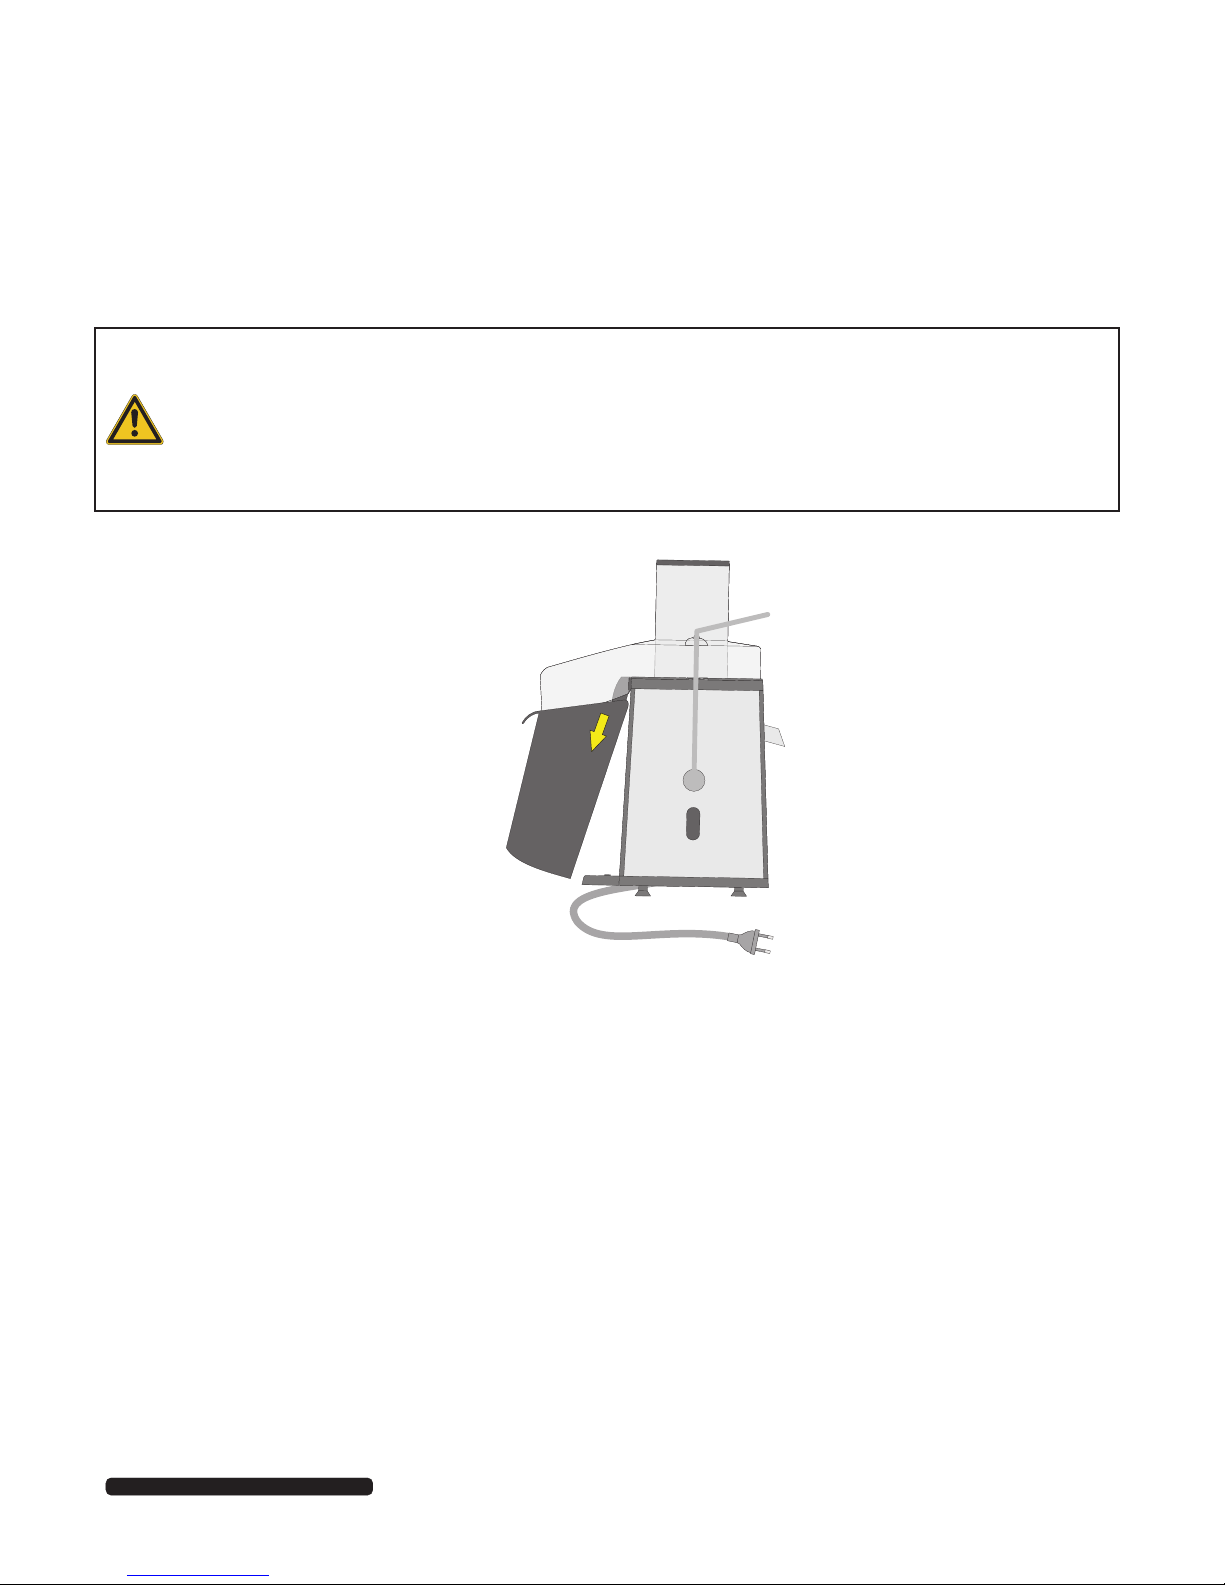
CAUTION! Risk of injury
Risk of cutting yourself when removing the pulp container.
Switch the appliance off.
Remove the pulp container once the motor and rotating inserts have completely stopped
moving.
When cleaning waste matter from the pulp container, pay attention to sharp edges.
2. Remove the pulp container (Part 7 - as seen on page 7) and dispose of the waste matter.
012
Figure 10: Removing the pulp container
3. Fold the safety clip (Part 4 - as seen on page 7) downwards.
4. Remove the inserts. Be careful when removing the filter (Part 9 - as seen on page 7), in order to avoid
cutting yourself!
5. Clean the appliance and the individual parts.

After Sales Support
Telephone: 1300 762 234
Email: [email protected]
14
Frequently Asked Questions
Which fruits and vegetables are suitable for use in the juice extractor?
The following fruits and vegetables are most suitable for use in the juice extractor: pineapple, apple,
melon, citrus fruits, cucumber, celery, carrot, spinach and tomato. Leafy vegetables (such as cabbage
and spinach) should be shaped into balls before being placed in the appliance.
The following fruits and vegetables are not suitable for use in the juice extractor, as these juices
become too thick: banana, mango and papaya.
The juice extractor cannot process hard and fibrous fruit and vegetables, or hard peel and pips.
Do I need to remove pips and peels?
Remove any stones or pips (e.g. from cherries, plums or peaches).
Remove any hard and non-edible peel (e.g. from pineapple, melon or potatoes).
Can I use the appliance outdoors?
Do not use the appliance outdoors. Only use the appliance in dry indoor areas. Never use the
appliance in areas with high humidity.
Which mode "1" or "2" should i use?
Use mode "1" for soft fruits and vegetables and mode "2" for hard fruits and vegetables.
Why does the motor not start after switching on?
The appliance can only be switched on when the safety clip (Part 4 - as seen on page 7) is folded
upwards into the recesses on the feed tube and engages.
Is there a risk of overheating and damage to the motor?
Do not leave the appliance switched on in uninterrupted continuous operation for more than a
maximum of 1 minute. Only switch the appliance on again after a five-minute cooling period.
Is it allowed to clean the individual parts in the dishwasher?
The following individual parts are dishwasher-safe and may be washed in the dishwasher: pulp
container (Part 7), separating insert (Part 8), feed tube (Part 10), compressor (Part 11) and juice
container (Part 2). The temperature during the wash cycle must not exceed 80°C.
Whom can i contact if the appliance is damaged and must be repaired, or an item must be replaced?
You find the contact information on the warranty card.
After Sales Support
Telephone: 1300 762 234
Email: [email protected]
15
Cleaning
Clean the appliance immediately after use. This makes it easier to remove fruit and vegetable remains.
CAUTION! Electric shock
Risk of electric shock.
Disconnect the appliance from the power supply before cleaning.
Wait until the appliance has cooled down.
Never immerse the appliance in water.
Never clean the central unit housing under running water.
Make sure that no water gets into the central unit housing.
Make sure that you do not damage the surfaces of the appliance or the inserts.
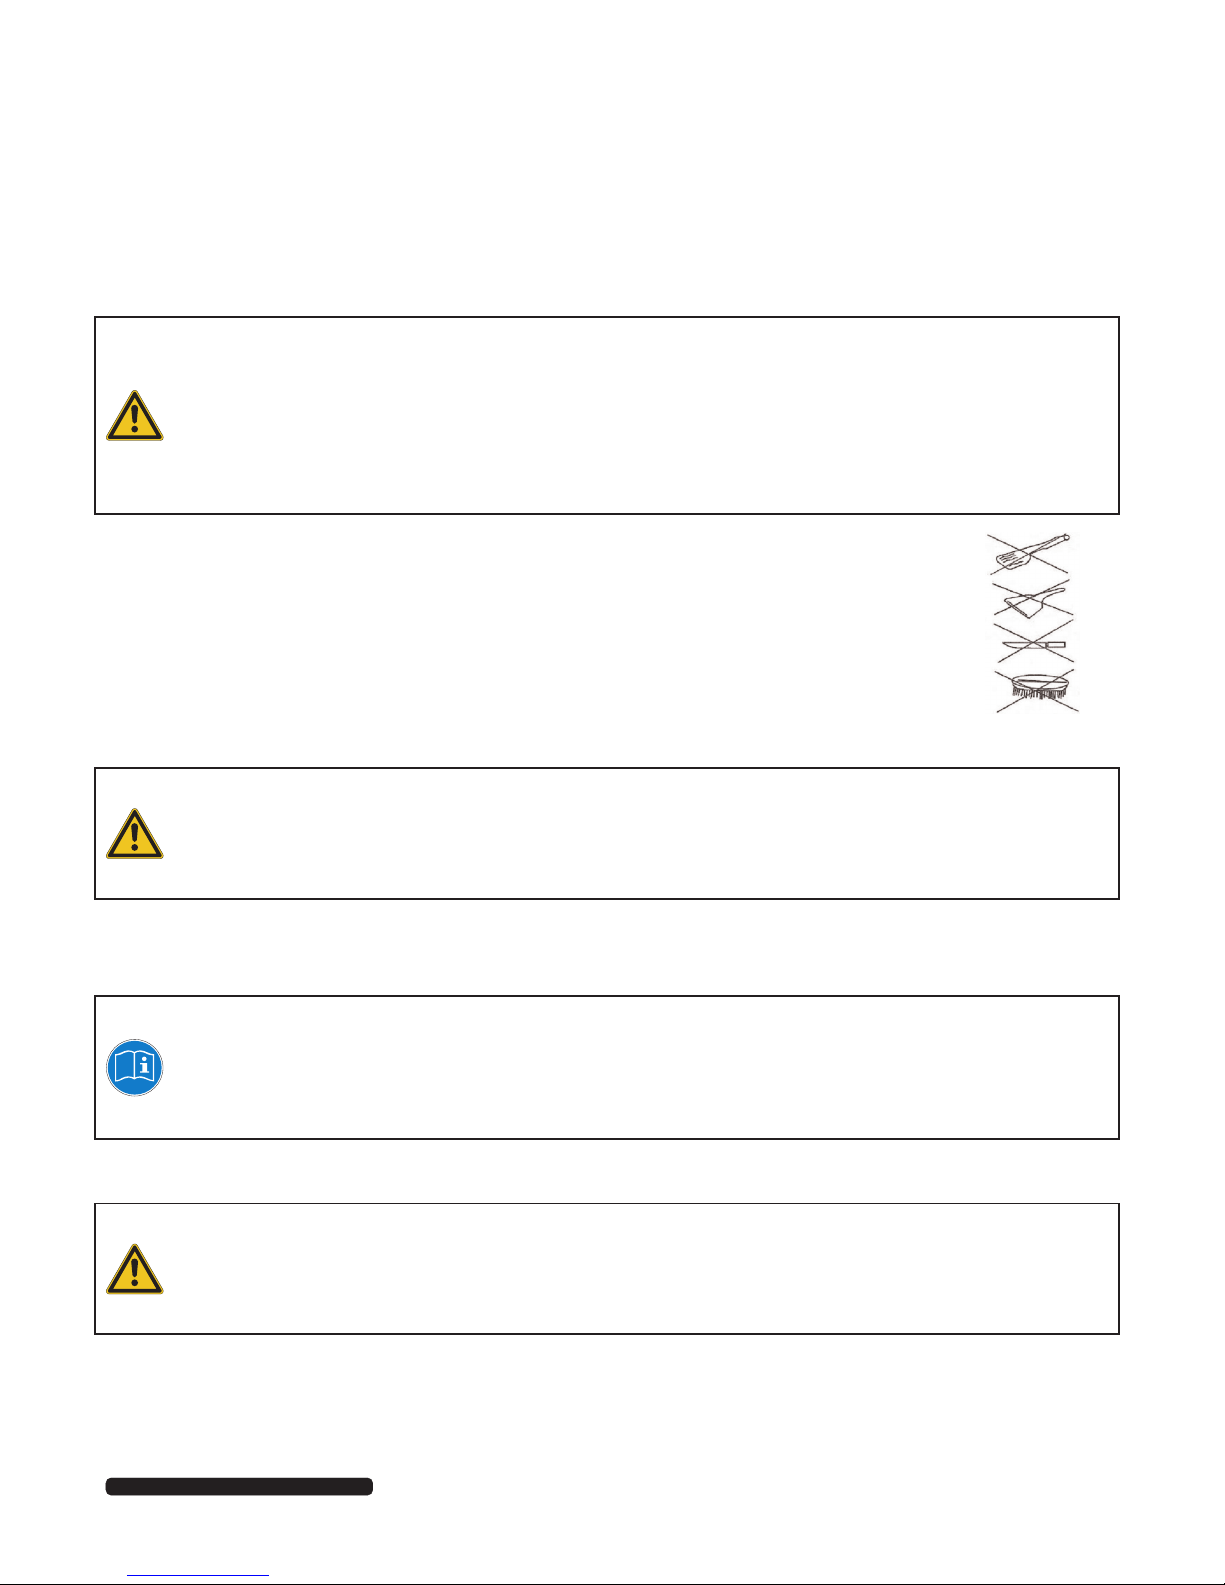
Do not use any aggressive cleaning agents, brushes with metal or nylon bristles, or sharp or
metallic cleaning objects such as knives, hard scrapers or similar.
1. Disconnect the appliance from the power supply.
2. Leave the appliance to cool and then take it apart.
Cleaning Individual Parts
CAUTION! Risk of injury
Risk of cutting yourself from sharp blades in the filter.
Be particularly careful when cleaning the filter and pay attention to the sharp blades.
1. Wash the individual parts thoroughly with a mild detergent, soft sponge and the brush supplied (Part 12 -
as seen on page 7).
2. Dry the individual parts with a soft cloth.
Note: Dishwasher-safe
The following individual parts are dishwasher-safe and may be washed in the dishwasher:
pulp container (Part 7), separating insert (Part 8), feed tube (Part 10), compressor (Part 11) and juice
container (Part 2).
The temperature during the wash cycle must not exceed 80°C.
Cleaning the Central Unit Housing
ATTENTION! Risk of damage
Excess moisture may get into live parts of the appliance and damage them.
Ensure that no excess moisture remains in the appliance after cleaning.
1. Clean the central unit housing with a damp cloth.
2. Carefully dry the central unit housing.
After Sales Support
Telephone: 1300 762 234
Email: [email protected]
16
Storing Your Appliance
The appliance and all individual parts must be completely dried before storage.
Always keep the appliance in a dry location.
Protect the appliance from direct sunlight!
Store the appliance so that it is not accessible to children, is safely put away and at a storage temperature of
between + 5°C and + 20°C.
Technical Data
Supply voltage: 220-240 V/50 Hz
RPM: 18.000
Maximum power consumption: 700 W
Cord length: Approx. 1.2 m
Maximum continuous operation: 1 minute
Noise level: 75.6 dB (A)
Disposal Information
Dispose of the appliance in an environmentally friendly manner. The appliance must not be
disposed of with household waste. Dispose of the appliance at a public collection point.
The packaging is partly recyclable. Dispose of the packaging in an environmentally-friendly
manner by recycling. Dispose of the appliance at a public collection point.
More detailed information can be found at your local waste disposal site.
Table of contents


