4
Wandaufbau... Erecting the walls
Bevor Sie mit dem Wandaufbau beginnen,
legen Sie die 5 Stück imprägnierte
Fundamentbalken in etwa gleichen Ab-
ständen zueinander auf Ihr Fundament.
Die Balken sind zwar imprägniert, Sie sollten
aber dennoch zur Sicherheit eine Lage
Bitumenpappe oder Folie zwischen Wand-
bohlen und Fundamentbalken legen, um das
Aufsteigen von Feuchtigkeit zu verhindern.
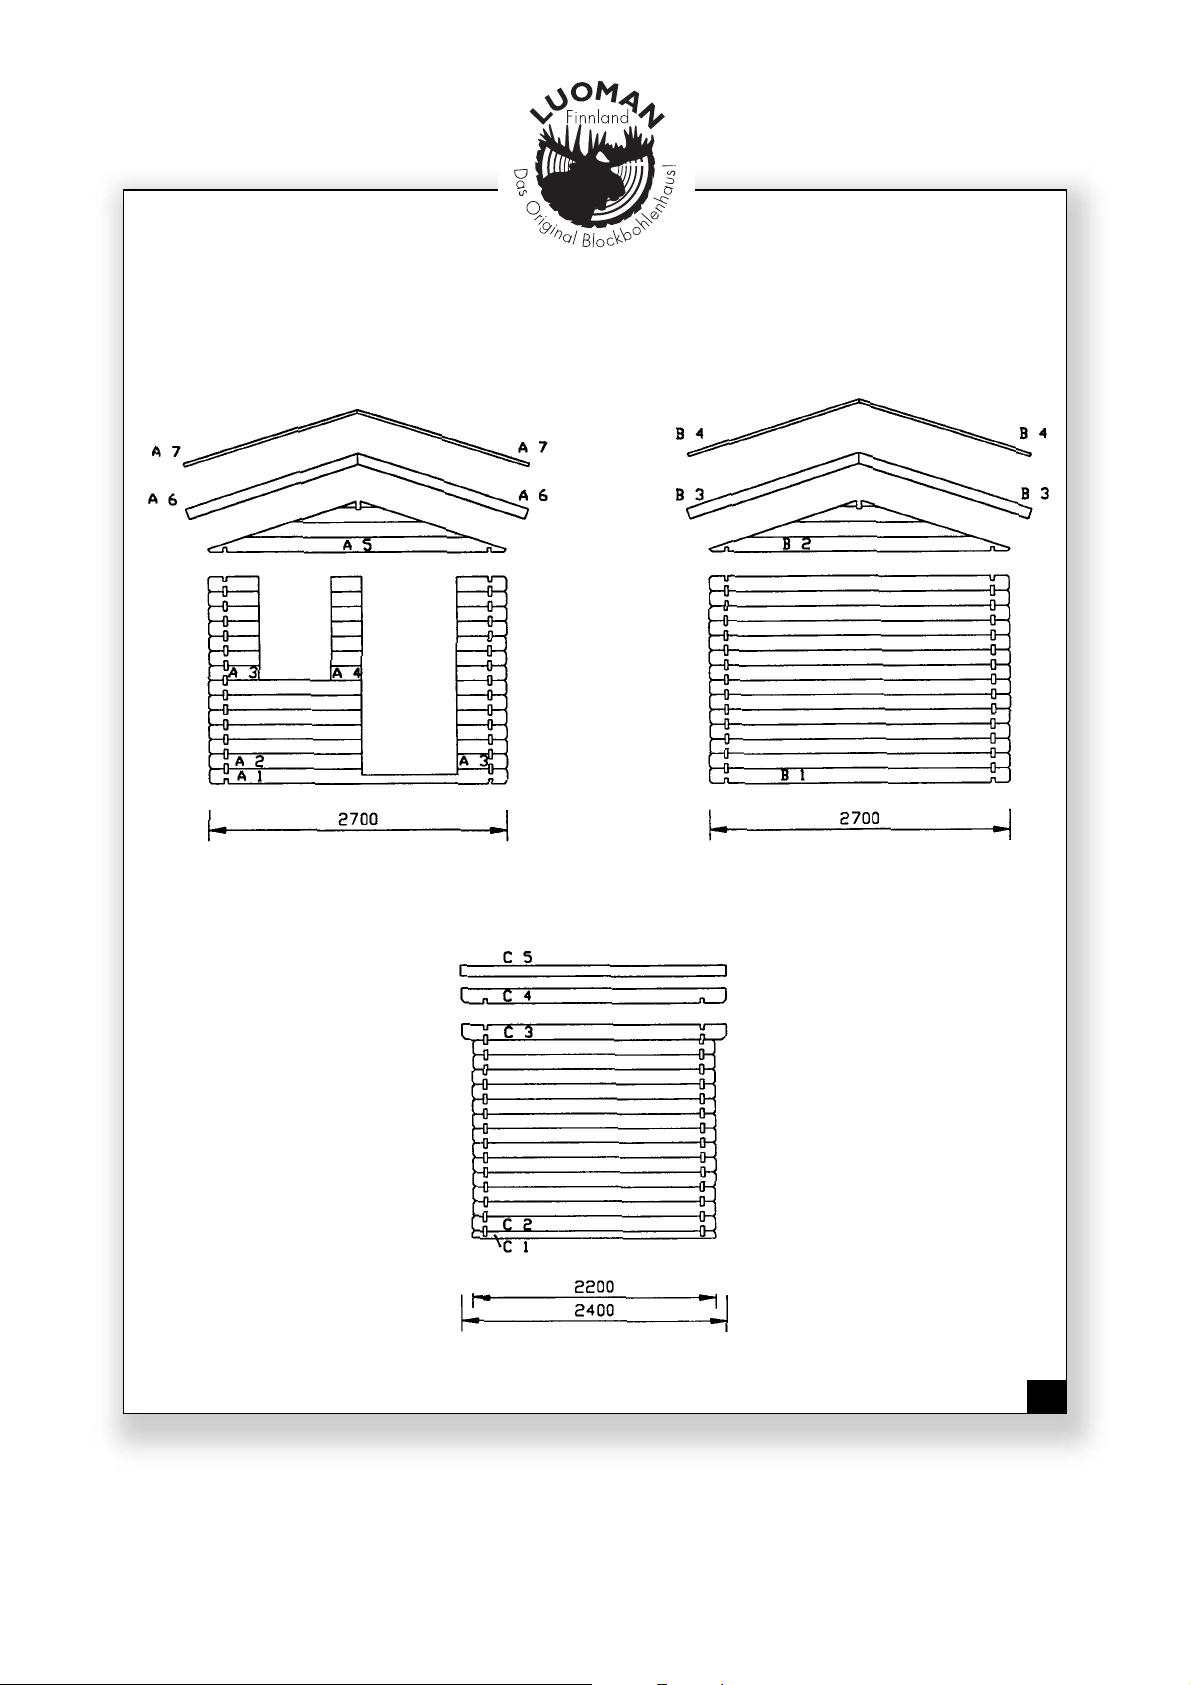
Den Aufbau der Wände entnehmen Sie bitte
der Zeichnung 1. Stecken Sie zuerst die
unteren Wandbohlen (2 ganze Wand-
bohlen A1 und B1 für Vorder- und
Rückwand sowie 2 halbe Bohlen C1 für
die Seitenwände) zusammen. Beachten
Sie, daß die Vorderwandbohle A1 einen
Ausschnitt für die Tür hat.
Hier hilft, wie bei der gesamten Montage, der
Einsatz eines Gummihammers. Schlagen Sie
jedoch nie direkt auf die Feder, um
Beschädigungen zu vermeiden – wir haben
Ihnen Holzklötzchen (mit ‘X’ markiert) mitge-
liefert, die Sie bitte auf die Feder stecken, um
so einen Schlagschutz zu erhalten – auch die
über die Ecken hinausstehenden Bohlenenden
erfordern besonders sorgfältige Arbeit, um ein
Absplittern zu vermeiden! Sollten trotzdem ein-
mal Bohlenenden absplittern, hat dies keine
negativen konstruktiven Auswirkungen und kann
leicht mit etwas Leim repariert werden.
3.1
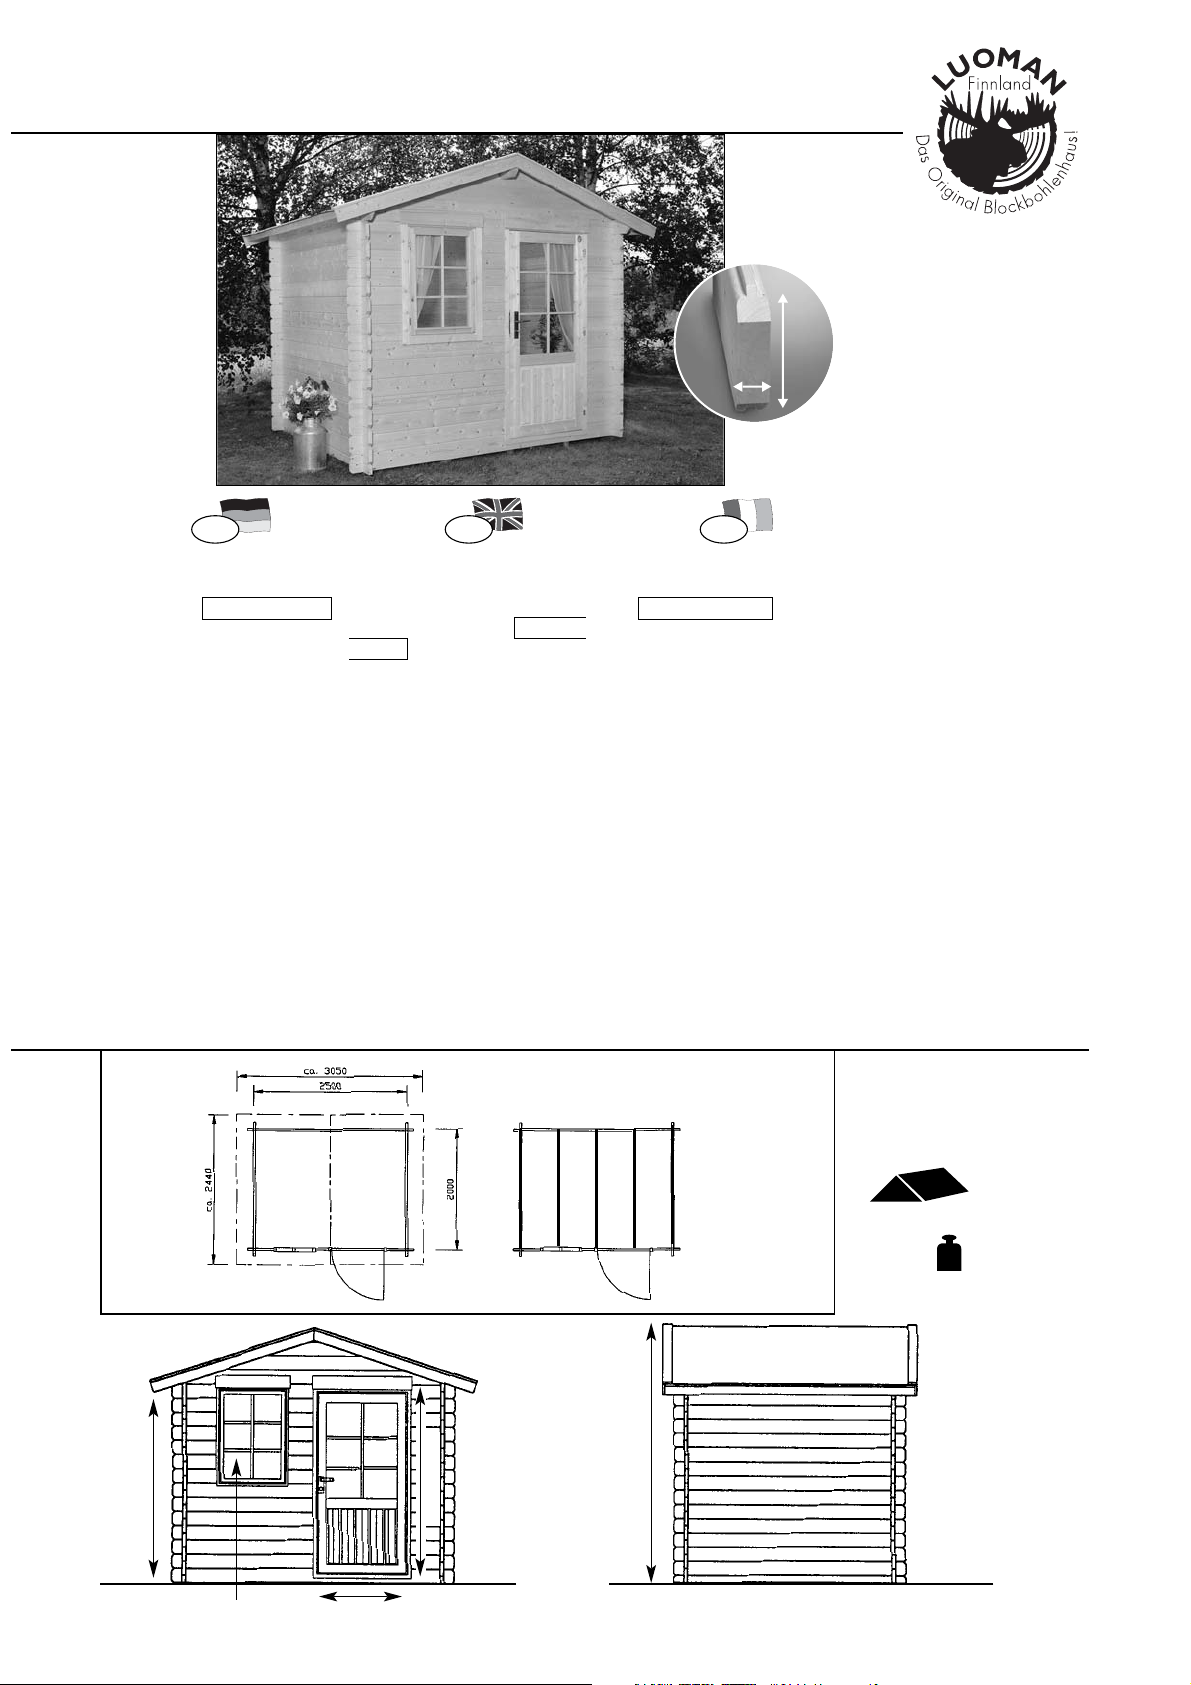
Lillevilla 6
Ordnen Sie die Teile, nach
kompletten Wänden sortiert, mit 1-2 m
Abstand (als Arbeitsraum) um das
Fundament an Zeichnung 2.
Before you start assembling the walls, lay the
5 treated floor-joists about the same
distance apart on top of the footings.
Even though the joists are Teknogrund®treated
it is a good idea to insert a layer of bituminous
felt or foil between the wall timbers and the
joists to prevent rising dampness.
Please see diagram 1 for assembling the
walls. First lock the bottom wall planks
(2 full-width wall boards A1 and B1
for the front and rear walls, and 2 half-
width boards C1 for the side walls)
together. Make sure that the front plank A1
has been cut away to allow the door
to be fitted.
(A rubber mallet is of help everywhere in the
assembly process. To avoid damage, never
bang the timbers directly with the head
of the mallet – we have enclosed wooden
blocks (marked with an "X") to be placed on
the planks for protection purposes – the ends
of the timbers protruding at the corners require
particular care, to prevent the wood from
splitting). However, if they happen to split or
crack it has no negative constructional effects
and cracks can be glued later.
Arrange all the parts for each wall on
either side of the foundations, leaving
1–2 m working space. See diagram 2.
Montage des murs...
Avant de commencer à monter les murs, posez
sur votre fondation les 5 poutres
traitées à intervalles réguliers.
Les poutres sont traitées avec un produit appelé
Teknogrund®, pourtant il est recommandé par
sécurité de mettre une couche de feuille bitumée
entre les madriers et les poutres de fondation
pour empêcher que l'humidité ne remonte.
Pour le montage des murs, reportez-vous au
schéma 1. Assemblez d'abord les
madriers inférieurs (2 madriers A1 et B1
entiers pour les murs avant et arrière
ainsi que 2 demi-madriers C1 pour les
murs latéraux). Attention: le madrier de mur
avant A1 a une découpe pour la porte.
Pour tout le montage, utilisez un maillet en caou-
tchouc. Ne tapez jamais directement sur
les languettes pour éviter de les endomma-
ger – Nous avons joint à la livraison des cales
de bois (marquage "X") que vous intercalerez
pour éviter les marques du maillet. Faites atten-
tion aussi aux extrêmités et angles des madriers
pour éviter que le bois ne se fende!
Cherchez les pièces qui forment
un mur complet et disposez-les
à 1-2 m autour de la fondation.
Voir schéma 2.
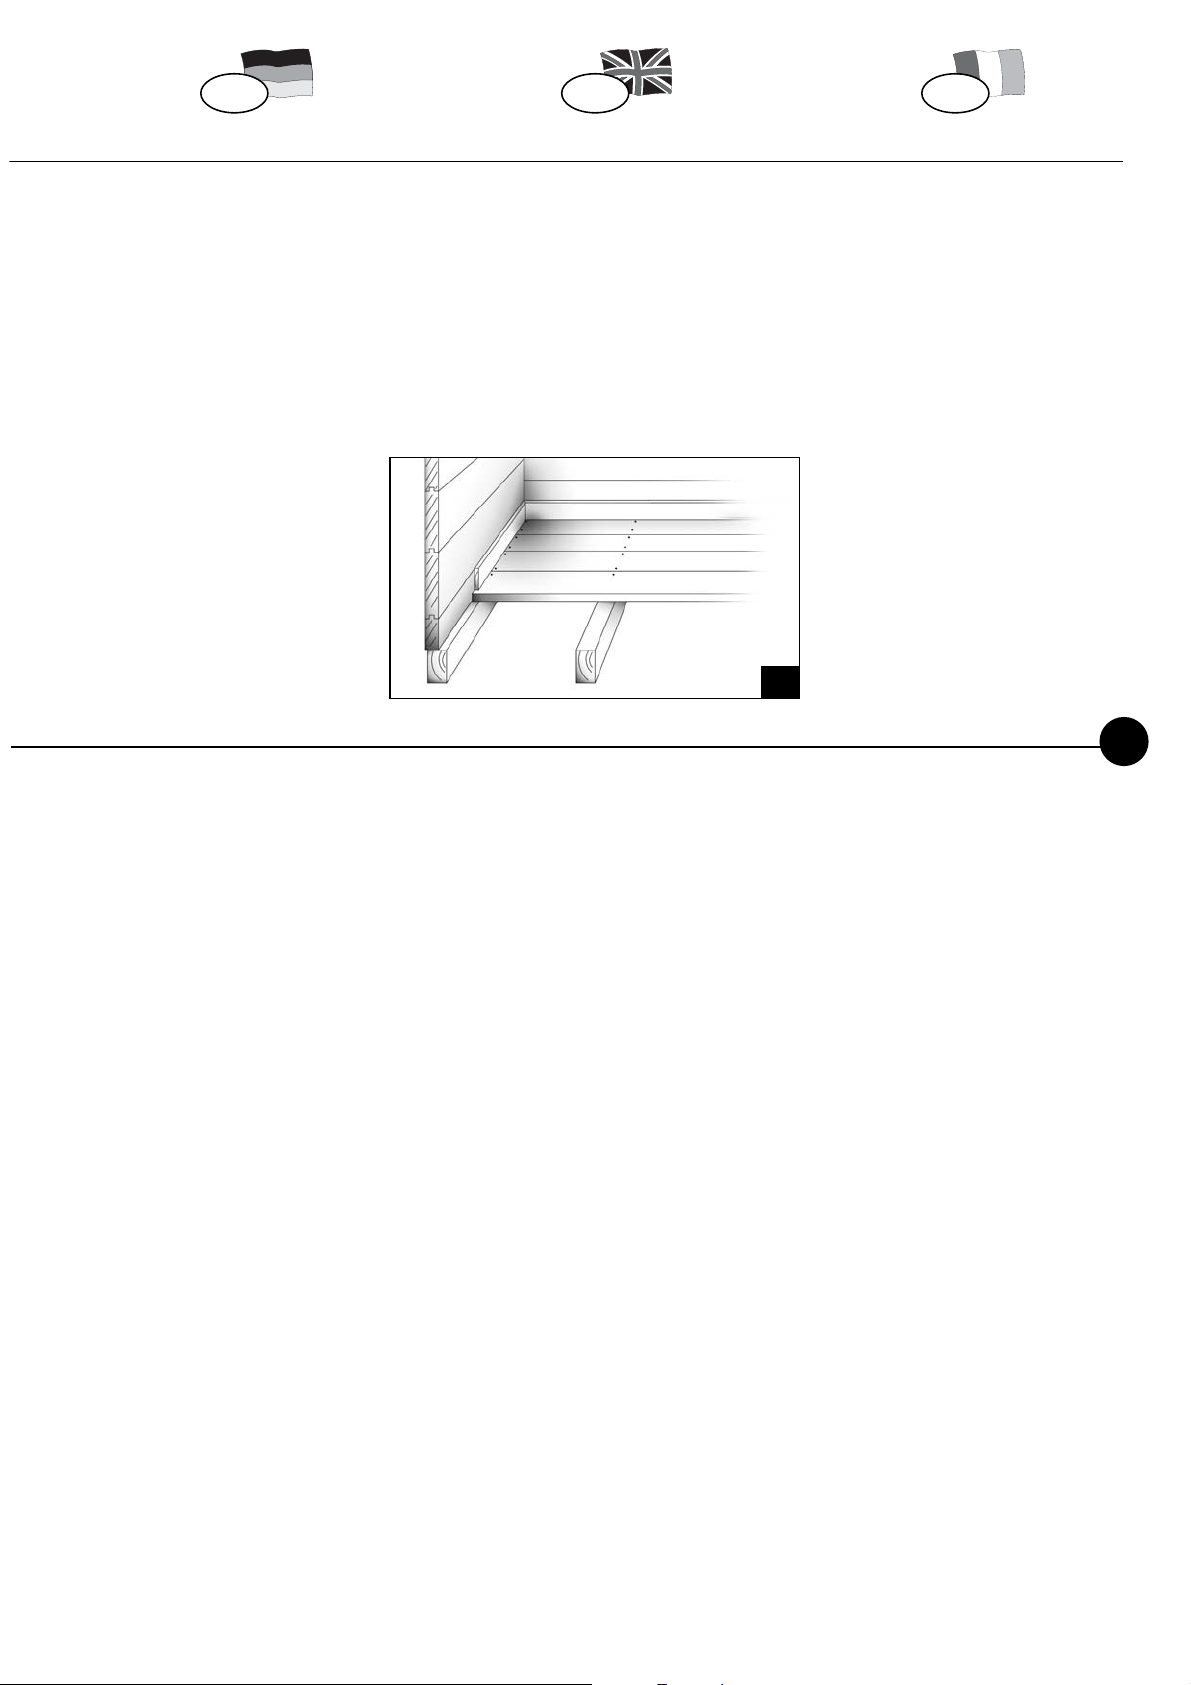
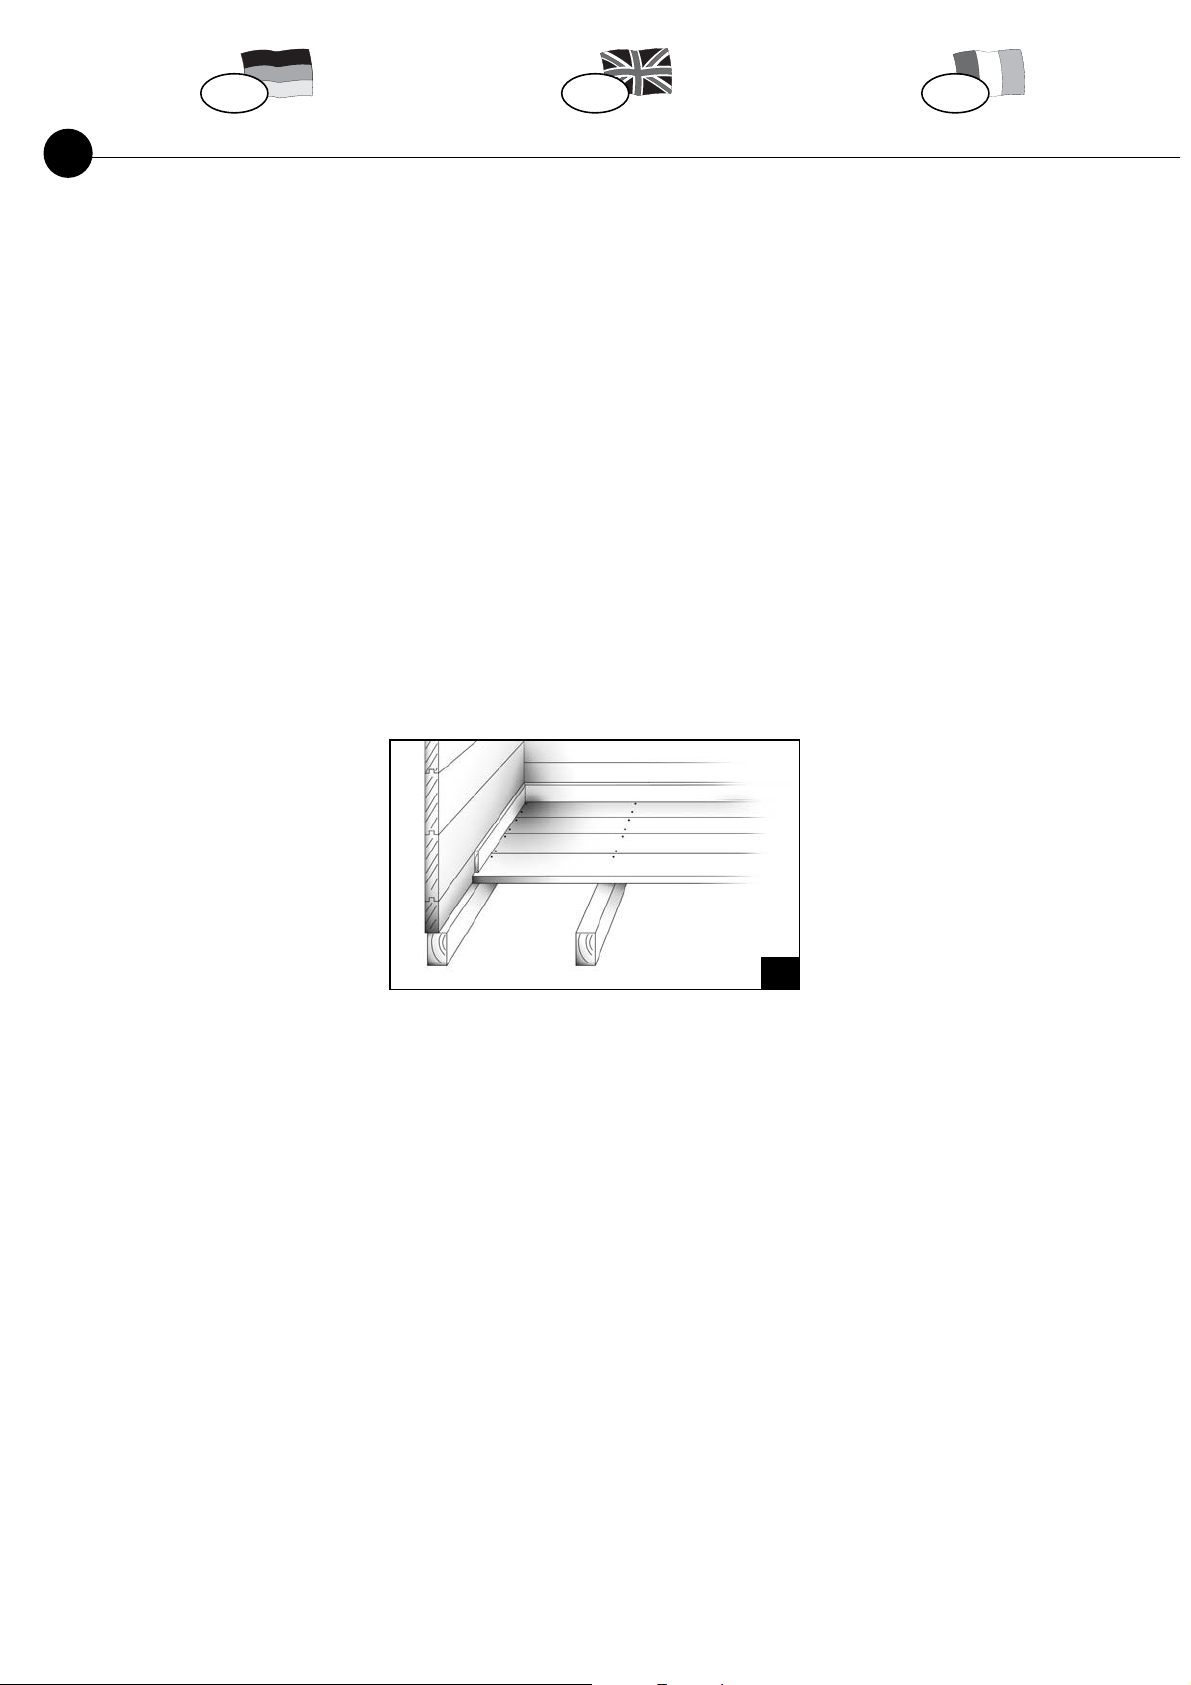
Diese erste Bohlenlage in den Eckfügungen auf
den Fundamentbalken verschrauben oder ver-
nageln (hier bitte unbedingt vorbohren!)
Zeichnung 4.
Dieser ‘Rahmen’ gibt Ihnen die Größe
des Hauses vor und so können Sie die
Fundamenthölzer leicht mit gleich großen
Abständen zueinander ausrichten – hier-
bei unbedingt auf Rechtwinkligkeit der
Wände achten!
Screw or nail this first row of timbers to the
pedestal beams at the corner joints (making
sure to drill the holes first!). See diagram 4.
This "frame" shows the size of the cabin,
easier to space the joists the same distance
apart – at this stage it is important to
make sure that the walls are exactly at
right angles to each other!
Fixez à l'aide des vis et clous (en ayant préala-
blement percé des trous!) ce premier étage de
madriers dans les encoignures sur les poutres de
fondation. Voir schéma 4.
Ce "cadre" vous donne une idée de la
grandeur du chalet. Il est plus facile
maintenant de disposer les poutres de
fondation à intervalles réguliers – Faites
attention que les angles des murs
soient bien à angle droit!
6230206
DGB F