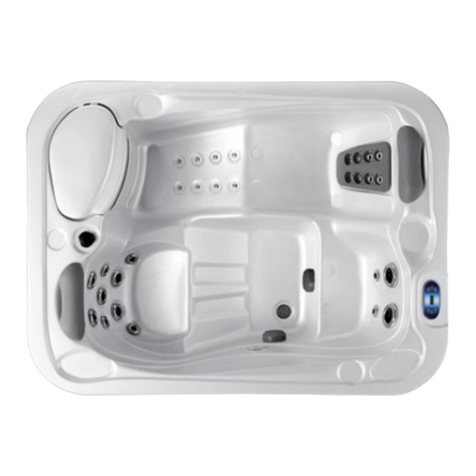
Luxury Spas Elite Series User manual

Owners Manual
Elite Series
Congratulations On Your New Spa!
Luxury Spa USA
Page 1
Call us at 866-220-7405

Table of Contents
Safety Informa�on ................................................................................................2
Safety Instruc�ons ...............................................................................................3
Preparing For your New Spa ..................................................................................5
Spa Models + Electrical Requirements .................................................................6
Electrical Install....................................................................................................7
Equipment Panel Removal ...................................................................................8
Wiring Diagram ...................................................................................................9
Spa Features .....................................................................................................10
Water Quality and Maintenance .........................................................................11
Tes�ng and adjus�ng water chemistry ..............................................................11
Filter removal and cleaning................................................................................12
Maintenance schedule ........................................................................................13
Draining and cleaning your spa ..........................................................................14
Vaca�on Care.....................................................................................................15
Chemical Safety .................................................................................................15
Filter Replacement ............................................................................................16
Opera�ng Instruc�ons ........................................................................................17
Elite Series Display Guide ..................................................................................18
Warranty Cer�ficate . ...................................................................................... 26
Luxury Spa USA
Page 2
Call us at 866-220-7405

Important Safety Instructions and Warnin s
Warning: Children should not use
spas or hot tubs without adult supervi-
sion.
Avertissement: Ne pas laisser les enfants
utiliser une cuve de relaxation sans surveillance.
Warning: Do not use spas or hot tubs
unless all suction guards are installed to
prevent body and hair entrapment.
Avertissement: Pour éviter que les cheveux
ou une partie du corps puissent étre aspirés, ne
pas utiliser une cuve de relaxation si les grilles
de prise d’aspiration ne sont pas poutes en
place.
Warning: People using medications
and/or having an adverse medical his-
tory should consult a physician before
using spa or hot tub.
Avertissement: Les personnes qui prennet
des medicaments ou ont des problemes de
sante devraient consulter un medicin avant d’
utiliser une cuve de relaxation.
Warning: People with infectious dis-
eases should not use a spa or hot tub.
Avertissement: les personnes at-
teintes de maladies infectieuses ne devraient
pas utiliser une cuve de relaxation.
Warning: To avoid injury, exercise
care when entering or exiting the spa
or hot tub.
Avertissement: Pour éviter des blessures,
user de prudence en entrant dans une cuve de
relaxation en sortant.
Warning: Do not use drugs or alcohol
before or during the use of a spa or
hot tub, to avoid unconsciousness and
possible drowning.
Avertissement: Pour éviter l’évanouissement
et la noyade éventuelle, ne prendre ni drogue ni
alcool avant d’utiliser une cuve de relaxation ni
quand on s’y trouve.
Warning: Pregnant or possibly preg-
nant women should consult a physician
before using a spa or hot tub.
Avertissement: Les femmes enceintes, que
leur grossesse soit confirmée ou non, devraient
consulter un médecin avant d’utiliser une.
Warning: Water temperature in ex-
cess of 38°C may be injurious to your
health.
Avertissement: Il peut etre dangereux pour la
sante de se plonger dans de l’eau a plus de
38°C.
Warning: Before entering the spa or
hot tub, measure the water tempera-
ture with an accurate thermometer.
Avertissement: Avant d’utiliser une cuve de
relaxation mesurer la température de l’eau á
l’aide d’un thermométre précis.
Warning: Do not use a spa or hot tub
immediately following strenuous exer-
cise.
Avertissement: Ne pas utiliser une cuve de
relaxation immédiatement aprés un exercise
fatigant.
SAVE THESE INSTRUCTIONSNS
READ AND FOLLOW ALL INSTRUCTIONSNS
To reduce the risk of injury, do not permit children to use this
product unless they are closely supervised at all times.
!
!
!
!
!
!
!
!
!
!
Luxury Spa USA
Page 3
Call us at 866-220-7405

Important Safety Instructions and Warnin s
Warning: Prolonged immersion in a
spa or hot tub may be injurious to your
health.
Avertissement: L’utilisation prolongee d’ une
cuve de relaxation peut etre dangereuse pour la
sante.
Warning: Do not permit or use elec-
tric appliances (such as a light, tele-
phone, radio or television) within 1.5
meters of spa or hot tub.
Avertissement: Ne pas placer d’appareil élec-
trique (luminaire, téléphone, radio, téléviseur,
etc.) á moins de 1.5 meters de cette cuve de
relaxation.
Caution: Maintain water chemistry in
accordance with the manufacturer’s in-
structions.
Attention: La teneur de l’eau en matiéres dis-
soutes doit étre conforme aux directives du
fabricant.
Caution: In order to avoid a hazard
due to inadvertent resetting of the
thermal cut-out, this appliance must
not be supplied through an external switching
device, such as a timer, or connected to a cir-
duit that is regularly switched on and off by the
utility.
HYPERTHERMIA
Hyperthermia occurs when the inter-
nal temperature of the body reaches a
level several degrees above the normal body
temperature of 37°C. The symptoms of hyper-
thermia include:
1) Unawareness of impending hazard;
2) Failure to perceive heat;
3) Failure to recognize the need to exit the spa
or hot tub;
4) Physical inability to exit the spa or hot tub;
5) Fetal damage in pregnant women; and
6) Unconsciousness and resulting in the danger
of drowning.
Warning: The use of alcohol or drugs
can greatly increase the risk of fatal hy-
perthermia in hot tubs or spas.
Avertissement: La consommation d’ alcool
ou de drogue augmente considerablement.
Warning: The appliance is not to be
used by persons (including children)
with reduced physical, sensory or men-
tal capabilities, or lack of experience and knowl-
edge, unless they have been given supervision
or instruction.
READ AND FOLLOW ALL INSTRUCTIONS
SAVE THESE INSTRUCTIONS
To reduce the risk of injury, do not permit children to use this
product unless they are closely supervised at all times.
!!
!
!
!
!
!
Luxury Spa USA
Page 4
Call us at 866-220-7405

Permitting
Most cities and county's require permits for exte-
rior construction and electrical circuits. In addition,
some communities have codes requiring residential
barriers such as fencing and/or self-closing gates on
property to prevent unsupervised access to the
property by children. Your local inspections office
can provide information on which permits may be
required and how to ob-tain them prior to the
delivery of your spa.
Prepare a Good Foundation
Damage caused by an inadequate or improper
foundation is not covered by the warranty. The
spa owner is responsible for providing a proper
foundation. Place the spa on a solid, level founda-
tion. If you are installing the spa indoors (not rec-
ommended), pay close attention to the flooring
beneath it. Choose flooring that will not be dam-
aged or stained. If you are installing your spa on an
elevated wood deck or other structure, consult a
structural engineer or a contractor to ensure the
structure will support the weight of 150 pounds
per square foot. An adequate drainage system has
to be provided to deal with overflow water.
Plan the Best Location
SAFETY FIRST
Do not place your spa within 10 feet (3 m)
of overhead power lines.
Consider Spa Use
How you intend to use your spa will help you
determine where you should position it. For exam-
ple, will you use your spa for recreational or thera-
peutic purposes? If your spa is mainly used for family
recreation, be sure to leave plenty of room around
it for activity. If you will use it for relaxation and
therapy, you will probably want to create a specific
mood around it.
Climate, Privacy and View
Place the spa near a house entry if you live in a
snowy or rainy environment so you have a place to
comfortably change clothes. Consider seasonal
changes, too. Bare trees don’t provide much for
privacy and don’t forget to think of your neighbors’
view of you, and your view of your neighbors.
Keep your Spa Clean
In planning your spa’s location, consider a location
where there is a clean path to and from the house.
Use a mat at the spa’s entrance to encourage
bathers to clean their feet before entering your spa.
Allow for Service Access
If you are installing your spa near a wall or with any
type of structure on the outside, such as a gazebo,
remember to allow a minimum of 18" access for
service.
!
Preparing for your New Spa
Luxury Spa USA
Page 5
Call us at 866-220-7405

Luxury Spa's Electrical Components
*Note: A GFCI circuit is required. Using the suggested size will
ensure proper operation. Call Customer Service for any
additional questions 866-220-7405.
Luxury Spa USA
Page 6
Call us at 866-220-7405
299

GFCI and Wiring Requirements
•The power supplied to the spa must be on a dedi-
cated GFCI protected circuit as required by ANSI/
NFPA 70 with no other appliances or lights sharing
the power.
•Use copper wire with THHN insulation. Do not use
aluminum wire.
•When NEC requires the use of wires larger than #6
AWG, install a junction box near the spa and use #6
AWG wire between the junction box and the spa.
•Wire runs over 85 feet must increase wire gauge to
the next lower number.
•Means for disconnection must be incorporated in
the fixed wiring in accordance with the wiring rules.
•All Luxury Spa Hot Tubs are configured with a 3-
wire power connection; L1(HOT), L2(HOT), and
Ground. There is no neutral. If you have a 4-wire
power supply to the hot tub you must cap the neutral
wire inside the hot tub panel. There must be a GFCI
disconnect breaker panel at least 5' from the spa.
Your GFCI Neutral wire will be connected to bus bar
inside disconnect panel.
Testing the GFCI Breaker
Test the GFCI breaker prior to first use and
periodi-cally when the spa is powered. To test
the GFCI breaker follow these instructions:
1. With spa operating, press the TEST button on the
GFCI. The GFCI will trip and the spa will shut off.
2. Reset the GFCI breaker by switching the breaker
to the full OFF position, wait a moment, then turn
the breaker back on. The spa should have power
again.
Point of Entry for Electric Service
Luxury Spas Hot Tubs are equipped with a
designated entry port for the Spa power
supply (refer to photo)
240 Volt Electrical Installation
Warning:
The electrical circuit must be installed by an
electrical contractor and approved by a local building
or electrical inspector.
Failure to comply with state and local codes
may result in fire or personal injury and will be the
sole responsibility of the spa owner.
Improper installations present hazards which
can result in personal injury or property damage and
void the warranty on the spa.
3-Wire System
All Luxury Spa Hot Tubs are configured with a
3-wire power connection; L1(HOT), L2(HOT), and
Ground. There is no neutral. If you have a 4-wire
power supply to the hot tub you must cap the neutral
wire inside the hot tub panel. There must be a GFCI
disconnect breaker panel at least 5' from the spa. Your
GFCI Neutral wire will be connected to bus bar inside
disconnect panel.
Do not remove or adjust dip switches. They are
pre-configured for a 240V Installation.
!
Luxury Spa USA
Page 7
Call us at 866-220-7405

Panel Removal
In order to remove your panel to access your controls and Bluetooth module, remove the screw covers
from the center or sides of the panels. (Arrows shown for reference). Once you’ve removed the screws,
pull outward on the panel to remove it. To reinstall simply reverse your steps making sure to align the
white clips on the backside of your panel. Once aligned press the panel inward to secure and re-attach
your screws.
Luxury Spa USA
Page 8
Call us at 866-220-7405

Prepare for Your New Spa
ON ON ON ON ON
OFF OFF OFF OFF OFF
RED (HOT)
BLACK (HOT)
WHT
GRN
FRONT VIEW OF TYPICAL G.F.C.I.
G.F.C.I. Breaker Box
House Breaker Box
GRN (GROUND)
GRN (GROUND)
GRN (GROUND)
WHT (NEUTRAL)
RED (HOT)
RED (HOT)
BLK (HOT)
BLK (HOT)
WHT
WHT
ON
OFF
LOAD
OUT
(BLK)
LOAD
OUT
(RED)
RED (HOT)
FROM SPA
BLK (HOT)
FROM SPA
WHT
FROM SPA
WHT
BOTTOM VIEW OF
TYPICAL G.F.C.I.
ON
OFF
L1
L2
GRND
THREE WIRE
& GROUND
THESE WIRES GO
TO THE PC BOARD
CONTROL CIRCUIT
240V
GFCI Wiring Diagram (North America 240V 60hZ)
WARNING:
The electrical circuit must be installed by an electrical con-
tractor and approved by a local building or electrical inspec-
tor. Failure to comply with state and local codes may result in fire or
personal injury and will be the sole responsibility of the spa owner.
Customer must provide a disconnect in the fixed wiring.
Improper installations present hazards which can result in per-
sonal injury or property damage and void the warranty on the spa.
!
IF THE NEUTRAL WIRE FROM THE SPA
IS NOT CONNECTED DIRECTLY INTO
THE LOAD NEUTRAL LUG ON THE GFCI
BREAKER, THE BREAKER WILL TRIP
CONSTANTLY. IF YOUR GFCI BREAKER
DOES NOT HAVE A LOAD NEUTRAL
LUG AND PIGTAIL WIRE, IT CANNOT
BE USED WITH THE SPA.
Luxury Spa USA
Page 9
Call us at 866-220-7405

1.) All electronic features of the spa except
the Bluetooth are controlled by the control
pad.
SPA FEATURES
2 ) Air adjuster handles let you adjust the
amount of pressure at the designated jets by
turning the handle left or right.
3) Water diversion handles turn the jet
pressure up or down at each seating location
by turning the handle left or right.
4) Hydromax rotating jets provide intense
massage for deep tissue penetration.
11) Chroma therapy lighting system provides up to 7 color
changing LED mood lights for relaxation and ambiance.
12) Pillow - All models come with one or more comfortable
headrests.
13) Our cores are engineered and molded (not drilled
PVC) which allows for the even flow of water through the
entire cartridge.
14) Bluetooth Connection- Spa models equipped with a
Bluetooth speaker system require a 4-digit PIN code to
connect to your smartphone. The name of the
Bluetooth system on your spa is BT40. The 4-digit PIN
code to access the BT40 Bluetooth is displayed on the
outside of the Bluetooth module. (see photo).
15) The water level gauge shows the proper water level
for your hot tub.
5) Hydromax adjustable directional jets
provide targeted massage to pinpoint specific
areas of need.
6) Hydromax power-stream jets are
positioned throughout the lower back and leg
areas for pinpoint massage and muscle trigger
points.
7) Hydromax pulsating jets provide a
soothing stream of water for a
complete foot massage.
Luxury Spa USA
Page 10
Call us at 866-220-7405
8) Air Bubble jets produce thousands
of bubbles that drift around your body
enhancing the sensation of float-ability
while putting you in a state of
relaxation.
9) Spa Drain allows you to drain the spa quickly for changing
out the water.
10) Water intake grates allow water circulation through
the motor and heater and out through the jets.

Water Quality and Maintenance
Testing and Adjusting Water Chemistry
-Before using your spa, it is important to test the water so that it maintains the correct chemical
balance. This will ensure water quality, clarity and help keep your spa equipment in good condition.
- You will need to test and adjust the chemical balance of your spa water. Although this is not difficult,
it needs to be done regularly.
There are 2 types of testing methods:
- The reagent test kit is a method which provides a high level of accuracy. It is available in either
liquid or tablet form.
- Test strips are a convenient testing method com-monly used by spa owners.
-You can purchase the test kits and chemicals locally or from our website @
www.luxuryspasusa.com
Balancing the Total Alkalinity
- Total alkalinity (TA) is the measure of the total levels of carbonates, bicarbonates, hydroxides, and
other alkaline substances in the water. TA can be considered a pH buffer. It is the measure of the
ability of the water to resist changes in pH level.
-The recommended total alkalinity is 80 - 120 ppm.
- If the TA is too low, the pH level will fluctuate widely from high to low. Low TA can be corrected by
adding alkalinity increaser.
- If the TA is too high, the pH level will tend to be too high and may be difficult to bring down. High
TA can be corrected by adding pH decreaser.
- When the TA is balanced, it normally remains stable, although adding water with high or low
alkalinity will raise or lower the TA level.
Balancing the Calcium Hardness
- Calcium hardness (CH) is a measure of the total amount of dissolved calcium in the water. Calcium
helps control the corrosive nature of the spa’s water and is why soft water is not recommended. The
low calcium content of soft water is very corrosive to the equipment and can cause staining of the spa
shell.
-The recommended calcium hardness is
150 - 200 ppm.
- If the CH is too low, add liquid hardness increaser.
- If the CH is too high, dilute the spa water with soft water or, if this is not available, add stain and
scale defense.
-When the CH is balanced, it normally remains sta-ble, although adding soft water or very hard water will raise
or lower the CH level.
Luxury Spa USA
Page 11
Call us at 866-220-7405

Balancing the pH Level
- The pH level is the measure of the balance
between acidity and alkalinity.
-The recommended pH is 7.2 - 7.6.
- If the pH is too low, it can cause corrosion of
metal fixtures and the heating element.
- If the pH is too high, it can cause scaling by
allowing metals or minerals to form deposits and
stain spa surfaces.
Ozone
Ozone is a natural purifier. Chemically known as
O3, it is produced from simple oxygen molecules
in our atmosphere. Ozone is produced in nature
from lightning during electrical storms and from
ultravio-let rays from the sun. It forms our
protective ozone layer. Your spa’s ozone generator
is designed to du-plicate this natural sanitizer.
Ozone breaks down and oxidizes oils, suntan
lotions, sweat, urea, etc. from spa water more
effectively than commercial oxidizers. Ozone
works with chlorine or bromine systems in your
spa to destroy bacteria and viruses and will do so
more effectively. Ozone only leaves simple oxygen
in the water as a by-product.
If your spa is equipped with an ozone generator it
will automatically produce ozone, but it cannot be
used as the sole means of maintaining safe spa
water. You must select and use a spa chemical
sani-tizer in addition to your ozone generator. The
ozone generator is a wearable, non-warranty item
and it needs to be replaced approximately every 2
years.
Too alkaline,
causes scaling
8.2
8.0
7.8
Ideal balance
7.6
7.4
7.2
Too acidic,
causes corrosion.
7.0
6.8
6.6
Decre se the
pH level.
Incre se the
pH level.
Sanitation
You will need to decide which chemical sanitizer
you wish to use regardless of the presence of an
ozonator. Spa owners with an ozonator still need to
use a chemical sanitizer. Sanitizers kill bacteria and
viruses and keep the water clean. n A low sanitizer
level will allow microbes to grow quickly in the spa
water. Use either bromine or chlorine as your
sanitizer or a non chlorine/non bromine sanitizer.
All work well when maintained regularly. Consult
your spa dealer for the right decision with regards
to your lifestyle and spa usage.
NOTE: This manual will cover general chlorine
sanitation only.
- Do not use Tri-chor tablets or liquid chlorine.
- Once a week, check the chlorine level using either
a test strip or a reagent kit. Refer to product for the
ideal range.
-Monitor chlorine levels of the spa water weekly.
Note that chlorine dissipation rate will be faster at
higher water temperatures and slower at lower
temperatures.
- When you add chlorine, make sure no bathers are
in the spa, open all jets and run the spa at high speed
with the cover open for at least 30 minutes.
If Using Bromine as a Sanitizer
-Bromine is a very effective sanitizer that produces
low chemical odors. Unlike chlorine, it can break
down bacteria and other impurities to a safe level
with a low burn-out rate.
Shocking the Water
- In addition to using a chemical sanitizer, you may
need to shock the water. Shocking the water helps
remove burned-out chemicals, bacteria, and other
organic material from your spa’s water and improves
your sanitizer’s effectiveness.
- Do not use chlorinating shock, which will damage
your spa’sjjets and pump seals. Only use an oxidizer
shock. It is an easy way to maintain chemical plans.
- For best results use the directions below.
Add oxidizer shock:
- If sanitizer level temporarily reads low
- After heavy bather loads
- If water has a strong odor
Spa must be running with all of the jets on
high for 30 minutes with the cover open. If
necessary, repeat oxidizer shock in 30
minute intervals.
If Using Chlorine as a Sanitizer
Luxury Spa USA
Page 12
Call us at 866-220-7405

Maintainin Spa Water Quality
The manufacturer does hereby claim
no responsibility or liability for use of
and quantities of the chemicals used.
Read and follow all label instructions.
Filtration
Cleaning your filter regularly is the easiest and most
effective single thing you can do to keep your water
clear. A clogged or dirty filter will cause the heater
and pump to work harder than they need to, possi-
bly causing them to fail. The spa’s heating system will
only function with the proper amount of water flow
through the system.
Filter Cleaning
The filter is the part of your spa that removes the
debris from the water and needs to be cleaned on a
regular basis to maximize your spa’s filtering per-
formance and heating efficiency.
In addition to spraying off the filter weekly to re-
move surface debris, your filter should be deep
cleaned periodically to dissolve scale and particles
that get lodged deep within the filter fibers and im-
pede the filtration process. Even if the filter looks
clean, scale and particles can clog the fibers and
prevent water from flowing through the filter
resulting in the most common spa problem – no
heat, caused by a dirty filter.
We recommend you clean your filter once a month
and replace it once every 6 months or as necessary.
- Remove the filter with the spa off.
- Place the dirty filter into a bucket of water deep
enough to cover the filter. Add 8 oz of liquid filter
cleaner to the bucket of water.
- Soak the filter for a minimum of 24 hours.
- Spray pleats of the filter with a water hose.
- Reinstall the filter.
Tip: Keep a spare filter to use in the spa while the
dirty filter is being deep cleaned.
!Maintenance Schedule
Each time you refill the spa
• Follow the Filling and Starting procedure,
sections 7-10 on page 12.
Prior to each use
•Test the spa water using either test strips
or a reagent test kit. Adjust chemical
levels as necessary.
Once a week
•Test the spa water using either test strips
or a reagent test kit. Adjust chemical
levels as necessary.
Once a month
• Deep clean your spa’s filter.
• Apply spa vinyl cleaner/protectant to vinyl
spa soft cover and pillows.
Every 3-4 months
• Drain and clean your spa with non-
abrasive cleaner.
• Polish shell with acrylic surface cleaner.
• Follow the Filling and Starting procedure,
sections 7-10 on page 12.
Once a year*
• Replace filter cartridge(s) if the pleats
appear frayed or damaged.
*May require more frequent replacement, depending on
use.
Every 2 years
• Replace your ozonator.
Ozonator Operation
Your Luxury Spas Hot Tub is equipped with an
ozonator to help sanitize the water. The ozonator
also helps break down body oils and other
biodegradable materials to keep the water pure
and clean. The ozonator works automatically
when the circulation pump is on. We recommend
changing the ozonator every 2-3 years. Your
ozonator is located inside the hot tub panel
corner. >
Luxury Spa USA
Page 13
Call us at 866-220-7405

1. Turn off the power at the breaker.
2. Remove filter.
3. Your drain valve is located outside
corner of the Service Access Side.
4. Rotate the cap and push until you
feel it give, then pull the plug one
notch out.
5. Once the drain plug is external,
hook up the female end of the
garden hose.
6. Rotate the drain plug with hose
connected while applying a pulling
pressure to release the water
while hose is attached.
7. Let spa drain completely, then
remove garden hose.
8. Apply the cap, and rotate the drain
while applying a pushing pressure
to lock the flow of the drain when
ready to re-fill.
Wter dr ined from your sp is s fe to dispose of in
your y rd, septic system or in dr in. Follow ll loc l/mu-
nicip l codes nd regul tions for dispos l.
Cleaning Your Spa
Acrylic Spa Shell
Each time you drain your spa, before you refill it you
should clean your spa shell with a low detergent,
non-abrasive cleaner specifically formulated to clean
the spa without damaging its acrylic finish.
1. Spray cleaner directly to the spa’s finish.
2. Wipe clean with a soft cloth.
3. Repeat on heavily calcified areas.
4. Wipe spa thoroughly with a wet sponge, rinsing
often in a bucket of clean water.
5. Allow the spa to dry completely.
IMPORTANT: Do not use any of these products on spas full
of water. Only apply to clean, cool, dry surfaces. In-correct
product usage may cause water issues.
Pillow Care and Removal
You can remove the pillows for cleaning and
mainte-nance quickly and easily. This method works
for all types of pillows.
1. Your spa pillows should be removed routinely for
cleaning and maintenance to ensure they stay in good
condition and do not deteriorate. If you don’t plan
on using your hot tub for a while we recommend
removing and storing the pillows.
2. You can remove any Luxury Spas pillow by gently
pulling the edges away from the hot tub. The pillow
will release from the mounting clip on each side.
They pillow can be re-installed by pressing the pillow
back over top or side of the clips based on the pillow
type.
3. Your spa pillows can be cleaned with any non-
abrasive spa pillow cleanser and conditioner.
Draining Your Spa
Your spa should be drained every 3-4 months, and
refilled with fresh tap water. The following is the rec-
ommended method for draining your spa.
Luxury Spa USA
Page 14
Call us at 866-220-7405

WARNING!
Never mix chemicals together.
Do not allow chemicals to come in
contact with skin, eyes or clothing.
Remove and wash clothing that may
have been exposed to chemical contact prior
to wearing them again.
Inhaling or ingesting chemicals will
cause serious injury, sickness, or even
death.
Chemicals must be stored com-
pletely out of the reach of children in
an area that is well vented, cool, and
dry. Failure to provide a proper area for
chemical storage may result in serious injury,
sickness, fire explosion and even death. Do
not store your chemicals inside the equip-
ment area of your spa.
!
!
!
!
Vacation Care
You can leave your spa unattended for up to two
weeks if you follow these instructions.
- ALWAYS lock your cover using the cover locks if
you plan to be away from home and the spa is filled
with water.
- Follow the water quality instructions starting on
page 20.
- Shock the water (add either chlorine or bromine
sanitizer).
- When you return, check water chemistry and ad-
just accordingly.
-If you will not be using your spa for longer
than 14 days and a spa maintenance service is
not available, we strongly recommend you
drain and winterize your spa.
WARNING!
Never add chemicals to your spa
while bathers are in the spa!
Do not exceed chemical dosages as
recommended on chemical bottles
and packages.
Never change chemical brands or
types without completely draining,
flushing and thoroughly cleaning the
spa and cover first.
!
!
!
Chemical Safety
Read and follow all printed instructions listed on
bottles and packages. Failure to follow chemical di-
rections may result in serious injury, sickness, or
even death.
Add chemicals to the center of the spa with the
pump running. Make sure the water is heated. Never
add chemicals to cold water, as this will effect chemi-
cal action. Also, never add chemicals directly into the
skimmer.
Luxury Spa USA
Page 15
Call us at 866-220-7405

Filter Replacement Guide
Luxury Spa USA
Page 16
Call us at 866-220-7405

Now that you know
the basics, let us
show you how to set
up your new Luxury
Spa Keypad
Luxury Spa USA
Page 17
Call us at 866-220-7405

Elite Series Display User Guide
LCD Display
Questions? Call 866.220.7405
Luxury Spa USA
Page 18
Call us at 866-220-7405

Spa Operational Modes:
Once the spa is powered on you can press and hold the program button for
three seconds to change the spa’s operational mode.
The spa has three operational modes.
Standard Mode is the default operational mode which allows all functions of the spa to work.
Standard mode should be used when the spa is being occupied. The LCD will display an “N”
at the bottom when in Standard Mode.
Economy Mode is a power saving mode that is used when the spa is not being occupied.
Economy mode uses the pre-programmed heating and water circulation time to maintain the
spa when not in use. Anti-freeze protection is also active while in Economy mode. The LCD
will display an “E” at the bottom when in Economy mode.
Sleeping Mode: While in Sleeping mode, the spa control functions will not be active except
the anti-freezing protection. The anti-freezing protection will turn the heater on automatically
when the temperature drops below 6℃(43℉). Once the water temperature reaches 10℃
(50℉, the heater function will turn off automatically. The LCD will display “D” in Sleeping
mode.
Keypad Buttons:
1Water Pump 1
1.1 When the control system is on, pressing the pump 1 button will turn the pump on.
If the pump is configured as a single-speed pump, pressing this button again will
turn the pump off. Depending on the model, if Pump 1 is configured as a two-speed
pump, pressing this button will change the pump from low speed to high speed and
turn it on and off.
1.2 Pump 1 will automatically shut down after running for 60 minutes.
Luxury Spa USA
Page 19
Call us at 866-220-7405

2Water Pump 2
2.1 When the control system is on, if the spa is equipped with a 2nd pump, you can
press this button to turn the pump on and off. Depending on the model, if Pump 2
is configured as a two-speed pump, pressing this button will change the pump from
low speed to high speed and turn it on and off.
2.2 Pump 2 will automatically shut down after running for 30 minutes.
3Water Pump 3
3.1 When the control system is on, if the spa is equipped with a 3rd pump, you can
press this button to turn the pump on and off. Depending on the model, if Pump 3
is configured as a two-speed pump, pressing this button will change the pump from
low speed to high speed and turn it on and off.
3.2 Pump 3 will automatically shut down after running for 30 minutes.
4Air Bubble Pump
4.1 When the control system is powered on, if the spa is equipped with an air bubble
system, pressing the Air Bubble Pump button will turn the air bubble system on
and off.
4.2 The air bubble pump will automatically shut down after running for 30 minutes.
5Underwater Lamp
5.1 When the control system is on, pressing this button will control the underwater
lamp. Pressing this button for 2 seconds will turn off the lamp. The underwater
lamp will automatically shut down after running for 2 hours.
5.2 There are 2 modes for the underwater lamp. On/Off Mode and Color Changing
Mode. In the ON/OFF mode, pressing the button will turn the lamp on/off.
5.3 In the Color Changing mode, the underwater lamp will change colors automatically
Luxury Spa USA
Page 20
Call us at 866-220-7405
This manual suits for next models
14
Table of contents
Other Luxury Spas Hot Tub manuals
Popular Hot Tub manuals by other brands

PDC spas
PDC spas Vitality SL12s owner's manual

Beachcomber
Beachcomber in.touch 2 Tech book

Intex
Intex PureSpa SJB-HS-10-1 owner's manual

Strong Pools and Spas
Strong Pools and Spas Grand Cayman Spa owner's manual

Jacuzzi
Jacuzzi Bellavista 6 Specifications

Spa Guts
Spa Guts 6200Y Series Owner's operation guide