FIGURE 6b
(6) The unit should be earthed.
(7) Fit the unit onto the back cover and secure: fit a
suitable bulb (not supplied) and secure the top
assembly.
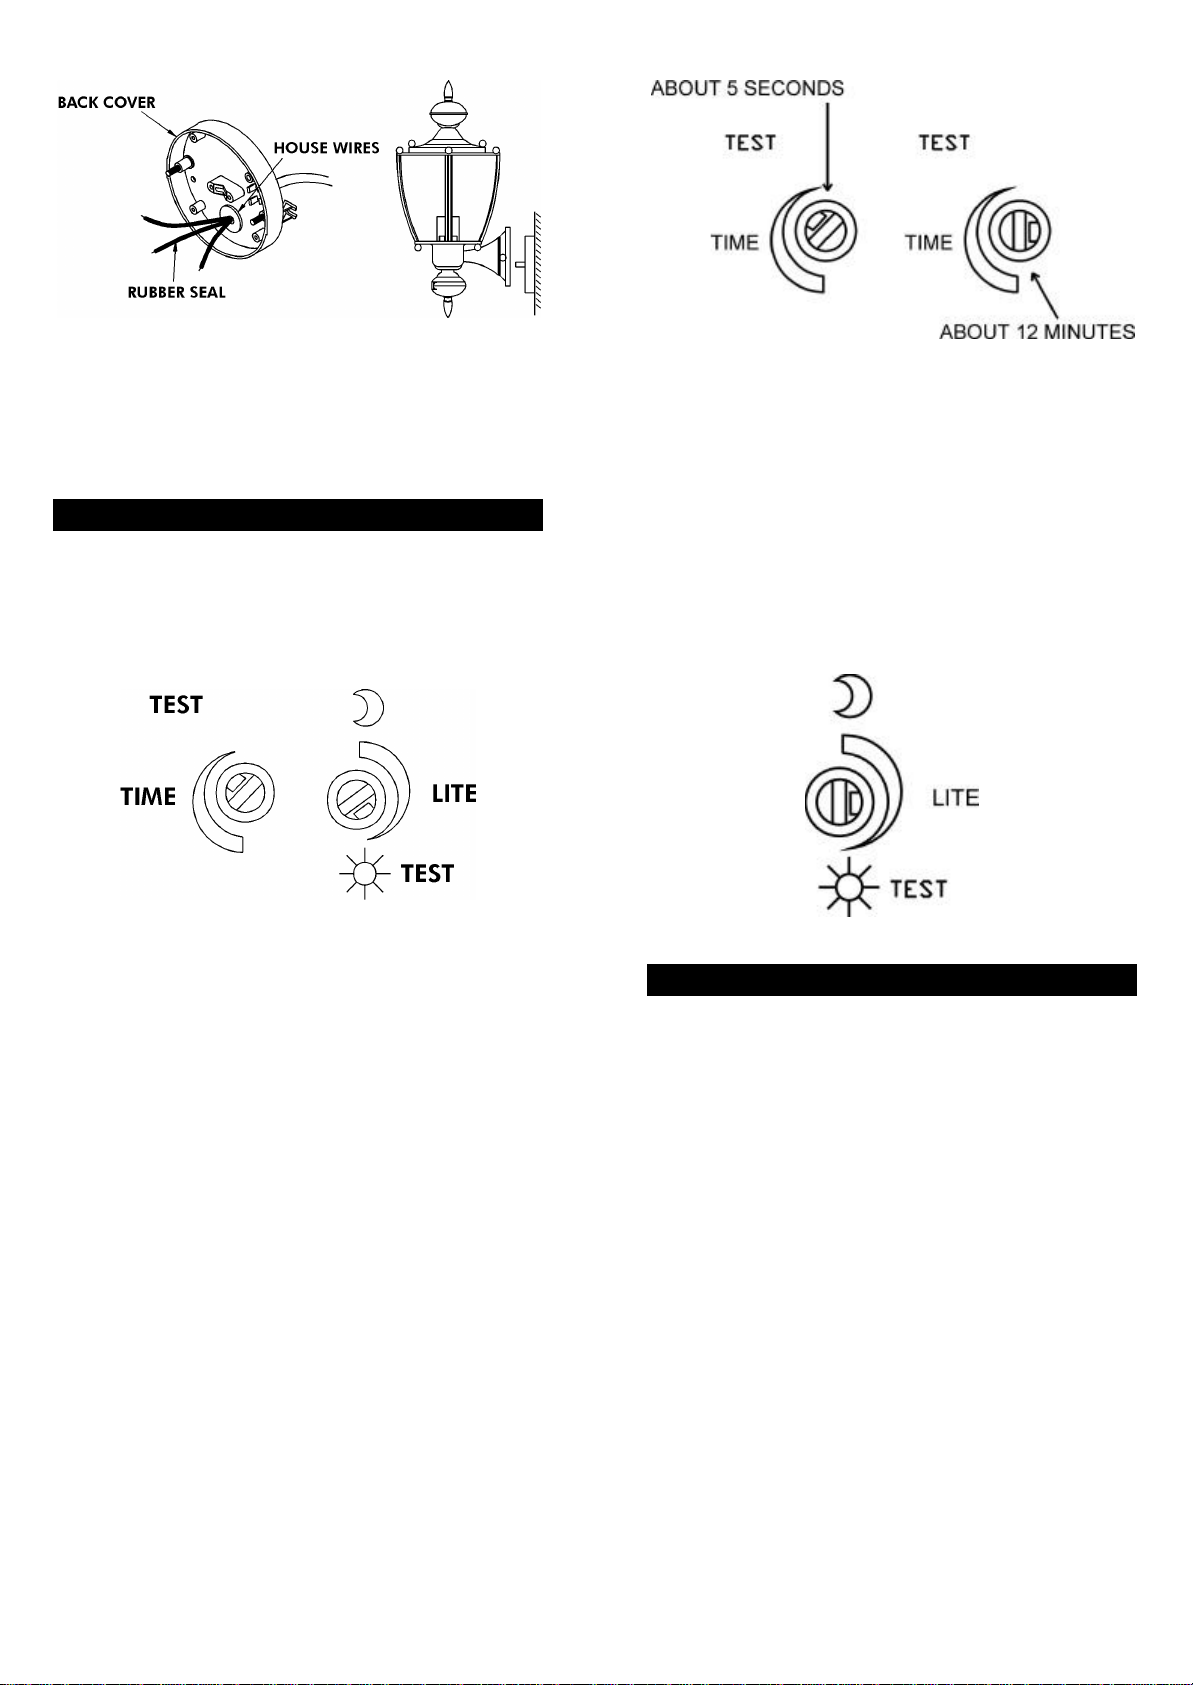
SETTING THE LIGHTING SYSTEM
(1) TEST MODE
lTurn the Motion Sensor Lite control and the
Time control clockwise to the edge –the TEST
position (FIGURE 7).
FIGURE 7
lTurn on the wall switch. The lantern will turn on for
about 1 minute to warm up. Then it turns off.
lWalk through the detection area. The lantern turns
on when you move and turns off when you stop.
Wait for the lantern to turn off before moving again to
test the sensor.
lAdjust the motion sensor to cover the desired
detection area. For a smaller coverage area, point
the sensor down; for a larger coverage area, point
the sensor up.
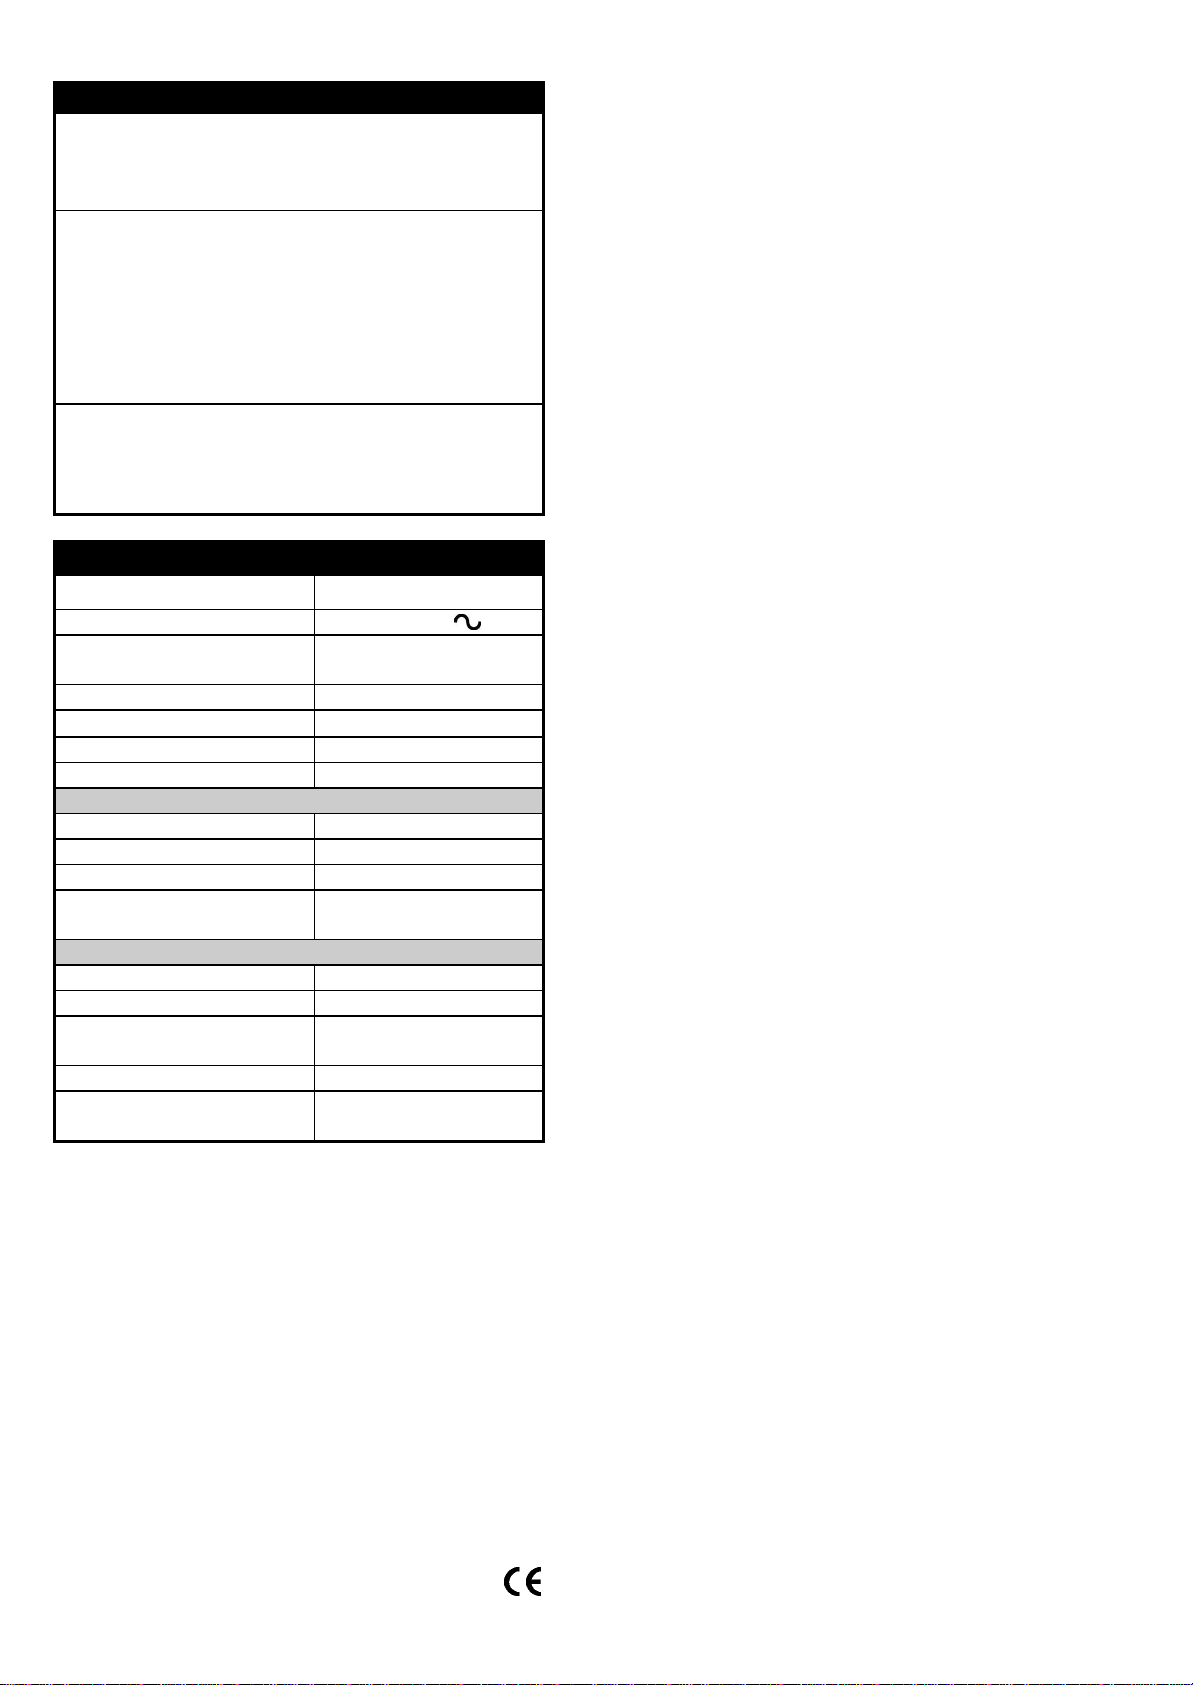
(2) TIME ADJUSTMENT
The TIME adjustment controls how long the lantern will
stay on after the motion has been detected.
Turn the Motion Sensor TIME control knob counter-
clockwise to increase (up to about 12 minutes) how long
the lights stay on or clockwise to decrease (down to
about 5 seconds) the time delay. (FIGURE 8)
4
FIGURE 8
(3) LITE ADJUSTMENT
The LITE adjustment determines at what light level the
lighting system will start operating when you set the
sensor to automatic operation.
Provisionally turn the Motion Sensor LITE control knob to
the edge counter-clockwise at the moon (dusk) position
(FIGURE 9). In this provisional setting mode, the Motion
Sensor remains inactive during daylight. At dusk when
you find it is the LUX level desired for operation, simply
set the LITE control knob to the position which will
become active as daylight declines.
FIGURE 9
OPERATION
By using wall switch to your ES61, you can easily
select one of two modes of operation: automatic
operation and manual override.
(1) AUTOMATIC OPERATION
Turn on the wall switch. When the sensor detects
motion, the lantern automatically turns on. The built-in
photocell turns the sensor off and on according to the
light level selected by the LITE adjustment.
(2) MANUAL OVERRIDE
To keep the lantern on regardless of the motion, you can
override the automatic operation. Turn the wall switch
off and on within 2 seconds.
In Manual Override mode, the lantern will remain on.
Users can also set the motion sensor back to Auto
operation by turning off the wall switch for at least 10
seconds and then turn it back on.
5