M-TI Sanctuary Spa Troubleshooting guide

MTI WHIRLPOOLS
SANCTUARY SPA
Installer: this booklet must be given to
the product owner. Please note important
information below:
Distributor Name
Model #
Manufacturer’s Date
Registration #
OWNER’S MANUAL
INSTALLATION GUIDE

OWNER’S MANUAL
AND INSTALLATION GUIDE
Thank you for choosing the MTI Sanctuary Hydrotherapy Tub. You have
purchased the best-built acrylic hydrotherapy tub in America. The instructions
in this booklet will provide you with the information you need to install and
operate this unit. Our customer service department is also available to answer
any additional questions you may have pertaining to the installation and
operation of this unit.
The commercial warranty for this product is included in this manual.
Please fill out the provided Warranty Registration Card and return it to the
manufacturer. Failure to do so may disrupt warranty coverage.
Call 1-800-783-8827 to speak to our Service Department.

1
OWNER’S GUIDE
A. PARTS AND FEATURES
Shown with chrome filter spout and optional handheld shower with diverter.
STANDARD FEATURES**
1. Air system control 8. Hand wand
2. On / Off control 9. Cable driven drain control*
3. Chromatherapy LED light control 10. Point-massage jets (10)
4. Detergent dispenser / Air volume control 11. Air jets (20) with 120 jet streams*
5. Breda backflow prevention valve 12. Suction / Intake (2)*
6. Simple Touch® on / off switch 13. Pump / motor*
7. High-flow faucetry 14. Air blower*
*Features not shown in diagram
** Hardware subject to change wihtout notice
1
23
4
5
8
6
7
10
11
12

2
B. TUB USE
The Sanctuary Hydrotherapy Tub is recommended for relaxing thermo-air baths and hydrother-
apy massage baths. Use the air system to relax the body and prepare for further bodywork,
use the point-massage jets to warm up the muscle tissues for deep tissue massages, and use
the hand wand to perform lymphatic drainage and treatments.
DO NOT RUN PUMP UNLESS WATER IS FILLED UP ABOVE THE JETS
ALWAYS CHECK WATER TEMPERATURE BEFORE ENTERING TUB
MTI recommends use of water soluble bath products only. As with any hydrotherapy tub, oil
based products may decrease the effectiveness of cleansers and could lead to bacterial build-
up on the tub and its components.
Note to therapists: The features on this tub are fully adjustable to allow you to create the
ideal pressure, pace, and rhythm for each individual client. Be sure to interview each client
before the session so that you may provide the appropriate stimulus and achieve the best
possible outcome. Communication during the session may also help you monitor the client’s
condition. Read the following sections carefully so that you can master the capabilities and
features of this tub.
AIR SYSTEM CONTROL
The air system capabilities range from a light, relaxing bubble effect to a rapid, invigorating bath.
The air system is controlled by a deck mounted control panel that allows the system to be adjusted
to any level in between or to a wave program that pulsates back and forth between the light and
rapid air settings.
Every 24 hours, a drying cycle will automatically start the blower for one minute. This cycle is
designed to purge any remaining water out of the patented check valves located in each indi-
vidual air jet. To re-set the 24-hour cycle, unplug the blower and plug it in again. 24 hours later,
and every 24 hours after, this drying cycle will come on. Do not be alarmed when you hear your
tub seem to “turn on by itself.” The blower will automatically shut off after one minute.
Tips for the therapist: The air system is an ideal way to warm up the soft tissue to prepare
for deeper bodywork. It is a good way to start a hydrotherapy massage. The light bubbling jet
action in the air system helps to promote circulation.
JET PRESSURE CONTROL
Water pressure in the large jets may be adjusted from a very high-pressure massage to a low,
relaxing current by turning the air volume control knob. Each individual jet may be turned off by
twisting the jet eyeball clockwise and turned on by twisting counter clockwise. Closing off jets
provides more pressure to those jets that remain open. Additionally, each jet may be manually
adjusted in different directions.
Tips for the therapist: The large jets in the tub are ideal for giving deep tissue massage.
Use of these jets can help to release muscle tension and prepare the body for the more pre-
cise work of the hand wand. If the client requires additional pressure in one area, close off
some jets by turning jet nozzle. This will divert the water pressure to the remaining open jet(s)
and allow for even deeper pressure. Note: always leave at least 3 jets open.

3
HAND WAND
NOTE: Fully submerge the head of the hand wand under water before turning on the pump.
Failure to do so could cause water to spray around the room and may disturb the client.
The massage hand wand is powered by the pump. When the pump is operating, a steady
stream of water will flow through the hand wand hose. To adjust the pressure of the hand
wand during operation, twist the handle located near the end of the hand wand. For extra deep
pressure, close off each of the individual jets so that all water pressure is diverted to the hand
wand. Turn off water flow to hand wand after each use.
Tips for the therapist: The hand wand is designed to allow the technician to give precise
treatments to the body. It can be used for lymphatic drainage treatments or to apply pressure
to specific trigger points. In order to perform deep tissue lymphatic drainage treatments, water
pressure should be applied from the extremities towards the heart. Such treatments should
only be performed by a certified, licensed professional.
LED CHROMATHERAPY LIGHT CONTROL
The LED chromatherapy light is a digital color changing light that produces fully saturated color
and color changing effects. To operate the LED light, depress the LED control button located
on the deck of the tub. Push the button again to move to the next of the 7 preset light shows.
DESCRIPTION OF LIGHT SHOWS:
Slow color wash: Color transition gracefully from color to color, cycling through the
entire color wheel. Each color takes about 3 minutes.
Fast color wheel wash: Colors transition from color to color, cycling through the entire
color wheel. Each color cycles about 1 minute.
Slow random color: Colors step or jump from one color to the next in random order.
Each color duration lasts about 10-15 seconds.
Fast random color: Colors step or jump from one color to the next in random order.
Each color duration lasts about 5 seconds.
High-speed random color: A rapid series of intense flashes of varying colored light.
Cross fade: Colors cycle back and forth gracefully between blue and green. Total cycle
lasts 1 minute.
Fixed color: Static display of a single color. Available colors include white, pink, laven-
der, light blue, dark blue, light green, and dark green.
IN-LINE HEATER (optional)
The factory installed in-line heater is designed to MAINTAIN the temperature of the water dur-
ing the hydrotherapy bath. The heater is not designed to heat cold water. The heater will acti-
vate with the pump. No external switch is required. The thermostat is pre-set at 102º F.
HANDHELD SPRAYER (optional)
The handheld sprayer is controlled by a chrome, high-flow diverter located next to the sprayer.

4
To divert water from the faucet spout to the hand sprayer or vice versa, push the diverter knob.
The sprayer may be adjusted to different settings by twisting the showerhead. The handheld
sprayer is a useful tool to help rinse the tub off after cleaning.
C. TUB CARE AND CLEANING
CLEANING YOUR TUB
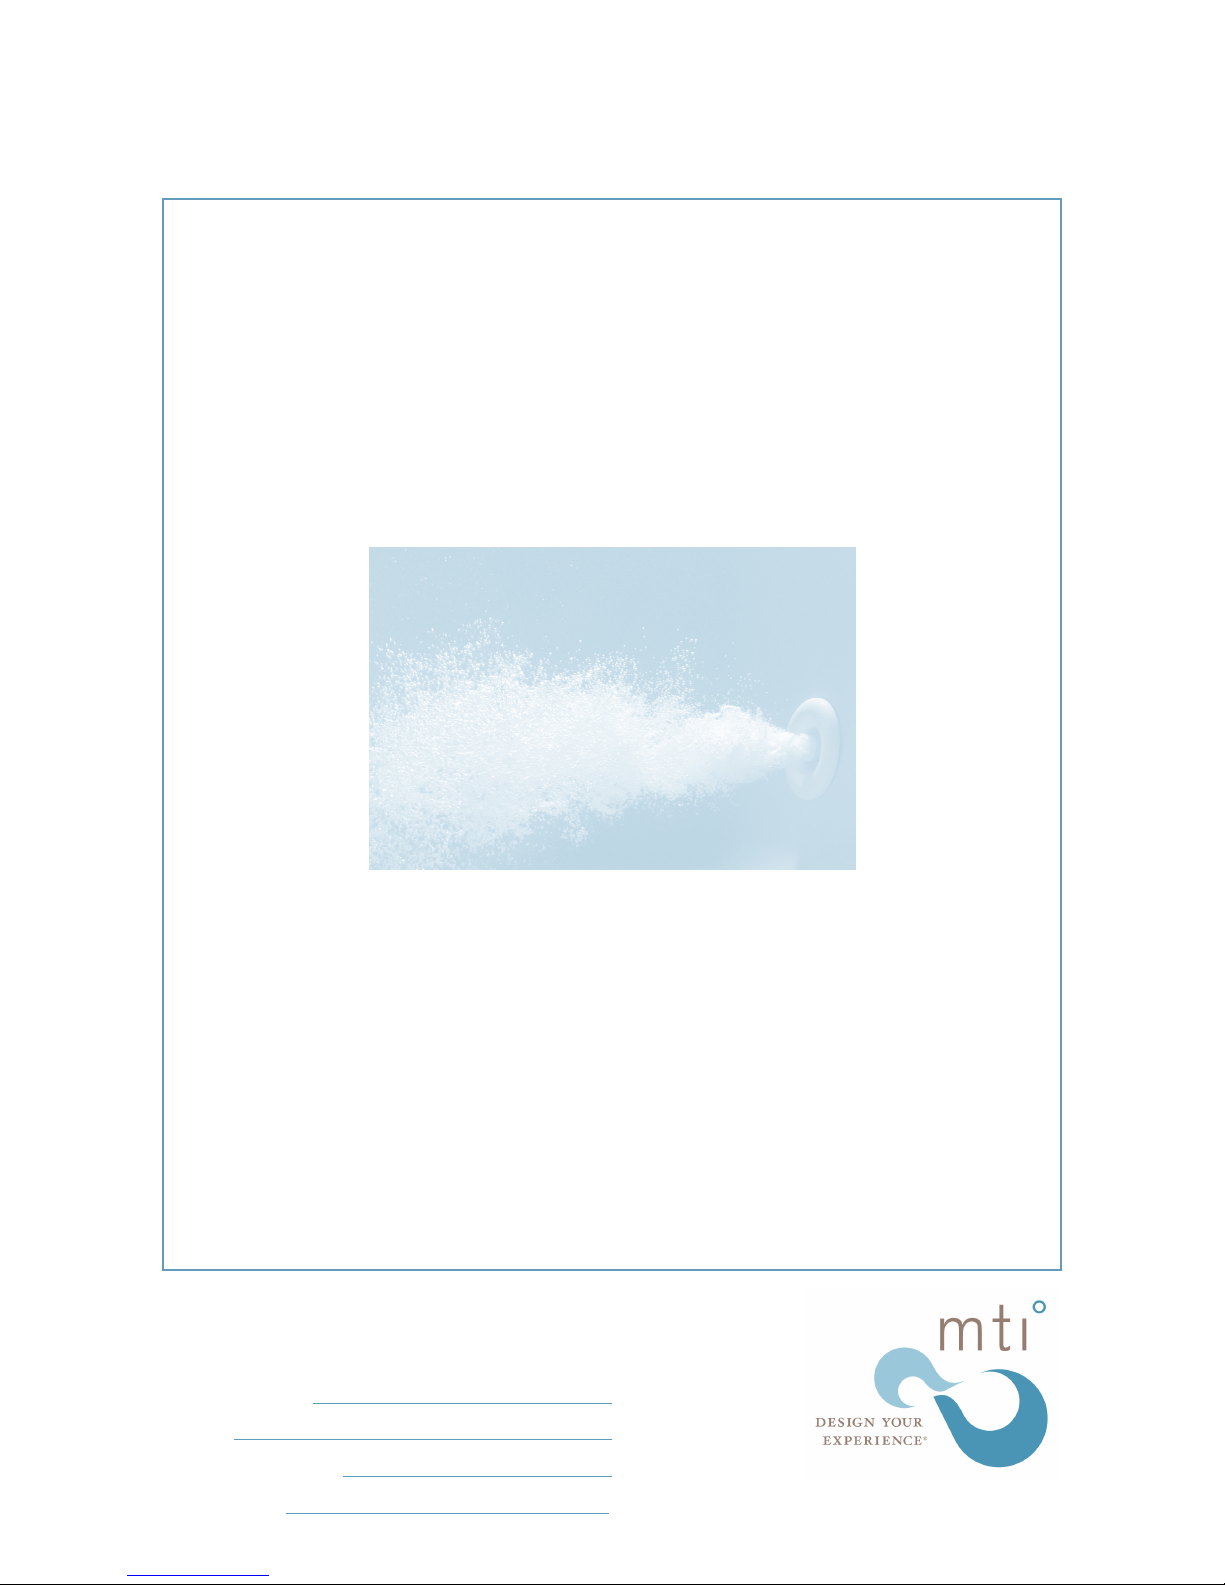
After each use, MTI recommends first turning on the
air system for one minute to expel any remaining water
from the air system. Then, run the Simple Touch system
(see instructions below). Finally, wipe down the tub (see
instructions below).
SIMPLE TOUCH CLEANING SYSTEM
OPERATING INSTRUCTIONS
MTI recommends flushing the tub after every use.
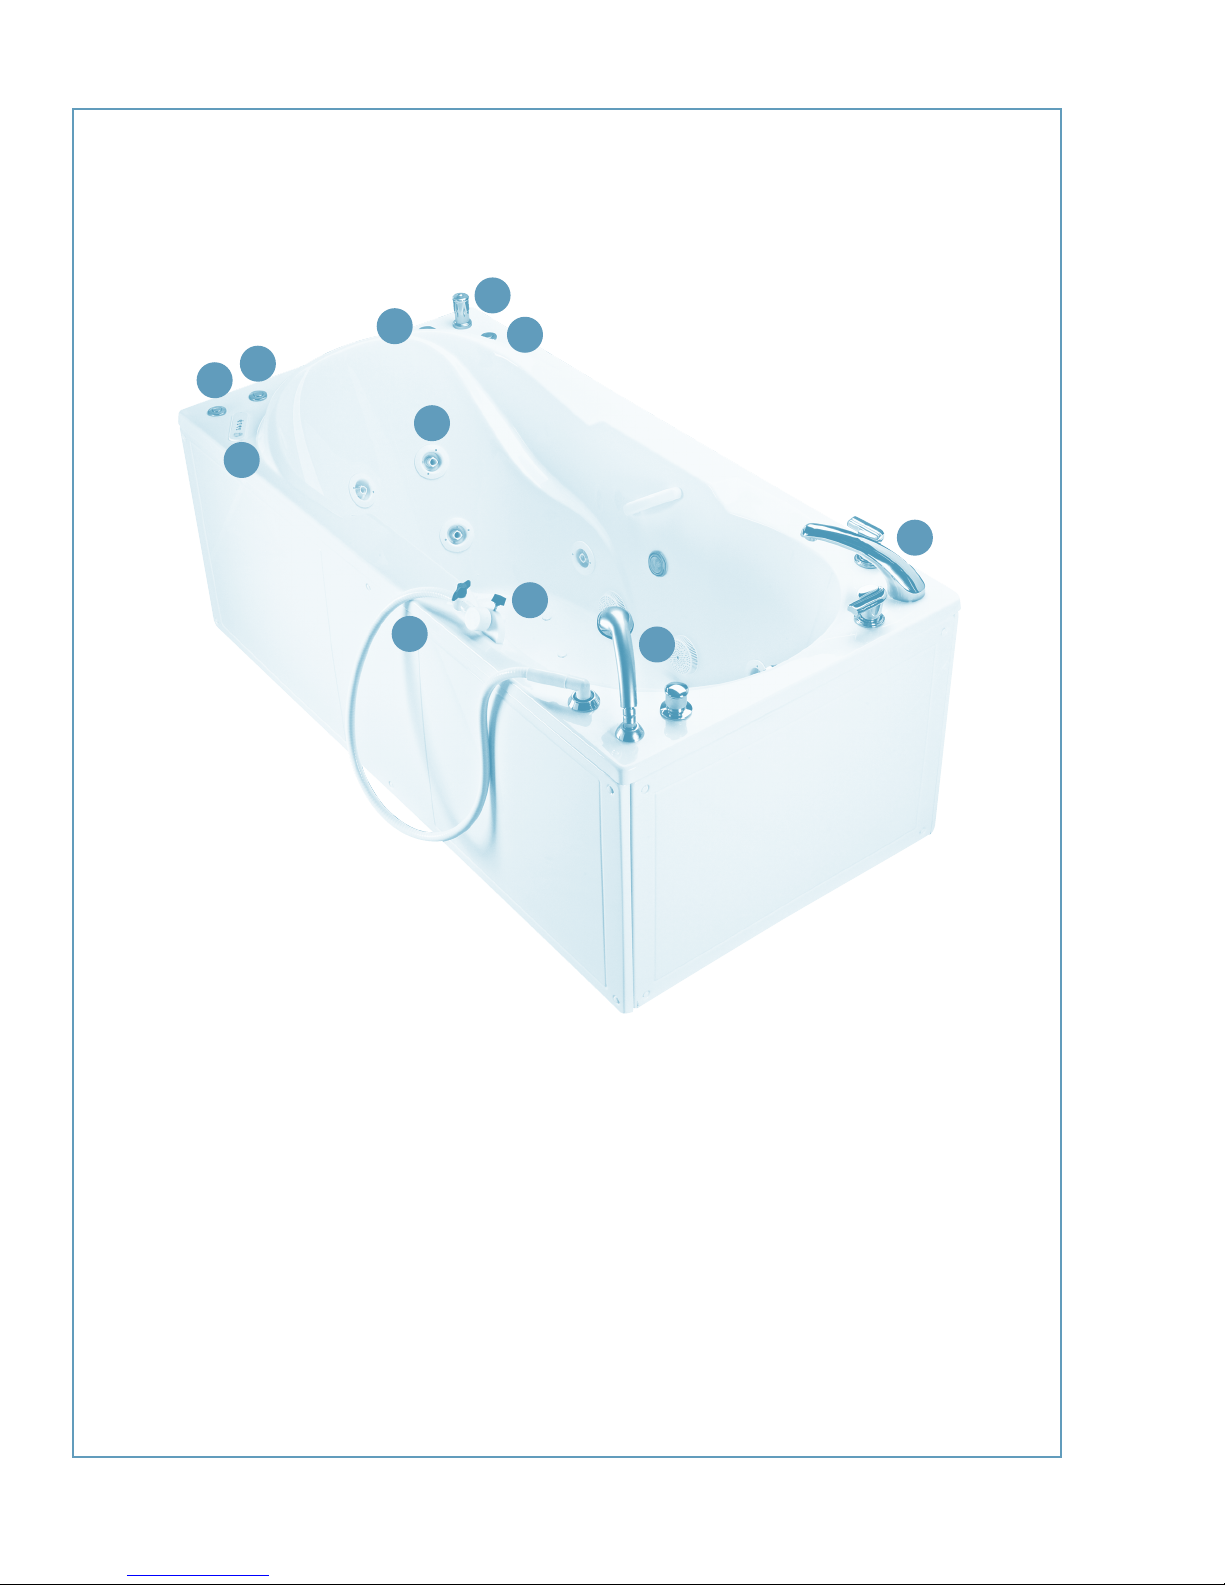
1. After completely draining the tub, close all jets by
by twisting each jet eyeball clockwise. Turn off
water flow to hand wand. Leave the drain open.
2.
Open detergent dispenser cap and pour in cleaning
solution. Cleaning solution options are: 2 oz. MTI
Fresh Wave cleaning solution (recommended) OR 1
cup white vinegar.
3. Depress the on/off button, which activates the
Simple Touch System.
4. The Simple Touch System will run for three min-
utes, circulating a mixture of water and cleaning
solution through the air line, water line and pump.
Residue will be flushed out through the suction intake and down the drain. NOTE: It is
normal for some water to exit around the jets and through the jet nozzles.
5. Once the system shuts off, turn on the hand wand control to allow any remaining water to drain.
6. Open the jets.
CLEANING IINSTRUCTIONS FOR THE ACRYLIC SHELL
The Lucite® cast acrylic surface of this tub is among the glossiest, most durable surfaces available. Its
hard, non-porous surface prevents dirt from accumulating and resists stains better than other materi-
als.
With normal use, Lucite cast acrylic will retain its beauty with only a minimal amount of care. To
maintain the high gloss, elegant look of the Lucite cast acrylic surface, follow these simple steps:
1. Use common household, non-abrasive cleaners for most cleaning jobs (for example:
a mild dishwashing detergent such as Ivory Liquid). Follow manufacturer’s directions
and precautions. Rinse well and dry with a soft, clean cloth. Be sure to check the prod-
uct label. Some products, although not containing abrasives, WILL damage the acrylic
over time. Never use any type of “scrubbing bubbles” on your acrylic product unless it
specifically states that it is safe for use on acrylic!
2. Never use abrasive cleansers. If any product feels gritty when rubbed between your
fingers, do not use on the acrylic surface or controls as permanent damage will occur.
3. Do not allow your cast acrylic surface to come into contact with nail polish, nail polish
remover, Wintergreen oil, dry cleaning solution, lacquer thinners, gasoline, pine oil, etc.

5
4. Remove dust and dry dirt with a soft, damp cloth.
5. Clean grease, oil, paint or ink stains with isopropyl (rubbing) alcohol. Dry with a clean, soft cloth.
6. Avoid using razor blades or other sharp objects that might scratch the surface. Small
scratches can be removed by applying a thin coat of automotive paste wax and buffing
lightly with a clean cloth. For deeper scratches, sand the surface lightly with a 400 grit
“wet or dry” paper and buff with a fine grit buffing compound.
MTI strongly recommends a professional acrylic repair person for deep scratches or chips.
PERIODIC DEEP CLEANING SOAK
MTI recommends completing this procedure once daily—preferably overnight.
1. Open all jets and fill the tub with water to 1” above the highest jet.
2. Add cleaning solution to the water. Cleaning solution options are: 2 oz. MTI Fresh Wave
cleaning solution (recommended) OR 1 cup white vinegar.
3. Turn on the pump, the air system and the hand wand for 1-2 minutes.
4. Turn off the pump, the air system and the hand wand.
5. Let soak (overnight, or at least 10 minutes)
6. Drain the tub.
7. Push the Simple Touch on/off button (no cleanser is needed—this is a rinsing step).
8. Clean the interior of the tub with a non-abrasive cleanser (see recommended cleaners
in the “cleaning your acrylic shell” section.)
D. SAFETY PRECAUTIONS
WARNING: When using electrical products, basic precautions should always be followed,
including these: (Please read and follow all directions!)
1. DANGER: To reduce the risk of injury, do not allow children or sick persons to use this
product unless they are supervised at all times.
2. This MTI hydrotherapy tub is designed solely for the uses described in this manual. Do
not use attachments not recommended in this manual without first consulting the manu-
facturer.
3. Do not drop or insert any object into any opening.
4. Do not operate this tub without the guard over the suction (water intake). This guard is
a safety device that reduces the potential hazard of hair or body entrapment. Keep hair
and body away from suction guard when pump is running.
5. Anyone under a doctor’s care, pregnant or whose health is poor should check with a
physician before using any whirlpool bath system.
6. Recommended length of hydrotherapy bath is no more than 25 minutes. If dizziness or
nausea occurs or a headache develops, exit the tub at once and cool down. If symptoms
persist, get medical attention and consult a doctor before using any whirlpool system.
7. Do not use immediately after eating or while under the influence of drugs or alcohol.
8. Before servicing the unit, shut off ALL electrical outlets, as more than one may be energized.

6
INSTALLATION GUIDE
Read all requirements and instructions before installing the tub
A. REQUIREMENTS
LOCATION REQUIREMENTS
See diagram above for proper location of electrical and water supply lines.
Proper installation is the responsibility of the tub owner. The installation location must have:
1. A water heater set to deliver a maximum of 120º F (49º C) water to the tub. Depending on
frequency of use and amount of fill, an above average size water heater may be required.
2. Access to hot and cold water supply and drain.
3. At least 2 grounded 3 prong, electrical ground fault circuit interrupter (GFCI) protected outlets.
If ordered as a drop-in unit (without frame and skirt), the tub must be framed on a level surface
to allow for proper drainage. NOTE: Air system is protected by a high-density foam bedding
compound, which eliminates the need for wet bedding, assuming the floor is perfectly level.
ELECTRICAL REQUIREMENTS
This tub comes with a 3 HP, 110-volt pump/motor that draws 14.4 amps and is powered by a
power supply cord with a 3-prong ground plug. It requires a 20 amp, grounded 3-prong, GFCI
protected outlet. The LED light draws one amp of power and can be plugged into the same
outlet as either the pump/motor or the air system.
The blower for the air system uses 8.8 amps of power and should be powered by a separate
15 amp, 110 VAC GFCI circuit. The Simple Touch cleaning system draws one amp of power
and can share an outlet with the air system or pump.
*
ê
ë
½
)
+
(
+(
+)
Floor location for Incoming Hot and Cold Water Lines
Floor location for Electrical Supply Lines
Blower
Pump

7
Every MTI Whirlpool is supplied with a 29” grounded plug to be plugged into a standard
grounded receptacle. Do not remove this plug. If a wall mount switch is desired to control use
of the unit, the switch should control the receptacle. Under no circumstance should you alter
the provided supply cord.
A pressure wire connector is supplied on the exterior of the pump to permit connection of a
NO.8 AWG (8.4 mm) solid copper bonding conductor between this unit and all other electrical
equipment and exposed metal in the vicinity as needed to comply with local requirements.
WARNING: Unauthorized modification may cause unsafe operation and poor performance of
the whirlpool. Do not relocate the whirlpool pump, or make other modifications to the whirlpool
system, as this could adversely affect the performance and safe operation of the whirlpool.
MTI shall not be liable under its warranty or otherwise for personal injury or damage caused by
any such unauthorized modification.
All electrical work must be performed by a liscensed electrician. It is the responsibility of the
electrician to take any necessary precautions to protect electrical connections depending on
the particular wet room application.
The electrical supply lines should be located as indicated in the diagram on page 6. If uncer-
tain if the tub is properly grounded, check with a qualified electrician.
PLUMBING REQUIREMENTS
This tub should be plumbed according to local plumbing codes. All plumbing connections
should be made by licensed, qualified plumbers.
3⁄4” supply lines must be located under the spout and mixing valves—see diagram on page 7
for location. (Do not use 1⁄2” supply lines— this will cause the tub to fill slowly). A 11⁄2” or larger
drain line must be located under the tub drain.
B. INSTALLATION INSTRUCTIONS
WARRANTY RELATED INSTRUCTIONS
This tub was water tested at the factory and found to be fully operational and leak free prior
to shipping. Freight handling and job site exposure may have deteriorated the tub’s condition.
This unit must be tested for operation and leaks PRIOR TO enclosure/final installation. Failure
to do so will void the warranty.
BEFORE INSTALLING:
Inspect tub thoroughly.
1. Damage from shipping or delivery must be reported to carrier immediately. Do not install
the damaged tub.
2. Factory defect must be reported to manufacturer before tub is installed. Defects claimed
after installation will exclude warranty.
CAUTION: DO NOT LIFT TUB BY PIPING OR PUMP.
To Do So May Cause Damage Not Covered By Warranty.
Always protect tub from construction damage by using a protective cover. Damage, including
chips and scratches, incurred at the jobsite is excluded from warranty. Do not store in temper-
atures below 32º F. Proper waste and overflow installation is the responsibility of the installer.
MTI does not warrant leaks associated with improper waste and overflow installation.

8
Your new MTI hydrotherapy tub is ready for turnkey installation. The pre-leveled frame assures
that the tub will be of uniform height; the high-density foam used to protect the air system
also functions as a bedding compound; and the removable skirting provides pump and blower
access. The high density foam used to protect the air system also serves as the bedding com-
pound. No additional bedding is required unless installation site is not level, in which case use
enough bedding compound so the top flange of the tub is perfectly level. Access must be pro-
vided to the tub pump and blower for installation and future servicing.
TUB MUST BE WATER TESTED FOR OPERATION AND LEAKS PRIOR TO ENCLOSURE
OF SURROUNDING AREAS. FAILURE TO DO SO WILL VOID WARRANTY.
(See instructions on page 11 of manual)
INSTALLATION INSTRUCTIONS FOR TUB WITH FRAME AND SKIRT
A. UNPACK TUB
1. Remove tub from shipping carton. Remove all protective packaging materials such as
tape and shipping pads.
2. Read entire manual before proceeding.
3. Carefully remove both end panels by unsnapping white screw caps and removing 4
screws securing each end panel. Set end panels aside until installation is complete.
B. CONNECT WATER SUPPLY
The tub must be plumbed according to local plumbing codes. All plumbing connections should
be made by licensed, qualified plumbers.
1. Connect hot and cold water lines to 3⁄4” copper pipe on the supply lines. See diagram on
page 7 for location of incoming water lines.
2. Tee off incoming cold water supply line and tie into the pre-installed 1/2” copper line
which connects to the solenoid valve.
3. Clean out any debris from the plumbing lines prior to final enclosure of the tub.
4. Connect the drain to 11⁄2” or larger drain line.
C. CONNECT POWER SUPPLY
All power must be installed by a qualified electrician.
1. Plug the pump into a 20 amp grounded, 3-prong, GFCI protected outlet. Do not plug the
pump and blower into the same outlet.
2. Plug the blower into a 15 amp grounded, 3-prong, GFCI protected outlet.
3. Plug the LED light and Simple Touch™ into the open outlet sockets, each with either the
pump or the blower. All four electrical components should be plugged into the 2 sepa-
rate outlets.
D. WATER TEST THE TUB
See directions on page 11 of this guide.
E. COMPLETING INSTALLATION
1. Replace end panels.
2. Check the electrical requirements. Be sure that you have the correct electrical supply
and the recommended grounding method. See “Electrical Requirements.”
3. Check to be sure that all parts are now installed. If there is an extra part, go back
through the steps to see which step was skipped.

9
4. Check to be sure that you have all of your tools.
5. Dispose of/recycle all packaging materials.
6. Check to be sure that the water faucets are working.
7. Check for leaks around the faucet and the drain.
8. Use a mild solution of liquid household cleaner and warm water to remove waxy residue
caused by the protective shipping material. Dry thoroughly with a soft cloth. For more
information, see the “Cleaning Your Tub” section of this guide.
TROUBLESHOOTING
The following are some common solutions to possible problems with your spa. For more
detailed information, contact MTI’s Service Department 1-800-783-8827.
TUB PUMP/MOTOR WON’T TURN ON
• Check the following:
1. Check the connection. Be sure pump is plugged in. Test outlet for power by plugging in
a small lamp or hair dryer.
2.
Check to be sure that the on/off switch is connected to the pump.
3. Check to be sure that a fuse has not blown or the circuit breaker has not tripped.
4. Check that the reset button on the GFCI has not tripped. If this problem persists, you
may need to call an electrician.
TUB WON’T DRAIN
• Is the drain clogged?
• Is the drain plug adjusted correctly?
See drain installation instructions to verify proper installation.
TUB MAKES NOISE
• Is the water level too low?
TUB LEAKS
• Check caulking around tub for leaks.
• Check plumbing for leaks.
• Is water splashing out of the tub?
The tub may be too full. Drain some water out of the
tub. Water level should be just
above the highest jets.
• Is leaking present around the pump?
1. Tighten large union nut rings on PVC line to pump.
These may have loosened during shipment or installa-
tion. These need to be hand tight only.
2. Remove both unions and check the rubber “O” rings
for proper seating. Replace unions hand tight.
115VAC Power
Supply Cord
On/Off
Control
Air line
Pump Motor
Union Nut

10
LITTLE OR NO ACTION FROM THE JETS
• Open air volume control to allow air to mix with water.
• Check each jet to assure that they are all set to the open position by twisting the inner eye-
ball of the jet. Note: Each jet may be shut off individually.
LED LIGHT NOT WORKING
• Ensure bulb is secure in housing.
• Check to see that clear air line is connected to the bottom of the on/off button for the light as
well as the electronic box.
• Be sure the electrical box is plugged in.
• Check to be sure outlet works—try plugging in a lamp or other electrical appliance.
SYSTEM ARIA (AIR SYSTEM) NOT WORKING
• Verify that the electronic touch control is connected to the blower.
• Make sure the blower is plugged into a working receptacle.
SYSTEM ARIA RUNS, BUT NO AIR COMES THROUGH THE JETS
• Verify that the grey air hose from the manifold to the blower is properly connected. If neces-
sary, reconnect and tighten clamps.
AIR OUTLETS OF JET HEADS ARE OBSTRUCTED
• If soap or other residues obstruct the air jets, fill the tub with warm water, use a soft tooth-
brush to gently brush the air jets. Turn the system on and off several times. If the air jets are
still clogged, please call MTI Technical Service at 800.783.8827 for assistance.
FACTORY INSTALLED HEATER NOT WORKING
• Be sure that both the heater AND the pump are properly plugged into a GFCI outlet. The
heater has an internal switch to operate only when the pump is in operation.
• Be sure to start by filling the tub with hot water. The heater installed on your MTI hydrothera-
py tub is designed to maintain the water temperature at 102º F. It will not effectively raise the
temperature of cold water.
• Check that the indicator light on the heater is on when the pump is running.
RUST OR GREASY SUBSTANCE IN NEW TUB
• Some construction debris is commonly found in the plumbing lines of a new tub. Such debris
typically washes away after running water passes through the pipes a few times.
• If the condition persists, there may be sediments in the water heater of the building. Drain
the water heater according to manufacturer’s instructions and clean the whirlpool system as
described in “Cleaning Instructions.”

11
ATTENTION INSTALLER!!!
This whirlpool tub was water tested at the factory and found to be fully operational and leak
free prior to shipping. Freight handling and job site exposure may have deteriorated the tub’s
condition.
This tub must be tested for operation and leaks PRIOR to enclosure of surrounding areas.
Failure to do so will void warranty.
TEST PROCEDURES
1. Fill tub to overflow and examine all fittings carefully for leaks WITHOUT PUMP
RUNNING.
2. Turn on pump and check all fittings carefully for leaks while operating.
3. Make sure all optional equipment is functioning properly.
4. If any leaks or operating problems are discovered, do not complete installation until prob-
lems are resolved. MTI will not be responsible for any costs involved with removing or
reinstalling the tub, or for the costs of any surrounding materials.
WARNING: DO NOT RUN PUMP DRY!

12
MTI COMMERCIAL WARRANTY
This warranty is effective for all MTI Sanctuary Hydrotherapy manufactured after February 1, 2006,
and is in lieu of all other warranties. Warranty coverage begins on date of purchase (regardless of
installation date). MTI Whirlpools, Inc. provides a limited warranty on the Sanctuary tub for use in
the continental United States of America*, to the original purchaser for commercial, rental or multi-
family applications. *Tubs installed outside of the continental United States of America carry a 1-year, parts
only warranty.
Whirlpool, Soaking, & Air Tub Warranty: MTI warrants the acrylic surface finish of the tub shell not to
peel, crack, blister or delaminate for a period of two years from date of purchase to the original purchaser
for commercial, rental or multi-family applications. MTI warrants the pump, motor, air blower (for air tubs),
and standard whirlpool system components (including the plumbing system) against malfunction, leaking
or defects in material or workmanship for a period of two years from the date of purchase. All other com-
ponents are subject to the MTI One-Year parts only warranty described below. Components covered for
parts only include, but are not limited to: on/off controls, transformer boxes, neck jet pillows, low water
sensors, solenoid valves & LED lights. The bath must be water tested for operation and leaks
prior to final enclosure of the unit. Failure to do so will void warranty. If a problem is discovered
after the final enclosure, MTI will not be responsible for the cost of removing or reinstalling the tub,
or for costs associated with any adjacent materials. Proper drain installation is the responsibility of
the installer. MTI’s warranty does not cover drain leakage.
One-Year (Parts Only) Warranty: MTI warrants options, accessories and all other components not
specifically listed above for one year for parts only against defects of material or workmanship.
Components covered for parts only include, but are not limited to: on/off controls, transformer boxes,
neck jet pillows, low water sensors, solenoid valves & LED lights. Replacement parts shall assume the
remaining warranty period of the parts replaced. Replacement parts are subject to availability, and may
differ from those originally supplied. MTI can not guarantee that parts currently in use will be available
in the future. Changes in materials, parts or specifications are not valid reasons for product refusal
or replacement under warranty claims. Grab bars and additional/ special order trims are specifically
excluded from this warranty. Valves and accessories installed and sold by MTI carry their own war-
ranty from their original manufacturer. MTI does not warrant valves and accessories. Check with MTI
for details.
Radiance Warranty®: MTI warrants Radiance for two years, parts only, against manufacturing
defects. If the control box or keypad fails within the two year period, MTI will send replacement
parts out at no charge. In the unlikely event that the electrical heating grid fails within the two year
period, MTI Whirlpools’ only obligation is to refund the purchase price of the Radiance system to
the original product owner. Proof of purchase required.
Stereo H2O® Warranty: MTI warrants the transducer(s) for one year against manufacturing defects to
the original product owner. Labor or any costs associated with gaining access for repair are specifically
excluded from warranty. Proof of purchase required.
Return of Warranty Card: The warranty registration card must be filled out by the purchaser within
one hundred twenty days from purchase and mailed to MTI Whirlpools in order for this warranty to
take effect. Warranty registration can also be done online at mtiwhirlpools.com.
Warranty Limitations:
Your warranty is void if unit is not water tested for operation and leaks and inspected prior
to final enclosure. Our warranty does not cover defects, damage, or failure caused by common
carrier, installer, user, or other person.
Chips, cracks, and scratches are damages and are NOT covered under warranty, however,
they may be repaired by a qualified technician at the owner’s/user’s expense. Damages or
defects that should be detected before installation are not covered.
Continued on next page

13
MTI Whirlpools is NOT liable for incidental or consequential damage, loss of time, inconvenience,
incidental expenses or material charges or any other costs related to the application of this warranty.
We do not cover the following: careless handling; modification of any type for any reason; improper
installation (See Installation Instructions); connections supplied by the installer; improper voltage
supply/electrical modifications; misuse; incorrect or improper maintenance; incorrect or inadequate
water use; use of improper cleaners; or extraordinary acts such as earthquakes, hurricanes, lightning,
floods, hail, etc.
Extent of Warranty: This warranty extends only to the original consumer/purchaser of the
MTI Whirlpools product when purchased and originally installed within the boundaries of the conti-
nental USA (unless otherwise noted). The warranty terminates after transfer of ownership or if tub
is installed or relocated outside the boundaries of the continental USA by the original consumer/pur-
chaser prior to the expiration of the warranty period.
Warranty Performance: In the event of any malfunction or defect covered under the terms of this
warranty, a Factory Authorized Service Agent of MTI Whirlpools will repair the MTI product. To obtain
service, contact the MTI Service Department for an agent in your area and issuance of a service order
number. No work/payment will be made without an authorized service order number. There will
be no charge for parts, labor or freight costs for parts necessary to repair the tub under warranty.
Written notice of any malfunction or defect must be given within ten days of the time the malfunctions
were discovered, and must be accompanied by the tub serial number, model number and manu-
facturer’s date to verify purchase date. Notice must be given to: MTI Whirlpools, 670 N. Price Rd.,
Sugar Hill, GA 30518, Attn: Service Dept. MTI reserves the right to inspect the malfunction or defect
on site and determine appropriate course of action.
Acts Invalidating Warranty: Inspecting the unit prior to installation is the responsibility of the
installer(s) or person(s) acting on behalf of the user. He/she is responsible for ensuring that the unit
is free of defect or damage. Our shipping container advises the installer of this responsibility. MTI is
not responsible for failure or damage that should have been discovered, repaired, and avoided by
proper inspection and testing prior to installation. Damage that occurred in transit is the responsibility
of the carrier. The consignee must open and inspect the unit for damage when it is delivered. If the
unit is damaged, this must be reported immediately to both the seller and the carrier in writing and
an inspection must be requested. In the event that the carrier fails to respond, report such response
to both the seller and the carrier. Any freight claims must be filed within ten business days. It is the
responsibility of the installer, contractor, or user to install/bed the unit properly allowing for access
for service. Access must be provided to each pump, air blower and/or electrical component on your
tub. The access panel(s) must have a minimum size of 16"x14" for installation and future servic-
ing of the equipment. MTI Whirlpools, Inc. will not authorize any service unless clear access is
available. Access from a crawlspace or incomplete access to all equipment may result in warranty
claims being denied. Unit must be water tested for operation and leaks prior to final enclo-
sure. Damage, including chips or scratches, occurring to the unit during installation is the
responsibility of the installer and after installation is the responsibility of the user.
Disclaimers: MTI Whirlpools is not responsible for incidental or consequential damages/losses
from any cause such as water damage to carpeting, floors, or ceilings. Optional equipment not man-
ufactured by MTI or installed by MTI is not covered. Damages or defects that should be detected
before installation are not covered. This limited warranty does not include labor, transportation,
or other costs incurred in the removal and/or reinstallation of the original unit or replacement unit.
Costs related to obtaining access for repair are not covered. The foregoing warranty is EXCLUSIVE
and in lieu of all other warranties, including any other warranty of quality, express or implied, and
including any warranty of merchantability, or any warranty of fitness for any particular purpose.
Customer Service: To verify coverage or request service, please contact the MTI service
department at 800-783-8827. Please have serial or registration number available.

MTI WHIRLPOOLS
Manufactured by: MTI Whirlpools, Inc.
mtiwhirlpools.com
670 N. Price Road
Sugar Hill, GA 30518
800 783 8827
770 271 8228
Fax 800 438 8827
© Copyright 2010 by MTI Whirlpools, Inc.
Modification Rights Reserved.
0410
Other M-TI Hot Tub manuals