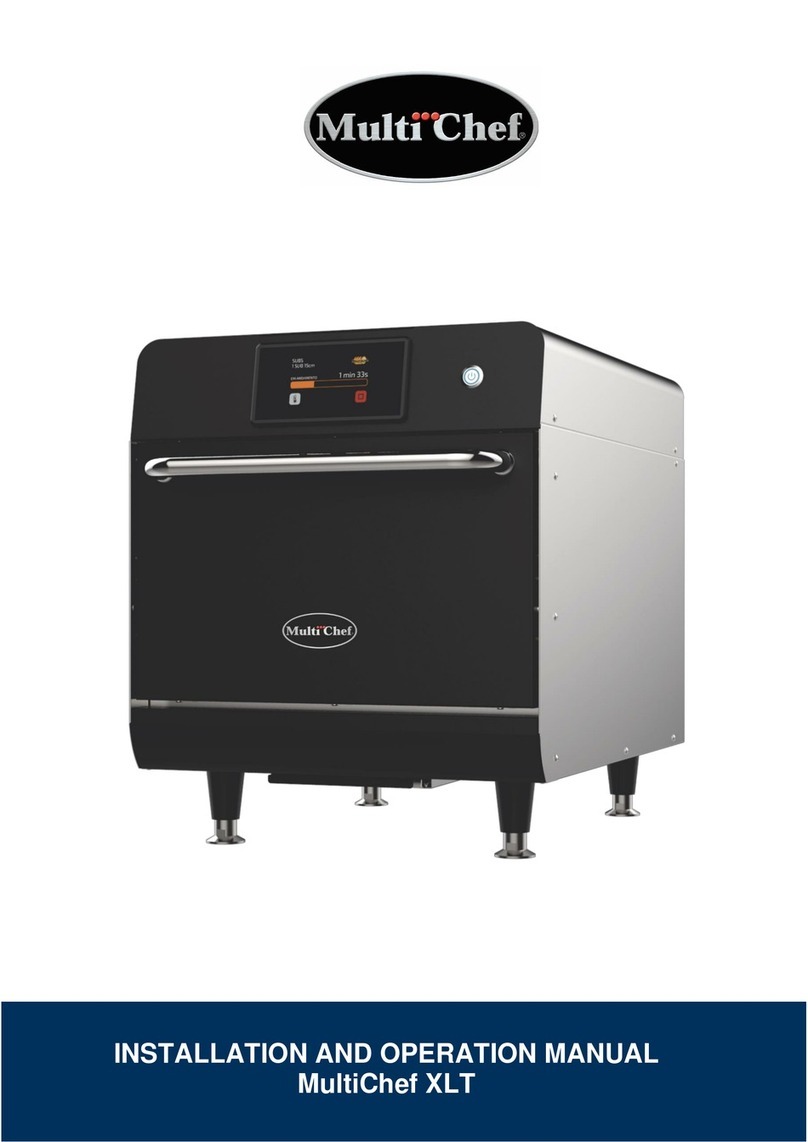
M-TI MultiChef XS User manual

INSTALLATION AND OPERATION MANUAL
MultiChef XS


CONTENTS
1WARRANTY TERM 05
2SAFETY INSTRUCTIONS 08
3PRECAUTIONS TO AVOID POSSIBLE EXPOSURE TO MICROWAVE ENERGY 11
4INSTALLATION 13
5COPA EXPRESS TECHNOLOGY 17
6PRINCIPLES OF OPERATION 19
7RECIPES CREATION 20
8OPERATION 21
8.1 PREHEATING 21
8.2 EXECUTING A RECIPE 21
8.3 ACCESSING THE OPTIONS 23
8.48.4 USER'S SETTINGS 23
8.4.1 EDIT GROUP 24
8.4.2 EDIT RECIPES 27
8.4.3 PREHEAT 32
8.4.4 USB 32
8.4.5 LANGUAGE 33
8.4.6 CURRENT TEMPERATURE 33
8.4.7 DATE/TIME ADJUSTMENT 33
8.4.8 CELSIUS/FAHRENHEIT 34
8.4.9 CHANGE PASSWORD 34
8.4.10 EDIT ACCESSES 34
8.4.11 MANUFACTURER'S INFORMATION 35
8.4.12 TECH SUPPORT 35
8.4.13 RESTORE FACTORY SETTINGS 35

CONTENTS
8.5 FAVORITES 36
8.6 MANUAL MODE 37
8.7 DAILY CLEANING GUIDE 38
8.7.1 CATALYTIC CONVERTER CLEANING GUIDE 41
8.7.2 AIR FILTER CLEANING GUIDE 41
9ALERTS AND ERRORS: POSSIBLE SOLUTIONS 42


04

1
WARRANTY TERM
1.1
Terms and detailing
05
a)
Our products have a legal warranty of three months and contractual warranty
of nine months (one year in total) from purchase invoice issuance date and
applies only to the first purchaser. If for any reason the purchase invoice
cannot be found, the equipment manufacture date contained in the indicative
label will be considered as the start date of enforceability of this warranty. The
followingwillbecoveredunderwarranty.
b)
Regardless of the actual installation or use of the equipment, the warranty
periodisstartedperthedateofissuanceofthepurchase invoice.
c)
For delivery and installation of the equipment, Prática will send, at no cost to
the customer, an authorized technician to the site where the appliance will be
installed(orthecustomercancallatechnicianoftheirchoice,ifpreferable).
d)
If new visits are needed to complete the delivery/installation of the product
due to the lack of adequate, electrical, or exhaust related conditions, the costs
ofsuchvisitsshallbethecustomer'sresponsibility.
e)
For the appliance's installation, the customer must provide all conditions
required (water, light, gas, grounding and exhaust if needed) in the installation
blueprint. The customer will also be responsible for transporting the
equipmenttotheinstallationsite.
f)
Thewarrantyonlycoversmanufacturingandcomponentfailures.
g)
The warranty will cover maintenance, adjustments or replacement of
defective parts. It is the responsibility of the customer or technician to return
thedefectivepartstoPráticaInc.foranalysis.
h)
Warranty service calls will not justify the extent of the warranty, returns or
exchangesoftheequipment,oranyothertypeofclaim.

06
1.2 Warranty Exclusions
a)
The customer should thoroughly inspect the equipment upon delivery and
contact the carrier in case of shipping damage arising from transport. At the
time of installation, the technician should find the equipment in its original
packaging(fullypreserved).
b)
Irregularitiesinbuildinginstallationsystems.
c)
Please use the Installation and Operation Manual that are included with the
product.
d)
Failure to observe the installation details per the Installation and Operation
Manual, such as: uneven floors, installing the oven next to equipment that
exudefat,heatorsolidparticles,lackofaircirculation,etc.
e)
Any damage and defects resulting from inappropriate cleaning that causes
damagesto the components will not be covered under warranty. For example,
pouringwaterinsidetheelectric panel,etc.
f)
Changes performed by unauthorized technicians in the original conditions of
installationsuchaselectricaldistribution,installationlocation,etc.
g)
Use of aggressive or abrasive products that are unsuitable for cleaning which
maytarnish,wear,scratchordamageaccessoriesorequipmentcomponents.
h)
Damage and operational failures arising from unfiltered water with great
calcium content or electrical supply with voltage oscillation or noise/
interferenceinpowerline.
i)
Occurrences from electrical discharges arising from acts of nature or voltage
peakscausedbygeneratorsorsupplycompanies.
j)
Damage to the equipment or its accessories because of accidents, abuse,
improper operation, improper handling or Installation as described by the
OperationManualincludedwiththisproduct.

07
k)
Repair attempts by unauthorized third parties or use of non-OEM parts and
components,regardlessofthedamageordefects.
l)
Wear and tear components are excluded from the warranty such as lights,
seals,belts,bearings,chains,tarps,glass,plastics,etc.
1.3 Notes and Recommendations
a)
TheoperatorcanusetheInstallationandOperationManualasaguide.
b)
Make sure that the electric and exhaust systems are made and installed by a
qualifiedcompanyor technician.
c)
Before contacting technical assistance, check the manual for troubleshooting
tipsthatcanbesolvedwithoutatechnician.
d)
The wear and tear of the unit is not covered by warranty. To ensure
productivity and increase the life of the product, it is essential to perform the
dailycleaningandapreventivemaintenanceregularly.
e)
You can call our technical assistance to provide feedback, offer suggestions, or
get assistance troubleshooting during normal business hours at:
+1.214.584.6269.
EQUIPMENT IDENTIFICATION
(Fill in to make technical support calls easier)
MODEL
VOLTAGE
SERIAL NUMBER
RESELLER
INVOICE
NUMBER
PURCHASE DATE

08
2 SAFETY INSTRUCTIONS
•Read the manual carefully before installing the appliance.
When carrying out the daily cleaning, please use personal protective
•equipmentsuchasprotectivegloves,apron,maskandgoggles.
Protective Gloves Protective Mask Apron Goggles
•TheapplianceMUSTbegrounded.
•Theovenmusthaveadedicatedcircuitbreaker.
•Donotimmersethepowercordorconnectwater.
•Keepthepowercordawayfromheatedsurfaces.
•Donotletthepowercablehangovertheedgeofthetableor counter.
•If the power cord is damaged, it must be immediately replaced by an
authorizedtechniciantoavoidshockhazard.
•Onlyqualifiedpersonnelshouldopen theequipment panel.
•Donotuseplasticutensils.
•Do not use the Microwave function without food as it can damage the
appliance.
•Do not operate the equipment with the door open due to microwave energy
exposure.
•Donotplaceanyobjectbetweenthedoorandtheovendoor.
•Do not allow food residue or other debris to accumulate on the surface of the
doorandhingetoavoiddamagingtheappliance.
•Donotuse the applianceifit is damaged. The oven's door should always close
properly.
•Foodswithskin,bark or membrane, such as tomato,potato,sausage, must be
punchedwithaforkastheymayexplode.
•Fullysealedpackagesshouldnotbeheatedintheovenastheycanexplode.
•
Use this appliance only for the functions described in this manual.
•Donotallowchildrentouseoroperatethisappliance.
•Donotcoveror blockanyairventson unit.
•Donotusetheapplianceoutdoorsor withoutcoverage.

09
•Do not use this product near water such as near the kitchen sink, in a wet
basement,ornearaswimmingpool.
•Donot use a water jetfor cleaning. Please see cleaning instructions for proper
cleaning.
•When cleaning the surface of the oven use only non-abrasive products
appliedwithanylonspongeorsoftcloth(page38).
•Toreducetheriskoffireintheovencavity:
•Removewiresusedtosealpaperor plasticbagsthatwill beintotheoven.
•Carefullymonitorequipmentwhenmaterialssuchaspaper,plastic,andother
combustiblematerialsareplacedinsidetheovenforeasycooking.
•Removeallcontentslocatedinsidetheovencavity.
•If the product catches fire inside the cook cavity, close the door immediately
and turn the unit off or unplug it. The power can also be turned off at the
circuitbreaker.
•Donotusethecavityoftheapplianceforstorage.
•Always wear thermal gloves or use holders or tongs to remove the food from
insidetheequipmenttoavoidburns.
•Liquids heated in the microwave can a cause delayed eruption due to thermal
shock.
•The appliance is not intended for use by persons (including children) with
reduced physical, sensory or mental capabilities, or that have not been
properlytrainedtooperatetheunit.
•Liquids, such as water, coffee, or tea are able to be overheated beyond the
boiling point without appearing to be boiling. Visible bubbling or boiling
when the container is removed from the microwave oven is not always
present. THIS COULD RESULT IN VERY HOT LIQUIDS SUDDENLY BOILING OVER
WHEN THE CONTAINER IS DISTURBED OR A UTENSIL IS INSERTED INTO THE
LIQUID.
•The minimum height of free space above the microwave should be of 5.9in
(150mm).
•Onlyuseutensilssuitableforuseinmicrowaveovens.
•When heating food in microwave safe container, check the oven frequently
duetothepossibilityofignition.
•Theovenshouldbecleaneddailyandanyfoodremainsshouldberemoved.
•Failuretomaintain the oven ina clean condition could lead todeterioration of
the surface that could adversely affect the life of the appliance and possibly
resultin thelossofwarranty.

10
•CAUTION: To avoid burns, do not use containers with liquids or kitchen
products that become liquids by heating up to boiling point. This marking
mustbe mountedafterinstallationat 5.25in(1.6m)abovefloorlevel.
•Donotoperateanyheatingorcookingappliancebeneaththisappliance.
•Donotmountunitoverornearanyportionof aheating orcookingappliance.
•Donotmountovera sink.
•Do not store anything directly on top of the appliance surface when the
applianceisinoperation.
•Oversized foods or oversized metal utensils should not be inserted in a
microwave/toasterovenastheymaycreateafireorriskofelectricshock.
•Donotcleanwithmetalscouringpads.Piecescanburn offthepadandtouch
electricalpartsinvolvingariskofelectricshock.
•Donotusepaperproductswhenapplianceisoperated inthetoaster mode.
•Do not store any materials, other than manufacturer's recommended
accessories,inthisovenwhennotinuse.
•Donot coverracks or any otherpart of the oven with metal foil. This will cause
overheatingoftheoven.
•Do Not Clean Door Gasket –The door gasket is essential for a good seal. Care
shouldbetakennottorub,damage,ormovethegasket.
•Do Not Use Oven Cleaners –No commercial oven cleaner or oven liner
protective coating of any kind should be used in or around any part of the
oven.
•It is necessary to remove and remove the air filter frequency, for more details
gotopage38ofthe manual.
•Daily cleaning is required to remove grease from equipment. For more
details,seepage 40of themanual.
•Some products such as whole eggs and sealed containers –for example,
closedglassjars–areabletoexplodeand should notbeheatedinthisoven.
•Use this appliance only for its intended use asdescribed in the manual. Do not
use corrosive chemicals or vapors in this appliance. This type of oven is
specifically designed to heat,cook, or dry food. It is not designed for industrial
orlaboratoryuse.

11
•CleanOnlyPartsListedinManual.

12
3 - PRECAUTIONS TO AVOID POSSIBLE EXPOSURE
TO EXCESSIVE MICROWAVE ENERGY
(a ) Do not attempt to operate this oven with the door open since open-door
operation can result in harmful exposure to microwave energy. It is important not
todefeatortamperwiththesafetyinterlocks.
(b ) Do not place any object between the oven front face and the door or allow soil
orcleanerresiduetoaccumulateon sealingsurfaces.
(c ) Do not operate the oven if it is damaged. It is particularly important that the
oven door close properly and that there is no damage to the: (1 ) Door (bent), (2 )
Hingesandlatches(brokenorloosened),(3)Door sealsand sealingsurfaces,
(d ) The oven should not be adjusted or repaired by anyone except properly
qualifiedservicepersonnel.

13
EQUIPOTENTIAL BONDING SYMBOL: This symbol identifies the terminals
which, when connected together, bring the various parts of an equipment or
of a system to the same potential, not necessarily being the earth (ground)
potential,e.g.forlocalbonding.
PROTECT EARTH (GROUND) SYMBOL: This symbol identifies the terminal
which is intended for connecting an external conductor for protection against
electric shock in case of a fault, or the terminal of a protective earth (ground)
electrode.
MICROWAVE WARNING SYMBOL: This symbol identifies there is a risk of
external and internal burns of body parts following exposure to microwave
energy.
HOT SURFACE WARNING SYMBOL: This symbol identifies There is a risk of
burns from high temperatures inside the cavity and on the inside of the
appliancedoor.
HIGH VOLTAGE WARNING SYMBOL: This symbol identifies a risk of high
voltageelectricshock.

14
4INSTALLATION
The installation of our products must be done with care to avoid problems or
damagetotheequipmentandguaranteeitsoptimalperformance.
Thisappliancemustbeinstalledby anauthorizedtechnician.
WARNING
•
Thisovenisnotintendedforbuilt-ininstallation (i.e.,installing the oven inany
structurethatsurroundstheovenby fiveormoresides).
4.1Dimensions
29 ¹⁄›"
(750 mm) 1¹⁄8"
(30 mm)
16"
(405 mm) 12 ¹⁄ "
(310 mm) 26 ³⁄ "
(680 mm) 1¹⁄8"
(30 mm)
21 S⁄ıь"
(544 mm)
27 ³⁄8"
(694 mm)
14 ¹⁄ıь"
(357 mm)
23 ¹⁄ "
(592 mm)
4"
(102 mm)
39"
(990 mm)
Capacity
17.5L - 0.61 cu.ft
Height
183mm - 7 ¹⁄ "
Width
336mm - 13 ¹⁄ "
Depth
287mm - 11 ¹⁄ "

15
4.2GeneralInstructions
•
The oven must be installed on a surface or counter that supports its weight of
approximately174lb(79Kg).
•
Donotblocktheairinletsoroutletsof theunit.
•
The oven must not be positioned near stoves, deep fryers, hot plates and
other equipment that releases fat, fumes and heat. The ventilation, electrical
panel and motor vents must be far from these heat sources to prevent
damagetotheelectricalsystemoftheappliance.
•
Theovenmustbeinstalledin aleveledandwell-ventilatedarea.
•
The installation of the equipment in a non-suitable place can result in the loss
ofwarranty.

16
208V
220/
240V
4.3ElectricPower
Note: The oven must be properly configured for optimum performance
before using for the first time. Follow the steps listed below to set the oven
operating system to either 208V or 240V supply voltage based on the voltage
being supplied at the oven's receptacle. This configuration step is only
performed on the initial set-up and installation. The oven will not need to be
configuredagainaslongasthesupplyvoltageremainsunchanged.
The ovens are shipped in a defaulted position of 240V for safety unless
specified on the original purchase order. Changes to this set voltage can be
easily done by following the instructions listed below. Please contact Pratica
Technical Support for more information if needed +1.214 584.6269.
1. Verify the supply voltage. If this knowledge is not readily available,
please use a qualified technician or individual familiar and comfortable
with electricity to take the measurements. Care must be used to avoid
electrical shock. Confirm the electrical configuration of the receptacle
conforms to the electrical specification in the table below and written
ontheoven'sdataplatelocatedonthebackoftheunit.
2. Connecttheoventothepowersupplyand turn on.
3. Press foraccesstoMenuscreen.
4. Press
to enter the Settings screen.
5. Enter password 456789 and press OK for access to user settings.
Note:Thepasswordmaybechanged(seepage34).
6. Press
to access the second Settings screen.
7. Press toentertheVoltagescreen.
8. Press or tosetthecorrectvoltage.
9. The oven is now ready for use, press the and confirm to
backtothePreheatingscreen.

17
Make sure that the electrical characteristics of building electric network follow the
technical specifications of the oven which can be found on the identification plate
locatedonthebackpanelandin theelectricaltablebelow.
Region
Voltage
(V)
Phases
Freq.
(Hz)
Power
(kW)
Circuit
Breaker
(A)
Cable
Socket
USA
208
Single
60
6.2
32
3x10AWG
NEMA
6-30
240
7.2
Use a dedicated circuit breaker for the oven. The maximum distance between the
rightsideof theovenandtheelectricalreceptacleis6ft.
Cooling
Exhaust
Outlet
•Properly size the circuit breaker and network cables. The oven requires the use of 30A circuit
breakeranda3x10 AWGpower cord.
•The oven MUST be properly grounded. In the event of damage due to improper grounding to
third parties and/or to the equipment, the will be held responsible and will characterized as
negligenceduetothenon-compliancewiththestandards.
•Thereis an equipotentialpointonthe rearpanel of theoven.
•
Note: The equipment has a connector to interconnect it with other equipment. This
connector is intended to keep several devices with the same electrical potential. Not
necessarily the grounding of a local connection. This connector on the back of the
deviceisidentifiedbythesymbolontheright:
30 mm
27 ¹⁄›"
(700mm)
Maximum
Distance
(1.8m)
6 ft
Circuit
Breaker
Air Inlet
Steam
Outlet
Power
Cable

18
2
3
1
7
4
6
5
5MultiChef XSTECHNOLOGY
The MultiChef XS oven uses a combination of heating for high-speed forced
air convection and microwave energy to heat forced food more quickly than
theconventionalmethods.
Thefigurebelowillustratesthestepsinvolvingthetechnology:
1)
Magnetrons generate energy through microwaves, which uniformly heat
thewatermoleculesofthefood;
2)
Internalheatingresistorstransferheatenergyto circulatingair;
3)
TheStirrerdistributesthemicrowavesevenly;
4)
Impingedairis directedtowardfood;
5)
Inferiorresistorshelptheheattransferwithinthechamber;
6)
The Catalytic Converter converts the volatile organic compounds into
c
arbon
dio
xide
and
w
a
ter
(CO
2
and
H2O);
7)
Theblowermotormakestheaircirculateathighspeed.
Table of contents
Other M-TI Oven manuals