Maas KCB-H-1000 User manual

EN
DE
Portable CB radio
Tragbares CB-Funkgerät
USER MANUAL
BEDIENUNGSANLEITUNG
Portable CB Radio
Tragbares CB-Funkgerät
Radio CB portátil
Radio CB portable
KBC-H-1000
USER MANUAL
BEDIENUNGSANLEITUNG
MANUAL DE USUARIO
MANUEL DE L’UTILISATEUR
ES
FR
KCB-H-1000

EN

- 3-
EN
– Read the following warnings to prevent fire, personal injury, or damage
to the CB radio or antenna.
– Do not try to adjust the CB radio while driving, it is dangerous.
– Do not position the CB radio on an excessively dusty, wet or unstable
surface. Do not connect the antenna during transmission, risk of burns
or electric shock. Keep your distance from devices that create interfe-
rence (such as: TV, generator, etc.)
– Those who use pacemakers are advised to keep their distance from the
antenna during transmission and especially not to touch it.
– Do not bring metal objects close to the internal electrical part of the CB
radio; danger of electric shock.
– Avoid exposing the CB radio to temperatures lower than -26°C and hig-
her than +80°C. The temperature inside a vehicle can sometimes ex-
ceed 80°C, which can cause irreparable damage in case of prolonged
exposure.
– Do not expose the CB radio to sunlight for a long time.
– Do not put anything on the CB radio, it will prevent it from cooling down.
Check if you have a sufficiently charged car battery to avoid a rapid
discharge.
– It is important to stop the CB radio before starting the engine, to avoid
damage caused by the high voltage at start-up.
– When replacing the fuse, you must use a fuse of the same type as the
original one. If an abnormal smell or smoke comes out of the CB radio,
turn off the power immediately.
– Do not transmit for a long time, the CB radio may heat up and mal-
function.
Safety warnings
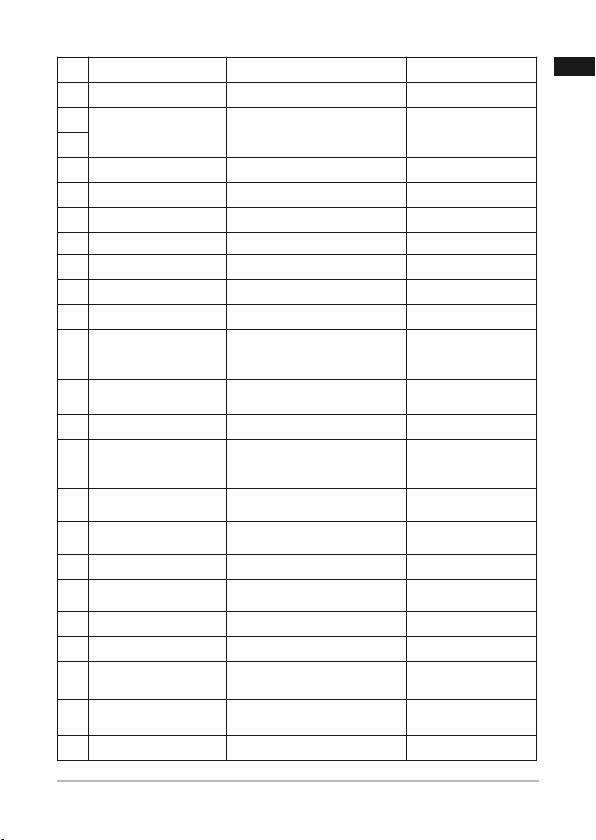
Important note! In some countries it may be necessary to present the
license that will certify the right to use the CB band. Please check the
local legislation and the table at the end of the manual.

- 4-
EN Keys and functions

- 5-
EN
Description Short press Long press
1 Antenna
2Volume
On/Off
3 Status LED
4 LCD screen
5 PTT Transmission
6 HI/LO High/low power selection
7 Backlight On/Off
8 Monitor
9 FUNC Menu
10 Increase channel
number
Continuous
increase in
channel number
11 DW Enable/Disable Dual
Watch Dual Watch
setting
12 LCR/VOX Last channel recall VOX control
13 Decrease channel
number
Continuous
decrease in
channel number
14 SQ/ASQ SQ/ASQ level selection Switch between
SQ/ ASQ
15 NRC/LOCK Enable/Disable NRC
(Noise Reduction Circuit) Key lock
16 AM/FM/BAND Switch between AM/FM Band selection
17 EMG/SC Emergency channel Enable/Disable
channel scanning
18 MIC
19 Speaker
20 2 pins PNI-K
headset connector
21 USB-C port for
battery charging
22 Belt clip

- 6-
EN
Turn the knob on the top of the CB radio [2] clockwise to turn it on. The
CB radio starts from the previous mode of use.
Turn the knob on the top of the CB radio [2] counterclockwise to turn it off.
After turning the CB radio on, continue to turn the knob [2] to adjust the
volume to the desired level.
Briefly press the CH or CH key to increase or decrease the channel
number, until you reach the desired channel.
Long press the CH or CH key to quickly increase or decrease the
channel number.
Briefly press the SQ/ASQ [14] key. On the screen, the SQ icon and the
digits corresponding to the level flash. 25 levels of manual squelch are
available, from 00 (squelch off ) to 25 (highest level).
When the digits corresponding to the level are flashing, press the or
keys to select the desired level.
To confirm the selection, press the SQ/ASQ key or wait 5 seconds.
Long press the SQ/ASQ [14] key to switch to ASQ mode. On the screen,
the SQ icon becomes ASQ.
On the screen, the ASQ icon and the digits corresponding to the level
flash. There are 5 levels of manual squelch available, from 01 (the lowest
Usage instructions
Turn the radio on/off
Volume control
Channel selection
Squelch (SQ) level selection
Automatic squelch (ASQ) level selection

- 7-
EN
level) to 05 (the highest level). When the digits corresponding to the level
are flashing, press the or keys to select the desired level.
To confirm the selection, press the SQ/ASQ key or wait 5 seconds.
Press the AM/FM/BAND [16] key to switch between AM and FM. The
corresponding icon will appear on the screen.
Note: Not all standards support both types of modulation. If the band you
are in does not support AM or FM, pressing the AM/FM/BAND key will
not produce any change.
Press the EMG/SC [17] key to switch to channel 09. The EMG icon ap-
pears on the screen.
Press the EMG/SC key again to switch to channel 19.
Press the EMG/SC key again to exit Emergency mode. The EMG icon
disappears from the screen.
Long press the NRC/LOOK key to activate the key lock function. The
icon appears on the screen. When pressing any key you will hear a war-
ning beep and the icon will blink. All radio’s keys are locked, except the
PTT key.
Long press again the NRC/LOOK key to disable the key lock function.
The icon will disappear from the screen.
Long press the EMG/SC [17] key. The SC icon blinks on the screen. The
channel scanning starts immediately.
During scanning, you can press the or key to change the scanning di-
rection. Long press the EMG/SC key or the PTT key to stop scanning.
The SC icon disappears from the screen.
AM/FM selection
Emergency channels (9/19)
Key lock
Channel scan

- 8-
EN
Briefly press the HI/LO [6] key on the side of the CB radio to change bet-
ween high (4 W) and low (1.5 W) transmission power. The HI or LO icon
will appear on the screen.
Long press the DW [11] key. The DW icon and the digits corresponding
to the channel blink on the screen. Press the or key to choose the second
channel you want to monitor. Press the DW key again to save and exit.
To activate the Dual Watch mode, briefly press the DW key. The two
channels set for simultaneous monitoring will be displayed successively
on the screen. The DW icon is blinking. Short press the DW key to exit.
Briefly press the NRC/LOOK [15] key to activate the background noise
reduction function. The NRC icon appears on the screen.
Briefly press the NRC/LOOK key again to disable the NRC function. The
NRC icon disappears from the screen.
Briefly press the LCR/VOX [12] key to return to the last channel you
stayed on for more than 5 seconds. Press LCR/VOX again to return to
the original channel.
Long press the LCR/VOX [12] key to activate the VOX function. The VOX
icon appears on the screen.
By activating the VOX function, you can transmit without pressing the PTT
key. The VOX sensitivity level can be set from the menu.
Long press the LCR/VOX [12] key to disable the VOX function. The VOX
icon disappears from the screen.
Channel scan
Dual Watch
NCR (Noise Reduction Circuit)
LCR (Last Channel Recall)
VOX

- 9-
EN
Briefly press the FUNC key [9] to access the menu. The icon and the cur-
rent setting (On or Off ) blink.
Press CH or CH to change the setting:
On - key beep enabled (the iconappears on the screen)
Off - key beep disabled (the icon disappears from the screen)
Press the FUNC [9] key twice to access the VOX menu.
On the screen, the VOX icon and the digits corresponding to the level
blink. Press the CH or CH key to change the VOX level. There are 5
levels available:
01 - low VOX sensitivity
05 - high VOX sensitivity
Press the FUNC [9] key three times to access the Roger Beep menu. The
icon and the current setting (On or Off ) blink.
Press CH or CH to change the setting:
On - roger beep enabled (the icon appears on the screen)
Off - roger beep disabled (the icon disappears from the screen)
Turn off the CB radio.
Hold down the AM/FM/BAND key [16] while restarting the CB radio. “150
TIME OUT TIMER” appears on the screen. Use the CH or CH keys
to set the maximum continuous transmission time.
Key beep
VOX level
Roger Beep
Menu
TOT (Timeout timer)

- 10-
EN
With the CB radio turned off, hold down the SQ/ASQ [14] key while tur-
ning back on the radio. The message Rest Default and the firmware ver-
sion will be displayed on the screen.
After the reset, the CB radio returns to the factory settings.
Long press the AM/FM/BAND [16] key. The icon corresponding to the
current standard blinks on the screen. Press the CH or CH key to
change the standard.
Short press AM/FM/BAND to save and exit or wait 5 seconds.
Check the Bands and frequency table at the end of this manual.
Reset
Standard selection
Frequency range 26.965 MHz – 27.405 MHz
Frequency tolerance ±300 Hz
Power supply 12 V (by the car adapter)
7.4 V ±0.4 V (by battery)
Emission power 4 W AM/FM
Consumption < 1.3 A
Frequency response 300–3000 Hz
Distortion < 8%
Impedance 50 Ω
Reception sensitivity 0.25 uv @ 12 dB
Interference rejection 60 dB
Audio power 1 W
Operating temperature –26 °C ~ +80 °C

- 20-
EN
DE
Norm Frequency
MHz Channel
Kanal Country
Land EMG (9/19)
EU 26.965–
27.405
40 CH
(4 W)
AM/FM
AT, BE, BG, CH,
CY, DK, EE, ES,
FI, FR, GR, HR,
HU, IE, IS, IT, LT,
LU, LV, NL, NO,
PT, RO, SE, SI
CH 09:
27.065 MHz
AM/FM
CH 19:
27.185 MHz
AM/FM
CE 26.965–
27.405
40 CH
(4 W) FM RO, MT
CH 09:
27.065 MHz
AM/FM
CH 19:
27.185 MHz
AM/FM
UK 27.60125–
27.99125
40 CH (4W)
FM UK
CH 09:
27.060 MHz
AM/FM
CH 19:
27.180 MHz
AM/FM
PL 26.960-
27.400
– 5kHz
40 CH (4W)
AM/FM
PL
CH 09:
27.060 MHz
AM/FM
CH 19:
27.180 MHz
AM/FM
DE
26.965-
27.405
01 CH-40
CH (4W)
AM/FM DE
CH 09:
27.065 MHz
AM/FM
CH 19:
27.185 MHz
AM/FM
26.965-
27.405
41 CH-80
CH (4W) FM
Bands and frequencies
Normen und Frequenzen
EN

DE
.RQIRUPLWlWVHUNOlUXQJ
(8GHFODUDWLRQRIFRQIRUPLW\
+LHUPLWHUNOlUHQZLU
:HKHUHE\GHFODUH
0DDV(OHNWURQLN±3HWHU0DDV
+HSSHQGRUIHUVWU
'(OVGRUI'HXWVFKODQG
GDVVVLFKGDV*HUlW
WKDWWKHIROORZLQJSURGXFW
*HUlWHDUW&%)XQNJHUlW$0)0
3URGXFWW\SH&%UDGLR$0)0
7\SHQEH]HLFKQXQJ0DDV.&%+
7\SHGHVLJQDWLRQ0DDV.&%+
LQhEHUHLQVWLPPXQJPLWGHQJUXQGOHJHQGHQ$QIRUGHUXQJHQXQGGHQEULJHQHLQVFKOlJLJHQ
%HVWLPPXQJHQGHU5LFKWOLQLH(8XQG(*EHILQGHW
LVLQFRPSOLDQFHZLWKWKHHVVHQWLDOUHTXLUHPHQWVDQGRWKHUUHOHYDQWSURYLVLRQVRIGLUHFWLYH(8DQG
(&
(19(19
(19
(1$
(1
(OVGRUI
,QKDEHU&(2
Konformitätserklärung
EU Declaration of Conformity
We hereby declare,
Maas Elektronik - Peter Maas
Heppendorferstr. 23
D-50189 Elsdorf (Germany)
That the following product,
Product type: CB radio AM / FM
Type designation: Maas KCB-H1000
Is in compliance with the essential requirements and other relevant
provisions of directive 2014/53/EU and 2011/65/EC.
EN 301489-1 V2.2.3, EN 301489-13 V1.2.1
EN 300433 V2.1.1
EN 62368-1:2014+A11:2017
EN 62311:2008
Declaration of conformity
EN

- 11-
DE
– Versuchen Sie nicht, das CB-Funkgerät während der Fahrt einzustellen,
es ist gefährlich.
– Stellen Sie das CB-Funkgerät nicht auf einer übermäßig staubigen, nas-
sen oder instabilen Oberfläche auf.
– Schließen Sie die Antenne nicht während des Sendens an, es besteht
Verbrennungs- oder Stromschlaggefahr.
– Halten Sie Abstand zu Geräten, die Störungen verursachen (z. B.: Fern-
seher, Generator usw.)
– Trägern von Herzschrittmachern wird empfohlen, während der Übertra-
gung Abstand zur Antenne zu halten und diese insbesondere nicht zu
berühren.
– Bringen Sie keine Metallgegenstände in die Nähe des internen elektri-
schen Teils des CB-Funkgeräts; Gefahr eines Stromschlags.
– Vermeiden Sie es, das CB-Funkgerät Temperaturen unter –26°C und
über +80°C auszusetzen. Die Temperatur in einem Fahrzeug kann
manchmal 80°C überschreiten, was bei längerer Einwirkung irreparable
Schäden verursachen kann. Setzen Sie das CB- Funkgerät nicht längere
Zeit dem Sonnenlicht aus.
– Legen Sie nichts auf das CB-Funkgerät, es verhindert das Abkühlen.
– Überprüfen Sie, ob Ihre Autobatterie ausreichend geladen ist, um eine
schnelle Entladung zu vermeiden.
– Es ist wichtig, das CB-Funkgerät vor dem Starten des Motors zu stop-
pen, um Schäden durch die Hochspannung beim Start zu vermeiden.
– Beim Austausch der Sicherung muss eine Sicherung desselben Typs
wie die Originalsicherung verwendet werden.
– Wenn ein ungewöhnlicher Geruch oder Rauch aus dem CB-Funkgerät
austritt, schalten Sie es sofort aus.
– Senden Sie längere Zeit nicht, kann das CB-Funkgerät sich erhitzen und
Fehlfunktionen verursachen.
Sicherheitshinweise
Wichtiger Hinweis! In einigen Ländern kann es erforderlich sein, die
Lizenz vorzulegen, die das Recht zur Nutzung des CB-Bandes be-
scheinigt. Bitte überprüfen Sie die lokale Gesetzgebung und die Ta-
belle am Ende des Handbuchs.

- 12-
DE
Tasten, Anschlüsse usw.

- 13-
DE
Beschreibung Kurz drücken Lange drücken
1 Antenne - -
2 Ein/aus Lautstärke - -
3 Status-LED - -
4 Display - -
5 PTT Senden Senden
6 HI/LO hohe/niedrige Leistung
7 - - Hintergrundbe-
leuchtung ein/aus
8 - Monitor -
9 FUNC Menü -
10 CH Kanalnummer erhöhen kontinuierlich
11 DW Dual Watch aktivieren/
deaktivieren Dual-Watch-
Einstellung
12 LCR • VOX Abruf des letzten Kanals VOX-Steuerung
13 CH Kanalnummer verringern kontinuierlich
14 SQ • ASQ SQ/ASQ-Pegel Wahl SQ/ASQ
15 NRC • LOCK NRC (Noise Reduction)
aktivieren/ deaktivieren Tastensperre
16 AM/FM • BAND AM/FM-Umschaltung Bandwahl
17 EMG • SC Notfallkanal Suchlauf aktivie-
ren/deaktivieren
18 MIC - -
19 Lautsprecher - -
20 2-Pin-PNI-K
Headset-
Anschluss - -
21 USB-C-Anschluss
zum Aufladen des
Akkus - -
22 Gürtelclip - -
Funktionen

- 14-
DE
Drehen Sie den Knopf auf der Oberseite des CB-Funkgeräts [2] im Uhr-
zeigersinn, um es einzuschalten. Das CB-Funkgerät startet von der vor-
herigen Verwendungsart. Drehen Sie den Knopf auf der Oberseite des
CB-Funkgeräts [2] gegen den Uhrzeigersinn, um es wieder auszuschal-
ten.
Drehen Sie nach dem Einschalten des CB-Funkgeräts den Knopf [2] wei-
ter, um die Lautstärke auf den gewünschten Pegel einzustellen.
Drücken Sie kurz die Taste CH oder CH , um die Kanalnummer zu
erhöhen bzw. zu verringern, bis Sie den gewünschten Kanal erreichen.
Halten Sie die Taste CH oder CH gedrückt, um die Kanalnummer
schnell zu erhöhen bzw. zu verringern.
Drücken Sie kurz die Taste SQ/ASQ [14]. Auf dem Display blinken das
Symbol SQ und die den Pegel entsprechenden Ziffern. 25 manuelle
Squelchpegel sind verfügbar, von 00 (Squelch aus) bis 25 (höchster
Pegel).
Wenn die dem Pegel entsprechenden Ziffern blinken, drücken Sie die Tas-
ten CH oder CH , um den gewünschten Pegel auszuwählen.
Um die Auswahl zu bestätigen, drücken Sie die SQ/ASQ-Taste oder war-
ten Sie 5 Sekunden.
Lautstärkeeinstellung
Funkgerät ein-/ausschalten
Kanalauswahl
Squelch (SQ) Pegeleinstellung
Bedienung

- 15-
DE
Drücken Sie die Taste SQ/ASQ [14] lange, um in den ASQ-Modus zu
wechseln. Auf dem Display wird das SQ-Symbol zu ASQ.
Auf dem Display blinken das ASQ-Symbol und die dem Pegel entspre-
chenden Ziffern. Es stehen 5 Pegel der automatischen Rauschsperre zur
Verfügung, von 01 (niedrigster) bis 05 (höchste Pegel).
Wenn die dem Pegel entsprechenden Ziffern blinken, drücken Sie die Tas-
ten CH oder CH , um den gewünschten Pegel auszuwählen.
Um die Auswahl zu bestätigen, drücken Sie die SQ/ASQ-Taste oder war-
ten Sie 5 Sekunden.
Drücken Sie die Taste AM/FM • BAND [16], um zwischen AM und FM
umzuschalten. Das entsprechende Symbol erscheint im Display.
Hinweis: Nicht alle Bänder (Ländernormen) unterstützen beide Modulati-
onsarten. Wenn das aktuelle Band AM oder FM nicht unterstützt, bewirkt
das Drücken der AM/FM • BAND-Taste keine Änderung.
Drücken Sie die Taste EMG • SC [17], um auf Kanal 09 umzuschalten.
Das EMG-Symbol erscheint im Display.
Drücken Sie EMG • SC erneut, um auf Kanal 19 umzuschalten.
Drücken Sie die EMG • SC-Taste erneut, um den Notfallmodus zu ver-
lassen. Das EMG-Symbol verschwindet vom Display.
Drücken Sie lange die NRC/LOCK-Taste [15], um die Tastensperre zu ak-
tivieren. Das Schlüsselsymbol erscheint im Dispay. Beim Drücken einer
beliebigen Taste ertönt ein Warnton und das Schlüsselsymbol blinkt. Alle
Tasten des Funkgeräts sind gesperrt mit Ausnahme der PTT-Taste. Drü-
cken Sie die Taste NRC/LOCK-Taste erneut lange, um die Tastensperre
zu deaktivieren. Das Schlüsselsymbol verschwindet vom Display.
AM/FM-Auswahl
Notfallkanäle (9/19)
Tastensperre
Automatic Squelch (ASQ) Pegeleinstellung

- 16-
DE Drücken Sie lange die Taste EMG • SC [17]. Das SC-Symbol blinkt im
Display und der Sendersuchlauf startet.
Während des Scannens können Sie die Taste CH oder CH drücken,
um die Suchlaufrichtung zu ändern. Drücken Sie die EMG • SC-Taste
lange oder die PTT-Taste, um den Scanvorgang zu stoppen. Das SC-
Symbol verschwindet vom Display.
Drücken Sie kurz die Taste HI/LO [6] an der Seite des CB-Funkgeräts,
um zwischen hoher (4 W) und niedriger (1,5 W) Sendeleistung zu wech-
seln. Das HI- oder LO- Symbol erscheint auf dem Display.
Drücken Sie lange die Taste DW [11]. Das DW-Symbol und die dem Kanal
entsprechenden Ziffern blinken im Display. Drücken Sie die Taste CH
oder CH , um den zweiten Kanal auszuwählen, den Sie überwachen
möchten. Drücken Sie die DW-Taste erneut, um die DW-Kanäle zu spei-
chern.
Um den Dual-Watch-Modus zu aktivieren, drücken Sie kurz die DW-Taste.
Die beiden für die gleichzeitige Überwachung eingestellten Kanäle werden
nacheinander auf dem Display angezeigt und das DW-Symbol blinkt.
Drücken Sie zum Beenden kurz die DW-Taste.
Drücken Sie kurz die Taste NRC • LOOK [15], um die Funktion zur Re-
duzierung von Hintergrundgeräuschen zu aktivieren. Das NRC-Symbol
erscheint auf dem Display. Drücken Sie erneut kurz die Taste NRC •
LOOK, um die NRC-Funktion zu deaktivieren. Das NRC-Symbol ver-
schwindet vom Display.
High/Low-Power-Auswahl
Dual Watch
NCR (Noise Reduction)
Sendersuchlauf

- 17-
DE
Drücken Sie kurz die LCR • VOX [12], um zum letzten Kanal zurückzu-
kehren, auf dem Sie länger als 5 Sekunden verblieben sind. Drücken Sie
erneut LCR • VOX, um zum ursprünglichen Kanal zurückzukehren.
Drücken Sie lange die Taste LCR • VOX [12], um die VOX-Funktion zu
aktivieren. Das VOX-Symbol erscheint auf dem Display.
Durch Aktivieren der VOX können Sie senden, ohne die PTT-Taste zu drü-
cken. Die VOX-Empfindlichkeit kann über das Menü eingestellt werden.
Drücken Sie lange die Taste LCR • VOX [12], um die VOX-Funktion zu
deaktivieren. Das VOX-Symbol verschwindet vom Display.
Drücken Sie kurz die Taste FUNC [9], um in das Menü zu gelangen. Das
Glockensymbol und die aktuelle Einstellung (ON=ein oder OFF=aus) blin-
ken. Drücken Sie oder , um die Einstellung zu ändern.
ON – Tastenton aktiviert (das Glockensymbol erscheint im Display)
OFF - Tastenton deaktiviert (das Glockensymbol verschwindet)
Drücken Sie zweimal die Taste FUNC [9], um das VOX-Menü aufzurufen.
Auf dem Display blinken das VOX-Symbol und die dem VOX-Pegel ent-
sprechenden Ziffern.
Drücken Sie die Taste CH oder CH , um den VOX-Pegel zu ändern.
Es stehen 5 Pegel zur Auswahl:
01 - niedrigste VOX-Empfindlichkeit
05 - höchste VOX-Empfindlichkeit
VOX
Tastenquittungston
Menü
LCR (Last Channel Recall)
VOX-Pegel

- 18-
DE Drücken Sie dreimal die Taste FUNC [9], um das Roger Beep-Menü auf-
zurufen. Das Symbol und die aktuelle Einstellung (Ein oder Aus) blinken.
Drücken Sie CH oder CH , um die Einstellung zu ändern:
On – Roger Beep aktiviert (das Notensymbol erscheint im Display)
Off - Roger Beep deaktiviert (das Notensymbol verschwindet)
Schalten Sie das CB-Funkgerät aus.
Halten Sie die AM/FM • BAND-Taste [16] gedrückt, während Sie das
CB-Funkgerät wieder einschalten. „150 TIME OUT TIMER“ erscheint im
Display. Verwenden Sie die Tasten CH oder CH , um die maximale
Dauersendezeit einzustellen.
Durch den Reset kehrt das CB-Funkgerät zu den Werkseinstellungen (SQ-
Pegel 8, Kanal 9, FM, Low Power und EU-Band) zurück.
Schalten Sie das Funkgerät aus und halten Sie die Taste SQ/ASQ [14]
gedrückt, während Sie das Funkgerät wieder einschalten. Auf dem Dis-
play wird die Meldung „RST“ und die Firmware-Version angezeigt.
Danach erscheint das normale Display.
Drücken Sie lange die Taste AM/FM • BAND [16]. Das der aktuellen
Norm entsprechende Symbol blinkt auf im Display.
Drücken Sie die Taste CH oder CH , um die Ländernorm zu ändern.
Drücken Sie nun die Taste AM/FM • BAND kurz, um die Änderung zu
speichern, oder warten Sie 5 Sekunden.
Beachten Sie die Ländernormen bzw. die Frequenztabelle am Ende dieser
Anleitung.
TOT (Timeout timer)
Zurücksetzen
Ländernorm
Roger Beep
Table of contents
Languages: