manuals.online logo
Brands
  1. Home
  2. •
  3. Brands
  4. •
  5. MAD
  6. •
  7. Burner
  8. •
  9. MAD EcoSmart+ Fire Gin 90 Bar User manual

MAD EcoSmart+ Fire Gin 90 Bar User manual

NOTE: Weight is approx only. Weight includes burner, re screen and black glass charcoal
CLEARANCES &
INSTALLATION MANUAL
PROPANE & NATURAL GAS
Please read these instructions and the Burner Operations Manual provided with your burner
completely before operating the appliance.
Gin 90 Dining
Concrete 172.5kg, 379.5lbs
Teak 128kg, 281.6lbs
Gin 90 Chat
Concrete 162.5kg, 357.5lbs
Teak 119kg, 261.8lbs
Gin 90 Low
Concrete 154.5kg, 339.9lbs
Teak 100kg, 220lbs
Gin 90 Bar
Concrete 180.5kg, 397.1lbs
Teak 133kg, 292.6lbs
www.ecosmartre.com
ENGLISH
Fireplace
Clearances
When planning an appliance installation, it’s necessary to determine
the following information rst:
Environmental Conditions
WARNING: Ensure that your re is positioned away from ammable
materials and other sources of ignition (combustible materials,
gasoline and other ammable vapors and liquids) at all times. Pay
very close attention to positioning the re away from items that may
move as a result of wind and drafts.
For example trees/branches/
curtains/paper and the like.
The base of the burner within the model must never come into direct
contact with ammable materials.
If you live in extreme weather conditions where accumulation of snow
is likely, use of the Winter Bag is imperative in order to be covered by
the warranty.
Locating your appliance
Adequate and constant ventilation is important to keep the appliance
functioning properly and safely, including ventilation of the appliance
undersides. Setting the appliance without air circulation underneath
can cause heat build up and improper combustion. Do not remove
the feet or operate the appliance with missing feet.
1. Locate the appliance on hard, at surface that extends the full
length and width of the appliance. The appliance and the LP tank
cover can be placed on combustible surface (such as wood deck)
or on non-combustible material (such as concrete). Ensure all
clearances to the sides and clearances above the appliance are
observed at all times (see gures 1 and 2).
2. Maintain a minimum air space of ½” (12.5mm) between the ground
surface and the underside of the appliance sidewalls by adjusting
the articulating feet up or down as necessary.
3. Do not place the appliance over grass, articial turf, carpet or
any uneven surface, as this will block the airow underneath the
appliance. See gure 1.
4. Follow the same instructions above for the LP tank cover (if
purchased). See gure 1.
CORRECT
Min 0.5’’
(12.5mm)
INCORRECT
CORRECT
Min 0.5’’
(12.5mm) INCORRECT
Figure 1
Position the appliance adjacent to the gas supply line or LP gas
supply cylinder.
DO NOT locate the appliance where it will get excessively wet or
submerged in water.
Minimum Clearances
Note: Measurements are distances closest to the ame
Side clearances to xed and stable furniture items that are not
susceptible to movement such as lounges or patio furniture must remain
a minimum of 24in (610mm) away from the ame at all times.
Overhead clearances to items that are susceptible to movement
(e.g. Curtains/Trees) must remain a minimum of:
- 78.7in (2000mm) away from the ame at all times.
Ceiling clearances must remain a minimum of:
- 72in (1,829mm) to overhang from top of burner.
Please note that:
Any furniture items or ttings directly above or beside the Burner
installation must be deemed suitable for heat tolerances by
their manufacturer e.g. electronic items including screens and
entertainment equipment, wallpaper, laminates, veneers, glues and
reconstituted materials.
MAD Design USA is not liable for any injuries or damages sustained
through any installation not in compliance with this manual.
A re extinguisher is strongly recommended.
WARNING
MAD Design USA disclaims any responsibility for, and the
warranty will be voided by, the following actions:
• Installation and use of any damaged components.
• Modication of the burner assembly or burner orice.
• Installation other than as instructed in this manual.
Any such action may cause a re hazard
WARNING
Fire Risk
Provide adequate clearance:
• Around air openings
• For service access
Locate appliance away from trac areas
Clearance measurements are distances from the edge of the ame,
not from the centre.
Figure 2
72in MIN
(1,829mm)
24in MIN
(610mm)
24in MIN
(610mm)
ENGLISH
1. Conrm you have received all necessary
parts as illustrated.
x 24
24 x M6x70mm Hex bolts
with wing nuts and washers
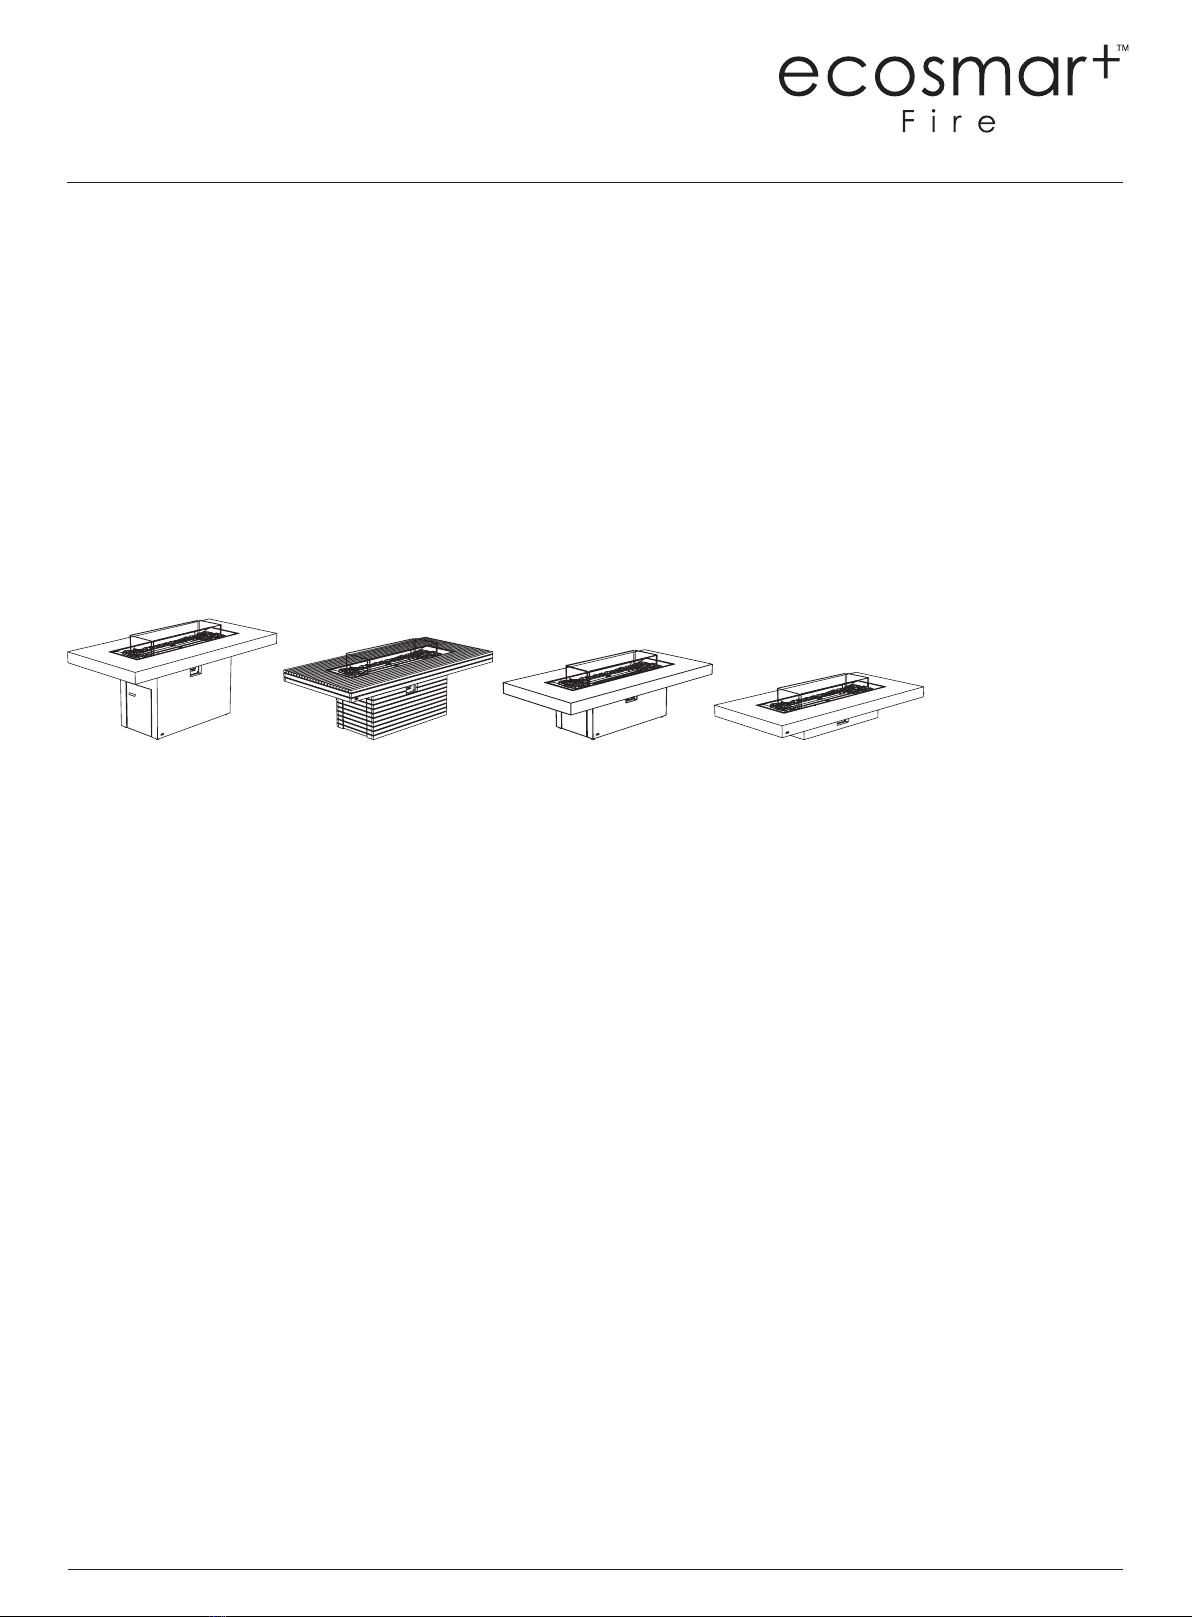
Gin 90 Table Top
Gin 90 Base
(Low, Chat, Dining or Bar height variants)
Propane Gas Bottle Platform
(For gas fuelled burners only)
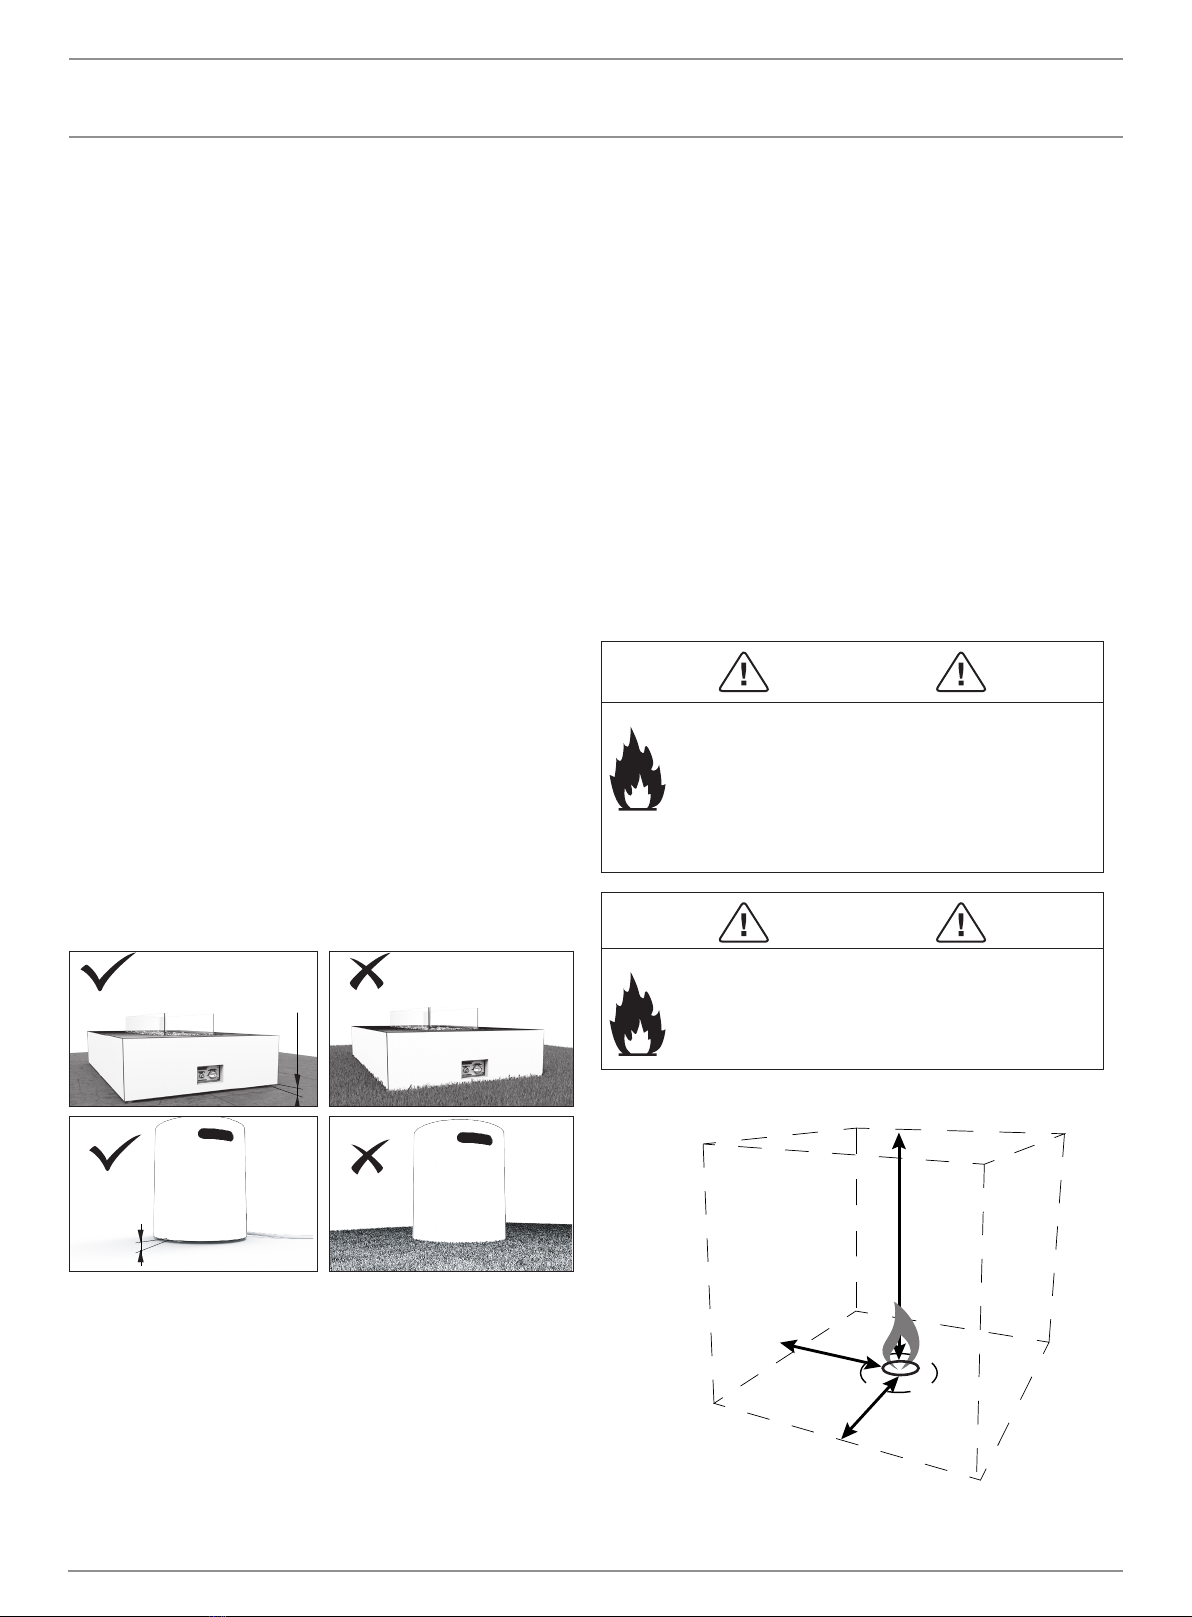
2. These models come with Ground Fixing
Brackets so they can be installed in a
xed position. Follow the instructions
supplied with the Ground Fixing Brackets to
complete the installation of the product.
3. NOTE: Height extension brackets are
available as an optional part to lift your table
top by an additional 76mm [3in].
If applicable, follow the instructions supplied
in the Lift Kit before proceeding with step 4.
4. Carefully align the Gin 90 top and table
base. Ensure the 6 xing points are aligned.
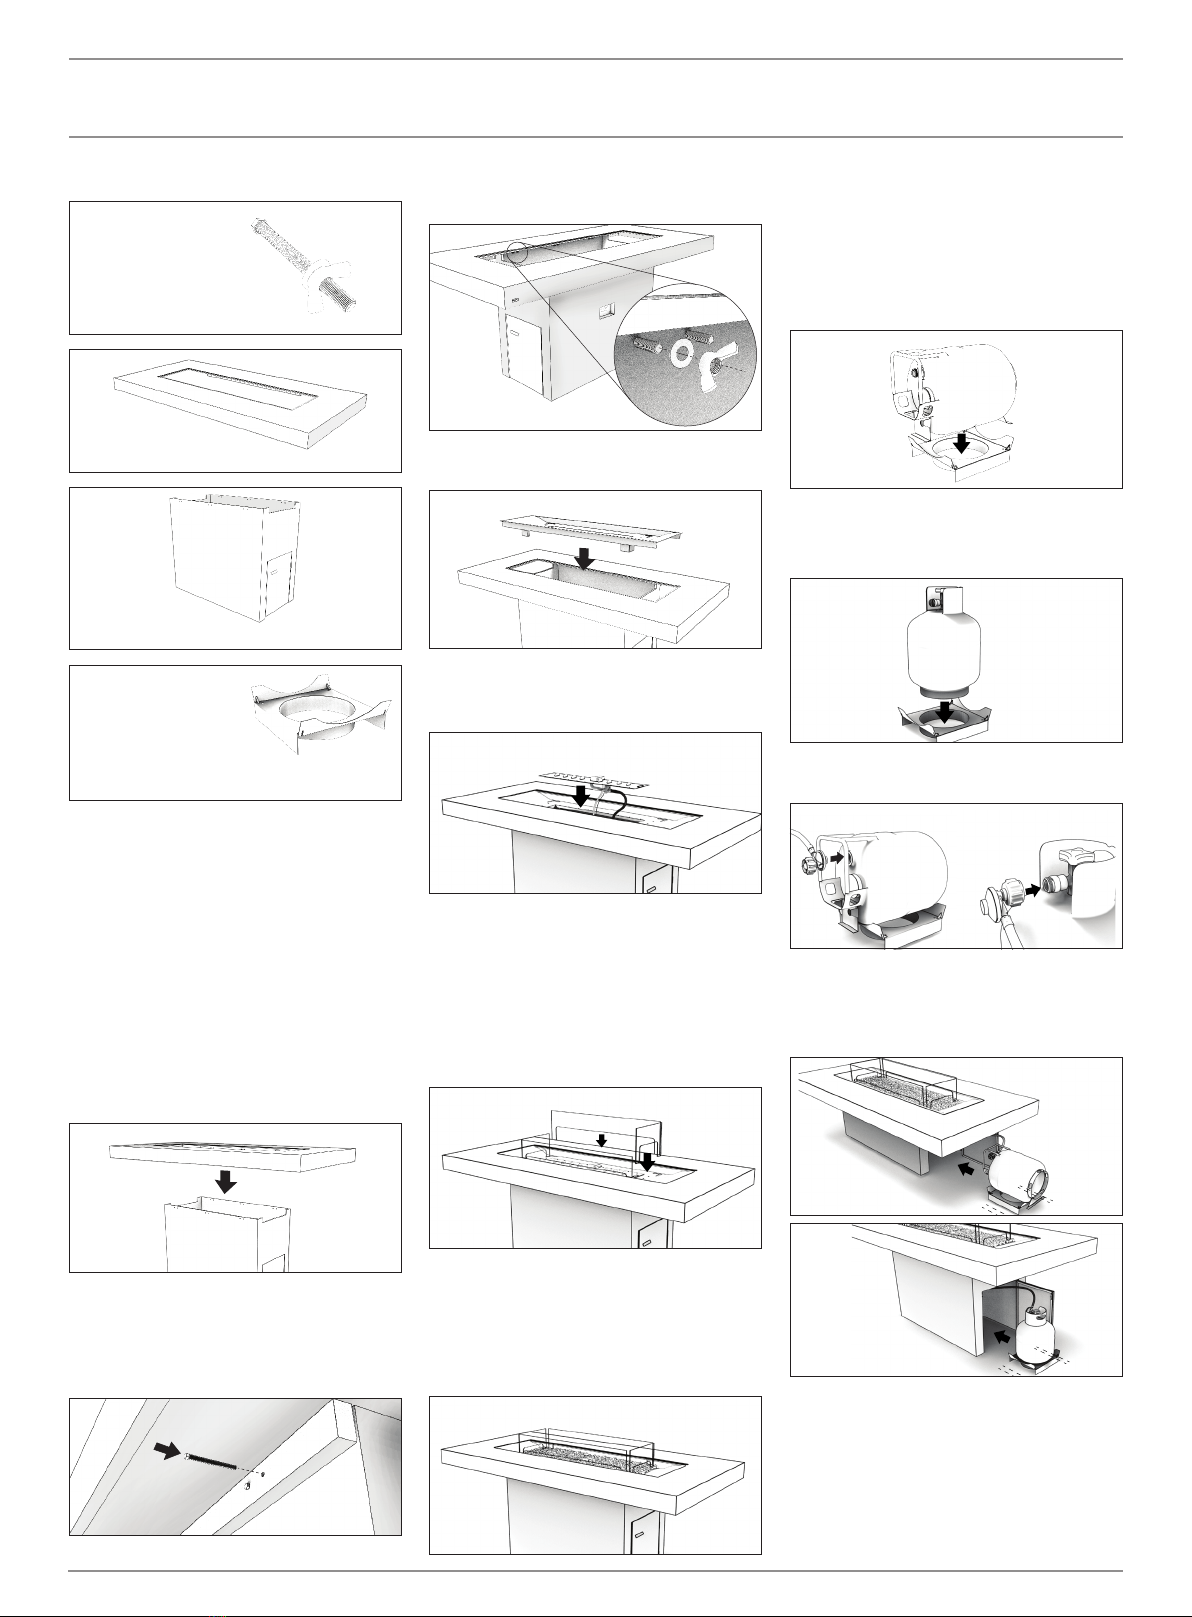
5. Disassemble the nut and bolt sets. Insert
the ange bolts from the underneath of
the table top where the xing positions
are aligned. Insert the bolt with the thread
facing inwards.
6. Once the bolts have been fully pushed
through its xing positions, install the washer
and secure tightly using the wing nut.
7. Insert the metal tray into the base.
8. Insert burner into metal tray. Please read
assembly instructions in the Operations
Manual provided with your burner.
5.1 Insert Ethanol burner
9. Insert Glass Screen (If applicable). Align
each glass screen tab with the designated
slots in the metal tray, gently put into
position. Exercise caution so as not to
fracture or damage glass. If included as a
standard part (compulsory in the USA), the
appliance must not be operated without the
glass screen installed.
6.1 Install Glass rescreens
10. Fill the burner area with the included black
glass media. Use all black glass charcoal
provided for best eect. Keep clear of
the sparker to avoid accidental blockage.
Spread the media evenly while ensuring the
burner is completely covered.
6 Insert decorative media into the tray area
IF USING PROPANE GAS BOTTLE
Gin 90 Chat, Dining and Bar Tables are the
only models suitable for storing the gas bottle
within the table base.
Gin 90 Chat: A horizontal propane bottle is
required. Turn the propane platform 90º and
rest the bottle on the holding tabs.
If you have a Horizontal propane bottle.
Turn the platform 90 degrees and rest the
bottle on the platform holding tabs
Gin 90 Dining and Gin 90 Bar: Place the gas
bottle onto the propane gas bottle platform in
an the upright position.
For Models: GNT Dining and GNT Bar Gas burner variants;
will require use of the Propane bottle platform.
Place the gas bottle onto the gas platform in the upright position as shown
Attach gas supply hose to the Propane bottle.
Ensure the Propane Gas Bottle Platform
assembly is in the correct orientation. Carefully
push the assembly into the cavity within the
Table Base. Close the door once in position.
Gin 90 Chat
Ensure the bottle platform assembly is
in the correct orientation. Carefully push
the assembly into the GNT table base.
Close the Door once complete.
Gin 90 Dining & Bar
CAUTION: No other items should be stored
within the Table Base cavity while the re is in
operation.
OPERATE ACCORDING TO THE BURNER
OPERATIONS MANUAL INCLUDED WITH
THE BURNER.
Fireplace
Installation
© Copyright 2004 - 2020 MAD Design Group. All rights reserved. V1120
MAD Design Group
Showrooms 3 & 4, 40-42 O’Riordan Street
Alexandria NSW 2015 Australia
Tel: +61 2 9997 3050 Email: [email protected]
REV1120

This manual suits for next models

3

Popular Burner manuals by other brands

Riello RG4S TL Installation, use and maintenance instructions

Riello

Riello RG4S TL Installation, use and maintenance instructions

Unigas TLX92R manual

Unigas

Unigas TLX92R manual

KitchenAid KBZU122T Installation Instructions and Use & Care Guide

KitchenAid

KitchenAid KBZU122T Installation Instructions and Use & Care Guide

DCS BGB131 Installation, use and care guide

DCS

DCS BGB131 Installation, use and care guide

BRAND-MAN Rustler 2 BG2211A6 owner's manual

BRAND-MAN

BRAND-MAN Rustler 2 BG2211A6 owner's manual

Lamborghini Caloreclima N 7 BC manual

Lamborghini Caloreclima

Lamborghini Caloreclima N 7 BC manual

THIESSENS TH2BCMP manual

THIESSENS

THIESSENS TH2BCMP manual

Giersch GG35 Technical information installation instructions

Giersch

Giersch GG35 Technical information installation instructions

Anderson ANM76 Operation manual

Anderson

Anderson ANM76 Operation manual

Caliber CRG60R-L Installation use & care instructions

Caliber

Caliber CRG60R-L Installation use & care instructions

FCC EM-XSW2 manual

FCC

FCC EM-XSW2 manual

CIB UNIGAS HTLX115 installation manual

CIB UNIGAS

CIB UNIGAS HTLX115 installation manual

Riello Gulliver BS2D Installation, use and maintenance instructions

Riello

Riello Gulliver BS2D Installation, use and maintenance instructions

Nu-Way NDFL100-38 Handbook

Nu-Way

Nu-Way NDFL100-38 Handbook

Bentone B 40 A2.2 Installation and maintenance  instruction

Bentone

Bentone B 40 A2.2 Installation and maintenance instruction

Riello Burners RL 70/2 Installation, use and maintenance instructions

Riello Burners

Riello Burners RL 70/2 Installation, use and maintenance instructions

Riello CAMRAY5 65/90B Installation, use and maintenance instructions

Riello

Riello CAMRAY5 65/90B Installation, use and maintenance instructions

CIB UNIGAS N1060A installation manual

CIB UNIGAS

CIB UNIGAS N1060A installation manual

manuals.online logo
manuals.online logoBrands
  • About & Mission
  • Contact us
  • Privacy Policy
  • Terms and Conditions

Copyright 2025 Manuals.Online. All Rights Reserved.