Magnat Audio M.ONE User manual

MAGNATM.ONE
Home Entertainment System

IMPORTANT SAFEGUARDES
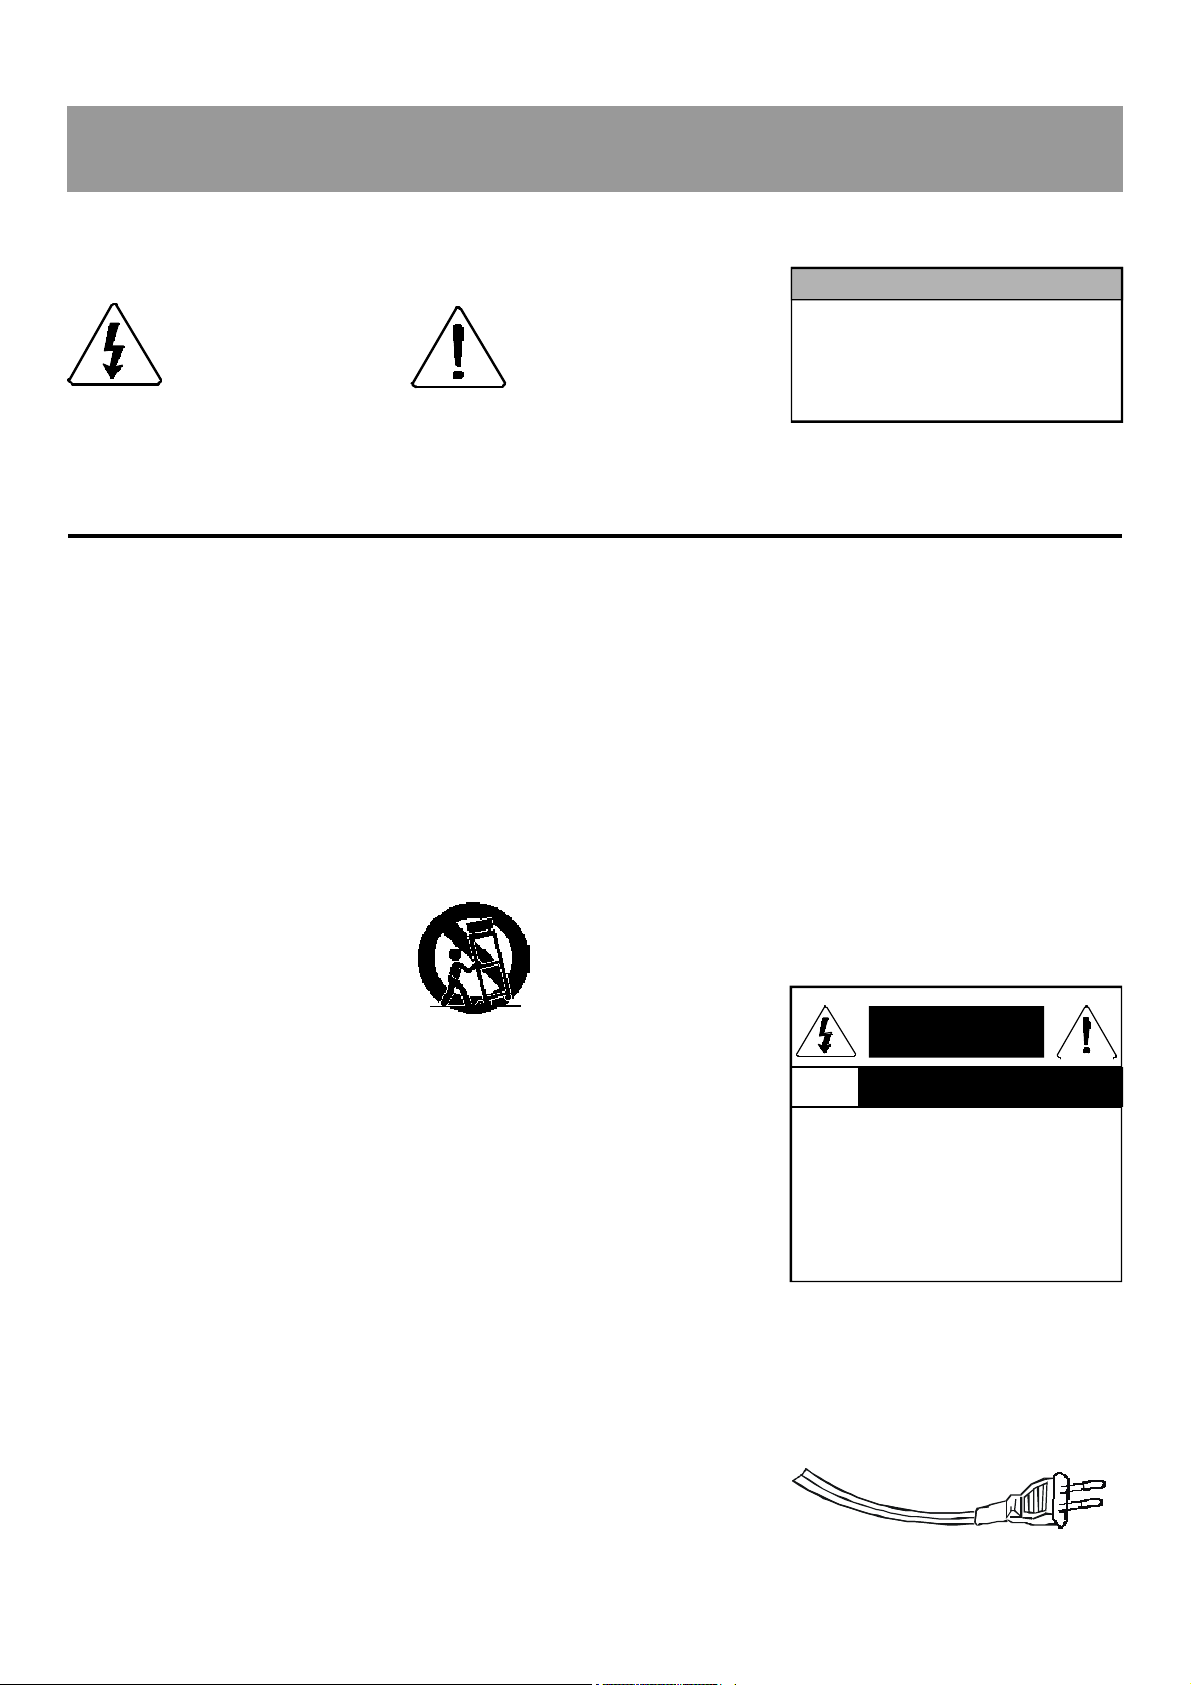
Explanation of Symbols
This symbol is intended to
alert the user of the pres-
ence of uninsulated
“dangerous voltage”
within the product’s en-
casement that may be of
sufficient magnitude to
constitute a risk of elec-
tric shock to persons.
This symbol is intended to
alert the user of the pres-
ence of important operat-
ing and maintenance (ser-
vicing)instructionsinthelit-
erature accompanying the
appliance.
WARNING
To prevent fire or shock hazard, do not
expose this appliance to rain or moisture.
If this happens, make sure the power to
the electrical outlet is turned off before you
touch or unplug the unit.
Important Safety Instructions
1. Read Instructions - All the safety
and operating instructions should
be read before the appliance is op-
erated.
2. Retain Instructions - The safety
and operating instructions should
be retained for future reference.
3. Heed Warnings - All warnings on
the appliance and in the operating
instructions should be adhered to.
4. Follow Instructions - All operat-
ing and use instructions should be
followed.
Safety Instructions
Do not operate the unit from any power
source except as indicated on the ste-
reo or in the owner’s manual.
Do not install the unit near or over a
radiator, or other heat sources.
Do not mount the unit to a wall or ceil-
ing except as recommended by the
manufacturer.
Do not place the unit in a built-in en-
closure such as a bookcase or cabi-
net, unless proper ventilation is pro-
vided.
Do not block the ventilation openings
of the unit by placing it on a bed, soft
rug, etc.
Do not allow objects to fall or liquids to
spill into the unit through the openings.
Do not use the unit near water, such as
bath tub, washbowl, sink, laundry tub,
swimming pool, etc.
Do not allow anything to rest on, roll
over, or pinch the power cord, or place
the power cord where it is subject to
traffic or abuse; this may result in a
fire hazard.
Do not use a cart or stand
not recommended by the
manufacturer.
Do not try to roll cart with
small castors across
thresholdsor deeppile car-
pets. Quick stops, exces-
siveforce, anduneven sur-
faces may cause the unit
and cart combination to
overturn.
Do not clean the unit except as de-
scribed in the owner’s manual.
Do not attempt to service the unit ser-
vicing should be referred to qualified
service technicians.
Do not leave the unit on when unat-
tended; a malfunction may result in a
fire hazard.
NOTE: For added protection during a
lightning storm or whenever the unit will
be left unattended for a long period of
time, disconnect the power source.
Have The Unit Serviced
If---------------------------------------------
---
--the power cord or the plug has been
damaged.
--objects have fallen, or liquid has been
spilled onto the unit.
--the unit has been exposed to rain or
excessive moisture.
--the unit does not appear to operate
normally or exhibits a marked
change in performance.
--the unit has been dropped or the en-
casement damaged.
AVIS
CAUTION: TO REDUCE THE RISK OF
ELECTRIC SHOCK, DO NOT REMOVE
COVER (OR BACK). NO USER
SERVICEABLE PARTS.
INSIDE; REFER SERVICING TO QUALIFIED
SERVICE TECHNICIANS.
“AVIS”: POUR EVITER LES CHOCS
ELECTRIQUES, INTRODUIRE LA LAME LA
PLUS LARGE DE LA FICHE DANS LA BORNE
CORRESPONDANTE DE LA PRISE ET
POUSSER JUSQU’AU FOND.
RISK OF ELECTRIC SHOCK
DO NOT OPEN
RESQUE DE CHOC ELECTRIQUE/NE PAS OUVRIR
For Europe only

1RecotonV.11
TABLE OF CONTENTS
GENERAL INFORMATION ................................................................................................................03--15
Important Safeguards and Precautions ............................................................................................03--04
Features .............................................................................................................................................04
Types of Disc that can be played on Your DVD Receiver .................................................................... 05-06
Selecting the Type of Disc for the Type of Connected TV ........................................................................07
Definition of Terms ...............................................................................................................................08
Disc Handling and Maintenance ............................................................................................................09
Accessoires.........................................................................................................................................10
Rear Panel Connections .................................................................................................................. 11-13
Connecting the Speakers......................................................................................................................14
Positioning the Speakers ......................................................................................................................15
FUNCTIONAL OVERVIEW ...............................................................................................................16--23
Front Panel ..................................................................................................................................... 16-18
Fluorescnt Display ................................................................................................................................19
Remote Control ............................................................................................................................... 20-23
SETTING UP....................................................................................................................................24--30
Setup ............................................................................................................................................. 24-30
•General Setup ............................................................................................................................... 24-26
•Preference ................................................................................................................................... 27-29
Display Information ......................................................................................................................... 29-30
•No Disc Indicator ...............................................................................................................................29
•Disc Error Indicator ............................................................................................................................29
•Region (Locale) Number Error Indicator ...............................................................................................29
•Parental Level Error Indicator ..............................................................................................................29
•Operation Mode Indicators ..................................................................................................................30
BASIC OPERATIONS .......................................................................................................................31--33
DVD Playback ................................................................................................................................ 31-32
•Basic Play .........................................................................................................................................31
•Still Picture ........................................................................................................................................31
•Single Stepping ..................................................................................................................................31
•Slow-Motion Play ................................................................................................................................31
•Resume Function ...............................................................................................................................32
•Fast Reverse......................................................................................................................................32
•Track up ............................................................................................................................................32
•Track down ........................................................................................................................................32
VCD and CD Playback .........................................................................................................................33
•Menu Navigation.................................................................................................................................33

2RecotonV.11
TABLE OF CONTENTS
SPECIAL FUNCTIONS .....................................................................................................................34--39
Direct Selection of Scenes...............................................................................................................34-35
•Selecting Scenes by Title Number .......................................................................................................34
•Moving from the Menu Screen to the Titles............................................................................................34
•Direct Skip Function ...........................................................................................................................34
•DVD Discs ........................................................................................................................................34
•VCD (video CDs) and CD (audio CDs) ................................................................................................35
Repeat Playback ..................................................................................................................................36
•DVD Discs ........................................................................................................................................36
•VCD and CD .....................................................................................................................................36
Angle Selection (DVD only)...................................................................................................................37
Subtitle Selection..................................................................................................................................37
Audio Selection ....................................................................................................................................38
•DVD Discs ........................................................................................................................................38
Advanced Playback.........................................................................................................................39-39
•Picture Zooming .................................................................................................................................39
•Playing Information Display .................................................................................................................39
SOUND MODE.................................................................................................................................40--42
Dolby Digital (AC-3) .............................................................................................................................40
Dolby Surround....................................................................................................................................40
Phantom..............................................................................................................................................40
3 Stereo ..............................................................................................................................................40
Stereo .................................................................................................................................................40
DTS ....................................................................................................................................................41
Dynamic Range Compressing Setting ....................................................................................................41
Test Tone .............................................................................................................................................42
Audio Sound Adjusting..........................................................................................................................42
TUNER ............................................................................................................................................43--45
Auto (automatic) / Manual Tuning...........................................................................................................43
Preset Memory ....................................................................................................................................43
RDS Operation................................................................................................................................44-45
TROUBLESHOOTING AND SPECIFICATONS.................................................................................. 46--47
Troubleshooting ....................................................................................................................................46
Specifications ......................................................................................................................................47

3RecotonV.11
IMPORTANT SAFEGUARDS AND PRECAUTIONS
CAUTION
BEFORE OPERATING YOUR NEW DVD RECEIVER,
PLEASE CAREFULLY READ THIS OPERATION MANUAL
AND THEN SAVE IT FOR FUTURE REFERENCE AS IT
WILL BE USEFUL IF YOU HAVE ANY PROBLEMS in OP-
ERATING YOUR DVD RECEIVER IN THE FUTURE.
Power Cord Protection
To avoid any malfunctions of the unit, and to protect against
electric shock, fire or personal injury, please observe the
following.
•Hold the plug firmly when connecting or disconnecting
the AC power cord.
•Keepthe ACpower cordaway fromheating appliances.
•Never put any heavy subject on the AC power cord.
•Do not attempt to repair or reconstruct the AC power
cord in any way.
Location and Handling
•Air vents are provided in the DVD receiver cabinet to
prevent excessive temperatures inside the unit. Do not
place your DVD receiver in closed spaces, cover it, or
otherwise block the vents.
•Do not place the DVD receiver in direct sunlight, or
near heat sources.
•Keep the DVD receiver away from strong magnetic sub-
jects.
•Do not insert or drop anything into the DVD receiver
through the air vents as this could cause serious dam-
age, possibly resulting in fire.
•Do not place any object containing water or other liq-
uids on the DVD receiver. In the event that liquid should
enter the cabinet, unplug the DVD receiver immediately
and contact the retailer or service centre immediately.
•Donotremove the DVDreceivercabinet. Touching parts
inside the cabinet could result in electric shock and/or
damage the DVD receiver.
Nonuse Periods
When the unit is not being used, turn the unit off.
When left unused for a long period of time, the unit should
be unplugged from the household AC outlet.
No fingers or Other Objects Inside
Do not put any foreign object on the disc tray.
Stacking
Place the unit in a horizontal position, and do not place
anything heavy on it.
Condensation
Moisture may form on the pickup lens in the following con-
ditions:
•Immediately after a heater has been turned on.
•In a steamy or very humid room.
•When the unit is suddenly moved from a cold environ-
ment to a warm one.
If moisture forms inside this unit, it may not operate prop-
erly. In this case, turn on the power and wait about one
hour for the moisture to evaporate.
IMPORTANT SAFEGUARDS AND PRECAUTIONS
GENERAL INFORMATION
Note:
This unit can be used only where the power supply is
AC 230V, 50Hz. It cannot be used elsewhere.
CAUTION:
USE OF CONTROLS OF ADJUSTMENTS OR PER-
FORMANCE OF PROCEDURES OTHER THAN
THOSE SPECIFIED HEREIN MAY RESULT IN HAZ-
ARDOUS RADIATION EXPOSURE.
AS THE LASER BEAM USED IN THIS DVD PLAYER
IS HARMFUL TO THE EYES, DO NOT ATTEMPT TO
DISASSEMBLE THE CABINET. REFER SERVICING
TO QUALIFIED PERSONNEL ONLY.
WARNING:
TO REDUCE THE RISK OF FIRE OR ELECTRIC
SHOCK, DO NOT EXPOSE THIS EQUIPMENT TO
RAINOR MOISTURE.
TO REDUCE THE RISK OF FIRE OR ELECTRIC
SHOCK, AND ANNOYING INTERFERENCE, USE
THE RECOMMENDED ACCESSORIES ONLY.
Laser Diode Properties
Material :AIGalnP
Wave length: 650nm
EmissionDuration: Continuous
Laser output: Maz. 0.7mW
•This DVD receiver is classified as a CLASS 1 LASER
product.
•The CLASS 1 LASER PRODUCT label is located on
the rear cover.
•This product contains a low power laser device. To en-
sure continued safety do not remove any cover or at-
tempt to gain access to the inside of the product. Refer
all servicing to qualified personnel.

4RecotonV.11
GENERAL INFORMATION
IMPORTANT SAFEGUARDS AND PRECAUTIONS
If There is Noise Interference on the TV While a Broad-
cast is being Received
Depending on the reception condition of the TV, interfer-
ence may appear on the TV monitor while you watch a TV
broadcast and the unit is left on. This is not a malfunction
of the unit or the TV. To watch a TV broadcast, turn off the
unit.
Service
Do not attempt to service this DVD receiver yourself. Please
refer any service to the nearest service centre.
Copyright
Audio-visual material may consist of copyrighted works
which must not be recorded without the authority of the
ownerof the copyright. Please refer to relevantlaws in your
country.
Copy Protection
This DVD receiver supports Macrovision copy protection.
On DVD discs that include a copy protection code, if the
contents the DVD disc are copied using a VCR, the copy
protection code prevents the videotape copy from playing
normally.
Recommended Measures for Optimum Picture
Execellence
The unit is a precision device that is constructed using ex-
tremely accurate technology.
Soiling or friction affecting the pickup lens or disc drive can
impair the image quality. At the worst, neither video nor
audio will be played back. To obtain optimum picture qual-
ity, the player should be checked (cleaning and replace-
ment of some parts) every 1,000 hours. Note that this pe-
riod varies depending on the environment (temperature,
humidity, dust, ect.) in which the player is used.
Do not attempt to clean the pickup lens yourself.
FEATURES
1
2
c
1
2
•Plays DVD, video CD and CD (Digital Audio) discs.
•Built-inDolby Digital (AC-3)decoder supporting DolbyPro
Logic* decoding and Virtual Surround.
•DTS* digital output capability.
* Manufactured under license from Dolby Laborato-
ries. “Dolby ”, “Dolby Pro Logic ”and the double-
D symbol are trademarks of Dolby Laboratories.
Confidential Unpublished Words. 1992-1997 Dolby
Laboratories, Inc. All rights reserved.
* “DTS”and “DTS Digital Surround”are trademarks
of Digital Theater Systems, Inc.
Disc Features and this Operation Manual
•Thetypesof functionandoperations that canbe used
for a particular disc vary depending on the features of
that disc. In some cases, these functions and opera-
tionsmay differ fromthe descriptionsgiven in thisOp-
eration Manual. In this event, follow the instructions
given on the screen. This Operation Manual only cov-
ers basic disc operations.
•For some operations, the icon may appear on
the screen. This indicates that the operation de-
scribed in this Operation Manual is not permitted
for the current disc.

5RecotonV.11
Types of Disc that can be played on Your DVD Receiver
Other CDs
1. On CD-G and CD-EXTRA discs, only the sound can be played (no images)
2. MP3 discs can be used.
3. Photo CD, DVD-ROM and CD-ROM discs cannot be used.
4. Discs with unusual shapes (heart- shaped or hexagonal discs ) cannot be used. The use of such discs will cause a
fault.
NOTE-1
•DVD receiver and discs are designed with region numbers which dictate the regions in which a disc can be played. If the
region number on the disc you want to play does not match the region number in your DVD receiver, you will not be able to
play the disc.
The region number for this DVD receiver is 2.
Sample disc display:
Discplayable inall regions
The unit can play back discs bearing any of the following marks:
DVD
( 8 cm disc / 12 cm disc )
Video CDs
( 8 cm disc / 12 cm disc )
Audio CDs
( 8 cm disc / 12 cm disc )
See NOTE-1
Sss NOTE-2
See NOTE-3
See NOTE-2
Supports version until version 2.0
GENERAL INFORMATION

6RecotonV.11
Icons used on DVD discs
Sample Icons
1 2 3
4 5 6
GENERAL INFORMATION
Types of Disc that can be played on Your DVD Receiver
NOTE-2
•The specific playback functionality for some DVD and video CD discs which is determined by the disc manufacturer.
Because this DVD Receiver plays disc data in accordance with the disc manufacturer’s guidelines, some functions may
not be available on some discs. Be sure to read the instructions provided with the disc.
•The”Prohibited”icon displayed during DVD Receiver operation indicates that such manufacturer imposed
restrictions apply.
NOTE-3
•The audio on a DVD disc recorded in MPEG version 2.0 format cannot be played back (images only).
Discs that Cannot be played
1. You cannot play illegally produced discs.
2. You cannot play scratched discs.
3. You cannot play discs that are dusty, soiled or marked with fingerprints.
•If the playing surface of a disc is soiled or scratched, the player may decide that the disc is incompatible and eject the
disc tray, or it may fail to play the disc correctly.
•While a disc is playing, soiling or scratches on the disc may disrupt the image (appearing as blocks on the screen).
When the image is disrupted, the player automatically restores the correct image after 2 or 3 seconds.
Glossary of Disc Terms
Title (DVD)
For instance, the movies on a disc that contains two movies can be numbered title 1 and title 2.
Chapter (DVD)
A further subdivision within a title
For example...
DVD Title 1 Chapter 1
Chapter 2
Chapter 1
Chapter 2
Chapter 3
Title 2
Track (video or audio CD)
For instance, the songs on disc that contains five songs can be numbered tracks 1, 2, 3, 4 and 5.
For example...
Video/audio CD
Track 1 Track 3Track 2 Track 4 Track 5
1. Englist
2. Chinese 1. English
2. Chinese
Number of recorded
audio tracks Type of subtitles
recorded Screen aspect
ratio recorded Disc with Multiple
camera angles Region code indicator

7RecotonV.11
Selecting the Type of Disc for the Type of Connected TV
Both DVD discs and video CDs have the material recorded in the PAL and NTSC systems. Refer to the table below to
select the correct disc type for the type of connected TV.
Connecting to the Multi-system TV
Connecting to the NTSC TV
Connecting to the PAL TV
Played in the PAL
system.
Played in the NTSC
system.
The use of a multisystem TV
is recommended
Disc TV Monitor
PAL
NTSC
Disc TV Monitor
Cannot be used.
Images play back in black and white. The images
may also be distorted or may overlap at the bottom
of the screen.
Played in the NTSC system.
Specify the settings for the type of TV connected
(4:3, 16:9).
PAL
NTSC
When viewed on a 4:3 TV, the images appear
compressed horizontally.
Cannot be used.
Images play back in black and white.
Disc TV Monitor
PAL
NTSC
GENERAL INFORMATION

8RecotonV.11
GENERAL INFORMATION
Definition of Terms
Angle
Recorded onto some DVD discs are scenes which have been simultaneously shot from a number of different angles (the
same scene is shot from the front, from the left side, from the right side, etc.). With such discs, the ANGLE button can be
used to view the scene from different angles.
Chapter Number
These numbers are recorded on DVD discs. A title is subdivided into many sections, each of which is numbered, and
specific parts of video presentations can be searched quickly using these numbers.
DVD
This refers to a high-density optical disc on which high-quality pictures and sound have been recorded by means of digital
signals. Incorporating a new video compression technology (MPEG II) and high-density recording technology, DVD en-
ables esthetically pleasing full-motion video to be recorded over long period of time (for instance, a whole movie can be
recorded).
DVD has a structure consisting of two 0.6 mm thin discs which are adhered to each other. Since the thinner the disc, the
higher the density at which the information can be recorded,a DVD disc has a greater capacity than a single 1.2mm thick
disc. Since the two thin discs are adhered to each other, there is the potential to achieve double-sided play sometime in the
future for even longer duration play.
Linear PCM Sound
Linear PCM is a signal recording format used for audio CDs.
The sound on audio CDs is recorded at 44.1kHz with 16 bits. (On DVD discs, sound is recorded at between 48kHz with16
bits and 96kHz with 24 bits.)
Playback Control (PBC)
This is recorded on a video CD (version 2.0). The scenes or information to be viewed (or listened to) can be selected
interactively with the TV monitor by looking at the menu shown on the TV monitor.
Subtitles
These are the printed lines appearing at the bottom of the screen which translate or transcribe the dialogue. They are
recorded on DVD discs.
Time Number
This indicates the play time which has elapsed from the start of a disc or a title. It can be used to find a specific scene
quickly. (It may not work with some discs.)
Title Number
These numbers are recorded on DVD discs. When a disc contains two or more movies, these movies are numbered as
title 1, title 2, ect.
Track Number
These numbers are assigned to the tracks which are recorded on video CDs and audio CDs.They enable specific tracks
to be located quickly.
Video CD(VCD)
This contains recordings of pictures and sound whose quality is on a par with that of videotape. This player also supports
video CDs with playback control (version 2.0).
On Screen Display (OSD)
OSD screens for showing the disc information or player information and providing access to many major functions of this
unit.

9RecotonV.11
GENERAL INFORMATION
Disc Handling and Maintenance
Handling Precautions
Maintenance
•Be sure to turn the unit off and disconnect the AC power cord before maintaining the unit.
•Wipe this unit with a dry soft cloth.
•If the surfaces are extremely dirty, wipe clean with a cloth which has been dipped in a weak soap-and-water solution and
wrung out thoroughly and then wipe again with a dry cloth.
•Never use alcohol, benzine, thinner, cleaning fluid or other chemicals. And do not use compressed air to remove dust.
If the playing surface of a disc is soiled or scratched, the player
may decide that the disc is incompatible and eject the disc tray,
or it may fail to play the disc correctly. Wipe any soiling off the
playing surface with a soft cloth.
•To hold the disc by the edges so the surface will not be soiled with fingerprints.
( A )
•Fingerprints, dirt and scratches can cause skipping and distortion.
•Do not write on the label side with a ball-point pen or other writing utensils.
•Do not use record clearing sprays, benzine, thinner, static electricity prevention
liquids or any other solvent.
•Be careful not to drop or bend the disc.
•Do not install more than 1 disc on the disc tray.
•Do not try to close the disc tray when the disc is not installed properly. ( B)
•Be sure to store the disc in its exclusive case when not in use. Then store
upright.
•Do not stick paper or adhesive labels to the disc.
If the Surface is Soiled ( C)
Wipe gently with a soft, damp (water only) cloth.
When wiping discs, always move the cloth from the centre hold toward the outer
edge.
(If you wipe the discs using a circular motion, circular scratches are likely to occur,
which will cause noise.)
If the Disc is Brought from a Cold to a Warm Environment,
Moisture may form on the disc
Wipe this moisture off with a soft, dry, lint-free cloth before using the disc.
Improper Disc Storage
You can damage discs if you store them in the following places:
•Areas exposed to direct sunlight
•Humid or dusty areas
•Areas directly exposed to a heat outlet or heating appliance

10

11 RecotonV.11
GENERAL INFORMATION
REAR PANEL CONNECTIONS REAR PANEL CONNECTIONS
1. S-VIDEOOUT
Connect your monitor TV here. The signal is S-VIDEO
out.
2. DIN-L
Connect the subwoofer with din cable for power supply.
3. VCR VIDEO OUT
Connect your VCR system here.
4. TV MONITOR OUT
Connect your monitor TV here.
5. TV/SAT AUDIO IN
Connect your TV/SAT system here. The sound signal
which is coming from the TV/SAT system will be heard
through the system.
6. VCR AUDIO IN
Connect your VCR system here. The sound signal which
is coming from the VCR system will be heard through
the system.
7. VCR AUDIO OUT
Connect your VCR system here. The sound signal will
output from the system to the VCR system for record.
(Can’t record the signal from the VCR AUDIO IN)
8. DIGITAL2 IN (COAXIAL)
If your player has coaxical digital output, connect it to
the COAXIAL jack on this unit.
9. DIGITAL1 IN (OPTICAL)
If your player has an optical digital output, connect it to
the OPTICAL jack on this unit.
10. AUX/TAPE IN
Connect your audio appliance here with phone jack.
The sound signal which is coming from the appliance
will be heard through the system.
11. TAPE OUT
Connect your audio appliance here. The sound signal
will output from the system to the audio appleance for
record. (Can’trecordthesignalfromtheAUX/TAPEIN)
12. DIN-S
Connect the subwoofer with din cable for signal output.
13. FM-75
For connecting the supplied 75 ohm FM antenna.
Composit and S-Video output (CVBS):
SomeTVs andmonitors areequipped within/out connectors
for Composit and S-Video outpput (CVBS). By connecting
these input connectors to the corresponding output
connectors on the DVD Receiver.
Ifyou areusing hteCVBS connectors,set theS-Video out,
CVBS, YUV selector switch to “CVBS”or“S-Video”.
Use the appropriate optional Video Out for your system
Theabove mentioned optionalvideo-out depends onwhich
kind of TV/Monitor you have, use the appropriate optional
Video Out for your system.

12 RecotonV.11
GENERAL INFORMATION
14. DIN-S
Connect the DVD Receiver with din cable for signal
output.
15. DIN-L
Connect the DVD Receiver with din cable for power
supply.
16. LEFT SPEAKERS (8ohm)
Connect left front speaker here.
17. RIGHT SPEAKERS (8ohm)
Connect right front speakers here.
18. CENTER SPEAKER (8ohm)
Connect center speaker here.
19. LEFT SURROUND SPEAKER (8ohm)
Connent left surround speaker here.
20. RIGHT SURROUND SPEAKER (8ohm)
Connect right surroun speaker here.
21. FUSE
Fuse T3.15A/250V.
22. AC 230V/50HZ
Power cord.
23. POWERON/OFF
Press the POWER button to switch the subwoofer ON
or OFF.
SUBWOOFER REAR PANEL CONNECTIONS SUBWOOFER REAR PANEL CONNECTIONS

13 RecotonV.11
GENERAL INFORMATION
1. Plug the FM Antenna into the FM terminal of the Main Unit.
NOTE:
Push and hold Speaker terminal tab down to insert wire. Release tab to lock wire in terminal. Make sure the insulation is
completely removed from the ends of the speaker wires at all connection points.
REAR PANEL CONNECTIONS

14 RecotonV.11
GENERAL INFORMATION
CONNECTINGTHESPEAKERS CONNECTINGTHESPEAKERS
At the rear of each speaker, you will find two click fit con-
nectors on speakers’rear panel, a black one marked (-)
and a red one (for the front speakers or surround right
speaker), a gray one (for the center speaker), a white one
(forsurround left speaker) marked (+).
Speaker wires are identified with different colors so that
you can distinguish from each other.
In order to prevent phase reversal, connect the marked or
colored wire to the matching speaker terminals.
Connecting the CENTER speaker
Connect the center speaker to the center speaker termi-
nals on the back of the main unit.
Make sure the (+) and (-) cables are connected to the cor-
rect center speaker terminals [ (+) to (+) and (-) to (-) ].
Connectingthe SURROUND speakers
Connect the right surround speaker to the surround speaker
″ R ″ terminal on the back of the main unit, and the left
surround speaker to the surround speaker ″L ″ terminal.
Make sure the (+) and (-) cables are connected to the cor-
rect surround speaker terminals [(+) to (+) and (-) to (-)].
Connecting the FRONT speakers
Connect the right front speaker to the front speaker ″ R ″
terminal on the back of the main unit, and the left front
speaker to the front speaker ″L ″terminal.
Make sure the (+) and (-) cables are connected to the cor-
rect front speaker terminals [(+) to (+) and (-) to (-)].
Connecting the SUBWOOFER speaker
Connect the subwoofer speaker to the main unit through
Din jacks on the backs.

15 RecotonV.11
GENERAL INFORMATION
POSITIONING THE SPEAKERS POSITIONING THE SPEAKERS
Avoid positioning the speakers in corners, as this will boost
too much the bass tones.
Placing the speaker behind curtains, furniture etc. will re-
duce the treble response, thus reducing the stereo effect
considerably. The listener should still be able to see the
speaker.
Each room has different acoustic characteristics and posi-
tioning possibilities are often limited. You can find the best
position for your speakers by experimenting. In general,
the speakers should be arranged as symmetrically as pos-
sible.
Positioning the FRONT speakers
The front speakers should be placed in frant of the listener,
left speaker to the left and right speaker to the right. This
can be checked with the balance control on the main unit.
The best height for the front speaker is where the high fre-
quency speakers ( tweeters ) are at ear height ( while
seated ).
Positioning the CENTER speaker
The center speaker should be placed centrally between the
front speakers, e.g. underneath or on top of the TV.
The best height for the center speaker is at the height of
your ears (while seated).
Positioning the SURROUND speaker
The surround speaker should be placed behind the listener,
left speaker to the left and right speaker to the right.
The surround speakers face the listener is recommended.
Positioning the SUBWOOFER speaker
Place the subwoofer to the left or right of the television as
seen from the front of television.

16 RecotonV.11
FUNCTION OVERVIEW
FRONT PANEL

17 RecotonV.11
FUNCTION OVERVIEW
FRONT PANEL FRONT PANEL
1. POWER
Press the POWER button to switch power of the unit
ON or OFF.
2. SOURCE
Press to taggle through list of sources: DVD/CD, FM,
AUX/TAPE, TV/SAT, VCR, DIGITAL1, DIGITAL2.
•DVD/CD function to select the input source of DVD/
CD.
•FM function to select the input source of FM.
•AUX/TAPE function to select the input source of AUX/
TAPE.
•TV/SAT function to select the input source of TV/SAT.
•VCR function to select the input source of VCR
•DIGITAL1 function to select the input source of DIGI-
TAL1.
•DIGITAL2 function to select the input source of DIGI-
TAL2.
3. MODE
Press to cyclically select listening modes.
4. SELECT
Press to cyclically select: BALANCE, SURROUND,
SUB, or DELAY TIME level.
5. (VOLUME DN & ADJ) -
Pressto adjust VOLUME, TREBLE,BASS, BALANCE,
SURROUND, SUBW., or DELAY TIME levels down.
6. (VOLUME DN & ADJ) +
Pressto adjust VOLUME, TREBLE,BASS, BALANCE,
SURROUND, SUBW., or DELAY TIME levels up.
7. REPEAT
Press to repeat playback of current chapter or title.
8. PREVIOUS
While you are playing a disc, this function jumps
backward to the beginning of the current chapter and
automatically starts playing that chapter again.
9. NEXT
While you are playing a disc this function jumps forward
to the beginning of the next chapter and automatically
starts playing that chapter.
10. PLAY/PAUSE
Basic Play: press this button to begin playing.
Still Picture: press this button to pause playback.
11. STOP
Press to stop playback. Pressing once enables
playback to resume from a point shortly before the
location where it stopped. Pressing twice causes the
disc to return to the beginning of the disc if playback
starts again.
12. OPEN/CLOSE
Press the OPEN/CLOSE button to open or close the
disc tray.

18 RecotonV.11
FUNCTION OVERVIEW
13. SENSOR
Thesensor behind thiswindow receives infraredsignals
from the remote control. Aim the remote at this area
and do not block or cover it unless an external remote
sensor is installed.
14. Dolby Digial LED indicator
•Flashes if the digital signal is received.
•Illuminates if the Dolby Digial mode is selected.
15. DTS LED indicator
•Flashes if the DTS signal is received.
•Illuminates if the DTS mode is selected.
16.PCM LED
•Flashes if the PCM is received.
•Illuminates if the PCM mode is selected.
FRONT PANEL FRONT PANEL
17. PHONE jack
Plug headphones into jack. Press the volume up or
down to adjust the sound level.
18. STANDBY LED indicator
This indicator will illuminate when the main power is
switched off via the remote control.
The indicator will flash when the MUTE function is
selected via either the button on the remote control or
the front panel.
19. DOWN MIX LED indicator
Illuminates if the DOWN MIX mode is selected.
20. NIGHT MODE LED indicator
Illuminates if the NIGHT MODE is selected.
Table of contents
Other Magnat Audio Home Theater System manuals