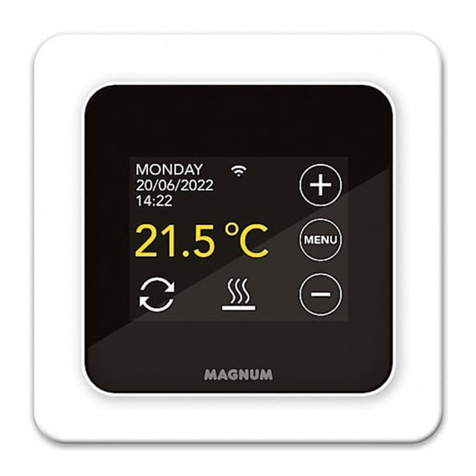
ES MAGNUM X-treme control
Estudiar cuidadosamente este
manual y guardar con el
documento de garantía.
Los ajustes avanzados
mencionados en el apartado 5.2.7
sólo se pueden modificar con el
consentimiento del proveedor.
Datos técnicos
Voltaje : 230V - 50/60 Hz
Carga máxima : máx. 16 Amp. / 230V
Rango de temperatura : +5/+40ºC
Grado de aislamiento : IP21
Color estándar : Blanco polar (RAL 9010) y Negro
Sensor : incl. integrado & sensor externo
Garantía : 2 años del fabricante
Certificados : FI / CE / CCA
Fabricante : C&F Technics, Holanda
Instrucciones de montaje
La conexión debe realizarse por un instalador cualificado de
acuerdo con las normas NEN 1010. Para el montaje o
desmontaje del termostato apague siempre la electricidad en
el cuadro general. El termostato MXC se puede montar en
una caja de empotrar de 50 mm de profundidad, de acuerdo
con los formatos DIN estándar.
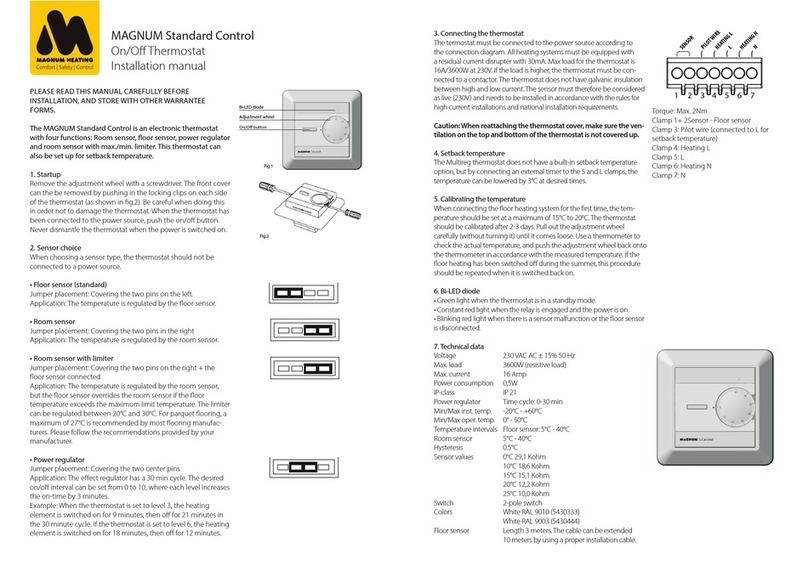
Asegúrese de que la alimentación esté apagada. Retire con
cuidado la carcasa de la pantalla con un objeto no afilado en
los orificios cuadrados a ambos lados mediante presión.
Tanto la carcasa de la pantalla como el marco son
desmontables.
PILOT : Conexión a sistemas domóticos
HEATING (N) : Conexión del cable calefactor
N : Suministro eléctrico (Neutro)
L : Suministro eléctrico (Fase)
HEATING (L): Conexión del cable calefactor
FLOOR SENSOR : Conexión sensor de suelo
EXTERNAL SENSOR : Conexión sensor externo
TOMA DE TIERRA:Tanto la toma tierra del cable calefactor
como la toma de tierra de la fuente de alimentación exterior
del termostato, incluye la ficha de conexión.
Coloque el termostato en posición de montaje y asegúrelo en
la caja de empotrar con 2 tornillos. Vuelva a colocar el marco
de acabado y la carcasa de la pantalla en su posición y
presione suavemente.
Una vez conectado a la fuente de alimentación, aparece en
pantalla la primera solicitud de selección del menú de
arranque:
Idioma Selección de idioma
Escala de temperatura Celsius o Fahrenheit
Año Ingrese el año actual
Mes Ingrese el mes actual
Día Ingrese el día actual
Hora Ingrese la hora actual
Tipo de calefacción Suelo radiante u otro tipo
Construcción del piso Profundidad de instalación del suelo
radiante
Revestimiento suelo Madera u otro (cerámico)
Control de temperatura En el suelo o ambiente
Resumen pantalla Resumen de la configuración
Temperatura de confortPeríodo de calentamiento
Temperatura reducida (no aplicable en suelo radiante)
Programación Programa estándar (véase 2.1)
Programación lenta Para suelos nuevos (véase 4.1.7)!
!!
Después de la última confirmación, aparece la pantalla
principal. Esto también confirma que todos los ajustes
predeterminados están operativos y que se ejecutarán
automáticamente.
Guía del usuario
1. Manejo
El termostato se maneja con las 3 teclas sensibles al tacto de
la parte inferior de la pantalla. Las funciones básicas son:
pArriba, uConfirmar, qAbajo.
Si aparece un icono sobre una de estas teclas, dicha función
es válida. Para un regreso rápido al menú principal, apriete la
tecla "Arriba" durante 2 segundos
2. Programación
2.1 Programa estándar automático
Incluye los siguientes períodos de calentamiento a una
temperatura de confort de 23 ° C:
De lunes a domingo
Período 1: 06.00 - 09.00
Período 2: 15.00 - 22.00
Fuera de estas horas, el termostato cambia automáticamente
al modo de ahorro de energía.
2.2 Si desea una programación personalizada:
1. Seleccione “menú” en la pantalla principal
2. Seleccione “Programación”
3. Presione uy seleccione “personalizado”
4. Presione el "icono del lápiz"
5. Seleccione el día que desea configurar
6. Seleccione "Personalizar"
7. Seleccione si desea establecer 1 o 2 períodos de
calentamiento
8. Establezca la hora de inicio del primer período de
calentamiento.
9. Establezca la hora de finalización del primer período de
calentamiento
10. Elija la temperatura adecuada
11. Establezca la hora de inicio del segundo período de
calentamiento
12. Establezca la hora de finalización del segundo periodo de
calentamiento
13. Elija la temperatura adecuada
14. Seleccione atrás y repita los pasos del 5 al 14 para
programar otro día o ver el punto 2.3 para copiar el programa
a otro día.
2.3 Copiar y pegar el programa diario:
1. Presione "icono de lápiz"
2. Seleccione el día que desea copiar
3. Seleccione "Copiar"
5. Seleccione el día en que desea pegarlo
6. Seleccione "Pegar"
7. Ahora verá una pantalla con los tiempos pegados.
8. Confirme
Repita los pasos del 5 al 8 para pegar el mismo programa del
día en otros días (El último programa copiado puede
continuar pegándolo a días consecutivos).
3. Símbolos de la pantalla principal
Modo;Ver 4.1.
Menú;Ver 4.2.
Cambio a temperatura temporal o manual. Esta opción
aparece sobre la tecla central cuando el termostato está
programado a una temperatura temporal o manual.
Demanda de calefacción en curso
Programa automático en curso
Programa temporal en curso
Programa manual en curso
Programación horaria en curso
Protección para heladas en curso
Error sensor:
La calefacción no funciona y el sensor está defectuoso o está
mal conectado. Consejo: Compruebe el conexionado de
cableado del sensor del suelo. Si el cableado está
correctamente conectado y el mensaje de error continúa
apareciendo, le aconsejamos que se ponga en contacto con
nuestro servicio técnico.
4. Estructura del Menú
4.1 Modo:
Aquí puede pausar el programa en ejecución del termostato
cambiando temporalmente a otro programa. Si una función
del modo está en funcionamiento, aparecerá el símbolo
correspondiente. La opción "Auto" permite activar de nuevo
el programa de tiempo predeterminado o personalizado.
4.1.1 Automático
El termostato se encenderá según la programación
de acuerdo con el ajuste de fábrica (véase 2.1) o con
los tiempos ajustados personalizados (véase 2.2).
4.1.2 Temperatura temporal
Establezca una temperatura temporal. El termostato
vuelve al programa automático en el siguiente
encendido o apagado
4.1.3 Temperatura manual
El termostato se encienda constantemente a una
temperatura establecida.
4.1.4 Apagado
Desactiva el termostato y el sistema de calefacción
4.1.5 Protección contra heladas
Si la temperatura del suelo o del espacio es inferior a
7˚C, el sistema se calentará y mantendrá esta
temperatura
4.1.6 Temporizador
Este modo puede utilizarse durante el período
vacacional. El termostato se adapta a los días de
ausencia programados.
4.1.7 Arranque lento
El termostato calentará gradualmente el suelo a la
temperatura establecida en 20 días. Después de
este período, el programa automático comenzará
4.2 Menú:
Aquí puede cambiar la configuración del termostato
4.2 .1 Ajuste de temperatura
Cambie los ajustes de temperatura programados.
4.2 .2 Programación
Programación de los periodos de calefacción para el
programa automático (véase 2.2)
4.2 .3 Consumo
El tiempo total de activación es mostrado en %
durante los últimos 30 y 365 días
4.2 .4 Bloqueo de seguridad
Bloquee el termostato. Pulse durante 2 segundos
para activar o desactivar. No se puede acceder a los
ajustes hasta que el bloqueo se borre de nuevo
4.2 .5 Información
Información sobre la versión del software y del
hardware del termostato
4.2 .6 Ajustes
Cambie los siguientes ajustes:
- Fecha y hora
-Idioma
-Brillo
-Iluminación de la pantalla
-Tema del color
-Pantalla de espera
-Función de ayuda
-Unidad de temperatura
5.2 .7 Ajustes avanzados
PRECAUCIÓN: Los ajustes de este menú pueden
afectar en gran medida el funcionamiento del
termostato. Sólo en consulta con el proveedor.
§Tipo de calefacción
§Calibrado
§Inteligencia
§Diferencial
§Función piloto
§Tipo de sensor
§Restablecer


