Maijie TIWB1610LS2 User manual

Applicable model: TIWB1610LS2
Please read this manual carefully before using this product.
USER MANUAL
Aircraft Design Smart Whiteboard

Foreword
Thank you very much for using our company's products, we will be happy to provide
you with the best service;
This manual may contain technical inaccuracies or text errors;
The contents of this manual will be updated regularly without notice. The updated
content will be added to the new version of this manual;
We will improve or update the products or programs described in this manual at any
time;
You can obtain technical support and related information of the company in the
following way;
Company website: http://www.hzmaijie.com/
Cautions
1.1 Warning
To reduce the risk of fire or electric shock, do not expose this product to rain or
moisture, as shown in Figure 1.1.1.
1.2 Attention
To reduce the risk of electric shock, do not open the product case. This product does
not contain user-serviceable parts. Please seek service from a professional installer, as
shown in Figure 1.1.2;
1.3 Tips
Please always keep the basic safety rule and the following terms when using the product:
Please use the specified accessory package.
Please read the instruction before use and pay attention to all warnings.
Turn off all product before connecting to other devices, in this way to avoid other equipment
failure or damage.
Do not expose the product to direct sunlight. The long time direct light and excessive
temperature may cause discoloration.
If there are other technical-related issues and quality problems. Please contact the manufacturer
or distributor.
Figure 1.1.1
Figure 1.1.2

Contents
1. Product Introduction
1.1 Product Feature
1.2 Packing List
1.3 Product Functi 01
2. Product Function Analysis
2.1 Overall function analysis
2.2 Controller box function
2.3 Control panel function
2.4 2.4G Wireless Microphone function 05
3. Control Panel operation steps
3.1 “Small Ears” Control Panel operation steps
3.2 LCD Screen Control Panel operation steps
3.3 Knob Control Panel operation steps
4. Troubleshooting
5. After-sales service 08
Version: V1.0 Issued in June 2019

1. Product Introduction
1.1 Product Feature
● 2.4G MIC wireless microphone is easy for teachers to carry with rope design.
2.4G wireless microphone features:
1. Adopt 2.4G wireless RF transmission technology; frequency range: 2400-2483MHZ;
2. Automatically synchronize with frequency when turn on the computer, the automatic
connection between the host and the microphone is ≤ 1 second within 2 meters; the
number of built-in channels is ≥ 80;
3. Built-in laser pointer support PPT page turning and other functions (optional).
4. Echo suppression: wireless microphone is 500mm away from the speaker, the sound
of amplify is normal without obvious whistling.
PAGE 01
1.2 Packing List
Ultra short focus projector special bracket 1 set
Overhead design simple smart whiteboard all in one 1 set
Whiteboard component 1 set
If there is any missing part from above packaging accessories, please contact the
distributor or company to ensure your rights.
1.3 Product Function
2.4G MIC Wireless Microphone
It is easy for teachers to carry and use in the class with rope design. The transmitter
automatically synchronize with receiver when turn on the computer, which is convenient
to use.
High fidelity sound with good transmission.

PAGE 02
2. Product Function Analysis
2.1 Overall function analysis
1. Ultra short focus projector special bracket 2. PS600C 3. Projector
4. Control panel 5. Cork board 6. Writing whiteboard
7. projection whiteboard
2.2 Controller box function
2.21 Function of Controller box back interface
1. Speaker cable interface 2. Notebook HDMI
signal input interface
3. TV / HDMI signal input interface for wireless projection
4. PC HDMI signal input interface 5. Projector HDMI
signal output interface
6. 3.5mm Audio input interface
2.22 Function of Controller box side interface
1. Control panel interface 2. Chassis interface 3. 3.5mm Audio input interface
4. USB power take-off interface 5. USB Portable Document Camera interface
6. USB mouse interface 7. USB computer interface
8. USB interactive whiteboard interface 9. AV01 panel interface
10. Network interface 11. Network interface 12. Network interface
13. RS232 control interface 14. RS485 control interface 15. IR control interface
16. Microphone cable interface 17. Network clock interface 18. Backup interface

PAGE 03
1. PC power interface
2. Projector power interface
3. Backup National standard
3-plug power interface
4. Total input power
5. Backup National standard 2-plug power interface
1. Microphone on/off switch
2. PC on/off switch
3. Projector on/off switch
4. IC card slot
5. Volume adjustment knob
6. Video switch knob
7. TV box control knob
8. RS485 interface
9. Backup power supply
10. Run code module
2.23 Function of Controller box power interface
2.31 Control Panel types
2.32 “Small Ears” Control Panel function
2.3 Control Panel function analysis
V01 LCD Screen Control Panel V02 Knob Control Panel V03 “Small Ears” Control Panel

PAGE 04
1. LCD Touchscreen Control Panel 2. Online status
3. Lock status 4. Signal source switch knob
5. Power on/off indicator 6. Desktop computer signal
7. Visual Presenter signal 8. Notebook signal
9. Wireless network projection signal 10. Projector on/off switch
11. Computer USB interface
12. Notebook/Interactive whiteboard interface 13. Notebook HDMI interface
14. Insert/Swipe IC card 15. Projection screen on/off switch
16. 3.5mm Audio input interface
17. Control module interface for signal connection
18. Amplifier module data interface
19. Swipe card/AV01 module data interface
20. LCD module data interface 21. Control box data interface
22. Control box Audio interface
23. Switch module data interface for signal source
24. Control box USB interface 25. Control box HDMI interface
2.33 LCD Screen Control Panel function

1. Online status 2. Lock status 3. Signal source switch knob
4. Power on/off indicator 5. Desktop computer signal 6. Visual Presenter signal
7. Notebook signal 8. Wireless network projection signal 9. Volume indicator
10. Volume adjustment knob 11. Mute status indicator 12. Projector on/off switch
13. Computer USB interface 14. Notebook/Interactive whiteboard interface
15. Notebook HDMI interface 16. Insert/Swipe IC card 17. Projection screen on/off switch
18. 3.5mm Audio input interface 19. Amplifier module data interface
20. Swipe card/AV01 module data interface 21. LCD module data interface
22. Lower computer data interface 23. Switch module data interface for signal source
24. Control box Audio interface 25. Switch module data interface for signal source
26. Control box USB interface 27. Control box HDMI interface
1. PPT page turning
2. Volume down button
3. PPT page turning
4. Mute button
5. Laser signal
6. Volume up button
7. Blue LED light
8. Red LED light
9. Built-in microphone
10. External microphone interface
11. Wireless microphone on/off switch
12. 5V / 0.5A charging port
2.4 2.4G wireless microphone function analysis
PAGE 05
2.34 Knob Control Panel

PAGE 06
Refer to the LCD Screen Control Panel UI user manual
3.13 The default input device for booting is a desktop computer. If you need to switch to
another input device, turn the knob to get TV screen, notebook, visual presenter and desktop
computer.
3.14 Shut down the device
Each device can be shut down independently through its own power control button, you can
also turn off all devices at once by long pressing the video switch knob. When the projector
is turned off, 2 minutes delay in system allow the projector lamp to cool down sufficiently,
which increased the service life of the projector.
3.15 2.4G microphone usage. The 2.4G microphone transmitter must be successfully paired
to the receiver in the control box before use.
Operation method: Before turning on the power of the microphone transmitter, turn on the
2.4G microphone power switch on the control box panel first, then turn the power switch of
the 2.4 microphone transmitter to ON. At this time, the red/green lights on the right side of
the transmitter will flash alternately, indicating that the frequency is not successful. When the
frequency is successful, the red light is turned off and the green light is turned on. The 2.4G
microphone can now be used.
3.2 LCD Screen Control Panel operation steps
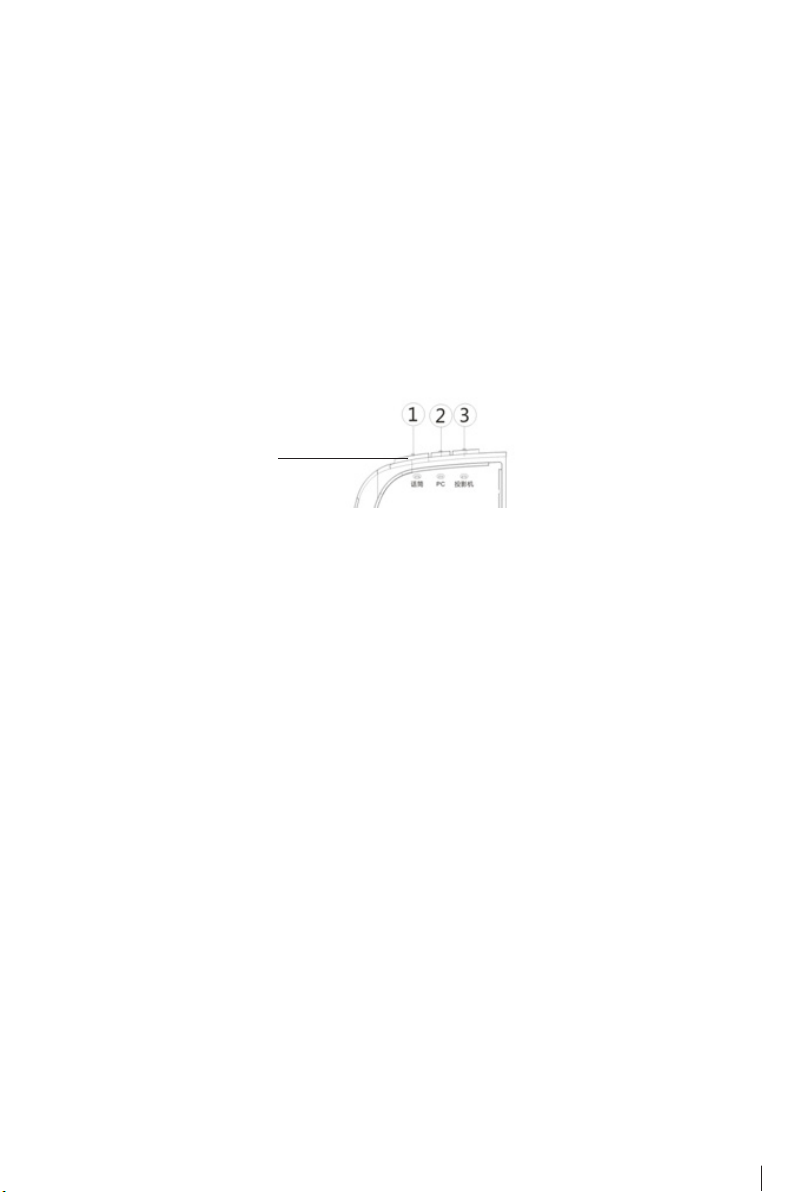
3.11 Three boot modes available (controlled by calling module on the back of the control
box),
A. Insert the IC card, press and hold the video switch knob to turn on the main power.
B. WIthout inserting the IC card, press and hold the video switch knob to turn on the main
power.
C. Insert the IC card and the main power turns on automatically.
3.12 After the main power is turned on, the projector or large LCD screen, control box,
control cabinet and other devices connected to the control box will be opened automatically.
If you need to use 2.4G wireless microphone, turn on the microphone power button
separately.
Microphone on/off switch 1. microphone
2. PC
3. Projector
3. Control Panel operation steps
3.1 “Small Ears” Control Panel operation steps

PAGE 07
4. Troubleshooting
2
3
1
3.31 Boot and shutdown
Boot: Place the IC card in the swiping area (see the figure below) for 2-3 seconds
or long time, the power indicator on the panel flashes and then disappears (see the
figure below), with the “system startup” sound, it means the boot is successful.
Shutdown: Press and hold the knob button (see the figure below) for more than 3
seconds, until you hear the sound ”shutdown”, and the power indicator on the panel
lights up, it means the shutdown is successful.
1. Swiping area 2. Power indicator light 3. Knob button
3.32 Turn signal switch
Turn the knob button to the right to get wireless projection among local computer,
notebook and Visual presenter.
3.33 Volume adjustment control
Turn the volume adjustment knob to the left to decrease the sound, turn to the right
to increase the sound, and tap the knob to mute.
3.3 Knob Control Panel operation steps
The
microphone
has no sound
No video
output
No power
Make sure the microphone power has
turned on
Did you press the transmitter mute
button?
The frequency is not successful (the red/
green lights flash alternately)
Is the projector HDMI cable connected
properly?
Does the signal source connect to input
device normally?
Is the power cord plugged in?
Is the socket fuse blown?
Pressed the lock button
Turn on the microphone power
Press the transmitter mute button
again
Close to the All In One Teaching System,
turn on the transmitter power again
Check power cord connection to see if
you need to change a fuse
Turn on the PC and switch to the PC
source
Check HDMI cable connection
Pressed the lock button again
Check the power cord

PAGE 08
5. After-sales service
5.1. Basic information
5.1.1 In the event of failure under normal circumstances due to the quality of the
product itself, Maijie company will be responsible for the limited warranty during the
warranty period.
5.1.2 If the product has any problem, please contact the Maijie Product Service Hotline
0571-78882925.
5.2 Warranty Policy
5.2.1 The product warranty period is one year. If there is another written agreement with
Maijie, it shall be executed in accordance with the agreement.
5.2.2 The warranty start date of the product is the product release date.
5.2.3 Users should keep this warranty card and the standard invoice issued by the dealer
at the time of purchase.
The above vouchers may be required to be used as a warranty basis during
maintenance.
5.2.4 Users should back up the data and the program by himself before the
maintenance, Maijie does not take responsibility for the damage or loss of programs,
data and storage media.
5.3. Exceptional clause
The following conditions are not covered by the warranty
□ Damage caused by incorrect installation, operation (such as plugging/unplugging
data and power cables, etc.)
□ Damage caused by accident, abuse (including over-workload) and misusage.
□ Damage to the product due to the use of self-made or non-public software software
□ Damage caused by non-Maide repairs
□ Damaged caused by natural disasters, or the appearance of the product is abnormally
damaged

Make multimedia classroom smarter and simpler
Add:Yuhangtang Road 2618, Yuhang District, Hangzhou City, Zhejiang Province, China
Tel:0571-57889225 / 0571-57897218 Fax:0571-88950599 Web: www.hzmaijie.com
Table of contents