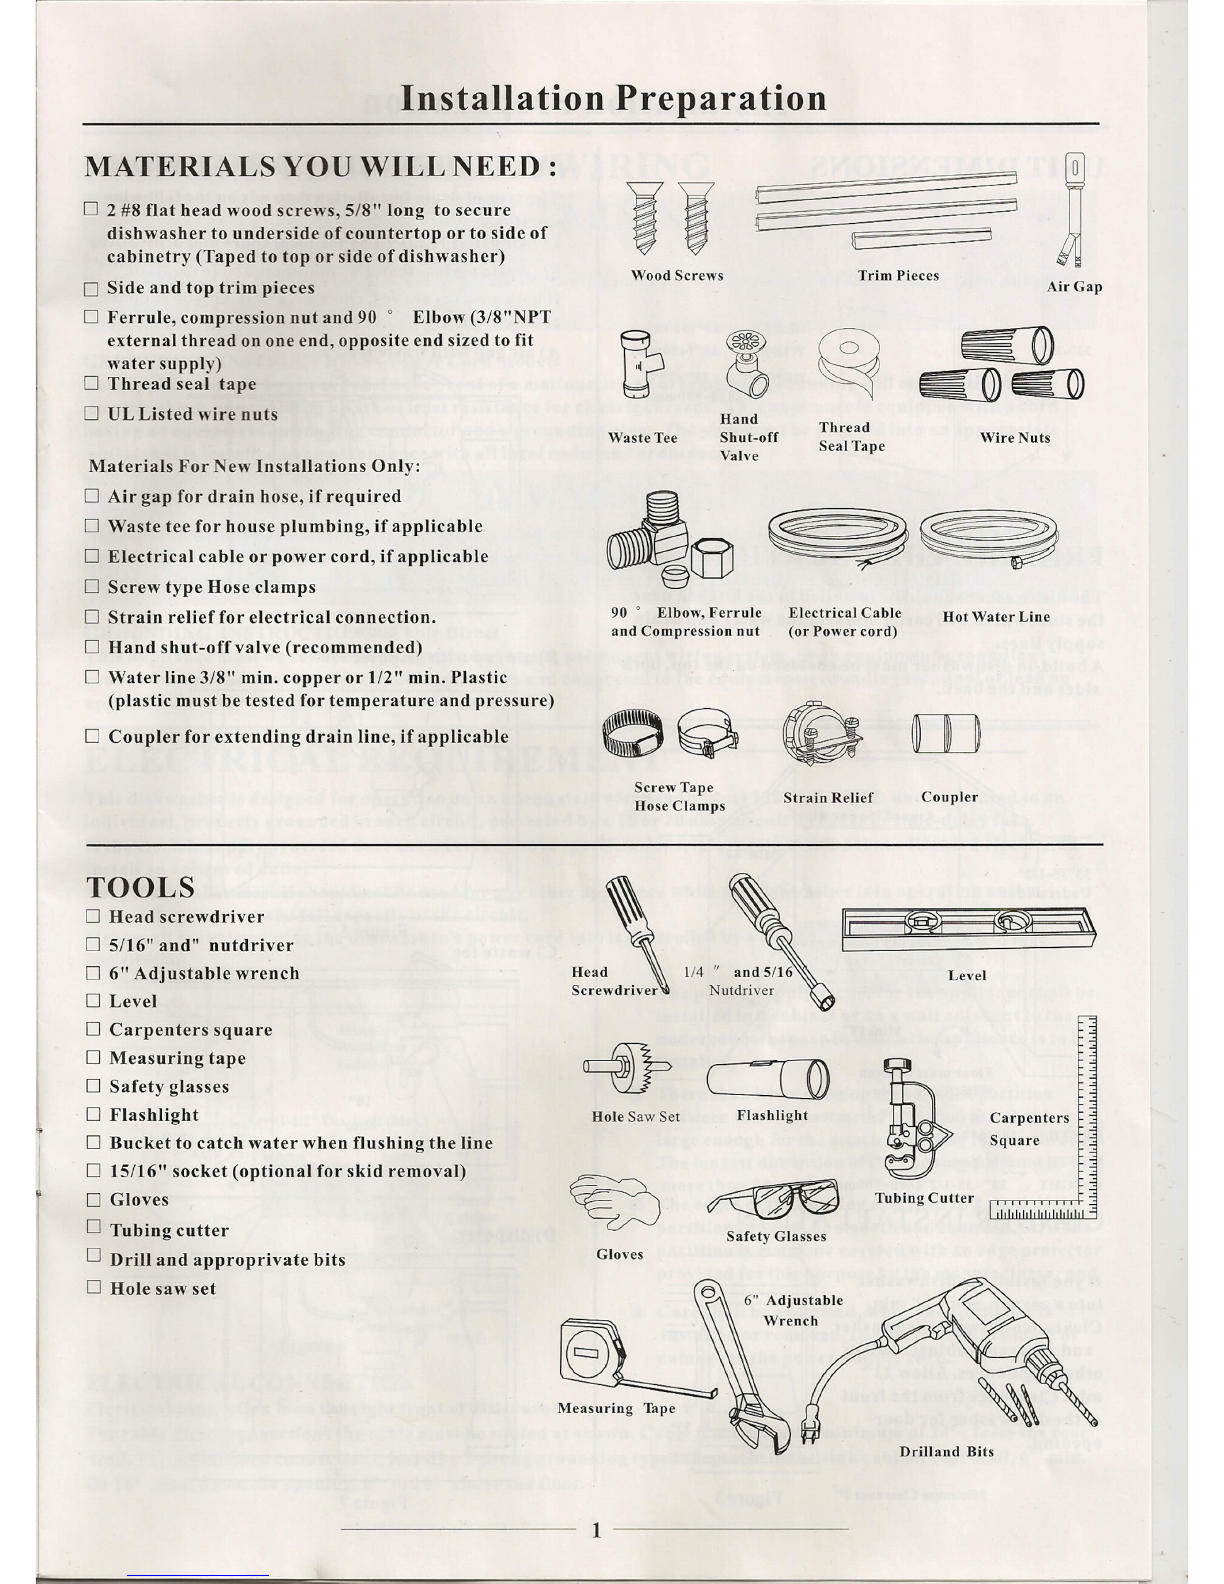
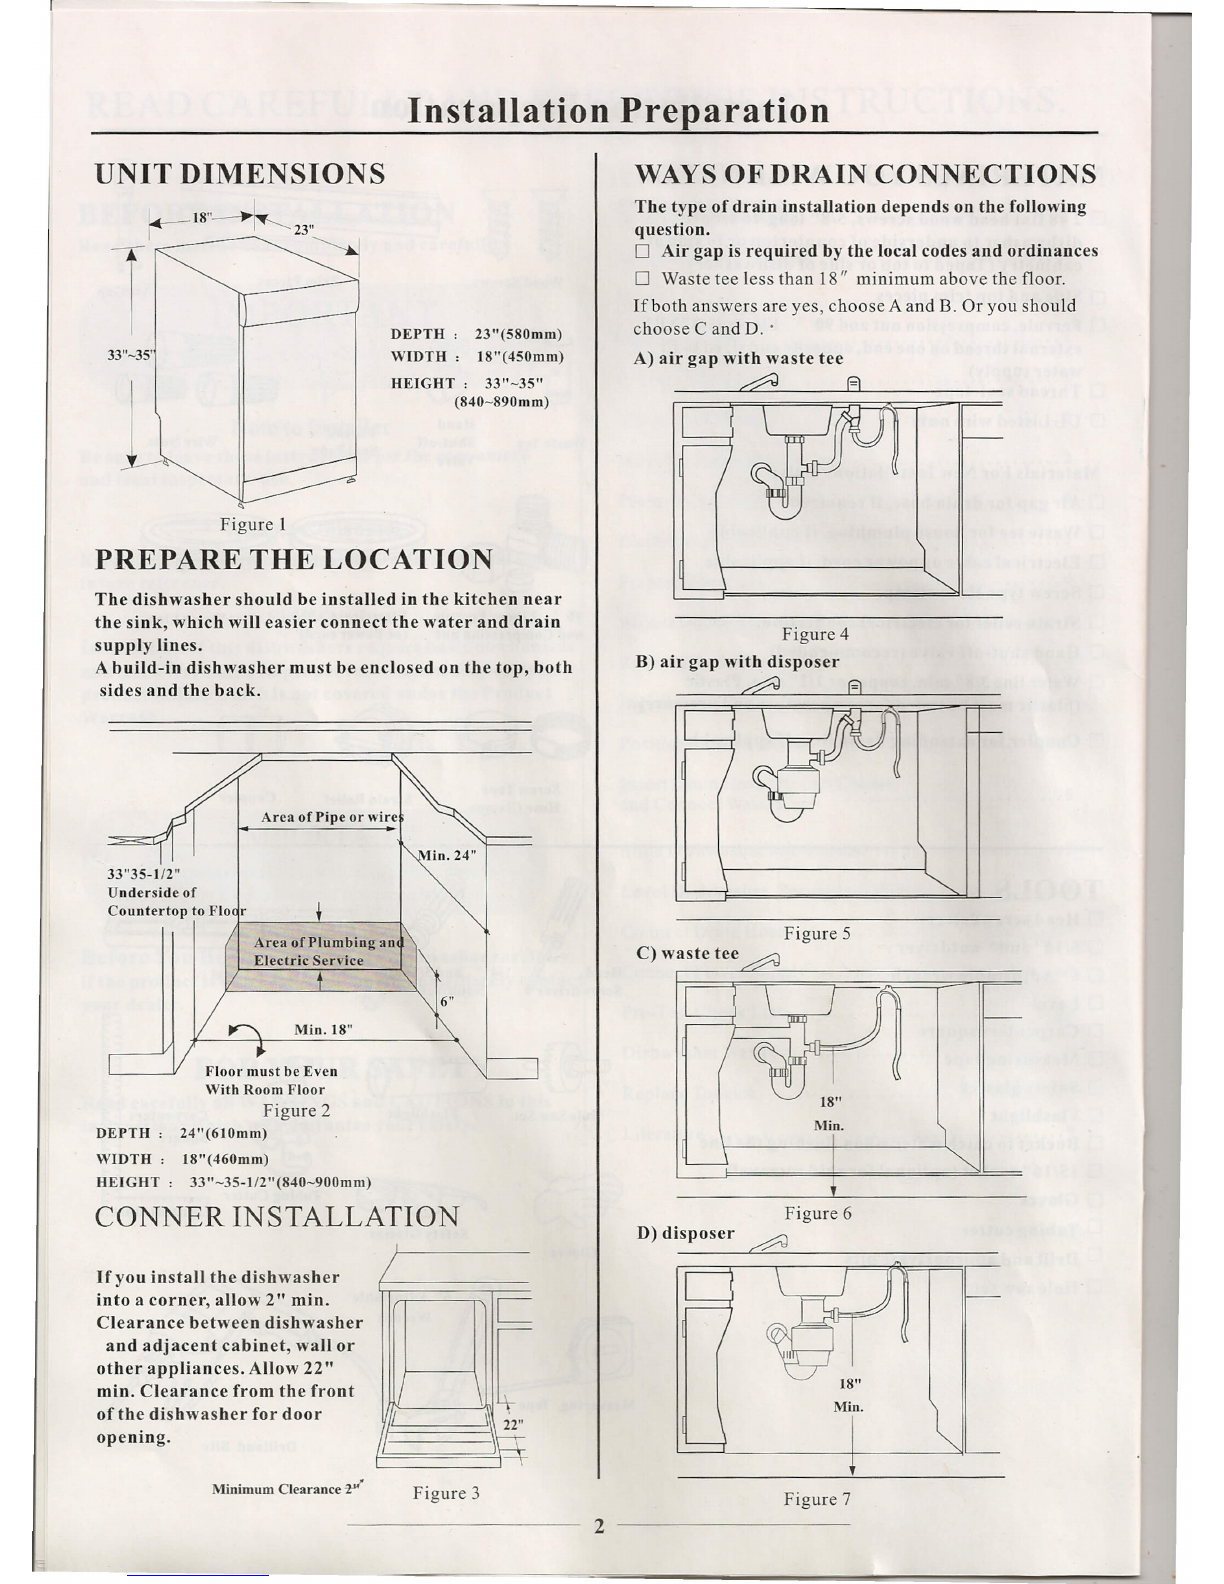
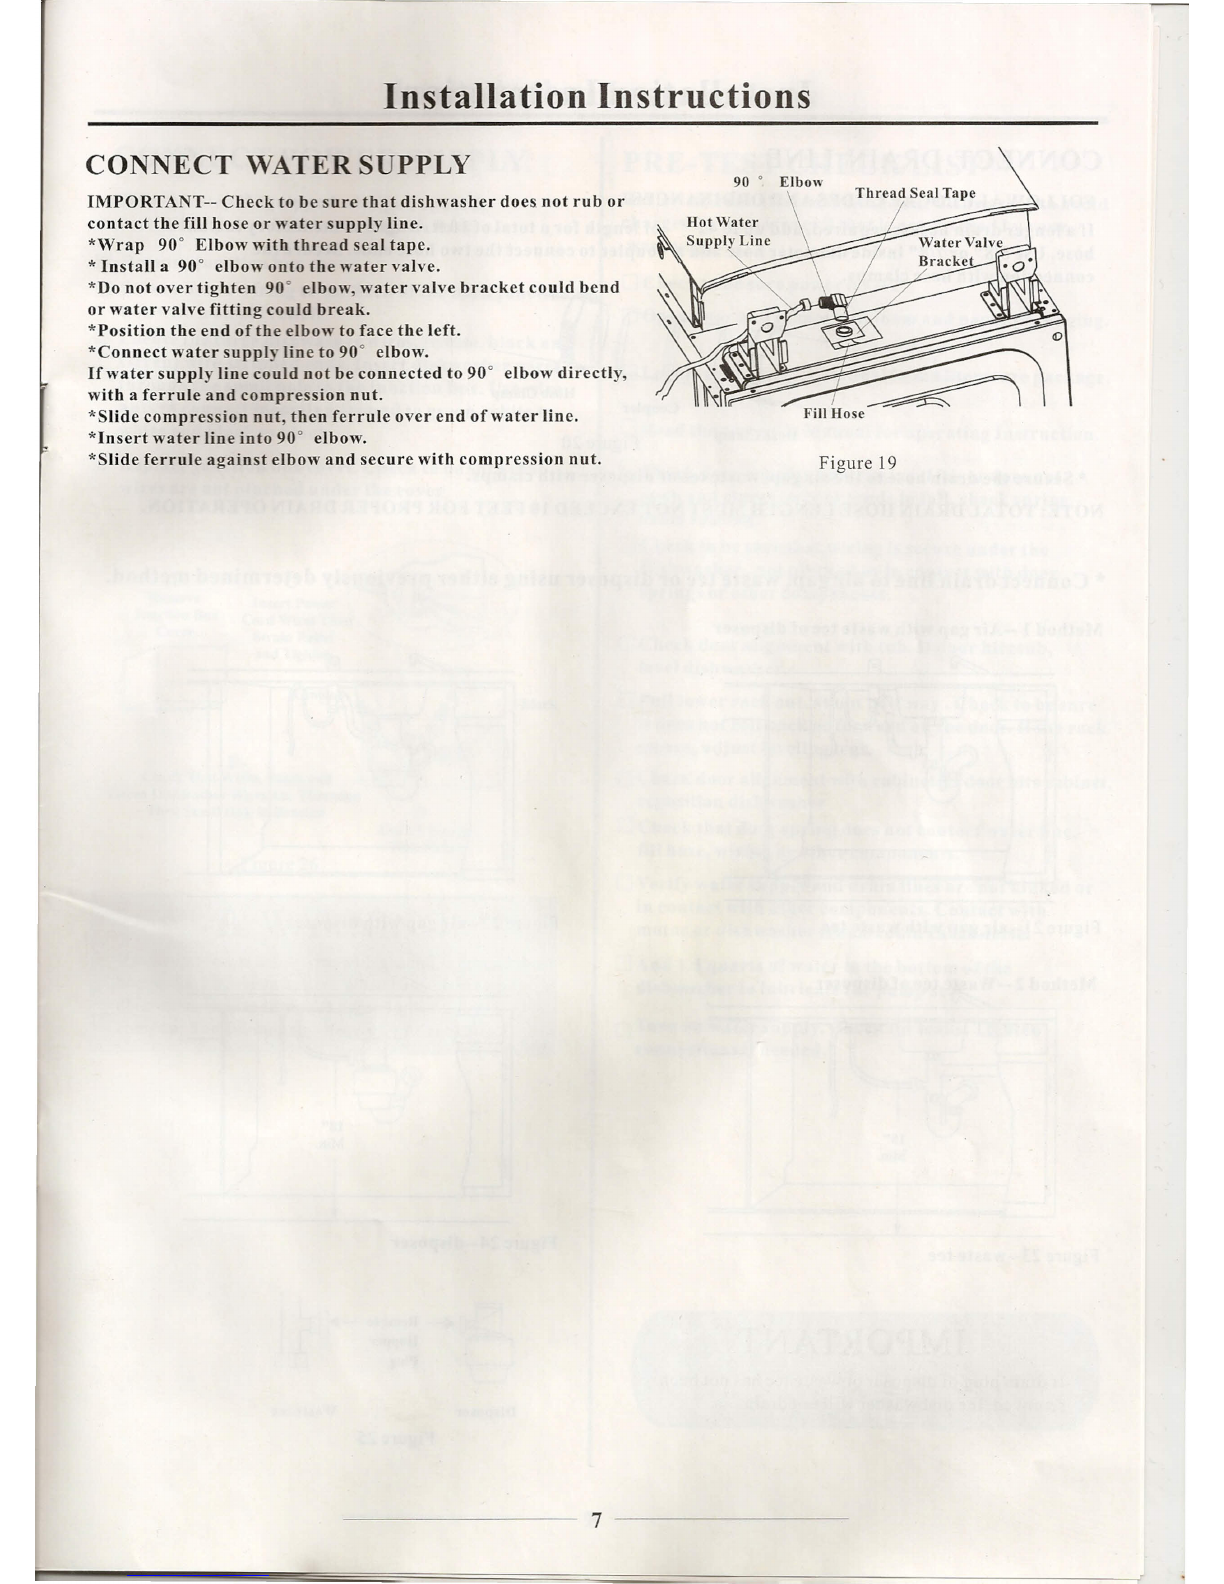
Installation Preparation
PREPARE ELECTRICAL WIRING
WARNING
FORPERSONALSAFET~
Remove house fuse or open circuit breaker before beginning installation. Do not use an extension cord or adapter
plug with this appliance.
GROUNDING INSTRUCTIONS--Power Cord Models
This appliance must be grounded. In the event of a malfunction or breakdown, grounding will reduce the risk of
electric shock by providing a path ofleast resistance for electric current. This appliance is equipped with a cord
having an equipment-grounding conductor and a grounding plug. The plug must be plugged into an appropriate
outlet that is installed in an accordance with all local codes and ordinances.
AWARNING
Improper connection of the equipment-grounding conductor can result in a risk of electric shock .Check with a qualified
electrician or service representative if you are in doubt wether the appliance is properly grounded. Do you modify the plug
provided with the appliance; Hit will not fit the outlet, have a proper outlet installed by a qualified electrician.
GROUNDING INSTRUCTIONS--Cable Direct
This appliance must be connected to a grounded metal, permanent wiring system ,or an equipment-grounding
conductor must be run with the circuit conductors and connected to the equipment-grounding terminal or lead on
appliance.
ELECTRICAL REQUIREMENT
This dishwasher is designed for operation on an adequately wired individual 120VAC, 60HZ, and connected to an
individual, properly grounded branch circuit, protected by a 15 or 20 amp circuit breaker or time-delay fuse.
lf
the electric supply provided does not meet the above specifications, it is recommended that a licensed electrician
install an approved outlet.
Your dishwasher circuit should not be used for any other appliance while the dishwasher is in operation as the
dishwasher requires the full capacity ofthe circuit.
lf
the wall socket you plug the dishwasher's power cord into is controlled by a switch, turn off the switch before
installation.
1 The power-supply socket for the appliance shall be
installed in a cabinet or on a wall adjacent to the
undercounter space in which the appliance is to be
installed.
2 There shall be an opening through the partition
between the compartments specified in 1 that is .
large enough for the attachment plug to pass through.
The longest dimension of the opening shall not be
more than 38mm.
3 The edges of the opening specified in 2 shall, ifthe
partition is wood, be smooth and rounded, or, if the
partition is metal, be covered with an edge protector
provided for this purpose by the manufacturer; and
Figure 8
4 Care shall be exercised, when the appliance is
installed or removed, to reduce the likelihood of
damage to the power-supply cord.
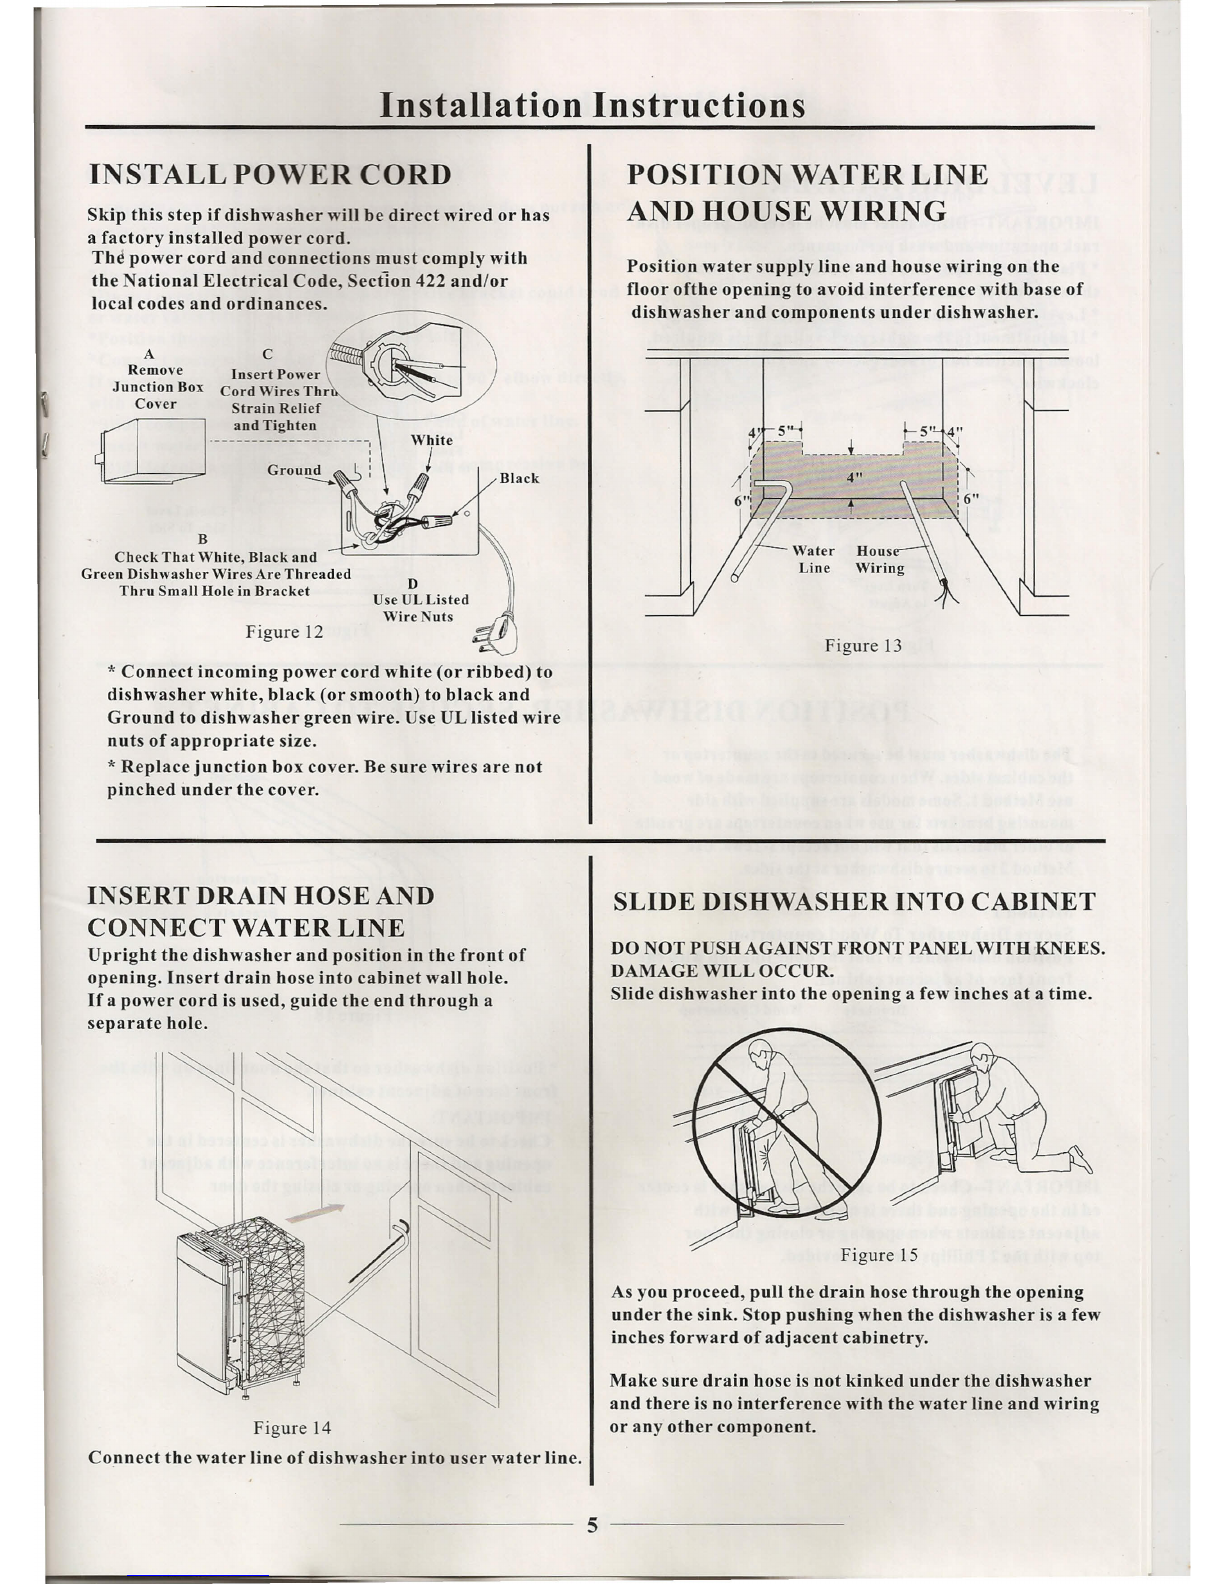
ELECTRICAL CONNECTION
Electrical connection is on the right front of dishwasher.
For cable direct connections the cable must be routed as shown. Cable must extend a minimum of24" from the rear
wall. For power cord connections, install a 3-prong grounding type receptacle in the sink cabinet rear wall, 6" min.
Or 16" max. From the opening, 6" to 16" above the floor.
3