Makino EDGE-2 User manual

15150 25th Avenue North, Minneapolis, MN 55447-1981
Phone 763-476-8600 Fax 763-476-4092
For Service: MN 763-476-4191 IA 319-632-4288 NE 402-330-2323
Visit us at: www.productivity.com Productivity is ISO 9001:2000 Certified
Productivity Inc®
Makino EDGE-2 PRE-INSTALLATION CHECKLIST – Rev 01/2009
Installation of your new Makino EDGE-2 can be smooth and rapid if preparations are made prior to the delivery of
your machine. Any questions regarding machine installation should be directed to our service department for
clarification. We hope this checklist will aid in a rapid installation of your new machine. NOTE: The following
must be completed prior to our service technician arriving to install your new machine.
¾Power Requirements for your machine: 30 Amp/3 phase/9kVa
*Voltage of 200 to 480 at +/- 10% must be maintained. If not, an Automatic Voltage Regulator should be used.
Proper voltage per machine specifications should be ready at machine site. Do NOT power up the machine.
See Makino Installation Manual for more information, or contact our Service Department with any
questions.
¾Customer should furnish and have available the proper supply and types of lubricants required for machine
operation.
ITEM CAPACITY FLUID TYPE
Dielectric Oil 52.8 Gal IONO Plus+
You will need to have Dielectric Oil on hand for installation. Contact our Service Department for more
information.
¾Air lines should be routed to the machine location and operational for proper air pressure.
Clean, Dry Compressed Air of 70 psi. must be available; less than 40% relative humidity; In-line water trap
recommended.
¾Machine location should be planned to allow enough room for access panels to be opened and serviced with
ease. A minimum of 36” is required around the machine for operator and maintenance access.
¾Weight requirements should be checked to insure that the surface below the machine will have sufficient
strength for support and stability. The machine must be set on a solid, sound and stable, steel bar-reinforced
concrete slab poured directly on the grade. In general, the 6” concrete floor on industrial buildings is suitable
for machine placement.
¾The EDGE-2 is best moved with a forklift. See Makino Installation Manual for lifting instructions.
**NOTE 1: LIFTING EQUIPMENT, ROPES, SCHACKLES, LIFTING BARS, LIFTING BEAMS, ETC. ARE
OPTIONAL EQUIPMENT AND ARE NOT PROVIDED WITH THE MACHINE. ITEMS MUST BE
PURCHASED PRIOR TO MACHINE DELIVERY IF LIFTING WITH OVERHEAD/CRANE. Upon arrival of
your machine, uncrate and immediately check for visible damage.
SHIPPING WEIGHT SHIPPING DIMENSIONS OF MACHINE
8,377 # (Skidded/wrapped) 91" L x 91" W x 96" H (Skidded/wrapped)
See Makino Installation Manual for floor space requirements/dimensions – will vary depending upon the
options you purchase.
¾Remove as much preservative from the machine as possible without having to power up (tables –
slides, pulleys, etc.). We recommend mineral spirits to clean. Apply oil when finished to prevent rust.
PLEASE FORWARD THIS TO THE APPROPRIATE PERSON. THANK YOU.

INSTALLATION INFORMATION METRIC ENGLISH
Machine Tool (WxDxH)....................................1625 mm x 1770 mm x 2290 mm..............................64" x 69.7" x 90.2"
Power Supply.............................................................................................................................................................Included
Dielectric Supply......................................................................................................................................................... Include
Machine Tool...........................................................................3000 kg.....................................................................6600 lbs
Power Supply ............................................................................................................................................................Included
Dielectric Unit...........................................................................................................................................................Included
Estimated Shipping Weight.....................................................3000 kg.....................................................................6600 lbs
Transportation The EDGE2 is Shipped FOB Port of Entry in One Container weighing 6600 lbs. Air Ride Transportation is
recommended.
Electrical 3 Phase Power is required with a ground of 100 ohms or less. Voltage of 200 to 480 at ±10% must be
maintained. If not, an Automatic Voltage Regulator should be used.
Machine Amperage Machine kVA
30 9
60 12
Dielectric Oil One drum (55 gallons) of Highly Refined Oil with a Minimum of PAH's similar to DM-244 or EDM-250 to
minimize any health risks is required for installation.
Air Clean, Dry Compressed Air of 70 psi. must be available.
Specifications may be changed without prior notice to incorporate improvements resulting from ongoing R&D programs.

20ED3A1863 (E) i
3UH,QVWDOODWLRQ*XLGH ('*(
Makino EDGE2
Ram Electrical Discharge Machine
with MGF Control
Pre-Installation Guide
This guide is intended for use by Makino customers and Makino employ-
ees and assigns for the safe operation and maintenance of Makino equip-
ment.
This guide was developed through the combined efforts of:
Makino Documentation Group - Mason USA
MBS Associates (Lynne Hays)
Makino Customer Support
1st Release Date: July 20, 2000
Copyright © 2000 Makino, Inc. All Rights Reserved
• No part of this manual may be reproduced or transmitted by any means or in any
form to parties other than which it is intended, without the expressed written
permission of Makino.
• All specifications and designs may change without notice.
Every attempt was made to ensure that the information in this publication was correct at
the time of printing. As specifications and designs change, Makino is not responsible for
information that becomes incorrect or inaccurate after publication.

ii
('*( 3UH,QVWDOODWLRQ*XLGH
The following icons are used in this document. Safety and precautionary
statements are presented as shown below.
• Precautionary statements must be followed to prevent personal injury
or damage to the machine.
• In addition, all safety requirements and guidelines found in Chapter 1 -
Safety, the ANSI safety guidelines the Makino Safety Manual, shipped
with the machine, and established company safety requirements and
regulations must be followed. Taking personal responsibility for safety
will prevent most accidents.
Notes are presented using the following icon format
A copy of the ANSI Safety Manual, ANSI document number ANSI B11.8
was shipped with the machine. If this manual was lost or misplaced,
another copy can be obtained from Makino at no charge.
A DANGER icon precedes each dan
g
er statement. A DANGER icon indicates an
existin
g
hazardous condition with a hi
g
h probability of death or severe injury. Precau-
tions must be taken immediately to prevent personal injury or death.
A WARNING icon proceeds each warnin
g
statement. A WARNING icon indicates a
potentially hazardous situation with some probability of death or serious injury. Precau-
tions must be taken immediately to prevent personal injury.
A CAUTION icon proceeds each caution statement. A CAUTION icon indicates a
potentially hazardous situation with some probability of personal injury or dama
g
e to
the machine. Precautions must be taken immediately to prevent personal injury or
machine dama
g
e.
A NOTE icon indicates information that expands on information
g
iven or indicates
where additional infromation can be found. Notes are presented immediately followin
g
the applicable content.
Write us at: Call or FAX us at:
Makino
P.O. Box 8003
7680 Innovation Way
Mason Ohio, 54040-8003
Attn: Information Services
Phone: (513) 573-7200
ask for Information Services
FAX: (513) 573-7360
Attn: Information Services

20ED3A1863 (E) iii
3UH,QVWDOODWLRQ*XLGH ('*(
To contact Makino, for service after the sale:
The following acronyms and abbreviations are used in this document:
Makino
7680 Innovation Way
Mason, Ohio 45040 USA
Technical Support Services (888) Makino4 (625-4664)
Mon.-Fri. 7:00 a.m. to 8:00 p.m.
Sat. 8:00 a.m. to 2:00 p.m. (Eastern Standard Time) Fax: (513) 459-1825
Parts Express (888) Makino1 (625-4661)
24 hours, 7 days a week Fax: (888)-881-9289
Training Services (888) Makino1 (625-4661)
Term Meaning
APC Automatic Pallet Changer- work table (pallet) storage and exchange device
ATC Automatic Tool Changer - tooling storage and exchange device
ccw counterclockwise - direction of rotation
CNC Computerized Numerical Control - control unit for machine tool system
cw clockwise - direction of rotation
DEC Deceleration - axis slow down for reference operations
DI Dielectric (i.e. DI Fluid, DI unit)
EOB End Of Block - program code at end of each block of data
E-Stop Emergency Stop - machine condition halting all machine operation
FPB Flexible Pendant Box - portable control and axis positioning device
FSE Field Service Engineer - customer service technician
LS Limit Switch - LS00 = limit switch 00
MDI Manual Data Input - operating mode for direct input of NC data
MTC Machine Tool Cabinet - Cabinet housing main machine electrics/electronics
NC Numerical Control - input data (i.e. NC program)
PM Preventive Maintenance - routine maintenance items and checks
S/G Splash Guard - machining area enclosure
SOL Solenoid - SOL01 = Solenoid 01

iv
('*( 3UH,QVWDOODWLRQ*XLGH
AVISO!
Las personas que no pueden leer o entender en Ingles deben mandar traducir este
manual y solicitar entrenamiento antes de operar o mantener la maquina. Todos los
que trabajen en esta maquina deberan saber como operarla con toda seguridad y en
forma correcta para evitar un posible dano.
ATTENTION!
Les personnes ne sachant pas lire l'anglais devront se faire lire et expliquer le manuel
avant d'utiliser ou de faire l'entretien de la machine. Toute personne travaillant sur la
machine doit savoir comment l'utiliser sans danger et correctement afin d'eviter tout
accident.
HINWEIS
Alle Personen die nur Teile des Handbuches oder kein Englisch verstenen, müssen
sich dieses Handbuch erklären lassen, bevor sie die Maschine in Betrieb nehmen
oder instandhalten. Alle Personen, die an der Maschine arbeiten, müssen zur Vermei-
dung von Verletzungen zur korrekten Handhabung angeleitet werden.
WARNING!
Persons unable to read English or do not understand any part of this guide, must have
this guide read and explained to them before operating or maintaining the machine.
Everyone working on the machine must know how to operate and maintain it safely
and correctly to prevent possible serious injury.

vi
('*( 3UH,QVWDOODWLRQ*XLGH

3UH,QVWDOODWLRQ*XLGH ('*(
01_20ed3a Safety.fm
Makino EDGE2
Ram Electrical Discharge Machine
with MGF Control
Chapter 1 Safety Precautions
For a Safe Working Environment

Chapter 1
Safety Precautions
Contents
('*( 3UH,QVWDOODWLRQ*XLGH
1.1 Overview . . . . . . . . . . . . . . . . . . . . . . . . . . . . . . . . . . . . . . . . . . . .1 - 1
1.2 General Safety. . . . . . . . . . . . . . . . . . . . . . . . . . . . . . . . . . . . . . . .1 - 1
1.2.1 Dan
g
er, Warnin
g
, Caution Statements and Symbols . . . . . .1 - 2
1.2.2 Access to Information . . . . . . . . . . . . . . . . . . . . . . . . . . . . . .1 - 4
1.2.3 Point-of-operation . . . . . . . . . . . . . . . . . . . . . . . . . . . . . . . . .1 - 4
1.2.4 Lockout/Ta
g
out Procedure . . . . . . . . . . . . . . . . . . . . . . . . . .1 - 5
1.3 Personal and Professional Safety . . . . . . . . . . . . . . . . . . . . . . . . .1 - 6
1.4 Equipment and Operation Safety . . . . . . . . . . . . . . . . . . . . . . . . .1 - 7
1.5 Environmental Safety . . . . . . . . . . . . . . . . . . . . . . . . . . . . . . . . .1 - 10
1.6 Liftin
g
Safety . . . . . . . . . . . . . . . . . . . . . . . . . . . . . . . . . . . . . . . .1 - 11
1.6.1 Slin
g
s . . . . . . . . . . . . . . . . . . . . . . . . . . . . . . . . . . . . . . . . . .1 - 11
1.6.2 Chains . . . . . . . . . . . . . . . . . . . . . . . . . . . . . . . . . . . . . . . . .1 - 11
1.6.3 Hooks . . . . . . . . . . . . . . . . . . . . . . . . . . . . . . . . . . . . . . . . . .1 - 12
1.6.4 Eye Bolts . . . . . . . . . . . . . . . . . . . . . . . . . . . . . . . . . . . . . . .1 - 12
1.6.5 Rin
g
s . . . . . . . . . . . . . . . . . . . . . . . . . . . . . . . . . . . . . . . . . .1 - 12
1.6.6 Liftin
g
the Machine or Components . . . . . . . . . . . . . . . . . . .1 - 13
1.6.7 Liftin
g
Workpieces and Fixtures . . . . . . . . . . . . . . . . . . . . . .1 - 13
1.7 Mechanical Maintenance Safety . . . . . . . . . . . . . . . . . . . . . . . . .1 - 14
1.8 Electrical Maintenance Safety. . . . . . . . . . . . . . . . . . . . . . . . . . .1 - 15
1.9 EDGE2 Ram Electrical Dischar
g
e Machine Safety . . . . . . . . . . .1 - 16
1.9.1 Fire Hazard and Prevention . . . . . . . . . . . . . . . . . . . . . . . . .1 - 16
1.9.1.1 EDM Fire Conditions . . . . . . . . . . . . . . . . . . . . . . . . . . .1 - 18
1.9.2 Machine Safety Features . . . . . . . . . . . . . . . . . . . . . . . . . . .1 - 20
1.9.3 Location of Emer
g
ency (E-Stop) Button . . . . . . . . . . . . . . .1 - 20
1.9.4 Location of Safety Labels . . . . . . . . . . . . . . . . . . . . . . . . . .1 - 21
1.10 EDGE2 Equipment and Operation Safety. . . . . . . . . . . . . . . . .1 - 23

01_20ed3a Safety.fm 1 - 1
3UH,QVWDOODWLRQ*XLGH ('*(
1.1 Overview
This chapter provides proven general safety guidelines that, if followed,
promote a safer working environment. It also contains safety information
specific to the EDGE2.
All machining centers have inherent hazards the manufacturer either
designs out, guards against, or warns about. Even though the manufac-
turer has this responsibility, the machine user has ultimate responsibility
to ensure that a safe working environment is maintained in and about the
machining center. This includes, but is not limited to, allowing only prop-
erly trained and technically qualified personnel program, operate, and
maintain the machining center.
It is Makino’s policy and responsibility to design, manufacture, and market
machining centers that are as reasonably safe as possible for their
intended use.
1.2 General Safety
Safety precautions or requirements discussed in Makino guides or manu-
als do not supersede any safety requirements imposed by local, state, or
federal governments. All government-imposed guidelines, i.e. OSHA
(Occupational Safety and Health Administration), NEC (National Electric
Code), NFC (National Fire Code), ANSI (American National Standard
Institute) standards, shall take precedence.
To protect against injury or damage operate the machining center within
the guidelines described in the provided documentation. Consider
Makino’s safety precautions supplemental to:
• Other Makino supplied guides or manuals related to programming,
operation, and maintenance of this specific machining center.
• Your company’s safety rules and regulations.
• All local, state, and federal regulations.
Your particular application may require additional safety measures to
ensure proper operator safety.
Additional copies of any guide or manual provided with your Makino
machining center may be purchased from Makino.

1 - 2
('*( 3UH,QVWDOODWLRQ*XLGH
Prior To Installation, Operation, or Service,
Do NOT attempt to install, operate, or service this machining center until:
• You have read and understand the safety instructions contained in this
guide.
• You have read and understand all Danger, Warning, and Caution
safety labels attached to the machining center and its related equip-
ment.
• You have read and understand all technical information, including the
following sections of this safety chapter.
Questions Regarding Safe Operation
Before you operate this machine – contact your Makino service group for
answers to any questions about safety and your Makino machine.
1.2.1 Danger, Warning, Caution Statements and Symbols
It is important that all employees recognize each safety symbol on the
machine and understand the meaning of Danger, Warning, and Caution.
These safety labels must never be removed, covered, or painted over,
and must be replaced if they are damaged, defaced, or become unread-
able.
Table 1-1 presents the meaning of each safety statement. It is important
that all employees recognize and understand the meaning of the safety
symbols shown in Table 1-2.
The location of safety labels for specific hazards on the EDGE2 is
described in section 1.9.4.

01_20ed3a Safety.fm 1 - 3
3UH,QVWDOODWLRQ*XLGH ('*(
TABLE 1-1 DEFINITION OF DANGER, WARNING, AND CAUTION STATEMENTS
Statement Meaning
DANGER DANGER is the most severe safety statement. This statement means
that either severe personal injury or death may result if the instruc-
tion(s) is not followed.
WARNING WARNING is the next level of safety statement. It indicates that if the
instruction(s) is not followed severe personal injury could result.
CAUTION A CAUTION is the least severe safety statement and indicates that if
the instruction(s) is not followed damage to the equipment may result.
TABLE 1-2 SAFETY SYMBOL SHAPES AND THEIR MEANING
Symbol Meaning
A triangle or diamond shaped safety symbol indicates a hazard
exists in the area or behind the enclosure where the symbol is
placed.
The symbol at left indicates an electrical shock hazard exists.
A solid colored circle shaped safety symbol with an icon inside indi-
cates the action shown by the icon is mandatory.
The symbol at left indicates that safety glasses be worn.
A square shaped safety symbol is used to convey information rela-
tive to the area where the symbol is placed.
The symbol at left indicates the area is hot.
A circle shaped safety symbol with a diagonal slash across the
image indicates the action shown is prohibited in or around that
area.
The symbol at left indicates that smoking is not allowed in the area.

1 - 4
('*( 3UH,QVWDOODWLRQ*XLGH
1.2.2 Access to Information
We strongly recommend that a copy of these safety instructions and all
provided guides, manuals, and technical information be kept near the
machine. This information should be organized for quick access and used
by operators, maintenance, and other personnel with duties related to the
machining center.
Access to this information:
• May save a life.
• Will prevent or reduce injury, mis-operation, and machining center
damage.
In the event that parts of this information become damaged or unusable,
replace them immediately.
1.2.3 Point-of-operation
“Point-of-operation” should be safeguarded to the greatest extentpossible
for all machining operations.
In addition to panel locks, interlocks, and guarding, certain areas of the
machining center are color coded for safety. It is important that the original
color and vividness of these areas be maintained.
Different operations or applications may make the general purpose safe-
guards unsuitable and require additional safeguards. You and your com-
pany are required to use special safeguards in these situations.
To assist in designing point-of-operation safeguards for specific machin-
ing center applications:
• OSHA has published a booklet called OSHA Publication No. 3067.
• Films regarding safety requirements for machine tools are available
from ANSI and trade groups such as NMTBA (National Machine Tool
Builders Association).

01_20ed3a Safety.fm 1 - 5
3UH,QVWDOODWLRQ*XLGH ('*(
1.2.4 Lockout/Tagout Procedure
The machining center is powered by high voltage and other energy
sources that represent potential hazards. To reduce the risk of injury or
death establish, define, and practice a Lockout/Tagout procedure for the
equipment in your facility.
Lockout/Tagout defines a minimum safe procedure to be followed by per-
sons who might be confronted with unexpected energizing, start-up, or
release of stored energy that could cause injury or death. At a minimum,
all Lockout/Tagout procedures should include:
1. Set the machine’s Main Power switch to the Off position.
2. Affix a DO NOT START tag with your name and department at, on, or
near the machine’s Main Power switch, until all repairs are complete.
3. Turn the Main Power disconnect to the Off position.
4. Install an industry approved lockout device through the Main Power
disconnect handle.
5. Install a tamper-proof padlock onto the lockout device. All persons
performing maintenance on the machine at the same time shall install
their own padlock onto the lockout device.
6. Disconnect the main power of all power sources (i.e. electrical, air,
hydraulic, etc.).
Use the Lockout/Tagout policy and procedures defined by your company.
If no Lockout/Tagout procedure has been communicated to you, please
ask your supervisor to provide and explain one or obtain copies of stan-
dards to develop and implement Lockout/Tagout in your plant.
• ANSI has issued a standard to assist in the design and development of
a Lockout/Tagout policy. It is written as a guide to follow when deter-
mining the specific procedures and training necessary and appropriate
to your plant operations.
- Copies of the ANSI standard are available from ANSI at 1430
Broadway, New York, NY 10018, ask for: Standard ANSI Z244.1-
1982, or as modified, for personal protection - Lockout/Tagout Of
Energy Sources - Minimum Safety Requirements.
Electrical Shock Hazards Exist - Work Safely
Failure to turn the Main Power disconnect to the Off position, lock it out, and ta
g
it could
result in severe personal injury or death.

1 - 6
('*( 3UH,QVWDOODWLRQ*XLGH
1.3 Personal and Professional Safety
General safety precautions should be practiced everyday, but never
become common place. Safety is the responsibility of every person on the
job site. In this regard, consider yourself responsible for safety in your
workplace. No one is better positioned to eliminate or prevent unsafe con-
ditions than you. Each employee should practice the following, regardless
of their position, title, or labor grade:
• Approach and intercede anytime you witness unsafe procedures.
• Be prepared to report any condition which seems unsafe to your com-
pany’s safety department or any supervisory or management staff. It
could save lives. In particular report such things as:
- Missing or defective guards and protective devices.
- Leaks and spills of cutting fluid, lubricants, or any liquids.
- Improperly stored chemicals or flammable materials and any
unusual fumes.
- Loose, worn, or broken flooring.
- Slippery, broken, or unstable platforms.
- Missing, broken, or unstable handrails.
• Avoid making sudden movements, loud noises, engaging in horseplay,
or other activities that may prove distracting and result in an unsafe or
dangerous work environment. Remember that around machinery, it
only takes a second’s inattention to result in personal injury or death.
• Observe and obey all signs posted on the machinery and its compo-
nents and signs placed by your company, like:
- NO SMOKING
- SAFETY GLASSES MUST BE WORN WHILE OPERATING THIS
MACHINE
- DANGER - HIGH VOLTAGE, etc.
• Wear appropriate safety equipment as defined by OSHA, the equip-
ment manufacturer, your company safety policy, or MSDS (Material
Safety Data Sheet). Always wear approved eye protection and other
safety equipment to meet the demands of current conditions while
operating or working around the machining center.
• Clean up any oil or other liquid spills immediately.

01_20ed3a Safety.fm 1 - 7
3UH,QVWDOODWLRQ*XLGH ('*(
• Obtain an MSDS for each chemical (such as cutting fluids, lubricating
oils, greases, etc.) used on or around the machining center. Practice
safe working habits and wear all protective equipment required. Know
and understand the procedures to follow in the event:
- Your skin is exposed to the chemical.
- Your eyes are contacted by the chemical.
- You ingested or inhaled the chemical.
1.4 Equipment and Operation Safety
We urge that all machining centers be operated, equipped, and cared for
in strict compliance with all local, state, and federal safety regulations. The
following safety requirements apply to all machinery and should be prac-
ticed in addition to machine specific safety guidelines.
• Do not neglect your responsibility to ensure that all machining centers
are operated, maintained, and equipped with complete regard for oper-
ator safety.
Only qualified personnel, trained in safety and all machining center func-
tions should be allowed to operate, maintain, or repair the machine.
To be considered qualified, all personnel whose duties are related to the
operation, maintenance, or repair of the machining center should:
• Know the location and operation of the [EMERGENCY] (E-Stop) but-
ton.
• Study the related guides or manuals prior to attempting to operate,
maintain, or repair the machine.
• Locate and understand all Danger, Warning, and Caution labels on the
machining center and accessories.
Machining centers are designed for operation by one person at a time.
• Persons other than the designated operator should stay out of the area
during operation.
• Unauthorized personnel may increase the potential for injury or dam-
age due to inattentiveness.

1 - 8
('*( 3UH,QVWDOODWLRQ*XLGH
Be sure to Always:
• Take steps to protect the machine tool and control cabinets from mois-
ture and condensation. Moisture can damage electrical components,
causing unwanted machine motion, leading to injury or machine dam-
age.
• Maintain the exact original color and vividness of any machine areas
that are color coded as safety precautions.
• Ensure that all shields and guards are in place and all covers, cabinet
doors, and terminal boxes are closed prior to operation.
• Avoid accidentally bumping any machine controls, as this may cause
unintended machine motion causing injury or machine damage.
• Be alert for loose, damaged, or worn parts on the machine and associ-
ated equipment. Immediately correct or report any loose items, notice-
able change in operating noise, or any unusual machine action.
• Be aware of the machine and auxiliary components’ moving members
and range of movement which may create pinch points. Always be
cautious of these areas. Avoid pinch points entirely during machine
operation.
• Keep the machining center properly maintained. Perform maintenance
at prescribed intervals, as described in the Mechanical Editions.
Machining center maintenance should be performed only by autho-
rized individuals.
• Check the level of each fluid reservoir periodically. Add fluids, if
needed, as described in the Mechanical Editions. Use only recom-
mended lubricants.
• Keep the machining center clean. Keep the work area clear of chips,
rags, etc. Clean up any spilled or splashed fluid on the floor immedi-
ately. Cleaning should be performed at least daily.
• Double check the set up and workpiece before power up.
• Check all clamp bolts for tightness and verify the accuracy of all set
ups before restarting machining operation.
• Use caution when handling workpieces after machining. Machining can
produce sharp edges and, at times, considerable heat.
Table of contents
Other Makino Sander manuals
Popular Sander manuals by other brands

Wen
Wen 20409 instruction manual

Global
Global G3492 Operating Instructions, Parts List, Warranty, & Warranty Repair Center

Makita
Makita BO4510H instruction manual

RADLEY
RADLEY 1262-300 manual
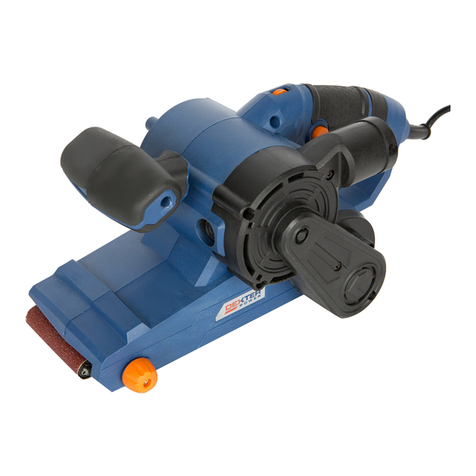
Dexter Power
Dexter Power NC900BS.1 Assembly, Use, Maintenance Manual

Festool
Festool Pollux 180 E Operating instructions/spare parts list

niteo
niteo PS0033-22 instruction manual

Axminster
Axminster AWEBDS46 MkII user manual

Dynabrade
Dynabrade 10390 Operating, maintenance and safety instructions

Festool
Festool RS 2 instruction manual

American Sanders
American Sanders FloorCrafter 8 07104A Operator's manual
Haussmann
Haussmann 58485004 Operator's manual


