Amano American Sanders 3DS User manual
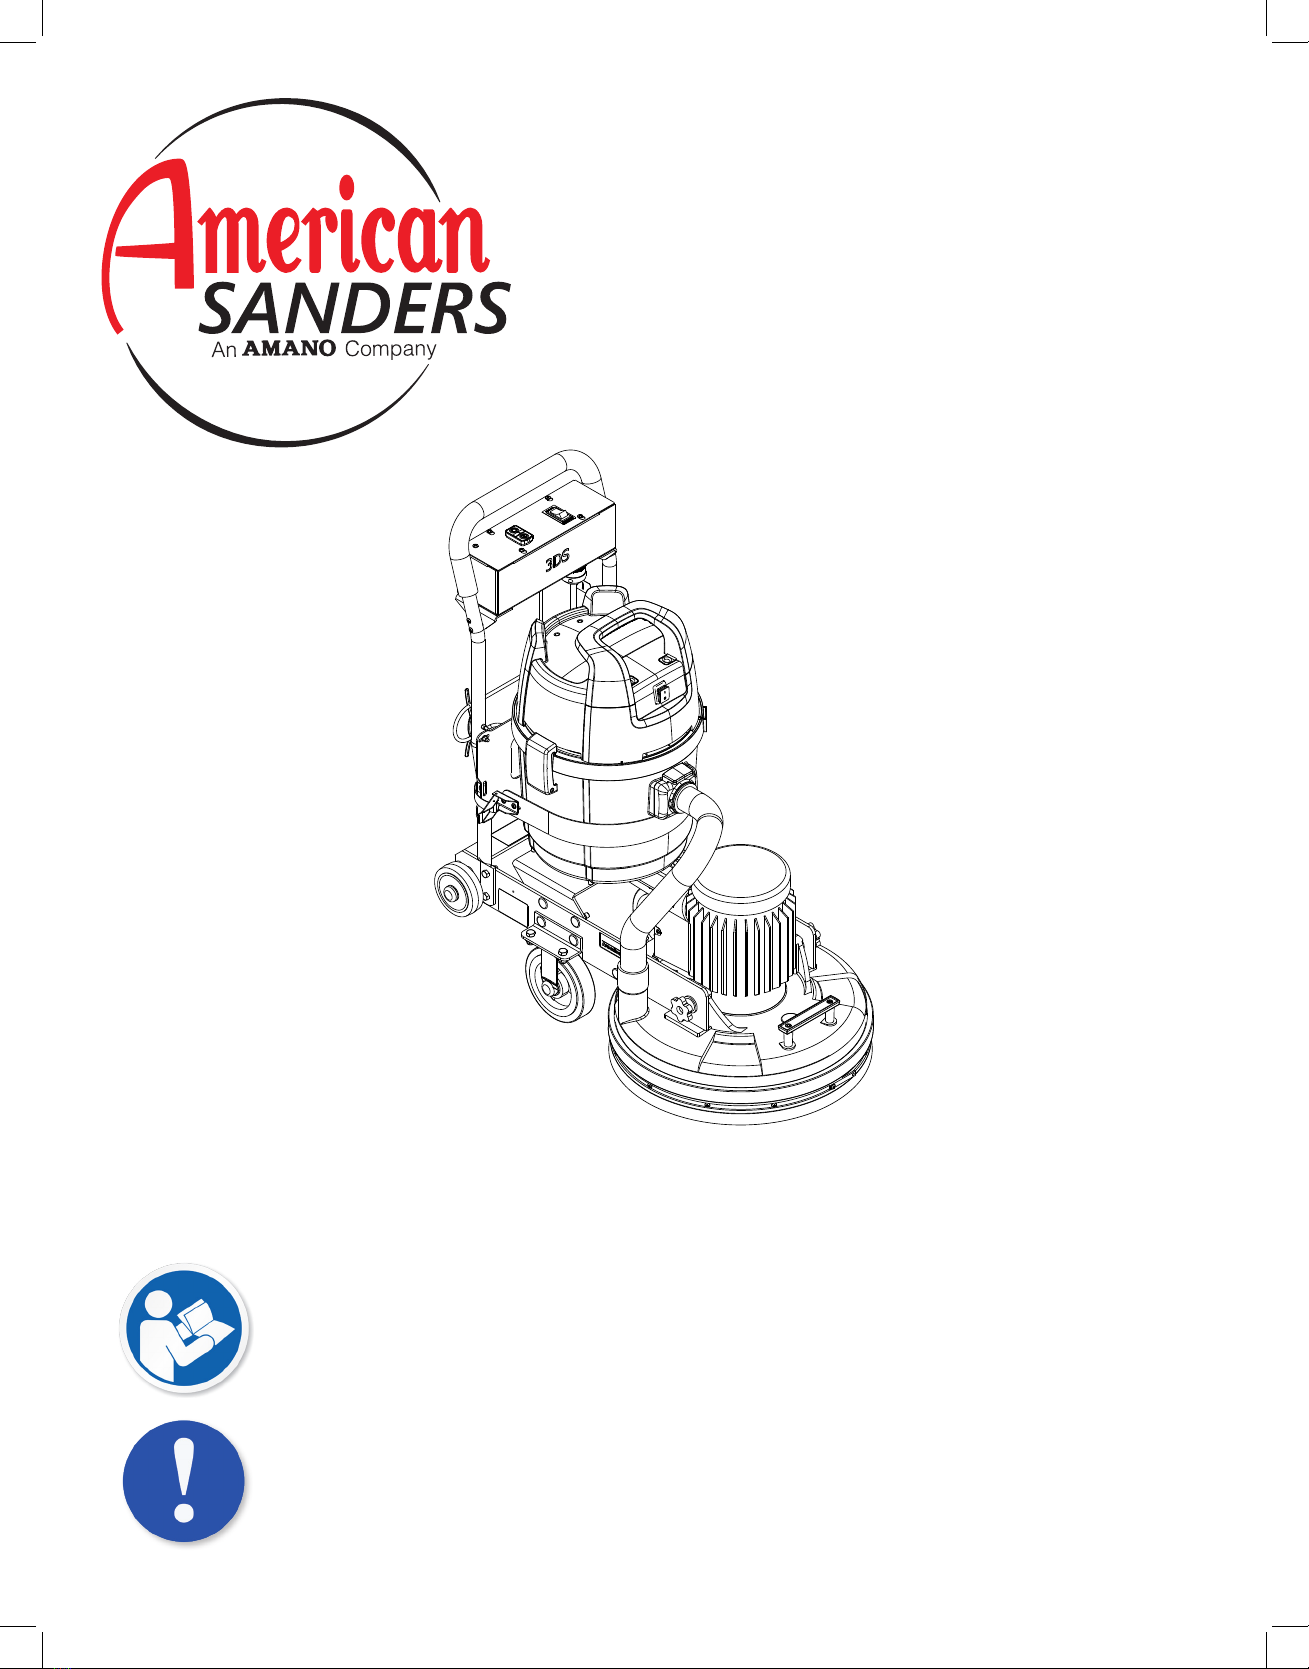
Rotary Sander
3DS
Operator’s Manual
Bedienungshandbuch
Manual del operador
Manuel de l’utilisateur
Manuale per l’operatore
Руководство по эксплуатации

READ THIS BOOK
This book has important information for the use and safe operation of this machine. Failure to read this book prior to
operating or attempting any service or maintenance procedure to your American Sanders machine could result in injury
to you or to other personnel; damage to the machine or to other property could occur as well. You must have training in
the operation of this machine before using it. If your operator(s) cannot read this manual, have it explained fully before
attempting to operate this machine.
All directions given in this book are as seen from the operator’s position at the rear of the machine.
***This product is intended for commercial use only***
WARNING!
The Products sold with this Manual contain or may contain chemicals that are known to certain governments (such as the State of
California, as identied in its Proposition 65 Regulatory Warning Law) to cause cancer, birth defects or other reproductive harm. In
certain locations (including the State of California) purchasers of these Products that place them in service at an employment job site
or a publicly accessible space are required by regulation to make certain notices, warnings or disclosures regarding the chemicals that
are or may be contained in the Products at or about such work sites. It is the purchaser’s responsibility to know the content of, and
to comply with, any laws and regulations relating to the use of these Products in such environments. The Manufacturer disclaims any
responsibility to advise purchasers of any specic requirements that may be applicable to the use of the Products in such environments.
In this Operation Manual you will find three statements that you must read and observe to ensure safe operation of this
machine.
DANGER means: Severe bodily injury or death can occur to you or other personnel if the DANGER statements
found on this machine or in this Operation Manual are ignored or are not adhered to. Read and observe
all DANGER statements found in this Operation Manual and on your machine.
WARNING means: Injury can occur to you or to other personnel if the WARNING statements found on your
machine or in the Operation Manual are ignored or are not adhered to. Read and observe all WARNING
statements found in this Operation Manual and on your machine.
CAUTION means: Damage can occur to the machine or to other property if the CAUTION statements found
on your machine or in this Operation Manual are ignored or are not adhered to. Read and observe all
CAUTION statements found in this Operation Manual and on your machine.
Operator Safety Instructions
EN Contents
Operator Safety Instructions......................................................................................................................... 2
Introduction and Machine Specications...................................................................................................... 6
Electrical Connection Instructions ................................................................................................................ 7
Machine Breakdown/Transportation............................................................................................................. 8
Machine Set-Up............................................................................................................................................ 9
Operating Instructions - Sanding.................................................................................................................11
Maintenance............................................................................................................................................... 12
Troubleshooting.......................................................................................................................................... 13
Sanding Cuts and Sandpaper .................................................................................................................... 14
SECTION II: Parts Manual
MainAssy .............................................................................................................................................. 78-79
HeadAssy .............................................................................................................................................. 80-81
Electrical Box Assy ............................................................................................................................... 82-83
Electrical Schematic ................................................................................................................................... 84

3
EN
DANGER: Failure to read the Owner’s Manual prior to operating or servicing your American Sanders machine could result in injury to
you or to other personnel; damage to the machine or to other property could occur as well. You must have training in the
operation of this machine before using it. If you or your operator(s) cannot read English, have this manual explained fully
before attempting to operate this machine.
DANGER: A. Sanding/nishing wood oors can create an explosive or combustible environment. Do not operate this machine around
solvents, thinners, alcohol, fuels, oor nishes, wood dust or any other ammable materials. Cigarette lighters, pilot lights,
electrical sparks and all other sources of ignition should be extinguished or avoided. Keep work area well ventilated.
B. Dust generated from sanding wood oors can spontaneously ignite or explode. Promptly dispose of any sanding dust in
a metal container clear of any combustibles. Do not dispose in a re.
DANGER: A. Electrocution could occur if the machine is being serviced while the machine is connected to a power source. Disconnect
the power supply before servicing.
B. Electrocution or re could occur if the machine is being operated with a damaged power cord. Keep the power cord clear
of the pad. Always lift the cord over the machine. Do not move the machine by the power cord.
C.Shock hazard. Do not use the machine if it has been rained on or sprayed with water.
DANGER: To avoid injury keep hands, feet, and loose clothing away from all moving parts on the machine. Disconnect the power cord
before replacing the pad, changing the abrasive, or when servicing. Do not operate the machine unless all guards are in
place. Never leave the machine unattended while connected to a power source.
WARNING: Injury can occur if protective clothing or equipment is not used while sanding. Always wear safety goggles, protective
clothing, and dust mask while sanding.
WARNING: This sander is not to be used on pressure treated wood. Some pressure treated woods contain arsenic and sanding
pressure treated wood produces hazardous dust. Inhaling hazardous dust from pressure treated wood can cause serious
injury or death. Sanding pressure treated wood decks or uneven surfaces can damage the sander which is not covered
under warranty or damage waiver.
WARNING: Any alterations or modications of this machine could result in damage to the machine or injury to the operator or other
bystanders. Alterations or modications not authorized by the manufacturer voids any and all warranties and liabilities.
WARNING: Risk of explosion. Floor sanding can result in an explosive mixture of ne dust and air. Use oor sanding machine only in a
well-ventilated area free from any ame or match.

4
EN

5
EN
6
Introduction
EN
WARNING: This machine contains moving parts. To reduce the
risk of injury, always unplug the power cord before servicing.
INTRODUCTION AND MACHINE SPECIFICATIONS
The 3DS is a machine designed primarily for ne nish sanding of hardwood oors. The nish sanding process results in a smoother and atter oor
and assists in removing imperfections created during the drum or belt sanding process. This machine can not be used on wet surfaces.
Model 07082C 07112A (UK) 07085C (EU)
07082C
PART NUMBER 07112A
Vacuum
Weight
Shipping Weight
Machine Type
Motor
Voltage
Frequency
Supply Cable
Amperage
Overload Protection
Motor Insulation Class
Working Diameter
Sanding Pad Diameter
Sanding Pad Speed (Loaded)
Disc Housing Speed (Loaded)
Noise Emission
Sanding Unit Weight
Chassis Weight
Dimension LxWxH
07085C
Equipped w/Vacuum
163 lbs. (74 kg)
234 lbs. (106 kg)
3 Disc Dry Sanding
2.2kW Single Phase
230v
50 Hz
15m HO7RN-F3G1.50
11.5 A
15 A Circuit Breaker
F
18.75” (48 cm)
8” (203 mm)
717 rpm
170 rpm
76 dBA
109 lbs (49 kg)
37 lbs (17 kg)
35” x 20” x 39.5” (88 x 51 x 100 cm)
Equipped w/Vacuum
163 lbs. (74 kg)
234 lbs. (106 kg)
3 Disc Dry Sanding
2.2kW Single Phase
230v
50 Hz
15m HO7RN-F3G1.50
11.5 A
15 A Circuit Breaker
F
18.75” (48 cm)
8” (203 mm)
717 rpm
170 rpm
76 dBA
109 lbs (49 kg)
37 lbs (17 kg)
35” x 20” x 39.5” (88 x 51 x 100 cm)
Equipped w/Vacuum
163 lbs. (74 kg)
234 lbs. (106 kg)
3 Disc Dry Sanding
3 Hp Single Phase
230v
60 Hz
40’ 12-3 SJO
11.5 A
15 A Circuit Breaker
F
18.75” (48 cm)
8” (203 mm)
717 rpm
170 rpm
76 dBA
109 lbs (49 kg)
37 lbs (17 kg)
35” x 20” x 39.5” (88 x 51 x 100 cm)

7
Electrical Connection Instructions
EN
230 VOLT MACHINES
INSTRUCTIONS FOR CONNECTION
TO THE POWER SUPPLY
AND THE ELECTRICAL GROUND
CAUTION: To avoid damage to the machine operate only
onAC frequency and electrical voltage shown
on the nameplate. Make sure you have the
correct frequency and voltage before connect-
ing the power cord to an outlet.
This product must be grounded. If it should malfunction or
breakdown, grounding provides a path of least resistance
for electric current to reduce the risk of electric shock. This
product is equipped with a cord having an equipment-grounding
conductor and grounding plug. The plug must be inserted into
an appropriate outlet that is properly installed and grounded in
accordance with all local codes and ordinances.
WARNING: Improper connection of the equipment-
grounding conductor can result in a risk
of electric shock. Check with a qualied
electrician or service person if you are in
doubt as to whether the outlet is properly
grounded. Do not modify the plug provided
with the product - if it will not t the outlet,
have a proper outlet installed by a qualied
electrician.
This product is for use on a nominal 230 volt circuit and has
a grounding attachment plug that looks like one of the plugs
illustrated in Fig. 1. Make sure that the product is connected to
an outlet having the same conguration as the plug. No adaptor
should be used with this product.
This machine must be connected to the electrical ground to protect
the operator from electrical shock. The machine has a power cord
with two main conductors and one earthing conductor. Connect
the plug to the receptacle. The green or green and yellow conduc-
tor in the cord is the ground wire. Never connect this wire to any
terminal other than the ground terminal.
Figure 1
IEC-309 16A-6h/200-250 Vac
WARNING: To avoid electrical shock always use this ma-
chine with anAC three-conductor electrical
system connected to the electrical ground.
Replace any worn, cut or damaged cords.
Replace any damaged plugs, receptacles,
or connector bodies. Do not move the
machine over an electrical cord. Always
lift the cord over the machine.
EXTENSION CORDS
Use only an approved extension cord with two main conduc-
tors and one earthing conductor. The machine has a power
cord with wire size 12 AWG or 2.5mm2.
WARNING:To avoid motor burnout, if you use an ex-
tension cord, use an extension cord with
minimum wire size of 10 AWG or 4.0mm2.
Do not use an extension cord longer than 40
feet or 15 meters. Do not join two extension
cords.
WARNING:To avoid electrical shock, do not cut, remove
or break the ground terminal. Do not try to
t a three-terminal plug into a receptacle or
connector body that does not t the plug. If
the receptacle or connector body does not
t the plug, see your authorized American
Sanders dealer to get an authorized person
to make the connection.
NEMA L6-20P
8
Machine Breakdown/Transportation
EN
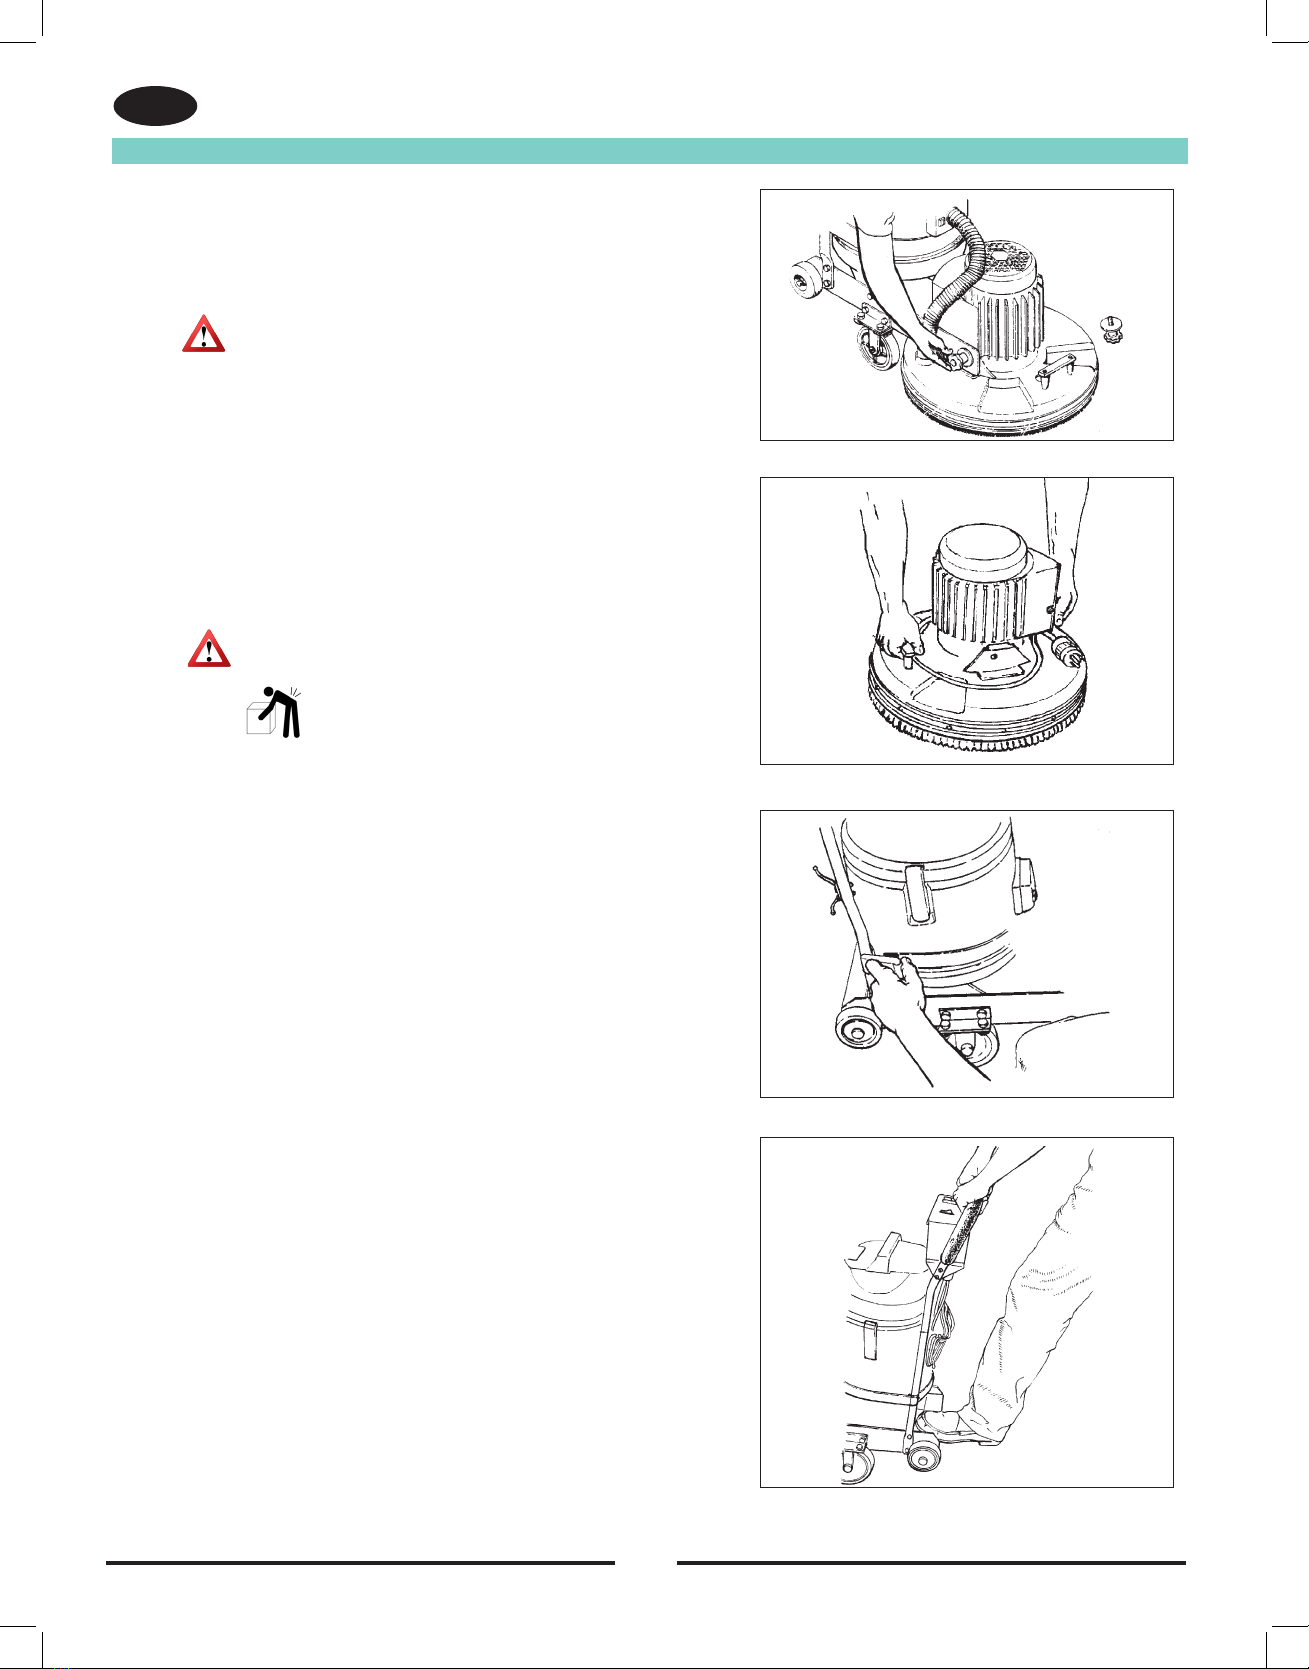
To break down the machine, follow this procedure:
1. Unplug machine from wall and wrap cord.
WARNING: Injury to the operator or bystanders could occur
if the power supply remains connected when
servicing the equipment, changing abrasive, or
empting the dust bag.
2. Unplug the power cord, motor cord, and vacuum from electric box.
3. Disconnect the vacuum hose from the sanding unit.
4. Remove both hand knobs from the sanding unit and
separate sanding unit from truck frame.
(see Figure 2)
WARNING: The sanding unit is heavy (109 lbs.). To avoid
injury to the operator or damage to the machine
use a rm grip and proper lifting technique. Get
assistance if necessary.
5. To lift the sanding unit grasp the assembly at the lifting sites. (see Figure 3)
6. Unwrap the vacuum power cord from the cleats on the handle and
place on vacuum head.
7. Disconnect the vacuum straps by unhinging the draw latch. The
vacuum strap will spring back and the vacuum can be lifted off the
truck frame. (See Figure 4)
8. The handle may be taken off by removing the four
5/16-18 bolts and nuts that secure it to the truck frame.
9. Secure all elements in cargo area when transporting to avoid
damage to the machine.
How to Move Machine (Room to Room)
When moving the machine short distances (room to room) it may be moved
by tilting it back until the 4” diameter wheels contact the oor. With steady
downward pressure on the handle the machine can be pushed to the desired
location. (see Figure 5)
Figure 2
Figure 3
Figure 4
Figure 5

9
Machine Setup
EN
Figure 6
Figure 7
Figure 8
Figure 9
Figure 10
Listed below are the tools needed for setup of the machine:
1 - #2 Phillips screwdriver
2 - ½” open end wrenches or (2) adjustable wrenches.
To prepare the machine for use, follow this procedure:
1. Remove all components of the machine from its package and
check for damaged or missing parts.
2. Read Operation and Parts Manual, including all danger, warn-
ing, and caution statements before operating the machine. If
you or the operator are unable to read the language this manual
is printed in, have the manual fully explained before attempting
to operate this machine.
3. Attach the sanding unit to the truck frame by securing the two
hand knobs through the truck frame to the sanding unit. (see
Figure 6). The eccentrics in the truck frame should be used
for
proper alignment between the truck frame and sanding unit.
Match
tick marks on spacers and frame; one on right and two on left.
4. Route the motor power cable under the head pressure strap
and vacuum support strap, then over the tilt assist strap.
5. Secure the handle assembly to the truck frame by bolting it on
with the four 5/16-18 bolts and nyloc nuts supplied and plug in
motor power cord. (see Figure 7) Tighten the nuts that hold on
the
tilt wheels and attach the vacuum support straps as per gure 7.
6. Put Dacron lter around the cloth lter. (See Figure 8)
7. Set the dry vacuum on the vacuum support straps with the
center bottom in the 2” diameter hole. NOTE: The vacuum
hose port should be facing the sanding unit motor. Attach the
vacuum strap around the base of the vacuum. (See Figure 9)
8. An optional disposable paper bag is available. If you wish
to use the paper bag, remove the vacuum head and install a
paper dust control bag by inserting the deector on the vacuum
into the mounting shoe of the paper bag. To ensure the bag
is properly seated on the deector, the rubber seal should rest
in the groove of the deector (See Figure 10). NOTE: Check
the paper bag for proper seating after transport to avoid dust
in the vacuum tank.
9. Wrap the vacuum cord around the cleats located on the back
of the handle. Leave enough slack in the cord to plug into the
electric box. Turn the vacuum switch to the “ON” position. The
vacuum switch should remain in the “ON” position. (See Figure
11 below)
Figure 11
10
Machine Set-up
EN
WARNING: Injury could occur to the operator or bystanders if the
machine should tip or fall while replacing the pad or
changing the abrasive.
WARNING: Never allow the machine to be started while tilted up.
Severe injury could result if the machine is started
while the abrasive is being changed.
CAUTION: Damage to the sanding head will occur if the unit is
allowed to drop freely from the tilted position.
CAUTION: Damage to the pad driver will occur if the machine
is operated without sandpaper or screen and pad.
Damage to the pad driver can also occur if the pad
is less than 1/8” thick.
10. Install or replace sandpaper or screen and pad. The sandpaper,
screen, and pad should be replaced if there are any tears or if they
have become worn and dull. The pad should also be replaced if
its thickness is less than 1/8”. To install or replace the sandpaper,
screen, or pad: (See Figure 12)
DANGER: Disconnect the power source. Electrocution
could occur if the machine is connected to
the power source while changing the abra-
sives, pads or empting the dust bag.
a.) Unplug the machine from its power source and move
the power cord out of your way.
b.) Tilt the machine back by pressing on the tilt assist strap
with your foot while also pushing down on the handle.
(see Figure 13)
c.) Remove foot from tilt assist strap and continue to push
down on the handle until the machine rests in the up
position on the handle and tilt wheels. (see Figure 14)
d.) To remove the existing paper or screen / pad stand to
the side of the machine and pull from one edge. The
screen may have a plastic pushpin in the center that
will require removing prior to the screen’s removal.
(See Figure 15)
e.) Center the new paper or screen / pad over the pad
driver and press against the pad driver until the hooks
on the driver hold them in position.
WARNING: The machine is heavy. Keep others away from the
machine because of possible injury if the machine
should tip or fall. When replacing the pad or changing
the abrasive use caution when tilting the machine. The
operator or other bystanders could be injured.
f.) Return the machine to upright position by standing
behind the handle and raising it from the oor until the
caster wheels contact the oor. Place your foot on the
tilt assist strap and ease the sanding unit to the oor.
11. Connect the vacuum hose to the sanding unit and vacuum.
12. Connect the power cord to the electric box.
Figure 12
Figure 15
Figure 13
Figure 14

11
Operating Instructions - Sanding
EN
Figure 16
Handle
Auto
Manual
Start
Stop
Figure 17
To operate the machine, follow this procedure:
1. Move machine to work location. When sanding the
area, work so that you are moving away from the power
supply. This will help to avoid damaging the power
cord and reduce the need to move the power cord as
frequently.
NOTE: For sanding cuts and sandpaper, see
page 13.
WARNING:
2. Install the abrasive. Use the same procedure outlined
in MACHINE SETUP for installing the sandpaper or
screen / pad.
(See Page 5)
DANGER:
3.
Loosen the head pressure until the rubber foot is not
touching the mainframe. (See Figure 16) Tighten until
the rubber foot touches the main frame. Adjust to suit
by running the machine, then making adjustments
either up or down to get sanding action desired.
4. Connect machine’s power cord to an appropriately
fused and grounded circuit.
5. Stand behind the handle, place the rocker switch to
“Automatic” and press the green start switch. To stop
the machine, press the red stop button. (See Figure
17)
CAUTION:
6. The operator must be moving the machine when the
machine is running. The operator may move the
machine in any direction when sanding the oor.
Electrocution could occur if the
machine is used on an ungrounded
electrical circuit. Always use a
three-wire electrical system con-
nected to the electrical ground.
Never remove or disable the
grounding supply conductor on the
electrical cord. Consult an electri-
cian if the grounding conductor
is missing or if you suspect your
circuit is not grounded properly.
Injury can occur if the machine is
connected to a power source while
installing or replacing the abra-
sives. Disconnect the machine
before installing the abrasives.
To prevent possible damage to the ooring
and to reduce heat buildup, keep the ma-
chine in motion while the motor is running.
1.
2.
3.
4.
5.
6.

12
Maintenance
EN
User Maintenance:
The paper bags should be replaced after every 3 hours of use, mini-
mum. Paper bags may need to be replaced more often with heavy
cutting and softer wood types.
NOTE: Before paper bags are replaced, the machine must be
vacuumed to remove all dust and the cloth lter must be cleaned to
remove accumulated dust. (See the DTV-7 Operator’s Manual for
instructions on how to clean the cloth lter)
When changing the sanding paper or screen, the foam and dual lock
“velcro” on the sanding pads should be checked for any frays, wear, or
damage.
Service Maintenance:
The 3DS Sander must be serviced after every 600 hours of use.
Contact an authorized Alto Service Center/Person for service.
(The Service Centers are listed on the inside back cover of the Opera-
tor’s Manual).
The following service should include:
1. Check and/or change the brushes and commutator in the
vacuum motor (See separate operator’s manual).
2. Check the rubber grommets on the sanding pads for wear
and tear; replace if damaged.
3. Check foam on sanding pads for wear and tear; replace if
damaged.
4. Check the drive mechanisms for wear, i.e. belts, pulleys,
motor shaft.
5. Blow accumulated dust out of vacuum motor.
6. Clean cloth lter on vacuum.
In addition to the above the following service should be done:
1. After 1500 hours the drive belt should be
replaced.
2. After 3000 hours the bearings on the drive
pulleys should be replaced.

Problem Cause Action
Motor will not start No Power Check power supply and
connections
Defective switch / bad connection Contact an authorized dealer
Motor fails to start / runs sluggish Low voltage from excessive length Use a 12 Ga. extension cord, not to
or undersized extension cord. exceed 40’ in length.
Defective start capacitor Contact an authorized dealer
Defective start switch Contact an authorized dealer
Defective start/run capacitor Contact an authorized dealer
Defective motor, low voltage Contact an authorized dealer
Fuse / Circuit Breaker repeatedly Low voltage Eliminate extension cord.
trips. Locate power source closer to work
site. Have voltage checked by a
qualied electrician.
Bad connection Contact an authorized dealer
Defective motor Contact an authorized dealer
Machine “hops” during operation Head pressure adjustment Adjust the Head pressure bolt to
not set to proper pressure. suite.
Bad/worn sanding pad Replace faulty pad.
Uneven pads. Replace uneven pads.
Sandpaper / screen torn, worn Replace faulty sandpaper/screen or
or improperly installed. install properly.
Machine pulls to the right Head pressure adjustment Loosen the head pressure
during operation. set too tight. adjustment. See Figure 17, page 8
Machine fails to properly Paper bag is full or not Replace paper bag in vacuum
contain dust. properly seated on vacuum securing properly on vacuum horn.
inlet horn.
Cloth lter is clogged Remove cloth lter and clean by
blowing with high pressure air.
Machine pushes to rear when Eccentric spacers on hand Adjust eccentrics to match “tick”
running. knobs improperly set. marks on frame with eccentric
hole toward front of machine.
NOTE: After adjustment both
casters should turn with the same
amount of pressure.
13
Troubleshooting
EN

14
Sanding Cuts and Sandpaper
EN
GENERAL CUTTING
As the machine is designed to have a random cutting pattern, any direction of travel is permitted, however it is recommended that the
machine be continuously moved during operation. A path of forward and back then over half is also a general sanding pattern.
INITIAL CUT
The purpose of the initial cut is to remove old nish, gross imperfections, and belt/drum sander marks on the oor surface. Use a
course grain abrasive (40-60 grit). For extreme cases use 36 grit abrasive.
FINAL CUTS
The purpose of a nishing cut is to remove the scratches from the initial cut and edger cuts. Use a ne grain abrasive (80-100 grit).
If the surface remains rough after a nishing cut, it may be necessary to use an even ner grain sandpaper abrasive or use a screen
abrasive. The pad used with the screen can also be used with ne grit sandpaper to get the desired nish. Care should be taken in
selecting the grit size of the abrasive. A very ne grain will close the pores on a wood oor making admission of a stain difcult.
If glazing or burning should occur the abrasive has dulled and must be replaced.
NOTE: This machine is used for ne nish sanding. However 36 and 40 grit sand paper can be used for special applications.

DE
Sicherheitshinweise für Bediener ..................................................................... 16
Einleitung und technische Daten...................................................................... 18
Anweisungen zum Anschluss an 230 V-Netzanschluss ................................... 19
Demontage/Transport der Maschine ................................................................ 20
Montage der Maschine..................................................................................... 21
Bedienungsanweisungen ................................................................................. 23
Wartung............................................................................................................ 24
Wartung durch den Benutzer .................................................................... 24
Service-Wartung ....................................................................................... 24
Fehlersuche...................................................................................................... 25
Schleifschliffe und Schleifpapier....................................................................... 26
Teil II Handbuch für Ersatzteile ................................................................78-84
Inhaltsverzeichnis
LESEN SIE DIESES HANDBUCH
Dieses Handbuch enthält wichtige Informationen für den Gebrauch und den sicheren Betrieb dieser Maschine. Versäumen Sie
es, dieses Handbuch vor der Inbetriebnahme oder vor der Ausführung von Service- oder Wartungsarbeiten an Ihrer American
Sanders-Maschine zu lesen, kann dies zu Schäden Ihrer Person oder anderen Personals führen. Ebenso könnten Schäden an
der Maschine oder andere Sachschäden auftreten. Bevor Sie diese Maschine bedienen, müssen Sie sich mit Ihrer Bedienung
vertraut gemacht haben. Wenn Sie kein Englisch verstehen, lassen Sie sich dieses Handbuch vor Bedienung dieser Maschine
vollständig erklären.
Alle in diesem Handbuch angegebenen Richtungen beziehen sich auf die Position des Bedieners hinter der Maschine.
DEUTSCH
Sicherheitshinweise Für Bediener
DE
16
GEFAHR: Wenn Sie das Bedienungshandbuch nicht gelesen haben, bevor Sie die Maschine bedienen oder warten, riskieren
Sie, sich selbst oder andere Personen zu verletzen bzw. die Maschine oder sonstige Ausrüstung zu beschädigen.
Bediener müssen im Umgang mit der Maschine unterwiesen werden, bevor sie damit arbeiten. Falls Sie nicht in
der Lage sind, dieses Handbuch in englischer Sprache zu lesen, sorgen Sie dafür, dass es Ihnen eingehend
erklärt wird, bevor die Maschine in Betrieb genommen wird.
GEFAHR: Wenn Sie eine Maschine bedienen, die noch nicht vollständig zusammengebaut ist, riskieren Sie Verletzungen
oder Sachschäden. Bedienen Sie die Maschine erst, nachdem der Zusammenbau vollständig abgeschlossen
ist. Sorgen Sie dafür, dass alle Befestigungsvorrichtungen fest angezogen sind. Achten Sie darauf, dass alle
Justierungen den Vorgaben des Herstellers entsprechen.
GEFAHR: Explosive Materialien - Gefahr schwerer Körperverletzung mit möglicher Todesfolge. Das Abschleifen bzw. Fer-
tigstellen von Holzböden kann zu explosionsgefährlichen Bedingungen führen. Betreiben Sie die Maschine nicht
mit oder in der Nähe von Lösungsmitteln, Verdünnungsmitteln , Alkohol, Treibstoffen, Brennstoffen, Bodenbearbei-
tungsmitteln, Holzstaub oder sonstigen entammbaren Substanzen. Die durch das Abschleifen bzw. Fertigstellen
von Holzböden freigesetzten Dämpfe bzw. Holzstaub schaffen eventuell eine explosionsgefährliche Umgebung.
Feuerzeuge, Anzünder, elektrische Funken und andere Zündquellen sollten ausgemacht bzw. vermieden werden.
Halten Sie den Arbeitsbereich stets gut belüftet.
GEFAHR: Der Schleifstaub kann sich selbst entzünden und einen Brand oder eine Explosion verursachen. Entsorgen Sie
den Staub immer prompt in einem Metallbehälter in sicherem Abstand von entzündbarem Material. Entleeren Sie
ihn nicht in eine offene Flamme.
GEFAHR: Es besteht mögliche Stromschlaggefahr, wenn die Maschine gewartet wird, während sie an einer Stromquelle
angeschlossen ist. Schalten Sie die Stromversorgung aus, bevor Sie Wartungsarbeiten an dieser Maschine
durchführen. Ziehen Sie den Stromstecker stets von der Stromquelle ab, bevor Sie die Bürste bzw. den Pad oder
anderes Zubehör auswechseln. Schalten Sie die Stromversorgung aus, wenn Sie die Maschine unbeaufsichtigt
stehen lassen.
GEFAHR: Es besteht mögliche Stromschlag- oder Feuergefahr, wenn die Maschine mit einem schadhaften Stecker oder
Stromkabel benutzt wird. Halten Sie das Stromkabel stets vom Pad frei. Heben Sie das Stromkabel immer über
die Schleifmaschine. Bewegen Sie die Maschine nicht, indem Sie am Netzkabel ziehen.
GEFAHR: Es besteht mögliche Stromschlaggefahr, wenn die Maschine an einem ungeerdeten Stromkreis benutzt wird.
Verwenden Sie stets ein dreipoliges, geerdetes elektrisches System. Entfernen bzw. deaktivieren Sie keinesfalls
den Erdungsleiter am Stromkabel. Konsultieren Sie bitte einen Elektriker, falls der Erdungsleiter nicht vorhanden
ist bzw. falls Sie vermuten, dass der Stromkreis nicht richtig geerdet ist.
GEFAHR: Halten Sie Hände, Füße und lockere Kleidungsstücke von allen beweglichen Teilen der Schleifmaschine fern, um
Verletzungen zu vermeiden. Ziehen Sie das Stromkabel aus der Steckdose, bevor Sie den Pad/das Schleifmate-
rial auswechseln bzw. eine Wartung durchführen. Betreiben Sie die Maschine nur, wenn diese sich in aufrechter
Position bendet und die Schleifeinheit den Boden berührt. Lassen Sie die Maschine niemals unbeaufsichtigt,
wenn das Versorgungskabel angeschlossen ist.
GEFAHR bedeutet: Schwere Körperverletzungen mit möglicher Todesfolge können für Sie oder Personal eintreten,
wenn die durch GEFAHR gekennzeichneten Anweisungen an dieser Maschine oder in diesem
Bedienungshandbuch ignoriert oder nicht befolgt werden. Lesen und befolgen Sie alle durch
GEFAHR gekennzeichneten Anweisungen an dieser Maschine oder in diesem Bedienung-
shandbuch.
WARNUNG bedeutet: Verletzungen mit möglicher Todesfolge können für Sie oder Personal eintreten, wenn die durch
WARNUNG gekennzeichneten Anweisungen an dieser Maschine oder in diesem Bedienung-
shandbuch ignoriert oder nicht befolgt werden. Lesen und befolgen Sie alle durch WARNUNG
gekennzeichneten Anweisungen an dieser Maschine oder in diesem Bedienungshandbuch.
VORSICHT bedeutet:
Schäden können an der Maschine oder anderem Eigentum eintreten, wenn die durch VORSICHT
gekennzeichneten Anweisungen an dieser Maschine oder in diesem Bedienungshandbuch
ignoriert oder nicht befolgt werden. Lesen und befolgen Sie alle durch VORSICHT gekennzeich-
neten Anweisungen an dieser Maschine oder in diesem Bedienungshandbuch.
Sicherheitshinweise Für Bediener
DE
17
WARNUNG: Stromschlaggefahr. Wenn elektrische Bauteile der Maschine Wasser oder Feuchtigkeit ausgesetzt werden,
besteht Kurzschlussgefahr. Halten Sie die elektrischen Bauteile der Maschine trocken. Wischen Sie die Mas-
chine nach Gebrauch stets ab. Lagern Sie die Maschine in einem trockenen Gebäude.
WARNUNG: Es besteht Verletzungsgefahr, wenn beim Schleifen keine Schutzausrüstung getragen wird. Tragen Sie beim
Schleifen stets einen Augenschutz, Schutzkleidung und Staubmasken.
WARNUNG: Änderungen oder Anpassungen an der Maschine können Schäden an der Maschine verursachen oder den
Bediener und Umstehende verletzen. Änderungen oder Anpassungen, die vom Hersteller nicht genehmigt
worden sind, führen zur Nichtigkeit aller Garantien und Haftungsverpichtungen.
WARNUNG: WennSieeine Maschine bedienen,ohnealleAnweisungen aufAufklebern undHinweisenzu beachten, riskieren
Sie Verletzungen oder Sachschäden. Lesen Sie alle Maschinenaufkleber, bevor Sie die Maschine bedienen.
Stellen Sie sicher, dass alle Aufkleber und Hinweisinformationen an der Maschine angebracht oder befestigt
sind. Besorgen Sie sich gegebenenfalls Ersatzaufkleber und –schilder von Ihrem Händler.
WARNUNG: Die Maschine ist schwer. Falls keine ordnungsgemäßen Hebemethoden angewendet werden, besteht Verlet-
zungsgefahr für Bedienungspersonal oder unbeteiligte Personen. Lassen Sie sich beim Heben der Maschine
helfen.
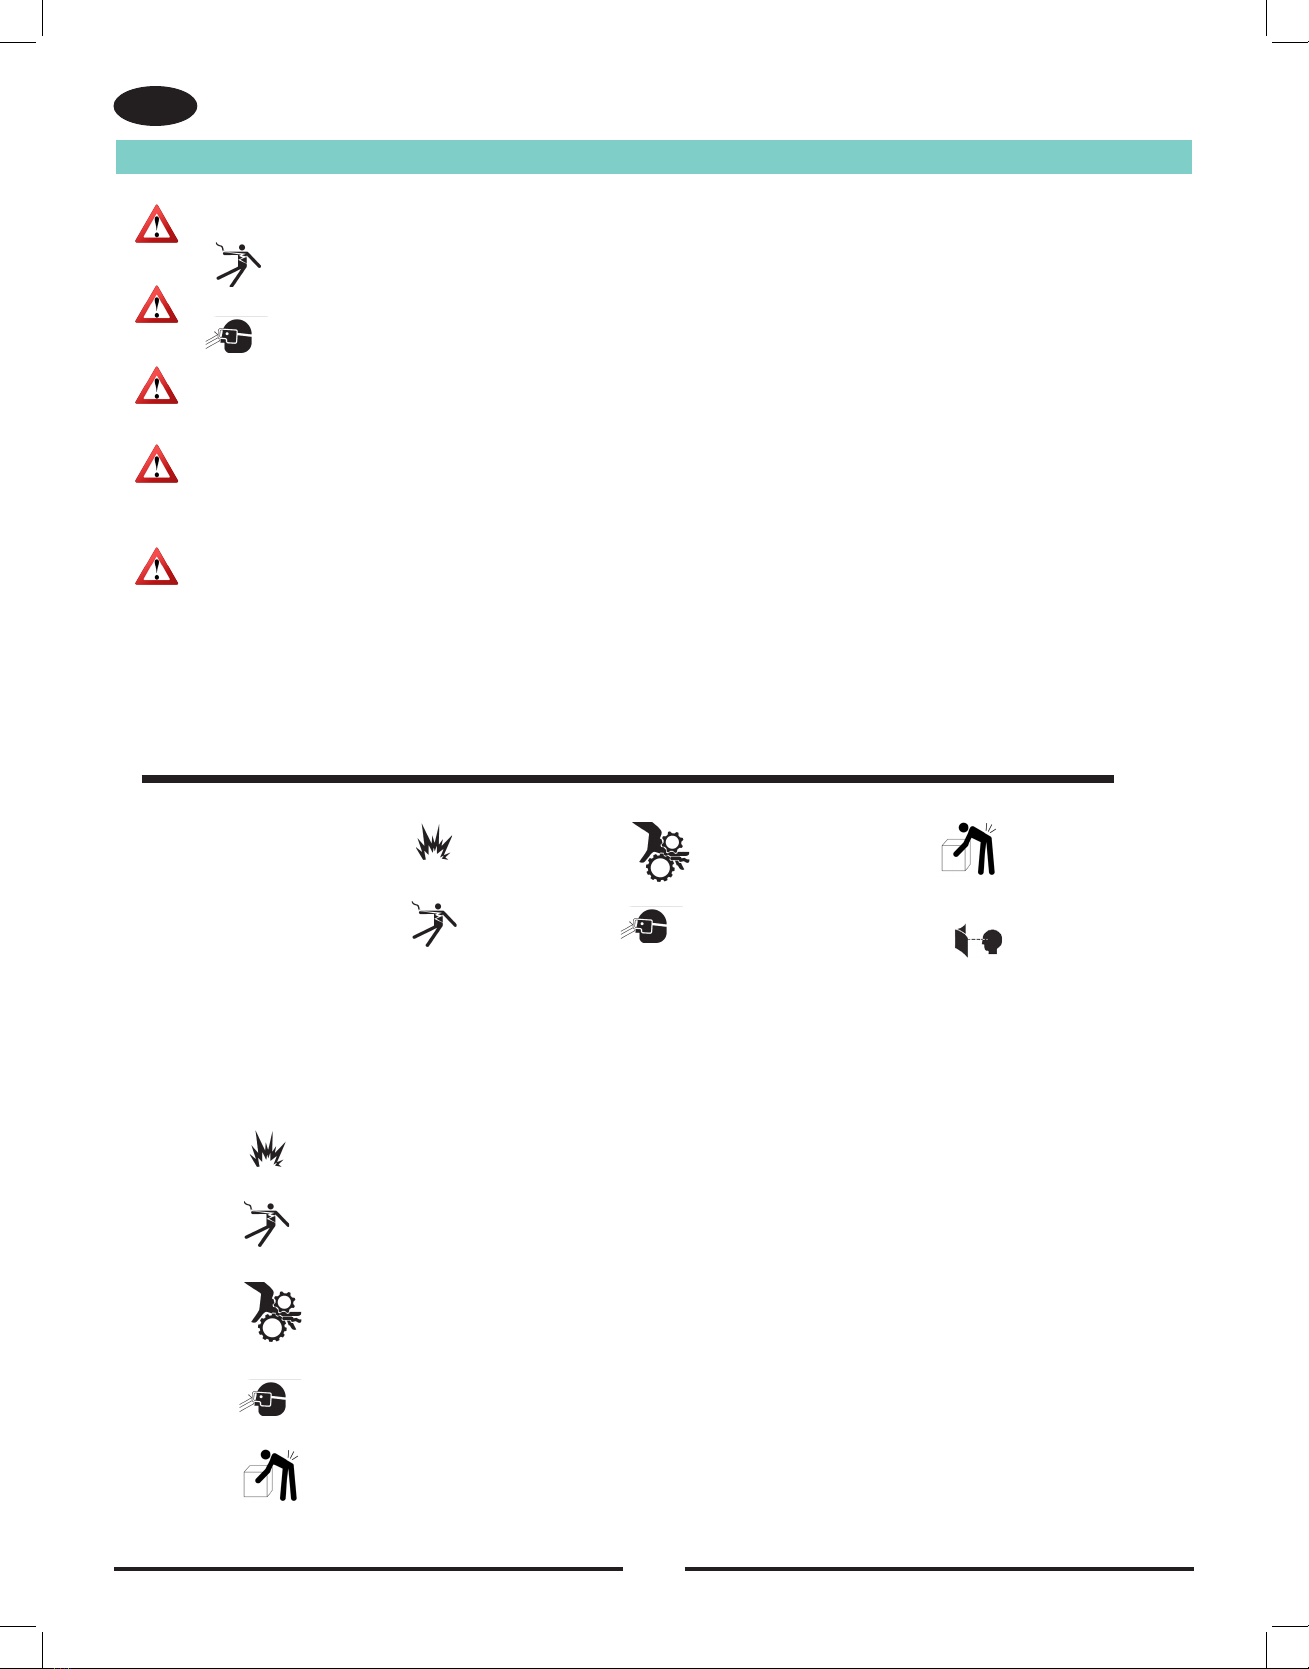
Erklärung der Gefahrensymbole
Wenn Sie das Bedienungshandbuch nicht lesen, riskieren Sie, sich selbst oder andere Personen zu verletzen oder die Maschine zu
beschädigen.
Das Flammensymbol macht auf ammbares Material und Verbrennungsgefahr aufmerksam.
Das Symbol eines Mannes “unter Spannung” weist auf Stromschlaggefahr hin. Dies kann zu
schwerwiegenden Verletzungen und Tod führen.
Dieses Symbol weist auf die Gefahr bewegter Maschinenteile hin. Es besteht Verletzungsgefahr.
Dieses Symbol einer Person mit Schutzbrille warnt vor Augenverletzungen.
Dieses Symbol eines Mannes, der eine Last hebt, weist auf die Gefahr durch unsachgemäßes
Heben hin.
Explosion
Stromschlag
Bewegte Teile
Augenschutz
Schweres Objekt
Ziehen Sie bitte Bedienung-
shandbuch zu Rate.

18
Einleitung und technische Daten
DE
Das 3DS ist ein Gerät, das primär zum Feinschleifen von Hartholzböden entwickelt wurde. Der Feinschleifprozess resultiert in einem
ebeneren Boden und hilft bei der Eliminierung von während dem Walzen- oder Bandschleifprozess entstandenen Mängeln. Diese
Maschine ist nicht auf nassen Oberächen anzuwenden.
TECHNISCHE DATEN:
Model 07068C 07117A (UK) 07068C (EU)
07082C
Maschinencode 07112A
Saugeinheit
Gewicht
Versandgewicht
Maschinentyp
Motor
Spannung
Frequenz
Stromkabel
Stromstärke
Überspannungsschutz
Motorenisolierungsklasse
Betriebsdurchmesser
Durchmesser Schleifpad
Geschwindigkeit Schleifpad (geladen)
Geschwindigkeit Scheibengehäuse (geladen)
Geräuschemission
Gewicht Schleifeinheit
Gewicht Chassis
Abmessungen LxBxH
07085C
Mit Saugeinheit
74 kg
106 kg
3-Scheiben-Trockenschleifgerät
2,2 kW Einphasenmotor
230v
50 Hz
15m HO7RN-F3G1.50
11,5 A
15 A Schutzschalter
F
48 cm
203 mm
717 UpM
170 UpM
76 dBA
49 kg
17 kg
88 x 51 x 100 cm
Mit Saugeinheit
74 kg
106 kg
3-Scheiben-Trockenschleifgerät
2,2 kW Einphasenmotor
230v
50 Hz
15m HO7RN-F3G1.50
11,5 A
15 A Schutzschalter
F
48 cm
203 mm
717 UpM
170 UpM
76 dBA
49 kg
17 kg
88 x 51 x 100 cm
Mit Saugeinheit
74 kg
106 kg
3-Scheiben-Trockenschleifgerät
3 PS Einphasenmotor
230v
60 Hz
40’ 12-3 SJO
11,5 A
15 A Schutzschalter
F
48 cm
203 mm
717 UpM
170 UpM
76 dBA
49 kg
17 kg
88 x 51 x 100 cm

19
Erdungshinweise - 230 V
DE
230 VOLT-MASCHINEN
ANWEISUNGEN ZUM ANSCHLUSS
AN DIE STROMQUELLE
UND ELEKTRISCHE ERDUNG
VORSICHT: Um Schäden zu verhindern, muss die
Maschine ausschließlich unter der Wechsel-
stromfrequenz und Stromspannung in Betrieb
genommen werden, die auf dem Maschinen-
schild angezeigt ist. Sorgen Sie dafür, dass
die richtige Frequenz und Stromspannung
vorhanden sind, bevor Sie das Stromkabel
an die Steckdose anschließen.
Dieses Gerät muss geerdet werden. Im Falle einer technischen
Störung oder dem Ausfall der Maschine bietet die Erdung
einen Weg des geringsten Widerstands für die Spannung, die
das Risiko eines Stromschlags reduziert. Dieses Produkt ist
mit einem Kabel mit Erdungsleiter und einem Schukostecker
ausgerüstet. Der Stecker ist an ein eine entsprechende Steck-
dose anzuschließen, die ordnungsgemäß installiert und unter
Einhaltung lokaler Regeln und Verordnungen geerdet wurde.
WARNUNG: Unsachgemäßer Anschluss des Erdung-
sleiters kann zu Stromschlag führen.
Konsultieren Sie einen Elektriker oder eine
Wartungsperson, falls Sie sich nicht sicher
sind, ob der Anschluss ordnungsgemäß
geerdet ist. Nehmen Sie keine Änder-
ungen am mit dem Produkt gelieferten
Stecker vor - falls dieser nicht in die Steck-
dose passt, lassen Sie einen qualizierten
Elektriker einen entsprechenden Stecker
montieren.
Dieses Produkt wurde ausschließlich zur Verwendung an
einem nominalen 230 V-Stromnetz entwickelt und ist mit
einem Schukostecker ähnlich einem der Stecker auf Abb. 1
ausgerüstet. Stellen Sie sicher, dass das Produkt an einer
Stromquelle angeschlossen ist, die über die gleiche Kongura-
tion verfügt, wie der Stecker selbst. Verwenden Sie keinen
Adapter mit diesem Produkt.
Die Maschine muss elektrisch geerdet werden, um den Bedie-
ner vor Stromschlag zu schützen. Die Maschine verfügt über
ein Stromkabel mit zwei Hauptleitern und einem Erdungsleiter.
Schließen Sie den Stecker an eine passende Steckdose an.
Der grüne bzw. grün-gelbe Leiter im Kabel ist der Erdungsdraht.
Schließen Sie diesen Draht nie an einen anderen Kontakt als den
Erdungskontakt an.
IEC-309 16A-6h/200-250 Vac
WARNUNG: Um die Gefahr eines Stromschlages zu ver-
ringern, verwenden Sie die Maschine aus-
schließlich an einem dreiadrigen Wechselstrom-
netz, das elektrisch geerdet ist. Ersetzen Sie
alle abgenutzten, beschädigten oder defekten
Kabel. Ersetzen Sie alle beschädigten Stecker,
Steckdosen oder Steckergehäuse. Bewegen
Sie die Maschine niemals über ein elektrisches
Kabel. Heben Sie das Stromkabel immer über
die Maschine.
Verlängerungskabel
Benutzen Sie ausschließlich ein zugelassenes Dreistift-Verlän-
gerungskabel mit zwei Hauptleitern und einem Erdungsleiter.
Diese Maschine ist mit einem Stromkabel mit Drahtdurchmess-
er 12 AWG bzw. 2,5 mm2ausgerüstet.
WARNUNG: Um Motorenbrände bei der Verwendung
eines Verlängerungskabels zu vermeiden,
benutzen Sie ein Verlängerungskabel mit
einem minimalem Drahtdurchmesser von
10 AWG bzw. 4,0 mm2. Benutzen Sie keine
Verlängerungskabel von mehr als 15 m Länge.
Verwenden Sie keinesfalls zwei Verlänger-
ungskabel gleichzeitig.
WARNUNG: Um Stromschläge zu vermeiden, darf der
Erdungskontakt keinesfalls geschnitten,
entfernt oder beschädigt werden. Versuchen
Sie nicht, einen dreiadrigen Stecker in eine
Steckdose oder einen Anschluss zu stecken,
in die er nicht passt. Sollte der Stecker nicht
in die Steckdose oder denAnschluss passen,
konsultieren Sie einen autorisierten American
Sanders-Vertreter, um eine befugte Person zu
nden, die dieses Problem beheben kann.
NEMA L6-20P
Abbildung 1

20
Demontage/Transport der Maschine
DE
Gehen Sie wie folgt vor, um die Maschine zu demontieren:
1. Trennen Sie die Maschine vom Stromnetz und wickeln Sie das
Kabel auf.
WARNUNG:
Wenn die Maschine bei der Wartung, dem
Auswechseln des Schleifmaterials oder dem
Entleeren des Staubsacks am Stromnetz an-
geschlossen bleibt, kann dies zu Verletzungen
des Bedienungspersonals oder unbeteiligter
Personen führen.
2. Ziehen Sie das Strom- und Motorenkabel ab und trennen Sie
die Saugeinheit vom Elektroanschluss.
3. Trennen Sie den Saugschlauch von der Schleifeinheit.
4. Entfernen Sie beide Handnoppen von der Schleifeinheit und
trennen Sie die Schleifeinheit vom Wagenrahmen
(siehe Abbildung 2).
WARNUNG: Die Schleifeinheit ist schwer (50 kg). Um
Verletzungen des Bedienungspersonals bzw.
Beschädigung der Maschine zu vermeiden, ist
diese mit einem festem Griff und der richtigen
Hebemethode anzuheben. Ziehen Sie wenn
nötig Hilfe hinzu.
5. Greifen Sie das Gerät an den Hebegriffen, um die Schleifeinheit
anzuheben (siehe Abbildung 3).
6. Lösen Sie das Stromkabel der Saugeinheit von den Klammern
am Handgriff und stecken Sie es in den Vakuumkopf.
7. Lösen Sie die Riemen der Saugeinheit, indem Sie die Zugsperre
öffnen. Dadurch lockert sich der entsprechende Riemen und
die Saugeinheit kann vom Wagenrahmen gehoben werden
(siehe Abbildung 4).
8. Der Griff kann durch Lösen der vier
5/16-18 Stellschrauben und Muttern, durch die dieser am
Wagenrahmen montiert ist, entfernt werden.
9. Sichern Sie alle Elemente im Cargobereich, um Trans-
portschäden an der Maschine zu vermeiden.
Bewegen der Maschine (von Raum zu Raum)
Zum Bewegen der Maschine (von Raum zu Raum) kann diese zurückge-
neigt werden, bis die 10 cm-Kippräder den Boden berühren. Mit gleich-
mäßigem Druck auf den Griff kann die Maschine nun an die gewünschte
Stelle geschoben werden (siehe Abbildung 5).
Abbildung 2
Abbildung 3
Abbildung 4
Abbildung 5
This manual suits for next models
1
Table of contents
Languages:
Other Amano Sander manuals

Amano
Amano American Sanders OSB-18 User manual

Amano
Amano American SANDERS EZ-8 User manual

Amano
Amano American SANDERS FloorCrafter User manual

Amano
Amano American Sanders American 12 User manual

Amano
Amano Pioneer Eclipse 225FP16TR User manual

Amano
Amano American Sanders American 8 User manual

Amano
Amano American Sanders OBS-18DC User manual

Amano
Amano American SANDERS EZ Sand - HDTR User manual

Amano
Amano Pioneer Eclipse PE225FP User manual

Amano
Amano American SANDERS FloorCrafter User manual


