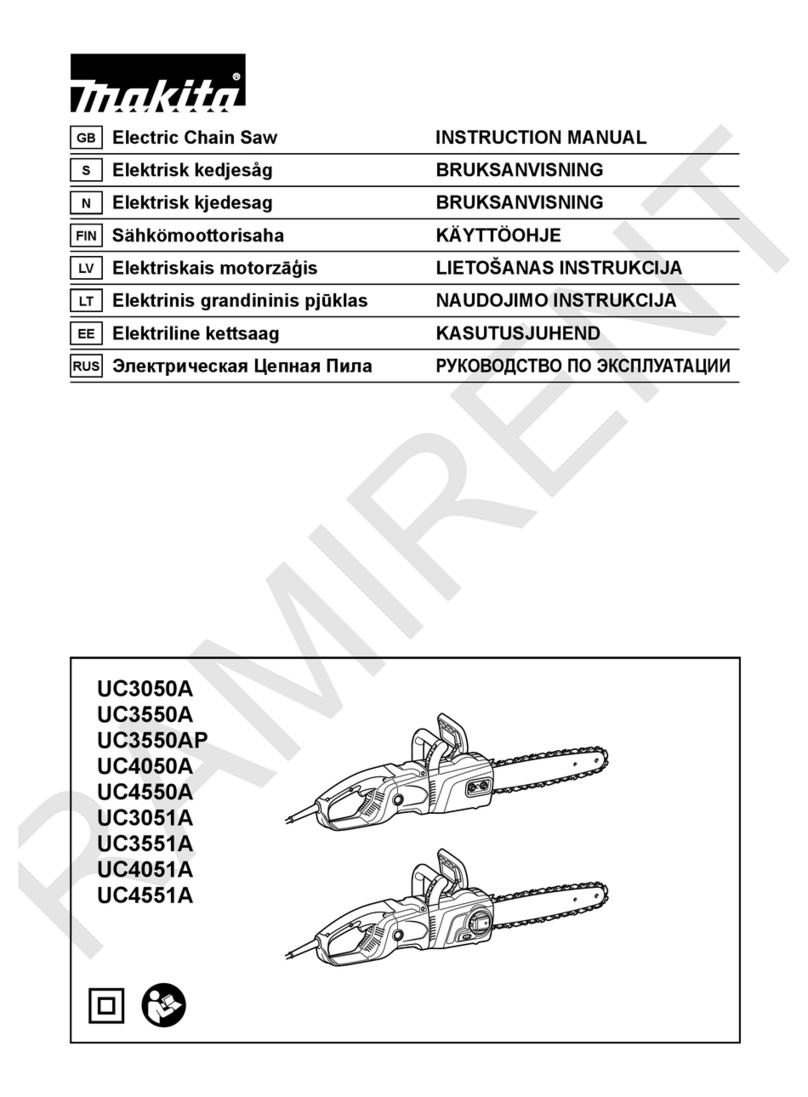
Makita UC3020A User manual

GB Chain Saw Instruction manual
FTronçonneuse Manuel d’instructions
D Kettensäge Betriebsanleitung
IMotosega Istruzioni per l’uso
NL Kettingzaag Gebruiksaanwijzing
ESierra de cadena Manual de instrucciones
PMoto-serra Manual de instruções
DK Motorsav Brugsanvisning
SMotorsåg Bruksanvisning
NMotorkjedesag Bruksanvisning
SF Ketjusaha Käyttöohje
GR Αλυσοπρίονο Οδηγίες χρήσης
UC3020A
UC3520A
UC4020A

2
12
34
1
2
3
45
6
7
13
10
8
9
11
12
15
14
12

3
56
78
910
11 12
1
2
3
4
5
6
29
7
8
9
10
3
11 4
12 3
4

4
13 14
15 16
17 18
19 20
13
14
615
16
2-4mm
3
11
Reclaimend
oil
17
13
14
615
16
2-4mm
1
2
18
20
19

5
21 22
23 24
25 26
27 28
21
22
A
B
A
B
45o
2 1/2
45o
23

6
29 30
31 32
33 34
35 36
aa
a
0.5 mm 0.5 mm
min.
3 mm
80 80
30
24
25

7
37 38
39 40
41 42
26
27
28
28
26 29

8
ENGLISH
Parts supplied
Explanation of general view
SPECIFICATIONS
1) The data assign equal weight to the full-load and maximum speed operating conditions.
• Due to our continuing program of research and development, the specifications herein are subject to change without
notice.
• Note: Specifications may differ from country to country.
Symbols END218-1
The following show the symbols used for the tool. Be sure
that you understand their meaning before use.
.................. Read instruction manual and follow the
warnings and safety instructions.
.................... DOUBLE INSULATION
...................Caution: particular care and attention
required!
................... Caution: withdraw the mains plug
immediately if the cable is damaged!
1. Rear handle
2. Switch trigger
3. Oil filter cap
4. Front handle
5. Front hand guard
6. Guide bar
7. Saw chain
8. Lever
9. Sprocket cover
10. Oil level sight
11. Rear hand guard
12. Serrated rail (claw stop)
13. Lock-off button
14. Chain catcher
15. Scabbard
1. Lock-off button
2. Switch trigger
3. Press in
4. Loosen
5. Sprocket cover
6. Adjusting dial
7. Adjusting pin
8. Hook
9. Hole
10. Small hole
11. Tighten
12. Lever
13. Low
14. High
15. Guide bar
16. Saw chain
17. Oil filler cap
18. Hand guard
19. Lock
20. Unlock
21. Sight glass
22. Serrated rail
23. Felling area
24. Oil guide groove
25. Oil feed hole
26. Push nut
27. Slotted bit screwdriver
28. Filter
29. Sprocket
Model UC3020A UC3520A UC4020A
Max. chain speed (m/s) 13.3
Cutting length 300 mm 350 mm 400 mm
Saw chain Type 90SG
Pitch 3/8”
Acoustic power level L WA av dB (A)
to EN 50144 -1 1) 105.3
Sound pressure level L pA av dB (A)
at the workplace to EN 50144 -1 1) 92.3
Vibration acceleration a h,w av to
ISO 50144-2-13 1) - Front handle m/s23.4 3.9
- Rear handle m/s24.0 4.5
Oil pump Automatic
Oil tank capacity (l) 0.20
Power transmission Direct
Chain brake Manual
Run-down brake Mechanical
Overall length (without guide bar) 436 mm
Net weight 3.8 kg
Extension cable (optional) DIN 57282/HO 7RN -F L=30 m max., 3 x 1.5 mm2

9
................... Caution: kickback!
................... Protect against rain and damp!
................... Wear a helmet, goggles and ear protec-
tion!
................... Wear safety gloves!
................... Withdraw the mains plug!
................... First aid
......... Recycling
................... CE marking
........... Maximum permissible length of cut
.......... Direction of chain travel
................... Chain oil
............. Chain brake released/applied
................... Prohibited!
Intended use
The tool is intended for cutting lumbers and logs.
Power supply
The tool should be connected only to a power supply of
the same voltage as indicated on the nameplate, and can
only be operated on single-phase AC supply. They are
double-insulated in accordance with European Standard
and can, therefore, also be used from sockets without
earth wire.
For public low-voltage distribution systems of
between 220 V and 250 V.
Switching operations of electric apparatus cause voltage
fluctuations. The operation of this device under unfavor-
able mains conditions can have adverse effects to the
operation of other equipment. With a mains impedance
equal or less than 0.35 Ohms it can be presumed that
there will be no negative effects. The mains socket used
for this device must be protected with a fuse or protective
circuit breaker having slow tripping characteristics.
ADDITIONAL SAFETY RULES
ENB098-1
1. Read the instruction manual in order to familiarize
yourself with operation of the chain saw.
2. Before using the chain saw for the first time,
arrange to have instruction in its operation. If this
is not possible, at least practice cutting round tim-
ber on a trestle before beginning work.
3. The chain saw must not be used by children or
young persons under 18 years of age. Young per-
sons over 16 years of age may be exempted from
this restriction if they are undergoing training
under the supervision of an expert.
4. Working with the chain saw requires a high level
of concentration. Do not work with the saw if you
are not feeling fit and well. Carry out all work
calmly and carefully.
5. Never work under the influence of alcohol, drugs
or medication.
Proper use
1. The chain saw is intended solely for cutting wood.
Do not use it for example to cut plastic or porous
concrete.
2. Only use the chain saw for operations described
in this instruction manual. Do not, for example,
use it to trim hedges or for similar purposes.
3. The chain saw must not be used for forestry work,
i.e. for felling and limbing standing timber. The
chain saw cable does not provide the operator
with the mobility and safety required for such
work.
4. The chain saw is not intended for commercial use.
5. Do not overload the chain saw.
Personal protective equipment
1. Clothing must be close-fitting, but must not
obstruct mobility.
2. Wear the following protective clothing during
work:
• A tested safety helmet, if a hazard is presented by fall-
ing branches or similar;
• A face mask or goggles;
• Suitable ear protection (ear muffs, custom or mould-
able ear plugs). Octave brand analysis upon request.
• Firm leather safety gloves;
• Long trousers manufactured from strong fabric;
• Protective dungarees of cut-resistant fabric;
• Safety shoes or boots with non-slip soles, steel toes,
and cut-resistant fabric lining;
• A breathing mask, when carrying out work which pro-
duces dust (e.g. sawing dry wood).
Protection against electric shock
................... The chain saw must not be used in wet
weather or damp environments, as the
electric motor is not waterproof.
1. Only plug the saw into earthed sockets in tested
electrical circuits. Check that the system voltage
matches that on the rating plate. Ensure that a 16
A line fuse is fitted. Saws used in the open air
must be connected to a residual current-operated
circuit-breaker with an operating current no higher
than 30 mA.
...................Should the connecting cable be dam-
aged, withdraw the mains plug immedi-
ately.
Safe working practices
1. Before starting work, check that the chain saw is
in proper working order and that its condition
RE Y

10
complies with the safety regulations. Check in par-
ticular that:
• The chain brake is working properly;
• The run-down brake is working properly;
• The bar and the sprocket cover are fitted correctly;
• The chain has been sharpened and tensioned in
accordance with the regulations;
• The mains cable and mains plug are undamaged;
Refer to the “CHECKS “section.
2. Always ensure in particular that the extension cable
used is of adequate cross-section (see “SPECIFICA-
TIONS”). When using a cable reel, wind the cable
completely off the reel. When using the saw in the
open air, ensure that the cable employed is intended
for open-air use and is rated accordingly.
3. Do not operate the chain saw in the vicinity of flamma-
ble dust or gases, as the motor generates sparks and
presents a risk of explosion.
4. Work only on firm ground and with a good footing. Pay
particular attention to obstacles (e.g. the cable) in the
working area. Take particular care where moisture,
ice, snow, freshly cut wood or bark may make sur-
faces slippery. Do not stand on ladders or trees when
using the saw.
5. Take particular care when working on sloping ground;
rolling trunks and branches pose a potential hazard.
6. Never cut above shoulder height. (Fig. 1)
7. Hold the chain saw with both hands when switching it
on and using it. Hold the rear handle with your right
hand and the front handle with your left. Hold the han-
dles firmly with your thumbs. The bar and the chain
must not be in contact with any objects when the saw
is switched on.
8. Clean the area to be cut of foreign objects such as
sand, stones, nails, wire, etc. Foreign objects damage
the bar and chain, and can lead to dangerous kick-
back.
9. Take particular care when cutting in the vicinity of wire
fences. Do nut cut into the fence, as the saw may kick
back.
10. Do not cut into the ground.
11. Cut pieces of wood singly, not in bunches or stacks.
12. Avoid using the saw to cut thin branches and roots, as
these can become entangled in the chain saw. Loss of
balance presents a hazard.
13. Use a secure support (trestle) when cutting sawn tim-
ber.
14. Do not use the chain saw to prise off or brush away
pieces of wood and other objects.
15. Guide the chain saw such that no part of your body is
within the extended path of the saw chain. (Fig. 2)
16. When moving around between sawing operations,
apply the chain brake in order to prevent the chain
from being operated unintentionally. Hold the chain
saw by the front handle when carrying it, and do not
keep your finger on the switch. Withdraw the mains
plug when taking breaks or leaving the chain saw
unattended. Leave the chain saw where it cannot
present a hazard.
17. Withdraw the mains plug when taking breaks or leav-
ing the chain saw unattended. Leave the chain saw
where it cannot present a hazard.
Kickback
1. Hazardous kickback may arise during work with the
chain saw. Kickback arises when the tip of the bar (in
particular the upper quarter) comes into contact with
wood or another solid object. This causes the chain
saw to be deflected in the direction of the operator.
(Fig. 3)
2. In order to avoid kickback, observe the following:
• Never begin the cut with the tip of the bar.
• Never use the tip of the bar for cutting. Take particu-
lar care when resuming cuts which have already
been started.
• Start the cut with the chain running.
• Always sharpen the chain correctly. In particular, set
the depth gauge to the correct height (refer to
“Sharpening the chain” for details).
• Never saw through several branches at a time.
• When limbing, take care to prevent the bar from
coming into contact with other branches.
• When bucking, keep clear of adjacent trunks.
Always observe the bar tip.
• Use a trestle.
Safety features
1. Always check that the safety features are in working
order before starting work. Do not use the chain saw if
the safety features are not working properly.
- Chain brake:
The chain saw is fitted with a chain brake which brings
the saw chain to a standstill within a fraction of a sec-
ond. It is activated when the hand guard is pushed for-
wards. The saw chain then stops within 0.15 s, and
the power supply to the motor is interrupted.
- Run-down brake: (Fig. 4)
The chain saw is equipped with an run down brake
which brings the saw chain to an immediate stop when
the ON/OFF switch is released. This prevents the saw
chain from running on when switched off, and thus
presenting a hazard.
-Thefront and rear hand guards protect the user
against in jury from pieces of wood which may be
thrown backwards, or a broken saw chain.
- The trigger lockout prevents the chain saw from
being switched on accidentally.
-Thechain catcher protects the user against injury
should the chain jump or break.
Transport and storage
................... When the chain saw is not in use or is
being transported, withdraw the mains
plug and fit the scabbard supplied with
the saw. Never carry or transport the
saw with the saw chain running.
1. Carry the chain saw by the front handle only, with the
bar pointing backwards.

11
2. Keep the chain saw in a secure, dry and locked room
out of the reach of children. Do not store the chain saw
outdoors.
Maintenance
1. Withdraw the plug from the socket before carrying out
any adjustments or maintenance.
2. Check the power cable regularly for damage to the
insulation.
3. Clean the chain saw regularly.
4. Have any damage to the plastic housing repaired
properly and immediately.
5. Do not use the saw if the switch trigger is not working
properly. Have it properly prepared.
6. Under no circumstances should any modifications be
made to the chain saw. Your safety is at risk.
7. Do not carry out maintenance or repair work other
than that described in this instruction manual. Any
other work must be carried out by MAKITA Service.
8. Only use original MAKITA replacement parts and
accessories intended for your model of saw. The use
of other parts increases the risk of accident.
9. MAKITA accepts no responsibility for accidents or
damage should non-approved bars, saw chains or
other replacement parts or accessories be used. Refer
to the “Extract from the spare parts list” for approved
saw bars and chains.
First aid
................... Do not work alone. Always work within
shouting distance of a second person.
1. Always keep a first-aid box to hand. Replace any
items taken from it immediately.
2. Should you request assistance in the event of an acci-
dent, state the following:
• Where did the accident happen?
• What happened?
• How many persons are injured?
• What injuries do they have?
• Who is reporting the accident?
NOTE:
Individuals with poor circulation who are exposed to
excessive vibration may experience injury to blood ves-
sels or the nervous system.
Vibration may cause the following symptoms to occur in
the fingers, hands or wrists: “Falling asleep “(numbness),
tingling, pain, stabbing sensation, alteration of skin colour
or of the skin.
If any of these symptoms occur, see a physician!
SAVE THESE INSTRUCTIONS
FUNCTIONAL DESCRIPTION
CAUTION:
• Always be sure that the tool is switched off and
unplugged before adjusting or checking function on the
tool.
Switch action (Fig. 5)
CAUTION:
• Before plugging in the tool, always check to see that
the switch trigger actuates properly and returns to the
“OFF” position when released.
To prevent the switch trigger from being accidentally
pulled, a lock-off button is provided.
To start the tool, depress the lock-off button and pull the
switch trigger.
Release the switch trigger to stop.
ASSEMBLY
CAUTION:
• Always be sure that the tool is switched off and
unplugged before carrying out any work on the tool.
Installing or removing saw chain
CAUTION:
• Always be sure that the tool is switched off and
unplugged before installing or removing the saw chain.
• Always wear gloves when installing or removing the
saw chain.
1. To remove the saw chain, move the lever in the
upright position. (Fig. 6)
2. Press the lever and with the lever pressed in, turn it
counterclockwise to loosen the nut until sprocket
cover comes off. (Pressing in the lever leads to the fit-
ting of lever into the nut.)
3. Turn the adjusting dial counterclockwise to release the
saw chain tension.
4. Remove the sprocket cover.
5. Remove the saw chain and guide bar from the chain
saw.
6. To install the saw chain, fit in one end of the saw chain
on the top of the guide bar and the other end of it
around the sprocket. (Fig. 7)
At this time, fit the saw chain as shown in the figure
because it rotates in the direction of arrow.
7. Rest the guide bar in place on the chain saw.
8. Turn the adjusting dial counterclockwise to slide the
adjusting pin in the direction of arrow. (Fig. 8)
9. Place the sprocket cover on the chain saw so that the
hook at its back cover is inserted into a hole in the
chain saw and the adjusting pin is positioned in a
small hole in the guide bar. (Fig. 9)
10. Press in the lever and with the lever depressed turn it
fully clockwise to tighten the nut. Then make it about a
quarter turn counterclockwise to loosen the nut lightly.
(Fig. 10)
Adjusting saw chain tension
The saw chain may become loose after many hours of
use. From time to time check the saw chain tension
before use.
Move the lever in the upright position. (Fig. 11)
Press in the lever. With the lever depressed, make a quar-
ter turn on it counterclockwise to loosen the nut lightly.

12
(Pressing in the lever leads to the fitting of lever into the
nut.) (Fig. 12)
Turn the adjusting dial to adjust saw chain tension. Grasp
the saw chain in the middle of the guide bar and lift up.
The gap between the guide bar and the tie strap of the
saw chain should be approx. 2 - 4 mm. If the gap is not
approx. 2 - 4 mm, slightly turn the adjusting dial which
secures the guide bar. At this time, adjust with the tip of
guide bar slightly pointing up. (Fig. 13)
With the lever depressed, turn it fully clockwise to tighten
the nut firmly. (Fig. 14)
Return the lever to its original position. (Fig. 15)
CAUTION:
• Excessively high tension of saw chain may cause
breakage of saw chain, wear of the guide bar and
breakage of the adjusting dial.
• Installing or removing saw chain should be carried out
in a clean place free from sawdust and the like.
OPERATION
Lubrication
CAUTION:
• Always be sure that the tool is switched off and
unplugged before lubricating the saw chain.
Lubricate the saw chain and bar using a biologically
degradable saw chain oil with an adhesion agent. The
adhesion agent in the saw chain oil prevents the oil from
being thrown off the saw excessively quickly. Mineral oils
must not be used, as they are harmful to the environment.
(Fig. 16)
CAUTION:
• Prevent the oil from coming into contact with the skin
and eyes. Contact with the eyes causes irritation. In the
event of eye contact, flush the affected eye immedi-
ately with clear water, then consult a doctor at once.
• Never use waste oil. Waste oil contains carcinogenic
substances. The contaminants in waste oil cause
accelerated wear of the oil pump, the bar and the
chain. Waste oil is harmful to the environment.
• When filling the chain saw with chain oil for the first
time, or refilling the tank after it has been completely
emptied, add oil up to the bottom edge of the filler neck.
The oil delivery may otherwise be impaired.
Clean the area around the oil filler cap shown in the figure
thoroughly to prevent any dirt from entering the oil tank.
(Fig. 17)
Unscrew the oil filler cap and add oil up to the lower edge
of the filler neck.
Screw the oil filler cap firmly back in place.
Wipe away any spilt chain oil carefully.
When the chain saw is used for the first time, it may take
up to two minutes for the saw chain oil to begin its lubricat-
ing effect upon the saw mechanism. Run the saw without
load until it does so (see “CHECKS“).
The tank capacity (200 ml) is sufficient for approximately
30 minutes' use.
CHECKS
Before starting work, carry out the following checks:
Checking the chain tension (Fig. 18)
WARNING:
• Always withdraw the mains plug before checking the
chain tension, and wear safety gloves.
The saw chain is correctly tensioned when it is in contact
with the underside of the bar and can be raised approxi-
mately 2 - 4 mm from the bar by light finger pressure.
Check the chain tension frequently, as new chains are
subject to elongation. A chain which is too slack can jump
off the bar, and therefore presents an accident risk.
If the chain is too slack: Refer to the section titled “Adjust-
ing saw chain tension” and adjust the saw chain tension
again.
Checking the switch action
CAUTION:
Always unplug the tool before testing the switch trigger.
Locking the switch trigger in the ON position is prohibited.
It must not be possible to depress the switch trigger
unless the lock-off button is first depressed.
The switch trigger must not jam in the depressed position.
When released, the switch trigger must return automati-
cally to the OFF position, and the lock-off button must
return to its original position. (Fig. 19)
Checking the chain brake
NOTE:
• If the chain saw fails to start, the chain brake must be
released. Pull the hand guard backwards firmly until
you feel it engage.
Hold the chain saw with both hands when switching it on.
Hold the rear handle with your right hand, the front handle
with your left. The bar and the chain must not be in con-
tact with any object.
First press the lock-off button, then the switch trigger. The
saw chain starts immediately.
Press the hand guard forwards using the back of your
hand. The saw chain must come to an immediate stand-
still. (Fig. 20)
CAUTION:
• Should the saw chain not stop immediately when this
test is performed, the saw may not be used under any
circumstances. Consult a MAKITA specialist repair
shop.
Checking the run-down brake
Switch on the chain saw.
Release the switch trigger completely. The saw chain
must come to a standstill within one second.
CAUTION:
• Should the saw chain not come to a stop within one
second when this test is performed, the saw must not
be used. Consult a MAKITA specialist repair shop.

13
Checking the chain oiler (Fig. 21)
Before starting work, check the oil level in the tank, and
the oil delivery.
The oil level can be seen in the sight glass shown in the
figure.
Check the oil delivery as follows:
Start the chain saw.
With the saw running, hold the saw chain approximately
15 cm above a tree trunk or the ground. If lubrication is
adequate, the oil spray will produce a light oil trace.
Observe the wind direction, and do not expose yourself to
the oil spray unnecessarily.
CAUTION:
• If an oil trace is not formed, do not use the saw. The
lifespan of the chain will otherwise be reduced. Check
the oil level. Clean the oil feed groove and the oil feed
hole in the bar (refer to “MAINTENANCE“).
WORKING WITH THE CHAIN SAW
Bucking
For bucking cuts, rest the serrated rail shown in the figure
on the wood to be cut. (Fig. 22)
With the saw chain running, saw into the wood, using the
rear handle to raise the saw and the front one to guide it.
Use the serrated rail as a pivot.
Continue the cut by applying slight pressure to the front
handle, easing the saw back slightly. Move the serrated
rail further down the timber and raise the front handle
again.
When making several cuts, switch the chain saw off
between cuts.
CAUTION:
• If the upper edge of the bar is used for cutting, the
chain saw may be deflected in your direction if the
chain becomes trapped. For this reason, cut with the
lower edge, so that the saw will be deflected away from
your body. (Fig. 23)
Cut wood under tension on the pressure side (A) first.
Then make the final cut on the tension side (B). This pre-
vents the bar from becoming trapped. (Fig. 24)
Limbing
CAUTION:
• Limbing may only be performed by trained persons. A
hazard is presented by the risk of kick-back.
When limbing, support the chain saw on the trunk if possi-
ble. Do not cut with the tip of the bar, as this presents a
risk of kickback.
Pay particular attention to branches under tension. Do not
cut unsupported branches from below.
Do not stand on the felled trunk when limbing.
Burrowing and parallel-to-grain cuts
CAUTION:
• Burrowing and parallel-to-grain cuts may only be car-
ried out by persons with special training. The possibility
of kickback presents a risk of injury.
Perform parallel-to-grain cuts at as shallow an angle as
possible. Carry out the cut as carefully as possible, as the
serrated rail cannot be used. (Fig. 25)
Felling
CAUTION:
• Felling work may only be performed by trained per-
sons. The work is hazardous.
Observe local regulations if you wish to fell a tree.
(Fig. 26)
- Before starting felling work, ensure that:
(1) Only persons involved in the felling operation are
in the vicinity;
(2) Any person involved has an unhindered path of
retreat through a range of approximately 45 °
either side of the felling axis. Consider the addi-
tional risk of tripping over electrical cables;
(3) The base of the trunk is free of foreign objects,
roots and ranches;
(4) No persons or objects are present over a distance
of 2 1/2 tree lengths in the direction in which the
tree will fall.
- Consider the following with respect to each tree:
• Direction of lean;
• Loose or dry branches;
• Height of the tree;
• Natural overhang;
• Whether or not the tree is rotten.
- Consider the wind speed and direction. Do not carry
out felling work if the wind is gusting strongly.
- Trimming of root swellings: Begin with the largest swel-
ings. Make the vertical cut first, then the horizontal cut.
(Fig. 27)
- Cut a scarf: The scarf determines the direction in which
the tree will fall, and guides it. It is made on the side
towards which the tree is to fall. Cut the scarf as close
to the ground as possible. First make the horizontal cut
to a depth of 1/5 -1/3 of the trunk diameter. Do not
make the scarf too large. Then make the diagonal cut.
- Cut any corrections to the scarf across its entire width.
(Fig. 28)
- Make the back cut a little higher than the base cut of
the scarf. The back cut must be exactly horizontal.
Leave approximately 1/10 of the trunk diameter
between the back cut and the scarf. The wood fibers in
the uncut trunk portion act as a hinge. Do not cut right
through the fibers under any circumstances, as the tree
will otherwise fall unchecked. Insert wedges into the
scarf in time.
- Only plastic or aluminum wedges may be used to keep
the scarf open. The use of iron wedges is prohibited.
- Stand to the side of the falling tree. Keep an area clear
to the rear of the falling tree up to an angle of 45 °
either side of the tree axis (refer to the “felling area” fig-
ure). Pay attention to falling branches.

14
MAINTENANCE
CAUTION:
• Always be sure that the tool is switched off and
unplugged before attempting to perform inspection or
maintenance.
• Always wear gloves when performing any inspection or
maintenance.
Carry out the maintenance work described below at regu-
lar intervals. Warranty claims will be accepted only if
these operations have been performed regularly and
properly.
Only maintenance work described in this instruction man-
ual may be performed by the user. Any other work must
be carried out by a MAKITA specialist repair shop.
Cleaning the chain saw
Clean the saw regularly with a clean rag. The handles, in
particular, must be kept free of oil.
Checking the plastic housing
Carry out regular visual inspections of all parts of the
housing. Should any parts be damaged, have them
repaired immediately and properly in a MAKITA specialist
repair shop.
Sharpening the saw chain
CAUTION:
• Always withdraw the mains plug and wear safety
gloves when performing work on the saw chain.
(Fig. 29)
Sharpen the saw chain when:
- Mealy sawdust is produced when damp wood is cut;
- The chain penetrates the wood with difficulty, even
when heavy pressure is applied;
- The cutting edge is obviously damaged;
- The saw pulls to the left or right in the wood. The rea-
son for this behaviour is uneven sharpening of the saw
chain, or damage to one side only.
Sharpen the saw chain frequently, but remove only a
little material each time.
Two or three strokes with a file are usually sufficient for
routine resharpening.
When the saw chain has been resharpened several times,
have it sharpened in a MAKITA specialist repair shop.
Sharpening criteria:
- All cutters must be of equal length (dimension a). Cut-
ters of differing length prevent the chain from running
smoothly, and may cause the chain to break.
- Do not sharpen the chain once a minimum cutter length
of 3 mm has been reached. A new chain must then be
fitted.
- The chip thickness is determined by the distance
between the depth gauge (round nose) and the cutting
edge. The best cutting results are obtained with a dis-
tance of 0.5 mm between cutting edge and depth
gauge. (Fig. 30)
WARNING:
• An excessive distance increases the risk of kick-back.
- The sharpening angle of 30 ° distance must be the
same on all cutters. Differences in angle cause the
chain to run roughly and unevenly, accelerate wear,
and lead to chain breaks.
- The side plate angle of the cutter of 80 ° is determined
by the depth of penetration of the round file. If the spec-
ified file is used properly, the correct side plate angle is
produced automatically. (Fig. 31)
File and file guiding (Fig. 32 - 34)
- Use a special round file (optional accessory) for saw
chains, with a diameter of 4.5 mm, to sharpen the
chain. Normal round files are not suitable.
- The file should only engage the material on the forward
stroke. Lift the file off the material on the return stroke.
- Sharpen the shortest cutter first. The length of this cut-
ter is then the gauge dimension for all other cutters on
the saw chain.
- Guide the file as shown in the figure. The file can be
guided more easily if a file holder (optional accessory)
is employed. The file holder has markings for the cor-
rect sharpening angle of 30 ° (align the markings paral-
lel to the saw chain) and limits the depth of penetration
(to 4/5 of the file diameter).
- After sharpening the chain, check the height of the
depth gauge using the chain gauge tool (optional
accessory).
- Remove any projecting material, however small, with a
special flat file (optional accessory).
- Round off the front of the depth gauge again.
Cleaning the guide bar and lubricating the
return sprocket
CAUTION:
• Always wear safety gloves for this task. Burrs present a
risk of injury. (Fig. 35)
Check the running surfaces of the bar regularly for dam-
age. Clean using a suitable tool, and remove burrs if nec-
essary.
If the chain saw receives frequent use, lubricate the return
sprocket bearing at least once a week. Before adding new
fresh grease, carefully clean the 2 mm hole on the tip of
the guide bar, then force a small quantity of multi-purpose
grease (optional accessory) into the hole.
Cleaning the oil guide (Fig. 36)
- Clean the oil guide groove and the oil feed hole in the
bar at regular intervals.
Cleaning the oil filter at the oil discharge
hole
Small dust or particles may be built up in the oil filter at the
oil discharge hole during operation.
Small dust or particles built up in the oil filter may impair
the oil discharge flow and cause an insufficient lubrication
on the whole saw chain.
When a poor chain oil delivery occurs at the top of guide
bar, clean the filter as follows.
Unplug the tool from the mains.

15
Remove the sprocket cover and saw chain from the tool.
(Refer to the section titled “Installing or removing saw
chain”.)
Remove the push nut using a slotted bit screwdriver with
a slender shaft or the like. (Fig. 37)
Take the filter out of the chain saw and remove small dust
or particles from it.
When the filter is too dirty, replace it with a new one.
Plug in the tool. (Fig. 38)
Pull the switch trigger to flow built-up dust or particles off
the oil discharge hole by discharging chain oil.
Unplug the tool from the mains. (Fig. 39)
Insert the cleaned oil filter into the oil discharge hole.
When the filter is too dirty, replace it with a new one.
(Fig. 40)
Insert the push nut with its correct side facing up as
shown in the figure into the oil discharge hole to secure
the filter. When the filter cannot be secured with a disfig-
ured push nut, replace the push nut with a new one.
- Reinstall the sprocket cover and saw chain on the tool.
(Fig. 41)
New saw chains
Use two or three saw chains alternately, so that the saw
chain, sprocket and running surfaces of the bar wear
evenly.
Turn the bar over when changing the chain so that the bar
groove wears evenly.
CAUTION:
• Only use chains and bars which are approved for this
model of saw (refer to “SPECIFICATIONS”). (Fig. 42)
Before fitting a new saw chain, check the condition of the
sprocket.
CAUTION:
• A worn sprocket will damage a new saw chain. Have
the sprocket replaced in this case.
Always fit a new locking ring when replacing the sprocket.
Maintaining the chain and run-down
brakes
The braking systems are very important safety features.
Like any other component of the chain saw, they are sub-
ject to a certain degree of wear. They must be inspected
regularly by a MAKITA specialist repair shop. This mea-
sure is for your own safety.
Storing tool
Biologically degradable saw chain oil can only be kept for
a limited period.
Beyond two years after manufacture, biological oils begin
to acquire an adhesive quality, and cause damage to the
oil pump and components in the lubricating system.
- Before taking the chain saw out of service for a longer
period, empty the oil tank and fill it with a small quantity
of engine oil (SAE 30).
- Run the chain saw briefly to flush all residue of the bio-
logical oil out of the tank, lubricating system and saw
mechanism.
When the chain saw is taken out of service, small
quantities of chain oil will leak from it for some time
afterwards. This is normal, and is not a sign of a fault.

Store the chain saw on a suitable surface.
Before returning the chain saw to service, fill up with fresh
BIOTOP saw chain oil.
To maintain product SAFETY and RELIABILITY, repairs,
any other maintenance or adjustment should be per-
formed by Makita Authorized Service Centers, always
using Makita replacement parts.
ACCESSORIES
CAUTION:
• These accessories or attachments are recommended
for use with your Makita tool specified in this manual.
The use of any other accessories or attachments might
present a risk of injury to persons. Only use accessory
or attachment for its stated purpose.
If you need any assistance for more details regarding
these accessories, ask your local Makita Service Center.
• Saw chain
• Scabbard
• Guide bar complete
• Chain gauge
• Round file 4.5 mm
• Flat file
• File holder with 4.5 mm file
• File handle
• 1 I BIOTOP chainsaw oil
• 5 I BIOTOP chainsaw oil
• Multi-purpose grease
• Grease gun

43
NEDERLANDS
Meegeleverde onderdelen
Verklaring van het onderdelenoverzicht
TECHNISCHE GEGEVENS
1) De gegevens kennen hetzelfde gewicht toe aan de bedrijfsomstandigheden onder vollast en bij maximale snelheid.
• Als gevolg van ons doorlopende onderzoeks- en ontwikkelingsprogramma, zijn de technische gegevens van dit
gereedschap onderhevig aan veranderingen zonder voorafgaande kennisgeving.
• Opmerking: De technische gegevens kunnen van land tot land verschillen.
Symbolen END218-1
Hieronder staan de symbolen die voor dit gereedschap
worden gebruikt. Zorg ervoor dat u weet wat ze
betekenen alvorens het gereedschap te gebruiken.
.................. Lees de gebruiksaanwijzing en volg de
waarschuwingen en
veiligheidsinstructies op.
.................... DUBBEL GEÏSOLEERD
...................Let op: bijzondere voorzichtigheid en
aandacht vereist!
1. Achterhandgreep
2. Aan/uit-schakelaar
3. Olievuldop
4. Voorhandgreep
5. Beschermkap van voorhandgreep
6. Zaagblad
7. Zaagketting
8. Hendel
9. Afdekking van kettingwiel
10. Oliepeilglas
11. Beschermkap van
achterhandgreep
12. Getande kam (klauwaanslag)
13. Uit-vergrendelknop
14. Kettingvanger
15. Schede van het zaagblad
1. Uit-vergrendelknop
2. Aan/uit-schakelaar
3. Indrukken
4. Losdraaien
5. Afdekking van kettingwiel
6. Stelknop
7. Stelpen
8. Haak
9. Opening
10. Klein gat
11. Vastdraaien
12. Hendel
13. Laag
14. Hoog
15. Zaagblad
16. Zaagketting
17. Olievuldop
18. Beschermkap van voorhandgreep
19. Vergrendelen
20. Ontgrendelen
21. Peilglas
22. Getande kam
23. Werkgebied
24. Olietoevoergleuf
25. Olietoevoergat
26. Drukdop
27. Platkopschroevendraaier
28. Oliefilter
29. Tandwiel
Model UC3020A UC3520A UC4020A
Max. kettingsnelheid (m/s) 13,3
Zaagbladlengte 300 mm 350 mm 400 mm
Zaagketting Type 90SG
Steek 3/8”
Geluidsvermogenniveau L WA gem. dB (A)
volgens EN 50144 -1 1) 105,3
Geluidsdrukniveau L pA gem. dB (A)
op de werkplek volgens EN 50144 -1 1) 92,3
Trillingsversnelling a h,w gem. volgens
ISO 50144-2-13 1) - Voorhandgreep m/s23,4 3,9
- Achterhandgreep m/s24,0 4,5
Oliepomp Automatisch
Inhoud olietank (l) 0,20
Krachtoverbrenging Direct
Kettingrem Handbediend
Uitlooprem Mechanisch
Totale lengte (zonder zaagblad) 436 mm
Netto gewicht 3,8 kg
Verlengsnoer (los verkrijgbaar) DIN 57282/HO 7RN -F L=30 m max., 3 x 1,5 mm2

44
................... Let op: trek de stekker onmiddellijk uit
het stopcontact als het netsnoer
beschadigd is!
................... Let op: terugslag!
................... Bescherm tegen regen en vocht!
................... Draag een veiligheidshelm,
veiligheidsbril en oorbescherming!
................... Draag veiligheidshandschoenen!
................... Trek de stekker uit het stopcontact!
................... EHBO
......... Recyclen
................... CE-symbool
........... Maximaal toelaatbare lengte van
zaagsnede
.......... Draairichting van de ketting
................... Kettingolie
............. Kettingrem los/vast gezet
................... Verboden!
Gebruiksdoeleinden
Het gereedschap is bedoeld om stammen te zagen.
Voeding
Het gereedschap mag uitsluitend worden aangesloten op
een voeding met dezelfde spanning als aangegeven op
het identificatieplaatje en werkt alleen op enkele-fase
wisselstroom. Het gereedschap is dubbel geïsoleerd
volgens de Europese norm en mag derhalve ook op een
niet-geaard stopcontact worden aangesloten.
Voor het openbare laagspanningsnet van 220 V t/m
250 V.
Het in- en uitschakelen van elektrische apparatuur
veroorzaakt spanningsfluctuaties. Het gebruik van dit
gereedschap terwijl het elektriciteitsnet in een slechte
toestand verkeert, kan de werking van andere apparatuur
nadelig beïnvloeden. Als de netweerstand lager is dan
0,35 ohm, mag u ervan uitgaan dat geen nadelige
effecten optreden. Het stopcontact waarop dit
gereedschap is aangesloten moet zijn beveiligd met een
zekering of veiligheidsstroomonderbreker met trage
uitschakeling.
AANVULLENDE
VEILIGHEIDSVOORSCHRIFTEN
ENB098-1
1. Lees de gebruiksaanwijzing om uzelf bekend te
maken met de bediening van de kettingzaag.
2. Alvorens de kettingzaag voor het eerst te
gebruiken dient u de bediening ervan uitgelegd te
krijgen. Als dat niet mogelijk is, moet u eerst
proefzagen met ronde stammen op een bok
voordat u daadwerkelijk met de kettingzaag werkt.
3. De kettingzaag mag niet worden gebruikt door
kinderen of jeugd jonger dan 18 jaar. Jongeren
ouder dan 16 jaar kunnen uitgezonderd worden
van deze regel mits zijn les krijgen onder toezicht
van een expert.
4. Werken met een kettingzaag vereist een hoge
mate van concentratie. Werk niet met een
kettingzaag als u zich niet 100% fit voelt. Werk
altijd rustig en voorzichtig.
5. Werk nooit onder invloed van alcohol, drugs of
medicijnen.
Juist gebruik
1. De kettingzaag is uitsluitend bedoeld voor het
zagen van hout. Gebruik hem niet voor het zagen
van bijvoorbeeld kunststof of poreus beton.
2. Gebruik de kettingzaag uitsluitend voor
bedieningen die beschreven staan in deze
gebruiksaanwijzing. Gebruik hem bijvoorbeeld
niet voor het snoeien van hagen of soortgelijke
werkzaamheden.
3. De kettingzaag mag niet worden gebruikt voor
bosbouwwerkzaamheden, bijv. voor het omzagen
en takken afzagen van staande bomen. Door het
netsnoer van de kettingzaag heeft de gebruiker
niet de mobiliteit en veiligheid die noodzakelijk
zijn voor dergelijk werk.
4. De kettingzaag is niet bedoeld voor commercieel
gebruik.
5. Overbelast de kettingzaag niet.
Persoonlijke-veiligheidsmiddelen
1. Kleding moet nauwsluitend zijn, maar de
bewegelijkheid niet belemmeren.
2. Draag de volgende beschermende kleding tijdens
het werk:
• Een goedgekeurde veiligheidshelm, als er gevaar
bestaat voor vallende takken en dergelijke;
• Een gezichtsmasker of veiligheidsbril;
• Geschikte gehoorbescherming (oorschelpen, of
aangepaste of kneedbare oordoppen).
Octaafbandanalyse op verzoek beschikbaar;
• Stevige, lederen veiligheidshandschoenen;
• Lange broek gemaakt van een sterke stof;
• Veiligheidsoverall van snijbestendige stof;
• Veiligheidsschoenen met antislipzolen, stalen neus en
snijbestendige, stoffen voering;
• Een mondmasker, indien tijdens het werk stof wordt
geproduceerd (bijv. bij het zagen van droog hout).
RE Y

45
Beveilig uzelf tegen elektrische schokken
................... De kettingzaag mag niet worden
gebruikt tijdens nat weer of in een
vochtige omgeving omdat de
elektromotor niet waterdicht is.
1. Steek de stekker van de kettingzaag alleen in een
geaard stopcontact van een getest elektrisch
circuit. Controleer dat de netspanning
overeenkomt met die op het typeplaatje. Zorg
ervoor dat het stopcontact op een groep zit met
een zekering van 16 A. Als de kettingzaag in de
open lucht wordt gebruikt, moet deze zijn
aangesloten op een op reststroom werkende
stroomonderbreker die in werking treedt bij een
reststroom van maximaal 30 mA.
................... Als het netsnoer of verlengsnoer
beschadigd raakt, moet u onmiddellijk
de stekker uit het stopcontact trekken.
Veilige werkmethoden
1. Alvorens met het werk te beginnen, controleert u
dat de kettingzaag zich in goede werkende staat
bevindt, en dat deze voldoet aan de
veiligheidsregels. Controleer met name dat:
• De kettingrem goed werkt;
• De uitlooprem goed werkt;
• Het zaagblad en de afdekking van het kettingwiel
goed zijn gemonteerd;
• De ketting is geslepen en gespannen
overeenkomstig de regels;
• Het netsnoer en de stekker niet beschadigd zijn;
Raadpleeg het hoofdstuk “CONTROLES”.
2. Zorg er met name altijd voor dat het gebruikte
verlengsnoer de juiste dwarsdoorsnede heeft (zie
“TECHNISCHE GEGEVENS”). Bij gebruik van een
kabelhaspel moet u het snoer helemaal uitrollen. Bij
gebruik van de kettingzaag in de open lucht,
controleert u dat het gebruikte snoer geschikt is voor
gebruik in de open lucht en als zodanig is
gemarkeerd.
3. Gebruik de kettingzaag niet in de buurt van brandbaar
stof of gas aangezien de motor vonken kan
produceren en explosiegevaar oplevert.
4. Werk uitsluitend op een vaste ondergrond en terwijl u
stevig staat. Let met name goed op obstakels (bijv. het
snoer) in het werkgebied. Let met name goed op op
plaatsen waar vocht, ijs, verse houtsnippers of schors
de ondergrond glad kunnen maken. Gebruik de
kettingzaag niet terwijl u op een ladder of in een boom
staat.
5. Let met name goed op wanneer u op een schuine
ondergrond staat omdat rillende stammen en takken
een gevaarlijke situatie kunnen opleveren.
6. Zaag nooit boven schouderhoogte (zie afb. 1).
7. Houd de kettingzaag met beide handen vast bij het
inschakelen en tijdens gebruik. Houd de
achterhandgreep met uw rechterhand vast en de
voorhandgreep met uw linkerhand. Houd de
handgrepen stevig vast met uw duim. Het zaagblad en
de zaagketting mogen met geen enkel voorwerp in
aanraking zijn op het moment dat de kettingzaag
wordt ingeschakeld.
8. Verwijder vreemde voorwerpen, zoals zand, stenen,
spijkers, draad, enz., uit het gebied waarin wordt
gezaagd. Vreemde voorwerpen beschadigen het
zaagblad en de zaagketting, en kunnen gevaarlijke
terugslag veroorzaken.
9. Wees met name voorzichtig wanneer u zaagt in de
buurt van afrasteringen. Raak de afrastering niet met
de kettingzaag want hierdoor kan een terugslag
ontstaan.
10. Raak de grond niet met de kettingzaag.
11. Zaag alleen enkele stukken hout en geen bundels of
stapels.
12. Vermijd het zagen van dunne takjes en wortels omdat
deze in de kettingzaag verstrengeld kunnen raken.
Hierdoor kunt u uw evenwicht verliezen.
13. Gebruik een stabiele ondersteuning (bok) wanneer u
in gezaagd hout zaagt.
14. Gebruik de kettingzaag niet voor het los peuteren of
wegvegen van stukjes hout en andere voorwerpen.
15. Houd de kettingzaag zodanig vast dat geen enkel
lichaamsdeel van u in het verlengde van de lijn van
de zaagketting ligt (zie afb. 2).
16. Bij het verplaatsen tussen twee zaagsneden, gebruikt
u de kettingrem om te voorkomen dat de ketting per
ongeluk in werking wordt gesteld. Houd de
kettingzaag bij het dragen vast aan de voorhandgreep
en houdt uw vinger daarbij niet om de aan/uit-
schakelaar. Trek de stekker uit het stopcontact
wanneer u een pauze neemt of de kettingzaag alleen
achterlaat. Leg de kettingzaag neer op een plaats
waar deze geen gevaar oplevert.
17. Trek de stekker uit het stopcontact wanneer u een
pauze neemt of de kettingzaag alleen achterlaat. Leg
de kettingzaag neer op een plaats waar deze geen
gevaar oplevert.
Terugslag
1. Tijdens het gebruik van de kettingzaag kan een
gevaarlijke terugslag optreden. Een terugslag treedt
op wanneer de punt van het zaagblad (met name het
laatste kwart) in aanraking komt met hout of een ander
massief voorwerp. Hierdoor zal de kettingzaag in de
richting van de gebruiker worden gedwongen
(zie afb. 3).
2. Let op de volgende punten om terugslag te
voorkomen:
• Begin een zaagsnede nooit met de punt van het
zaagblad.
• Gebruik de punt van het zaagblad niet om te zagen.
Let met name goed op wanneer u verder gaat zagen
in een reeds gemaakte zaagsnede.
• Begin te zagen met draaiende ketting.
• Slijp de ketting altijd op de juiste wijze. Stel vooral
de dieptevoeler in op de juiste hoogte (zie “De
ketting slijpen” voor meer informatie).
• Zaag nooit door meerdere takken tegelijk.
• Let er bij het afzagen van takken op dat het
zaagblad niet in aanraking komt met andere takken.

46
• Houd bij het afzagen afstand tot andere stammen in
de buurt. Kijk altijd naar de punt van het zaagblad.
• Gebruik een bok.
Veiligheidsvoorzieningen
1. Controleer altijd dat de veiligheidsvoorzieningen in
werkende staat verkeren alvorens met het werk te
beginnen. Gebruik de kettingzaag niet als de
veiligheidsvoorzieningen niet goed werken.
- Kettingrem:
De kettingzaag is uitgerust met een kettingrem die de
zaagketting binnen een fractie van een seconde tot
stilstand brengt. De kettingrem wordt in werking
gesteld wanneer de beschermkap van de
voorhandgreep naar voren wordt geduwd. De
zaagketting staat dan binnen 0,15 seconde stil en de
voeding naar de motor wordt onderbroken.
- Uitlooprem: (zie afb. 4)
De kettingzaag is uitgerust met een uitlooprem die de
zaagketting onmiddellijk tot stilstand brengt wanneer
de aan/uit-schakelaar wordt losgelaten. Hierdoor
wordt voorkomen dat de zaagketting blijft draaien
terwijl de kettingzaag is uitgeschakeld, zodat
gevaarlijke situaties worden voorkomen.
-Debeschermkappen van de voor- en
achterhandgrepen beschermen de gebruiker
tegen verwondingen door houtsnippers die naar
achteren kunnen worden geworpen, of door een
gebroken zaagketting.
- De uit-vergrendeling voorkomt dat de kettingzaag
per ongeluk wordt ingeschakeld.
-Dekettingvanger beschermt de gebruiker tegen
verwonding in het geval dat de ketting springt of
breekt.
Vervoer en opslag
................... Wanneer de kettingzaag niet in gebruik
is of wordt vervoerd, trekt u de stekker
uit het stopcontact en plaatst u de
schede om het zaagblad. Draag of
vervoer de kettingzaag nooit met
draaiende zaagketting.
1. Draag de kettingzaag aan alleen de voorhandgreep
met het zaagblad naar achteren gericht.
2. Bewaar de kettingzaag op een veilige, droge en
afgesloten plaats, buiten het bereik van kinderen.
Bewaar de kettingzaag niet buitenshuis.
Onderhoud
1. Trek de stekker uit het stopcontact alvorens enige
instel- of onderhoudswerkzaamheden uit te voeren.
2. Controleer het netsnoer regelmatig op beschadiging
van de isolatie.
3. Maak de kettingzaag regelmatig schoon.
4. Laat eventuele beschadiging van de kunststof
behuizing onmiddellijk en vakkundig repareren.
5. Gebruik de kettingzaag niet als de aan/uit-schakelaar
niet goed werkt. Laat deze eerst vakkundig repareren.
6. Onder geen beding mag de kettingzaag op enigerlei
wijze worden veranderd. Uw veiligheid staat op het
spel.
7. Voer geen onderhouds- of reparatiewerkzaamheden
uit anders dan beschreven in deze
gebruiksaanwijzing. Alle andere werkzaamheden
moeten worden uitgevoerd door Makita Service.
8. Gebruik uitsluitend originele MAKITA-
vervangingsonderdelen en -accessoires die
ontworpen zijn voor uw model kettingzaag. Als u
andere onderdelen gebruikt, wordt de kans op een
ongeval vergroot.
9. MAKITA accepteert geen enkele aansprakelijkheid
voor ongevallen of schade in geval een niet-
goedgekeurd zaagblad, zaagketting of ander
vervangingsonderdeel of accessoire wordt gebruikt.
Raadpleeg “Verkorte vervangingsonderdelenlijst” voor
goedgekeurde zaagbladen en -kettingen.
EHBO
................... Werk niet alleen. Werk altijd binnen
hoorafstand van iemand anders.
1. Houd altijd een EHBO-doos bij de hand. Vervang de
verbruikte items uit de EHBO-doos onmiddellijk.
2. Mocht u hulp nodig hebben na een ongeval, vermeldt
het volgende:
• Waar vond het ongeval plaats?
• Wat is er gebeurd?
• Hoeveel gewonden zijn er?
• Welke verwondingen hebben zij?
• Wie meldt het ongeval?
OPMERKING:
Personen met een slechte bloedsomloop die worden
blootgesteld aan sterke trillingen, kunnen verwondingen
aan bloedvaten of het zenuwstelsel oplopen.
Trillingen kunnen de volgende symptomen veroorzaken in
de vingers, handen of polsen: “slapen” (ongevoeligheid),
tintelen, pijn, stekend gevoel, veranderen van huidskleur
of van de huid.
Als een van deze symptomen zich voordoet,
raadpleegt u uw huisarts!
BEWAAR DEZE
VOORSCHRIFTEN
BESCHRIJVING VAN DE
FUNCTIES
LET OP:
• Controleer altijd of het gereedschap is uitgeschakeld
en de stekker uit het stopcontact is getrokken alvorens
de functies van het gereedschap te controleren of af te
stellen.
In- en uitschakelen (zie afb. 5)
LET OP:
• Controleer altijd, voordat u de stekker in het
stopcontact steekt, of de aan/uit-schakelaar op de

47
juiste manier schakelt en weer terugkeert naar de uit-
stand nadat deze is losgelaten.
Om te voorkomen dat de aan/uit-schakelaar per ongeluk
wordt bediend, is een uit-vergrendelknop aangebracht.
Om het gereedschap te starten, drukt u de uit-
vergrendelknop in en knijpt u de aan/uit-schakelaar in.
Laat de aan/uit-schakelaar los om het gereedschap te
stoppen
ONDERDELEN AANBRENGEN/
VERWIJDEREN
LET OP:
• Controleer altijd of het gereedschap is uitgeschakeld
en de stekker uit het stopcontact is getrokken alvorens
enige werk aan het gereedschap uit te voeren.
De zaagketting monteren en verwijderen
LET OP:
• Zorg er altijd voor dat het gereedschap is
uitgeschakeld en de stekker uit het stopcontact is
getrokken, voordat u de zaagketting monteert of
verwijdert.
• Draag altijd handschoenen tijdens het monteren of
verwijderen van de zaagketting.
1. Om de zaagketting te verwijderen, zet u de hendel
rechtop (zie afb. 6).
2. Druk de hendel in en draai de ingedrukte hendel
linksom om de moer los te draaien tot de afdekking
van het kettingwiel los komt. (Door de hendel in te
drukken grijpt deze aan op de moer.)
3. Draai de stelknop linksom om de spanning van de
zaagketting af te halen.
4. Verwijder de afdekking van het kettingwiel.
5. Haal de zaagketting en zaagblad van de kettingzaag
af.
6. Om de zaagketting te monteren, plaatst u een uiteinde
van de zaagketting rond de voorkant van het zaagblad
en het andere uiteinde rond het kettingwiel
(zie afb. 7).
Monteer op dat moment de zaagketting zoals
aangegeven in de afbeelding omdat deze draait in de
richting van de pijl.
7. Leg het zaagblad op zijn plaats op de kettingzaag.
8. Draai de stelknop linksom zodat de stelpen in de
richting van de pijl verschuift (zie afb. 8).
9. Leg de afdekking van het kettingwiel op de
kettingzaag zodanig dat de haak op de achterrand van
de afdekking in de opening van de kettingzaag valt en
de stelpen in een klein gat in het zaagblad steekt
(zie afb. 9).
10. Druk de hendel in en draai de ingedrukte hendel zo
ver mogelijk rechtsom om de moer vast te draaien.
Draai daarna de hendel een kwart slag linksom om de
moer iets los te draaien (zie afb. 10).
De kettingspanning instellen
De zaagketting kan na vele gebruiksuren los gaan zitten.
Controleer regelmatig de kettingspanning vóór gebruik.
Zet de hendel rechtop (zie afb. 11).
Druk de hendel in. Draai de ingedrukte hendel een kwart
slag linksom om de moer iets los te draaien. (Door de
hendel in te drukken grijpt deze aan op de moer.)
(zie afb. 12)
Draai de stelknop om de kettingspanning in te stellen. Pak
de zaagketting in het midden van het zaagblad vast en
trek deze omhoog. De opening tussen het kettingwiel en
de rand van het zaagblad moet ongeveer 2 tot 4 mm zijn.
Als de opening niet ongeveer 2 tot 4 mm is, draait u de
instelknop waarmee het zaagblad is vastgezet iets. Zorg
ervoor dat tijdens het instellen de punt van het zaagblad
iets omhoog wijst (zie afb. 13).
Draai de ingedrukte hendel zo ver mogelijk rechtsom om
de moet stevig vast te draaien (zie afb. 14).
Zet de hendel terug in de oorspronkelijke stand
(zie afb. 15).
LET OP:
• Door een buitensporig hoge kettingspanning kan de
zaagketting breken, het zaagblad slijten en de stelknop
afbreken.
• Het monteren en verwijderen van de zaagketting dient
te gebeuren op een schone plaats zonder zaagsel,
enz.
BEDIENING
Smeren
LET OP:
• Zorg er altijd voor dat het gereedschap is
uitgeschakeld en de stekker uit het stopcontact is
getrokken, voordat u de zaagketting smeert.
Smeer de zaagketting en het zaagblad met een biologisch
afbreekbare zaagkettingolie met een hechttoevoeging. De
hechttoevoeging in de zaagkettingolie voorkomt dat de
olie te snel van de zaagketting afvliegt. Minerale olie mag
niet worden gebruikt vanwege het schadelijke effect op
het milieu (zie afb. 16).
LET OP:
• Vermijd dat de olie in aanraking komen met uw huid en
ogen. Olie in het oog veroorzaakt irritatie. In het geval
de olie in het oog komt, moet u het betreffende oog
onmiddellijk spoelen met schoon water en direct een
huisarts raadplegen.
• Gebruik nooit afvalolie. Afvalolie bevat
kankerverwekkende bestanddelen. De
verontreinigingen in afvalolie veroorzaken een
versnelde slijtage van de oliepomp, het zaagblad en de
zaagketting. Afvalolie is schadelijk voor het milieu.
• Wanneer u de kettingzaag voor het eerst vult met
zaagkettingolie, of de olietank bijvult nadat deze geheel
leeg is geraakt, vult u olie bij tot aan de onderrand van
de vulnek. Anders kan de olietoevoer gehinderd
worden.
Maak het gebied rond de olievuldop, aangegeven in de
afbeelding, grondig schoon om te voorkomen dat vuil in
de olietank kan komen (zie afb. 17).
This manual suits for next models
2
Table of contents
Languages:
Other Makita Chainsaw manuals

Makita
Makita DUC204 User manual

Makita
Makita DCS4600S User manual

Makita
Makita UC010G User manual

Makita
Makita DUC254SF User manual

Makita
Makita EA3500F Instruction Manual

Makita
Makita UC002G User manual

Makita
Makita DUC307 User manual

Makita
Makita UC014G User manual

Makita
Makita DCS 330 TH Instruction Manual

Makita
Makita DCS34 Quick start guide

Makita
Makita 5016N8 User manual

Makita
Makita DUC306 User manual

Makita
Makita XCU07 User manual

Makita
Makita EA3201S User guide

Makita
Makita DUC303 User manual

Makita
Makita UC4550A User manual

Makita
Makita EA7900P Instruction Manual

Makita
Makita EA4300F User manual

Makita
Makita UC3550A User manual

Makita
Makita DUC407 User manual