Makita HP1620 Manual

Models No.
Description
PRODUCT
TECHNICAL INFORMATION
CONCEPT AND MAIN APPLICATIONS
Specification
Standard equipment
Optional accessories
< Note > The standard equipment for the tool shown may differ from country to country.
P 1 / 12
HP1620, HP1620F, HP1621, HP1621F
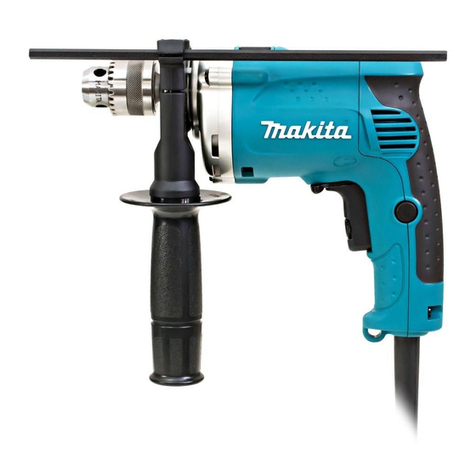
Hammer Drills 16mm (5/8")
HP1620 HP1621HP1620F HP1621F
The above products are up-grade version of the existing
models HP1500 and HP1501.
Their features are as follows.
F/R Change by
brush holder unit
LED Job Light
Model No.
Keyless drill chuck
Dimensions : mm ( " )
Width ( W )
Height ( H )
Length ( L )
Model No. HP1620(F) HP1621(F)
303 (11-7/8)
222 (8-3/4)
68 (2-11/16)
HP1620
HP1620F HP1621
HP1621F
LL
HH
WW
Continuous Rating (W)
Voltage (V) Cycle (Hz) Input Output Max. Output(W)
110
120
220
230
240
Current (A)
50 / 60
50 / 60
50 / 60 560
650
650
380
380
320
380
380
380
650
650
650
600
500
500
500
600
600
50 / 60
50 / 60
50 / 60
110 for Taiwan 6.2
5.4
5.7
3.1
3.0
2.9
Model No.
Chuck ability : mm ( " )
Keyless chuck
F/R Change system
LED Job Light
No load speed : (min -1= rpm)
Blows per min. : (min -1= bpm)
Drilling
capacity : mm ( " ) Steel
Concrete
Wood
Protection from electric shock
Net weight :Kg (lbs )
Cord length : m ( ft )
HP1620 HP1620F HP1621 HP1621F
YesNo
No No
No
Yes Yes
Yes
2.0 (6.6)
1.7 (3.8)
Double insulation
Brush holder unit
16 (5/8)
13 (1/2)
30 (1-3/16)
1.5 - 13 (1/16 - 1/2)
0 - 2,800
0 - 44,800
* Side handle ....................................... 1 pc.
* Depth gauge ...................................... 1pc.
* Chuck key S-13................................. 1 pc. (only for HP1620 and HP1620F)
* Plastic carrying case ......................... 1 pc.
* T.C.T. Hammer drill bit ø16mm
* Metal drill bit ø13mm
* Drill bit for wood ø30mm
* Keyless drill chuck set
* Chuck key S-13 (only for HP1620 and HP1620F)
* Plastic carrying case
* Depth gauge
* Drill stand type 43
* Blow out bulb
* Drill chuck set
* Side handle set

Repair P 2 / 12
< 1 > Lubrication
Apply MAKITA grease N. No.1 to the following portions designated by black triangle to protect
parts and product from unusual abrasion.
Position
No. Parts item Amount : g
(oz)
Portion to be lubricated
9
9
Spindle
13
13
17
17
Helical gear 45
Change lever
The portion where ball bearing 6002LLB contacts,
when spindle reciprocates.
The portion where steel ball 5.0 contacts.
The teeth portion which engages armature gear.
The cam portion which contacts the those of cam
holder.
The whole portion with which steel ball 5.0 is
accepted.
0.1 (0.01)
0.1 (0.01)
0.1 (0.01)
6.0 (0.31)
1.7 (0.06)
Steel ball 5.0
Ball bearing
6002DDW
Drill chuck Cam holder
complete
Armature
Fig. 1

Repair P 3 / 12
< 2 > Removing drill chuck
<Note in assembling>
Pre-set the fastening torque of the torque wrench with 35.7 - 45.9 N.m (350 - 450kgf.cm), when assembling.
Firmly hold No.1R139 "Drill chuck extractor" with vise.And lock spindle with the drill chuck extractor.
Holding No.1R298 "hex socket" with drill chuck, and turn the hex socket with No.1R223 "Torque wrench"
counter clockwise. So drill chuck can be disassembled from spindle. See Fig. 2.
< 3 > Mounting drill chuck
Firmly hold No.1R139 "Drill chuck extractor" with vise.And lock spindle with the drill chuck extractor.
Holding No.1R298 "hex socket" with drill chuck, and turn the hex socket with No.1R223 "Torque wrench"
clockwise. So drill chuck can be assembled to spindle. See Fig. 2.
No.1R298 Hex socket
No.1R223
Torque wrench
No.1R224 Ratchet head
Fig. 2
1R139 Drill chuck extractor
Sleeve portion
Retaining ring portion
(Removing keyless drill chuck with trouble)
If the drill bit sticks in keyless drill chuck, it can be difficult to turn the sleeve portion by hand for removing
the drill bit.
In this case, turn the hex nut with wrench 19 cluckwise vewing from bit side, while holding the sleeve portion
with pipe wrench firmly. So the drill bit can be removed from the keyless drill chuck.
See Fig. A.
Hex nut
Fig. A
Wrench 19
Pipe wrench

Repair P 4 / 12
< 4 > Disassembling housing R and L
( 1 ) Slide change lever to the drill mode. And pull off handle cover, while pushing a pin, inserted into
the pin hole of housing L. See Fig. 3.
( 2 ) Unscrew 7 pcs. of tapping screw 4x18. See Fig. 4. Now housing R can be separated from housing L.
Fig. 3 Fig. 4
Slide change lever
to the drill mode.
Insert a pin of which
diameter is smaller than 2.0mm,
into the pin hole of housing L,
and push it.
Handle
cover
Tapping screw
4x18 ; 7 pcs.
( 3 ) After removing housing R, take off carbon brushes as illustrated in Fig. 5.
Now the inner parts can be removed from housing.
Fig. 5
Turn brush holder unit in a
direction of arrow.
Then, the carbon brush of
upper side can be removed.
For removing the carbon brush
of lower side, turn brush holder
unit in a direction of arrow.

Repair P 5 / 12
( 1 ) Take off the inner parts from housing L, and remove gear section from cam holder complete as illustrated in Fig. 6.
( 2 ) Put the gear section on No.1R165 "Ring Spring Setting Tool" and press the spindle with arbor press. See Fig. 7.
< 5 > Disassembling gear section (spindle, ball bearing 6002 LLB and helical gear 45)
Fig. 6
Gear section
Housing L
Cam holder
complete Fig. 7
1R165 Ring spring
setting tool
Helical gear 45
of gear section
Ball bearing
6002LLB
Spindle
Compression
spring 15
Fig. 8 Fig. 9
( 3 ) Remove retaining ring S-15 from spindle. See Fig. 8.
( 4 ) Remove ball bearing 6002LLB with arbor press. See Fig. 9.
Be careful, not to lose compression spring 15 in this step.
Ball bearing
6002LLB
Ball bearing
6002LLB
Spindle
No.1R291
Retaining ring
S and R pliers
Compression
spring 15
Retaining
ring S-15
Bearing setting plate Compression
spring 15
Spindle
< 6 > Assembling gear section
Fig. 10 Fig. 11
( 1 ) After mounting compression spring 15 to spindle, mount the spindle with compression spring 15, to
ball bearing 6002LLB by pressing with arbor press. See Fig. 10.
( 2 ) Mount retaining ring S-15 to the spindle for securing ball bearing 6002 LLB and compression spring 15.
See Fig. 11.
Spindle
Compression
spring 15
Ball bearing
6002LLB
Retaining
ring S-15

Repair P 6 / 12
( 3 ) Mount the spindle to helical gear 45 as illustrated in Fig. 12R.
( 4 ) Mount the gear section to cam holder complete. And mount the inner parts to housing L as illustrated in Fig. 13.
( 5 ) Slide change lever to drill mode, and mount carbon brushes. See Fig. 14.
( 6 ) Secure housing R with 7 pcs. of tapping screw 4 x18. See Fig. 15.
( 7 ) Mount handle cover to the housing. See Fig. 16.
Helical gear 45 1R165 Ring spring
setting tool
Fig. 12R Fig. 12F
Ball bearing
6002LLB
Ball bearing
6002LLB
Do not face the cam
portion to ball bearing
6002LLB side.
Otherwise, the cam of
helical gear 45 can not
engage with the cam
holder.
Fig. 13 Fig. 14
Gear section
Housing L
Cam holder
complete
Turn brush holder unit in a
direction of arrow.
Then, the carbon brush of
upper side can be mounted.
For mounting the carbon brush
of lower side, turn brush holder
unit in a direction of arrow.
Fig. 15
Tapping screw
4x18 ; 7 pcs.
Slide to drill mode.
Fig. 16
Handle
cover
Be careful, not to damage
hooks of handle cover, when
mounting it.

Repair P 7 / 12
< 7 > Removing armature
( 1 ) After removing inner parts, separate gear section from cam holder complete. See Fig. 17.
( 2 ) Pull off change lever with steel ball 5.0 from cam holder complete. Remove plate 19. See Fig. 18.
( 3 ) Remove armature from cam holder complete as illustrated in Fig. 19.
Fig. 17 Fig. 18
Gear section
Housing L
Cam holder
complete
Fig. 19
Armature Cam holder complete
Change lever
Steel ball 5.0
Cam holder
complete
Plate 19
Cam holder
complete
1R045 Gear extractor
( 4 ) Remove ball bearing 627DDW from cam holder complete as illustrated in Fig. 20.
Fig. 20
Ball bearing
627DDW
ø 8mm Round
bar for arbor

Repair P 8 / 12
< 8 > Mounting armature
( 1 ) Hold cam holder complete as illustrated in Fig. 21.
< Note >
The cam portion has not to come on the supporter. Otherwise, it is impossible to hold
cam holder complete horizontally.
( 2 ) Mount armature assembly to cam holder complete by pressing with arbor press. See Fig. 22.
Something to hold
cam older complete
Something to hold
cam holder complete
Cam holder complete
Cam portion
Fig. 22
Fig. 21
Fig. 23
Plate 19
( 3 ) Mount plate 19 to cam holder complete. After mounting steel ball 5.0 to change lever, push the change lever
into cam holder complete. See Fig. 23.
Steel ball 5.0
Cam holder complete Cam holder complete with
armature
< Note >
Apply MAKITA grease N No.1 to
steel ball 5.0 before mounting it.

Repair P 9 / 12
Fig. 24
Fig. 26
< 9 > Removing field and brush holder unit
Gear section
Cam holder
complete
( 4 ) Mount gear section to cam holder complete to which armature has been mounted. And mount them to housing L
together with field and brush older unit . See Fig. 24.
( 5 ) Mount housing R in the order of Fig. 14, 15 and Fig. 16. See page 5.
( 1 ) Disconnect 2 lead wires (black) from brush holder unit. And remove inner parts from housing L. See Fig. 25.
( 2 ) Remove armature, cam holder complete and gear section. See Fig. 26.
( 3 ) Pull off brush holder unit from field. See Fig. 26.
Brush holder unit
Fig. 25
Field
Brush holder
unit

Repair P 10 / 12
( 1 ) After connecting brush holder unit with field, mount them to housing L. And connect 2 lead wires
(black) of switch to brush holder unit as illustrated in See Fig. 27.
( 2 ) Mount armature, cam holder complete and gear section by passing through field and brush holder unit. See Fig. 28.
< 10 > Mounting field and brush holder unit
Switch
Brush holder unit
Brush holder unit and field have to be so mounted
to housing L, that the recess portion of brush holder
unit has to be faced to switch.
Recess portion
Fig. 27
Fig. 28
Brush holder
unit
Field
Housing L
( 3 ) Mount housing R in the order of Fig. 14, 15 and Fig. 16. See page 5.
Connect 2 lead
wires (black) of
switch to brush
holder unit.
Switch

Circuit diagram
Wiring diagram
P 11 / 12
Model HP1620 and HP1621
without LED job light
Model HP1620 and HP1621
without LED job light
Noise
suppressor
Power supply cord
1 2 C1 C2
M2 M1
Switch
Brush holder unit
Color index of lead wires' sheath
Black
White
Blue
Brown
a
a : Black lead wire can
be used for some country
instead of brown.
b : White lead wire can
be used for some country
instead of blue. Noise suppressor is not
used for some country.
b
Put noise suppressor
here, if it is used.
Rib
Switch
Brush holder unit
Refer to Fig. 27
in page 10, when
mounting brush holder
unit.
Do not put this field lead
wire on the rib.

Circuit diagram
Wiring diagram
P 12 / 12
Model HP1620F and HP1621F
with LED job light
Model HP1620F and HP1621F
with LED job light
Power supply cord
1 2 C1 C2
M2 M1
Switch
Brush holder unit
Color index of lead wires' sheath
Black
White
Blue
Brown
Red
Light circuit LED
Noise
suppressor
Put noise suppressor
here, if it is used.
Rib
Switch
Brush holder unit
Refer to Fig. 27
in page 10, when
mounting brush holder
unit.
Do not put this field lead
wire on the rib.
LED
Circuit for LED
a : Black lead wire can
be used for some country
instead of brown.
b : White lead wire can
be used for some country
instead of blue.
a
b
Other manuals for HP1620
11
This manual suits for next models
3
Table of contents
Other Makita Drill manuals

Makita
Makita DS4010 User manual

Makita
Makita FD02 User manual

Makita
Makita BHP460 User manual

Makita
Makita DBM131 User manual

Makita
Makita DHP482 Manual

Makita
Makita BHP456 User manual

Makita
Makita DF001G User manual

Makita
Makita 8444DWDE User manual

Makita
Makita 6407 User manual

Makita
Makita 6305 User manual

Makita
Makita M8103 User manual

Makita
Makita HP2040 User manual

Makita
Makita 6407 User manual

Makita
Makita 6010DW User manual

Makita
Makita DDF484 User manual

Makita
Makita XFD16 User manual

Makita
Makita 6503D User manual

Makita
Makita 6317D User manual

Makita
Makita HP331D User manual

Makita
Makita 6307 User manual