Makita DTD171 User manual

DTD171
EN Cordless Impact Driver INSTRUCTION MANUAL 5
SL Akumulatorski udarni vijačnik NAVODILA ZA UPORABO 14
SQ Trapan me goditje me bateri MANUALI I PËRDORIMIT 23
BG Акумулаторен ударен
винтоверт РЪКОВОДСТВО ЗА
ЕКСПЛОАТАЦИЯ 32
HR Akumulatorski udarni zavrtač PRIRUČNIK S UPUTAMA 43
МК Безжичен ударен одвртувач УПАТСТВО ЗА УПОТРЕБА 52
SR Бежични ударни одвртач УПУТСТВО ЗА УПОТРЕБУ 62
RO Maşină de înşurubat cu
impact cu acumulator MANUAL DE INSTRUCŢIUNI 71
UK Бездротовий ударний
шуруповерт ІНСТРУКЦІЯ З
ЕКСПЛУАТАЦІЇ 80
RU Аккумуляторный ударный
шуруповерт РУКОВОДСТВО ПО
ЭКСПЛУАТАЦИИ 91

1
2
3
Fig.1
1
2
Fig.2
1
Fig.3
1
Fig.4
1
Fig.5
1
AB
Fig.6
1
2 3
Fig.7
1
Fig.8
2

1
Fig.9
1
Fig.10
1
2
Fig.11
Fig.12
12
Fig.13
13
2
Fig.14
3
2
1
Fig.15
3

Fig.16
4

5ENGLISH
ENGLISH (Original instructions)
SPECIFICATIONS
Model: DTD171
Fastening capacities Machine screw 4 mm - 8 mm
Standard bolt 5 mm - 16 mm
High tensile bolt 5 mm - 14 mm
No load speed Max impact mode 0 - 3,600 min-1
Hard impact mode 0 - 3,200 min-1
Medium impact mode 0 - 2,100 min-1
Soft impact mode 0 - 1,100 min-1
Wood mode 0 - 1,800 min-1
Bolt mode 0 - 3,600 min-1
T mode (1) 0 - 2,900 min-1
T mode (2) 0 - 3,600 min-1
Impacts per minute Max impact mode 0 - 3,800 min-1
Hard impact mode 0 - 3,600 min-1
Medium impact mode 0 - 2,600 min-1
Soft impact mode 0 - 1,100 min-1
Wood mode 0 - 3,800 min-1
Bolt mode 0 - 3,800 min-1
T mode (1) -
T mode (2) 0 - 2,600 min-1
Rated voltage D.C. 18 V
Overall length 116 mm
Net weight 1.2 - 1.5 kg
• Duetoourcontinuingprogramofresearchanddevelopment,thespecicationshereinaresubjecttochange
without notice.
• Specicationsmaydifferfromcountrytocountry.
• Theweightmaydifferdependingontheattachment(s),includingthebatterycartridge.Thelightestandheavi-
est combination, according to EPTA-Procedure 01/2014, are shown in the table.
Applicable battery cartridge and charger
Batterycartridge BL1815N / BL1820 / BL1820B / BL1830 / BL1830B / BL1840 /
BL1840B / BL1850 / BL1850B / BL1860B
Charger DC18RC / DC18RD / DC18RE / DC18SD / DC18SE / DC18SF
•
Someofthebatterycartridgesandchargerslistedabovemaynotbeavailabledependingonyourregionofresidence.
WARNING: Only use the battery cartridges and chargers listed above.Useofanyotherbatterycartridges
andchargersmaycauseinjuryand/orre.
Intended use
The tool is intended for screw driving in wood, metal
and plastic.
Noise
ThetypicalA-weightednoiseleveldeterminedaccord-
ing to EN62841-2-2:
Sound pressure level (LpA) : 97 dB(A)
Sound power level (LWA) : 108 dB (A)
Uncertainty(K):3dB(A)
NOTE: The declared noise emission value(s) has
been measured in accordance with a standard test
methodandmaybeusedforcomparingonetoolwith
another.
NOTE: The declared noise emission value(s)
mayalsobeusedinapreliminaryassessmentof
exposure.

6ENGLISH
WARNING: Wear ear protection.
WARNING:
The noise emission during actual
use of the power tool can differ from the declared
value(s) depending on the ways in which the tool is
used especially what kind of workpiece is processed.
WARNING:
Be sure to identify safety measures
to protect the operator that are based on an estima-
tion of exposure in the actual conditions of use (tak-
ing account of all parts of the operating cycle such
as the times when the tool is switched off and when
it is running idle in addition to the trigger time).
Vibration
The vibration total value (tri-axial vector sum) deter-
mined according to EN62841-2-2:
Work mode: impact tightening of fasteners of the maxi-
mumcapacityofthetool
Vibration emission (ah) : 13.5 m/s2
Uncertainty(K):1.5m/s2
NOTE: The declared vibration total value(s) has been
measured in accordance with a standard test method
andmaybeusedforcomparingonetoolwithanother.
NOTE:Thedeclaredvibrationtotalvalue(s)mayalso
beusedinapreliminaryassessmentofexposure.
WARNING:
The vibration emission during actual
use of the power tool can differ from the declared val-
ue(s) depending on the ways in which the tool is used
especially what kind of workpiece is processed.
WARNING:
Be sure to identify safety measures
to protect the operator that are based on an estima-
tion of exposure in the actual conditions of use (tak-
ing account of all parts of the operating cycle such
as the times when the tool is switched off and when
it is running idle in addition to the trigger time).
EC Declaration of Conformity
For European countries only
TheECdeclarationofconformityisincludedasAnnexA
to this instruction manual.
SAFETY WARNINGS
General power tool safety warnings
WARNING: Read all safety warnings, instruc-
tions, illustrations and specications provided
with this power tool. Failure to follow all instructions
listedbelowmayresultinelectricshock,reand/or
seriousinjury.
Save all warnings and instruc-
tions for future reference.
Theterm"powertool"inthewarningsreferstoyour
mains-operated(corded)powertoolorbattery-operated
(cordless) power tool.
Cordless impact driver safety
warnings
1. Hold the power tool by insulated gripping
surfaces, when performing an operation
where the fastener may contact hidden wiring.
Fastenerscontactinga"live"wiremaymake
exposed metal parts of the power tool "live" and
could give the operator an electric shock.
2. Always be sure you have a rm footing.
Be sure no one is below when using the tool in
high locations.
3. Hold the tool rmly.
4. Wear ear protectors.
5. Do not touch the bit or the workpiece immedi-
ately after operation. They may be extremely
hot and could burn your skin.
6. Keep hands away from rotating parts.
7. Use auxiliary handle(s), if supplied with the
tool.Lossofcontrolcancausepersonalinjury.
8. Hold the power tool by insulated gripping
surfaces, when performing an operation where
the cutting accessory may contact hidden
wiring.Cuttingaccessorycontactinga"live"
wiremaymakeexposedmetalpartsofthepower
tool "live" and could give the operator an electric
shock.
SAVE THESE INSTRUCTIONS.
WARNING: DO NOT let comfort or familiarity
with product (gained from repeated use) replace
strict adherence to safety rules for the subject
product.
MISUSE or failure to follow the safety rules stated
in this instruction manual may cause serious
personal injury.
Important safety instructions for
battery cartridge
1. Before using battery cartridge, read all instruc-
tions and cautionary markings on (1) battery
charger, (2) battery, and (3) product using
battery.
2. Do not disassemble battery cartridge.
3. If operating time has become excessively
shorter, stop operating immediately. It may
result in a risk of overheating, possible burns
and even an explosion.
4. If electrolyte gets into your eyes, rinse them
out with clear water and seek medical atten-
tion right away. It may result in loss of your
eyesight.
5. Do not short the battery cartridge:
(1) Do not touch the terminals with any con-
ductive material.
(2) Avoid storing battery cartridge in a con-
tainer with other metal objects such as
nails, coins, etc.
(3) Do not expose battery cartridge to water
or rain.

7ENGLISH
A battery short can cause a large current
ow, overheating, possible burns and even a
breakdown.
6. Do not store the tool and battery cartridge in
locations where the temperature may reach or
exceed 50 °C (122 °F).
7. Do not incinerate the battery cartridge even if
it is severely damaged or is completely worn
out. The battery cartridge can explode in a re.
8. Be careful not to drop or strike battery.
9. Do not use a damaged battery.
10. The contained lithium-ion batteries are subject
to the Dangerous Goods Legislation require-
ments.
Forcommercialtransportse.g.bythirdparties,
forwarding agents, special requirement on pack-
aging and labeling must be observed.
For preparation of the item being shipped, consult-
ing an expert for hazardous material is required.
Pleasealsoobservepossiblymoredetailed
national regulations.
Tape or mask off open contacts and pack up the
batteryinsuchamannerthatitcannotmove
around in the packaging.
11. When disposing the battery cartridge, remove
it from the tool and dispose of it in a safe
place. Follow your local regulations relating to
disposal of battery.
12. Use the batteries only with the products
specied by Makita. Installing the batteries to
non-compliantproductsmayresultinare,exces-
siveheat,explosion,orleakofelectrolyte.
13. If the tool is not used for a long period of time,
the battery must be removed from the tool.
SAVE THESE INSTRUCTIONS.
CAUTION: Only use genuine Makita batteries.
Use of non-genuine Makita batteries, or batteries that
havebeenaltered,mayresultinthebatterybursting
causingres,personalinjuryanddamage.Itwill
alsovoidtheMakitawarrantyfortheMakitatooland
charger.
Tips for maintaining maximum
battery life
1. Charge the battery cartridge before completely
discharged. Always stop tool operation and
charge the battery cartridge when you notice
less tool power.
2. Never recharge a fully charged battery car-
tridge. Overcharging shortens the battery
service life.
3. Charge the battery cartridge with room tem-
perature at 10 °C - 40 °C (50 °F - 104 °F). Let
a hot battery cartridge cool down before
charging it.
4. Charge the battery cartridge if you do not use
it for a long period (more than six months).
FUNCTIONAL
DESCRIPTION
CAUTION: Always be sure that the tool is
switched off and the battery cartridge is removed
before adjusting or checking function on the tool.
Installing or removing battery
cartridge
CAUTION: Always switch off the tool before
installing or removing of the battery cartridge.
CAUTION: Hold the tool and the battery car-
tridge rmly when installing or removing battery
cartridge.Failuretoholdthetoolandthebattery
cartridgermlymaycausethemtoslipoffyourhands
andresultindamagetothetoolandbatterycartridge
andapersonalinjury.
►Fig.1: 1. Red indicator 2. Button 3.Batterycartridge
Toremovethebatterycartridge,slideitfromthetool
while sliding the button on the front of the cartridge.
Toinstallthebatterycartridge,alignthetongueonthe
batterycartridgewiththegrooveinthehousingandslip
itintoplace.Insertitallthewayuntilitlocksinplace
withalittleclick.Ifyoucanseetheredindicatoronthe
uppersideofthebutton,itisnotlockedcompletely.
CAUTION: Always install the battery cartridge
fully until the red indicator cannot be seen. If not,
itmayaccidentallyfalloutofthetool,causinginjuryto
youorsomeonearoundyou.
CAUTION: Do not install the battery cartridge
forcibly.Ifthecartridgedoesnotslideineasily,itis
notbeinginsertedcorrectly.
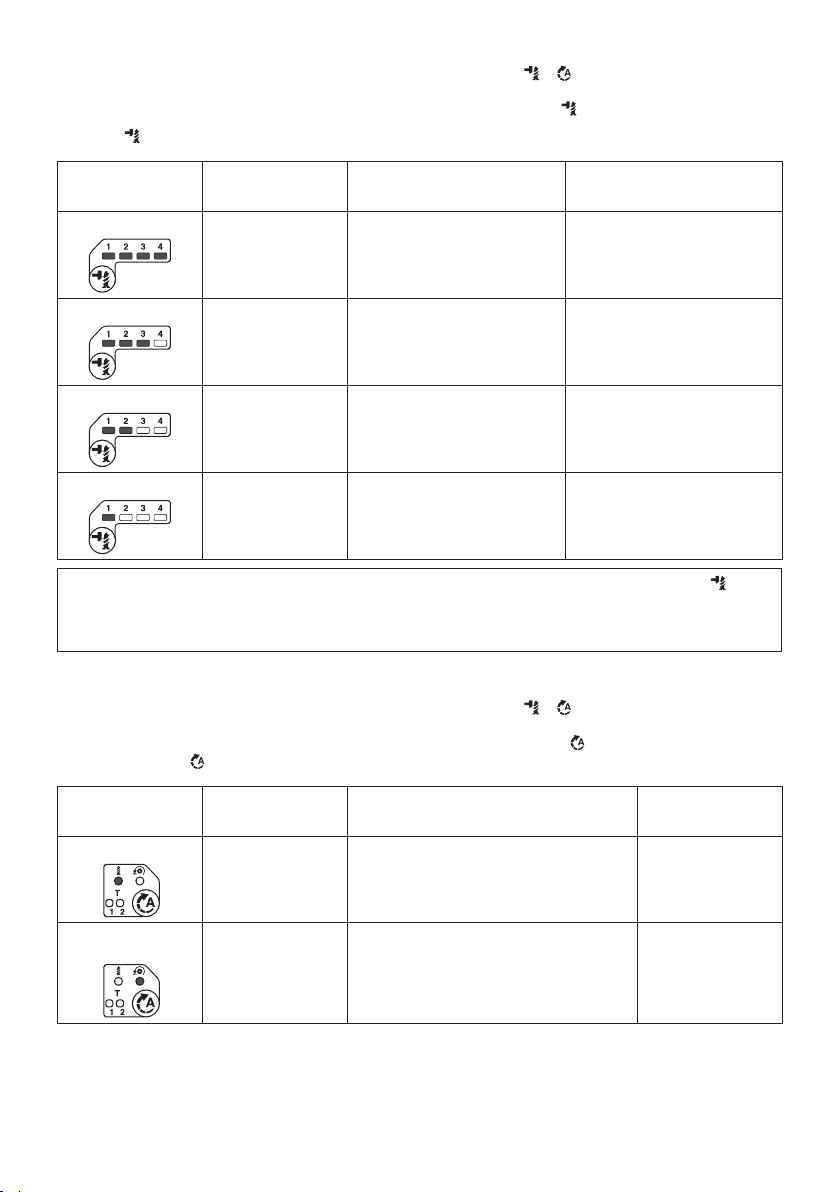
Tool / battery protection system
Thetoolisequippedwithatool/batteryprotectionsys-
tem.Thissystemautomaticallycutsoffpowertothe
motortoextendtoolandbatterylife.Thetoolwillauto-
maticallystopduringoperationifthetoolorbatteryis
placed under one of the following conditions:
Overload protection
Whenthebatteryisoperatedinamannerthatcausesit
todrawanabnormallyhighcurrent,thetoolstopsauto-
matically.Inthissituation,turnthetooloffandstopthe
application that caused the tool to become overloaded.
Then turn the tool on to restart.
Overheat protection
Whenthetool/batteryisoverheated,thetoolstops
automatically.Inthissituation,letthetool/batterycool
before turning the tool on again.
Overdischarge protection
Whenthebatterycapacityisnotenough,thetoolstops
automatically.Inthiscase,removethebatteryfromthe
toolandchargethebattery.

8ENGLISH
Indicating the remaining battery capacity
Only for battery cartridges with the indicator
►Fig.2: 1. Indicator lamps 2. Check button
Pressthecheckbuttononthebatterycartridgetoindicatetheremain-
ingbatterycapacity.Theindicatorlampslightupforafewseconds.
Indicator lamps Remaining
capacity
Lighted Off Blinking
75% to 100%
50% to 75%
25% to 50%
0% to 25%
Charge the
battery.
Thebattery
mayhave
malfunctioned.
NOTE: Depending on the conditions of use and the
ambienttemperature,theindicationmaydifferslightly
fromtheactualcapacity.
Switch action
►Fig.3: 1. Switch trigger
CAUTION:
Before installing the battery cartridge into
the tool, always check to see that the switch trigger actuates
properly and returns to the "OFF" position when released.
Tostartthetool,simplypulltheswitchtrigger.Tool
speedisincreasedbyincreasingpressureontheswitch
trigger. Release the switch trigger to stop.
NOTE:Thetoolautomaticallystopsifyoukeeppull-
ing the switch trigger for about 6 minutes.
NOTE:Whilepullingtheswitchtrigger,anyother
buttons do not work.
Lighting up the front lamp
CAUTION: Do not look in the light or see the
source of light directly.
►Fig.4: 1. Lamp
►Fig.5: 1. Button
Pull the switch trigger to turn on the lamp. To turn off,
releaseit.Thelampgoesoutapproximately10seconds
after releasing the switch trigger.
To keep the lamp off, turn off the lamp status. To turn off
thelampstatus,rstpullandreleasetheswitchtrigger.
And then press the button within 10 seconds.
To turn on the lamp status again, press the but-
ton againsimilarly.
NOTE:Whenthetoolisoverheated,thelightashes
foroneminute,andthentheLEDdisplaygoesoff.In
this case, cool down the tool before operating again.
NOTE:Toconrmthelampstatus,pullthetrigger.
Whenthelamplightsupbypullingtheswitchtrigger,
the lamp status is ON. When the lamp does not come
on, the lamp status is OFF.
NOTE:Useadryclothtowipethedirtoffthelensof
the lamp. Be careful not to scratch the lens of lamp, or
itmaylowertheillumination.
Reversing switch action
►Fig.6: 1. Reversing switch lever
CAUTION: Always check the direction of
rotation before operation.
CAUTION: Use the reversing switch only after
the tool comes to a complete stop. Changing the
directionofrotationbeforethetoolstopsmaydam-
age the tool.
CAUTION: When not operating the tool,
always set the reversing switch lever to the neu-
tral position.
This tool has a reversing switch to change the direction
of rotation. Depress the reversing switch lever from the
A side for clockwise rotation or from the B side for coun-
terclockwise rotation.
When the reversing switch lever is in the neutral posi-
tion, the switch trigger cannot be pulled.
Changing the application mode
What's the application mode?
The application mode is the variation of the driving
rotationandimpactwhicharealreadypresetinthetool.
Bychoosingasuitableapplicationmodedependingon
thework,youcanaccomplishquickerworkand/ormore
beautifulnish.
This tool features following application modes:
Impact force
• Max
• Hard
• Medium
• Soft
Assist type
• Wood mode
• Bolt mode
• T mode (1)
• T mode (2)
Theapplicationmodecanbechangedbythebut-
ton , , or the quick mode-switching button.
►Fig.7: 1. Quick mode-switching button
2. Button 3. Button
Byregisteringacertainapplicationmodetothetool,
youcanswitchtotheregisteredapplicationmodeby
justpressingthequickmode-switchingbutton(quick
mode-switching function).

9ENGLISH
NOTE: When none of the lamp on the panel is lit,
pull the switch trigger once before pressing the quick
mode-switching button.
NOTE: You will not be able to change the application
modeifyoudonotoperatethetoolforapproximately
one minute. In this case, pull the switch trigger
once and press the button, button, or quick
mode-switching button.
NOTE: Refer to "Registering the application mode"
in "Quick mode-switching function" section for how to
register the application mode.
Quick mode-switching button
The function of the quick mode-switching button varies
dependingonwhetheryouhaveregisteredtheapplica-
tion mode to the tool.
►Fig.8: 1. Quick mode-switching button
When the application mode is not
registered:
Thelevelofimpactforcechangeseverytimeyoupress
the quick mode-switching button. The front lamps on
bothsideswillashoncewhentheimpactforceis
changedbypressingthequickmode-switchingbutton.
When the application mode is registered:
The tool switches between the registered application
modeandcurrentapplicationmodeeverytimeyou
press the quick mode-switching button. The front lamps
onbothsideswillashoncewhentheapplication
modeischangedbypressingthequickmode-switching
button.
NOTE: When the lamp status is off, the lamps will not
ashevenwhentheapplicationmodeischangedby
pressing the quick mode-switching button.
NOTE: Refer to "Registering the application mode"
in "Quick mode-switching function" section for how to
register the application mode.
Disabling the quick mode-switching
button
You can also disable the quick mode-switching button.
After disabling, the quick mode-switching button will not
work for changing the impact force and switching the
application mode.
To disable the quick mode-switching button, press and
hold the quick mode-switching button and the but-
ton at the same time until the all lamps on the panel
blink.
To resume the quick mode-switching button, perform
the same procedure as above again.
NOTE: Registering and erasing the application mode
can be performed even if the quick mode-switching
button is disabled. After registering or erasing the
application mode, the quick mode-switching button
will be activated.
Quick reference
The following table shows the functions of the quick
mode-switching button.
indicates the quick mode-switching button.
Button(s) / Purpose How to conrm
+
Registering the application
mode The customize lamp and the
lamp of desired application
mode blinks.
(When quick mode-switch-
ing function is OFF)
Changing the impact force
by the quick mode-switch-
ing button
Thelampsonthetoolash
once.
(When quick mode-switch-
ing function is ON)
Switching to the registered
application mode
Thelampsonthetoolash
once.
+
Erasing the registered
application mode The customize lamp and all
impact force grade lamps
blink.
+
Disabling/resuming the
quick mode-switching
button
All lamps on the panel blink.

10 ENGLISH
Changing the impact force
You can change the impact force in four steps: max,
hard, medium, and soft.
This allows a tightening suitable to the work.
Thelevelofimpactforcechangeseverytimeyoupress
the button or the quick mode-switching button.
Youcanchangetheimpactforcewithinapproximately
one minute after releasing the switch trigger or press-
ing the button , , or the quick mode-switching
button.
►Fig.9: 1. Button
Application mode
(Impact force grade
displayed on panel)
Maximum blows Purpose Example of application
Max 3,800 min-1 (/min) Tightening with the maximum force
and speed.
Driving screws to underwork materi-
als, tightening long screws or bolts.
Hard 3,600 min-1 (/min) Tightening with less force and speed
than Max mode (easier to control than
Max mode).
Driving screws to underwork materi-
als, tightening bolts.
Medium 2,600 min-1 (/min) Tighteningwhenagoodnishingis
needed.
Drivingscrewstonishingboardsor
plaster boards.
Soft 1,100 min-1 (/min) Tightening with less force to avoid
screw thread breakage.
Tightening sash screws or small
screws such as M6.
NOTE: When none of the lamp on the panel is lit, pull the switch trigger once before pressing the button or the
quick mode-switching button.
NOTE:Alllampsontheswitchpanelgooutwhenthetoolisturnedofftosavethebatterypower.Theimpactforce
gradecanbecheckedbypullingtheswitchtriggertotheextentthatthetooldoesnotoperate.
Changing assist type
Thistoolemploysassistfunctionthatoffersseveraleasy-to-
use application modes for driving screws with good control.
Thetypeoftheapplicationmodechangeseverytime
youpressthebutton .
Youcanchangetheassisttypewithinapproximately
one minute after releasing the switch trigger or press-
ing the button , , or the quick mode-switching
button.
►Fig.10: 1. Button
Application mode
(Assist type displayed
on panel)
Maximum blows Feature Purpose
Wood mode *1 3,800 min-1 (/min) This mode helps to prevent a screw from falling at
the beginning of driving. The tool drives a screw
withlow-speedrotationatrst.Afterthetoolstarts
to impact, the rotation speed increases and reaches
the maximum speed.
Tightening long screws.
Bolt mode (reverse rota-
tion auto stop) *1 *2
3,800 min-1 (/min) This mode helps to prevent a bolt from falling off.
When loosening a bolt with the tool driving in coun-
terclockwiserotation,thetoolautomaticallystops
after the bolt/nut gets enough loosened. The stroke
of the switch trigger to reach maximum speed will
become short in this mode.
Loosening bolts.

11 ENGLISH
Application mode
(Assist type displayed
on panel)
Maximum blows Feature Purpose
T mode (1) *1 –
(The tool stops rotating
soon after impact starts.)
This mode helps to prevent the screws from
over-tightening. It also accomplishes quick oper-
ationandgoodnishatthesametime.Thetool
drives a screw with high-speed rotation and stops
soon after the tool starts to impact.
NOTE:
The timing to stop the driving varies depending
on the type of the screw and material to be
driven. Make a test driving before using this
mode.
Driving self-drilling
screws to a thin metal
platewithgoodnish.
T mode (2) *1 2,600 min-1 (/min) This mode helps to prevent the screws from
breakage and stripping. It also accomplishes quick
operationandgoodnishatthesametime.Thetool
drives a screw with high-speed rotation and slows
down the rotation when the tool starts to impact.
NOTE:
Release the switch trigger as soon as the tight-
ening nished to avoid overtightening.
Driving self-drilling
screws to a thick metal
platewithgoodnish.
*1:Automaticspeedcontrolworksonlywhentheswitchtriggerisfullypulled.
*2:Reverserotationautostopworksonlywhenthetoolisdrivingincounterclockwiserotation.
NOTE: When none of the lamp on the panel is lit, pull the switch trigger once before pressing the button .
NOTE:Alllampsontheswitchpanelgooutwhenthetoolisturnedofftosavethebatterypower.Thetypeofthe
applicationmodecanbecheckedbypullingtheswitchtriggertotheextentthatthetooldoesnotoperate.
Quick mode-switching function
What you can do with the quick mode-
switching function
The quick mode-switching function saves the time
for changing the application mode of the tool. You
canswitchtoyourdesiredapplicationmodebyjust
pressing the quick mode-switching button. It is helpful
when doing a repetitive work which requires to switch
betweentwoapplicationmodesalternately.
EXAMPLEIfyouhaveaworktouseTmodeand
max impact force, register the max impact force for
quickmode-switchingfunction.Onceregisterit,you
canswitchtothemaximpactforcefromTmodeby
justoneclickofthequickmode-switchingbutton.
Also,youcanreturntoTmodebypressingthequick
mode-switching button again.
Even if the tool is in other application mode than T
mode, pressing the quick mode-switching button
changestomaximpactforce.Itisconvenientforyou
toregisteraapplicationmodethatyoufrequentlyuse.
You can choose one of following application modes for
quick mode-switching function:
Impact force
• Max
• Hard
• Medium
• Soft
Assist type
• Wood mode
• Bolt mode
• T mode (1)
• T mode (2)
Registering application mode
Tousethequickmode-switchingfunction,registeryour
desired application mode to the tool beforehand.
1. With the button or ,chooseyourdesired
application mode.
2. Press and hold the button and the quick
mode-switching button at the same time until the cus-
tomize lamp and the lamp of desired application mode
blinks.
►Fig.11: 1. Quick mode-switching button
2. Customize lamp
NOTE: You can overwrite the current application
modewithnewonebyperformingtheprocedure
above.
Using the quick mode-switching function
When the tool is in the mode that is not registered,
press the quick mode-switching button to switch to the
registered application mode. The tool switches between
the registered application mode and last application
modeeverytimeyoupressthequickmode-switching
button.Thefrontlampsonbothsideswillashonce
when switching to the registered application mode.
NOTE: The customize lamp will light up when the
application mode registered to the tool is chose.
Cancelling the quick mode-switching
function
Press and hold the button and quick mode-switch-
ing button at the same time until the customize lamp
and all impact force grade lamps blink.
NOTE: After cancelling the quick mode-switching
function, the quick mode-switching button works for
changing the impact force.

12 ENGLISH
ASSEMBLY
CAUTION: Always be sure that the tool is
switched off and the battery cartridge is removed
before carrying out any work on the tool.
Installing or removing driver bit/
socket bit
►Fig.12
Useonlydriverbit/socketbitthathasinsertingportion
showninthegure.Donotuseanyotherdriverbit/
socket bit.
For tool with shallow driver bit hole
A=12mm
B=9mm
Useonlythesetypeofdriver
bit. Follow the procedure
1. (Note) Bit-piece is not
necessary.
For tool with deep driver bit hole
A=17mm
B=14mm
Toinstallthesetypesofdriver
bits, follow the procedure 1.
A=12mm
B=9mm
Toinstallthesetypesofdriver
bits, follow the procedure 2.
(Note)Bit-pieceisnecessary
for installing the bit.
Procedure 1
For tool without one-touch type sleeve
►Fig.13: 1. Driver bit 2. Sleeve
To install the driver bit, pull the sleeve in the direction of
the arrow and insert the driver bit into the sleeve as far
as it will go.
Then release the sleeve to secure the driver bit.
For tool with one-touch type sleeve
To install the driver bit, insert the driver bit into the
sleeve as far as it will go.
Procedure 2
In addition to Procedure 1, insert the bit-piece into the
sleeve with its pointed end facing in.
►Fig.14: 1. Driver bit 2. Bit-piece 3. Sleeve
To remove the driver bit, pull the sleeve in the direction
of the arrow and pull the driver bit out.
NOTE: If the driver bit is not inserted deep enough
into the sleeve, the sleeve will not return to its original
position and the driver bit will not be secured. In this
case,tryre-insertingthebitaccordingtotheinstruc-
tions above.
NOTE:Whenitisdifculttoinsertthedriverbit,pull
the sleeve and insert it into the sleeve as far as it will
go.
NOTE: After inserting the driver bit, make sure that it
isrmlysecured.Ifitcomesout,donotuseit.
Installing hook
CAUTION: When installing the hook, always
secure it with the screw rmly. If not, the hook
maycomeofffromthetoolandresultinthepersonal
injury.
►Fig.15: 1. Groove 2. Hook 3. Screw
Thehookisconvenientfortemporarilyhangingthetool.
This can be installed on either side of the tool. To install
the hook, insert it into a groove in the tool housing on
either side and then secure it with a screw. To remove,
loosen the screw and then take it out.
OPERATION
►Fig.16
Theproperfasteningtorquemaydifferdependingupon
the kind or size of the screw/bolt, the material of the
workpiece to be fastened, etc. The relation between fas-
teningtorqueandfasteningtimeisshowninthegures.
Proper fastening torque for standard bolt
N•m
(kgf•cm)
M14
M12
M10
M8
M16
M14
M12
M10
M8
M16
140
(1428)
(1224)
(1020)
(816)
(612)
(408)
(204)
120
100
80
60
40
20
01
2
1
2
1. Fastening time (second) 2. Fastening torque

13 ENGLISH
Proper fastening torque for high tensile bolt
2
1
M14
M12
M14
M12
M10
M8
M10
M8
200
180
160
140
120
100
80
60
40
20
0123
(2040)
(1836)
(1632)
(1428)
(1224)
(1020)
(816)
(612)
(408)
(204)
N•m
(kgf•cm)
1. Fastening time (second) 2. Fastening torque
Holdthetoolrmlyandplacethepointofthedriverbit
inthescrewhead.Applyforwardpressuretothetoolto
the extent that the bit will not slip off the screw and turn
the tool on to start operation.
NOTICE: If you use a spare battery to continue
the operation, rest the tool at least 15 min.
NOTE: Use the proper bit for the head of the screw/
boltthatyouwishtouse.
NOTE: When fastening M8 or smaller screw, choose
aproperimpactforceandcarefullyadjustpressureon
the switch trigger so that the screw is not damaged.
NOTE: Hold the tool pointed straight at the screw.
NOTE:Iftheimpactforceistoostrongoryoutighten
thescrewforatimelongerthanshowninthegures,
thescreworthepointofthedriverbitmaybeover-
stressed,stripped,damaged,etc.Beforestartingyour
job,alwaysperformatestoperationtodeterminethe
properfasteningtimeforyourscrew.
Thefasteningtorqueisaffectedbyawidevarietyof
factorsincludingthefollowing.Afterfastening,always
check the torque with a torque wrench.
1. Whenthebatterycartridgeisdischargedalmost
completely,voltagewilldropandthefastening
torque will be reduced.
2. Driver bit or socket bit
Failure to use the correct size driver bit or socket
bit will cause a reduction in the fastening torque.
3. Bolt
•
Eventhoughthetorquecoefcientandtheclass
of bolt are the same, the proper fastening torque
will differ according to the diameter of bolt.
•
Even though the diameters of bolts are the same, the
proper fastening torque will differ according to the
torquecoefcient,theclassofboltandtheboltlength.
4.
The manner of holding the tool or the material of
driving position to be fastened will affect the torque.
5. Operating the tool at low speed will cause a reduc-
tion in the fastening torque.
MAINTENANCE
CAUTION: Always be sure that the tool is
switched off and the battery cartridge is removed
before attempting to perform inspection or
maintenance.
NOTICE: Never use gasoline, benzine, thinner,
alcohol or the like. Discoloration, deformation or
cracks may result.
To maintain product SAFETY and RELIABILITY,
repairs,anyothermaintenanceoradjustmentshould
beperformedbyMakitaAuthorizedorFactoryService
Centers,alwaysusingMakitareplacementparts.
OPTIONAL
ACCESSORIES
CAUTION: These accessories or attachments
are recommended for use with your Makita tool
specied in this manual.Theuseofanyother
accessories or attachments might present a risk of
injurytopersons.Onlyuseaccessoryorattachment
for its stated purpose.
Ifyouneedanyassistanceformoredetailsregard-
ingtheseaccessories,askyourlocalMakitaService
Center.
• Driver bits
• Socket bits
• Bit piece
• Hook
• Tool hanger
• Plasticcarryingcase
• Makitagenuinebatteryandcharger
• Batteryprotector
NOTE:Someitemsinthelistmaybeincludedinthe
toolpackageasstandardaccessories.Theymay
differfromcountrytocountry.

14 SLOVENŠČINA
SLOVENŠČINA (Originalna navodila)
TEHNIČNI PODATKI
Model: DTD171
Zateznezmogljivosti Strojnivijak 4 mm - 8 mm
Standardnivijak 5 mm - 16 mm
Visokonateznivijak 5 mm - 14 mm
Hitrost brez obremenitve Načinmaksimalnegaudarca 0 - 3.600 min-1
Načinmočnegaudarca 0 - 3.200 min-1
Načinsrednjegaudarca 0 - 2.100 min-1
Načinrahlegaudarca 0 - 1.100 min-1
Načinzales 0 - 1.800 min-1
Vijačninačin 0 - 3.600 min-1
NačinT(1) 0 - 2.900 min-1
NačinT(2) 0 - 3.600 min-1
Udarci na minuto Načinmaksimalnegaudarca 0 - 3.800 min-1
Načinmočnegaudarca 0 - 3.600 min-1
Načinsrednjegaudarca 0 - 2.600 min-1
Načinrahlegaudarca 0 - 1.100 min-1
Načinzales 0 - 3.800 min-1
Vijačninačin 0 - 3.800 min-1
NačinT(1) -
NačinT(2) 0 - 2.600 min-1
Nazivna napetost D.C. 18 V
Celotnadolžina 116 mm
Netoteža 1,2 - 1,5 kg
• Kernenehnoopravljamoraziskaveinrazvijamosvojeizdelke,selahkotehničnipodatkivtemdokumentu
spremenijobrezobvestila.
• Tehničnipodatkiselahkorazlikujejooddržavedodržave.
• Težaselahkorazlikujegledenapriključke,vključnozakumulatorskobaterijo.Najlažjainnajtežjakombinacijav
skladu s postopkom EPTA 01/2014 sta prikazani v preglednici.
Uporabna akumulatorska baterija in polnilnik
Baterijskivložek BL1815N / BL1820 / BL1820B / BL1830 / BL1830B / BL1840 /
BL1840B / BL1850 / BL1850B / BL1860B
Polnilnik DC18RC / DC18RD / DC18RE / DC18SD / DC18SE / DC18SF
• Nekaterezgorajnavedeneakumulatorskebaterijeinpolnilnikimordavvašidržaviprebivališčanisonavoljo.
OPOZORILO: Uporabljajte le zgoraj navedene akumulatorske baterije in polnilnike. Uporaba drugih
akumulatorskihbaterijinpolnilnikovlahkopovzročitelesnepoškodbein/alipožar.
Predvidena uporaba
Orodjejenamenjenozavijačenjevles,kovinoin
plastiko.
Hrup
ObičajnaA-ovrednotenaravenhrupavskladuz
EN62841-2-2:
Ravenzvočnegatlaka(LpA): 97 dB (A)
Ravenzvočnemoči(LWA): 108 dB (A)
Odstopanje(K):3dB(A)
OPOMBA:Navedenevrednostioddajanjahrupaso
bileizmerjenevskladusstandardnimimetodami
testiranjainselahkouporabljajozaprimerjavoorodij.
OPOMBA:Navedenevrednostioddajanjahrupa
selahkouporabljajotudipripredhodnioceni
izpostavljenosti.

15 SLOVENŠČINA
OPOZORILO: Uporabljajte zaščito za sluh.
OPOZORILO: Oddajanje hrupa med dejansko
uporabo električnega orodja se lahko razlikuje od
navedenih vrednosti, odvisno od načina uporabe
orodja in predvsem vrste obdelovanca.
OPOZORILO:
Upravljavec mora za lastno zaščito
poznati varnostne ukrepe, ki temeljijo na oceni izpostavlje-
nosti v dejanskih pogojih uporabe (poleg časa proženja je
treba upoštevati celoten delovni cikel, vključno s časom, ko
je orodje izklopljeno, in časom, ko deluje v prostem teku).
Vibracije
Skupnevrednostivibracij(vektorskavsotatrehosi)v
skladu z EN62841-2-2:
Delovninačin:udarnoprivijanjepritrjevalnikovznajve-
čjozmogljivostjoorodja
Emisijevibracij(ah): 13,5 m/s2
Odstopanje(K):1,5m/s2
OPOMBA:
Navedeneskupnevrednostioddajanjavibra-
cijsobileizmerjenevskladusstandardnimimetodami
testiranjainselahkouporabljajozaprimerjavoorodij.
OPOMBA:
Navedeneskupnevrednostioddajanjavibracij
selahkouporabljajotudipripredhodnioceniizpostavljenosti.
OPOZORILO:
Oddajanje vibracij med
dejansko uporabo električnega orodja se lahko raz-
likuje od navedenih vrednosti, odvisno od načina
uporabe orodja in predvsem vrste obdelovanca.
OPOZORILO:
Upravljavec mora za lastno zaščito
poznati varnostne ukrepe, ki temeljijo na oceni izpostavlje-
nosti v dejanskih pogojih uporabe (poleg časa proženja je
treba upoštevati celoten delovni cikel, vključno s časom, ko
je orodje izklopljeno, in časom, ko deluje v prostem teku).
Izjava o skladnosti ES
Samo za evropske države
IzjavaESoskladnostijevključenavdodatkuA,kije
priložentemnavodilomzauporabo.
VARNOSTNA OPOZORILA
Splošna varnostna opozorila za
električno orodje
OPOZORILO: Preberite vsa varnostna opo-
zorila in navodila s slikami in tehničnimi podatki,
ki so dobavljeni skupaj z električnim orodjem.
Obneupoštevanjuspodajnavedenihnavodilobstaja
nevarnostelektričnegaudara,požarain/alihudih
telesnihpoškodb.
Shranite vsa opozorila in navo-
dila za poznejšo uporabo.
Izraz„električnoorodje“vopozorilihsenanašanavaše
električnoorodje(skablom)alibaterijskoelektrično
orodje(brezkabla).
Varnostna opozorila za brezžični
udarni vijačnik
1. Če obstaja nevarnost, da bi s pritrjevalnikom
prerezali skrito električno napeljavo, držite ele-
ktrično orodje na izoliranih držalnih površinah.
Obstikuzvodnikipodnapetostjodobijonapetost
vsineizoliranikovinskidelielektričnegaorodja,
zaradičesarlahkopridedoelektričnegaudara.
2. Vedno zagotovite, da imate trden oprijem na
podlagi, kjer stojite.
Kadar uporabljate orodje na višini, se prepri-
čajte, da spodaj ni nikogar.
3. Trdno držite orodje.
4. Uporabljajte zaščito za sluh.
5. Takoj po končani obdelavi se ne dotikajte
nastavka ali obdelovanca. Lahko sta zelo
vroča in povzročita opekline kože.
6. Ne približujte rok vrtečim se delom.
7. Uporabite pomožne ročaje, če so dobavljeni
z orodjem.Izgubanadzoralahkopovzroči
poškodbeoseb.
8. Če obstaja nevarnost, da bi z rezilnim orodjem
prerezali skrito električno napeljavo, držite ele-
ktrično orodje na izoliranih držalnih površinah.
Obstikuzvodnikipodnapetostjodobijonapetost
vsineizoliranikovinskidelielektričnegaorodja,
zaradičesarlahkouporabnikutrpielektričniudar.
SHRANITE TA NAVODILA.
OPOZORILO: NE dovolite, da bi zaradi udob-
nejšega dela ali znanja o uporabi izdelka (prido-
bljenega z večkratno uporabo) opustili strogo
upoštevanje varnostnih zahtev v okviru pravilne
uporabe orodja.
ZLORABA ali neupoštevanje varnostnih zahtev
v teh navodilih za uporabo lahko povzroči resne
telesne poškodbe.
Pomembna varnostna navodila za
akumulatorsko baterijo
1. Pred uporabo baterijskega vložka preberite
vsa navodila in opozorilne oznake na (1) pol-
nilniku akumulatorja, (2) akumulatorju in (3)
izdelku, ki uporablja akumulator.
2. Ne razstavljajte baterijskega vložka.
3. Če se je čas delovanja občutno skrajšal, takoj
prenehajte uporabljati orodje. V nasprotnem
primeru lahko pride do pregretja, morebitnih
opeklin in celo eksplozije.
4. Če pride elektrolit v stik z očmi, jih sperite s
čisto vodo in takoj poiščite zdravniško pomoč.
Posledica je lahko izguba vida.
5. Ne povzročite kratkega stika baterijskega
vložka:
(1) Ne dotikajte se priključkov s kakršnim
koli prevodnim materialom.
(2) Izogibajte se shranjevanju baterijskega
vložka v vsebniku z drugimi kovinskimi
predmeti kot so žeblji, kovanci itn.
(3) Ne izpostavljajte baterijskega vložka vodi
ali dežju.

16 SLOVENŠČINA
Kratek stik akumulatorja lahko povzroči velik
električni tok, pregrevanje, morebitne opekline
in celo okvaro.
6. Ne shranjujte orodja in baterijskega vložka
na mestih, kjer lahko temperatura doseže ali
preseže 50 °C.
7. Ne sežigajte baterijskega vložka, tudi če je
hudo poškodovan ali v celoti izpraznjen.
Baterijski vložek lahko v ognju eksplodira.
8. Poskrbite, da akumulator ne bo izpostavljen
padcem ali udarcem.
9. Ne uporabljajte poškodovanih akumulatorjev.
10. Priložene litij-ionske baterije ustrezajo zahte-
vam zakonodaje v zvezi z nevarnim blagom.
Zakomercialneprevoze,npr.tiste,kijihopravljajo
tretjestrankeincarinskiposredniki,jetrebaupo-
števatiposebnezahtevevzvezizembalažoin
označevanjem.
Med postopkom priprave na odpremo izdelka se
jetrebaposvetovatisstrokovnjakomzanevarne
snovi.Pritemupoštevajtetudipodrobnejšenacio-
nalne predpise.
Odprtestikeoblepitezlepilnimtrakomalijihdru-
gačezaščitite,baterijopazapakirajtetako,dasev
embalažinemorepremikati.
11. Ko odstranjujete akumulatorsko baterijo, jo
vzemite iz orodja in varno zavrzite. Upoštevajte
lokalne uredbe glede odlaganja baterije.
12. Baterije uporabljajte le z izdelki, ki jih določi
Makita.Čenamestitebaterijevneskladneizdelke,
lahkopridedopožara,pregrevanja,eksplozijeali
puščanjaelektrolita.
13. Če orodja dlje časa ne uporabljate, morate iz
njega odstraniti baterijo.
SHRANITE TA NAVODILA.
POZOR: Uporabljajte le originalne baterije
Makita.ČeuporabljateneoriginalnebaterijeMakita
alibaterije,kisobilespremenjene,lahkopridedo
eksplozijebaterijeinposledičnodopožara,telesnih
poškodbalimaterialneškode.Stakšnouporabo
bostetudirazveljaviligarancijoMakitazaorodjein
polnilnik Makita.
Nasveti za ohranjanje največje
zmogljivosti akumulatorja
1. Napolnite baterijski vložek, preden se v celoti
izprazni. Ko opazite, da ima orodje manjšo
moč, vedno ustavite delovanje orodja in napol-
nite baterijski vložek.
2. Nikoli znova ne polnite popolnoma napol-
njenega baterijskega vložka. Prenapolnjenje
skrajša življenjsko dobo akumulatorja.
3. Baterijski vložek s sobno temperaturo pol-
nite pri temperaturi okolja od 10 °C do 40 °C.
Počakajte, da se vroč baterijski vložek pred
polnjenjem ohladi.
4. Če baterijskega vložka ne uporabljate dalj časa
(več kot 6 mesecev), ga napolnite.
OPIS DELOVANJA
POZOR: Pred nastavljanjem ali preizkusom
delovanja orodja se prepričajte, ali je orodje
izključeno in ali je akumulatorska baterija
odstranjena.
Nameščanje ali odstranjevanje
akumulatorske baterije
POZOR: Vedno izklopite orodje, preden name-
stite ali odstranite akumulatorsko baterijo.
POZOR: Kadar nameščate ali odstranjujete
akumulatorsko baterijo, trdno držite orodje in
akumulatorsko baterijo.Čeorodjainakumulatorske
baterijenedržitetrdno,selahkozgodi,davamzdr-
snetaizrok,posledicapajelahkopoškodbaorodjain
akumulatorskebaterijetertelesnapoškodba.
►Sl.1: 1.Rdečiindikator2. Gumb 3.Baterijskivložek
Čeželiteodstranitiakumulatorskobaterijo,jopotisniteiz
orodja,pritempapomikajtegumbnasprednjistranivložka.
Akumulatorskobaterijovstavitetako,daporavnate
jezičeknabaterijizutoromnaohišjuinjopotisnetev
ležišče.Potisnitejodokonca,dasezaskoči.Čejerdeči
indikatornazgornjistranigumbaviden,pomeni,da
baterijaniustreznozaklenjena.
POZOR: Vedno namestite akumulatorsko
baterijo tako, da rdeči indikator ni več viden.Če
teganeupoštevate,lahkobaterijanepričakovano
padeizorodjainpoškodujevasaliosebevneposre-
dnibližini.
POZOR: Ne nameščajte akumulatorske bate-
rije s silo.Česeakumulatorskabaterijanezaskoči
zlahka,nipravilnovstavljena.
Zaščitni sistem orodja/akumulatorja
Orodjejeopremljenozzaščitnimsistemomzaorodje/
akumulator.Sistemsamodejnoprekinenapajanje
orodja,dapodaljšaživljenjskodoboorodjainakumula-
torja.Orodjesesamodejnozaustavimeddelovanjem,
čeorodjealiakumulatordelujetapodnaslednjimipogoji:
Zaščita pred preobremenitvijo
Kadarakumulatoruporabljatenanačin,kipovzroča
uporaboneobičajnovisokegatoka,seorodjesamo-
dejnoustavi.Vtemprimeruizklopiteorodjeinprekinite
delo,kijepovzročilopreobremenitevorodja.Natovklo-
piteorodje,dagaznovazaženete.
Zaščita pred pregrevanjem
Česeorodje/akumulatorpregreje,seorodjesamodejno
ustavi.Vtemprimerupustite,daseorodje/akumulator
ohladi,predenorodjeznovavklopite.
Zaščita pred izpraznjenjem
Kojezmogljivostakumulatorjaprenizka,seorodje
samodejnoustavi.Vtemprimeruodstraniteakumulator
izorodjainganapolnite.

17 SLOVENŠČINA
Prikazuje preostalo raven
napolnjenosti akumulatorja
Samo za akumulatorske baterije z indikatorjem
►Sl.2: 1.Indikatorskelučke2.Gumbzapreverjanje
Pritisnitegumbzapreverjanjenabaterijskemvložku,
dapreveriteravennapolnjenostiakumulatorja.
Indikatorskelučkenakratkozasvetijo.
Indikatorske lučke Prikaz pre-
ostale ravni
napolnjenosti
Sveti Ne sveti Utripa
od 75 % do
100 %
od 50 % do
75 %
od 25 % do
50 %
od 0 % do
25 %
Napolnite
akumulator.
Akumulator
jemorda
okvarjen.
OPOMBA:Odvisnoodpogojevuporabeinokoljske
temperatureseoznačbalahkonekolikorazlikujeod
dejanskenapolnjenosti.
Delovanje stikala
►Sl.3: 1.Sprožilnostikalo
POZOR:
Preden vstavite akumulatorsko baterijo v
orodje, se vedno prepričajte, da stikalo deluje brezhibno
in se vrača v položaj za izklop (OFF), ko ga spustite.
Zazagonorodjapovlecitesprožilnostikalo.Hitrost
orodjasepovečazapovečanitlaknasprožilnemsti-
kalu. Za izklop spustite stikalo.
OPOMBA:Orodjesesamodejnoustavi,čedržite
sprožilnostikalopritisnjenopribližno6minut.
OPOMBA:
Drugigumbimedpritiskanjemsprožilcanedelujejo.
Vklop sprednje lučke
POZOR: Ne glejte neposredno v lučko ali vir
svetlobe.
►Sl.4: 1.Lučka
►Sl.5: 1. Gumb
Povlecitesprožilnostikalozavkloplučke.Zaizkloppa
gaspustite.Lučkaseizklopipribližno10sekundzatem,
kospustitesprožilnostikalo.
Čeželite,dalučkaostaneizklopljena,izklopitestanje
lučke.Zaizklopstanjalučkenajprejpritisniteinspustite
sprožilnostikalo.Natovnaslednjih10sekundahpriti-
snite gumb .
Zaponovenvklopstanjalučkeznovapritisnite
gumb naenaknačin.
OPOMBA:Čejeorodjepregreto,lučkautripaeno
minuto, nato pa se LED zaslon izklopi. V tem primeru
predponovnouporaboohladiteorodje.
OPOMBA:Zapotrditestanjalučkepritisnitesprožil-
nik.Čelučkazasveti,kopritisnetesprožilnostikalo,
jestanjelučkeVKLOPLJENO.Čelučkanezasveti,
potemjestanjelučkeIZKLOPLJENO.
OPOMBA:Uporabitesuhokrpo,daobrišeteumaza-
nijozlečelučke.Pazite,daneopraskatesteklalučke,
kerpraskeobčutnozmanjšajosvetilnost.
Stikalo za preklop smeri vrtenja
►Sl.6: 1.Ročicazapreklopsmerivrtenja
POZOR: Pred obratovanjem vedno preverite
smer vrtenja.
POZOR: Stikalo za spreminjanje smeri vrtenja
uporabite šele, ko se stroj popolnoma ustavi.Če
smervrtenjaspremenite,predensestrojustavi,seta
lahkopoškoduje.
POZOR: Ko orodja ne uporabljate, vedno poti-
snite preklopno stikalo v nevtralen položaj.
Toorodjejeopremljenospreklopnikomzaspremembo
smerivrtenja.Ročicopreklopnikasmerivrtenjapritisnite
vsmeriAzavrtenjevsmeriurnegakazalcainvsmeriB
zavrtenjevobratnismeriurnegakazalca.
Kojepreklopnostikalovnevtralnempoložaju,seglav-
nega stikala ne da premakniti.
Sprememba načina uporabe
Kaj je način uporabe?
Načinuporabejerazličicavrtenjapriprivijanjuinudar-
janja,kistažeprednastavljenivorodju.Zizbiroustre-
zneganačinauporabegledenavrstodelalahkodelate
hitrejein/alidosežetelepšoobdelavo.
Toorodjeimanaslednjenačineuporabe:
Udarna sila
• Maksimalno
• Močno
• Srednje
• Rahlo
Vrsta pomoči
• Načinzales
• Vijačninačin
• NačinT(1)
• NačinT(2)
Načinuporabelahkospreminjatezgumbom , ali
gumbomzahiterpreklopnačina.
►Sl.7: 1.Gumbzahiterpreklopnačina
2. Gumb 3. Gumb
Zregistracijodoločeneganačinauporabezaorodje
lahkonaregistriraninačinuporabepreklopitetako,da
pritisnetegumbzahiterpreklopnačina(funkcijahitrega
preklopanačina).

18 SLOVENŠČINA
OPOMBA:Čenaploščinesvetinobenalučka,enkrat
pritisnitesprožilec,predenpritisnetegumbzahiter
preklopnačina.
OPOMBA:Načinauporabenebostemoglispreme-
niti,čeorodjaneuporabljatevsajzapribližnoeno
minuto.Vtemprimeruenkratpritisnitesprožilec
in pritisnite gumb , gumb ali gumb za hiter
preklopnačina.
OPOMBA:Glejterazdelka„Registracijanačina
uporabe“in„Funkcijahitregapreklopa“zapostopek
registracijenačinauporabe.
Gumb za hiter preklop načina
Gumbzahiterpreklopnačinaimarazličnefunkcije,ki
soodvisneodtega,alisteregistriralinačinuporabeza
orodje.
►Sl.8: 1.Gumbzahiterpreklopnačina
Če niste registrirali načina uporabe:
Stopnjaudarnesilesespremenivsakič,kopritisnete
gumbzahiterpreklopnačina.Sprednjelučkenaobeh
stranehenkratzasvetijo,kospremeniteudarnosiloz
gumbomzahiterpreklopnačina.
Če ste registrirali način uporabe:
Orodjeobvsakempritiskugumbazahiterpreklop
načinapreklopimedregistriranimnačinomuporabein
trenutnimnačinomuporabe.Sprednjelučkenaobeh
stranehenkratzasvetijo,kospremenitenačinuporabez
gumbomzahiterpreklopnačina.
OPOMBA:Kojestanjelučkeizklopljeno,lučkene
bodozasvetilenitivprimeru,čespremenitenačin
uporabezgumbomzahiterpreklopnačina.
OPOMBA:Glejterazdelka„Registracijanačina
uporabe“in„Funkcijahitregapreklopa“zapostopek
registracijenačinauporabe.
Onemogočanje gumba za hiter preklop
načina
Gumbazahiterpreklopnačinalahkotudionemogočite.
Kogumbzahiterpreklopnačinaonemogočite,nebo
spremeniludarnesileinspremenilnačinuporabe.
Gumbzahiterpreklopnačinaonemogočitetako,da
hkratipritisneteindržitegumbzahiterpreklopnačinain
gumb ,doklernaploščinezačnejoutripativselučke.
Gumbzahiterpreklopnačinaomogočitetako,daizve-
deteistipostopek,kotjeopisanozgoraj.
OPOMBA:Registracijoinbrisanjenačinauporabe
lahkoizvajate,tudičejeonemogočengumbzahiter
preklopnačina.Poregistracijialibrisanjunačina
uporabeseaktiviragumbzahiterpreklopnačina.
Hitra navezava
Vnaslednjitabelisoprikazanefunkcijegumbazahiter
preklopnačina.
označujegumbzahiterpreklopnačina.
Gumb(i)/namen Kako potrditi
+
Registracija načina uporabe Utripatalučkazaprilagoditev
inlučkaželeneganačina
uporabe.
(Ko je funkcija hitrega
preklopa izklopljena)
Spreminjanje udarne sile z
gumbom za hiter preklop
načina
Lučkenaorodjuzasvetijo
enkrat.
(Ko je funkcija hitrega
preklopa vklopljena)
Preklop na registrirani
način uporabe
Lučkenaorodjuzasvetijo
enkrat.
+
Brisanje registriranega
načina uporabe Utripajolučkazaprilagoditev
invselučkezastopnjoudarne
sile.
+
Onemogočanje/omogočanje
gumba za hiter preklop
načina
Utripajovselučkenaplošči.

19 SLOVENŠČINA
Sprememba udarne sile
Udarnosilolahkospreminjatevštirihkorakih:maksi-
malno,močno,srednjeinrahlo.
Toomogočaprivijanje,kijeprimernozadelo.
Stopnjaudarnesilesespremenivsakič,kopritisnete
gumb aligumbzahiterpreklopnačina.
Udarnosilolahkospremenitevpribližnoeniminutipo
tem,kospustitesprožilecalipritisnetegumb , ali
gumbzahiterpreklopnačina.
►Sl.9: 1. Gumb
Način uporabe
(Stopnja udarne sile,
prikazana na plošči)
Največje število
udarcev
Namen Primer uporabe
Maksimalno 3.800 min-1 (/min) Privijanjeznajvečjosiloinhitrostjo. Privijanjevijakovvpodpornemate-
riale,zategovanjedolgihvijakovali
sornikov.
Močno 3.600 min-1 (/min) Privijanjezmanjšosiloinhitrostjo,
kotnačinmaksimalnegaudarca(lažji
nadzorkotvnačinumaksimalnega
udarca).
Privijanjevijakovvpodpornemateri-
ale,zategovanjesornikov.
Srednje 2.600 min-1 (/min) Privijanje,kojepomembnakakovo-
stnakončnaobdelava.
Privijanjevijakovvobložnealimavčne
plošče.
Rahlo 1.100 min-1 (/min) Privijanjezmanjšosilo,danepridedo
zlomanavojnegadela.
Privijanjeokenskihvijakovalimajhnih
vijakov,kotsoM6.
OPOMBA:Čenaploščinesvetinobenalučka,enkratpritisnitesprožilec,predenpritisnetegumb ali gumb za
hiterpreklopnačina.
OPOMBA:Vselučkenastikalniploščiugasnejo,koizklopiteorodje,davarčujezakumulatorjem.Stopnjoudarne
silelahkopreverite,takodapovlečetesprožilnostikalodotemere,daorodjenehadelovati.
Spreminjanje vrste pomoči
Toorodjeuporabljapomožnofunkcijo,kiomogočavečnačinov
enostavneuporabezaprivijanjevijakovzdobrimnadzorom.
Vrstanačinauporabesespremenivsakič,kopritisnetegumb .
Vrstopomočilahkospremenitevpribližnoeniminutipo
tem,kospustitesprožilecalipritisnetegumb , ali
gumbzahiterpreklopnačina.
►Sl.10: 1. Gumb
Način uporabe (Vrsta
pomoči, prikazana na
plošči)
Največje število
udarcev
Funkcija Namen
Načinzales*1 3.800 min-1 (/min) Tanačinpreprečujepadanjevijakovnazačetku
privijanja.Orodjenajprejprivijavijakzvrtenjempri
nizkihitrosti.Kozačneorodjeuporabljatisilo,se
hitrostzačnepovečevati,doklernedoseženajvečje
hitrosti.
Privijanjedolgihvijakov.
Vijačninačin(samodejna
zaustavitevvrtenjav
obratni smeri) *1 *2
3.800 min-1 (/min) Tanačinpreprečujeizpadanjesornikov.Prirahljanju
sornikazorodjem,kigaizvijazvrtenjemvobratni
smeri,seorodjesamodejnoustavi,kozadosti
zrahljasornik/matico.Vtemnačinuseskrajšagib
sprožilcazadoseganjemaksimalnehitrosti.
Rahljanjesornikov.
NačinT(1)*1 –
(Orodjesekmalupre-
nehavrteti,kozačne
uporabljatisilo.)
Tanačinpreprečujeprekomernozategovanjevijakov.
Pravtakoomogočahitrodelovanjeindobroobdelavo
obenem.Orodjeprivijavijakzvrtenjemprivisokihitrosti
insekmaluzaustavi,kozačneorodjeuporabljatisilo.
OPOMBA:
Čas, v katerem orodje zaustavi privijanje, je odvisen
od vrste vijaka in materiala, v katerega privijate.
Izvedite testno privijanje, preden uporabite ta način.
Privijanjesamoreznih
vijakovvtankokovinsko
ploščozdobroobdelavo.

20 SLOVENŠČINA
Način uporabe (Vrsta
pomoči, prikazana na
plošči)
Največje število
udarcev
Funkcija Namen
NačinT(2)*1 2.600 min-1 (/min) Tanačinpreprečujezlominpoškodbevijakov.Prav
takoomogočahitrodelovanjeindobroobdelavo
obenem.Orodjeprivijavijakzvrtenjemprivisoki
hitrostiinupočasnivrtenje,kozačneorodjeupo-
rabljatisilo.
OPOMBA:
Spustite sprožilec takoj, ko zaključite s privija-
njem, da preprečite čezmerno privitje.
Privijanjesamorez-
nihvijakovvdebelo
kovinskoploščozdobro
obdelavo.
*1:Samodejninadzorhitrostidelujesamo,čedokoncapritisnetesprožilec.
*2:Samodejnazaustavitevvrtenjavobratnismeridelujesamo,koorodjeprivijavobratnismeriurnegakazalca.
OPOMBA:Čenaploščinesvetinobenalučka,enkratpritisnitesprožilec,predenpritisnetegumb .
OPOMBA:Vselučkenastikalniploščiugasnejo,koizklopiteorodje,davarčujezakumulatorjem.Vrstonačina
uporabelahkopreverite,takodapritisnetesprožilecdotemere,daorodjenehadelovati.
Funkcija za hiter preklop načina
Kaj lahko počnete s funkcijo za hiter
preklop načina
Funkcijazahiterpreklopnačinaprihraničas,kibigaporabili
zaspreminjanjenačinauporabeorodja.Vželeninačinuporabe
lahkopreklopitezgumbomzahiterpreklopnačina.Funkcijaje
koristna,koopravljateponavljajočesedelo,prikateremmorate
izmeničnopreklapljatimeddvemanačinomauporabe.
PRIMERČemorateprideluuporabitinačinTin
maksimalnoudarnosilo,registrirajtemaksimalno
udarnosilozahiterpreklopnačina.Koopraviteregi-
stracijo,lahkoiznačinaTpreklopitenamaksimalno
udarno silo z enim samim pritiskom gumba za hiter
preklopnačina.PolegtegaselahkovrnetevnačinT,
češeenkratpritisnetegumbzahiterpreklopnačina.
Čejeorodjevdrugemnačinuuporabe,kininačinT,
gabostespritiskomgumbazahiterpreklopnačina
prav tako preklopili na maksimalno udarno silo.
Priročnoje,daregistriratenačinuporabe,kigaredno
uporabljate.
Izberetelahkoenegaizmednaslednjihnačinovuporabe
funkcijezahiterpreklopnačina:
Udarna sila
• Maksimalno
• Močno
• Srednje
• Rahlo
Vrsta pomoči
• Načinzales
• Vijačninačin
• NačinT(1)
• NačinT(2)
Registracija načina uporabe
Čeželiteuporabljatifunkcijohitregapreklopa,morate
predhodnoregistriratiželeninačinuporabezaorodje.
1. Z gumbom ali izberiteželeninačin
uporabe.
2. Hkratipritisniteterdržitegumb in gumb za
hiterpreklopnačina,doklernezačnetautripatilučkaza
prilagoditevinlučkazaželeninačinuporabe.
►Sl.11: 1.Gumbzahiterpreklopnačina2.Lučkaza
prilagoditev
OPOMBA:Trenutninačinuporabelahkoprepišete
znovimnačinom,takodaponovitezgorajopisani
postopek.
Uporaba funkcije za hiter preklop načina
Kojeorodjevneregistriranemnačinu,gapreklopitev
registriraninačinuporabezgumbomzahiterpreklop
načina.Orodjevsakičpreklopimedregistriranimnači-
nomuporabeinzadnjimnačinomuporabe,kopritisnete
gumbzahiterpreklopnačina.Sprednjelučkenaobeh
stranehenkratzasvetijo,kopreklopitevregistrirani
načinuporabe.
OPOMBA:Lučkazaprilagoditevzasveti,koizberete
načinuporabe,kijeregistriranzaorodje.
Preklic funkcije za hiter preklop načina
Hkratipritisniteterdržitegumb in gumb za hiter
preklopnačina,doklernezačnejoutripatilučkaza
prilagoditevinvselučkezastopnjoudarnesile.
OPOMBA:Gumbzahiterpreklopnačinapopreklicu
funkcijezahiterpreklopnačinaomogočaspreminja-
njeudarnesile.
MONTAŽA
POZOR: Pred vsako izvedbo dela na orodju se
prepričajte, da je le to izključeno in da je akumula-
torska baterija odstranjena.
Nameščanje ali odstranjevanje
vijačnega ali natičnega nastavka
►Sl.12
Uporabljajtesamovijačnealinatičnenastavkezvstav-
nimdelom,kijeprikazannasliki.Neuporabljajtedrugih
vijačnih/natičnihnastavkov.
Za orodje s plitvo odprtino za vijačne nastavke
A=12 mm
B=9 mm
Uporabljajtesamoto
vrstovijačnihnastavkov.
Upoštevajtepostopek1.
(Opomba)Izenačevalna
konica ni potrebna.
Other manuals for DTD171
6
Table of contents
Languages:
Other Makita Impact Driver manuals

Makita
Makita DTD153Z User manual

Makita
Makita TW140DSME User manual

Makita
Makita DTD136 User manual

Makita
Makita BTD136 User manual

Makita
Makita DTD157 User manual

Makita
Makita LXDT08 Series User manual

Makita
Makita 6905B User manual

Makita
Makita TL064D User manual

Makita
Makita 6903VD User manual

Makita
Makita TD110D User manual

Makita
Makita 6905B User manual

Makita
Makita 6704D User manual

Makita
Makita DTW251 User manual

Makita
Makita 6905B User manual

Makita
Makita DTWA260 User manual

Makita
Makita DTD153 User manual

Makita
Makita 6905B User manual

Makita
Makita 6990D User manual

Makita
Makita DTD154 User manual

Makita
Makita BTD042 User manual