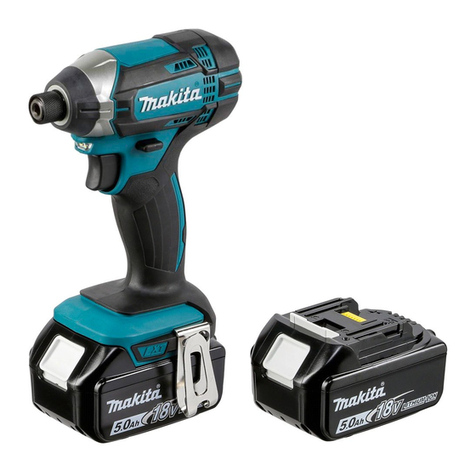
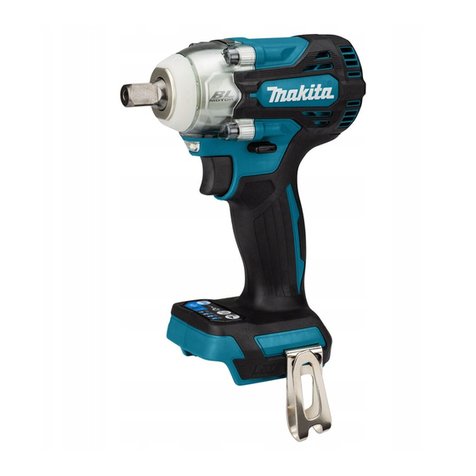
Makita DTP141 User manual

INSTRUCTION MANUAL
MANUEL D'INSTRUCTION
MANUAL DE INSTRUCCIONES
Cordless 4 Mode Impact Driver
Visseuse à choc 4 fonctions
sans Fil
Atornillador de Impacto
Multifunción Inalámbrico
DTP141
IMPORTANT: Read Before Using.
IMPORTANT : Lire avant usage.
IMPORTANTE: Lea antes de usar.

2ENGLISH
ENGLISH (Original instructions)
SPECIFICATIONS
Model DTP141
Impact driver mode Fastening
Capacities
Machine screw 4 mm - 8 mm (5/32" - 5/16")
Standard bolt 5 mm - 14 mm (3/16" - 9/16")
High tensile bolt 5 mm - 12 mm (3/16" - 15/32")
No load speed (/min) (Soft / Medium / Hard)
0 - 1,300 / 0 - 2,200 / 0 - 2,700
Impacts per minute (Soft / Medium / Hard) 0 - 1,200 / 0 - 2,400 / 0 - 3,200
Hammer drill mode No load speed (/min) (Low (1) / High (2)) 0 - 700 / 0 - 2,700
Blows per minute (Low (1) / High (2)) 0 - 8,400 / 0 - 32,400
Drilling Capacities / Concrete 8 mm (5/16")
Drill mode Drilling Capacities
(Low (1) / High (2))
Steel 10 mm / 6.5 mm (3/8" / 1/4")
Wood 21 mm / 12 mm (13/16" / 15/32")
No load speed (/min) (Low (1) / High (2)) 0 - 700 / 0 - 2,700
Screwdriver mode
Fastening Capacities
(Low (1) / High (2))
Machine screw 3.5 mm - 6 mm / 4 mm - 6 mm (1/8" - 1/4" / 5/32" - 1/4")
Self drilling screw
4 mm (5/32"), 5 mm (3/16") / 4 mm (5/32") (Thickness 3.2 mm (1/8") max.)
No load speed (/min)
(Low (1) / High (2))
Depends on torque
setting
0 - 300 / 0 - 1,100
P mode 0 - 600 / 0 - 2,300
Standard battery cartridge BL1815N/ BL1820B BL1830/ BL1830B/ BL1840B/
BL1850B/ BL1860B
Net weight 1.5 kg (3.3 lbs) 1.8 kg (3.9 lbs)
Rated voltage D.C. 18 V
• Due to our continuing program of research and development, the specications herein are subject to change with-
out notice.
• Specications and battery cartridge may differ from country to country.
• Weight, with battery cartridge, according to EPTA-Procedure 01/2003
General power tool safety warnings
WARNING: Read all safety warnings and
all instructions. Failure to follow the warnings and
instructions may result in electric shock, re and/or
serious injury.
Save all warnings and instruc-
tions for future reference.
The term "power tool" in the warnings refers to your
mains-operated (corded) power tool or battery-operated
(cordless) power tool.
Work area safety
1. Keep work area clean and well lit. Cluttered or
dark areas invite accidents.
2. Do not operate power tools in explosive atmo-
spheres, such as in the presence of ammable
liquids, gases or dust. Power tools create sparks
which may ignite the dust or fumes.
3. Keep children and bystanders away while
operating a power tool. Distractions can cause
you to lose control.
Electrical Safety
1. Power tool plugs must match the outlet. Never
modify the plug in any way. Do not use any
adapter plugs with earthed (grounded) power
tools. Unmodied plugs and matching outlets will
reduce risk of electric shock.
2. Avoid body contact with earthed or grounded
surfaces, such as pipes, radiators, ranges and
refrigerators. There is an increased risk of elec-
tric shock if your body is earthed or grounded.
3. Do not expose power tools to rain or wet con-
ditions. Water entering a power tool will increase
the risk of electric shock.
4. Do not abuse the cord. Never use the cord for
carrying, pulling or unplugging the power tool.
Keep cord away from heat, oil, sharp edges
or moving parts. Damaged or entangled cords
increase the risk of electric shock.
5. When operating a power tool outdoors, use an
extension cord suitable for outdoor use. Use of
a cord suitable for outdoor use reduces the risk of
electric shock.
6. If operating a power tool in a damp location is
unavoidable, use a ground fault circuit inter-
rupter (GFCI) protected supply. Use of a GFCI
reduces the risk of electric shock.

3ENGLISH
Personal Safety
1. Stay alert, watch what you are doing and use
common sense when operating a power tool.
Do not use a power tool while you are tired or
under the inuence of drugs, alcohol or med-
ication. A moment of inattention while operating
power tools may result in serious personal injury.
2. Use personal protective equipment. Always
wear eye protection. Protective equipment such
as a dust mask, non-skid safety shoes, hard hat or
hearing protection used for appropriate conditions
will reduce personal injuries.
3. Prevent unintentional starting. Ensure the
switch is in the off-position before connecting
to power source and/or battery pack, picking
up or carrying the tool. Carrying power tools with
your nger on the switch or energising power tools
that have the switch on invites accidents.
4. Remove any adjusting key or wrench before
turning the power tool on. A wrench or a key left
attached to a rotating part of the power tool may
result in personal injury.
5. Do not overreach. Keep proper footing and
balance at all times. This enables better control
of the power tool in unexpected situations.
6. Dress properly. Do not wear loose clothing or
jewellery. Keep your hair, clothing, and gloves
away from moving parts. Loose clothes, jewel-
lery or long hair can be caught in moving parts.
7. If devices are provided for the connection of
dust extraction and collection facilities, ensure
these are connected and properly used. Use of
dust collection can reduce dust-related hazards.
Power tool use and care
1. Do not force the power tool. Use the correct
power tool for your application. The correct
power tool will do the job better and safer at the
rate for which it was designed.
2. Do not use the power tool if the switch does
not turn it on and off. Any power tool that cannot
be controlled with the switch is dangerous and
must be repaired.
3. Disconnect the plug from the power source
and/or the battery pack from the power tool
before making any adjustments, changing
accessories, or storing power tools. Such pre-
ventive safety measures reduce the risk of starting
the power tool accidentally.
4. Store idle power tools out of the reach of chil-
dren and do not allow persons unfamiliar with
the power tool or these instructions to operate
the power tool. Power tools are dangerous in the
hands of untrained users.
5. Maintain power tools. Check for misalignment
or binding of moving parts, breakage of parts
and any other condition that may affect the
power tool’s operation. If damaged, have the
power tool repaired before use. Many accidents
are caused by poorly maintained power tools.
6. Keep cutting tools sharp and clean. Properly
maintained cutting tools with sharp cutting edges
are less likely to bind and are easier to control.
7. Use the power tool, accessories and tool bits
etc. in accordance with these instructions, tak-
ing into account the working conditions and
the work to be performed. Use of the power tool
for operations different from those intended could
result in a hazardous situation.
Battery tool use and care
1. Recharge only with the charger specied by
the manufacturer. A charger that is suitable for
one type of battery pack may create a risk of re
when used with another battery pack.
2. Use power tools only with specically desig-
nated battery packs. Use of any other battery
packs may create a risk of injury and re.
3. When battery pack is not in use, keep it away
from other metal objects, like paper clips,
coins, keys, nails, screws or other small metal
objects, that can make a connection from one
terminal to another. Shorting the battery termi-
nals together may cause burns or a re.
4. Under abusive conditions, liquid may be
ejected from the battery; avoid contact. If con-
tact accidentally occurs, ush with water. If
liquid contacts eyes, additionally seek medical
help. Liquid ejected from the battery may cause
irritation or burns.
5. Do not use a battery pack or tool that is dam-
aged or modied. Damaged or modied batteries
may exhibit unpredictable behaviour resulting in
re, explosion or risk of injury.
6. Do not expose a battery pack or tool to re or
excessive temperature. Exposure to re or tem-
perature above 130 °C may cause explosion.
7. Follow all charging instructions and do not
charge the battery pack or tool outside the
temperature range specied in the instruc-
tions. Charging improperly or at temperatures
outside the specied range may damage the
battery and increase the risk of re.
Service
1. Have your power tool serviced by a qualied
repair person using only identical replacement
parts. This will ensure that the safety of the power
tool is maintained.
2. Follow instruction for lubricating and chang-
ing accessories.
3. Keep handles dry, clean and free from oil and
grease.
CORDLESS 4 MODE IMPACT
DRIVER SAFETY WARNINGS
1. Wear ear protectors when impact drilling.
Exposure to noise can cause hearing loss.
2. Use auxiliary handle(s), if supplied with the
tool. Loss of control can cause personal injury.
3. Hold power tool by insulated gripping sur-
faces, when performing an operation where
the fastener may contact hidden wiring.
Fasteners contacting a "live" wire may make
exposed metal parts of the power tool "live" and
could give the operator an electric shock.
4ENGLISH
4. Hold power tool by insulated gripping sur-
faces, when performing an operation where
the cutting accessory may contact hidden
wiring. Cutting accessory contacting a "live"
wire may make exposed metal parts of the power
tool "live" and could give the operator an electric
shock.
5. Always be sure you have a rm footing.
Be sure no one is below when using the tool in
high locations.
6. Hold the tool rmly.
7. Keep hands away from rotating parts.
8. Do not leave the tool running. Operate the tool
only when hand-held.
9. Do not touch the bit or the workpiece immedi-
ately after operation; they may be extremely
hot and could burn your skin.
10. Some material contains chemicals which may
be toxic. Take caution to prevent dust inhala-
tion and skin contact. Follow material supplier
safety data.
SAVE THESE INSTRUCTIONS.
WARNING: DO NOT let comfort or famil-
iarity with product (gained from repeated
use) replace strict adherence to safety
rules for the subject product. MISUSE or
failure to follow the safety rules stated in
this instruction manual may cause serious
personal injury.
Symbols
The followings show the symbols used for tool.
volts
direct current
no load speed
revolutions or reciprocation per minute
number of blow
Important safety instructions for
battery cartridge
1. Before using battery cartridge, read all instruc-
tions and cautionary markings on (1) battery
charger, (2) battery, and (3) product using
battery.
2. Do not disassemble battery cartridge.
3. If operating time has become excessively
shorter, stop operating immediately. It may
result in a risk of overheating, possible burns
and even an explosion.
4. If electrolyte gets into your eyes, rinse them
out with clear water and seek medical atten-
tion right away. It may result in loss of your
eyesight.
5. Do not short the battery cartridge:
(1) Do not touch the terminals with any con-
ductive material.
(2) Avoid storing battery cartridge in a con-
tainer with other metal objects such as
nails, coins, etc.
(3) Do not expose battery cartridge to water
or rain.
A battery short can cause a large current
ow, overheating, possible burns and even a
breakdown.
6. Do not store the tool and battery cartridge in
locations where the temperature may reach or
exceed 50 °C (122 °F).
7. Do not incinerate the battery cartridge even if
it is severely damaged or is completely worn
out. The battery cartridge can explode in a re.
8. Be careful not to drop or strike battery.
9. Do not use a damaged battery.
10. The contained lithium-ion batteries are subject
to the Dangerous Goods Legislation require-
ments.
For commercial transports e.g. by third parties,
forwarding agents, special requirement on pack-
aging and labeling must be observed.
For preparation of the item being shipped, consult-
ing an expert for hazardous material is required.
Please also observe possibly more detailed
national regulations.
Tape or mask off open contacts and pack up the
battery in such a manner that it cannot move
around in the packaging.
11. Follow your local regulations relating to dis-
posal of battery.
SAVE THESE INSTRUCTIONS.
CAUTION: Only use genuine Makita batteries.
Use of non-genuine Makita batteries, or batteries that
have been altered, may result in the battery bursting
causing res, personal injury and damage. It will
also void the Makita warranty for the Makita tool and
charger.
Tips for maintaining maximum
battery life
1. Charge the battery cartridge before completely
discharged. Always stop tool operation and
charge the battery cartridge when you notice
less tool power.
2. Never recharge a fully charged battery car-
tridge. Overcharging shortens the battery
service life.
3. Charge the battery cartridge with room tem-
perature at 10 °C - 40 °C (50 °F - 104 °F). Let
a hot battery cartridge cool down before
charging it.
4. Charge the battery cartridge if you do not use
it for a long period (more than six months).

5ENGLISH
FUNCTIONAL
DESCRIPTION
CAUTION:
• Always be sure that the tool is switched off and
the battery cartridge is removed before adjust-
ing or checking function on the tool.
Installing or removing battery
cartridge
1
2
3
► 1. Red indicator 2. Button 3. Battery cartridge
CAUTION:
• Always switch off the tool before installing or
removing of the battery cartridge.
• Hold the tool and the battery cartridge rmly
when installing or removing battery car-
tridge. Failure to hold the tool and the battery
cartridge rmly may cause them to slip off your
hands and result in damage to the tool and
battery cartridge and a personal injury.
To remove the battery cartridge, slide it from the tool
while sliding the button on the front of the cartridge.
To install the battery cartridge, align the tongue on the
battery cartridge with the groove in the housing and slip
it into place. Insert it all the way until it locks in place
with a little click. If you can see the red indicator on the
upper side of the button, it is not locked completely.
CAUTION:
• Always install the battery cartridge fully until the
red indicator cannot be seen. If not, it may acci-
dentally fall out of the tool, causing injury to you
or someone around you.
• Do not install the battery cartridge forcibly. If the
cartridge does not slide in easily, it is not being
inserted correctly.
Tool / battery protection system
The tool is equipped with a tool/battery protection sys-
tem. This system automatically cuts off power to the
motor to extend tool and battery life. The tool will auto-
matically stop during operation if the tool or battery is
placed under one of the following conditions:
Overload protection
When the battery is operated in a manner that causes
it to draw an abnormally high current, the tool automat-
ically stops without any indication. In this situation, turn
the tool off and stop the application that caused the tool
to become overloaded. Then turn the tool on to restart.
Overheat protection
When the tool/battery is overheated, the tool stops
automatically. In this situation, let the battery cool
before turning the tool on again.
Overdischarge protection
When the battery capacity is not enough, the tool stops
automatically. In this case, remove the battery from the
tool and charge the battery.
NOTE: Overload protection will work only with batter-
ies with star marking.
1
► 1. Star marking
Indicating the remaining battery
capacity
(Only for battery cartridges with "B" at the end of the
model number.)
1
2
► 1. Indicator lamps 2. Check button
Press the check button on the battery cartridge to indi-
cate the remaining battery capacity. The indicator lamps
light up for few seconds.

6ENGLISH
Off BlinkingLighted
Indicator lamps
Charge the
battery.
0% to 25%
25% to 50%
50% to 75%
75% to 100%
Remaining
capacity
The battery
may have
malfunctioned.
NOTE:
• Depending on the conditions of use and the
ambient temperature, the indication may differ
slightly from the actual capacity.
Switch action
1
► 1. Switch trigger
CAUTION:
• Before installing the battery cartridge into the
tool, always check to see that the switch trigger
actuates properly and returns to the "OFF"
position when released.
To start the tool, simply pull the switch trigger. The tool
speed is increased by increasing pressure on the switch
trigger. Release the switch trigger to stop.
NOTE:
• The tool will stop three minutes after pulling the
switch trigger.
Electric brake
This tool is equipped with an electric brake. If the tool
consistently fails to quickly stop after switch trigger
release, have tool serviced at a Makita service center.
Lighting up the front lamp
CAUTION:
• Do not look in the lamp or see the source of
lamp directly.
1
► 1. Lamp
1
2
► 1. LED display 2. Lamp button
Every time the lamp button on the LED display is
pressed, the lamp status is alternatively changed from
the ON to the OFF and from the OFF to the ON.
With the lamp button in the ON status, pull the switch
trigger to turn on the lamp. To turn off, release it and
the lamp goes out approximately 10 seconds after
releasing.
With the lamp button in the OFF status, even if the
trigger is pulled, the lamp will not light on.
NOTE:
• To make sure the status of lamp, pull the trigger.
When the lamp lights up by pulling the switch
trigger, the lamp switch is in the ON status.
When the lamp does not come on, the lamp
switch is in the OFF status.
• During the operation of switch trigger, the lamp
status cannot be changed.
• For approximately 10 seconds after releas-
ing the switch trigger, the lamp status can be
switched.

7ENGLISH
Reversing switch action
1
AB
► 1. Reversing switch lever
This tool has a reversing switch to change the direction
of rotation. Depress the reversing switch lever from the
A side for clockwise rotation or from the B side for coun-
terclockwise rotation.
When the reversing switch lever is in the neutral posi-
tion, the switch trigger cannot be pulled.
CAUTION:
• Always check the direction of rotation before
operation.
• Use the reversing switch only after the tool
comes to a complete stop. Changing the direc-
tion of rotation before the tool stops may dam-
age the tool.
• When not operating the tool, always set the
reversing switch lever to the neutral position.
Speed change
1
► 1. Speed change lever
NOTICE:
• Always set the speed change lever fully to the cor-
rect position. If you operate the tool with the speed
change lever positioned halfway between the "1"
side and "2" side, the tool may be damaged.
• Do not use the speed change lever while the tool
is running. The tool may be damaged.
• Do not force the lever to "1" side with impact driver
mode. The tool may be damaged.
To change the speed, rst switch off the tool and then
slide the speed change lever to the "2" side for high
speed or "1" side for low speed. Be sure that the speed
change lever is set to the correct position before opera-
tion. Use the right speed for your job.
When turning the action mode changing ring to impact
driver mode, set the speed change lever to the "2" side.
Selecting the action mode
12
3
► 1. Mode mark 2. Action mode changing ring
3. Arrow
This tool employs an action mode changing ring. Select
one of the 4 modes suitable for your work need by
turning this ring.
When driving wood screws or bolts, point the arrow at
the mark for impact driver mode. The impact force
can be adjusted on the LED display.
When drilling into concrete or tiles, point the arrow at
the mark for hammer drill mode.
When drilling into wood or metal, point the arrow at
the mark for drill mode.
When driving small wood screws or machine screws,
point the arrow at the mark for screwdriver mode.
The fastening torque can be adjusted on the LED
display.
CAUTION:
• Always set the arrow correctly to either mode
mark. If you operate the tool with the action
mode changing ring positioned halfway between
the mode marks, the tool may be damaged.
• When turning the action mode changing ring,
make sure that the tool stops. If the ring does
not easily move, pull the switch trigger slightly to
rotate the spindle and then move the ring.
• In the hammer drill mode or drill mode, the blow-
ing force or torque is not adjustable. In those
modes, the number on the LED display will be
off.

8ENGLISH
Changing the impact force (impact
driver mode)
1
2
3
4
5
► 1. Changed in three steps 2. Hard 3. Medium 4. Soft
5. Control button
Impact force grade
displayed on panel Maximum blows Application Work
Hard
Medium
Soft
Tightening when force
and speed are desired.
Tightening when a good
finishing is needed.
Tightening when excessive
tightening need to be avoided
because of potentially clogged
female screw and broken or
damaged screw head.
Tightening in underwork
material/ Tightening long
screws/ Tightening bolts.
Tightening in the finishing
board, plaster board.
Tightening sash screw/
Tightening small screws
such as M6.
3,200
(/min)
2,400
(/min)
1,200
(/min)
The impact force can be changed in three steps: hard,
medium and soft.
This allows a tightening suitable to the work.
Every time the button is pressed, the impact force
grade changes in three steps.
For approximately one minute after releasing the switch
trigger, the impact force can be changed.
NOTE: During the operation of switch trigger, the
impact force grade cannot be changed.
Changing the torque setting
(screwdriver mode)
The fastening torque can be adjusted by pressing the
button in screwdriver mode.
The numbers on the LED display shows torque setting.
The fastening torque is minimum at the number 1 and
maximum at the number 9. The indication "P" is a spe-
cial mode for fastening self drilling screws.
Every time the button is pressed, the torque setting
changes from 1 to 9 and P, and then returns to 1.
The torque setting changes fast by keeping pressing
the button.
P mode is suitable for fastening self drilling screws into
steel plates in the following conditions.

9ENGLISH
• With speed change lever at "2" side, fastening
max. 4 mm screw into total max. 3.2 mm steel
plates.
• With speed change lever at "1" side, fastening
max. 5 mm screw.
Before an actual operation, drive a trial screw into
your material or a piece of duplicate material to deter-
mine which torque level is required for a particular
application.
First, try to fasten the screw at "1". Then increase the
number to continue fastening. Hold the tool rmly during
operation.
CAUTION: Don't fasten the machine screw on P
mode. It may twist your wrist suddenly and result in
personal injury.
NOTE:
• Make sure to check the number on LED display
before operation. If the number is not indicated,
contact your nearest Makita service center.
• When the remaining battery capacity gets low
in the screwdriver mode, the light ashes a few
times when fastening the screw completely. In
this case, recharge the battery. If you keep oper-
ating, you may not obtain the desired torque.
• During pulling the switch trigger, the torque
setting cannot be changed.
• For approximately one minute after releasing
the switch trigger, the torque setting can be
changed. if you want to change the torque set-
ting after that, pull the switch trigger again.
• The number of torque setting does not mean
specic torque rate.
Empty signal for remaining battery
capacity
(Country specic)
1
► 1. Battery capacity
The remaining battery capacity will be signaled on the
LED display when pulling the switch trigger.
The remaining battery capacity is shown as the follow-
ing table.
LED indicator status Remaining battery capacity
About 50% or more
About 20% - 50%
About less than 20%
NOTE:
• When the LED display goes off, the tool is
turned off to save the battery power. To check
the remaining battery capacity, slightly pull the
switch trigger.
• The LED display goes off approximately one
minute after releasing the switch trigger.
• When the temperature of the tool gets high, the
light ashes once per second for one minute,
and then the LED display goes off. In this case,
cool down the tool before operation.
ASSEMBLY
CAUTION:
• Always be sure that the tool is switched off and
the battery cartridge is removed before carrying
out any work on the tool.
Installing or removing driver/drill/
socket bit
Use only the driver/drill/socket bit shown in the gure.
Do not use any other driver/drill/socket bit.

10 ENGLISH
For tool with shallow bit hole
A=12mm
B=9mm
Use only these type of bit. Follow the
procedure (1).
(Note) Bit-piece is not necessary.
For tool with deep bit hole
To install these types of bits, follow
the procedure (1).
To install these types of bits, follow
the procedure (2).
(Note) Bit-piece is necessary for
installing the bit.
A=17mm
B=14mm
A=12mm
B=9mm
1. To install the bit, pull the sleeve and insert the bit
into the sleeve as far as it will go. Then release the
sleeve to secure the bit.
1
2
► 1. Bit 2. Sleeve
2. To install the bit, insert the bit-piece and bit into the
sleeve as far as it will go. The bit-piece should be
inserted into the sleeve with its pointed end facing
in. Then release the sleeve to secure the bit.
1
2
3
► 1. Bit 2. Bit-piece 3. Sleeve
To remove the bit, pull the sleeve in the direction of the
arrow and pull the bit out rmly.
CAUTION:
• Do not touch the drill bit shortly after operating
as it gets hot. Replace the drill bit after cooling it
down.
NOTE:
• If the bit is not inserted deep enough into the
sleeve, the sleeve will not return to its original
position and the bit will not be secured. In this
case, try re-inserting the bit according to the
instructions above.
• After inserting the bit, make sure that it is rmly
secured. If it comes out, do not use it.
Hook (Optional accessory)
1
2
3
► 1. Groove 2. Hook 3. Screw
CAUTION:
• When installing the hook, tighten the screw
rmly. Failure to do so may cause the breakage
of the tool or personal injury.
The hook is convenient for temporarily hanging the tool.
This can be installed on either side of the tool.
To install the hook, insert it into a groove in the tool
housing on either side and then secure it with a screw.
To remove, loosen the screw and then take it out.
OPERATION

11 ENGLISH
CAUTION:
• Always insert the battery cartridge all the way
until it locks in place with a little click. If you can
see the red indicator on the upper side of the
button, it is not locked completely. Install it fully
until the red indicator cannot be seen. If not,
it may accidentally fall out of the tool, causing
injury to you or someone around you.
• If the tool is operated continuously until the
battery cartridge has discharged, allow the tool
to rest for 15 minutes before proceeding with a
fresh battery.
Impact driver mode
CAUTION:
• When changing the action mode to the
impact driver mode, always check that the
tool impacts by tightening wood screws. If
the action mode is not changed completely, the
tool twists the operator's hand resulting injury.
Screwdriving
Hold the tool rmly and place the point of the driver bit
in the screw head. Apply forward pressure to the tool to
the extent that the bit will not slip off the screw and turn
the tool on to start operation.
Tightening bolts
The proper fastening torque may differ depending upon
the kind or size of the screw/bolt, the material of the
workpiece to be fastened, etc. The relation between fas-
tening torque and fastening time is shown in the gures.
120
100
80
60
40
20
Standard bolt
N m
Fastening torque
Fastening time
Proper fastening torque
(ft lbs)
(87)
(72)
(58)
(43)
(29)
(14)
(S)
0 1.0 2.0 3.0
(M14)
(M12)
(M10)
(M8)
0
M14 (9/16”)
M12 (15/32”)
M10 (3/8”)
M8 (5/16”)
(9/16”)
(5/16”)
(3/8”)
(15/32”)
High tensile bolt
N m
Fastening torque
Fastening time
Proper fastening torque
(S)
0 1.0 2.0 3.0
(M12)
(M10)
(M8)
0
120
100
80
60
40
20
(87)
(72)
(58)
(43)
(29)
(14)
M12
M10 (3/8”)
M8 (5/16”)
(ft lbs)
(15/32”)
(5/16”)
(3/8”)
(15/32”)
NOTE:
• When the action mode is set to impact driver
mode, make sure that the tool impacts properly
by fastening a wood screw before operation.
If the tool does not work properly, contact your
nearest Makita service center.
• Hold the tool pointed straight at the screw.
• Use the proper bit for the head of the screw/bolt
that you wish to use.
• When fastening screw M8 or smaller, carefully
adjust pressure on the switch trigger so that the
screw is not damaged.
• If you tighten the screw for a time longer than
shown in the gures, the screw or the point of
the driver bit may be overstressed, stripped,
damaged, etc. Before starting your job, always
perform a test operation to determine the proper
fastening time for your screw.
The fastening torque is affected by a wide variety of
factors including the following. After fastening, always
check the torque with a torque wrench.
1. When the battery cartridge is discharged almost
completely, voltage will drop and the fastening
torque will be reduced.
2. Driver bit or socket bit
Failure to use the correct size driver bit or socket
bit will cause a reduction in the fastening torque.
3. Bolt
• Even though the torque coefcient and the
class of bolt are the same, the proper fasten-
ing torque will differ according to the diame-
ter of bolt.
• Even though the diameters of bolts are the
same, the proper fastening torque will differ
according to the torque coefcient, the class
of bolt and the bolt length.

12 ENGLISH
4. The manner of holding the tool or the material
of driving position to be fastened will affect the
torque.
5. Operating the tool at low speed will cause a reduc-
tion in the fastening torque.
Hammer drill mode
CAUTION:
• Always hold the tool rmly during operation.
There is a tremendous and sudden twisting
force exerted on the tool/bit at the time of hole
break-through, when the hole becomes clogged
with chips and particles, or when striking rein-
forcing rods embedded in the concrete.
Be sure to use a tungsten-carbide tipped bit.
Position the bit at the desired location for the hole, then
pull the switch trigger. Do not force the tool. Light pres-
sure gives best results. Keep the tool in position and
prevent it from slipping away from the hole.
Do not apply more pressure when the hole becomes
clogged with chips or particles. Instead, run the tool at
an idle, then remove the bit partially from the hole. By
repeating this several times, the hole will be cleaned out
and normal drilling may be resumed.
Drilling mode
CAUTION:
• Pressing excessively on the tool will not speed
up the drilling. In fact, this excessive pressure
will only serve to damage the tip of your bit,
decrease the tool performance and shorten the
service life of the tool.
• There is a tremendous force exerted on the tool/
bit at the time of hole break through. Hold the
tool rmly and exert care when the bit begins to
break through the workpiece.
• A stuck bit can be removed simply by setting
the reversing switch to reverse rotation in order
to back out. However, the tool may back out
abruptly if you do not hold it rmly.
• Always secure small workpieces in a vise or
similar hold-down device.
• Do not pull the switch trigger repeatedly when
the motor is locked. It may damage the tool.
For drilling in wood, the best results are obtained with
wood drills equipped with a guide screw. The guide
screw makes drilling easier by pulling the bit into the
workpiece.
For drilling in metal, to prevent the bit from slipping
when starting a hole, make an indentation with a cen-
ter-punch and hammer at the point to be drilled. Place
the point of the bit in the indentation and start drilling.
Use a cutting lubricant when drilling metals. The excep-
tions are iron and brass which should be drilled dry.
NOTE:
• Choose suitable speed for the work load. Drilling
over the following capacity may damage the
tool.
–Drilling capacity
High speed Steel 6.5 mm (1/4")
Wood 12 mm (15/32")
Low speed Steel 10 mm (3/8")
Wood 21 mm (13/16")
Screwdriver mode
CAUTION:
• Adjust the number on the LED display to the
proper torque level for your work.
• Make sure that the driver bit is inserted straight
in the screw head, or the screw and/or bit may
be damaged.
• Hold the tool rmly. When the clutch cuts in or
refastening, a sudden twisting force may occur
and it can twist your wrist.
Place the point of the driver bit in the screw head and
apply pressure to the tool. Start the tool slowly and then
increase the speed gradually.
NOTE:
• This tool employs an electronic clutch. The tool
stops automatically when the clutch cuts in. To
keep operating, release the switch trigger once.
• When driving wood screw, pre-drill a pilot hole
2/3 the diameter of the screw. It makes driving
easier and prevents splitting of the workpiece.
• See the following chart for the relation between
the number of torque setting and fastening
torque rate.
The fastening torque rate will be different
depends on materials. Make a test fastening to
get the desired torque before operation.
Number on LED
Display
Fastening torque rate
Low (1) High (2)
1Approx. 2.5 N•m
(Approx. 1.8 ft•lbs)
Approx. 1.1 N•m
(Approx. 0.8 ft•lbs)
3Approx. 4.6 N•m
(Approx. 3.3 ft•lbs)
Approx. 2.0 N•m
(Approx. 1.4 ft•lbs)
5Approx. 8.1 N•m
(Approx. 5.9 ft•lbs)
Approx. 3.0 N•m
(Approx. 2.2 ft•lbs)
7Approx. 10.0 N•m
(Approx. 7.3 ft•lbs)
Approx. 4.0 N•m
(Approx. 2.9 ft•lbs)
9Approx. 11.5 N•m
(Approx. 8.4 ft•lbs)
Approx. 5.8 N•m
(Approx. 4.2 ft•lbs)

13 ENGLISH
MAINTENANCE
CAUTION:
• Always be sure that the tool is switched off and
the battery cartridge is removed before attempt-
ing to perform inspection or maintenance except
for the following troubleshooting related to the
light.
• Never use gasoline, benzine, thinner, alcohol
or the like. Discoloration, deformation or cracks
may result.
To maintain product SAFETY and RELIABILITY,
repairs, any other maintenance or adjustment should
be performed by Makita Authorized or Factory Service
Centers, always using Makita replacement parts.
OPTIONAL
ACCESSORIES
CAUTION:
• These accessories or attachments are recom-
mended for use with your Makita tool specied
in this manual. The use of any other accessories
or attachments might present a risk of injury to
persons. Only use accessory or attachment for
its stated purpose.
If you need any assistance for more details regard-
ing these accessories, ask your local Makita Service
Center.
• Screw bits
• Hook
• Plastic carrying case
• Makita genuine battery and charger
NOTE:
• Some items in the list may be included in the
tool package as standard accessories. They
may differ from country to country.
MAKITA LIMITED ONE
YEAR WARRANTY
Warranty Policy
Every Makita tool is thoroughly inspected and tested
before leaving the factory. It is warranted to be free of
defects from workmanship and materials for the period
of ONE YEAR from the date of original purchase.
Should any trouble develop during this one year period,
return the COMPLETE tool, freight prepaid, to one
of Makita’s Factory or Authorized Service Centers. If
inspection shows the trouble is caused by defective
workmanship or material, Makita will repair (or at our
option, replace) without charge.
This Warranty does not apply where:
• repairs have been made or attempted by others:
• repairs are required because of normal wear and
tear:
• the tool has been abused, misused or improperly
maintained:
• alterations have been made to the tool.
IN NO EVENT SHALL MAKITA BE LIABLE FOR ANY
INDIRECT, INCIDENTAL OR CONSEQUENTIAL
DAMAGES FROM THE SALE OR USE OF THE
PRODUCT. THIS DISCLAIMER APPLIES BOTH
DURING AND AFTER THE TERM OF THIS
WARRANTY.
MAKITA DISCLAIMS LIABILITY FOR ANY IMPLIED
WARRANTIES, INCLUDING IMPLIED WARRANTIES
OF "MERCHANTABILITY" AND "FITNESS FOR A
SPECIFIC PURPOSE," AFTER THE ONE YEAR TERM
OF THIS WARRANTY.
This Warranty gives you specic legal rights, and you
may also have other rights which vary from state to
state. Some states do not allow the exclusion or lim-
itation of incidental or consequential damages, so the
above limitation or exclusion may not apply to you.
Some states do not allow limitation on how long an
implied warranty lasts, so the above limitation may not
apply to you.

14 FRANÇAIS
FRANÇAIS (Mode d’emploi original)
SPÉCIFICATIONS
Modèle DTP141
Mode visseuse à
chocs
Capacités de
serrage
Vis de mécanique 4 mm - 8 mm (5/32″ - 5/16″)
Boulon standard 5 mm - 14 mm (3/16″ - 9/16″)
Boulon à haute
résistance
5 mm - 12 mm (3/16″ - 15/32″)
Vitesse à vide (/min) (Mou / Moyen / Dur) 0 - 1 300 / 0 - 2 200 / 0 - 2 700
Chocs par minute (Mou / Moyen / Dur) 0 - 1 200 / 0 - 2 400 / 0 - 3 200
Mode perceuse à
percussion
Vitesse à vide (/min) (Bas (1) / Élevé (2)) 0 - 700 / 0 - 2 700
Frappes par minute (Bas (1) / Élevé (2)) 0 - 8 400 / 0 - 32 400
Capacités de perçage / Béton 8 mm (5/16″)
Mode perceuse
Capacités de perçage
(Bas (1) / Élevé (2))
Acier 10 mm / 6,5 mm (3/8″ / 1/4″)
Bois 21 mm / 12 mm (13/16″ / 15/32″)
Vitesse à vide (/min) (Bas (1) / Élevé (2)) 0 - 700 / 0 - 2 700
Mode visseuse
Capacités de serrage
(Bas (1) / Élevé (2))
Vis de mécanique 3,5 mm - 6 mm / 4 mm - 6 mm (1/8″ - 1/4″ / 5/32″ - 1/4″)
Vis auto-perceuse
4 mm (5/32″), 5 mm (3/16″) / 4 mm (5/32″) (épaisseur 3,2 mm (1/8″) max.)
Vitesse à vide (/min)
(Bas (1) / Élevé (2))
Varie suivant le
réglage du couple
0 - 300 / 0 - 1 100
Mode P 0 - 600 / 0 - 2 300
Batterie standard BL1815N/ BL1820B BL1830/ BL1830B/ BL1840B/
BL1850B/ BL1860B
Poids net 1,5 kg (3,3 lbs) 1,8 kg (3,9 lbs)
Tension nominale C.C. 18 V
• Étant donné l’évolution constante de notre programme de recherche et de développement, les présentes caracté-
ristiques techniques sont sujettes à modication sans préavis.
• Les caractéristiques techniques et la batterie peuvent varier suivant les pays.
• Poids, batterie comprise, conforme à la procédure EPTA de 01/2003
Consignes de sécurité générales
pour outils électriques
MISE EN GARDE :
Lisez toutes les consignes
de sécurité et toutes les instructions. L’ignorance des
mises en garde et des instructions comporte un risque
de choc électrique, d’incendie et/ou de blessure grave.
Conservez toutes les mises en
garde et instructions pour réfé-
rence future.
Le terme « outil électrique » qui gure dans les avertissements fait
référence à un outil électrique branché sur une prise de courant
(par un cordon d’alimentation) ou alimenté par batterie (sans l).
Sécurité de la zone de travail
1. Maintenez la zone de travail propre et bien
éclairée. Les zones de travail encombrées ou
sombres ouvrent grande la porte aux accidents.
2. N’utilisez pas les outils électriques dans les
atmosphères explosives, par exemple en pré-
sence de liquides, gaz ou poussières inam-
mables. Les outils électriques produisent des
étincelles au contact desquelles la poussière ou
les vapeurs peuvent s’enammer.
3. Assurez-vous qu’aucun enfant ou curieux ne
s’approche pendant que vous utilisez un outil
électrique. Vous risquez de perdre la maîtrise de
l’outil si votre attention est détournée.
Sécurité en matière d’électricité
1.
Les ches d’outil électrique sont conçues pour
s’adapter parfaitement aux prises de courant. Ne
modiez jamais la che de quelque façon que ce
soit. N’utilisez aucun adaptateur de che sur les
outils électriques avec mise à la terre. En ne modi-
ant pas les ches et en les insérant dans des prises
de courant pour lesquelles elles ont été conçues,
vous réduirez les risques de choc électrique.
2.
Évitez tout contact corporel avec les surfaces
mises à la terre, telles que tuyaux, radiateurs, cuisi-
nières et réfrigérateurs. Le risque de choc électrique
est plus élevé si votre corps se trouve mis à la terre.
3. N’exposez pas les outils électriques à la pluie
ou à l’eau. La présence d’eau dans un outil élec-
trique augmente le risque de choc électrique.
4. Ne maltraitez pas le cordon. N’utilisez jamais
le cordon pour transporter, tirer ou débrancher
l’outil électrique. Maintenez le cordon à l’écart
des sources de chaleur, de l’huile, des objets à
bords tranchants et des pièces en mouvement.
Le risque de choc électrique est plus élevé lorsque
les cordons sont endommagés ou enchevêtrés.

15 FRANÇAIS
5. Lorsque vous utilisez un outil électrique à l’ex-
térieur, utilisez un cordon prolongateur conçu
pour l’usage extérieur. Les risque de choc élec-
trique est moindre lorsqu’un cordon conçu pour
l’usage extérieur est utilisé.
6. Si vous devez utiliser un outil électrique dans
un endroit humide, utilisez une source d’ali-
mentation protégée par un disjoncteur de fuite
à la terre. L’utilisation d’un disjoncteur de fuite à la
terre réduit le risque de choc électrique.
Sécurité personnelle
1. Restez alerte, attentif à vos mouvements et
faites preuve de bon sens lorsque vous utili-
sez un outil électrique. N’utilisez pas les outils
électriques si vous êtes fatigué ou avez pris
une drogue, de l’alcool ou un médicament. Un
moment d’inattention pendant l’utilisation d’un
outil électrique peut entraîner une grave blessure.
2. Portez des dispositifs de protection person-
nelle. Portez toujours une protection oculaire.
Les risques de blessure seront moins élevés si
vous utilisez des dispositifs de protection tels
qu’un masque anti-poussière, des chaussures à
semelle antidérapante, une coiffure résistante ou
une protection d’oreilles.
3. Évitez les démarrages accidentels. Assurez-
vous que l’interrupteur est en position d’arrêt
avant de brancher l’outil à la prise de courant
et/ou au bloc-piles, et avant de prendre ou
de transporter l’outil. Vous ouvrez la porte aux
accidents si vous transportez les outils électriques
avec le doigt sur l’interrupteur ou si vous les bran-
chez alors que l’interrupteur est en position de
marche.
4. Retirez toute clé de réglage ou de serrage
avant de mettre l’outil électrique sous tension.
Toute clé laissée en place sur une pièce rotative
de l’outil électrique peut entraîner une blessure.
5. Ne vous étirez pas exagérément. Assurez-vous
d’une bonne prise au sol et d’un bon équilibre
en tout temps. Cela vous permettra d’avoir une
meilleure maîtrise de l’outil électrique dans les
situations imprévues.
6. Portez des vêtements adéquats. Ne portez ni
vêtements amples ni bijoux. Vous devez main-
tenir cheveux, vêtements et gants à l’écart des
pièces en mouvement. Les pièces en mouve-
ment peuvent happer les vêtements amples, les
bijoux et les cheveux longs.
7. Si des accessoires sont fournis pour raccorder
un appareil d’aspiration et de collecte de la
poussière, assurez-vous qu’ils sont correc-
tement raccordés et qu’ils sont utilisés de
manière adéquate. L’utilisation d’un appareil de
collecte permet de réduire les risques liés à la
présence de poussière dans l’air.
Utilisation et entretien des outils électriques
1. Ne forcez pas l’outil électrique. Utilisez l’outil
électrique adéquat suivant le type de travail à
effectuer. Si vous utilisez l’outil électrique adé-
quat et respectez le régime pour lequel il a été
conçu, il effectuera un travail de meilleure qualité
et plus sécuritaire.
2.
N’utilisez pas l’outil électrique s’il n’est pas pos-
sible de l’allumer et de l’éteindre avec son inter-
rupteur. Un outil électrique dont l’interrupteur est
défectueux représente un danger et doit être réparé.
3. Débranchez la che de la source d’alimen-
tation et/ou retirez le bloc-piles de l’outil
électrique avant d’effectuer tout réglage, de
remplacer un accessoire ou de ranger l’ou-
til électrique. De telles mesures préventives
réduisent les risques de démarrage accidentel de
l’outil électrique.
4. Après l’utilisation d’un outil électrique,
rangez-le hors de portée des enfants et ne
laissez aucune personne l’utiliser si elle n’est
pas familiarisée avec l’outil électrique ou les
présentes instructions d’utilisation. Les outils
électriques représentent un danger entre les
mains de personnes qui n’en connaissent pas le
mode d’utilisation.
5.
Veillez à l’entretien des outils électriques.
Assurez-vous que les pièces mobiles ne sont pas
désalignées ou coincées, qu’aucune pièce n’est
cassée et que l’outil électrique n’a subi aucun
dommage affectant son bon fonctionnement. Le
cas échéant, faites réparer l’outil électrique avant
de l’utiliser. De nombreux accidents sont causés
par des outils électriques mal entretenus.
6. Maintenez les outils tranchants bien aiguisés
et propres. Un outil tranchant dont l’entretien est
effectué correctement et dont les bords sont bien
aiguisés risquera moins de se coincer et sera plus
facile à maîtriser.
7. Utilisez l’outil électrique, ses accessoires, ses
embouts, etc., en respectant les présentes
instructions, en tenant compte des conditions
de travail et du type de travail à effectuer.
L’utilisation d’un outil électrique pour d’autres
usages que ceux prévus peut entraîner une situa-
tion dangereuse.
Utilisation et entretien des outils alimentés par
batterie
1. Pour recharger, utilisez uniquement le char-
geur spécié par le fabricant. L’utilisation d’un
chargeur conçu pour un type donné de bloc-piles
comporte un risque d’incendie lorsqu’il est utilisé
avec un autre type de bloc-piles.
2. N’utilisez un outil électrique qu’avec le bloc-
piles conçu spéciquement pour cet outil. Il y a
risque de blessure ou d’incendie si un autre bloc-
piles est utilisé.
3. Lorsque vous n’utilisez pas le bloc-piles, ran-
gez-le à l’écart des objets métalliques tels que
trombones, pièces de monnaie, clés, clous,
vis ou autres petits objets métalliques qui
risqueraient d’établir une connexion entre les
bornes. La mise en court-circuit des bornes de
batterie peut causer des brûlures ou un incendie.
4. Dans des conditions d’utilisation inadéquates
de la batterie, il peut y avoir fuite d’électrolyte;
évitez tout contact avec ce liquide. En cas
de contact accidentel, rincez avec beaucoup
d’eau. Si le liquide pénètre dans vos yeux, il
faut aussi consulter un médecin. L’électrolyte
qui s’échappe de la batterie peut causer des
irritations ou des brûlures.

16 FRANÇAIS
5. N’utilisez pas une batterie ou un outil s’il est
endommagé ou modié. Les batteries endom-
magées ou modiées peuvent avoir un comporte-
ment imprévisible dont peut résulter un incendie,
une explosion ou un risque de blessure.
6. N’exposez pas une batterie ou un outil au feu
ou à une température excessive. L’exposition
au feu ou à une température supérieure à 130 °C
peut entraîner une explosion.
7. Suivez toutes les instructions de charge et ne
chargez pas la batterie ou l’outil à l’extérieur
de la plage de température spéciée dans les
instructions. Charger de manière inadéquate
ou à des températures hors de la plage spéciée
peut endommager la batterie et augmenter le
risque d’incendie.
Réparation
1. Faites réparer votre outil électrique par un
réparateur qualié qui utilise des pièces de
rechange identiques aux pièces d’origine. Le
maintien de la sûreté de l’outil électrique sera ainsi
assuré.
2. Suivez les instructions de lubrication et de
remplacement des accessoires.
3. Maintenez les poignées de l’outil sèches,
propres et exemptes d’huile ou de graisse.
CONSIGNES DE SÉCURITÉ
POUR LA VISSEUSE À CHOC 4
FONCTIONS SANS FIL
1. Portez des protections d'oreilles lorsque vous
utilisez une perceuse à percussion. L'exposition
au bruit peut entraîner des lésions de l'ouïe.
2. Utilisez la ou les poignées auxiliaires si elles
sont fournies avec l'outil. Toute perte de maî-
trise comporte un risque de blessure.
3. Tenez l'outil par ses surfaces de prise isolées
pendant toute opération où l’accessoire de
xation pourrait venir en contact avec un
câblage dissimulé. En cas de contact avec un
conducteur sous tension, les pièces métalliques à
découvert de l'outil pourraient devenir sous ten-
sion et risqueraient de transmettre une décharge
électrique à l'utilisateur.
4. Tenez l'outil par ses surfaces de prise iso-
lées pendant toute opération où l’accessoire
de coupe pourrait venir en contact avec un
câblage dissimulé. En cas de contact avec un
conducteur sous tension, les pièces métalliques à
découvert de l'outil pourraient devenir sous ten-
sion et risqueraient de transmettre une décharge
électrique à l'utilisateur.
5. Adoptez toujours une position de travail vous
assurant d'un bon équilibre.
Assurez-vous qu'il n'y a personne plus bas
lorsque vous utilisez l'outil en position élevée.
6. Tenez l'outil fermement.
7. Gardez les mains éloignées des pièces en
rotation.
8. N'abandonnez pas l'outil alors qu'il tourne. Ne
faites fonctionner l'outil qu'une fois que vous
l'avez bien en main.
9. Ne touchez ni la fraise, ni la pièce à travail-
ler immédiatement après l'utilisation ; elles
peuvent être extrêmement chaudes et vous
pourriez vous brûler la peau.
10. Certains matériaux contiennent des produits
chimiques qui peuvent être toxiques. Prenez
les précautions nécessaires pour éviter l'inha-
lation de ces poussières ou leur contact avec
la peau. Conformez-vous aux consignes de
sécurité du fournisseur du matériau.
CONSERVEZ CE MODE
D'EMPLOI.
MISE EN GARDE : NE VOUS LAISSEZ
PAS tromper (au l d'une utilisation répé-
tée) par un sentiment d'aisance ou de
familiarité avec le produit en négligeant les
consignes de sécurité qui accompagnent
le produit. L'utilisation non sécuritaire ou
incorrecte de cet outil comporte un risque
de blessure grave.
Symboles
Les symboles utilisés pour l’outil sont indiqués
ci-dessous.
volts
courant continu
vitesse à vide
tours ou alternances par minute
nombre de frappes
Consignes de sécurité importantes
pour la batterie
1. Avant d’utiliser la batterie, lisez toutes les
instructions et les mises en garde apposées
sur (1) le chargeur de batterie, (2) la batterie et
(3) le produit utilisant la batterie.
2. Ne démontez pas la batterie.
3. Cessez immédiatement l’utilisation si le temps
de fonctionnement devient excessivement
court. Il y a risque de surchauffe, de brûlures,
voire d’explosion.
4.
Si l’électrolyte pénètre dans vos yeux, rincez-les
à l’eau claire et consultez immédiatement un
médecin. Il y a risque de perte de la vue.
5. Ne court-circuitez pas la batterie :
(1) Ne touchez les bornes avec aucun maté-
riau conducteur.
(2) Évitez de ranger la batterie dans un
conteneur avec d’autres objets métal-
liques tels que clous, pièces de monnaie,
etc.

17 FRANÇAIS
(3) Évitez d’exposer la batterie à l’eau ou à la
pluie.
Un court-circuit de la batterie pourrait provo-
quer un fort courant, une surchauffe, parfois
des brûlures et même une panne.
6. Ne rangez pas l’outil ou la batterie dans
des emplacements où la température peut
atteindre ou dépasser 50 °C (122 °F).
7. Ne jetez pas la batterie au feu même si elle est
sérieusement endommagée ou complètement
épuisée. La batterie peut exploser au contact
du feu.
8. Prenez garde d’échapper ou de heurter la
batterie.
9. N’utilisez pas une batterie si elle est
endommagée.
10. Les batteries lithium-ion fournies sont sou-
mises aux exigences de la législation sur les
marchandises dangereuses.
Des exigences particulières sur l’emballage et
l’étiquetage doivent être respectées lors du trans-
port commercial par des tiers, des transitaires, etc.
Pour préparer la marchandise à expédier, consul-
tez un expert en matériaux dangereux si néces-
saire. Respectez aussi les éventuelles réglemen-
tations nationales plus détaillées.
Recouvrez de ruban isolant les contacts exposés,
et emballez la batterie de sorte qu’elle ne puisse
pas se déplacer à l’intérieur de l’emballage.
11. Suivez la réglementation locale concernant
l’élimination de la batterie.
CONSERVEZ CES
INSTRUCTIONS.
ATTENTION : Utilisez exclusivement les bat-
teries fabriquées par Makita. Les batteries autres
que celles fabriquées par Makita ou les batteries
modiées peuvent exploser et causer un incendie,
une blessure ou des dommages. Cela annule aussi la
garantie Makita de l’outil et du chargeur Makita.
Conseils pour maintenir la
durée de service maximale de la
batterie
1. Rechargez la batterie avant qu’elle ne soit
complètement déchargée. Arrêtez toujours
l’outil et rechargez la batterie quand vous
remarquez que la puissance de l’outil diminue.
2. Ne rechargez jamais une batterie complète-
ment chargée. La surcharge réduit la durée de
service de la batterie.
3. Chargez la batterie à une température
ambiante comprise entre 10 °C et 40 °C (50 °F
et 104 °F). Si la batterie est chaude, laissez-la
refroidir avant de la charger.
4. Chargez la batterie si elle est restée inutilisée
pendant une période prolongée (plus de six
mois).
DESCRIPTION DU
FONCTIONNEMENT
ATTENTION :
• Assurez-vous toujours que l'outil est hors
tension et que sa batterie est retirée avant de
l'ajuster ou de vérier son fonctionnement.
Installation ou retrait de la batterie
1
2
3
► 1. Indicateur rouge 2. Bouton 3. Batterie
ATTENTION :
• Mettez toujours l'appareil hors tension avant
d'installer ou de retirer la batterie.
• Tenez fermement l'outil et la batterie lors de
l'installation ou du retrait de cette dernière.
Sinon, l'outil et la batterie pourraient vous glis-
ser des mains, ce qui risque d'endommager
l'outil et la batterie, ou encore de provoquer des
blessures.
Pour retirer la batterie, faites-la glisser de l'outil tout en
faisant glisser le bouton se trouvant à l'avant.
Pour installer la batterie, alignez sa languette sur la rainure
pratiquée dans le boîtier, et glissez la batterie en place.
Insérez-la à fond jusqu'à ce que vous entendiez un clic. Si
vous pouvez voir l'indicateur rouge situé sur le dessus du
bouton, la batterie n'est pas complètement verrouillée.
ATTENTION :
• Installez toujours la batterie à fond jusqu’à
ce que vous ne puissiez plus voir l’indicateur
rouge. Dans le cas contraire, elle pourrait tom-
ber de l'outil et entraîner des blessures.
• Ne forcez pas sur la batterie pour l'installer. Si
la batterie ne glisse pas facilement, c'est qu'elle
n'est pas insérée correctement.
Dispositif de protection de l’outil et
de la batterie
L’outil est équipé d’un système de protection d’outil/
batterie. Ce système coupe automatiquement l’alimen-
tation du moteur pour augmenter la durée de vie de
l’outil et de la batterie. L’outil s’arrête automatiquement
pendant l’utilisation lorsque l’outil ou la batterie est dans
l’une des situations suivantes :

18 FRANÇAIS
Protection contre la surcharge
Lorsque la batterie est utilisée d’une façon qui lui fait
consommer un courant anormalement élevé, l’outil
s’arrête automatiquement, sans aucune indication.
Dans ce cas, éteignez l’outil et arrêtez l’application qui
a causé la surcharge de l’outil. Rallumez ensuite l’outil
pour redémarrer.
Protection contre la surchauffe
Lorsque l’outil ou la batterie surchauffe, l’outil s’arrête
automatiquement. Dans ce cas, laissez refroidir la
batterie avant de rallumer l’outil.
Protection contre la décharge
excessive
Lorsque la charge de la batterie est insufsante, l’outil
s’arrête automatiquement. Dans ce cas, retirez la batte-
rie de l’outil et chargez la batterie.
NOTE : La protection contre la surcharge ne fonc-
tionne qu’avec les batteries qui portent la marque
d’étoile.
1
► 1. Marque d’étoile
Afche la capacité restante de la
batterie
(Uniquement pour les batteries dont le numéro de
modèle se termine par « B ».)
1
2
► 1. Témoins 2. Bouton de vérication
Appuyez sur le bouton de vérication sur la batterie
pour afcher la capacité résiduelle de la batterie. Les
témoins s'allument pendant quelques secondes.
ARRÊT ClignotementAllumé
Témoins
Chargez la
batterie.
0 % à 25 %
25 % à 50 %
50 % à 75 %
75 % à 100 %
Capacité
résiduelle
La batterie peut
avoir présenté
un défaut de
fonctionnement.
NOTE :
• Selon les conditions d'utilisation et la tempé-
rature ambiante, il est possible que la capacité
relevée soit légèrement différente par rapport à
la capacité réelle.
Interrupteur
1
► 1. Gâchette
ATTENTION :
• Avant d’installer la batterie dans l’outil, vériez
toujours si la gâchette fonctionne correctement
et revient en position « OFF » lorsque libérée.
Pour démarrer l’outil, appuyez simplement sur la
gâchette. La vitesse de l’outil augmente à mesure que
vous augmentez la pression sur la gâchette. Pour l’arrê-
ter, libérez la gâchette.
NOTE :
• L’outil s’arrêtera trois minutes après la pression
sur la gâchette.
Frein électrique
Cet outil est équipé d'un frein électrique. Si à plusieurs
reprises l'outil ne s'arrête pas rapidement après le
relâchement de la gâchette, faites-le réparer dans un
centre de service après-vente Makita.

19 FRANÇAIS
Allumage de la lampe avant
ATTENTION :
• Évitez de regarder dans la lampe ou de regarder
directement la source lumineuse de la lampe.
1
► 1. Lampe
1
2
► 1. Afchage DEL 2. Bouton de la lampe
Chaque pression du bouton de lampe sur l’af-
cheur à DEL fait alterner la lampe d’activée à désacti-
vée ou de désactivée à activée.
Lorsque le bouton de lampe est à l’état activé, appuyez
sur la gâchette pour allumer la lampe. Pour éteindre la
lampe, libérez la gâchette; la lampe s’éteindra environ
10 secondes après la libération.
Lorsque le bouton de lampe est à l’état désactivé, la
lampe ne s’allume pas même si vous appuyez sur la
gâchette.
NOTE :
• Pour vérier l’état de la lampe, appuyez sur la
gâchette. Si la lampe s’allume lorsque vous
appuyez sur la gâchette, cela signie que l’inter-
rupteur de lampe est à l’état activé. Si la lampe
ne s’allume pas, cela signie que l’interrupteur
de lampe est à l’état désactivé.
• Il n’est pas possible de changer l’état de la
lampe pendant l’utilisation de la gâchette.
• Pendant environ 10 secondes après la libéra-
tion de la gâchette, l’état de la lampe peut être
permuté.
Inverseur
1
AB
► 1. Levier inverseur
L'outil possède un inverseur qui permet de changer le
sens de rotation. Enfoncez le levier inverseur du côté
A pour une rotation dans le sens des aiguilles d'une
montre, ou du côté B pour une rotation dans le sens
inverse des aiguilles d'une montre.
La pression sur la gâchette n'est pas possible lorsque le
levier inverseur se trouve en position neutre.
ATTENTION :
• Vériez toujours le sens de rotation avant de
mettre l'outil en marche.
•
N'actionnez l'inverseur qu'une fois que l'outil est com-
plètement arrêté. Si vous changez le sens de rotation
avant l'arrêt de l'outil, vous risquez de l'endommager.
• Lorsque vous n'utilisez pas l'outil, placez tou-
jours le levier inverseur en position neutre.
Changement de vitesse
1
► 1. Levier de changement de vitesse
AVIS :
• Mettez toujours le levier de changement de
vitesse complètement sur la bonne position. Si
vous utilisez l’outil avec le levier de changement
de vitesse placé à mi-course entre les côtés « 1 »
et « 2 », vous risquez d’endommager l’outil.
•
N’utilisez pas le levier de changement de vitesse pendant
que l’outil tourne. Vous pourriez endommager l’outil.
• En mode visseuse à chocs, ne forcez pas le levier
du côté « 1 ». Vous pourriez endommager l’outil.

20 FRANÇAIS
Pour changer de vitesse, éteignez d’abord l’outil, puis
glissez le levier de changement de vitesse du côté « 2
» pour la vitesse élevée, ou du côté « 1 » pour la basse
vitesse. Avant l’utilisation, assurez-vous que le levier
de changement de vitesse est sur la bonne position.
Utilisez la vitesse qui convient au travail à effectuer.
Lorsque vous tournez la bague de changement de
mode sur le mode visseuse à chocs, mettez le levier de
changement de vitesse du côté « 2 ».
Sélection du mode de travail
12
3
► 1. Marque de mode 2. Bague de changement de
mode d'action 3. Flèche
Cet outil est doté d’une bague de changement de
mode. Tournez cette bague pour sélectionner, parmi
les 4 modes, celui qui répond aux exigences du travail
à effectuer.
Lorsque vous posez des vis à bois ou des boulons à
bois, faites pointer la èche vers la marque du
mode visseuse à chocs. La force d’impact peut être
ajustée sur l’afcheur à DEL.
Lorsque vous percez dans du béton ou du carrelage,
faites pointer la èche vers la marque du mode
perceuse à percussion.
Lorsque vous percez dans le bois ou le métal, faites
pointer la èche vers la marque du mode perceuse.
Lorsque vous posez des petites vis à bois ou
vis de mécanique, faites pointer la èche vers la
marque du mode visseuse. Le couple de serrage
peut être ajusté sur l’afcheur à DEL.
ATTENTION :
• Placez toujours la èche correctement sur
l’une ou l’autre des marques de mode. Si vous
utilisez l’outil avec la bague de changement de
mode placée à mi-course entre les marques de
mode, vous risquez d’endommager l’outil.
• Avant de tourner la bague de changement de
mode, assurez-vous que l’outil est arrêté. Si la
bague ne se déplace pas facilement, appuyez
légèrement sur la gâchette pour faire tourner
l’arbre, puis déplacez la bague.
• En mode perceuse à percussion ou en mode
perceuse, il n’est pas possible d’ajuster la force
de la frappe ou le couple. Dans ces modes, le
numéro sur l’afcheur à DEL sera éteint.
Modication de la force d’impact
(mode visseuse à chocs)
1
2
3
4
5
► 1. Changé vers trois niveaux 2. Rude 3. Moyenne
4. Doux 5. Bouton de commande
Table of contents
Languages:
Other Makita Impact Driver manuals

Makita
Makita DTD152 User manual

Makita
Makita DTD134 User manual

Makita
Makita 6918FDWDE User manual

Makita
Makita tw0250 Manual

Makita
Makita DTP131 User manual

Makita
Makita TD020D User manual

Makita
Makita DTD153 User manual

Makita
Makita 6918FD User manual

Makita
Makita TD001G User manual

Makita
Makita 6935FDWAE User manual