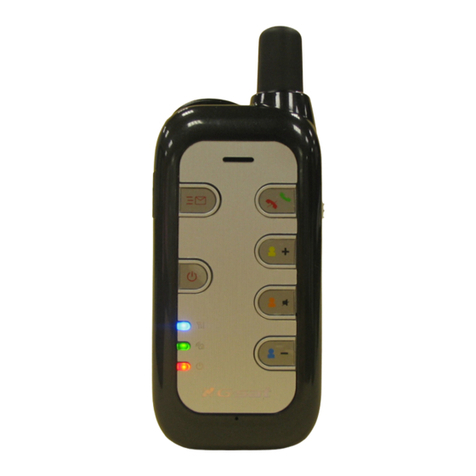
Mammut ELEMENT Barryvox User manual

The L M NT Barryvox®is designed for snow
and mountain sports outside of controlled,
groomed slopes within ski area boundaries as
well as controlled, mantained trails. All snow
and winter sport activities are inherently dan-
gerous.
Knowledge and experience are essential to
reduce the risk of injury or even death. Do not
enter avalanche terrain without an experienced
guide or equivalent training. Apply common
sense at all times. Never pursue these activi-
ties alone.
IMPORTANT:
Version 1.0 2013
Reference Manual
ELEMENT Barryvox®
ENGLISH

REGISTRATION AND SERVICE
Service Centers Information and prices for maintenance and repair are available at:
www.mammut.ch/barryvox (–>Service)
Switzerland Mammut Sports Group AG, Birren 5, CH-5703 Seon
Phone: +41 (0)62 769 83 88
email: [email protected]
Europe and Mammut Sports Group GmbH, Mammut-Basecamp 1, D -87787 Wolfertschwenden
countries not Phone: +49 (0) 8331 83 92 240
listed email: [email protected]
USA and Mammut Sports Group Inc., 458 Hurricane Lane, Suite 111, US-Williston, VT 05495
Canada Phone: +1 800 451 5127
-Mail: [email protected]
Register your ELEMENT Barryvox®today!
By registering your device, you will gain exclusive access to the Barryvox Community. We will remind you when
to have your device serviced and provide you with technical tips, the latest insights on avalanche theory, as well
as information about the availability of software updates. If you register now, several services will be free of
charge!
www.mammut.ch/barryvox
Register your L M NT Barryvox®at:
[ Photo: Patrice Schreyer ]
© Copyright by Mammut Sports Group AG
Illustrations and Avalanche Rescue Expertise copyright and provided by Genswein.
All rights reserved. Text, text excerpts, images and diagrams are all subject to copyright. No part may
be reproduced or copied without written permission from the publisher. For further use and publica-
tions for educational purposes, please contact Mammut Sports Group AG.
Mammut and Barryvox are registered trademarks of the Mammut Sports Group AG. All rights reserved.

AVALANCHE RIS MANAGEMENT
Avalanche Training Centers
Within the “Avalanche Training Centers”, provided
by Mammut in several regions, you have the
opportunity to practice realistic search and exca-
vation situations for free. In addition to compre-
hensive information on the assessment of ava-
lanche danger, permanently installed, snow-cov-
ered transmitters can be activated randomly and
searched for.
For years, Mammut has been heavily involved in
«Avalanche Risk Management» [a.r.m.] with the
objective to increase the safety of all winter sports
enthusiasts by providing better equipment, know-
how transfer, and focused training.
Rescue Equipment
With the L M NT Barryvox, probes, shovels and the
airbag systems, Mammut offers a comprehensive
choice of avalanche rescue and survival
devices.
Additional information on [a.r.m.] or Mammut
products can be found at: www.mammut.ch
Mammut and Snowpulse Airbag Systems:
The additional use of a Mammut or Snowpulse
Airbag increases the chance to stay on the sur-
face and therefore considerably reduces the risk
of a complete burial.
FRONT VIEW
Wrist loop
-Key
Display
SEND-Control LED Main switch
Speaker

WELCOME
7
Introduction
Digital 3-antenna device focusing on the essentials.
The Barryvox®L M NT stands out thanks to its
ease-of-use and clear instructions. Its one-button
operation and clearly laid out display make the device
very user friendly. Guaranteeing fast and precise
location. Signal analysis, listing of people and a mar-
king function are additional details to quickly and reli-
ably tackle even complex situations involving multiple
buried people. The extremely robust housing offers
good resistance to impact or breakage. For further
information concerning maintenance Mammut Barry-
vox ransceivers, please consult
www.mammut.ch/barryvox.
Congratulations on the purchase of your new
ELEMENT Barryvox®
This reference manual explains the functionality and
use of the L M NT Barryvox® .
A transceiver does not protect you against
avalanches!
As a winter outdoor enthusiast, you must consider
all possible avalanche prevention measures and
plan your trips carefully. Companion rescue – the
worst case – must be practiced frequently. Under
the stress of an accident, this is the only way you
will be able to locate and dig out a companion
quickly and efficiently. Despite practice and all the
technological advancements, by far not all of the
completely buried avalanche victims are rescued!
An avalanche burial is always life threatening.
Important information on these topics can be found
in the chapters on companion rescue and avalanche
theory.
L M NT Barryvox®– Made in Switzerland
Our heritage is compelling. Mammut and Barryvox
follow the time-honored tradition of world-class
precision products made in Switzerland. From its
design to its engineering and production, this
device is completely Swiss-made.
This device is compatible with all avalanche trans-
ceivers that comply with the N 300718 standard
and operate on a frequency of 457 kHz.
The following documents for the Barryvox transcei-
vers are available at
www.mammut.ch/BarryvoxManual:
Barryvox Legal and Regulatory Guide
Contains information concerning the normative and
legal use of the device, warranty and repair, as well
as the region and country specific differences in the
application of the W-Link data transmission.
Barryvox Emergency Plan
Stick the emergency plan on the back of the battery
compartment lid. It shows the elementary steps for
a successful companion rescue.
Barryvox User manual
The user manual is a practical companion in the
field.
Barryvox Reference Manual
The reference manual is a comprehensive resource
of information for your Barryvox. It includes the
complete system overview, information on mainte-
nance and troubleshooting, but as well on rescue
organization, excavation and avalanche prevention.
Barryvox Application Safety Guide
In addition to the reference handbook the Applica-
tion Safety Guide contains comprehensive instruc-
tions on the safe use and maintenance of your
transceiver as well as possible sources of interfer-
ence. Special considerations are included for effi-
cient fleet management.
(www.mammut.ch/BarryvoxManual)
[ Photo: Rainer Eder ]

8
TABLE OF CONTENTS
9
Front view
Welcome
1. Operation ................................................................................................................ 10
2. Setup...................................................................................................................... 14
3. Sen Mo e (S ND) .................................................................................................... 20
4. Search Mo e (S ARCH) .............................................................................................. 20
Search Phases .......................................................................................................... 21
Search Mode ............................................................................................................ 26
Search for Multiple Buried Subjects ..............................................................................................29
5. A itional Information ............................................................................................ 34
6. Companion Rescue .................................................................................................. 40
7. Intro uction to Avalanche Theory .............................................................................. 46
In ex .............................................................................................................................. 50

1110
OPERATION
1. Operation
1.1 Main Switch OFF / SEND / SEARCH
The main switch is located on the top side of the device. It can be moved by pressing down on the button. By
applying lateral pressure to the switch, it can be set to S ND at any time. In the left switch position, the transceiv-
er is OFF, in the center position, it is in S ND mode, and in the right position, the S ARCH mode is activated.
To get into the OFF position, an additional safety button must be pressed down, as well.
Always make sure that the switch locks into position mechanically to avoid an undesired change of mode.
OFF
OFFSEND SEARCH
OFFSEND SEARCH
OFF -> SEND SEND -> OFF
OFFSEND SEARCH
SEARCH
OFFSEND SEARCH
SEND -> SEARCH SEARCH -> SEND
Examples:
1.2 Use of eys
The L M NT Barryvox®clearly excels through its
ease of use. The device is operated using the two
lateral keys. The current function of the key is
always shown at the right of the display.
-key:
3Mark
-key:
Group check

1312
COC PIT SEND / SEARCH / GROUP CHEC COC PIT SEARCH MODE / GERÄTEINFORMATIONEN
SEND MODE
SIGNALSUCHE
COARSE SEARCH
Chapter «Search»
FINE SEARCH
Chapter «Fine search»
Chapter
«Auto Revert to Send»
Chapter
«Auto Revert to Send»
Chapter
«Auto Revert to Send»
MULTIPLE
BURIALS
Chapter
«Search for Multiple
Buried Subjects»
Chapter «Limitations»
and «Search for Multiple
Buried Subjects»
Chapter «Limitations»
Chapter «Signal Search»
1 2 3
Chapter «Send Mode»
Chapter «Battery Level
Indicator» und «Turning
Device ON»
OFF
OFFSEND SEARCH
OFF -> SEND
Chapter «Main Switch»
SEND –> SEARCH
SEARCH –> SEND
1 2
Chapter «Send Mode» Chapter «Search»
SEND ->SEARCH
Chapter «Main Switch»
1 2
GROUP CHEC
Chapter «Group Check» Chapter «Group Check» Chapter «Group Check»
Chapter «Battery Level
Indicator» und «Turning
Device ON»
Chapter «Group Check» Chapter «Send Mode»
OFFSEND SEARCH
1 2
Chapter «Send Mode»Chapter «Search» SEARCH -> SEND
Chapter «Main Switch»
SEARCH
OFFSEND SEARCH
SWITCH OFF
AND ADDITIONAL
INFORMATION
1 2
Chapter «Periodic
Checks» und «W-Link»
SEND -> OFF
Chapter «Main Switch»
OFFSEND SEARCH
3 3
5 Sec. Count-Down

1514
2.4 Handling the Barryvox
As all transceivers, the Barryvox contains shock-
sensitive ferrite antennas. Therefore, you should
handle it with utmost care!
Store the device and the carrying system in a dry
spot that is protected from extreme cold or heat
and direct sunshine.
It is recommended that you have the functionality
tested at regular intervals (see chapter «Periodic
Checks»).
2.5 Interferences
As a matter of principle, avoid having other elec-
tronic devices (e.g. mobile phones, radios, head-
lamps), metal objects (pocket knives, magnetic but-
tons), or other transceivers close to (20 cm in
S ND; 50 cm in S ARCH) your running avalanche
transceiver. Users of pacemakers are advised to
carry the device in a pant pocket, the zipper
must remain closed for the duration of the trip
(without vital data detection). Consult the manu-
facturer’s instructions with regard to the impact on
pacemakers.
For professional and institutional use, it is highly
recommended to consult the Barryvox Application
Safety Guide (www.mammut.ch/BarryvoxManual).
When searching, hold the device at a minimum of
50cm away from these objects and turn off any
electronic devices, if possible.
Be aware that electronic devices used by other res-
cuers may disturb the search. This is equally valid
for mobile phones, therefore it is highly recommen-
ded to switch off phones which are not absolutely
required.
The Application Safety Guide of the Barryvox con-
tains an exhaustive list of allowed equipment as
well as a detailed list of possible limitations.
(www.mammut.ch/BarryvoxManual)
SETUP
2. Setup
2.1 Initial Setup
Before you use the device for the first time, remove
the protective foil on the front side and stick the
emergency plan on the back of the battery com-
partment lid.
2.2 Insert / Replace Batteries
Only use alkaline (LR03/AAA) batteries of the same
type. Always insert 3 new batteries of the same
type. In case these batteries need to be removed,
the same 3 batteries or 3 new batteries need to be
reinserted. Never use rechargeable batteries and
always replace all the batteries at the same time.
Make sure the lid is properly closed and that the
device and the batteries stay dry. Periodically
inspect the battery compartment. Clean or dry it, if
needed, since moisture can cause corrosion. Avoid
touching the contacts with your hands.
A reliable power supply is crucial for the safe oper-
ation. Please refer to the detailed instructions in the
Application Safety Guide.
(www.mammut.ch/BarryvoxManual)
2.2.1 Important Points When
Using Alkaline Batteries
Type LR03/AAA
When storing or not using the transceiver for an
extended period of time (i.e. in the summer),
remove the batteries and leave the battery com-
partment open. The warranty becomes void if bat-
teries have leaked! When reinserting the batteries,
use the same 3 batteries or 3 new batteries.
2.3 Adjusting the carrying system
Adjust the carrying system to fit your body.
(Chapter «Carrying positions»).
1
2
VIDEO
VIDEO

1716
Setup
2.7 Turning the Device On
When the main switch is moved from the OFF to the
S ND or S ARCH positions, the transceiver is turned
on. To slide the main switch from OFF to S ND or
S ARCH, unlock the main switch by pressing down the
button at the top.
While starting, the device conducts a self-test.
The microprocessor, the antennas and the display
are checked.
If the self-test is completed successfully, the dis-
play will show «OK».
The remaining battery level is displayed as a percent-
age.
If the self-test fails, an error message is displayed
for 20 seconds along with an acoustic warning.
The meanings of the different error messages are
described in the chapter «Troubleshooting».
Test your Barryvox at home prior to your trip. Turn
the transceiver on and monitor the self-test and the
battery level. This gives you the opportunity to
replace low batteries and have an eventual defect
repaired beforehand.
2.8 Battery Level Indicator
The following table gives you average values for the
battery levels.
The remaining battery level can only be displayed
correctly if batteries are used according to the
chapter «Insert / Replace Batteries». Low tempera-
tures, age, and brand can have a negative impact
on the battery life and the accuracy of the battery
level indication.
100%: Normative Requirement
(=minimum requirement)
min 200 hrs S ND at 10°C
followed by 1hr S ARCH at -10°C
Typical values for the L M NT
Barryvox®with alkaline batteries:
250 hrs S ND at 10°C
Measured with Duracell ULTRA
(initial set of batteries)
less than The batteries must be
20% replaced as soon as
or 0% possible!
mergency reserve at 20%:
Max. 20 hrs in S ND mode
and max. 1 hr in S ARCH
mode left.
The transceiver sounds a warning if the battery
level is below 20% or unknown at startup.
SETUP
2.6 Carrying Positions
Regardless of the carrying position, the display
should always face your body!
2.6.1 Carrying System
(Recommended Carrying Position)
The carrying system has to be put on your inner-
most layer of clothing prior to beginning the trip
(see illustration) and has to be worn on your body
for the duration of the trip. The transceiver shall
always remain covered by one layer of clothing.
The device itself is inserted into the carrying sys-
tem according to the illustration. It should always
remain anchored to the base plate of the carrying
system using the red hook on the wrist loop.
2.6.2 Carrying the
Transceiver in a Pocket
If you carry the Barryvox
in a pant pocket, the zip-
per must remain closed
for the duration of the trip.
Always use a secured
pocket (see illustration). If
possible, attach the wrist
loop to your pants or
secure it around your belt.
VIDEO
VIDEO

1918
Double Group Check
We recommend to perform a double group check
ones a week and in general when a new group gets
together.
The double group check individually tests the S ND
and S ARCH function of all devices.
The members of the party activate the group check
on their transceivers or set them to a low receive
volume. The leader switches his or her transceiver
to the S ND mode and ensures that all party mem-
bers can receive. Subsequently, the party members
switch their transceivers to S ND, and the leader
activates the group check or sets the transceiver to
a low receive volume. The S ND mode of all trans-
ceivers is checked, and ultimately the leader
switches his or her transceiver to S ND.
Group check SEND
SEND Group check
MEMBERSLEADER
SETUP
2.9 Group Check
Single Group Check
Before a party takes off, the transceivers of all party
members must be checked. To conduct this test,
the function group check is activated on a single
transceiver within the party. Activate the group
check by switching the device from OFF to S ND
and pressing either of the keys within the first 5
seconds. After a few seconds, the device will auto-
matically activate the group check. Make sure all
the other transceivers of the party are in S ND
mode.
The test is successful if you can clearly hear beep
sounds from each participant's transceiver within
the range indicated on the display. The members of
the party must be spread out appropriately to avoid
mutual interference. The indicated test distance
must not be shortened, as otherwise the group
check becomes very unreliable.
If no tone is heard within the indicated range,
the device may not be used.
How to solve the problem:
1.Check if the device is switched to S ND.
2.Replace the batteries.
3.Have the device checked by the manufacturer.
(chapter «Maintenance and Repair»)
After 5 minutes in group check, the transceiver
automatically switches to the S ND mode. The user
is warned ahead of time by an acoustic alarm. This
automatic switching can be prevented by pressing
any button within 20 seconds. After the group
check, the transceiver must be switched to the
S ND mode by pressing the lateral key.
If your L M NT Barryvox®detects that the trans-
mit frequency of the tested device is not within the
normative regulations, an « 6» warning message
will be shown. In this case, repeat the test with 5m
distance between the participants to identify the
defective transmitter. Such devices must be
checked/repaired by the manufacturer.
MEMBERSLEADER
Group check SEND

2120
SEARCH MODE
4.1 Search Phases
In an avalanche search, the following phases are
distinguished:
l Signal search
l Coarse search
l Fine search
l Pinpointing
Signal search:
Search area to the point
where the first signal can
be detected.
Coarse search:
Search area starting from
the reception of the first
signal until the immediate
vicinity of the buried sub-
ject. In this phase the signal
search pattern is abandoned
in order to follow the sig-
nals leading to the buried
subject.
Fine search:
Search area in the immedi-
ate vicinity of the buried
subject.
Pinpointing:
First use of the probe until
probe hit.
using transceiver
using probe
4. SEARCH Mo e
Although the avalanche transceiver is easy to
use, its effective use requires proper training.
We recommend that you practice transceiver
searches regularly.
Electronic devices and metal objects can inter-
fere with the search or make it impossible.
See chapter «Interferences».
Be aware that electronic devices used by other res-
cuers may disturb the search. This is equally valid
for mobile phones, therefore it is highly recommen-
ded to switch off phones with are not absolutely
required.
At the beginning and during the search, pay close
attention that the rescuer’s transceivers are not
transmitting and do not switch to S ND unintentio-
nally.
It does not make sense to remove the backpack and
mount the shovel and probe already at the boarder
of the avalanche. Keep the backpack with all the
equipment on you! The assembled shovel and probe
is only a hindrance during signal and course
search. Only remove your pack to assemble probe
and shovel ones you have successfully concluded
the fine search.
SEND MODE
3. SEND Mo e
The S ND mode is the normal operating mode out-
doors or in all other situations in which there is a
risk of avalanches.
ach time the S ND mode has been activated, this
is confirmed by a triple beep sound.
ach individual signal element is tested. If the test
is successful, this is confirmed by a blink of the red
S ND-Control L D.
The LCD display is automatically deactivated in the
S ND mode, but can be activated any time by pres-
sing either of the keys.

2322
Pinpointing
Marking &
Multiple Search
«Landing»:
Transceiver on the snow surface, move slowly,
high search precision.
Mark
3
10
Signal Search Fine SearchCoarse Search
«Large distance to the target»:
Fast search speed, low search precision
«Airport visible»:
Slow down considerably
The transceiver search is comparable to the landing of an airplane!
SEARCH SPEED
SEARCH MODE
«Signal» «Fine Search» «Probe Hit»
RESCUE ORGANIZATION: EVENT DRIVEN, LOUD AND CLEAR COMMUNICATION
SEARCH PRECISION

2524
4.2 Auto-Revert to SEND
Auto-revert to S ND automatically switches the
transceiver from the S ARCH mode to the S ND
mode if no user interaction occurs during 8 min-
utes.
Prior to reverting, the device will sound an audible
alarm. Reverting can be avoided if either of the
keys is pressed within 30 seconds of the alarm.
In case rescuers are buried in a second avalanche,
this function allows them to be located using trans-
ceivers.
Elementary understanding of transceiver search
The 457kHz transmitter of the transceiver has a spa-
cial, kidney shaped transmit distribution, which is
visualized with field lines in the illustration below.
The searching transceiver leads the rescuer along
the field lines and therefore usually not in a straight
line to the buried subject.
Search Along the Field Line: Flux line search
SEARCH MODE
4.1.1 Signal Search
From the start of the search until you hear the first
tone, you are in signal search.
The avalanche surface is searched systematically
until you pick up a signal. During the acoustic sig-
nal search, the rescuer has the visual focus on the
surface of the debris in order to be able to see body
parts or objects protruding the snow surface.
The ELEMENT Barryvox®uses the symbol as
a generic instruction to apply one of the follow-
ing search patterns for new signals!
Optimization of Range
To optimize the range, rotate the transceiver slowly
around all axes. Hold the device with the loudspeaker
facing your ear sidewise of your head.
If your Barryvox®detects that the signal search
strip width needs to be reduced due to a device
transmitting far apart from the normative regula-
tion, the reduced search strip width will be indicat-
ed.
Regardless of the operating mode, the following
search strategies apply:
Search strategy if the last seen point is unknown.
Search strategy if the last seen point is known. The
signal search strip extends downhill from the last
seen point in the direction of the slide.
LAST SEEN POINT
UN NOWN
LAST SEEN POINT
LAST SEEN POINT
UN NOWN
MULTIPLE RESCUERS
SINGLE RESCUER

2726
Start
Above approx. 60 meters:
Signal search
Above 3 meters:
Coarse search with
distance and direction
indication
Below 3 meters:
Fine search with
Symbol «Runway»
User interface in the search mode
SEARCH MODE
4.3 Search Mode
As soon as the device is switched to S ARCH, it is
operating in search mode.
4.3.1 Search for a Single Buried Subject
Using the Search Mode
Coarse Search
If the distance to the buried subject is less than
approx. 60 meters, the distance and direction are
displayed.
Interpretation of the Distance Indication
The distance indication shows the longest possible
distance to the buried subject in meters. The buried
subject may be much closer, but never ever further
apart from the rescuer.
The distance can never be determined exactly. It is
important whether the numbers are increasing or
decreasing. The closer you are to the transmitting
device, the more precise the indicated distance is.
Practical Search Instructions
Hold the transceiver horizontally in front of you
and proceed in the direction indicated by the
arrow. If the distance increases, you are moving
away from the victim. Continue the search in the
opposite direction. The transceiver will lead you to
the buried subject quickly and reliably.
Do not move backwards, otherwise the direction
indication will be incorrect.
Start the search at a high speed and reduce your
speed as you close in on the buried subject. Oper-
ate the transceiver in a quiet and concentrated
manner - avoid rapid movements. This way, you will
reach the objective in the quickest and easiest
manner!

2928
Deep Burials
Marking a buried subject in more than 3 meters
depth is not possible. For further information,
please see chapter «No Probe Hit».
3
SEARCH MODE
Fine search
During fine search hold the transceiver directly
above the snow surface! Proceed in a straight
line until you reach the point of the smallest
distance reading and use the shovel to mark
this spot as a visual reference for the probing
spiral.
Use the avalanche probe to complete locating the
buried subject (See chapter «Companion Rescue»).
A located subject should only be marked using the
3-Mark function after his or her location has been
verified using a probe pole! Do not place the Bar-
ryvox on the snow surface again for this purpose!
After marking a subject’s location, the Barryvox
searches for other possible burials. The transceiver
leads you directly to the next buried subject or the
signal search symbol is displayed and advising
you to search the rest of the avalanche (See chap-
ter «Signal Search»).

3130
Procedure for multiple burials
Procedure
1. The device favors
the closest subject
first. Locate the vari-
ous buried subjects
using the transceiver
and probe pole
(Chapter «Search for
a Single Buried Sub-
ject using the Search
Mode»).
2. As soon as you mark
an individual subject,
the transceiver takes
you to the nearest,
unmarked buried
subject.
3. Continue this proce-
dure until all sub-
jects are located and
marked.
4. The rescuer now
searches for addi-
tional buried sub-
jects while the dis-
play shows the sym-
bol for the signal
search phase to
indicate that the rest
of the avalanche sur-
face must be
searched (Chapter
«Signal Search»).
SEARCH MODE
4.3.2 Search for Multiple Buried Subjects
Using the Search Mode
In search mode, the transceiver attempts to analyze
all the detectable signals and to determine the num-
ber of buried subjects. This is possible, because all
the signals from one transmitter display characteris-
tics, which are distinguishable from the signals from
other transmitters. The more unique the signal char-
acteristics are, the more accurately the signals can
be distinguished and located (pattern recognition).
By automatically associating the signals with their
respective sources, multiple burial situations can be
solved without applying specific search tactics.
Transceivers which additionally transmit W-Link
information can be detected particularly fast and
reliable.
List of Buried Sub ects
The buried subjects whose transmit patterns can be
identified are inserted in the list of buried subjects
based on their signal strength. The closest buried
subject on the avalanche is shown at the bottom, the
furthest at the top of the list.
The list of buried subjects can show no more than
3 buried subjects at the time. In case the amount of
recognized buried subjects is greater, arrow symbols
indicate that the list contains further down or further
up in the list additional entries. Usually, the device
guides you so that the list is processed from bottom
to top. The lower, already hidden part of the list of
buried subjects (symbol ). contains therefore
the buried subjects which have already been marked
as found, and the upper, not yet visible part of the
list (symbol ), the buried subjects which are
not found yet and still ahead of you on the avalan-
che. Independently of the position of a buried subject
in the list, the device will always try to guide you as
quickly as possible until all recognized buried sub-
jects are found.

3332
4.3.3 Limitations
The larger the number of buried subjects, the more
difficult and time-consuming the exact analysis of
the situation gets, because of overlapping signals.
The more signals there are, the longer the signal
overlaps can last. The capability to automatically
detect and isolate signals from multiple buried sub-
jects is therefore limited.
+Symbol
The +symbol indicates that signals are received from
additional buried subjects that cannot be isolated
and entered in the list of buried subjects yet. Turn off
the transceivers of the buried subjects already found
as soon as possible to simplify the isolation of the
remaining signals.
Search Suspension / “Stand still!”
During the search for multiple subjects, signals may
overlap making it impossible to analyze the signal
of a single buried subject. If the signal overlap lasts
several seconds, the rescuer has to interrupt the
process temporarily to avoid deviating from the
optimal search path. The Barryvox®will indicate
the necessity to suspend (max. 15 seconds) the
search by displaying the word «Stop». Stand still,
and do not move until the word «Stop» disappears,
at which time you can continue to search.
SEARCH MODE
Search With Multiple Rescuers
When the search is conducted with multiple res-
cues searching at the same time, it should be
avoided that several rescuers search for the same
buried subject.
Situation 1: Two rescuers receive two buried sub-
jects. One rescuer continues the search for the
buried subject closest to him, the other rescuer
should directly search for the second buried sub-
ject, without having to mark the first one. The
search is therefore continued on the current signal
search pattern until the transceiver obviously leads
to a different buried subject.
Situation 2: The two rescuers only receive one
buried subject. One rescuer continues the search
for the buried subject closest to him, the other res-
cuer should search the remaining of the avalanche
for more buried subjects. The search is therefore
continued on the current signal search pattern until
the transceiver obviously leads to a different buried
subject.

5.5 Periodic check by a Barryvox
Service Point
To check the proper function of the device, is highly
recommended to send the device every 3 years, or
when reaching 3000 hours of operation, to a Barry-
vox service center or have it checked by a Barryvox
service point (service charge will apply).
The functional test is much more comprehensive
and precise than the self and group check. As part
of this service the electronics and the mechanical
components such as the case, the main switch and
the lateral key, the battery contacts, the battery
compartment and cover as well as the wrist strap
will be checked. In case the check shows abnormal
wear and tear due to incorrect or long, very intense
use, the service center may recommend you to pur-
chase an exchange device.
We recommend that you have your device checked
during the summer months so that your Barryvox is
tested and ready to use at the start of the next win-
ter season. In the “Maintenance” tab in the start
menu, you can see when the next check is due.
For further information concerning maintenance
and testing of Barryvox transceivers, please consult
the Barryvox Application Safety Guide.
(www.mammut.ch/BarryvoxManual)
35
34
5.4 Frequent, self-responsible check
Always check the result of the self- and battery test
(chapter “Turning the Device On” and “Battery Level
Indicator”) and pay attention to alert messages
(chapter “Troubleshooting”). Regularly carry out the
group checks as indicated in chapter “Group
Check”. Furthermore, we recommend that you take
self-responsibility by frequently checking your devi-
ce for mechanical damage of the casing, proper
function of the main switch, battery compartment
cover as well as cleanness of the battery contacts.
In case you detect problems, it is mandatory to
have the device checked by one of the service cen-
ters listed under “Registration and Service”
How to verify the W-Link setting of your
ELEMENT Barryvox®
Press the key on the side during shut-down to see
the W-Link region of your device.
In the «Cockpit Send / Search / Group Check» you
find a step-by-step setup guide
5.2 Maintenance and Repair
Barryvox transceivers, which do not function cor-
rectly, despite full and properly inserted batteries
(e.g. problem listed under troubleshooting, no signal
during the group check, mechanical defects) must
be sent to a service center listed at the beginning of
this manual.
5.3 Maintenance
Press the key on the side during shut-down to see
in which year the next periodic check is required.
5. A itional Information
5.1 W-Link
The L M NT Barryvox®uses a W-Link radio trans-
mission. Different countries have varying frequency
regulations. The following world map shows the fre-
quencies used in the individual countries. Note that
specific frequencies may not be used in certain
countries. The frequency is factory set depending
on the country of sale. The manufacturer declines
all liability in the case of after-sale frequency mod-
ifications. Please consult as well the Barryvox Legal
and Regulatory Guide.
ADDITIONAL INFORMATION
Frequency setting:
EU = Region A / W-Link Frequency 868 MHz
[= light grey] U- and FTA-Member countries
NA = Region B / W-Link Frequency 915 MHz
[= dark grey] USA, Canada and New Zealand
no = W-Link not allowed [= black]
Japan, Russia, India, China
unknown [= white]

3736
5.6 Warranty
There is a 5-year warranty on the Barryvox trans-
ceiver (excluding the batteries, the carrying system,
and the wrist loop) from the date of purchase shown
on the purchase receipt. In case of a warranty claim,
all parts that can be shown to have material or pro-
duction defects will be replaced free of charge. Dam-
age that can be traced to incorrect handling or nor-
mal wear and tear is excluded. The warranty is void-
ed if the buyer or any non-authorized third party
opens the device. This is also the case for devices
that have been used with spare parts or accessories,
which are not original and are not recommended by
the manufacturer. A fee will be charged for the diag-
nostic test of a transceiver not needing any repair.
Warranty repairs do not extend the duration of the
warranty. There is a six-month warranty on spare
parts. Warranty repairs will only be conducted if the
device is sent in along with the receipt. The owner
will be charged for the shipping. No other warranty
shall exist. Any liability for any kind of loss or dam-
age including but not limited to any direct, indirect or
consequential damage is explicitly excluded.
ADDITIONAL INFORMATION
5.5 Troubleshooting
Error message / failure description Solution
Transceiver doesn’t turn on / 1. Check and replace batteries.
No self-test at startup 2. If this doesn’t help, the device
must be repaired.
E1: Batteries are empty! The batteries must be replaced as soon as
E2: Batteries are weak! possible. Refer to the instruction in the
chapters «Batteries, Handling and Maintenance».
E3: Alert 457 SEND! 1. Make sure that no metal objects or electronic
SEND LED doesn’t blink devices are close to the transmitter.
2. Check and replace batteries.
3. Turn the transceiver off and turn it back on
after it has properly shut down.
4. If this doesn’t help, the device must be repaired.
E4: Alert 457 SEARCH! 1. Make sure that no metal objects or electronic
devices are close to the transmitter.
2. Turn the transceiver off for approx. 1 minute
and turn it back on.
3. If this doesn’t help, the device must be repaired.
E6: Group test When testing another device, an error message appeared. Refer
to the instructions in the chapter «Single Group Check».

3938
5.8 Approval / Conformity
All information concerning approval and conformity is available in the Barryvox Legal and Regulatory
Guide.
All information provided without liability. Status July 2013. Technical data and specifications are subject
to change without notice in future transceivers.
ADDITIONAL INFORMATION
5.7 Technical Data
Transmitter frequency 457 kHz (International standard)
W-Link frequency Region A: 869.8 MHz
Region B: 916 – 926 MHz
Frequency setting see chapter «W-Link»
Power supply 3 x I C – LR03 1.5 V Alkaline (AAA)
Initial set of batteries Duracell Ultra Alkaline
Battery life min. 200 h
Maximum range Normally 60 m in standard mode
Search strip width 50 m in Search Mode
The search strip width has been calculated based on the
method Good
Operating temperature range –20° to +45° C
Dimensions (L x W x H) 113 x 75 x 27 mm
Weight 210 g (incl. batteries)
Type/Modell L M NT Barryvox® A10010-10000 (W-Link 868 MHz)
A10012-10000 (W-Link 915 MHz)
A10013-10000 (W-Link off).
Other manuals for ELEMENT Barryvox
2
Table of contents
