manuals.online logo
Brands
  1. Home
  2. •
  3. Brands
  4. •
  5. Mania
  6. •
  7. Horn
  8. •
  9. Mania MEGAHORN User manual

Mania MEGAHORN User manual

INSTRUCTION MANUAL
MEGAHORN AIR HORN
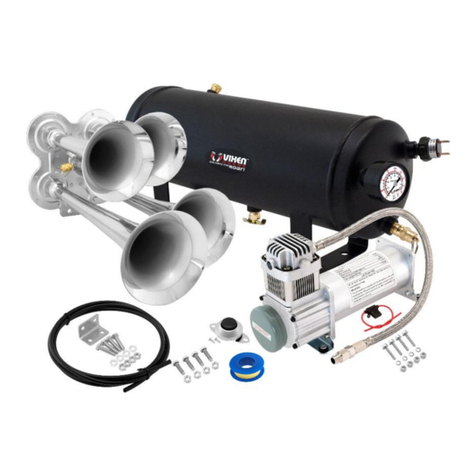
PACKAGE CONTENTS
•Air horn with mounts
•Air compressor
•Air hose
•Bag of fixings
TECHNICAL SPECIFICATIONS
•Power supply: 12 V car battery (not
included)
•Working voltage: 12 V
•Working current: 20 A
•Maximum volume: 150 dB
•Size: 9 × 10 × 44.5 cm
COMPONENTS
(1) Horn
(2) Horn mounts
(3) Air input nozzle
(4) Air hose
(5) Air compressor wire connectors
(6) Air compressor
(7) Air compressor output nozzle
(8) Air compressor mount
(9) Horn mounting pads
(10) Air compressor mounting bolt and nut
(11) Horn mounting bolts and nuts
BEFORE INSTALLATION
•Installing the Megahorn requires a few
extra components, which can be bought in
any automotive store.
•Required materials: Megahorn and all its
components (included), 2.05 mm wire (12
AWG) that can handle a 20 A current, 20–
40 A inline fuse, 20 A switch/button. You
will also be required to drill a few holes to
fix the horn to your vehicle. The wires,
switches and fuses are not supplied in the
package.
•Our recommendation is that you find an
auto electrician to install the Megahorn for
you.
•Make sure your vehicle is powered off.
•Decide where to put the horn and the air
compressor (make sure there is enough
space, and that the components are not in
direct contact with a source of heat).
•The air compressor should be installed
vertically.
•Read the whole instruction manual before
you begin!
HOW TO INSTALL
•Screw the air compressor and the horn in
place where you want to install it and make
sure that the wires that will be connected
to the compressor are as short as possible,
and that the tube that will be connecting
the horn and the compressor (no. 3 and 7)
won’t have restricted airflow.
•Install the compressor vertically and try to
angle the horn downwards, to prevent
water getting inside.
•After you have screwed the main
components in place using the included
screws and pads, it’s time to do the wiring.
Make sure you have all the components
needed to complete the circuit, which were
listed in the previous chapter.
•If you are not experienced with electrical
wiring and circuits, take your vehicle to an
auto electrician to complete the
installation.
•If you are confident in your electrical skills,
use the diagram below to complete the
wiring of the horn and compressor.
•Make sure you correctly connect the
positive and negative sides of the battery
and the compressor.
•Wire power from the battery “+” to your
switch/button in the car. Also install a 20–40
A fuse closer to the battery on this wire for
safety reasons.
WARNINGS
•We highly recommend you to install the
horn with the help of a certified auto
electrician.
•Make sure your car is powered off when
installing the horn.
•Do not blow the horn close to humans or
animals, it can cause permanent damage to
hearing due to the high sound volume.
•Check your local automotive rules and
regulations before installation to make sure
that the horn complies with the laws on
vehicle modifications.
•Use this product only for its intended
purpose. Do not use attachments of any
kind.
•Do not honk for extended periods of time.
•Make sure you use the correct wires for the
wiring of the horn. Using the wrong wires
may present a fire hazard.
WARRANTY
The warranty is valid for 24 months. You can claim it
from DFVU d.o.o., Liparjeva 6a, 1234 Mengeš,
Slovenia, for a replacement product or a refund.
Send us your order number and purchase date in the
email, which is available by clicking on our logo in the
bottom right corner. The product has a lifetime of 24
months from the date of collection.
WEEE disposal and recycling symbol.
The WEEE symbol is attached to the
product in compliance with the EU
directive 2012/19/EU on Waste
Electrical and Electronic Equipment
(WEEE). It is intended to deter the
improper disposal of this product and
to promote reuse and recycling.

Popular Horn manuals by other brands

Vixen Horns VXO8580/3418B installation guide

Vixen Horns

Vixen Horns VXO8580/3418B installation guide

Valcom VIP-9831 Specifications

Valcom

Valcom VIP-9831 Specifications

Assured AUTOMOTIVE Bull Horn ACHRKS-444 Install

Assured AUTOMOTIVE

Assured AUTOMOTIVE Bull Horn ACHRKS-444 Install

B&C Speakers Horns ME10 Specification sheet

B&C Speakers

B&C Speakers Horns ME10 Specification sheet

Vixen Horns VXH4318B installation guide

Vixen Horns

Vixen Horns VXH4318B installation guide

Valcom V-1050C brochure

Valcom

Valcom V-1050C brochure

Optimus AC-650T instruction manual

Optimus

Optimus AC-650T instruction manual

Cooper Wheelock WH1T-115-NS specification

Cooper Wheelock

Cooper Wheelock WH1T-115-NS specification

EAW BH800P Technical specifications

EAW

EAW BH800P Technical specifications

Vixen Horns VXO8210/3311B2 Instruction guide

Vixen Horns

Vixen Horns VXO8210/3311B2 Instruction guide

Vixen Horns VXO8580 installation guide

Vixen Horns

Vixen Horns VXO8580 installation guide

Vixen Horns VXO8560 installation guide

Vixen Horns

Vixen Horns VXO8560 installation guide

Vixen Horns VXO8350/3114C installation guide

Vixen Horns

Vixen Horns VXO8350/3114C installation guide

Electro-Voice MH940C Specification sheet

Electro-Voice

Electro-Voice MH940C Specification sheet

Electro-Voice 848 engineering data

Electro-Voice

Electro-Voice 848 engineering data

Vixen Horns VXO8815/3118B installation guide

Vixen Horns

Vixen Horns VXO8815/3118B installation guide

Vixen Horns La Cucaracha VXH6803B installation guide

Vixen Horns

Vixen Horns La Cucaracha VXH6803B installation guide

Peavey MB-2 manual

Peavey

Peavey MB-2 manual

manuals.online logo
manuals.online logoBrands
  • About & Mission
  • Contact us
  • Privacy Policy
  • Terms and Conditions

Copyright 2025 Manuals.Online. All Rights Reserved.