manuals.online logo
Brands
  1. Home
  2. •
  3. Brands
  4. •
  5. Marantz
  6. •
  7. CD Player
  8. •
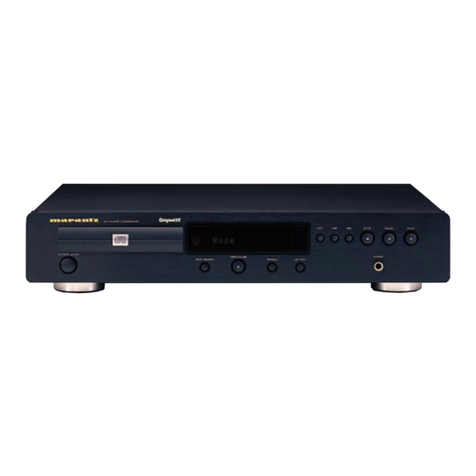
  9. Marantz CD50 User manual

Marantz CD50 User manual

Other Marantz CD Player manuals
Marantz Professional PMD325 User manual

Marantz

Marantz Professional PMD325 User manual

Marantz CD5004 User manual

Marantz

Marantz CD5004 User manual

Marantz SA1/F1N User manual

Marantz

Marantz SA1/F1N User manual

Marantz CD6006 User manual

Marantz

Marantz CD6006 User manual

Marantz SA8004 User manual

Marantz

Marantz SA8004 User manual

Marantz CC-4001 User manual

Marantz

Marantz CC-4001 User manual

Marantz CD Player User manual

Marantz

Marantz CD Player User manual

Marantz SA12 User manual

Marantz

Marantz SA12 User manual

Marantz CD5001 User manual

Marantz

Marantz CD5001 User manual

Marantz 74 CD7 User manual

Marantz

Marantz 74 CD7 User manual

Marantz CD-5000 User manual

Marantz

Marantz CD-5000 User manual
Marantz CD6003 User manual

Marantz

Marantz CD6003 User manual

Marantz SA-7S1 User manual

Marantz

Marantz SA-7S1 User manual

Marantz CD7300F1N User manual

Marantz

Marantz CD7300F1N User manual

Marantz CD6006 User manual

Marantz

Marantz CD6006 User manual

Marantz CC-4300 User manual

Marantz

Marantz CC-4300 User manual

Marantz CC-67 User manual

Marantz

Marantz CC-67 User manual

Marantz PMD330N1M User manual

Marantz

Marantz PMD330N1M User manual

Marantz CD6000K User manual

Marantz

Marantz CD6000K User manual

Marantz CD6000 series User manual

Marantz

Marantz CD6000 series User manual
Marantz CD5400 User manual

Marantz

Marantz CD5400 User manual

Marantz SA8003 User manual

Marantz

Marantz SA8003 User manual

Marantz SA-KI PEARL User manual

Marantz

Marantz SA-KI PEARL User manual

Marantz PMD371 User manual

Marantz

Marantz PMD371 User manual

Popular CD Player manuals by other brands

Arcam CD23 Handbook

Arcam

Arcam CD23 Handbook

Sanyo MCD-Z1F Service manual

Sanyo

Sanyo MCD-Z1F Service manual

JVC RC-ST3SL instructions

JVC

JVC RC-ST3SL instructions

Technics SL-P9066 operating instructions

Technics

Technics SL-P9066 operating instructions

Sony DVP-FX850 Service manual

Sony

Sony DVP-FX850 Service manual

Philips AZ1140 Instrukcja obs?ugi

Philips

Philips AZ1140 Instrukcja obs?ugi

Alpine 7909 owner's manual

Alpine

Alpine 7909 owner's manual

JVC CH-X350 instructions

JVC

JVC CH-X350 instructions

RCA RP-7923 instruction manual

RCA

RCA RP-7923 instruction manual

Pioneer DEH-P3550MP XM Operation manual

Pioneer

Pioneer DEH-P3550MP XM Operation manual

Philips Shockproof AX2102 brochure

Philips

Philips Shockproof AX2102 brochure

Philips CD582 user manual

Philips

Philips CD582 user manual

Philips AZ 6821 operating manual

Philips

Philips AZ 6821 operating manual

Lasonic MSU-2020 user manual

Lasonic

Lasonic MSU-2020 user manual

Denon DCD-1420 Service manual

Denon

Denon DCD-1420 Service manual

Panasonic SJ-MR100 operating instructions

Panasonic

Panasonic SJ-MR100 operating instructions

Onkyo DX-7210 instruction manual

Onkyo

Onkyo DX-7210 instruction manual

Cambridge Audio SONATA CD30 manual 

Cambridge Audio

Cambridge Audio SONATA CD30 manual 

manuals.online logo
manuals.online logoBrands
  • About & Mission
  • Contact us
  • Privacy Policy
  • Terms and Conditions

Copyright 2025 Manuals.Online. All Rights Reserved.

ERR
eR
Bean
ERE
ZZ
°
79CD50
Model
CD50
User
Guide
i
eet
Compact
Disc
Player
|
English
.
page
5
WARRANTY
For
warranty
information,
contact
your
local
Marantz
distributor.
Retain
your
purchase
receipt
Your
purchase
receipt
is
your
permanent
record
of
a
valuable
purchase.
It
should
be
kept
in
a
safe
place
to
be
referred
to
as
necessary
for
insurance
purposes
or
when
corresponding
with
Marantz.
Important
When
seeking
warranty
service,
it
is
the
responsibility
of
the
consumer
to
establish
proof
and
date
of
purchase.
(Your
purchase
receipt
or
invoice
is
adequate
for
such
proof.)
For
UK
only:
This
undertaking
is
in
addition
to
a
consumer’s
statutory
rights
and
does
not
affect
those
rights
in
any
way.
Frangais
page
12
GARANTIE
Pour
les
conditions
de
garantie,
veuillez
vous
adresser
a
votre
distributeur
local.
Gardez
votre
bordereau
d’achat
Votre
recu
d’achat
est
la
preuve
permanente
de
votre
achat.
Il
doit
étre
conservé
soigneusement
pour
servir
de
référence
uilterieure
dans
les
cas
nécessitant
l'intervention
de
l’assurance,
ou en
cas
de
correspondance
avec
la
société
Marantz.
Important
Si
le
recours
ala
garantie
est
nécessaire,
le
consommateur
doit
fournir
la
preuve
de
l’achat
et la
date.
Dans
ce
cas,
le
bordereau
ou
la
facture
servent
de
preuve.
Deutsch
Seite
19
GARANTIE
Bewahren
Sie
Ihren
Kassenzettel
stets
gut
auf.
Bei
Inanspruchnahme
der
Gewédhrleistung
kommt
ihm
eine
wichtige
Bedeutung,
der
Beweis
des
Kaufdatums,
zu.
Nederlands
pag.
26
GARANTIE
Voor
garantie
kunt
u
zich
tot
uw
lokale
Marantz
dealer
wenden.
Bewaar
uw
kassabon
De
kassabon
is
uw
bewijs
van
een
waardevolle
aankoop.
Deze
dient
op
een
veilige
plaats
bewaard
te
worden,
zodat
u
ernaar
kunt
verwijzen
bij
verzekeringskwesiies
of
correspondentie
met
Marantz.
Belangrijk
Het
overleggen
van
de
aankoopbon
kan
belangrijk
zijn
wanneer
u
gebruik
moet
maken
van
de
garantie
of
servicedienst.
Svenska
sida
33
GARANTI
For
upplysningar
angaende
garanti,
vind
dig
till
din
lokala,
Marantz-
disiribut6r.
Behall
ditt
inképskvitto
Inkdépskvittot
dr
ditt
bevis
pa
ett
vardefullt
inkép.
Det
bdr
forvaras
sa
att
det
kan
anvandas
som
referens
vid
garantiservice,
da
det
ar
konsumenten
som
maste
kunna
visa
nar
apparaten
dr
inkdpt
(inképskvitto
eller
faktura
galler
som
sadant
bevis).
Italiano
pag.
40
GARANZIA
Per
informazioni
sulle
condizioni
di
garanzia
consultate
i!
certificato
fornito
con
l'apparecchio.
Portugués
pag.
47
GARANTIA
Para
informa¢o
sobre
garantia,
contacte
o
agente
Marantz
local.
Guarde
o
recibo
da
compra
O
seu
recibo
de
compra
é
0
registro
permanente
duma
boa
aquisiéao.
Guarde-p
num
local
seguro,
de
modo
a
enconira-lo
quando
necessitar
de
recorre
as
condiéoes
de
garantia,
ou
para
a
troca
de
correspondéncia
cam
a
Marantz.
Importante
Quando
solicitar
os
servicos
em
garantia,
a
apresenta¢ao
da
prova
de
garantia
e
data
da
aquisi¢ao,
6
da
responsabilidade
do
comprador.
(O
recibo
da
compra
ou
a
factura,
constituem
prova
suficiente.)
CLASS
1
2
LASER
PRODUCT
ANE
Ann
weno
on
RECALL
PMODE
\
AS
PROGRAM
EDIT
9
10111213
14
1516
TRACK
STEPINDEX
MIN
17
18
mime
meio
ote
mem
cect
eee
Remain:
ams
23
45
6
7
8
9
10
11
12
13
14
15
16
17
18
19
20
cS
English
ABOUT
THIS
MANUAL
When
reading
these
operating
instructions,
fold
out
page
3
to
refer
to
the
labelled
illustrations.
References
to
controls
and
connections
are
printed
in
BOLD
FACE
type
as
they
appear
on
the
unit.
CONTENTS
Page
INSTALLATION.
snd
erp
tateeent
ae:
ouibiinn
geen
CAUSE
RGA
AER
GM
ctee
eas
5
CONNECTIONS
<.3.54.65
cn
pas
ae
dan
ae
hed
pdt
Ogee
aE
End agy
Gates
5
OPERATION
3
Ger
dele
nid
lte
ka
pote
datas
ae
gheste
atonal
Nee
gaurd
GE
6-8
PROGRAMMING
~
sehisc.ccs
hates
ta
yea
sles
wget:
EF
Oa
le
egal
ali
9
FAVOURITE
TRACK
SELECTION
(‘FTS’)
2.0...
eee
eee
eee
eee
10
OTHER:POSSIBILITIES
x.
fo
ecest.ay
wisi
ingeits
opcaliste-dhaieae
taeliutle
3G
SUNN
Girne
10
ADDITIONAL
INFORMATION
1.00...
...
00000.
c
eee
eee
11
INSTALLATION
WARNING!
In
some
circumstances,
the
CD
player
may
cause
radio
or
TV
interference.
@
Therefore
position
the
CD
player
undermostin
the
HiFi
system
and
away
from
your
radio,
tuner
or
TV.
@
The
CD
player
should
be
switched
off
when
you
are
listening
to
your
tuner.
REMOVING
THE
TRANSIT
CLAMPS
(Fig.
5)
The
two
red
transit
clamps
on
the
underside
lock
the
player
mechanism
to
secure
it
during
transportation.
@
Turn
the
player
upside
down.
@
Turn
the
clamps
anti-clockwise
and
withdraw
them
from
the
player.
@
Store
them
in
the
recesses
provided.
@
If
you
wantto
transport
the
player,
always
reinsert
the
clamps
and
rotate
them
clockwise
until
they
lock
in
position.
WARNING!
Operating
this
CD
player
before
the
transit
clamps
have
been
removed
may
damage
the
unit.
CHECKING
THE
POWER
SUPPLY
SETTING
@
Check
that
the
type
plate
on
the
rear
of
the
player
indicates
the
correct
supply
voltage.
e@
If
not,
contact
your
dealer.
Certain
versions
of
this
player
are
equipped
with
a
voltage
selector),
which
enables
you
to
set
the
player
to
the
correct
mains
voltage
yourself.
When
changing
the
voltage
seiting
from
220/240
V
to
110/127
V
or
vice
versa,
it
is
also
necessary
to
change
the
mains
fuse
to
one
of
the
correct
rating.
REPLACING
THE
MAINS
FUSE
@
Using
a
screwdriver,
remove
the
MAINS
FUSE
HOLDER
().
@
Remove
the
old
fuse
and
replace
with
a
fuse
of
the
correct
rating
(800
mA
for
110/127
V;
500
mA
for
220/240
V).
@
Refit
the
MAINS
FUSE
HOLDER.
INSERTING
THE
BATTERIES
IN
THE
REMOTE
CONTROL
(Fig.
7)
@
Open
the
battery
compartment.
@
Insert
the
batteries
according
to
the
diagram
in
the
compartment.
@
Replace
the
cover.
@
For
replacement
only
use
batteries
of
the
type
RO3,
UM4
or
AAA.
CONNECTIONS
(Fig.
1)
All
connections
to
the
rear
panel
should
be
made
with
the
power
to
the
entire
system
switched
off.
;
To
avoid
cross-connection
of
channels,
connect
one
plug
at
a
time.
@
ANALOGUE
OUTPUTS
VARIABLE
(a):
For
connection
to
an
amplifier
or
HiFi
system
without
its
own
remote
control.
FIXED
(b):
For
connection
to
a
MARANTZ
amplifier
or
HiFi
system
with
its
own
remote
control.
@
Insert
a
red
plug
into
the
'R’
socket
(right-hand
channel)
and
the
other
plug
into
the
’L’
socket
(left-hand
channel)
of
the
VARIABLE
output
or
the
FIXED
output
@.
In
the
case
of
connection
via
the
VARIABLE
output,
the
sound
level
can
be
adjusted
with
the
Vv
VOLUME
&
keys
on
the
remote
control.
@
Insert
the
two
other
plugs
into
the
corresponding
sockets
of
the
CD
or
AUX
input
of
your
amplifier.
You
can
also
use
the
TUNER
or
TAPE
IN
connection,
but
never
the
PHONO
input.
This
is
not
suitable
for
Compact
Disc
reproduction.
@
REMOTE
CONTROL
OUT/IN
—
For
connecting
up
the
equipment
when
you
are
incorporating
the
player
ina
MARANTZ
HiFi
system
with
its
own
remote
control
system.
A
special
remote
control
cable
is
available
for
this
from your
dealer.
—
For
connecting
the
remote
contro!
receiver
RC
55,
available
as
an
accessory,
if
the
siting
of
the
changer
prevents
its
REMOTE
SENSOR
from
receiving
the
signals
from
the
remote
control
directly.
@
DIGITAL
OUTPUT
COAX
For
digital
signal
processing
or
future
applications
such
as
CD-I.
This
output
supplies
a
digital
signal
and
can
therefore
only
be
connected
to
an
input
which
is
suitable
for
this
signal.
Use
here
a
lead
with
one
cinch
plug
on
either
end.
WARNING!
Never
connect
this
socket
to
a
non-digital
input
of
an
amplifier,
such
as
AUX,
CD,
TAPE,
PHONO,
etc.
This
can
damage
the
amplifier
and
the
loudspeakers.
@
MAINS
FUSE
HOLDER
See
‘Replacing
the
mains
fuse’.
®©
VOLTAGE
SELECTOR
See
'Checking
the
power
supply
setting’.
MAINS
SOCKET
@
Insert
the
plug
of
the
mains
lead
supplied
into
the
MAINS
SOCKET.
@
Connect
the
other
end
to
your
mains
supply.
IMPORTANT
-
FITTING
A
MAINS
PLUG
(U.K.
only)
The
wires
in
the
mains
lead
are
coloured
in
accordance
with
the
following
code:
Blue
-
Neutral:
Brown
-
Live.
As
the
colours
of
the
wires
may
not
correspond
with
the
terminal
identification
in
your
plug,
proceed
as
follows:
@
Connect
the
brown
wire
to
the
terminal
marked
L
or
coloured
brown
or
red.
e@
Connect
the
blue
wire
to
the
terminal
marked
N
or
coloured
blue
or
black.
For
13
A
plugs,
conforming
to
BS1363,
use
a
3
A
fuse.
For
other
plugs,
use
a
5
A
or
lower
fuse
in
the
plug,
adaptor
or
at
the
distribution
board.
OPERATION
FRONT
OF
PLAYER
(Fig.
2)
REMOTE
CONTROL
(Fig.
3)
‘O)
@
®
oe
©
© ©
©
®
Disc
tray
on
which
the
OPEN
key
is
situated;
the
tray
closes
when
the
front
is
pressed
briefly.
REMOTE
SENSOR
Receives
the
signals
from
the
remote
control
handset.
DISPLAY
—
Informs
you
about
the
functioning
of
the
player.
—
Displays
details
from
the
disc
contents
list.
PLAY-REPLAY
(P
)
—
Starting
play
(PLAY).
—
Returning
to
the
beginning
of
a
track
(REPLAY).
PAUSE
(II)
Interrupting
play.
ON/OFF
Switching
on
and
off.
RECALL
Reviewing
a
programme.
P(ROGRAM)
MODE
-
Selecting
PROGRAM
mode
when
storing
a
programme.
Selecting
EDIT
mode
to
enter
the
recording
time
when
making
a
tape
recording.
‘1-0’
digit
keys
—
Selecting
another
track
number
during
play.
Selecting
a
track
number
to
start
play
with.
—
Selecting
track
numbers
when
programming.
Entering
the
recording
time
when
making
a
tape
recording:
MEMO
—
Storing
track
numbers
in
a
programme.
~
Storing
the
recording
time
when
making
a
tape
recording.
CANCEL
—
Erasing
track
numbers
you
do
not
wish
to
include
in
a
programme.
~
Erasing
track
numbers
from
a
programme.
-
Erasing
favourite
track
selections.
<<
Fast
search
for
a
particular
passage;
backwards
to
the
beginning
of
the
disc.
<>
—
Selecting
another
track
number
during
play.
—
Selecting
a
track
number
to
start
play
with.
~
Selecting
track
numbers
when
programming.
(t<@
from
high
to
low;
bi
from
low
to
high).
PHONES
Connecting
headphones.
STOP/CM
—
Stopping
play
(STOP).
—
Erasing
a
programme
(CM
=
Clear
Memory).
RPT
Repeating
a
track,
the
entire
disc
or
a
programme
(RPT
=
repeat).
@
RANDOM
Playing
in
a
random
order.
>>
Fast
search
for
a
particular
passage;
forwards
to
the
end
of
the
disc.
Most
of
the
controls
also
appear
on
the
remote
control
handset.
The
functions
below
can
only
be
operated
using
the
remote
control
handset:
FTS
Activating
the
Favourite
Track
Selection
circuit.
@)
AMS
Automatically
playing
the
beginning
of
each
track
(AMS
=
Automatic
Music
Scan).
@)
A-B
Storing
the
start
and
stop
points
of
a
passage
to
be
repeated.
@
WV
VOLUME
A
Adjusting
the
sound
level
when
the
player
is
connected
via
the
VARIABLE-output
to
an
amplifier
or
HiFi
system
without
its
own
remote
control
(W
from
high
to
low;
&
from
low
to
high).
@)
«—
INDEX
_»
—
Selecting
another
index
number
during
play.
—
Selecting
an
index
number
to
start
play
with.
(«a
from
high
to
low;
—m
from
low
to
high).
@
TIME
Selecting
the
time
information
you
want
to
see:
—
REMAIN:
The
remaining
playing
time
of
a
track.
—
TOTAL
REMAIN:
The
remaining
playing
time
of
the
entire
disc
or
a
programme.
—
The
elapsed
playing
time
of
a
track.
NOTE!
—
For
the
best
reception
of
the
signals
from
the
remote
control
you
should
aim
it
as
directly
as
possible
at
the
REMOTE
SENSOR.
-
If
the
player
is
connected
via
the
REMOTE
CONTROL
connection
to
other
equipment
in
a
HiFi
system,
or
if
the
RC
55
remote
control
receiver
is
connected
to
the
player,
the
REMOTE
SENSOR
wil!
be
switched
off
automatically.
The
remote
control
handset
should
then
be
aimed
at
the
amplifier
of
the
system
or
at
the
remote
control
receiver.
a
a
a
Se
OPERATION
a
SC
TT
THE
INFORMATION
ON
THE
DISPLAY
(Fig.
4)
Each
Compact
Disc
has,
along
with
the
music,
a
list
of
contents
detailing
the
numbers
of
the
tracks,
the
playing
time
of
each
track
and
the
total
playing
time
of
the
disc.
The
player
always
scans
this
first
and
stores
it
in
its
memory
in
order,
for
instance,
to
provide
information
via
the
display.
PROGRAM
Lights
up
when
the
piayer
is
switched
to
PROGRAM
mode.
—
Flashes
when
you
switch
the
player
on.
—
Flashes
when
the
table
of
contents
of
a
disc
is
being
traced.
—
Flashes
after
FTS
has
been
pressed.
~
Flashes
after
loading
a
disc
which
has
an
FTS
programme.
—
Lights
up
when
a
programme
from
the
FTS
memory
is
played.
EDIT
Lights
up
when
the
player
is
switched
to
EDIT
mode
for
the
recording
time
to
be
entered
when
you
are
going
to
make
a
tape
recording.
[a]
Cights
during
playback
of
the
tracks
that
are
to
be
recorded
on
side
A
of
the
tape.
—
Lights
up
if
the
disc
or
the
programme
to
be
recorded
is
longer
than
side
A
of
the
tape.
The
numbers
that
do
not
fit
on
this
side
are
then
automatically
stored
for
side
B.
—
Lights
up
during
playback
of
the
tracks
that
are
to
be
recorded
on
side
B
of
the
tape.
TRACK
Indicates
the
track
number
being
played.
STEP
Indicates
the
numbers
contained
in
a
programme.
INDEX
The
numbers
only
change
if
the
parts
of
a
track
have
index
numbers.
MIN
and
SEC
Indicate:
—
The
total
playing
time
of
the
disc
or
a
programme
(TOTAL).
—
The
elapsed
playing
time
of
a
track.
—
The
remaining
playing
time
of
a
track
(REMAIN).
—
The
total
remaining
playing
time
of
the
disc
or
a
programme
(TOTAL
REMAIN).
A-B
—
Lights
whenever
a
passage
is
repeated.
—
A-
lights
up
when
the
start
point
of
the
passage
is
set.
—
B
lights
up
when
the
stop
point
of
the
passage
is
set.
1
Lights
up
when
a
track
is
repeated.
ALL
Lights
up
when
the
entire
disc
or
programme
is
repeated.
AMS
Lights
up
during
scanning,
when
the
beginning
of
each
track
is
played
automatically.
4-20’
track
number
indicator
Lights
up
when
the
table
of
contents
of
the
disc
has
been
traced.
As
many
of
these
numbers
as
there
are
tracks
on
the
disc
remain
alight.
Each
time
a
track
has
been
played,
the
corresponding
number
goes
out.
——S
Lights
up
if
there
are
more
than
20
tracks
on
a
disc.
Error
Lights
up
if
you
make
a
mistake
when
operating
the
player.
NOTE!
There
is
no
indication
on
the
display
for
the
PLAY-REPLAY
(P
),
PAUSE
(1),
REPEAT
and
RANDOM
functions.
To
show
that
the
command
is
being
carried
out,
the
keys
light
up
when
they
are
pressed.
PLAYING
AN
ENTIRE
DISC
(PLAY-REPLAY
P
)
@
Press
ON/OFF
to
switch
the
player
on.
Eisc]
starts
flashing.
Press
OPEN
to
open
the
disc
tray.
Load
a
disc
into
the
tray
with
the
printed
side
facing
upwards
(Fig.
6)
and
close
the
tray.
~
bisc]
flashes
again.
—
The
number
of
tracks
and
the
playing
time
of
the
disc
are
shown
on
the
display.
—
Bisc}
goes
out
and
a
few
moments
later
playback
starts.
You
can
also
start
play
with
PLAY-REPLAY
(P);
the
tray
then
closes
automatically.
—
The
track
number
indicator
shows
how
many
tracks
there
are
on
the
disc.
—
Each
time
a
track
has
been
played,
the
corresponding
number
goes
out.
—
The
track/index
number
being
played
is
always
shown
under
TRACK
and
INDEX.
—
The
elapsed
playing
time
of
the
current
track
is
always
shown
under
MIN
and
SEC.
@
When
the
last
track
has
been
played,
play
will
stop.
—
The
display
again
shows
the
number
of
tracks
and
the
playing
time
of
the
disc.
Press
OPEN
to
open
the
disc
tray
and
remove
the
disc.
Bsc]
lights
up
and
the
information
disappears
from
the
display.
Close
the
tray.
Press
ON/OFF.
The
display
goes
out;
the
player
is
now
switched
off.
|@eie
NOTE!
—
If
there
is
already
a
disc
in
the
tray
when
the
player
is
switched
on,
playback
will
start
automatically
after
10
seconds.
—
If
the
disc
has
an
FTS
programme,
then
this
will
be
played.
ADJUSTING
THE
SOUND
LEVEL
(¥
VOLUME
4)
@
Press
W
VOLUME
(on
the
remote
control).
;
—
The
volume
which
has
been
set
at
the
amplifier
decreases
in
steps
to
a
set
level.
@
Press
VOLUME
4
(on
the
remote
control).
—
The
volume
now
increases
in
the
same
steps
to
the
originally
set
level.
NOTE!
The
volume
setting
selected
using
W
VOLUME
&
will
remain
stored
in
the
player's
memory,
even
if
the
player
is
switched
off.
CALLING
UP
OTHER
TIME
INFORMATION
(TIME)
@
Press
TIME
(on
the
remote
control)
whenever
you
want
to
know
the
remaining
playing
time
of
a
track.
—
REMAIN
lights
up.
@
Press
TIME
again
if
you
wish
to
know
the
remaining
playing
time
of
the
entire
disc.
—
TOTAL
REMAIN
lights
up.
@
Press
TIME
again
if
you
wish
to
return
to
the
elapsed
playing
time
indication.
INTERRUPTION
OF
PLAY
(PAUSE
II)
e@
Press
PAUSE
(II).
—
The
music
stops
but
the
disc
continues
to
spin.
@
Press
PAUSE
(11)
again
to
restart
play.
PLAY-REPLAY
(P),
<<
>,
Kd
PH,
oe
INDEX
—»
and
‘the
1-0’
digit
keys
may
be
used
during
pause
to
move
to
any
particular
point
on
the
disc.
However,
play
will
not
recommence
until
PAUSE
(II)
is
pressed
again.
OPERATION
STOPPING
PLAY
(STOP/CM
or
OPEN)
e@
Press
STOP/CM
if
you
only
wish
to
stop.
e@
Press
OPEN
if
you
wish
to
stop
and
remove
the
disc.
RETURNING
TO
THE
BEGINNING
OF
A
TRACK
(PLAY-REPLAY
>)
@
Press
PLAY-REPLAY
(P).
~
The
track
starts
again
from
the
beginning.
SELECTING
ANOTHER
TRACK
NUMBER
(<4
bb
or
1-0’)
Using
the
ki
»P!
keys
@
Press
PI
or
<d
until
the
desired
number
appears
under
TRACK.
—
The
music
stops
and
a
moment
tater
the
selected
track
begins
to
play.
—
If
you
press
ed
during
the
first
track
or
tI
during
the
last
track
play
will
continue
as
normal.
Using
the
’1-0’
digit
keys
@
Key
in
the
desired
number.
~
The
number
appears
under
TRACK.
@
Now
press
PLAY-REPLAY
(>
)
within
7
seconds.
—
The
music
stops
and
a
moment
later
the
selected
track
begins
to
play.
-
If
the
number
does
not
exist,
Error
appears
and
play
continues
with
the
current
track.
SELECTING
ANOTHER
INDEX
NUMBER
(«4
INDEX
_»)
e@
Press
INDEX
—
or
««—
INDEX
(on
the
remote
control)
until
the
desired
number
appears
under
INDEX.
~
Play
stops
and
a
moment
later
the
selected
index
number
begins
to
play.
—
Ifthe
index
number
does
not
exist,
play
will
start
again
with
the
first
index
number
of
the
current
track.
SEARCHING
FOR
A
PASSAGE
(<<
or
>>)
@
Keep
»
pressed
to
search
forwards.
@
Keep
<4
pressed
to
search
backwards.
The
searching
speed
is
determined
by
how
long
a
key
is
pressed:
—
the
first
2
seconds
fairly
slowly,
with
sound;
—
then
at
maximum
speed,
with
no
sound.
If
you
reach
the
end
of
the
disc
and
release
>,
play
starts
several
seconds
before
the
end.
REPEATING
A
PASSAGE
(A-B)
@
During
play
press
A-B
(on
the
remote
control)
at
the
required
start
point.
—
A-
lights
up.
@
Press
A-B
again
at
the
required
stop
point.
-
B
lights
up.
@
The
passage
between
points
A
and
B
will
now
be
repeated
continuously.
@
Press
A-B
again
to
stop
the
passage
being
repeated.
~-
A-B
goes
out
and
play
continues
as
normal.
To
quickly
find
the
required
start
and
stop
points,
you
can
use
the
<<
>»
and
He
pepe}
keys.
REPEATING
A
TRACK
(RPT)
@
Press
RPT
before
or
during
play.
-
1
lights
up.
—
The
track
will
be
repeated
again
and
again.
@
To
stop
repeat,
press
RPT
twice.
—
1
goes
out
and
play
stops
at
the
end
of
the
disc.
REPEATING
A
DISC
(RPT)
Press
RPT
twice
before
or
during
play.
ALL
lights
up.
—
The
entire
disc
will
be
repeated
again
and
again.
@
To
stop
repeat,
press
RPT
again.
~
ALL
goes
out
and
play
stops
at
the
end
of
the
disc.
PLAYING
IN
A
RANDOM
ORDER
(RANDOM)
@
Press
RANDOM
before
or
during
play.
—
If
the
tray
was
open,
it
will
now
close.
—
A
Pappears
on
the
display;
under
SEC
a
5-second
pause
is
counted
down.
This
is
repeated
each
time
before
a
new
track
is
played.
—
The
tracks
on
the
disc
or
in
the
programme
are
now
played
in
a
random
order.
@
Press
RANDOM
again
if
you
wish
to
revert
to
normal
play.
If
you
press
<d
you
will
return
to
a
track
which
has
already
been
played.
If
you
press
I
you
are
selecting
any
one
of
the
following
tracks.
If
you
press
RPT
twice,
the
tracks
will
be
repeated
in
a
different
order
each
time.
Searching
for
a
passage
is
limited
to
within
the
track
being
played.
SCANNING
A
DISC
(AMS)
e@
Press
AMS
(on
the
remote
control)
before
or
during
play.
—
AMS
lights
up.
—
If
the
tray
was
open,
it
will
now
close.
—
The
first
20
seconds
of
each
track
are
played
in
turn.
@
When
the
player
reaches
a
track
which
you
wish
to
hear
in
full,
press
AMS
again.
—
AMS
then
goes
out
and
play
continues
as
normal.
During
the
scan
you
can
use
the
x@<
BP#-keys.
STARTING
WITH
A
PARTICULAR
TRACK
NUMBER
('1-0’
or
<4
Pi
and
PLAY-REPLAY
P
)
@
Load
a
disc,
but
do
not
close
the
tray
yet!
@
Key
in
the
desired
number
or
press
tI
or
Kd
until
the
number
appears
under
TRACK.
@
Now
press
PLAY-REPLAY
(P
)
within
7
seconds.
—
The
tray
closes
and
psc}
starts
flashing.
—
Bsclgoes
out
and
a
few
moments
later
play
starts
with
the
selected
track.
—
lf
the
track
number
does
not
exist,
play
starts
with
the
first
track
on
the
disc.
STARTING
WITH
A
PARTICULAR
INDEX
NUMBER
('1-0’
or
Kd<¢
bP,
c_
INDEX
m=
and
PLAY-REPLAY
P
)
NOTE!
When
starting
play
with
a
particular
index
number,
make
sure
that
no
more
than
7
seconds
elapse
between
pressing
keys,
or
the
display
will
again
show
the
number
of
tracks
and
the
playing
time
of
the
disc.
@
Load
a
disc,
but
do
not
close
the
tray
yet!
@
Key
in
the
desired
track
number
or
press
BP
or
kd
unti!
the
number
appears
under
TRACK.
@
Press
INDEX
—m
or
«—
INDEX
(on
the
remote
control)
until
the
desired
index
number
appears
under
INDEX.
@
Press
PLAY-REPLAY
(>
).
—
The
tray
closes
and
fisc]starts
flashing.
~
Bisc]goes
out
and
a
few
moments
later
playback
starts
with
the
selected
index
number.
—
if
the
index
number
does
not
exist
play
starts
at
the
beginning
of
the
selected
track.
PROGRAMMING
It
is
possible
to
program
in
two
ways:
ADD-IN
PROGRAMMING:
You
store
in
the
players
memory
the
tracks
which
are
to
be
played
and
their
order.
Up
to
20
track
numbers
can
be
stored
in
this
way.
TAKE-OUT
PROGRAMMING:
You
erase
the
track
numbers
you
do
not
want
to
hear.
Nowyou
can
store
as
many
numbers
as
there
are
tracks
on
the
disc.
NOTE!
—
Index
numbers
cannot
be
stored.
—
Once
you
are
programming
in
one
of
the
two
ways,
you
can
no
longer
switch
to
the
other
way.
—
A
programme
can
be
stored
either
before
or
during
play.
—
Ifyou
wish
to
compile
your
programme
before
starting
play,
first
load
the
disc
but
do
not
close
the
tray
yet!
~
When
storing
track
numbers,
make
sure
that
no
more
than
7
seconds
elapse
between
pressing
keys,
or
the
display
will
again
show
the
number
of
tracks
and
the
playing
time
of
the
disc.
—
If
you
exeed
the
maximum
of
20
tracks
or
if
you
select
a
number
which
does
not
exist
then
Error
appears.
ADD-IN
PROGRAMMING
@
Key
in
the
first
required
number
or
press
1
or
<4
until
the
number
appears
under
TRACK.
e@
Press
MEMO.
—
The
number
is
now
stored
in
the
player's
memory.
—
Store
the
other
tracks
required
in
the
same
way.
—
Each
time
you
store
a
track,
the
number
of
tracks
and
the
playing
time
of
your
programme
will
be
shown
under
STEP
and
MIN
and
SEC
for
a
few
seconds.
—
The
track
number
indicator
always
shows
which
numbers
have
been
stored.
NOTE!
If
you
press
PROGRAM
MODE
during
programming,
the
information
under
STEP
and
MIN
and
SEC
remains
visible.
However,
all
other
information
will
disappear.
You
can
call
this
information
up
again
by
pressing
PROGRAM
MODE
twice.
TAKE-OUT
PROGRAMMING
@
Key
in
the
first
number
you
wish
to
omit
or
press
b>}!
or
<d
until
the
number
appears
under
TRACK.
@
Press
CANCEL.
—
The
number
disappears
from
the
track
number
indicator;
it
has
now
been
erased.
@
Erase
the
other
tracks
you
do
not
wish
to
hear
in
the
same
way.
—
Each
time
you
erase
a
track,
the
remaining
tracks
and
their
playing
time
will
be
shown
under
STEP
and
MIN
and
SEC
for
a
few
seconds..
—
The
track
number
indicator
always
shows
which
tracks
remain
for
inclusion
in
your
programme.
—
The
numbers
displayed
on
the
track
number
indicator
after
the
unwanted
numbers
have
been
erased,
are
included
in
the
programme
in
the
order
in
which
they
appear
on
the
disc.
NOTE!
If
you
press
PROGRAM
MODE
during
programming,
the
information
under
STEP
and
MIN
and
SEC
remains
visible.
However,
all
other
information
will
disappear.
You
can
call
this
information
up
again
by
pressing
PROGRAM
MODE
twice.
STORING
TRACK
NUMBERS
USING
AMS
@
Press
AMS
(on
the
remote
control)
before
or
during
play.
—
AMS
lights
up.
~
If
the
tray
is
open,
it
will
now
close.
—
The
first
20
seconds
of
each
track
are
played
in
turn.
@
Now
you
can
compile
your
programme
in
either
the
add-in
or
the
take-out
way:
Add-in
@
Press
MEMO
at
each
track
you
wish
to
include
in
the
programme.
—
The
number
appears
on
the
track
number
indicator;
it
has
now
been
stored.
—
The
playerimmediately
starts
to
play
the
first
20
seconds
of
the
next
track.
Take-out
@
Press
CANCEL
at
each
track
you
do
not
wish
to
include
in
the
programme.
~
The
number
disappears
from
the
track
number
indicator;
it
has
now
been
erased.
—
The
playerimmediately
starts
to
play
the
first
20
seconds
of
the
next
track.
REVIEWING
A
PROGRAMME
@
Press
RECALL.
—
All
track
numbers
appear
on
the
display
in
the
order
in
which
they
were
stored.
—
If
Error
appears,
the
memory
is
empty
and
nothing
has
been
stored.
You
can
review
a
programme
prior
to,
during
or
after
programmed
play.
PROGRAMMED
PLAY
@
Press
PLAY-REPLAY
(>).
—
lf
the
tray
was
open,
it
will
now
close.
—
Play
begins
with
the
first
number
of
the
programme.
All
keys
can
be
used
during
programmed
play.
Searching
for
a
passage
is
only
possible
in
the
track
which
is
being
played.
ERASING
A
PROGRAMME
e@
Press
STOP/CM
twice,
or
if
the
disc
has
already
stopped,
just
once.
e@
You
can
also
press
OPEN
straight
away.
—
The
programme
has
now
been
erased.
ERASING
A
TRACK
FROM
A
PROGRAMME
e@
Press
RECALL
before
or
after
programmed
play.
—
All
track
numbers
appear
on
the
display
in
the
order
in
which
they
were
stored.
@
Press
CANCEL
as
soon
as
the
number
which
you
want
to
erase
appears.
—
The
erased
number
will
disappear
from
the
display
and
from
the
track
number
indicator.
FAVOURITE
TRACK
SELECTIONS
(’FTS’)
You
can
also
transfer
a
programme
to
the
permanent
(FTS)
memory
of
the
player.
Your
favourite
track
selection
of
a
given
disc
can
then
be
called
up
and
played
whenever
you
wish.
The
selection
will
remain
stored
in
the
FTS
memory
even
if
you
play
the
entire
disc
or
compile
a
different
programme
from
it.
Each
disc
in
the
FTS
memory
is
given
a
ranking
number.
There
are
127
numbers
available.
The
number
of
discs
which
can
be
stored
in
the
FTS
memory
depends
on
the
number
of
tracks
in
each
programme.
NOTE!
FTS
must
always
be
used
together
with
other
keys.
Press
the
next
key
within
5
seconds,
otherwise
[Fs]
will
stop
flashing.
You
can
then
start
again
by
pressing
FTS
once
more.
STORING
A
FAVOURITE
TRACK
SELECTION
@
Compile
your
programme
as
described
in
the
PROGRAMMING
section.
@
Press
FTS.
—
[as]
starts
flashing.
@
Press
MEMO.
—
The
display
shows
FtS and
the
ranking
number
of
this
programme.
~
[As]now
lights
continuously;
your
favourite
selection
is
now
stored
in
the
FTS
memory
under
this
ranking
number.
—
lf
a
selection
of
a
particular
disc
had
already
been
stored,
then
it
is
automatically
erased
and
the
new
selection
is
stored
under
the
old
ranking
number.
NOTE!
H
Error
appears
after
you
have
pressed
MEMO,
it
can
be
for
one
of
the
following
reasons:
—
The
FTS
memory
is
full:
you
must
erase
one
or
more
old
FTS
programmes
to
make
room
to
store
the
new
programme.
—
No
programme
has
been
compiled
first.
FTS
PROGRAMMED
PLAY
@
Load
the
disc
and
close
the
tray.
—
[fs]
starts
flashing.
@
Press
PLAY-REPLAY
(P
).
—
[Fts]now
lights
up
continuously;
your
favourite
selection
for
this
disc
will
now
be
played.
@
Press
STOP/CM
twice
if
you
wish
to
revert
to
normal
play.
All
keys
can
be
used
while
a
favourite
selection
is
being
played.
Search
for
a
passage
is
only
possible
in
the
track
which
is
being
played.
ERASING
A
FAVOURITE
TRACK
SELECTION
@
Hold
FTS
pressed
down
and
press
>
or
<4
as
often
as
necessary
until
the
ranking
number
to
be
erased
appears
next
to
FtS.
@
Hold
CANCEL
pressed
down.
—
CLr
appears
on
the
display
together
with
the
ranking
number,
followed
a
few
moments
later
by
Fts
-
-
-;
the
selection
has
now
been
erased
from
the
memory.
If
you
do
not
know
the
ranking
number:
@
Insert
the
disc
and
close
the
tray.
@
Press
FTS,
then
RECALL.
—
FtS
and
the
ranking
number
appear
on
the
display.
@
Hold
CANCEL
pressed
down.
—
CLr
appears
on
the
display
together
with
the
ranking
number,
followed
afew
moments
later
by
Ffs
-
-
-;
the
selection
has
now
been
erased
from
the
memory.
ERASING
THE
ENTIRE
FTS
MEMORY
Press
FTS
and
then
RECALL
or
one
of
the
Me
B
keys.
FtS
appears
on
the
display
together
with
a
ranking
number.
Hold
RPT
and
CANCEL
pressed
down.
CLr
ALL
appears
on
the
display,
followed
a
few
moments
later
by
FtS
-
-
-:
the
FTS
memory
has
now
been
erased
completely.
|1e@ete
OTHER
POSSIBILITIES
LISTENING
WITH
HEADPHONES
@
Connect
headphones
with
a
6.3
mm
jack
plug
and
an
impedance
between
8
and
2000
ohms
to
the
PHONES
socket.
~
The
volume
of
the
sound
you
hear
is
determined
by
the
impedance
of
the
headphones
and
the
signal
level
on
the
disc
itself.
The
sound
level
can
be
adjusted
using
the
W
VOLUME
A
keys
on
the
remote
control.
RECORDING
FROM
YOUR
COMPACT
DISC
PLAYER
If
you
wish
to
make
a
tape
recording
of
a
disc
or
a
programme,
it
can
be
useful
to
store
the
recording
time
of
the
tape
in
the
player's
memory.
Should
the
disc
or
the
programme
be
longer
than
one
side
of
the
tape,
a
pause
will
then
be
inserted
automatically
after
the
last
track
which
fits
onto
that
side.
This
will
prevent
the
disc
or
the
programme
continuing
to
play
when
the
tape
has
already
stopped.
NOTE!
if
the
player
is
connected
to
the
amplifier
via
the
VARIABLE
output,
the
v
VOLUME
4
keys
may
not
be
used
during
recording.
If
necessary,use
the
VOLUME
4
key
to
increase
the
volume
level
up
to
the
volume
level
at
which
the
amplifier
has
been
set.
e
Press
PROGRAM
MODE
iwice.
—
EDIT
lights
up
and
MIN
starts
flashing.
@
Key
in
the
total
recording
time
of
the
tape
using
the
’1-0°
digit
keys.
@
Press
MEMO.
—
TRACK,
STEP,
MIN
and
SEC
light
up.
—
The
recording
time
is
now
stored
in
the
players
memory;
you
can
now
record
the
disc
or
first
compile
a
programme
from
the
disc.
e@
Press
PLAY-REPLAY
(P
)
to
play
the
disc
or
the
programme.
-
[a]
lights
up.
—
The
track
number
indicator
shows
which
tracks
can
be
recorded
on
side
A
of
the
tape;
these
numbers
will
be
played
one
after
the
other.
—
Play
will
stop
after
the
last
track.
-
[B]
lights
up.
—
The
track
number
indicator
shows
which
tracks
can
be
recorded
on
side
B
of
the
tape.
@
Press
PAUSE
(11)
to
continue
play.
NOTE!
—
You
can
also
start
playback
with
RANDOM;
the
numbers
will
then
be
recorded
in
a
different
order
than
on
the
disc
or
in
the
programme.
—
As
soon
as
you
press
PLAY-REPLAY
(>
)
or
RANDOM,
the
other
player
functions
(except
TIME)
will
temporarily
be
switched
off
to
prevent
the
recording
being
interfered
with.
—
Should
the
disc
or
the
programme
be
longer
than
the
tota/recording
time
of
the
tape,
a
pause
will
then
again
be
inserted
after
the
last
track
which
fits
onto
side
B.
[a]
lights
up
again
and
the
track
number
indicator
shows
the
remaining,
unrecorded
tracks.
ADDITIONAL
INFORMATION
i
i
a
MAINTENANCE
REPAIRS
Discs
Although
both
sides
of
a
disc
are
protected
by
a
special
coating,
it
is
still
advisable
to
treat
the
discs
with
care:
@
Never
leave
discs
lying
around,
put
them
back
in
their
holders
immediately
after
use.
@
Never
write
on
the
printed
side
of
the
disc!
@
Do
not
attach
any
stickers
to
the
disc.
@
Keep
the
shiny
surface
of
the
disc
clean.
Use
a
soft
lint-free
cloth
and
always
wipe
the
disc
in
a
straight
line
from
centre
to
edge.
You
may
breathe
lightly
on
the
disc
first.
NOTE!
Cleaning
agents
for
conventional
records
are
not
suitable
for
cleaning
a
Compact
Disc.
Detergents
or
abrasive
cleaning
agents
should
not
be
used
either.
The
player
The
player
mechanism
is
fitted
with
self-lubricating
bearings
and
must
not
be
oiled
or
greased.
A
chamois
leather
slightly
moistened
with
water
is
sufficient
for
cleaning
the
player.
Do
not
use
cleaning
agents
containing
alcohol,
spirit,
ammonia
or
abrasives.
The
disc
tray
should
be
kept
free
of
dust.
IN
CASE
OF
DIFFICULTY
If
you
suspect
that
your
CD
player
is
faulty,
first
check
the
following
items
before
contacting
your
dealer
or
the
nearest
Marantz
Service
Centre.
Disc
does
not
rotate
@
Check
that
both
shipping
clamps
have
been
removed.
@
Check
that
the
mains
lead
is
properly
connected.
@
Check
that
the
CD
player
is
switched
on.
@
Check
that
the
disc
is
not
placed
upside
down.
(The
disc
should
be
placed
with
the
label
face
up.)
@
Check
that
the
disc
is
not
dirty.
@
Check
that
the
disc
has
no
scratches.
@
Check
that
the
disc
is
not
warped.
Disc
rotates
but
no
sound
is
heard
@
Check
the
connections
between
the
CD
player,
amplifier
and
speakers.
@
Check
that
the
amplifier
is
switched
on.
@
Check
that
the
volume
control
of
the
amplifier
is
not
set
to
the
minimum
position.
@
Check
that
the
source
selector
of
the
amplifier
is
set
to
CD,
AUX
or
whichever
position
corresponds
to
the
CD
player.
Sound
is
noisy
or
interrupted
intermittently
@
Check
for
dirt
on
the
disc.
@
Check
the
disc
for
large
scratches.
@
Check
the
disc
for
warps.
@
Check
the
connections
between
the
CD
player,
amplifier
and
speakers.
The
player
does
not
react
to
the
commands
from
the
remote
control
handset
@
The
batteries
are
low
and
the
distance
to
the
player
was
too
great,
or
you
did
not
aim
accurately
enough
in
the
direction
of
the
player.
@
The
batteries
are
flat.
In
the
event
of
difficulty
please
refer
to
your
local
dealer
or
write
directly
to
your
local
Marantz
Authorized
Service
Centre.
The
names
and
addresses
are
listed
on
the
back
page.
Please
quote
the
mode!
and
serial
number
of
your
CD
player
and
enclose
a
full
description
of
what
you
feel
is
abnormal
in
its
behaviour.
Repacking
for
shipment
Should
it
become
necessary
to
repack
the
CD
player
for
shipment
to
an
Authorized
Service
Centre,
or
elsewhere,
please
observe
the
following
precautions:
@
Refit
the
two
shipping
clamps
on
the
underside
of
the
player.
@
Pack
the
unit
carefully,
using
the
original
packaging
material.
@
Ship
viaa
reputable
carrier
(do
not
use
Parcel
Post)
and
obtain
a
shipping
receipt
from
the
carrier.
e@
Remember
to
include
your
return
address
on
the
shipping
label.
@
Enclose
as
detailed
a
description
of
the
problem
as
possible.
TECHNICAL
DATA
Typical
audio
performance
Number
of
channels:
2
Frequency
range:
2-20
000
Hz
Phase
linearity:
+0.5°
Dynamic
range:
96
dB
Signal-to-noise
ratio:
>
105
dB
Channel
separation:
>
105
dB
Total
harmonic
distortion:
<0.002%
(1
KHz)
Wow
and
flutter:
quartz
crystal
precision
D/A
conversion:
quadruple
oversampling
(176.4
kHz)
with
digital
filter
and
two
16-bit
D/A
converters
Error
correction
system:
Cross
Interleaved
Reed
Solomon
Code
(CIRC)
Optical
readout
system
(laser
pick-up)
Laser:
semi-conductor
AlGaAs
Wavelength:
780
nm
Signal
format
Sampling
frequency:
44.1
kHz
Quantization:
16
bit
linear/channel
Power
supply
Mains
voltage:
see
type
plate
at
rear
of
player
Mains
frequencies:
50
and
60
Hz
Power
consumption:
20
W
approx.
Safety
requirements:
IEC
Cabinet,
general
Material/finish:
metal
and
polystyrene
with
decorative
trim
Dimensions
(w
x
hx
d):
420
x
100
x
280
mm
Weight:
4,7
kg
approx.
Disc
Diameter:
80/120
mm
Thickness:
1.2
mm
Direction
of
rotation
(seen
from
reading
side):
anti-clockwise
Scanning
velocity:
1.2-1.4
m/s
Rotation
speed:
500-200
rpm
Playing
time
(theoretical):
74
min
(stereo)
Track
pitch:
1.6
wm
Material:
plastic
The
right
is
reserved
to
change
data
if
necessary
This
Compact
Disc
player
complies
with
the
radio
interference
requirements
as
laid
down
in
EC
(European
Community)
regulations.