manuals.online logo
Brands
  1. Home
  2. •
  3. Brands
  4. •
  5. Marantz
  6. •
  7. CD Player
  8. •
  9. Marantz CC3000 User manual

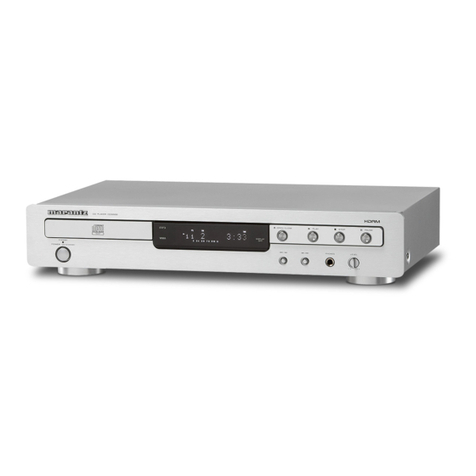
Marantz CC3000 User manual

Other manuals for CC3000

5

This manual suits for next models

3

Other Marantz CD Player manuals

Marantz 74CD60 User manual

Marantz

Marantz 74CD60 User manual

Marantz CD110/N1S User manual

Marantz

Marantz CD110/N1S User manual

Marantz CC3000 User manual

Marantz

Marantz CC3000 User manual

Marantz CDR500 F1B User manual

Marantz

Marantz CDR500 F1B User manual

Marantz SA-KI-PEARL-LITE User manual

Marantz

Marantz SA-KI-PEARL-LITE User manual

Marantz CD-57 User manual

Marantz

Marantz CD-57 User manual

Marantz SA-1 User manual

Marantz

Marantz SA-1 User manual

Marantz CD6004 User manual

Marantz

Marantz CD6004 User manual

Marantz SA-10 User manual

Marantz

Marantz SA-10 User manual

Marantz SA-11S1 User manual

Marantz

Marantz SA-11S1 User manual

Marantz SA-14S1 User manual

Marantz

Marantz SA-14S1 User manual

Marantz CD6000K User manual

Marantz

Marantz CD6000K User manual

Marantz RS-232C User manual

Marantz

Marantz RS-232C User manual

Marantz SA8001 User manual

Marantz

Marantz SA8001 User manual

Marantz CD5005 User manual

Marantz

Marantz CD5005 User manual

Marantz SA8004 User manual

Marantz

Marantz SA8004 User manual

Marantz SA-17S1 User manual

Marantz

Marantz SA-17S1 User manual

Marantz SA-11S2 User manual

Marantz

Marantz SA-11S2 User manual

Marantz HD-CD1 User manual

Marantz

Marantz HD-CD1 User manual

Marantz CD7300 User manual

Marantz

Marantz CD7300 User manual

Marantz CD5001 OSE Owner's manual

Marantz

Marantz CD5001 OSE Owner's manual

Marantz CD6005 User manual

Marantz

Marantz CD6005 User manual

Marantz M-CR611 User manual

Marantz

Marantz M-CR611 User manual

Marantz SA-15S1 User manual

Marantz

Marantz SA-15S1 User manual

Popular CD Player manuals by other brands

Arcam CD23 Handbook

Arcam

Arcam CD23 Handbook

Sanyo MCD-Z1F Service manual

Sanyo

Sanyo MCD-Z1F Service manual

JVC RC-ST3SL instructions

JVC

JVC RC-ST3SL instructions

Technics SL-P9066 operating instructions

Technics

Technics SL-P9066 operating instructions

Sony DVP-FX850 Service manual

Sony

Sony DVP-FX850 Service manual

Philips AZ1140 Instrukcja obs?ugi

Philips

Philips AZ1140 Instrukcja obs?ugi

Alpine 7909 owner's manual

Alpine

Alpine 7909 owner's manual

JVC CH-X350 instructions

JVC

JVC CH-X350 instructions

RCA RP-7923 instruction manual

RCA

RCA RP-7923 instruction manual

Pioneer DEH-P3550MP XM Operation manual

Pioneer

Pioneer DEH-P3550MP XM Operation manual

Philips Shockproof AX2102 brochure

Philips

Philips Shockproof AX2102 brochure

Philips CD582 user manual

Philips

Philips CD582 user manual

Philips AZ 6821 operating manual

Philips

Philips AZ 6821 operating manual

Lasonic MSU-2020 user manual

Lasonic

Lasonic MSU-2020 user manual

Denon DCD-1420 Service manual

Denon

Denon DCD-1420 Service manual

Panasonic SJ-MR100 operating instructions

Panasonic

Panasonic SJ-MR100 operating instructions

Onkyo DX-7210 instruction manual

Onkyo

Onkyo DX-7210 instruction manual

Cambridge Audio SONATA CD30 manual 

Cambridge Audio

Cambridge Audio SONATA CD30 manual 

manuals.online logo
manuals.online logoBrands
  • About & Mission
  • Contact us
  • Privacy Policy
  • Terms and Conditions

Copyright 2025 Manuals.Online. All Rights Reserved.

R
Model CC3000/CC4000/CC4000 OSE User Guide
5 Disc CD Changer
CAUTION
RISK OF ELECTRIC SHOCK
DO NOT OPEN
CAUTION: TO REDUCE THE RISK OF ELECTRIC SHOCK,
DO NOT REMOVE COVER (OR BACK).
NO USER-SERVICEABLE PARTS INSIDE.
REFER SERVICING TO QUALIFIED SERVICE PERSONNEL.
The lightning flash with arrowhead symbol, within an equilateral triangle,
is intended to alert the user to the presence of uninsulated “dangerous
voltage” within the product’s enclosure that may be of sufficient magni-
tude to constitute a risk of electric shock to persons.
The e clamation point within an equilateral triangle is intended to alert
the user to the presence of important operating and maintenance (ser-
vicing) instructions in the literature accompanying the appliance.
WARNING
TO REDUCE THE RISK OF FIRE OR ELECTRIC SHOCK, DO NOT EXPOSE THIS APPLIANCE TO RAIN OR MOISTURE.
CAUTION:
TO PREVENT ELECTRIC SHOCK, MATCH WIDE BLADE OF PLUG TO WIDE SLOT, FULLY INSERT.
ATTENTION:
POUR ÉVITER LES CHOCS ÉLECTRIQUES, INTRODUIRE LA LAME LA PLUS LARGE DE LA FICHE DANS LA BORNE CORRESPON-
DANTE DE LA PRISE ET POUSSER JUSQU’AU FOND.
LASER SAFETY
T is unit employs a laser, Only a qualified service person s ould remove t e cover or attempt to service t is device, due to
possible eye injury.
CAUTION:
USE OF CONTROLS OR ADJUSTMENTS OR PERFORMANCE OF PROCEDURE OTHER THAN THOSE SPECIFIED HEREIN MAY RESULT IN HAZARDOUS
RADIATION EXPOSURE.
En lish
Français
En lish . . . . . . . . . . . . . . . . . . . .4
Français . . . . . . . . . . . . . . . . . .19
NOTE
:
This equipment has been tested and found to
comply with the limits for a Class B digital
device, pursuant to Part 15 of the FCC Rules.
These limits are designed to provide reason-
able protection against harmful interference in
a residential installation. This equipment gen-
erates, uses and can radiate radio frequency
energy and, if not installed and used in accor-
dance with the instructions, may cause harmful
interference to radio communications.
However, there is no guarantee that interfer-
ence will not occur in a particular installation. If
this equipment does cause harmful interfer-
ence to radio or television reception, which
can be determined by turning the equipment off
and on, the user is encouraged to try to correct
the interference by one or more of the following
measures:
– Reorient or relocate the receiving anten-
na.
– Increase the separation between the
equipment and receiver.
– Connect the equipment into an outlet on a
circuit different from that to which the
receiver is connected.
– Consult the dealer or an e perienced
radio/TV technician for help.
NOTE
:
Changes or modifications may cause
this unit to fail to comply with Part 15 of the FCC
Rules and may void the user’s authority to
operate the equipment.
This Class B di ital apparatus meets all
requirements of the Canadian Interference-
Causin Equipment Re ulations.
Cet appareil numérique de la Classe B
respecte toutes les exi ences du Rè lement
sur le matérier brouilleur du Canada.
4
En lish
T is product was designed and manufactured to meet strict quality and safety stan-
dards. T ere are, owever, some installation and operation precautions w ic you
s ould be particularly aware of.
1. Read Instructions - All t e safety and operating instructions s ould be read
before t e appliance is operated.
2. Retain Instructions - T e safety and operating instructions s ould be retained for
future reference.
3. Heed Warnin s - All warnings on t e appliance and in t e operating instructions
s ould be ad ered to.
4. Follow Instructions - All operating and use instructions s ould be followed.
5. Water and Moisture - T e appliance s ould not be used near water - for example,
near a bat tub, was bowl, kitc en sink, laundry tub or swimming pool, or in a wet
basement.
6. Carts and Stands - T e appliance s ould be used only wit a cart or stand t at is
recommended by t e manufacturer.
6A. An appliance and cart combination s ould be moved wit
care. Quick stops, excessive force, and uneven surfaces may
cause t e appliance and cart combination to overturn.
7. Wall or Ceilin Mountin - T e appliance s ould be mounted to a wall or ceiling
only as recommended by t e manufacturer.
8. Ventilation - T e appliance s ould be situated so t at its location or position does
not interfere wit its proper ventilation. For example, t e appliance s ould not be
situated on a bed, sofa, rug, or similar surface t at may block t e ventilation open-
ings; or, placed in a built-in installation, suc as a bookcase or cabinet t at may
impede t e flow of air t roug t e ventilation openings.
9. Heat - T e appliance s ould be situated away from eat sources suc as radiators,
eat registers, stoves, or ot er appliances (including amplifiers) t at produce eat.
10. Power Sources - T e appliance s ould be connected to a power supply only of
t e type described in t e operating instructions or as marked on t e appliance.
11. Groundin or Polarization - Precautions s ould be taken so t at t e grounding
or polarization means of an appliance is not defeated.
Caution:
To prevent electric
s ock, matc t e wide blade of t is plug to t e wide
slot and fully insert. Do not use t is (polarized) plug
wit an extension cord, receptacle or ot er outlet
unless t e blades can be fully inserted to prevent
blade exposure.
12. Power Cord Protection - Power supply cords s ould be routed so t at t ey are
not likely to be walked on or pinc ed by items placed upon or against t em, paying
particular attention to cords and plugs, convenience receptacles, and t e point
w ere t ey exit from t e appliance.
13. Cleanin - T e appliance s ould be cleaned only as recommended by t e manufac-
turer.
14. Power Lines - An outdoor antenna s ould be located away from power lines.
15. Outdoor Antenna Groundin - If an outside antenna is connected to t e receiver,
be sure t e antenna system is grounded so as to provide some protection against
voltage surges and built up static c arges.
Section 810 of t e National Electrical Code, ANSI/NFPA No. 70-1984, provides
information wit respect to proper grounding of t e mast and supporting structure,
grounding of t e lead-in wire to an antenna disc arge unit, size of grounding con-
nectors, location of antenna-disc arge unit, connection to grounding electrodes, and
requirements for t e grounding electrode. See figure below.
16. Non-use Periods - T e power cord of t e appliance s ould be unplugged from t e
outlet w en left unused for a long period of time.
17. Object and Liquid Entry - Care s ould be taken so t at objects do not fall and liq-
uids are not spilled into t e enclosure t roug openings.
18. Dama e Requirin Service - T e appliance s ould be serviced by qualified ser-
vice personnel w en:
A. T e power supply cord or t e plug as been damaged; or
B. Objects ave fallen, or liquid as spilled into t e appliance; or
C. T e appliance as been exposed to rain; or
D. T e appliance does not appear to operate normally or ex ibits a marked c ange
in performance; or
E. T e appliance as been dropped, or t e enclosure damaged.
19. Servicin - T e user s ould not attempt to service t e appliance beyond t at
described in t e operating instructions. All ot er servicing s ould be referred to
qualified service personnel.
SAFETY INSTRUCTIONS – Read before operatin equipment
5
En lish
SAFETY INSTRUCTIONS
Note to the Cable TV system installer
T is reminder is provided to call t e Cable TV system installer's attention to Article 820-40 of t e NEC t at provides guidelines for proper grounding
and, in particular, specifies t at t e cable ground s all be connected to t e grounding system of t e building, as close to t e point of cable entry as
practical.
Ground Clamp
Electric Service Equipment
Antenna Dischar e Unit
(NEC Section 810-20)
Groundin Conductors
(NEC Section 810-21)
Ground Clamps
Antenna Lead-in Wire
Power Service Groundin Electrode System
(NEC Art. 250, Part H)
Example of Antenna Groundin as
per NEC - National Electrical Code
6
En lish
Thank you for selectin the Marantz CC 3000 &
CC4000 & CC4000 OSE Compact Disc Chan er.
A Compact Disc C anger of t e state-of-t e-art Marantz
t e CC 3000, CC4000 & CC4000 OSE combines supreme
playback quality wit a ig degree of user-friendliness
by offering t e following possibilities:
– able to play CD-RW disc;
– c anging CDs during play;
– quick access to a particular CD by means of QUICK
PLAY;
– storing 40 tracks from different CDs in any desired
order in t e c anger memory;
– storing t e required recording time and playing time
in t e EDIT mode.
Power Supply Settin
• C eck t at t e type plate on t e rear of your c anger
indicates t e correct supply voltage.
• If your mains supply voltage is different, consult your
dealer or our Service Organisation.
Sitin the Compact Disc Chan er
Free standin
• Always position t e c anger orizontally on a flat,
firm surface.
• Allow a free space of at least 3 cm above t e
c anger so as not to interfere wit t e cooling of t e
c anger.
In an audio rack
• T e c anger can be sited in any desired position.
Stacked
• Site t e c anger preferably at t e bottom or at t e
top.
• Never position t e c anger directly on top of a ig -
power amplifier, as suc an amplifier gives off a
substantial amount of eat.
RECEIVER
CD CHANGER
CASSETTE DECK
Introduction . . . . . . . . . . . . . . . . . . . . . . .6
Installation . . . . . . . . . . . . . . . . . . . . .6 - 7
Functional Overview . . . . . . . . . . . . .7 - 9
Playback . . . . . . . . . . . . . . . . . . . . .11 - 15
Programming . . . . . . . . . . . . . . . . . . . . .15
dit . . . . . . . . . . . . . . . . . . . . . . . . . .16 - 17
Additional Information . . . . . . . . .17 - 18
Troubleshooting . . . . . . . . . . . . . . . . . . .18
CONTENTS INTRODUCTION INSTALLATION
Connections
1 Di ital Out
T is output supplies digital signal and can t erefore
only be connected to an input w ic is suitable for
t is signal. Use ere a lead wit one cinc plug on
eit er end.
Never connect this socket to a non-digital input
of an amplifier, such as AUX, CD, TAP , PHONO
etc!
2 Analo Out
For t e connecting cable to t e amplifier.
• Insert a red plug into t e ‘R’ socket and t e
ot er plug into t e ‘L’ socket.
• Insert t e two ot er plugs into t e corresponding
sockets of t e CD or AUX input of your amplifier.
You can also use t e TUNER or TAPE IN connection,
but never t e PHONO input!
3 Remote Control
For connecting up t e equipment w en you are
incorporating t e c anger in a HiFi system wit its
own remote control system.
Connectin Headphones (for CC4000 &
CC4000OSE only)
• Connect eadp ones wit a 6.3 mm jack plug to t e
PHONES socket.
• T e sound level is adjusted wit t e LEVEL control.
Note:
– The volume control on the remote control must not be
at the minimum level.
PHONES/
LEVEL
7
En lish
INSTALLATION
21
COAXIAL
ANALOG
OUT
RL
3
REMOTE
CONTROL
IN OUT
DIGITAL
OUTPUT
8
En lish
FUNCTIONAL OVERVIEW
11POWER-ON/ OFF
Switc ing on and off.
22EDIT
Activating t e EDIT function w en making a
recording.
33PROGRAM
Opening t e memory w en compiling a program.
44TIME
Selecting t e information you want to see on t e
display.
55SCAN
Automatically playing t e beginning of eac track.
66REPEAT
Repeating play.
77FADER
Fading in and out during play.
PEAK SEARCH
Searc ing t e loudest passage (peak) on a CD or in
a program w en making a tape recording.
88DISPLAY
Informs you about t e functioning of t e player.
99I(nfra) R(ed) SENSOR
Receives t e signals from t e remote control.
00SHUFFLE
Playing in random order.
!!PAUSE ;
Interrupting play.
@@S T
– Selecting anot er track during play.
– Selecting a track to start play wit .
– Selecting tracks w en compiling a program.
– Fast searc to a particular passage during play.
– Selecting t e recording mode during edit.
– Selecting t e recording time during edit.
##STOP 9
– Stopping play.
– Cancel a Program, Peak Searc or Edit.
$$PLAY 2
– Starting play.
– Returning to t e beginning of a track.
%%CD DIRECT PLAY
– Selecting anot er CD during play.
– Selecting a CD to start play wit .
– Selecting CDs w en compiling a Program, Peak
Searc or Edit.
^^OPEN/CLOSE
Opening and closing t e CD compartment.
&&CD CAROUSEL TRAY
**LEVEL (for CC4000 & CC4000 OS only)
Adjusting t e volume w en listening wit
eadp ones.
((PHONES (for CC4000 & CC4000 OS only)
Connecting eadp ones.
))QUICK PLAY
Immediate playing of a particular CD.
¡¡LOAD
Rotating t e turntable in t e CD compartment w en
inserting CDs.
PROGRAM SCAN REPEAT
EDIT TIME P.SEARCH/F
TRACK PEAK TOT REM TRACK TIME
SHUFFLE VIDEO CD 1+G
PAUSE
REPEAT DISC
54
13 2
PROGRAM
1
POWER ON/OFF
PHONES/
LEVEL
5 DISC CD CHANGER
PAUSE
SHUFFLE
OPEN/CLOSE
STOP/CP PLAY/REPLAY
DISC
;
12 3 4 5
9)
?
CD REWRITABLE PLAYBACK
1
23 4 5 67 89!@# $%
^&*(
0
PROGRAM SCAN REPEAT
EDIT TIME P.SEARCH/F
TRACK PEAK TOT REM TRACK TIME
SHUFFLE VIDEO CD 1+G
PAUSE
REPEAT DISC
54
13 2
PROGRAM
1
POWER ON/OFF
PHONES/
LEVEL
5 DISC CD CHANGER CC4000
PAUSE
SHUFFLE
OPEN/CLOSE
STOP/CP PLAY/REPLAY
DISC
;
12 3 4 5
9)
?
CD REWRITABLE PLAYBACK
¡)
Remote Control 1 PAUSE ;
Interrupting play.
2 SCAN
Automatically playing t e beginning of eac track.
3 PROG.
Opening t e memory w en compiling a program.
4 DISC
– Selecting anot er CD during play.
– Selecting a CD to start play wit .
– Selecting CDs w en compiling a Program, Peak
Searc or Edit.
5 TRAY OPEN /
Opening and closing t e CD compartment.
6 SHUFFLE
Playing in random order.
7 0-9 DIGIT KEYS
– Selecting anot er track.
– Selecting a track to start play wit .
– Selecting tracks w en compiling a program.
8 REPEAT
Repeating play.
9 – VOLUME +
Adjusting t e sound level w en t e c anger is
connected via t e ANALOG or DIGITAL OUT output
to an amplifier or HiFi system wit out its own
remote control. Also for adjusting t e sound level
on t e eadp ones.
10 ∞PREV. / NEXT §
– Selecting anot er track during play.
– Selecting a track to start play wit .
– Selecting tracks w en compiling a program.
– Fast searc to a particular passage during play.
– Selecting t e recording mode during edit.
– Selecting t e recording time during edit.
11 STOP 9
– Stopping play.
– Cancel a Program, Peak Searc or Edit.
12 PLAY 2
– Starting play.
– Returning to t e beginning of a track.
T e life of t e batteries of t e remote control is around
one year. For replacement only use batteries of t e type
RO3, UM4 or AAA.
PROG.
DISC
SCAN SHUFFLE
É
Ç
∞
VOLUME
PAUSE REPEAT
DIGITAL REMOTE CONTROL
2
4
89
3
5
1
7
0
/
§
5
6
7
8
9
10
11
10
12
1
2
3
4
2 X 1.5 V R03 /
UM4 / AAA
9
En lish
FUNCTIONAL OVERVIEW
Display
{
– Lig ts up w en t e c anger receives a command from
t e remote control.
1 - 5 CD number indicator
– Lig ts up w en you switc t e c anger on.
– Indicates t e number of CDs in t e CD compartment.
– Indicates w at CD is being played (CD number
flas es).
PROGRAM
– Flas es w en a program is being compiled.
– Lig ts up w en a program is being played.
TRACK –Indicates:
– w at track is being played;
– t e number of tracks on a CD or in a program.
PEAK
– Flas es w en t e loudest passage (peak) on a CD or
in a program is being searc ed.
– Lig ts up w en t e loudest passage (peak) as been
found.
TRACK TIME
– Indicates t e elapsed playing time of t e track being
played.
REM(aining) TRACK TIME
– Indicates t e remaining playing time of t e track
being played.
TOT(al) REM(aining) TIME
– Indicates t e remaining playing time of a CD.
TOT(al) TIME
– Indicates t e total playing time of a CD.
SHUFFLE
– Lig ts up w en t e tracks are played in random order.
PAUSE
– Lig ts up w en play is interrupted.
REPEAT 1
– Lig ts up w en you repeat a track.
REPEAT DISC
– Lig ts up w en you repeat a CD.
REPEAT
– Lig ts up w en you repeat all CDs or a program from
t em.
Display messa es:
– Lig ts up w en a CD’s contents list is being
scanned.
–Lig ts up w en t ere are no CDs in t e CD
compartment.
– Lig ts up w en you select a non-
existent track number.
– Lig ts up w en you try to activate a
function for w ic you must first select a CD number.
– Lig ts up w en you give a play
command w ile t e CD compartment is empty.
– Lig ts up if you try to activate a
function for w ic you must first stop play.
– Lig ts up w en t e player is put into t e
EDIT mode.
54
13 2
10
En lish
FUNCTIONAL OVERVIEW