Marantz MV5100 User manual

R
Model MV5100 User Guide
Video Cassette Recorder
SUPER VHS ET
REC/OTR
MENU
OK/STATUS
S-VHS ET
AUDIO
POWER VCR/TV
CHANNEL PLAYPAUSE/STILL
STOP/EJECT
OPEN A/V FRONT CONNECTORS DUBBING
VCR
SPSLP
NORM
-15dB
6
0
4
+8
L
HI-FI STEREO VIDEO CASSETTE RECORDER MV5100
VCRTV
VCR/TV
QUICK PROGRAMMING
POWER
STILL/SLOW
SMARTPICTURE
CHVOL
MENU
TIMER
JOG/SHTL
TURBO
TIMER
AUDIO/
MUTE
SKIP
SEARCH
TAPE
MANAGER
OK/STATUS
-
.......... ..........
+
CBL/DBS
1
–+*
2
ABC
3
DEF
4
GHI
5
JKL
6
MNO
7
PQRS
8
TUV
9
WXYZ
START STOP DATE
VPS/PDC DAILY
SPEED DBS/SAT
PLAY
REW FF
STOP
WEEKLY
/OTR
REC
-
+
-
+
ALT
0
CLEAR
SAT/
REV FWD
COVER MV5100 00.7.14, 6:19 PM1

SAFETY PRECAUTIONS
Introduction
Congratulations on purchasing your
newVCR.
You can’t wait to get it working,but
before you do, spare a few moments to
read this brief introduction to the world of
video recording. It may repay you hand-
somely in terms of improved results, and
avoiding of costly mistakes.
Positioning
Do not place theVCR directly on top of,
or underneath,yourTV set.Ensure that
there is at least 20 cm between theVCR
and theTV set,and that air can circulate
freely through the ventilation openings of
theVCR.
WARNING: TO PREVENT FIRE OR SHOCK HAZARD,
DO NOT EXPOSETHIS EQUIPMENTTO
RAIN OR MOISTURE.
CAUTION
RISK OF ELECTRIC SHOCK
DO NOT OPEN
CAUTION: TO REDUCE THE RISK OF ELECTRIC SHOCK, DO NOT
REMOVE COVER (OR BACK). NO USER-SERVICEABLE PARTS
INSIDE. REFER SERVICING TO QUALIFIED SERVICE PERSONNEL.
This“bolt of lighting” indicates uninsulated material
within your unit may cause an electrical shock.For the
safety of everyone in your household, please do not
remove product covering.
This“exclamation point” calls attention to features
for which you should read the enclosed literature
closely to prevent operating and maintenance
problems.
For Customer Use
Enter below the Serial No. which is located
on the rear of the cabinet.
Retain this information for future reference.
Model No.
Serial No.
CAUTION: To prevent electrical shock, match wide
blade of plug to wide slot,and fully insert.
ATTENTION: Pour éviter les chocs électriques,introduire
la lame la plus large de la fiche dans la
borne correspondante de la prise et pouss
er jusqu’au fond.
FCCWarning: Any unauthorized changes or modifications
to this equipment void the user’ authority
to operate it.
MV5100 02-3 7/21/00 10:56 AM Page 1

Introduction 3
Welcome to yourVCR owner’s manual.
This manual has seven sections:Setting UpYourVCR; Description of Controls;Basic Operations; Recording;
Playing;Additional Features;and InformationYou May Need.The instructions explain all of theVCR’s fea-
tures,which are listed below.
• Your new product,its packaging,and
this manual contain materials that
can be recycled and reused.
Specialized companies can recycle
your product to increase the amount
of reusable materials and to mini-
mize the amount that needs to be
properly disposed.
Your product uses batteries that
should not be thrown away when
depleted but should be disposed of
as small chemical waste. Please find
out about the local regulations on
disposal of your old products,batter-
ies,manual,and packaging whenever
you replace existing equipment.
Helpful Hint
The ENERGY STAR®name and logo are registered marks of the U.S.
Environmental ProtectionAgency. As an ENERGY STAR®Partner,Marantz
America,Inc. has determined that this product meets the ENERGY STAR®
guidelines for energy efficiency.
SmartPicture and ShowGuard are trademarks of Marantz America,Inc.
VCR Plus+C3and PlusCode are registered trademarks of Gemstar
Development Corporation.TheVCR Plus+ system is manufactured
under license from Gemstar Development Corporation.
Copyright 2000 Marantz America Inc.All rights reserved.
Features
• Automatic Channel Setup
• Automatic Clock Setting
• Automatic Head Cleaner/Head CleaningWarning
• Audio Dubbing
• Blue Background
• Child Lock
• Controller for Cable Box or Direct Broadcasting
System (DBS)
• Daylight-SavingsTime
• Digital Studio Picture Control (DSPC)
• Hi-Fi StereoTape Playback
• Index Search
• Multi-ChannelTelevision Sound (MTS) System
• 19 Micron Head
• On-Screen Menus in English,Spanish, or French
• Program OverlapWarning
• Quick Programming
• Record Link
• Remote Control with Capability to OperateTV,
Cable Box,and Direct Broadcast System (DBS)
• Repeat Play
• S-VHS ET
• S-VHS Recording
• ShowGuardTM-IndefiniteTimer Recording Memory
• Skip Search
• SmartPictureTM
• Tape Manager
• TurboTimer
• VCR Plus+ Programming System
• Video Stabilizer
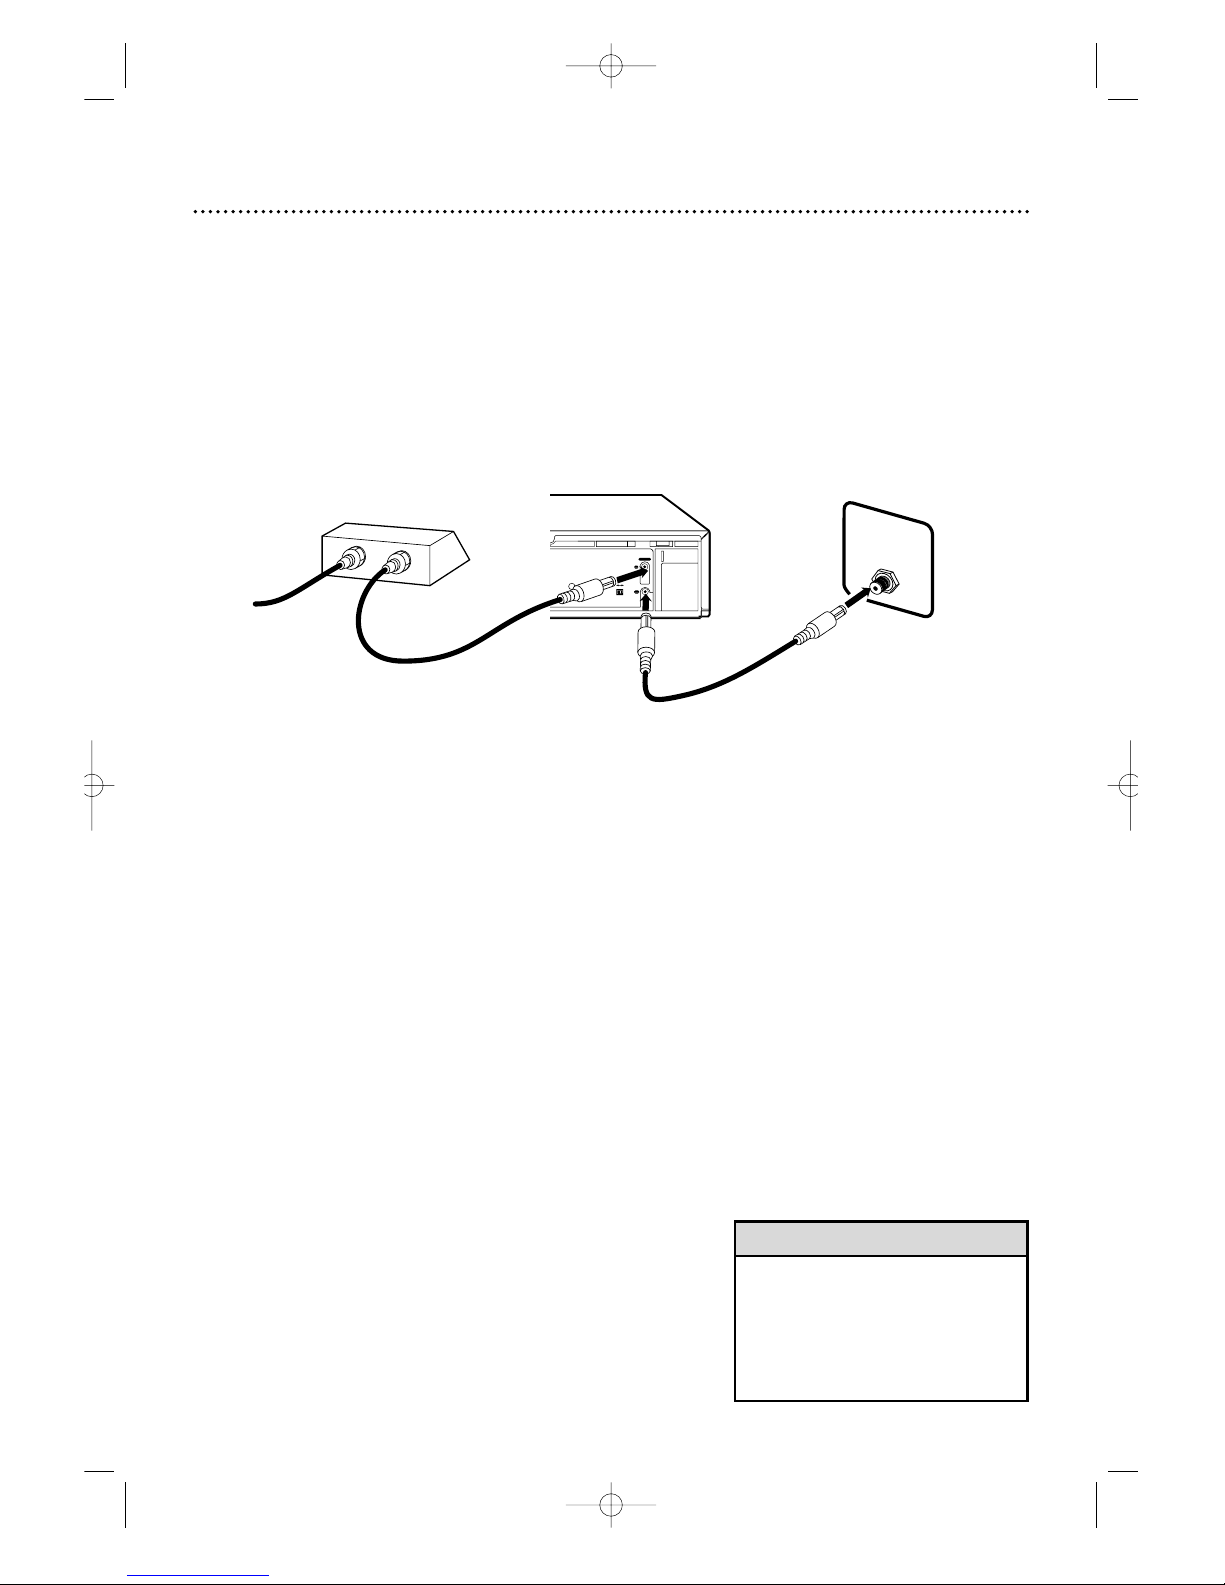
ThisVCR,equipped with a High Quality (HQ) System,is compatible with existingVideo Home System (VHS)
equipment. It also has a 19 micron head that provides a better picture when you view tapes recorded in slow
speed (SLP). The S-VHS feature provides the best picture quality when theVCR uses S-VHS tapes.
MARANTZAMERICA,Inc.recommends that you use only video cassette tapes that are labelled with the
mark or the mark.The use of other tapes may result in poor picture quality and excessive deposits on
the video heads,which may not be covered by the warranty if damage occurs.
Safety Precautions
Warning:To prevent fire or shock hazard,do not expose this equipment to rain or moisture.
Federal Communications Commission (FCC)Warning:Any unauthorized changes or modifica-
tions to this equipment void the user’s authority to operate it.
Note to the CableTV System Installer:This reminder is provided
to call the CableTV system installer’s attention toArticle 820-40
of the National Electrical Code,which provides guidelines for proper
grounding – in particular,specifying that the cable ground shall be
connected to the grounding system of the building,as close to the
point of cable entry as possible.
Declaration of Conformity
Model Number: MV5100
Trade Name: MARANTZ
Responsible Party: MARANTZAMERICA,Inc
440 Medinah Road,
Roselle,IL 60172
(630) -307-3100
This device complies with part 15 of the FCC Rules. Operation is subject to the fol-
lowing two conditions:(1)This device may not cause harmful interference,and (2) this
device must accept any interference received, including interference that may cause
undesired operation.
MV5100 02-3 7/21/00 10:56 AM Page 2

4 Table of Contents
Setting UpYourVCR
Introduction . . . . . . . . . . . . . . . . . . . . . . . . . . . . . . . . . . . . . . . . . . . . . . . . . . . . . . .3
Table of Contents . . . . . . . . . . . . . . . . . . . . . . . . . . . . . . . . . . . . . . . . . . . . . . . . . . .4
Before UsingYourVCR . . . . . . . . . . . . . . . . . . . . . . . . . . . . . . . . . . . . . . . . . . . . . . .5
Hookups without a Cable Box . . . . . . . . . . . . . . . . . . . . . . . . . . . . . . . . . . . . . . . .6-7
Hookups with a Cable Box/Direct Broadcast System . . . . . . . . . . . . . . . . . . . . . . .8-9
Turning onYourVCR . . . . . . . . . . . . . . . . . . . . . . . . . . . . . . . . . . . . . . . . . . . . . .10-11
Automatic Channel Setup . . . . . . . . . . . . . . . . . . . . . . . . . . . . . . . . . . . . . . . . . .12-13
Setting the Clock . . . . . . . . . . . . . . . . . . . . . . . . . . . . . . . . . . . . . . . . . . . . . . . .14-18
Daylight-SavingsTime . . . . . . . . . . . . . . . . . . . . . . . . . . . . . . . . . . . . . . . . . . . . . . . .19
Language Selection . . . . . . . . . . . . . . . . . . . . . . . . . . . . . . . . . . . . . . . . . . . . . . . . . .20
Description of Controls
Display Panel . . . . . . . . . . . . . . . . . . . . . . . . . . . . . . . . . . . . . . . . . . . . . . . . . . . . . .21
Front Panel . . . . . . . . . . . . . . . . . . . . . . . . . . . . . . . . . . . . . . . . . . . . . . . . . . . . . . .22
Rear Panel . . . . . . . . . . . . . . . . . . . . . . . . . . . . . . . . . . . . . . . . . . . . . . . . . . . . . . .23
Remote Control Buttons . . . . . . . . . . . . . . . . . . . . . . . . . . . . . . . . . . . . . . . . . .24-25
On-Screen Status Displays . . . . . . . . . . . . . . . . . . . . . . . . . . . . . . . . . . . . . . . . . . . .26
Setting the Remote Control to Operate aTV . . . . . . . . . . . . . . . . . . . . . . . . . . . . .27
Setting the Remote Control to Operate a Cable Box/DBS . . . . . . . . . . . . . . . . . . . .28
Basic Operations
Playing . . . . . . . . . . . . . . . . . . . . . . . . . . . . . . . . . . . . . . . . . . . . . . . . . . . . . . . . . . .29
Recording . . . . . . . . . . . . . . . . . . . . . . . . . . . . . . . . . . . . . . . . . . . . . . . . . . . . . . . .30
Recording
S-VHS Recording . . . . . . . . . . . . . . . . . . . . . . . . . . . . . . . . . . . . . . . . . . . . . . . . . .31
S-VHS ET . . . . . . . . . . . . . . . . . . . . . . . . . . . . . . . . . . . . . . . . . . . . . . . . . . . . . . .32
Recording One Channel/Watching Another . . . . . . . . . . . . . . . . . . . . . . . . . . . . . .33
One-Touch Recording . . . . . . . . . . . . . . . . . . . . . . . . . . . . . . . . . . . . . . . . . . . . . . .34
Record Link . . . . . . . . . . . . . . . . . . . . . . . . . . . . . . . . . . . . . . . . . . . . . . . . . . . . . .35
Setting Up theVCR Plus+ Programming System . . . . . . . . . . . . . . . . . . . . . . . . .36-37
Timer Recording with theVCR Plus+ Programming System . . . . . . . . . . . . . . . .38-39
Quick Programming . . . . . . . . . . . . . . . . . . . . . . . . . . . . . . . . . . . . . . . . . . . . . .40-43
TurboTimer . . . . . . . . . . . . . . . . . . . . . . . . . . . . . . . . . . . . . . . . . . . . . . . . . . . . . . .44
Program Review . . . . . . . . . . . . . . . . . . . . . . . . . . . . . . . . . . . . . . . . . . . . . . . . . . . .45
Program OverlapWarning . . . . . . . . . . . . . . . . . . . . . . . . . . . . . . . . . . . . . . . . . . . .46
Timer Recording Speed Setting . . . . . . . . . . . . . . . . . . . . . . . . . . . . . . . . . . . . . . . .47
Rerecording (Tape Duplication) . . . . . . . . . . . . . . . . . . . . . . . . . . . . . . . . . . . . . . . .48
Audio Dubbing . . . . . . . . . . . . . . . . . . . . . . . . . . . . . . . . . . . . . . . . . . . . . . . . . . . .49
Connecting the Controller . . . . . . . . . . . . . . . . . . . . . . . . . . . . . . . . . . . . . . . . . . . .50
Setting the Controller to Operate a Cable Box . . . . . . . . . . . . . . . . . . . . . . . . .51-52
Setting the Controller to Operate a DBS . . . . . . . . . . . . . . . . . . . . . . . . . . . . . .53-54
Playing
Multi-ChannelTelevision Sound System . . . . . . . . . . . . . . . . . . . . . . . . . . . . . . . .55-56
Hi-Fi StereoTape Playback . . . . . . . . . . . . . . . . . . . . . . . . . . . . . . . . . . . . . . . . . . . .57
Video Stabilizer . . . . . . . . . . . . . . . . . . . . . . . . . . . . . . . . . . . . . . . . . . . . . . . . . . . .58
SmartPicture . . . . . . . . . . . . . . . . . . . . . . . . . . . . . . . . . . . . . . . . . . . . . . . . . . . . . .59
Digital Studio Picture Control . . . . . . . . . . . . . . . . . . . . . . . . . . . . . . . . . . . . . . . . .60
Search Options . . . . . . . . . . . . . . . . . . . . . . . . . . . . . . . . . . . . . . . . . . . . . . . . . . . .61
Playback Options . . . . . . . . . . . . . . . . . . . . . . . . . . . . . . . . . . . . . . . . . . . . . . . .62-63
Additional Features
Tape Manager . . . . . . . . . . . . . . . . . . . . . . . . . . . . . . . . . . . . . . . . . . . . . . . . . . .64-73
Child Lock . . . . . . . . . . . . . . . . . . . . . . . . . . . . . . . . . . . . . . . . . . . . . . . . . . . . . . . .74
Blue Background . . . . . . . . . . . . . . . . . . . . . . . . . . . . . . . . . . . . . . . . . . . . . . . . . . .75
Automatic Operation Features . . . . . . . . . . . . . . . . . . . . . . . . . . . . . . . . . . . . . . . . .76
InformationYou May Need
Glossary . . . . . . . . . . . . . . . . . . . . . . . . . . . . . . . . . . . . . . . . . . . . . . . . . . . . . . . . .77
Helpful Hints . . . . . . . . . . . . . . . . . . . . . . . . . . . . . . . . . . . . . . . . . . . . . . . . . . .78-79
Specifications . . . . . . . . . . . . . . . . . . . . . . . . . . . . . . . . . . . . . . . . . . . . . . . . . . . . . .80
Index . . . . . . . . . . . . . . . . . . . . . . . . . . . . . . . . . . . . . . . . . . . . . . . . . . . . . . . . . . . .81
MV5100 04-26 7/21/00 10:58 AM Page 4

Before UsingYour VCR 5
Putting Batteries in the Remote Control
3
Replace the battery compartment lid.
Using the Remote Control
• Do not put objects between the remote control and theVCR.
•Point the remote control at the device you are operating.
•Press theVCR button before pressing otherVCR buttons;press the
TV button before pressing otherTV buttons; press the
SAT/CBL/DBS button before pressing other Cable Box/DBS but-
tons.Details are on pages 24-25 and 27-28.
• The remote control and its batteries
are supplied.
• Do not mix alkaline and manganese
batteries.
• Do not mix old and new batteries.
• A thin, plastic cover may protect the
front panel of yourVCR.Before using
theVCR, lift a corner of the plastic,
then peel it off.
Helpful Hints
VCR Maintenance/Video Head Cleaning
•Remove any light adhesive stick-on notes from the video cassette
before putting the cassette in theVCR.Removable labels can jam
theVCR.
•Periodic maintenance is required to maintain yourVCR’s perfor-
mance.YourVCR automatically cleans the video heads each time
you insert a tape.However,the heads may become dirty.“USE
CLEANING CASSETTE” may appear on the screen,or“U:01” may
appear on theVCR display panel.Details are on page 79.
Erase Protection
Video cassettes have record tabs to ensure that recordings are not
erased accidentally.
1
To prevent accidental erasure,break off the tab with a
screwdriver.
2
To record again, cover the hole with cellophane tape.
1
To remove the battery compartment lid, push in the tab,
then pull up the lid.
2
Place twoAA batteries inside the battery compartment
with their +and – ends aligned as indicated.
1
2
1
2
3
MV5100 04-26 7/21/00 10:58 AM Page 5

6 Hookups without a Cable Box
LP
20917-003
INOUT
S VIDEO
VHF/UHF
IN
ANTENNA
OUT
TV
CABLE BOX
VIDEO
L
R
AUDIO
(MONO)
OUT IN
OR
LP
20917-003
VHF/UHF
IN
ANTENNA
OUT
TV
CH3 CH4
CH3 CH4
75Ω
ANT /
CABLE
OR
75Ω
ANT /
CABLE
The basicVCR/TV connection – antenna/cable toVCR toTV – is shown below. If you have a Cable Box or a
Direct Broadcast System,please refer to pages 8-9.After you hook up theVCR, please go to pages 10-11 to
turn on theVCR.
ANTENNA IN
Jack
(on back ofTV)
Cable
(75 ohm)
Antenna
Indoor/Outdoor
(300 ohm)
1
Disconnect the antenna or cable from yourTV.
2
Connect the antenna or cable to theANTENNA IN Jack on the back of the
VCR.
Cable
(75 ohm)
Antenna
Indoor/Outdoor
(300 ohm)
MV5100 04-26 7/21/00 11:52 AM Page 6

Hookups without a Cable Box (cont’d) 7
LP
20917-003
INOUT
S VIDEO
VHF/UHF
IN
ANTENNA
OUT
TV
CABLE BOX
VIDEO
L
R
AUDIO
(MONO)
OUT IN
CH 4
or
CH 3
CH3 / CH4
Switch
CH3 CH4
LP
20917-003
VHF/UHF
IN
ANTENNA
OUT
TV
CH3 CH4
CH3 CH4
LP
20917-003
VHF/UHF
OUT
TV
CH3 CH4
LP
20917-003
INOUT
S VIDEO
VHF/UHF
IN
ANTENNA
OUT
TV
CABLE BOX
VIDEO
L
R
AUDIO
(MONO)
OUT IN
75V
ANT/
CABLE
75Ω
ANT /
CABLE
CH3 CH4
RF coaxial cable
Antenna
or Cable
3
Connect the RF coaxial cable (supplied) to theTV OUT Jack on the back of
theVCR and to the ANTENNA IN Jack on theTV. (You may use either a snap-on
type or screw-on type of coaxial cable,whichever you prefer. A snap-on type is supplied.)
5
Set the CH3/CH4 switch on the back of theVCR to CH3 or CH4, whichever
channel is not used or least used in your area.To operate yourVCR with yourTV, set
theTV to the same channel. For example, when playing a tape, if the CH3/CH4
switch is set to CH3,theTV should be on channel 3.
Antenna In Jack
(on back of TV)
example only
4
Plug in theTV and theVCR.
6
You are ready to turn on theVCR. Please go to pages 10-11 before turning on
theVCR.
MV5100 04-26 7/21/00 10:58 AM Page 7

CH3 CH4
LP
20917-003
INOUT
S VIDEO
VHF/UHF
IN
ANTENNA
OUT
TV
CABLE BOX
VIDEO
L
R
AUDIO
(MONO)
OUT IN
OUT
IN
S
V
I
D
E
O
75Ω
ANT /
CABLE
OUT
IN
8 Hookups with a Cable Box/Direct Broadcast System
Connections
1
Connect a Cable signal to the IN jack on the Cable Box/DBS.
2
Use an RF coaxial cable (supplied) to connect the OUT jack on the
Cable Box/DBS to theANTENNA IN jack on theVCR.
3
Use a second RF coaxial cable to connect theTV OUT jack on the
VCR to theTV’sANTENNA IN jack.
Recording/Viewing Any Channel
1
With theVCR on and inVCR position (theVCR light will appear on
the display panel),use the CH(annel) 8/9button to set theVCR to
the Cable Box/DBS output channel (channel 03 or 04).
2
Set theTV to the same channel to which you set theVCR. Set the
CH3/CH4 switch on theVCR to the same channel.
3
Select the channel you want to view/record at the Cable Box/DBS.
12
There are two ways to connect your Cable Box/DBS to theVCR.With this connection:
•You may view any channel.
•You must select channels at the Cable Box/DBS.Channels cannot be changed at theVCR.
•You may not view a channel other than the one you are recording.
•You may not set up channels at theVCR.
•You can only program a timer recording for one channel at a time if you are not using the Controller. Set
theTV and theVCR to the Cable Box/DBS output channel (channel 03 or 04);set the CH3/CH4 switch
to the same channel.Set your Cable Box/DBS to the channel you want to record.When you enter the
channel you want to record in a timer recording, select channel 03 or 04 (the Cable Box/DBS output
channel).(This is step 3 on page 40.) Leave the Cable Box/DBS on for a timer recording.
•To set up the Controller,see pages 50-54.
3
Cable signal
RF coaxial cable RF coaxial cable
Cable Box/DBS VCR
TV’s
ANTENNA
IN jack
• If you are using Record Link,use
audio and video cables to connect
the AUDIO/VIDEO OUT jacks on
the Cable Box/DBS to the
AUDIO/VIDEO IN jacks on the back
of theVCR. Details are on page 35.
Helpful Hint
MV5100 04-26 7/21/00 10:58 AM Page 8

Hookups with a Cable Box/Direct Broadcast System (cont’d) 9
LP
20917-003
INOUT
S VIDEO
VHF/UHF
IN
ANTENNA
OUT
TV
CABLE BOX
(MONO)
IN
CH3 CH4
IN OUT
75Ω
ANT /
CABLE
Connections
1
Connect a Cable signal to theVCR’s ANTENNA IN jack.
2
Use an RF coaxial cable (supplied) to connect theTV OUT jack on
theVCR to the IN jack on the Cable Box/DBS.
3
Use a second RF coaxial cable to connect the OUT jack on the
Cable Box/DBS to theTV’sANTENNA IN jack.
Recording One Channel/Watching Another
1
Put the Cable Box/DBS on the same channel as theVCR’s
CH3/CH4 switch.Set theTV to the Cable Box/DBS output chan-
nel (03 or 04).
Then,with theVCR inVCR position (theVCR light will appear on
the display panel), use the CH(annel) 8/9button to select the
channel you want to record at theVCR. Start the recording.
2
Press theVCR/TV button once to put theVCR inTV position.
(TheVCR light will disappear.)
3
Select the channel you want to watch at the Cable Box/DBS.
12
With this connection:
•You may watch one channel while recording another.
•You may not record scrambled channels.
3
Cable signal
RF coaxial cable RF coaxial cable
VCR
Cable Box/DBS
TV’s
ANTENNA
IN jack
• When you play a tape,make sure
the Cable Box/DBS is set to the
same channel as the CH3/CH4
switch on theVCR. Set theTV to the
Cable Box/DBS output channel (03
or 04).
Helpful Hint
MV5100 04-26 7/21/00 10:58 AM Page 9

10 Turning onYour VCR
• Before turning on yourVCR,make sure there are batteries in
the remote control and theVCR,TV, and Cable Box/DBS (if
applicable) are connected.
• The menus will continue to appear every time you turn on the
VCR until you complete the steps on pages 10-11.
• If you want to set up the Controller now,you must first connect
the Controller. See page 50 before continuing.
• Leave the Cable Box turned on if you plan to set up the Cable
Box Controller now.
• If you plan to set up the Controller now,set the Cable Box to a
channel other than channel 09.
• Read through these steps before you begin;the process will be
easier if you familiarize yourself with this information before
beginning.
1
Press theVCR button, then press the POWER button.
3
Press the PLAY 8or STOP 9button to select the lan-
guage of the on-screen displays and menus.
2Turn on theTV.
4
Press the OK/STATUS button.The menu shown below will
appear.
➔ENGLISH
ESPAÑOL
FRANÇAIS
SELECT: 89 CONFIRM:OK
END: MENU
CABLE BOX CONTROLLER
OFF
AOFF CH.=CHANNEL
ON CH.2 ON CH. 7
ON CH.3 ON CH. 8
ON CH.4 ON CH. 9
ON CH.5 ON A/V FRONT
ON CH.6 ON A/V REAR
SELECT: , 9 CONFIRM:OK
END:MENU
• Auto or – – :– – may appear on
the display panel until the clock is
set.
• If you do not want to set up chan-
nels now,press the MENU button
at step 6.TUNER NOT SET will
appear on the screen briefly.
• You may not set up channels at
step 6 if you are using a Cable
Box/DBS.
Helpful Hints
3
4
1
2
Turn on theTV. Set it to channel 3 or 4, whichever chan-
nel the CH3/CH4 switch on the back of theVCR is set to
(or your Cable Box/DBS output channel,if applicable).
The menu shown below will appear.
VCRTV
VCR/TV
QUICK PROGRAMMING
POWER
STILL/SLOW
SMARTPICTURE
CHVOL
MENU
TIMER
JOG/SHTL
TURBO
TIMER
AUDIO/
MUTE
SKIP
SEARCH
TAPE
MANAGER
OK/STATUS
-
.......... .......... +
CBL/DBS
1–+*2ABC 3DEF
4 GHI 5 JKL 6
MNO
7
PQRS
8TUV 9
WXYZ
START STOP DATE
VPS/PDC DAILY
SPEED DBS/SAT
PLAY
REW FF
STOP
WEEKLY
/OTR
REC
-
+
-
+
ALT 0
CLEAR
SAT/
REV FWD
MV5100 04-26 7/21/00 10:58 AM Page 10

VCRTV
VCR/TV
QUICK PROGRAMMING
POWER
STILL/SLOW
SMARTPICTURE
CHVOL
MENU
TIMER
JOG/SHTL
TURBO
TIMER
AUDIO/
MUTE
SKIP
SEARCH
TAPE
MANAGER
OK/STATUS
-
.......... .......... +
CBL/DBS
1–+*2ABC 3DEF
4 GHI 5 JKL 6
MNO
7
PQRS
8TUV 9
WXYZ
START STOP DATE
VPS/PDC DAILY
SPEED DBS/SAT
PLAY
REW FF
STOP
WEEKLY
/OTR
REC
-
+
-
+
ALT 0
CLEAR
SAT/
REV FWD
Turning onYour VCR (cont’d) 11
5
If you do not want to set up the Cable Box Controller now,
press the OK/STATUS button to leave the Controller
turned OFF.The display shown below will appear on the
screen.Proceed to step 6. You may set up the Controller later by
following the instructions on pages 50-54.
If you do want to set up the Cable Box Controller now, fol-
low steps 5-8 on pages 51-52 now.
6
Press the OK/STATUS button to begin automatic channel
setup. AUTO CH. SET PROCEEDING PLEASEWAIT will appear
on the screen.TheVCR will memorize all of the channels you
receive,so when you scan through channels using the CH(annel)
8/9button,you’ll only scan through channels that you receive.
7
When channels are set up, AUTO CH.SET COMPLETED will
appear on the screen briefly.
7Wait for theVCR to set up
channels.
CONNECTANTENNA OR CABLE
TOVCR FOR AUTO CH. SET
READY: OK
END: MENU
5-6
MV5100 04-26 7/21/00 10:58 AM Page 11

12 Automatic Channel Setup
5Wait for theVCR to set up
channels.
Although yourVCR may automatically memorize the channels you
receive when you turn it on for the first time,this function lets
you set up channels again. Make each entry within one minute of
the previous entry.
5
Wait for a few minutes while theVCR sets up channels.
When programming is complete,AUTO CH. SET COMPLETED
will appear on the screen.Then,the programming of the lowest
channel number placed in theVCR’s memory will appear on the
screen.Now when you press the CH(annel) 8/9button,you will
scan only through channels you receive.
1
Press theVCR button, then press the MENU button.
2
Press the PLAY 8or STOP 9button to selectTUNER
SET UP,then press the OK/STATUS button.
3
Press the FF -button repeatedly so that ANT (if you
have an antenna) or CABLE (if you have a cable connec-
tion) appears beside CABLE/ANTENNA.
4
Press the STOP 9button to select AUTO CH. PRO-
GRAMMING, then press the OK/STATUS button. AUTO
CH.SET PROCEEDING PLEASEWAIT and a scale that shows the
progress of channel setup will appear on the screen.TheVCR will
memorize all the channels you receive.
• The two Line Input modes will
always be stored in theVCR’s mem-
ory at channel 00.To select A/V IN
FRONT orA/V IN REAR, press 0,0
so that A/V IN appears briefly,then
press the CH(annel) 8/9button so
that A/V IN FRONT or A/V IN REAR
appears on the screen briefly.To exit
Line Input mode,use the CH(annel)
8/9button to select a channel
other than 00.
• TheVCR may automatically set
CABLE or ANT even if you do not
select it.
Helpful Hints
➔VCR SET UP
TUNER SET UP
INITIAL SET UP
TAPE MANAGER
SELECT: 89 CONFIRM: OK
END: MENU
2,4 3
1
1
➔CABLE/ANTENNA CABLE
AUTO CH.PROGRAMMING
ADD/DELETE CH.
SELECT: 89 CHANGE:'
END: MENU
VCRTV
VCR/TV
QUICK PROGRAMMING
POWER
STILL/SLOW
SMARTPICTURE
CHVOL
MENU
TIMER
JOG/SHTL
TURBO
TIMER
AUDIO/
MUTE
SKIP
SEARCH
TAPE
MANAGER
OK/STATUS
-
.......... .......... +
CBL/DBS
1–+*2ABC 3DEF
4 GHI 5 JKL 6
MNO
7
PQRS
8TUV 9
WXYZ
START STOP DATE
VPS/PDC DAILY
SPEED DBS/SAT
PLAY
REW FF
STOP
WEEKLY
/OTR
REC
-
+
-
+
ALT 0
CLEAR
SAT/
REV FWD
MV5100 04-26 7/21/00 10:58 AM Page 12

Automatic Channel Setup (cont’d) 13
Adding/Deleting Channels
2
Press the PLAY 8or STOP 9button to selectTUNER
SET UP,then press the OK/STATUS button.
3
Press the PLAY 8or STOP 9button to select
ADD/DELETE CH., then press the OK/STATUS button.
4
Use the Number buttons, the CH(annel) 8/9button, or
the PLAY 8or STOP 9buttons to select the channel you
want to add or delete. An arrow will appear beside the select-
ed channel.
5
Press the FF -button so that DELETED or ADDED
appears beside the channel number.
6
Press the MENU button. Programming of the last channel you
added or deleted will appear on the screen.
1
Press theVCR button, then press the MENU button.
➔CABLE/ANTENNA CABLE
AUTO CH.PROGRAMMING
ADD/DELETE CH.
SELECT: 89 CHANGE:-
END: MENU
124 DELETED
125 DELETED
01 – – – –> DELETED
02 ADDED
03 ADDED
SELECT: 89 OR 0-9
CHANGE:-END: MENU
➔VCR SET UP
TUNER SET UP
INITIAL SET UP
TAPE MANAGER
SELECT: 89 CONFIRM: OK
END: MENU
2-5
4
1,6
1
4
VCRTV
VCR/TV
QUICK PROGRAMMING
POWER
STILL/SLOW
SMARTPICTURE
CHVOL
MENU
TIMER
JOG/SHTL
TURBO
TIMER
AUDIO/
MUTE
SKIP
SEARCH
TAPE
MANAGER
OK/STATUS
-
.......... .......... +
CBL/DBS
1–+*2ABC 3DEF
4 GHI 5 JKL 6
MNO
7
PQRS
8TUV 9
WXYZ
START STOP DATE
VPS/PDC DAILY
SPEED DBS/SAT
PLAY
REW FF
STOP
WEEKLY
/OTR
REC
-
+
-
+
ALT 0
CLEAR
SAT/
REV FWD
MV5100 04-26 7/21/00 10:58 AM Page 13

14 Setting the Clock
• To program theVCR so its clock
will automatically move forward one
hour in April and turn back one hour
in October,see page 19.
• To make corrections,follow steps
1-3,then press the OK/STATUS but-
ton until the item you want to correct
is flashing.Press the PLAY 8or
STOP 9button to enter the correct
information.When you are finished,
press the MENU button.
• The menu may appear differently at
step 3 if you are using a Controller
or a Cable Box/DBS.
Helpful Hints
There are four ways to set theVCR’s clock:Manually, withTime
Zone Selection,with Manual PBS Channel Selection, or with
Automatic PBS Channel Selection.Cable Box/DBS users must set
the clock manually.Before you set the clock, make sure:
•TheVCR power is on.
•TheVCR light appears on the display panel. If it does not,press
theVCR/TV button once.
•Channels are set up.Details are on page 12.
•You make each entry within one minute of the previous entry.
To set the clock manually, follow the steps on pages 14-15.To use
Time Zone Selection,go to page 16.To use Manual PBS Channel
Selection,go to page 17.To use Automatic PBS Channel Selection,
go to page 18.
Manual Clock Setting
1
Press theVCR button, then press the MENU button.
3
Press the PLAY 8or STOP 9button to select CLOCK,
then press the OK/STATUS button. CABLE BOX USERS SET
CLOCK MANUALLY will appear briefly.
2
Press the PLAY 8or STOP 9button to select INITIAL
SET UP,then press the OK/STATUS button.
➔CLOCK
LANGUAGE ENGLISH
VCR PLUS+ CH.
CABLE BOX
DBS RECEIVER
SELECT: 89 CONFIRM: OK
END: MENU
TIME – – :– – AM
DATE 01/01/00
AUTO CLOCK ON
PBS CH. AUTO
D.S.T. AUTO
TIME ZONE AUTO
SET: 89 NEXT: OK
END: MENU
➔VCR SET UP
TUNER SET UP
INITIAL SET UP
TAPE MANAGER
SELECT: 89 CONFIRM: OK
END: MENU
2-3
1
VCRTV
VCR/TV
QUICK PROGRAMMING
POWER
STILL/SLOW
SMARTPICTURE
CHVOL
MENU
TIMER
JOG/SHTL
TURBO
TIMER
AUDIO/
MUTE
SKIP
SEARCH
TAPE
MANAGER
OK/STATUS
-
.......... .......... +
CBL/DBS
1–+*2ABC 3DEF
4 GHI 5 JKL 6
MNO
7
PQRS
8TUV 9
WXYZ
START STOP DATE
VPS/PDC DAILY
SPEED DBS/SAT
PLAY
REW FF
STOP
WEEKLY
/OTR
REC
-
+
-
+
ALT 0
CLEAR
SAT/
REV FWD
MV5100 04-26 7/21/00 10:58 AM Page 14

Setting the Clock (cont’d) 15
6
Press the PLAY 8or STOP 9button repeatedly to set
theYEAR.When the year is correct,press the OK/STA-
TUS button.The day of the week will appear automatically.
8
Press the MENU button.
5
Press the PLAY 8or STOP 9button repeatedly to set
the DATE (month and day). Every time you press the PLAY 8
or STOP 9button,the day changes in one-day increments. If you
press and hold the PLAY 8or STOP 9button,the day changes in
15-day increments.
When the month and day are correct, press the OK/STA-
TUS button.
7
Press the OK/STATUS button once again to skip “AUTO
CLOCK” and go to“D.S.T.” (Daylight SavingsTime). Press
the PLAY 8or STOP 9button to set D.S.T. to ON or
OFF. IfAUTO CLOCK is OFF, you may set D.S.T.to ON or OFF
only.For more information,please see page 19.
4
Press the PLAY 8or STOP 9button repeatedly to set
theTIME. Every time you press the PLAY 8or STOP 9button,
the time changes in one-minute increments. If you press and hold
the PLAY 8or STOP 9button, the time changes in 30-minute
increments.
When the time is correct, press the OK/STATUS button.
TIME 10 :45PM
DATE 01/01/00
AUTO CLOCK OFF
D.S.T. ON
SET: 89 NEXT: OK
END: MENU
TIME 10 :45PM
DATE 06/21/00
AUTO CLOCK OFF
D.S.T. ON
SET: 89 NEXT: OK
END: MENU
TIME 10 :45PM
DATE 06/21/00
WEDNESDAY
AUTO CLOCK OFF
D.S.T. ON
SET: 89 NEXT: OK
END: MENU
8
4-7
VCRTV
VCR/TV
QUICK PROGRAMMING
POWER
STILL/SLOW
SMARTPICTURE
CHVOL
MENU
TIMER
JOG/SHTL
TURBO
TIMER
AUDIO/
MUTE
SKIP
SEARCH
TAPE
MANAGER
OK/STATUS
-
.......... .......... +
CBL/DBS
1–+*2ABC 3DEF
4 GHI 5 JKL 6
MNO
7
PQRS
8TUV 9
WXYZ
START STOP DATE
VPS/PDC DAILY
SPEED DBS/SAT
PLAY
REW FF
STOP
WEEKLY
/OTR
REC
-
+
-
+
ALT 0
CLEAR
SAT/
REV FWD
MV5100 04-26 7/21/00 10:58 AM Page 15

16 Setting the Clock (cont’d)
6
Press the MENU button.
7
An on-screen message will ask you to turn off theVCR.
Press the POWER button to turn off theVCR.
Auto will flash in the display panel until the clock is set.Leave the
VCR turned off until the time appears on the display panel.
If – – :– – appears on the display panel after you turn off theVCR,
theVCR could not find the time.Use a different method to set the
clock.
Time Zone Selection
4
Press the OK/STATUS button repeatedly to selectTIME
ZONE.
5
Press the PLAY 8or STOP 9button repeatedly to select
yourTime Zone, then press the OK/STATUS button.
• When the power plug is connected
to an AC outlet, the correct time will
appear on the display panel of the
VCR when the power is off.
• Press the OK/STATUS button repeat-
edly to make the time appear on
the display panel when theVCR
power is on.
Helpful Hints
3
Press the PLAY 8or STOP 9button to select CLOCK,
then press the OK/STATUS button. CABLE BOX USERS SET
CLOCK MANUALLY will appear briefly.
(IfAUTO CLOCK is set to OFF,TIME ZONE will not be available in
the menu.If this happens,press the OK/STATUS button to select
AUTO CLOCK,then press the PLAY 8or STOP 9button to set
AUTO CLOCK to ON.)
➔CLOCK
LANGUAGE ENGLISH
VCR PLUS+ CH.
CABLE BOX
DBS RECEIVER
SELECT: 89 CONFIRM: OK
END: MENU
TIME – – :– – AM
DATE 01/01/00
AUTO CLOCK ON
PBS CH. AUTO
D.S.T. AUTO
TIME ZONE AUTO
SET: 89 NEXT: OK
END: MENU
1
Press theVCR button, then press the MENU button.
2
Press the PLAY 8or STOP 9button to select INITIAL
SET UP,then press the OK/STATUS button.
2-5
6
1
7
VCRTV
VCR/TV
QUICK PROGRAMMING
POWER
STILL/SLOW
SMARTPICTURE
CHVOL
MENU
TIMER
JOG/SHTL
TURBO
TIMER
AUDIO/
MUTE
SKIP
SEARCH
TAPE
MANAGER
OK/STATUS
-
.......... .......... +
CBL/DBS
1–+*2ABC 3DEF
4 GHI 5 JKL 6
MNO
7
PQRS
8TUV 9
WXYZ
START STOP DATE
VPS/PDC DAILY
SPEED DBS/SAT
PLAY
REW FF
STOP
WEEKLY
/OTR
REC
-
+
-
+
ALT 0
CLEAR
SAT/
REV FWD
MV5100 04-26 7/21/00 10:58 AM Page 16

3
Press the PLAY 8or STOP 9button to select CLOCK,
then press the OK/STATUS button. (IfAUTO CLOCK is set to
OFF,PBS CH. will not be available in the menu.If this happens,press
the OK/STATUS button to selectAUTO CLOCK,then press the
PLAY 8or STOP 9button to setAUTO CLOCK to ON.)
Setting the Clock (cont’d) 17
6
Press the MENU button.
5
Press the PLAY 8or STOP 9button repeatedly to select
the station number of your PBS channel.
Manual PBS Channel Selection
4
Press the OK/STATUS button repeatedly to select PBS CH.
1
Press theVCR button, then press the MENU button.
2
Press the PLAY 8or STOP 9button to select INITIAL
SET UP,then press the OK/STATUS button.
TIME – – :– – AM
DATE 01/01/00
AUTO CLOCK ON
PBS CH. AUTO
D.S.T. AUTO
TIME ZONE AUTO
SET: 89 NEXT: OK
END: MENU
7
An on-screen message will ask you to turn off theVCR.
Press the POWER button to turn off theVCR.
Auto will flash in the display panel until the clock is set.Leave the
VCR power off until the clock is set.
If – – :– – appears on the display panel after you turn off theVCR,
theVCR could not find the time.Repeat steps 1 - 6 above, enter-
ing a different PBS channel at step 5. Or,use a different method to
set the clock.
2-5
6
1
7
VCRTV
VCR/TV
QUICK PROGRAMMING
POWER
STILL/SLOW
SMARTPICTURE
CHVOL
MENU
TIMER
JOG/SHTL
TURBO
TIMER
AUDIO/
MUTE
SKIP
SEARCH
TAPE
MANAGER
OK/STATUS
-
.......... .......... +
CBL/DBS
1–+*2ABC 3DEF
4 GHI 5 JKL 6
MNO
7
PQRS
8TUV 9
WXYZ
START STOP DATE
VPS/PDC DAILY
SPEED DBS/SAT
PLAY
REW FF
STOP
WEEKLY
/OTR
REC
-
+
-
+
ALT 0
CLEAR
SAT/
REV FWD
MV5100 04-26 7/21/00 10:58 AM Page 17

18 Setting the Clock (cont’d)
5
Press the PLAY 8or STOP 9button repeatedly so that
AUTO flashes beside PBS CH.
• To display the time on the display
panel,press the OK/STATUS button
repeatedly.
• If you live near the boundary of an
adjacent time zone,your PBS channel
may come from a different time zone.
UseTime Zone Selection to set your
clock.Details are on page 16.
Helpful Hints
6
Press the MENU button.
Automatic PBS Channel Selection
4
Press the OK/STATUS button repeatedly to select PBS CH.
3
Press the PLAY 8or STOP 9button to select CLOCK,
then press the OK/STATUS button. (If AUTO CLOCK is set to
OFF,PBS CH. will not be available in the menu.If this happens,press
the OK/STATUS button to selectAUTO CLOCK,then press the
PLAY 8or STOP 9button to setAUTO CLOCK to ON.)
1
Press theVCR button, then press the MENU button.
2
Press the PLAY 8or STOP 9button to select INITIAL
SET UP,then press the OK/STATUS button.
TIME – – :– – AM
DATE 01/01/00
AUTO CLOCK ON
PBS CH. AUTO
D.S.T. AUTO
TIME ZONE AUTO
SET: 89 NEXT: OK
END: MENU
7
An on-screen message will ask you to turn off theVCR.
Press the POWER button to turn off theVCR.
Auto will flash in the display panel until the clock is set. Leave the
VCR power off until the clock is set. If – – :– – appears on the
display panel after you turn off theVCR,theVCR could not find
the time. Use a different method to set the clock.
2-5
6
1
7
VCRTV
VCR/TV
QUICK PROGRAMMING
POWER
STILL/SLOW
SMARTPICTURE
CHVOL
MENU
TIMER
JOG/SHTL
TURBO
TIMER
AUDIO/
MUTE
SKIP
SEARCH
TAPE
MANAGER
OK/STATUS
-
.......... .......... +
CBL/DBS
1–+*2ABC 3DEF
4 GHI 5 JKL 6
MNO
7
PQRS
8TUV 9
WXYZ
START STOP DATE
VPS/PDC DAILY
SPEED DBS/SAT
PLAY
REW FF
STOP
WEEKLY
/OTR
REC
-
+
-
+
ALT 0
CLEAR
SAT/
REV FWD
MV5100 04-26 7/21/00 10:58 AM Page 18

Daylight-SavingsTime 19
6
Press the MENU button.
Follow the steps below to program theVCR so its clock will move
forward one hour inApril and turn back one hour in October.
3
Press the PLAY 8or STOP 9button to select CLOCK,
then press the OK/STATUS button.(IfAUTO CLOCK is set to
OFF,PBS CH.andTIME ZONE will not appear in the menu.)
CABLE BOX USERS SET CLOCK MANUALLY will appear on the
screen briefly.
5
Press the PLAY 8or STOP 9button so that ON,OFF, or
AUTO appears beside D.S.T.
Select ON to make the clock adjust itself according to theVCR’s cal-
endar.Select OFF to turn off the feature.SelectAUTO to make the
clock adjust itself according to the signal it receives from the PBS
channel.IfAUTO CLOCK is set to OFF, you may only set D.S.T.to
ON or OFF.
4
Press the OK/STATUS button repeatedly to select D.S.T.
➔CLOCK
LANGUAGE ENGLISH
VCR PLUS+ CH.
CABLE BOX
DBS RECEIVER
SELECT: 89 CONFIRM: OK
END: MENU
1
Press theVCR button, then press the MENU button.
2
Press the PLAY 8or STOP 9button to select INITIAL
SET UP,then press the OK/STATUS button.
TIME 10:45AM
DATE 01/01/00
SATURDAY
AUTO CLOCK ON
PBS CH. AUTO
D.S.T. AUTO
TIME ZONE AUTO
SET: 89 NEXT: OK
END: MENU
7
An on-screen message may ask you to turn off theVCR.
Press the POWER button to turn off theVCR. Auto will flash
in the display panel until the clock is set. Leave theVCR power off
until the clock is set. If – – :– – appears on the display panel after
you turn off theVCR, theVCR could not find the time.Use a differ-
ent method to set the clock.
2-5
6
1
7
VCRTV
VCR/TV
QUICK PROGRAMMING
POWER
STILL/SLOW
SMARTPICTURE
CHVOL
MENU
TIMER
JOG/SHTL
TURBO
TIMER
AUDIO/
MUTE
SKIP
SEARCH
TAPE
MANAGER
OK/STATUS
-
.......... .......... +
CBL/DBS
1–+*2ABC 3DEF
4 GHI 5 JKL 6
MNO
7
PQRS
8TUV 9
WXYZ
START STOP DATE
VPS/PDC DAILY
SPEED DBS/SAT
PLAY
REW FF
STOP
WEEKLY
/OTR
REC
-
+
-
+
ALT 0
CLEAR
SAT/
REV FWD
MV5100 04-26 7/21/00 10:58 AM Page 19

20 Language Selection
5
Press the MENU button.
Follow the steps below to change the language of the on-screen
displays and menus.
3
Press the PLAY 8or STOP 9button to select LAN-
GUAGE.
• If you accidentally select Spanish or
French and need English,follow
these steps.
1) Press theVCR button,then press
the MENU button.
2) Press the PLAY 8or STOP 9
button to select SISTEMA INICIAL or
PROGRAMM.INITIALE, then press
the OK/STATUS button.
3) Press the PLAY 8or STOP 9
button to select LENGUAJE or
LANGUE.
4) Press the FF -button repeat-
edly so that the English menu
appears.
Helpful Hint
1
Press theVCR button, then press the MENU button.
2
Press the PLAY 8or STOP 9button to select INITIAL
SET UP,then press the OK/STATUS button.
➔VCR SET UP
TUNER SET UP
INITIAL SET UP
TAPE MANAGER
SELECT: 89 CONFIRM: OK
END: MENU
➔CLOCK
LANGUAGE ENGLISH
VCR PLUS+ CH.
CABLE BOX
DBS RECEIVER
SELECT: 89 CONFIRM: OK
END: MENU
4
Press the FF -button repeatedly until your preferred lan-
guage appears.
2-4
5
1
VCRTV
VCR/TV
QUICK PROGRAMMING
POWER
STILL/SLOW
SMARTPICTURE
CHVOL
MENU
TIMER
JOG/SHTL
TURBO
TIMER
AUDIO/
MUTE
SKIP
SEARCH
TAPE
MANAGER
OK/STATUS
-
.......... .......... +
CBL/DBS
1–+*2ABC 3DEF
4 GHI 5 JKL 6
MNO
7
PQRS
8TUV 9
WXYZ
START STOP DATE
VPS/PDC DAILY
SPEED DBS/SAT
PLAY
REW FF
STOP
WEEKLY
/OTR
REC
-
+
-
+
ALT 0
CLEAR
SAT/
REV FWD
MV5100 04-26 7/21/00 10:58 AM Page 20
Other manuals for MV5100
1
Table of contents
Other Marantz VCR System manuals