Operating Instructions
PANEL DESCRIPTIONS
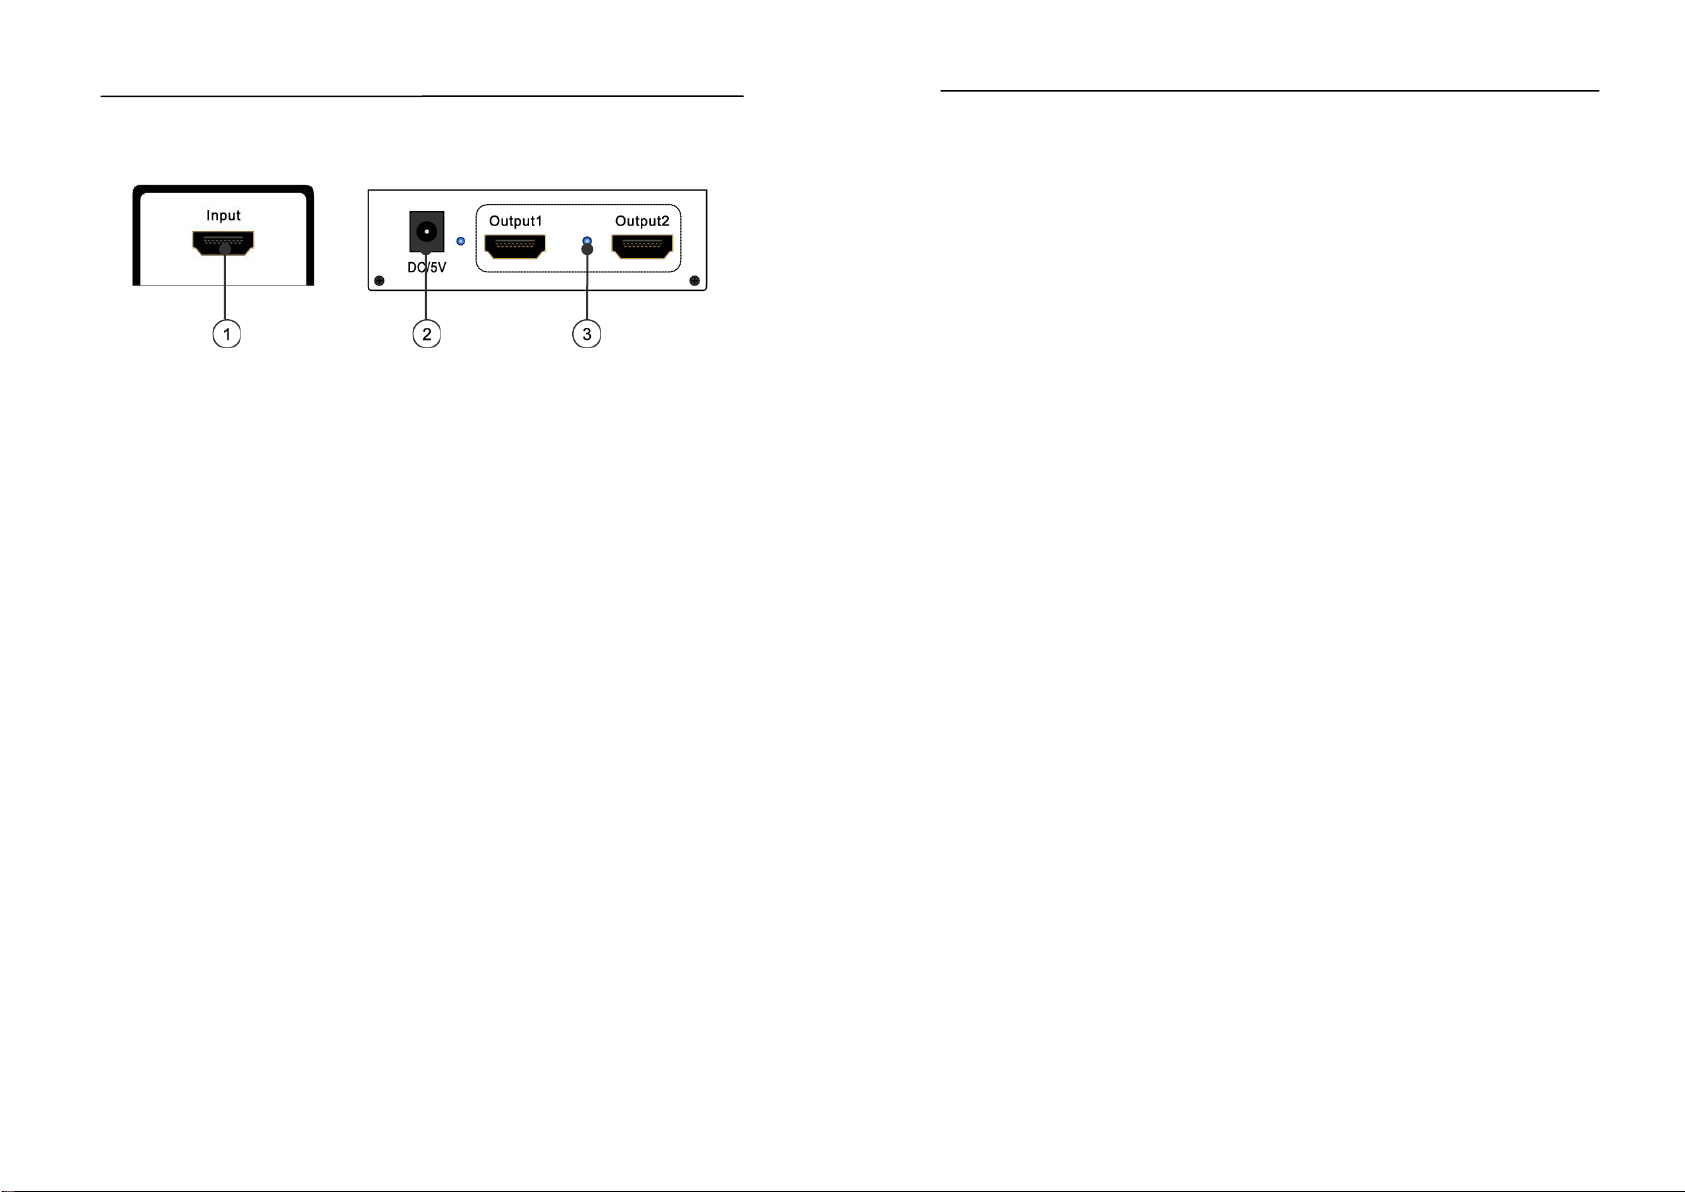
Left Panel Front Panel
1) HDMI input port
2) Power input.
3) HDMI output ports
Connecting and Operating
1) Connect the HDMI signal sources (Such as PS3, STB etc.) into HDMI splitter
input.
2) Connect the HDMI display device (such as:HD-LCD, HD-DLP) into HDMI
output.
3) Plug the 5VDC power supply into HDMI splitter and the unit is ready to use.
Attention: Insert/Extract cable gently.
MAINTENANCE
Clean this unit with a soft, dry cloth. Never use alcohol, paint thinner of benzine to
clean this unit.
PRODUCT SERVICE
1) Damage requiring service: The unit should be serviced by qualified service
personnel if:
(a)The DC power supply cord orAC adaptor has been damaged;
(b)Objects or liquids have gotten into the unit;
(c)The unit has been exposed to rain;
(d)The unit does not operate normally or exhibits a marked change in
performance;
(e)The unit has been dropped or the cabinet damaged.
2) Servicing Personnel: Do not attempt to service the unit beyond that described
in these operating instructions. Refer all other servicing to authorized servicing
personnel.
3) Replacement parts: When parts need replacing ensure the servicer uses parts
specified by the manufacturer or parts that have the same characteristics as the
original parts. Unauthorized substitutes may result in fire, electric shock, or other
hazards.
3
Operating Instructions
4) Safety check: After repairs or service, ask the servicer to perform safety
checks to confirm that the unit is in proper working condition.
WARRANTY
If your product does not work properly because of a defect in materials or
workmanship, our Company (referred to as "the warrantor" ) will , for the length of
the period indicated as below, (Parts(2)Year ,Labor(90) Days) which starts with
the date of original purchase ("Limited Warranty period"), at its option either(a)
repair your product with new or refurbished parts, or (b) replace it with a new of a
refurbished product. The decision to repair or replace will be made by the
warrantor.
During the "Labor" Limited Warranty period there will be no charge for labor.
During the "Parts" warranty period, there will be no charge for parts. You must
mail-in your product during the warranty period. This Limited Warranty is
extended only to the original purchaser and only covers product purchased as
new. A purchase receipt or other proof of original purchase date is required for
Limited Warranty service.
Mail-In Service
When shipping the unit carefully pack and send it prepaid, adequately insured
and preferably in the original carton. Include a letter detailing the complaint and
provide a day time phone and/or email address where you can be reached.
LIMITED WARRANTY LIMITS AND EXCLUSIONS
1) This Limited Warranty ONLY COVERS failures due to defects in materials or
workmanship, and DOES NOT COVER normal wear and tear or cosmetic
damage. The Limited WarrantyALSO DOES NOT COVER damages which
occurred in shipment, or failures which are caused by products not supplied by
warrantor, or failures which result from accidents, misuse, abuse, neglect,
mishandling, misapplication, alteration, faulty installation, set-up adjustments,
misadjustment of consumer controls, improper maintenance, power line surge,
lightning damage, modification, or service by anyone other than a Factory
Service center or otherAuthorized Servicer, or damage that is attributable to acts
of God.
2) THEREARE NO EXPRESS WARRANTIES EXCEPT AS LISTED UNDER
"LIMITED WARRANTY COVERAGE".THE WARRANTOR IS NOT LIABLE FOR
INCIDENTAL OR CONSEQUENTIAL DAMAGES RESULTING FROM THE USE
OF THIS PRODUCT, OR ARISING OUT OF ANY BREACH OF THIS WARRNTY.
(As examples, this excludes damages for lost time, cost of having someone
remove or re-install an installed unit if applicable, travel to and from the service,
loss of or damage to media or images, data or other recorded content. The items
listed are not exclusive, but are for illustration only.)
3) PARTS AND SERVICE, WHICHARE NOT COVERED BY THIS LIMITED
WARRANTY, ARE YOUR RESPONSIBILITY.
4


