±±Ø±Ǥ
±±Ǥ
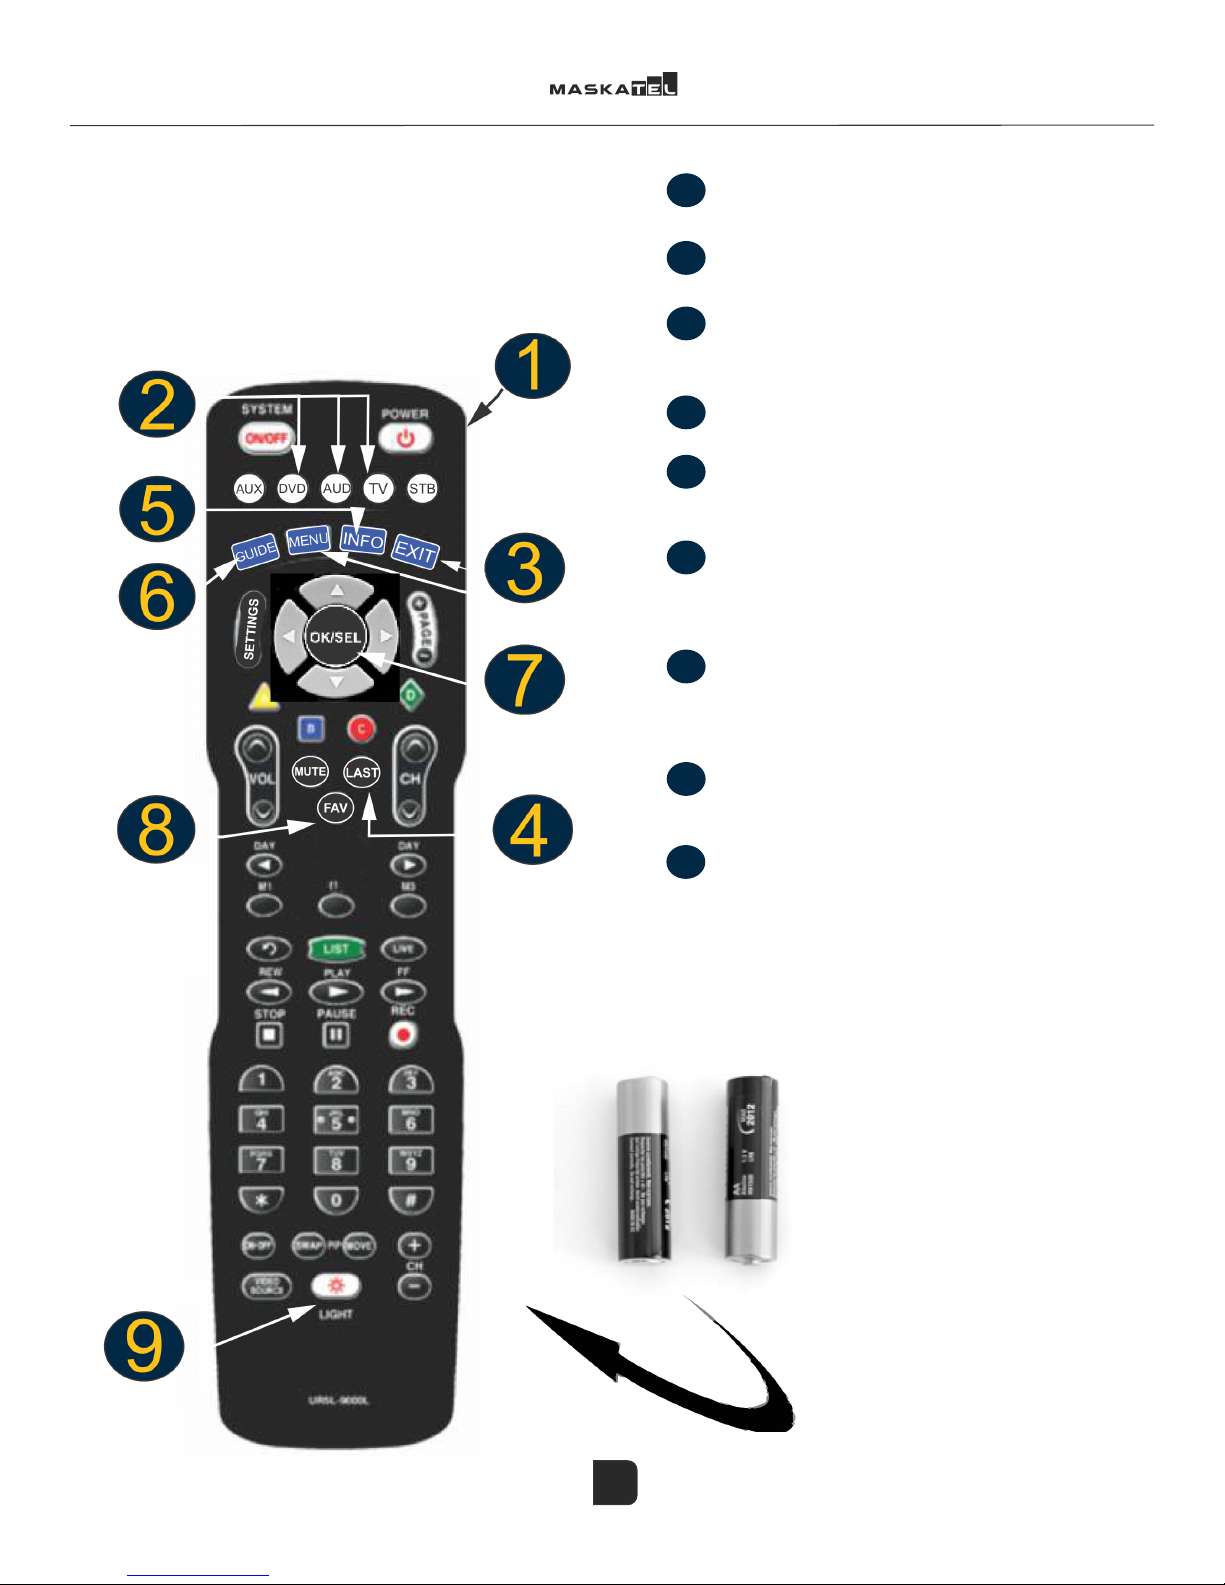
ƥ±ȋƤǡ±±±ǡ±±±ǡǤ
±Ȁǯ±Ǥ
ǯ±ȋƤǡǡ±ǡ
ǡǤ
ǯ±±±ǡǯ±ǡ
Ǥ
±Á±±±±±
Ǥ±ǯ
Ǥ
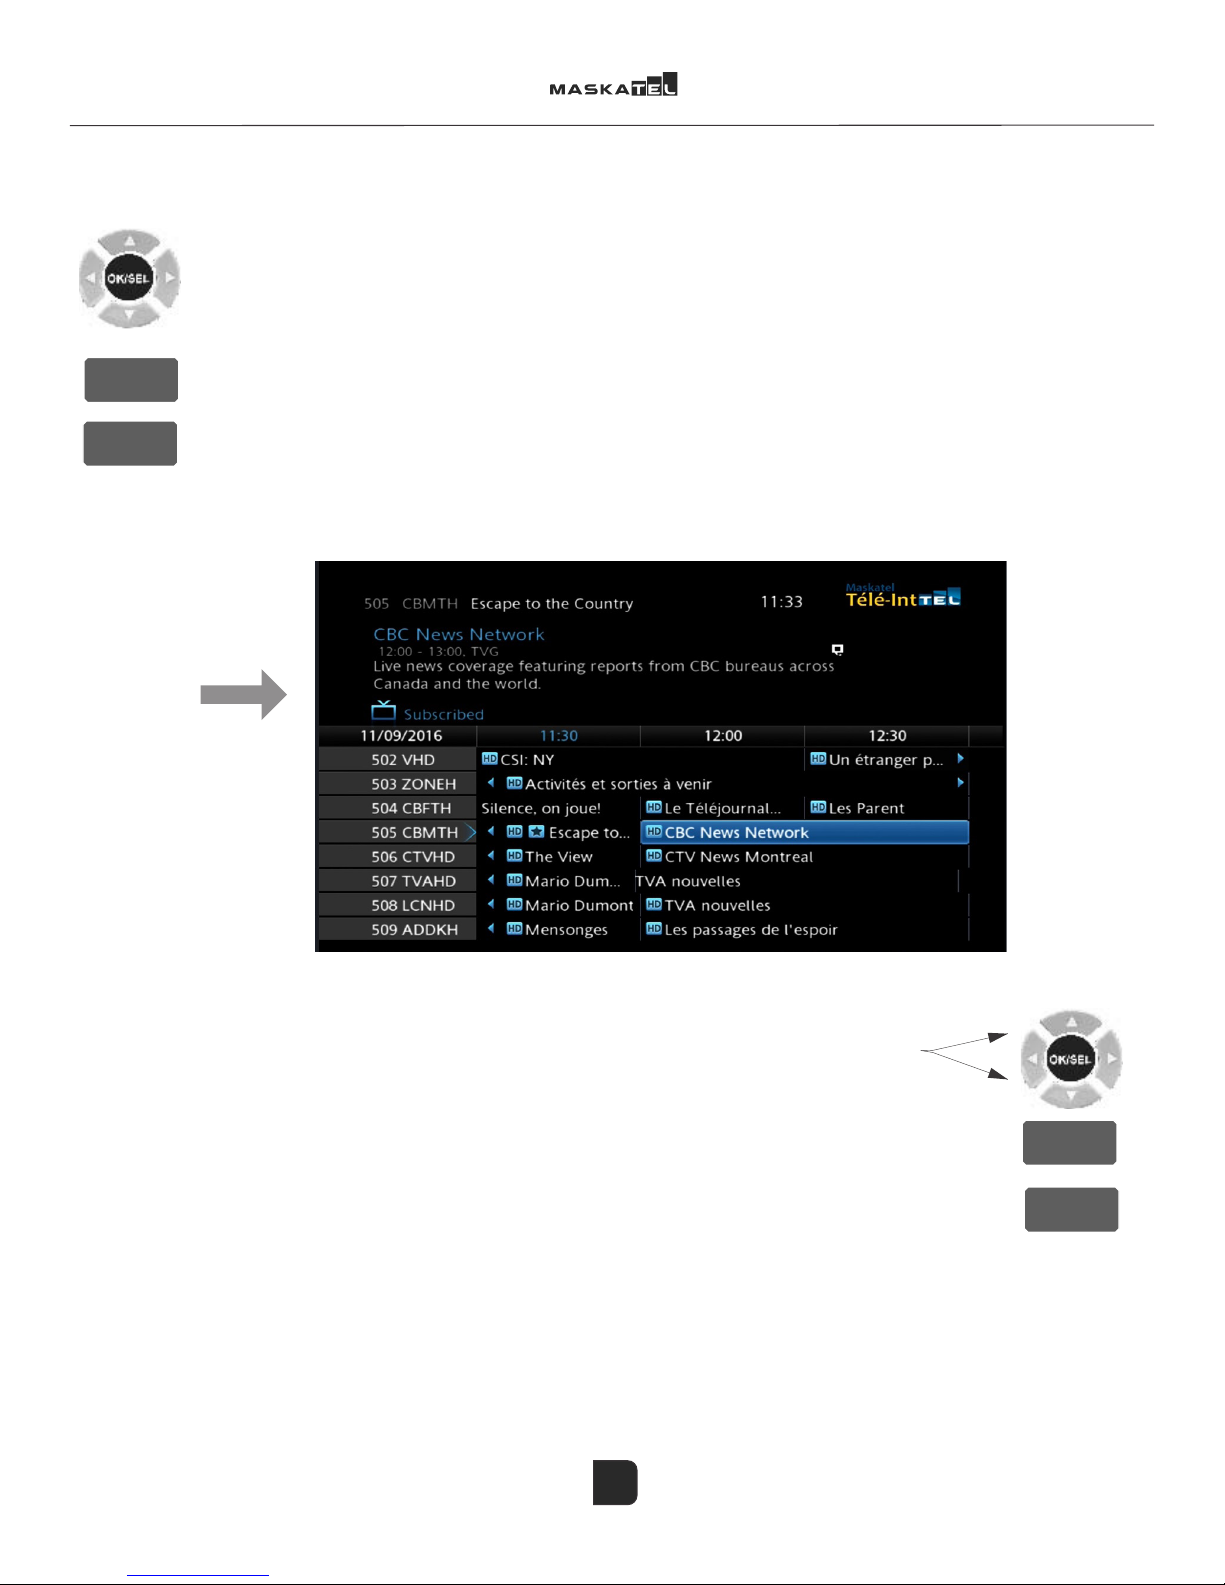
±
ȋȌǤƥǯ±ǯǯǯ±Ǥ
ǣ±Ǥ
°±
±±Ǥǯ±±±±ǤǤǤ
21
'(0$1'
2Ƥ°±Ǥ
±Ǥ
±ǤƤǯǤ
°±±2ǡ22ǯ
ÁØǤ
ǯȋǯȌ²±Ǥ
±±ǤǯǯǯǤ
2±ǯ
±ǣ
°
±
°±ǯ
Ǥ
±
%LEOLR
4
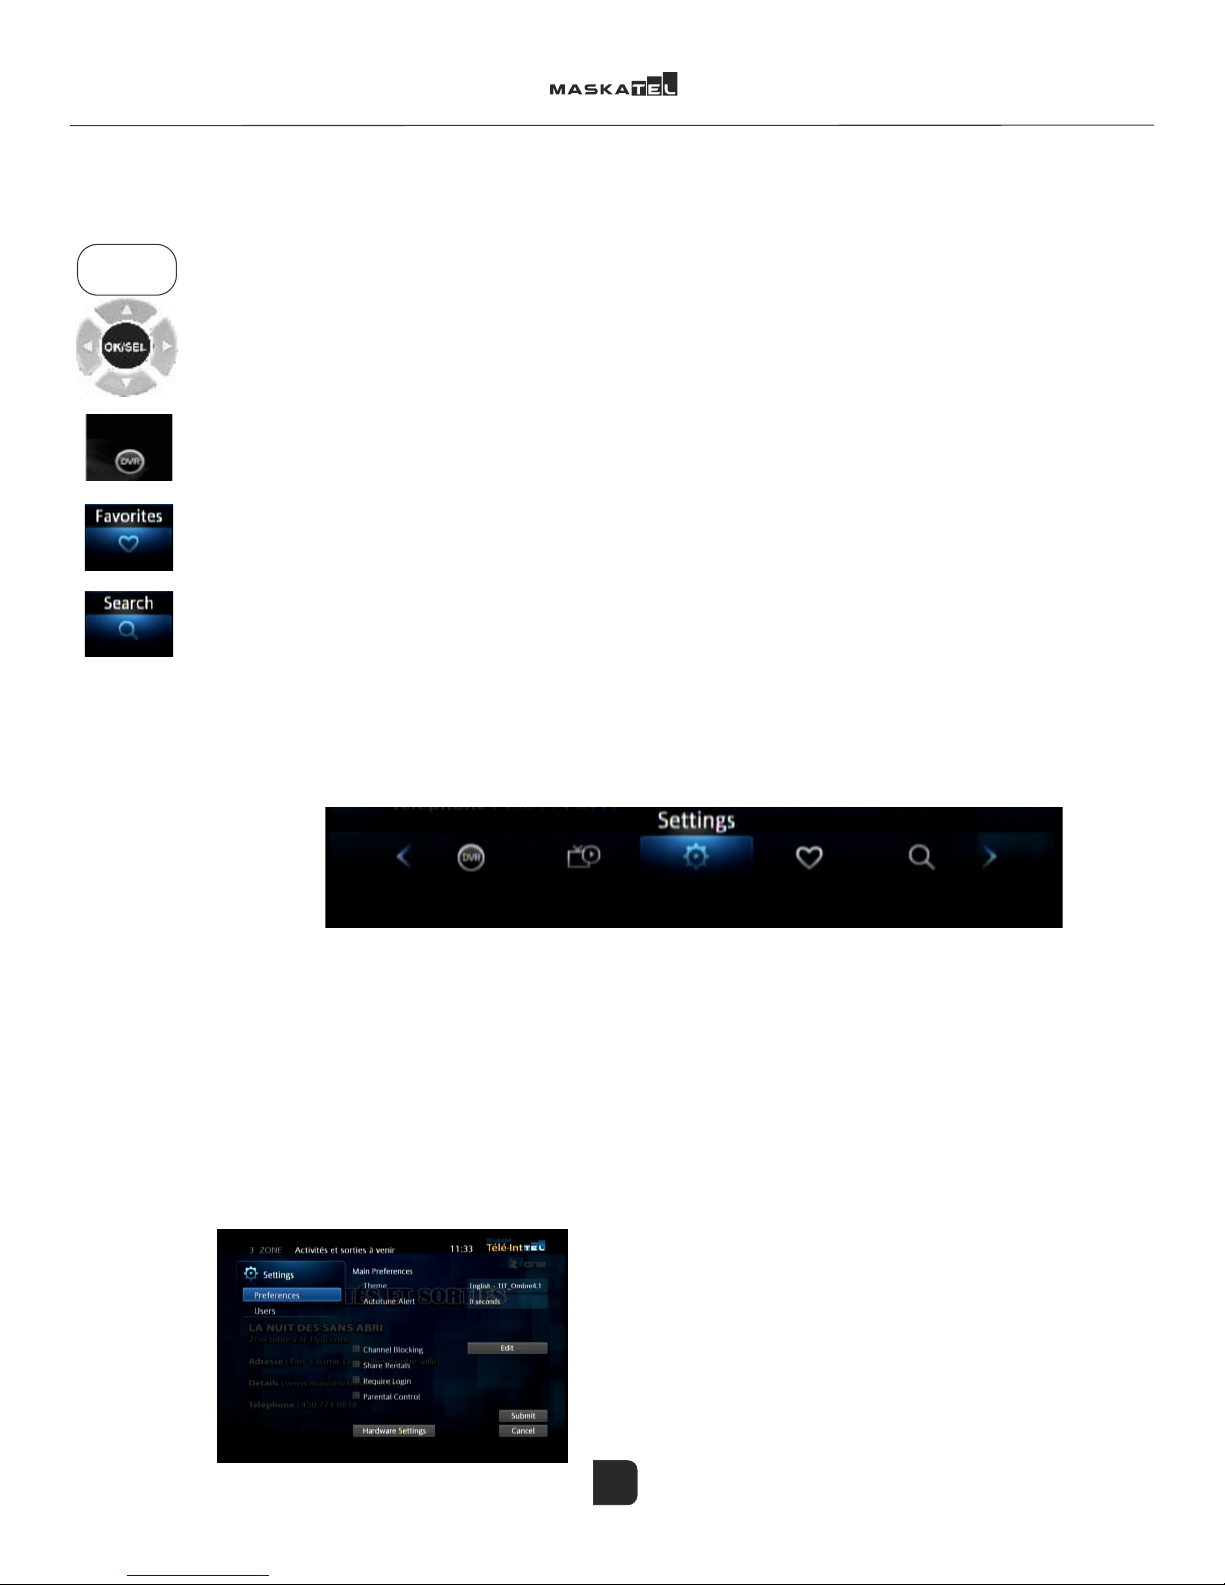
The interactive menu includes several elements that control your receiver.
The RENTALS section is accessible via the ON DEMAND button on your remote control. All the content available for
rent is displayed (lms, series, special events, etc.)
Make your selection and then press the OK/SEL button by following the instructions on screen.
T
he MY LIBRARY section includes information about the content you have ordered (lms, VOD, videos,
sports packages, etc.)
This section also contains a history of your messages received as well as the phone numbers of the requesting client,
if the option is activated.
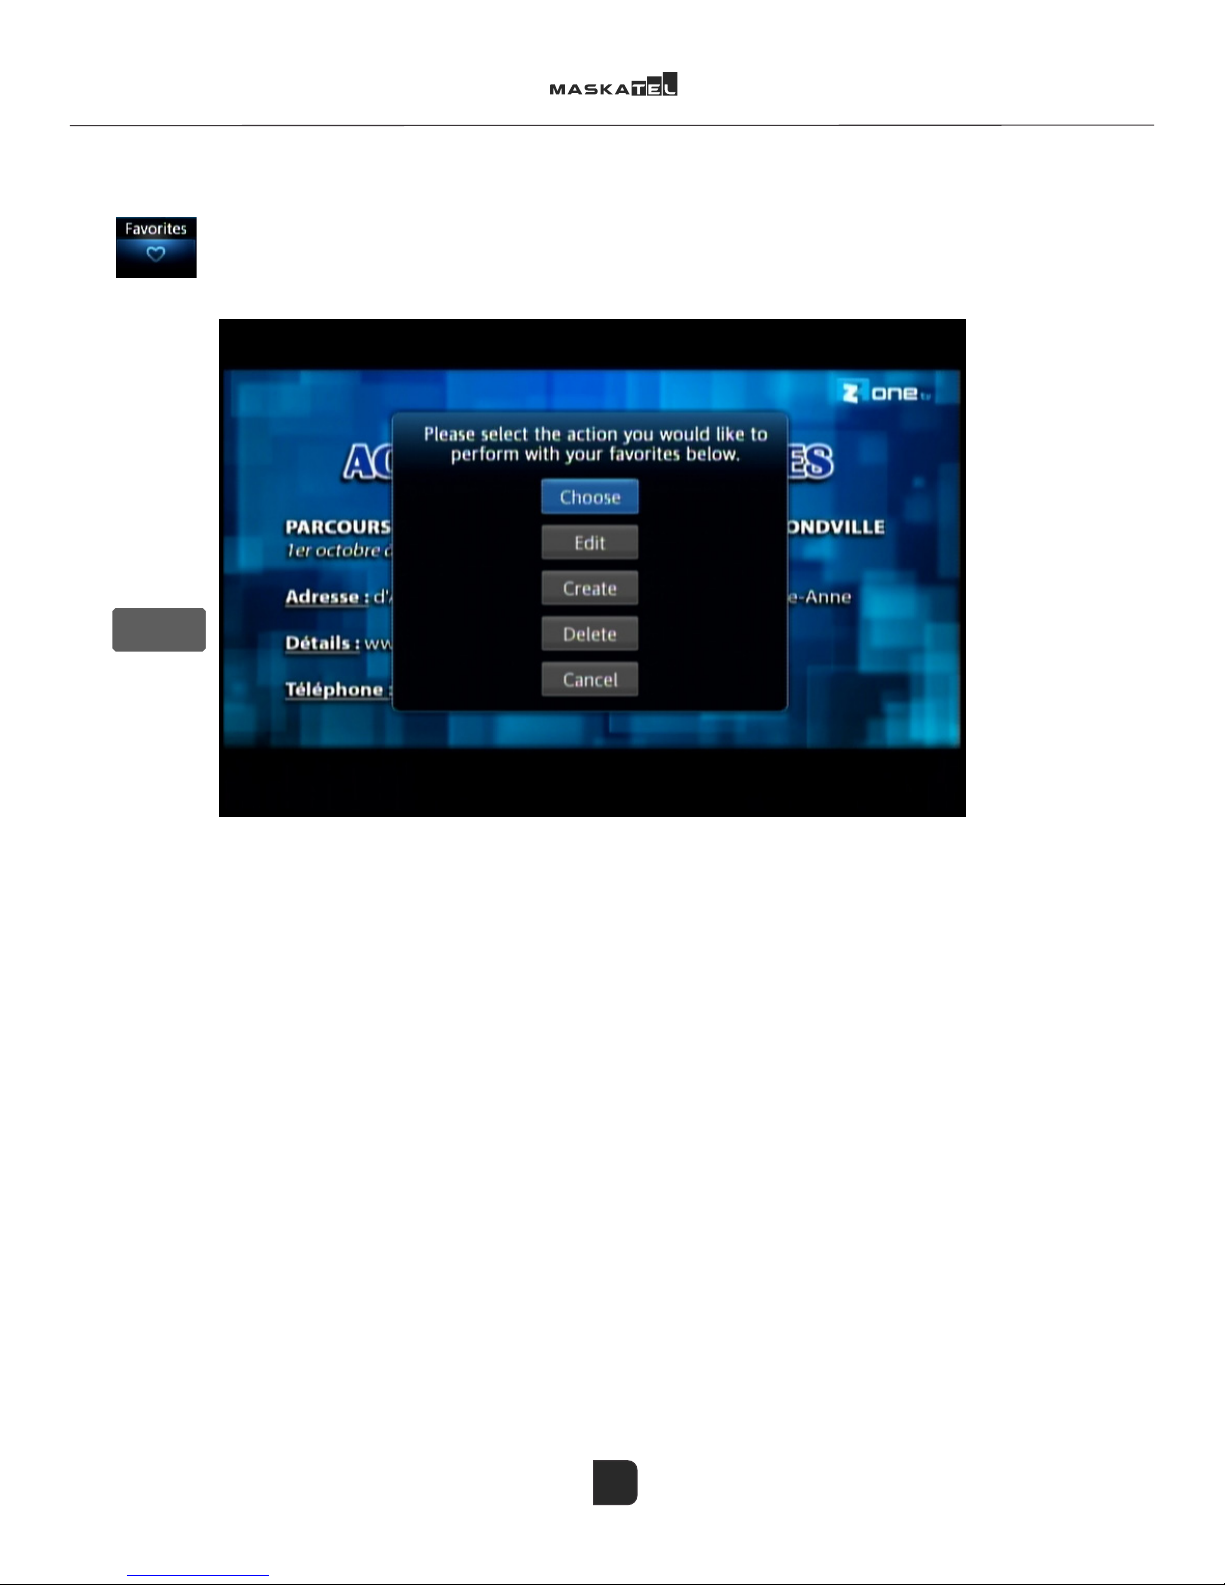
The FAVOURITES section allows you to select your favourite channels and quickly access the programs of your
choice. You can create your own list while allowing members of your family to include their own.
The SEARCH function allows you to search for content within the guide. Simply access the section
and enter a search term using the visual keyboard on the screen.
Note: the E-MAIL and WEB function cannot be used at that time.
Our customer relations centre will be happy to inform you of the latest developments regarding our PVRs and
The SETTINGS section allows you to modify several options to personalize your receiver. A password is required to
access this section.
The default password is 12345. It can be changed by the user and technical support agents.
After accessing the SETTINGS section, the PREFERENCES section contains various options including blocking channels
and activating parental control.
The THEME can be changed to French TIT_Ombre 4.1 or English_Ombre according to which language you want
displayed. This is where you can choose to go back to the default interface if the new one is not to your liking.
The HARDWARE SETTINGS includes all the settings options for the image size according to the type of
Interactive menu
Settings
menu
Default
password:
12345
Do not change
the video
settings Please do not change the video settings unless you
are asked to do so by a technical support agent.