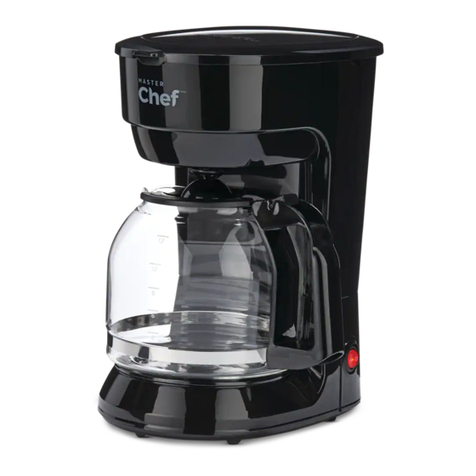
MasterChef MCCM12D User manual

12-CUP DIGITAL STAINLESS STEEL
COFFEE MAKER
Use and Care Guide
MCCM12D
TM
TM

2
READ AND SAVE
THESE INSTRUCTIONS
IMPORTANT SAFEGUARDS
When using electrical appliances, basic safety precautions should
always be followed to reduce the risk of re, electric shock, and/or injury
to persons, including the following:
1. Read all instructions.
2. Do not touch hot surfaces. Use handles or knobs.
3. To protect against re, electric shock, and injury to persons, do
not immerse cord, plug, or Coffee Maker in water or other liquid.
4. Close supervision is necessary when any appliance is used by or
near children.
5. Unplug from outlet when not in use and before cleaning. Allow to
cool before putting on or taking off parts, and before cleaning the
appliance.
6. Do not operate any appliance with a damaged cord or plug, or after
the appliance malfunctions, or has been damaged in any manner.
Contact Consumer Service for examination, repair or adjustment.
7. The use of accessory attachments not recommended by the
appliance manufacturer may result in re, electric shock, or injury
to persons.
8. Do not use outdoors.
9. Do not let cord hang over edge of table or counter, or touch hot
surfaces.
10. Do not place on or near a hot gas or electric burner, or in a heated
oven.
11. To disconnect, press the ON/OFF Button to turn the unit OFF,
then remove plug from wall outlet.
12. Do not use appliance for other than intended use.
13. Be certain Lids are securely in place before operating appliance.
14. Scalding may occur if the Lid is opened during the brewing cycles.

3
15. This Carafe is designed for use with this Coffee Maker. It must
never be used on a range top.
16. Do not set a hot Carafe on a wet or cold surface.
17. Do not use a cracked Carafe or a Carafe having a loose or
weakened handle.
18. Do not clean Carafe with cleansers, steel wool pads, or other
abrasive material.
SAVE THESE INSTRUCTIONS
ADDITIONAL IMPORTANT SAFEGUARDS
1. All users of this appliance must read and understand these Use &
Care instructions before operating or cleaning this appliance.
2. The cord to this appliance should be plugged into a 120V AC
electrical outlet only.
3. Use water only in this appliance! Do not put any other liquids or
food products in this appliance. Do not mix or add anything to the
water placed in this appliance, except as instructed in the USER
MAINTENANCE INSTRUCTIONS to clean the appliance.
4. DO NOT attempt to move an appliance containing hot liquids. Allow
appliance to cool completely before moving.
5. Keep appliance at least 4 inches away from walls or other objects
during operation. Do not place any objects on top of appliance while
it is operating. Place the appliance on a surface that is resistant
to heat.
6. If this appliance begins to malfunction during use, press the ON/
OFF Button to turn the unit OFF, then immediately unplug the cord.
Do not use or attempt to repair the malfunctioning appliance.
7. If this appliance falls or accidentally becomes immersed in water or
any other liquid, unplug it immediately.

4
Do not use this appliance after it has fallen into or has become
immersed in water. Contact Consumer Service for examination
and repair.
8. DO NOT leave this appliance unattended during use.
9. The appliance must be left to cool down sufciently before adding
more water to avoid splattering.
10. Always use fresh, cool water in your appliance. Warm water or
other liquids, except as listed in the cleaning section, may cause
damage to the appliance.
11. DO NOT put Carafe into a microwave.
12. DO NOT leave empty Carafe on Warming Plate when appliance is
turned ON, as the Carafe may crack or become otherwise
damaged.
13. DO NOT lift or open Lid until brewing is complete, and all parts
have cooled.
POLARIzED PLUG
This appliance has a polarized plug (one blade is wider than the other).
To reduce the risk of electric shock, this plug is intended to t into a
polarized outlet only one way. If the plug does not t fully in the outlet,
reverse the plug. If it still does not t, contact a qualied electrician.
Do not attempt to modify the plug in any way.
SHORT CORD INSTRUCTIONS
A short power supply cord is provided to reduce the risk resulting from
becoming entangled in or tripping over a longer cord. Do not use an
extension cord with this product.
PLASTICIzER WARNING
CAUTION: To prevent Plasticizers from migrating from the nish of the
counter top or table top or other furniture, place NON-PLASTIC
coasters or place mats between the appliance and the nish of the
counter top or table top.
ADDITIONAL IMPORTANT SAFEGUARDS (CONT.)

5
COFFEE YIELD
12-Cup Digital Stainless Steel Coffee Maker: 12 (5-oz.) cups
NOTE: A 5-oz. cup is the American industry standard and is used by
most Coffee Maker manufacturers. To ll your favorite mug, ll Coffee
Maker reservoir with enough water for 2 cups (10 ounces).
WARNING
ELECTRIC POWER
If the electrical circuit is overloaded with other appliances, your
appliance may not operate properly. It should be operated on a separate
electrical circuit from other appliances.

6
GETTING TO KNOW YOUR ®
12-CUP DIGITAL STAINLESS STEEL
COFFEE MAKER
PRODUCT MAY VARY SLIGHTLY FROM ILLUSTRATIONS
1. Lid
2. Control Panel
3. Digital Display
4. Glass Carafe with Lid
(P/N MCCM12D-RP-CA)
5. Warming Plate
6. Overow Slot
7. Water Level Indicator
8. Removable Filter Holder
(P/N MCCM12D-RP-FB)
9. Auto Pause & Pour Feature
10. Handle
11. Coffee Scoop - NOT SHOWN
(P/N MCCM12D-RP-SC)

7
Use this Button to program your Coffee Maker to start brewing at a
specied time.
Use this Button to display the correct hour when setting the time.
Press this Button to turn the unit ON to start the brewing process.
You can also turn the unit OFF by pressing this Button when the brewing
cycle is complete. The Red ON Light, to the left of the ON/OFF Button,
will illuminate when the Coffee Maker is ON. The Green AUTO Light, to the
right of the PROGRAM Button, will illuminate when the Coffee Maker has
been programmed.
The Aroma Button regulates the brewing cycle to provide a richer,
stronger cup of coffee. Use the Aroma Button anytime you want a
stronger brew, or if you are brewing 5 cups or less coffee (because it
slows down the ow of water, the saturation time will be prolonged to
ensure a good cup of coffee).
Use this Button to display the correct minute when setting the time.
CONTROL PANEL

8
BEFORE BREWING FOR THE FIRST TIME
1. After carefully unpacking from carton, the inside of your Coffee
Maker and Glass Carafe must be cleaned. Remove any labels from
the outer surfaces.
2. Brew 12 (5-oz.) cups of fresh water only. Follow the OPERATING
INSTRUCTIONS, but do not add coffee grounds or paper lter to
the Removable Filter Holder.
NOTE: The Removable Filter Holder must be placed into the Coffee
Maker with the 2 handles, located on the sides of the Filter Holder,
aligning with the 2 notches on the inside of the unit. Press the Filter
Holder down until it clicks into place.
3. When all the water has brewed into the Carafe, press the ON/OFF
Button so the unit is turned OFF.
4. Allow the Coffee Maker to cool for 15 minutes, discard the water
from the Carafe, then repeat steps 2 and 3.
5. After the second pot of water has cooled, discard the water and
thoroughly wash the Removable Filter Holder, Glass Carafe and Lid
in warm, soapy water. Dry all parts thoroughly.
COFFEE FILTERS
Standard #4 cone-shaped paper lters are available locally at grocery
stores and where coffee makers are sold.
The use of basket-style paper lters is not recommended, since they do
not conform to the shape of the Removable Filter Holder and may
cause coffee to back up and spill over during brewing.
SETTING THE CLOCK
1. Plug the appliance into a standard 120V AC electrical outlet.
12:00 will ash in the display window and the AM LED will illuminate.
2. To set the clock, press the HOUR Button until the hour has been
reached. To set the clock to PM, press the HOUR button until the
PM LED is illuminated.
3. Press the MIN Button until the minutes have been reached. You
may press and hold the HR or MIN Buttons to display the correct
time more rapidly.
NOTE: Unplugging the unit will reset the clock to 12:00 and the AM
LED will illuminate.

9
OPERATING INSTRUCTIONS
1. Plug the appliance into a standard 120V AC electrical outlet.
2. Open the Lid by using the lip located on top of the Coffee Maker.
3. Insert a cone paper coffee lter inside the Removable Filter Holder.
4. Place coffee grounds in the lter, using one level tablespoon of drip
grind coffee for each cup of brewed coffee.
5. Fill the Carafe with cold water and pour it into the Water Chamber.
Fill to the desired level using the Water Level Indicator Window to
measure. For the best tasting brewed coffee, is recommended
that no less than 2 cups of coffee be brewed at a time. Place the
Carafe on the Warming Plate.
NOTE: Brewing less than 2 cups is not recommended.
NOTE: Avoid overlling the water reservoir. The Coffee Maker is
equipped with an Overow Slot near the top of the water reservoir. If
too much water is added it will ow out of this slot and collect near the
base of the unit.
6. Close the Lid.
7. You may choose to brew your coffee at a stronger brew strength.
To do so, press the Aroma Button. A lled coffee cup icon will
appear in the Display indicating a stronger brew strength.
8. Press the Power Select ON/OFF Button. Both the Orange Brewing
Light and the Red Power ON Light will illuminate. The time 12:30
will appear in the display window and will begin the count-down time
process, indicating that the brewing cycle has begun. Hot water
will be dispensed gently and evenly through the coffee grounds.
9. To pour a cup of coffee before the brew cycle is complete, simply
remove the Carafe from the Warming Plate and pour. Brewing will
continue but dripping will automatically pause. Return the Carafe
to the Warming Plate within 1 minute; dripping will resume.
10. When brewing is completed, the Orange Brewing Light will disap-
pear and the Orange Ready Light will illuminate. The Coffee Maker
switches to a Keep Warm mode which will hold coffee at the
proper serving temperature. To keep the coffee hot, place the

10
(CONT.)
Carafe back on the Warming Plate when not serving.
11. Press the ON/OFF Button again to turn the unit OFF when not in
use. When the brewing cycle is over, the Coffee Maker will auto-
matically shut off after two hours.
12. To brew another Carafe of coffee, turn unit OFF and wait 10
minutes to allow heating element to cool.
NOTE: The amount of coffee in the Carafe may be slightly less than the
amount of water placed in the Water Chamber, since some of the
water is absorbed by the coffee grounds.
1. Follow steps 1 – 6 in Brewing Coffee – Immediate Start.
2. Be sure clock is set to the current time (see SETTING THE CLOCK
instructions on Page 8).
3. Press the PROGRAM Button once. A Green Light will illuminate to
the right of the PROGRAM BUTTON indicating you are in the delay
mode and the default time of 12:00 will appear in the Display
Window and the AM LED will illuminate. To set the Delay Timer to
PM, press the HOUR Button until the PM LED is illuminated.
4. Press the HOUR and MIN Buttons until the desired brew time is
reached.
5. Press the AUTO ON Button. A Green Light will illuminate next to
the AUTO ON BUTTON indicating that the Coffee Maker is now
waiting for the preset brew time to be reached before it begins
the brewing cycle. To cancel the Auto Brew, press either the AUTO
ON Button or the PROGRAM button and the Green Light next to
the AUTO ON will disappear.
As an added convenience, your Coffee Maker has been designed with an
Auto Shut-Off feature. When the brewing cycle is complete, the Coffee
Maker will automatically shut-off after 2 hours.

11
The Auto Pause and Pour feature allows you to pour a cup of coffee
before brewing is complete. Simply remove the Carafe from the
Warming Plate. Always keep the Lid on the Carafe down when pouring
the coffee.
IMPORTANT: When using the Auto Pause & Pour Feature while the
Coffee Maker is still brewing, the Carafe with Lid must be replaced on
the Warming Plate, under the Filter Holder Cavity within 1 minute to
prevent the Filter Holder from overowing. Replacing the Carafe will
restart the brewing process.
The Aroma Button regulates the brewing cycle to provide a richer,
stronger cup of coffee. Use the Aroma Button anytime you want a
stronger brew, or if you are brewing 5 cups or less coffee (because it
slows down the ow of water, the saturation time will be prolonged to
ensure a good cup of coffee).
To activate, simply press the Aroma Button. A Green Light will appear
in the Display Window. To cancel, press the Aroma Button and the
Green Light will disappear.
To brew a second pot of coffee, turn the appliance OFF for 10 minutes
and allow it to cool. Empty used coffee grounds and repeat steps for
brewing.
CAUTION: Failure to allow appliance to cool completely may cause
water to overheat and spray hot steam. The hot steam can cause
severe burns.

12
HINTS FOR BEST RESULTS
• We recommend using coffee which has been ground specically for
automatic drip coffee makers. This type of coffee is prepared speci-
cally for your Coffee Maker’s brewing system and promotes fuller
extraction to provide rich, full-bodied coffee.
• Use only cone-shaped lters with this Coffee Maker. Cone-shaped
paper lters are available locally at grocery stores. Use standard,
#4 lters. Do not use basket-style paper lters.
• A clean Coffee Maker is essential for making great tasting coffee.
Regular cleaning, as specied in the USER MAINTENANCE
INSTRUCTIONS, is highly recommended.
• Always use fresh, cold water in your Coffee Maker.
• Store coffee in a cool, dry place. Once coffee has been opened, keep
it tightly sealed in the refrigerator to maintain freshness.
• For optimum coffee, buy whole beans and grind them nely just
before brewing.
• Do not re-use coffee grounds since this will greatly impair coffee
avor.
• Reheating coffee is not recommended. Coffee is at its peak avor
immediately after brewing.

13
USER MAINTENANCE INSTRUCTIONS
This appliance requires little maintenance. It contains no user service-
able parts. Do not try to repair it yourself. Any servicing that requires
disassembly must be performed by a qualied appliance repair
technician.
CLEANING INSTRUCTIONS
NOTE: Do not place anything other than water or the vinegar cleaning
solution specied in this manual into the Water Chamber.
1. To clean your Coffee Maker after brewing, be sure the Coffee Maker
is turned OFF, unplugged and is cool. Discard the paper lter.
2. Wipe the outside of your Coffee Maker and the Warming Plate with
a soft, damp cloth and dry. Do not use abrasive cleaners or scour-
ing pads.
3. Hand wash Removable Filter Holder in warm, sudsy water. DO NOT
PLACE IN DISHWASHER.
4. The Glass Carafe and Lid may be washed in warm, soapy water. DO
NOT PLACE IN DISHWASHER.
Your Coffee Maker must be cleaned when you begin to notice excessive
steaming or the brewing time increases considerably. This condition is
caused by a buildup of lime and mineral deposits from your water. If the
pumping action stops before all the water has been pumped out of the
machine, then the appliance requires decalcication.
The frequency of decalcication depends on the hardness of water
used. It is suggested that this unit be descaled according to the
following intervals:
• Soft water: every 80 brewing cycles
• Hard water: every 40 brewing cycles.

14
HOW TO DECALCIFY YOUR COFFEE MAKER
1. Place a #4 cone-shaped paper lter into the Removable Filter
Holder. Make sure the Removable Filter Holder ts securely into
the unit.
2. Fill Carafe with a solution of 2 tablespoons white vinegar to one
liter of cold water. Pour the water and vinegar solution into the
Water Chamber.
3. Place the empty Carafe on the Warming Plate. Plug the Coffee
Maker into an outlet and press the ON/OFF Button to turn the
Coffee Maker ON.
4. Keep the Coffee Maker ON until the Carafe is half full. Press the
ON/OFF Button to turn the Coffee Maker OFF and let cool for 1/2
hour.
5. After 1/2 hour, pour the water and vinegar solution back into the
Coffee Maker.
6. Place the empty Carafe on the Warming Plate. Press the ON/OFF
Button to turn the the Coffee Maker ON and let all the water and
vinegar solution ow through.
7. Discard the solution and the paper lter.
8. After allowing the Coffee Maker to cool for 15 minutes, ush out
all the traces of vinegar by pouring a Carafe full of cold water into
the Water Chamber. Make sure to insert a fresh lter into the
Filter Holder before brewing and place the empty Carafe on the
Warming Plate. Press the ON/OFF Button to turn the Coffee
Maker ON and allow it to cycle through.
9. At the end of the brew cycle, press the ON/OFF Button to turn
the Coffee Maker OFF. Discard water in the Carafe. Repeat steps
8 - 9. Unplug the Coffee Maker when nished.

15
RECIPES
1 cup butter pecan ice-cream
1/2 cup ice
1/4 cup half & half
3 tablespoons strong coffee
Combine all ingredients into a blender. Blend until smooth. Serves 2.
1/3 cup heavy cream, chilled
2 teaspoons plus 4 Tablespoons hazelnut avored syrup
1 cup milk
2 tablespoons chocolate syrup
1/2 cup hot, fresh strong coffee
Whip heavy cream and 2 teaspoons hazelnut syrup in chilled small bowl
with electric mixer on low speed until cream begins to thicken. Beat on
high speed to desired consistency. Chill.
Pour milk into 1-quart microwave-safe bowl. Microwave on HIGH 1 to 1
1/2 minutes or until hot but not boiling. Whisk until foamy.
Pour 2 tablespoons hazelnut syrup and 1 tablespoon chocolate syrup
into each of two standard-size coffee cups. Microwave on HIGH 20
seconds to warm syrups. Stir 1/4 cup hot coffee into each cup. Add
steamed milk to brim of cup. Serves 2.

16
1 cup fresh strong coffee
5 tablespoons caramel ice cream topping
Whipped cream
Ground cinnamon
Pour coffee into mug. Add caramel topping, stir until blended. Top with
whipped cream, sprinkle with cinnamon. Serves 1.
1 – 9” x 13” Pillsbury boxed brownie mix
2 large eggs
1/2 cup melted butter
1/4 cup fresh strong coffee
1 cup chocolate chips
1 cup chopped pecans
Preheat oven to 350°F. Spray 9” x 13” pan with cooking spray. Mix all
ingredients except chocolate chips and pecans in a large bowl. Mix well.
Stir in chocolate chips and pecans. Pour batter into prepared pan.
Bake for 25 – 30 minutes or until toothpick comes out clean. Remove
and cool on a wire rack. May be frosted if desired. Serves 24.

17
Recipe courtesy of MasterChef Kitchens
1 cup toasted walnuts
1 cup (2 sticks) unsalted butter, at room temperature
1/4 cup granulated sugar
1 teaspoon pure vanilla extract
Pinch of salt
2 cups all-purpose our
1/2 cup confectioners’ sugar for rolling, plus more for dusting
Preheat oven to 350°.
Chop the nuts with a knife or pulse in a food processor until nely
chopped but not powdery. Set aside.
Using a handheld or standing electric mixer, beat the butter on medium
speed until very uffy. Beat in the granulated sugar, vanilla, and salt until
well blended. Gradually beat in the nuts and our and continue to mix
until fully incorporated.
Using your hands, roll the dough into balls the size of large marbles.
Space them 1-inch apart on ungreased baking pans. Bake for 12 to 15
minutes, or until the cookies are lightly brown.
Remove from the oven. Put the confectioners’ sugar in a small shallow
bowl or pie plate. While still hot, roll the cookies in the sugar, a few at a
time. Let cool on a plate or cooling rack. Dust with additional powdered
sugar for a pretty presentation.


LIMITED ONE YEAR WARRANTY
This product is warranted by Triple Loop Housewares, LLC to be free from defects in materials
or workmanship for a period of (1) year from the original purchase date. This product warranty covers only
the original consumer purchaser of the product. Neither the retailer nor any other company involved in the
sale or promotion of this product is a co-warrantor of Triple Loop’s warranty.
: This warranty is void if the product has been damaged by accident in shipment,
unreasonable use, misuse, neglect, improper service, commercial use, repairs by unauthorized personnel,
normal wear and tear, improper assembly, installation or maintenance abuse or other causes not arising
out of defects in materials or workmanship. This warranty is effective only if the product is purchased
and operated in the USA, and does not extend to any units which have been used in violation of written
instructions furnished with the product or to units which have been altered or modied or to damage to
products or parts thereof which have had the serial number removed, altered, defaced or rendered illegible.
ANY IMPLIED WARRANTIES WHICH THE PURCHASER MAY HAVE ARE LIMITED IN
DURATION TO ONE (1) YEAR FROM THE DATE OF PURCHASE. Some states do not allow limitations on
how long an implied warranty lasts, so the above limitation may not apply to you.
During the above one-year warranty period, a product with a defect will be
refunded for purchase price less shipping and handling, when the cord and rating label are returned to the
Repair Department.
Should the appliance malfunction, you should rst call toll-free
1 (877) 231-9237 between the hours of 8:30 am - 5:00 pm Eastern Standard Time Monday - Friday and
9:00 am - 5:00 pm on Saturdays. Please refer to model number MCCM12D when you call and have your
receipt for reference.
For an appliance covered under the manufacturer’s
warranty period, no charge is made for service or postage. Call for return authorization 1 (877) 231-9237.
You may return the cord and rating label with
postage prepaid to the USA address listed below. Please note that all customs duty/brokerage fees, if any,
must be paid by you and we will require you to pay the cost of customs duty/brokerage fees to us in advance
of our performing any service.
Repair Department
1403 TI Boulevard
STE. B
Richardson, TX 75081
1 (877) 231-9237
No representative or person is authorized to assume for Triple Loop any other
liability in connection with the sale of our products. There shall be no claims for defects or failure of
performance or product failure under any theory of tort, contract or commercial law including, but not
limited to negligence, gross negligence, strict liability, breach of warranty and breach of contract. Refund
shall be the sole remedy of the purchase under this warranty, and in no event shall Triple Loop be liable for
any incidental or consequential damages, losses or expenses.
Some states do not allow the exclusion or limitation of incidental or consequential damages, so the above
limitation or exclusion may not apply to you.
This warranty gives you specic legal rights, and you may also have other rights which vary
from state to state.
This product distributed by Triple Loop Housewares © 2011, Columbia MO 65203
© 2011 Reveille Independent, LLC MasterChef™ is a trademark of Reveille Independent, LLC and used
under license. The MasterChef™ Logo is a trademark of Shine Limited and used under license. All rights
reserved. FOX™ Fox and its related entities. All Rights Reserved.
Printed in China P/N MCCM12D-OM-411

GARANTIE LIMITÉE D’UN AN
Ce produit est garanti par Triple Loop Housewares, LLC d’être exempt de matériaux défectueux
et de vice de fabrication pour une période d’un (1) an suivant la date d’achat initiale. La présente garantie
est offerte seulement à l’acheteur initial et n’est pas transférable. Aucun détaillant ni aucune autre société
qui participe à la vente ou à la promotion de ce produit n’est considéré comme un garant de la garantie de
Triple Loop.
La présente garantie ne couvre pas les dommages causés par les accidents
lors de la livraison, le mauvais usage, la négligence, le mauvais entretien, l’usage commercial, une réparation
par un personnel non autorisé, l’usure normale, l’assemblage incorrect, l’installation ou l’entretien
abusif ou tout autre dommage occasionné autrement que par la défectuosité des pièces et les vices de
fabrication. La présente garantie est valide seulement si le produit a été acheté et utilisé aux États-Unis
et ne s’applique pas aux unités qui ont été utilisées en violation des instructions écrites fournies à l’achat
du produit ou aux unités qui ont été modiées ou aux dommages aux produits ou pièces de ceux-ci dont le
numéro de série a été enlevé, modié, abîmé ou rendu illisible.
TOUTES LES GARANTIES IMPLICITES QUE L’ACHTEUR PEUT AVOIR SONT LIMITÉES
EN DURÉE À UN (1) AN À COMPTER DE LA DATE D’ACHAT INITIALE. Certains territoires ne permettent
pas la limitation de la durée d’une garantie implicite, de sorte que les limitations précitées peuvent ne pas
s’appliquer à vous.
Durant la période de garantie d’un an ci-haut mentionnée, un produit avec une
défectuosité sera remboursé du montant de l’achat moins les frais d’expédition et de manutention, quand
la corde et l’étiquette d’évaluation auront été retournées au Service de réparations.
Si l’appareil venait à ne pas fonctionner correctement, vous devez en premier lieu
appeler au numéro sans frais 1 877 231-9237 entre 8 h 30 et 17 h heure normale de l’Est – du lundi
au vendredi et entre 9 h et 17 h le samedi. Veuillez mentionner le numéro de modèle MCSD3 quand vous
appelez et ayez votre reçu en mains.
Pour un appareil encore sous la garantie du manufacturier,
il n’y a aucuns frais de service ou d’expédition. Appeler au 1 877 231-9237 pour obtenir l’autorisation de
retourner l’appareil. .
vous pouvez retourner la corde et
l’étiquette d’évaluation à l’adresse aux É.-U. indiquée ci-dessous. L’affranchissement est prépayé. Veuillez
noter que les droits de douane et les frais de courtage, s‘il y en a, doivent aussi être acquittés par vous et
nous exigeons qu’ils soient payés à l’avance pour que nous assurions le service.
Service de réparations
1403 TI Boulevard
STE. B
Richardson, TX 75081
1 (877) 231-9237
Aucun représentant ni aucune personne n’est autorisé à prendre en charge
pour Triple Loop quelque responsabilité en rapport avec la vente de nos produits. Aucune réclamation ne
devrait être faite pour des pièces défectueuses ou une défaillance de fonctionnement or une défaillance du
produit en vertu d’aucune théorie de responsabilité, contrat ou droit commercial y compris, mais sans se
limiter à la négligence, négligence grave, responsabilité absolue, violation de garantie et violation de contrat.
Le remboursement sera pour l’acheteur la seule réparation en vertu de cette garantie, et en aucun cas
Triple Loop ne devrait être tenu responsable de dommages accessoires ou consécutifs, de pertes ou
de dépenses. Certains États ou certaines provinces ne permettent pas l’exclusion ou la limitation des
dommages accessoires ou consécutifs, de sorte que les limitations ou les exclusions pourraient ne pas
s’appliquer à vous.
La présente garantie vous offre des droits spéciques. Il est possible que vous disposiez
également d’autres droits qui varient d’un État ou d’une province à l’autre.
Ce produit est distribué par Triple Loop Housewares © 2011, Columbia MO 65203
© 2011 Reveille Independent, LLC MasterChef™ est une marque commerciale de Reveille Independent,
LLC, utilisée sous licence. Le logo MasterChef™ est une marque commerciale de Shine Limited, utilisée
sous licence. Tous droits réservés. FOX™ Fox et ses entités liées. Tous droits réservés.
Imprimé en Chine P/N MCCM12D-OM-411
Table of contents
Other MasterChef Coffee Maker manuals