8 Matrox Veos – User Guide
Step-by-step connection setup – Display unit
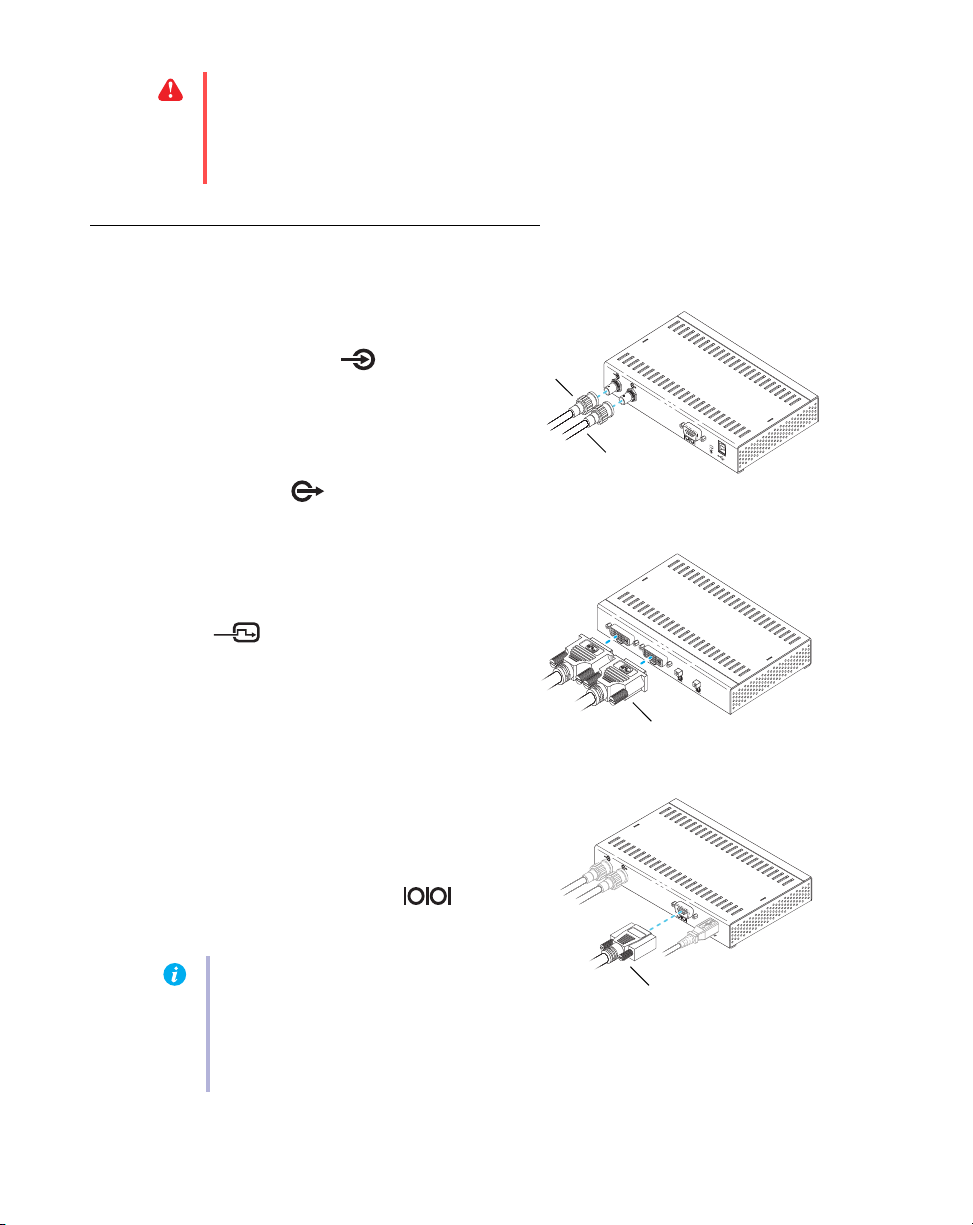
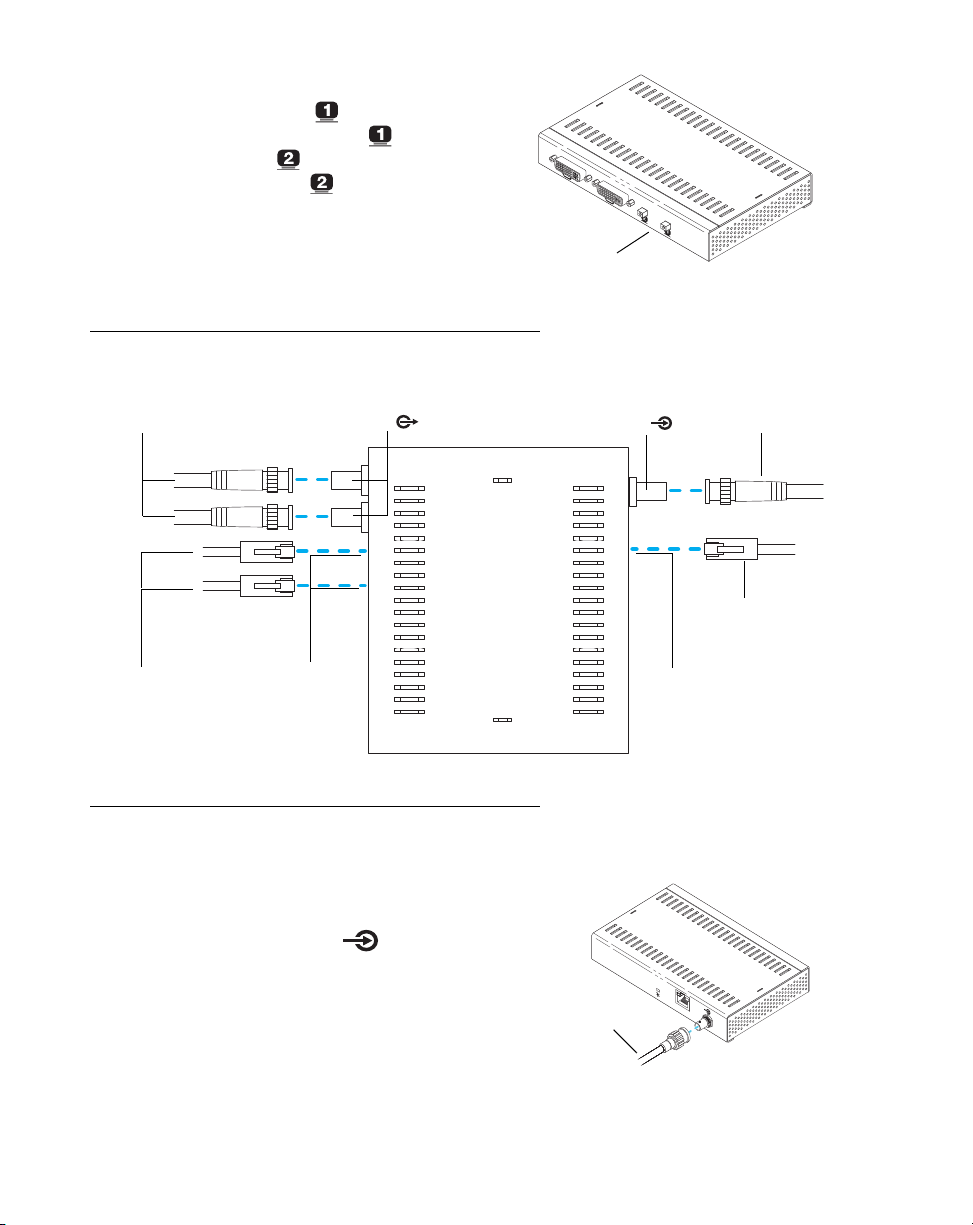
1Connect the coaxial cable
Connect the input coaxial cable to the input
coaxial connector ( ) on your Display
unit.
To connect your Display unit to another
Veos unit (Display or Repeater), connect a
second coaxial cable to the output coaxial
connector ( ) on your Display unit.
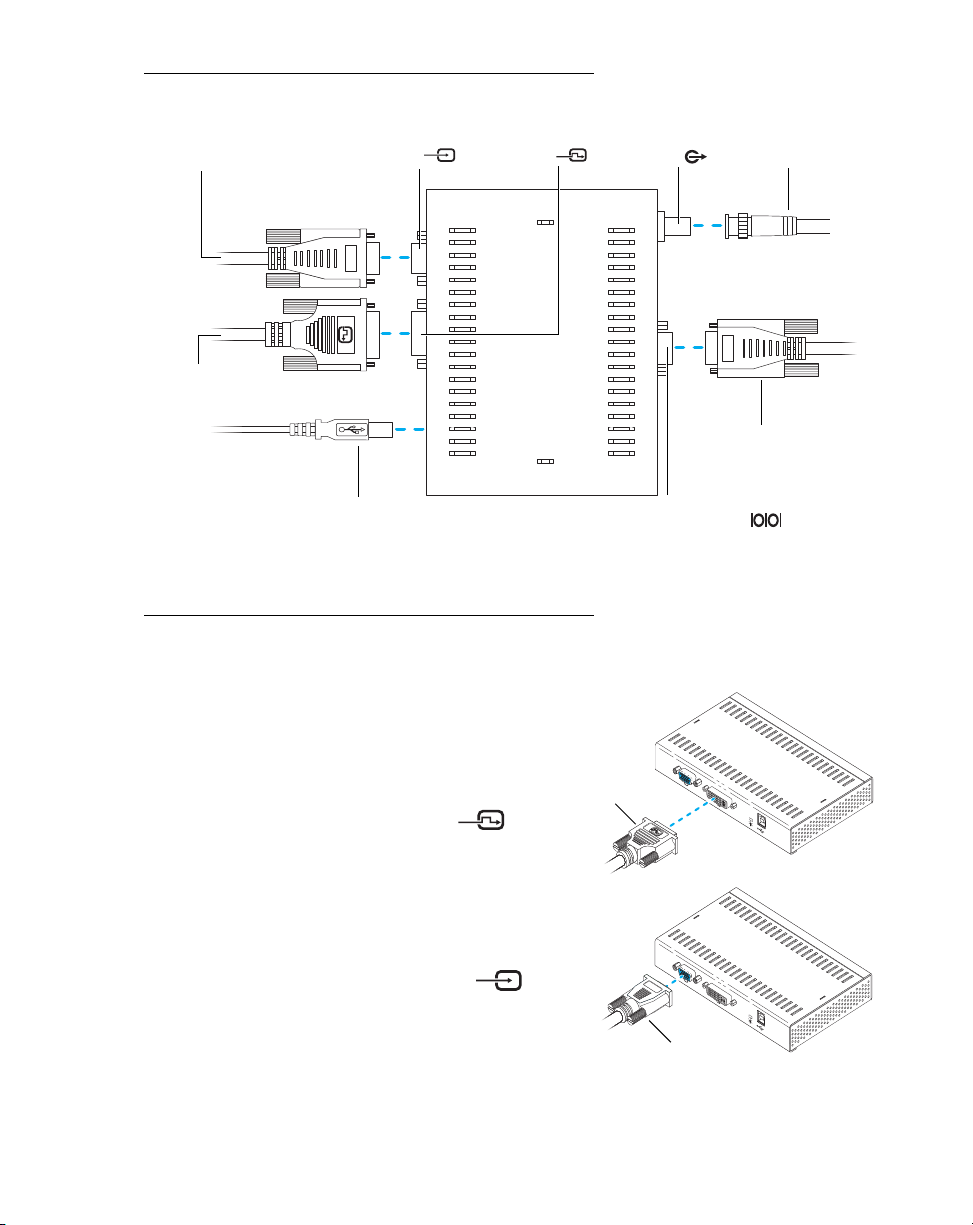
2Connect your monitors
If your monitor has a DVI connector,
connect it directly to the connector labeled
( ) on your Display unit.
If your monitor has an HD-15 connector,
use a DVI-to-HD15 adapter included with
your Display unit to connect your monitor
to the monitor connector on your Display
unit.
If your monitor has an RS-232 serial port
connector, attach one end of your RS-232
serial cable to the connector on your
monitor. Attach the other end of the cable to
the DB-9 output connector ( ) on
your Display unit.
WARNING:
Don’t change monitor connections while your computer is turned on. While
your computer is turned on, it may be using monitor settings that are specific to the
current monitor connections.
Some
devices may be permanently damaged if incorrect
settings are used.
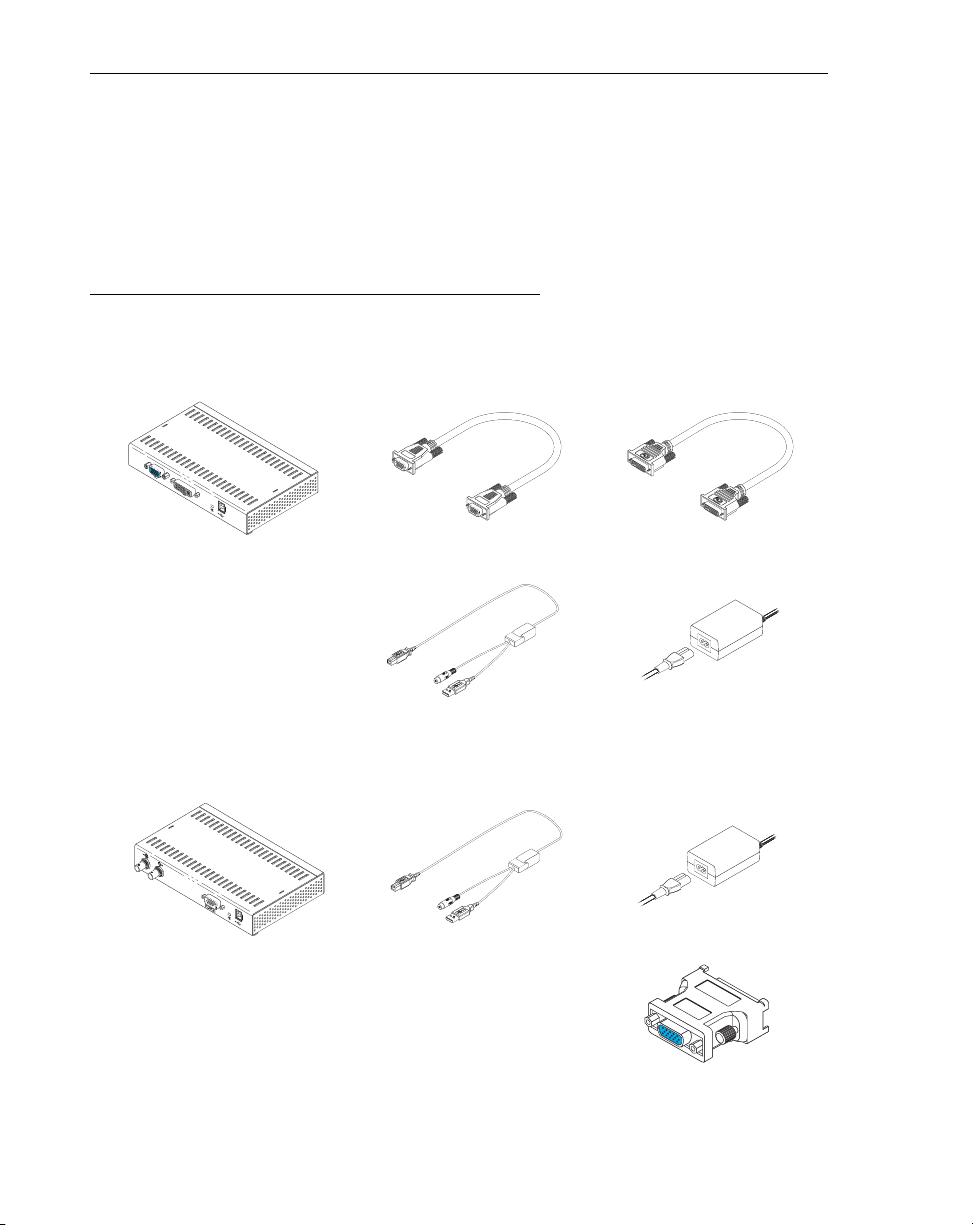
Output coaxial
cable
Input coaxial
cable
Note:
Some monitors that have RS-232
serial port connectors support daisy
chaining. For information on the
capabilities of your monitor, see your
monitor documentation.