maveo Bluefi Stick User manual

Quick Setup Guide
Blue™ Stick
www.marantecamerica.com

Product Evaluation Requirements
PLEASE READ THIS IN IT’S ENTIRETY
The maveo BlueFi™ Stick oers a quick and convenient way to add Wi-Fi connectivity to your existing
Marantec garage door opener and when programmed, provides a two-way communication between the
garage door opener and a smartphone with the maveo app installed.
Pre-Installation – read before continuing:
The maveo BlueFi™ Stick is compatible with select Marantec Garage Door Models including: M55,
Synergy 200 Series and Synergy 300 Series.
Make sure your home Wi-Fi router is powered on and working and congured to send and receive data
at 2.4 GHz. Please have your network ID (SSID) and network password handy. It is required for the
installation process.
Before starting the installation process, please download the Maveo BlueFi Stick app from Apple
TestFlight App in the Apple App Store and or the Google Play App store to your smartphone. Do not
congure the app until instructed to do so during the installation process.
NOTE: If you did not receive an email invite to join the Apple or Android test environments, please contact
Mike Joseph and/or Marc Hellweg.
The Bluetooth® word mark and logos are registered trademarks owned by the Bluetooth SIG, Inc. and any use of
such marks by Marantec Antriebs-und ISteuerungstechnik GmbH & Co. KG is under license. Other trademarks and
trade names are those of their respective owners.
Need Help?
Go to: www.marantecamerica.com/maveo
One Year Limited Warranty
Marantec America Corporation warrants to the rst consumer purchaser of this product that it is free from defect
in materials and/or workmanship for a period of 1 year from the date of purchase.
FCC/IC Statement
This device complies with FCC Part 15 rules and with Industry Canada license-exempt RSS standard(s). Operation is
subject to the following two conditions: (1) This device may not cause interference, and (2) This device must accept
any interference, including interference that may cause undesired operation of this device.
Copyright 2022, All Rights Reserved. Marantec America Corporation | No part of this manual may be reproduced without
our prior written approval. Marantec reserves the right to design and technical specication subject to change without
notice | Document No: 189114 Version 1.0

The maveo BlueFi Stick oers a quick and convenient way to add maveo technology to your existing
Marantec garage door opener and when programmed, provides a two-way communication between
the garage door opener and a smartphone with the maveo app installed.
OVERVIEW
Install maveo BlueFi™ Stick within sight of garage door, out of reach of children at a
minimum height of 5 feet (1.5 m), and away from ALL moving parts of door.
NEVER permit children to operate or play with door control push buttons or remote
control transmitters.
Activate door ONLY when it can be seen clearly, is properly adjusted, and there are no
obstructions to door travel.
ALWAYS keep garage door in sight until completely closed.
NEVER permit anyone to cross path of closing garage door.
WARNING
PRE-INSTALLATION
The maveo BlueFi™ Stick is compatible with select Marantec garage door models including: M55,
Synergy 200 Series and Synergy 300 Series.
Make sure your home Wi-Fi router is powered on and working and congured to send and receive
data at 2.4 GHz. Please have your network ID (SSID) and network password handy. It is required
for the installation process.
Before starting the installation process, please download the maveo BlueFi™ Stick app from the
Apple App Store or the Google Play App store to your smartphone.
Do not congure the app until instructed to do so during the installation process.
To install and program the maveo BlueFi™ Stick, follow the graphical programming steps as
indicated in the next section.

INSTALL THE BLUEFI™ STICK
Step 1
Unplug your Marantec Garage Door Opener for 30 Seconds. If you are using a backup battery,
remove the blue fuse.
Step 2
Insert the Maveo BlueFi stick into your Marantec garage door opener as indicated below.
Step 3
Re-plug your Marantec garage door opener and replace the blue battery backup fuse. You may see
the display on your garage door opener count down from 24 to zero - this is normal.
If any point of the initial setup process is not successful, power down and restart your
smartphone and your Marantec garage door opener. Disconnect and reconnect battery backup,
if one is used. Then restart the setup process.
NOTE
For more help, visit www.marantecamerica.com/maveo to
watch a short installation video.
The Maveo Blue™ Stick simply inserts into the head of
the garage door opener at connection point XW40.
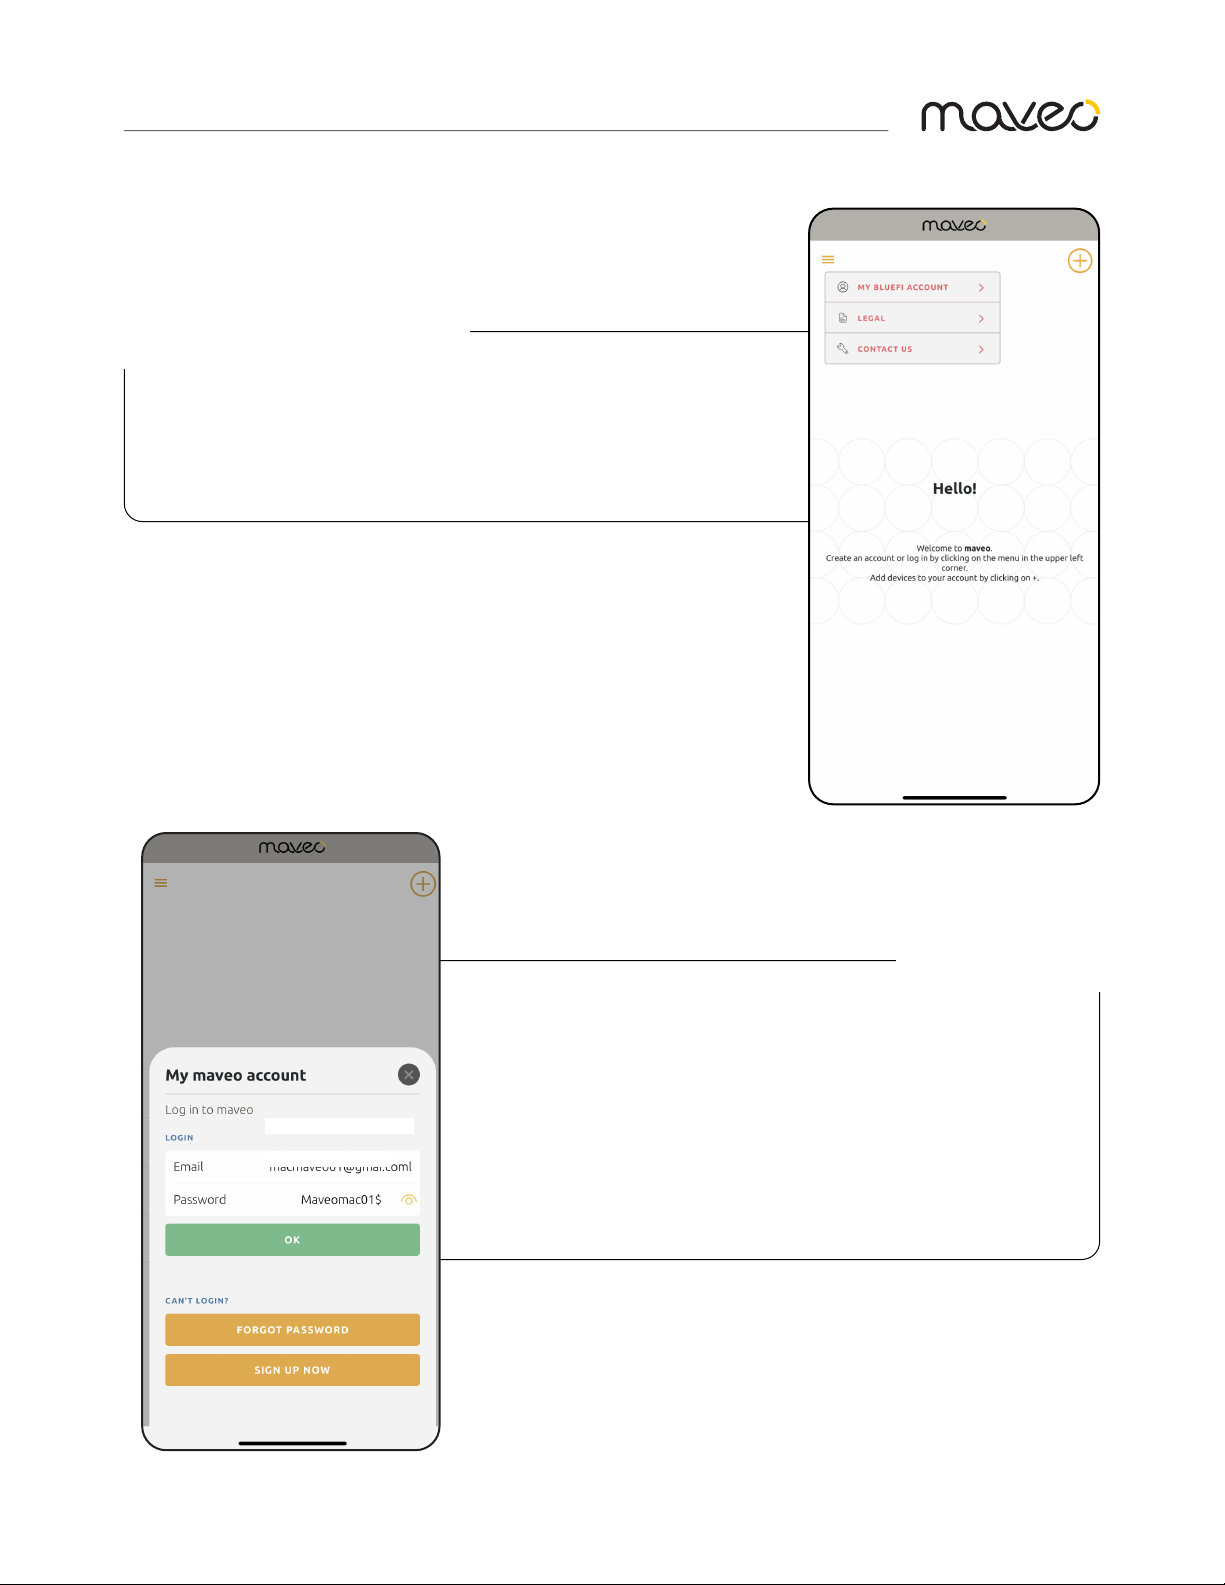
APP SETUP
1. Tap 3 horizontal bars in the upper left corner.
2. Select MY BLUEFI ACCOUNT.
3. Follow the prompts to login or create your
maveo account. A validation code will be sent to
your email for verication.
4. Once logged in, tap the “X” in the top right
corner to continue the setup process.
NAVIGATE TO YOUR ACCOUNT
LOGIN & SIGN-UP

5. Tap the circle with a “+” symbol in the upper
right corner.
6. Then tap “maveo BlueFi Stick”. You can
also create a guest access key by tapping that
option.
7. Enable bluetooth and location services on
your phone.
ADD A BLUEFI™ STICK
ENABLE PERMISSIONS
Note: The maveo app requires bluetooth and location
services. Enabling location using the “Allow While Using
App” option allows you to use the “Coming Home Scenario”
feature.

8. Press and release the yellow bluetooth
pairing button. The light on the BlueFi™
stick will blink blue and the pairing
process will begin.
9. Upon a successful pairing, you will see the
this screen. The light on the BlueFi™ stick will
change to solid blue.
10. Tap “SETUP ACCESS TO WIFI” and proceed.
If bluetooth paring is not successful, repeat
step 8.
PAIR THE BLUEFI™ STICK
COMPLETE PAIRING
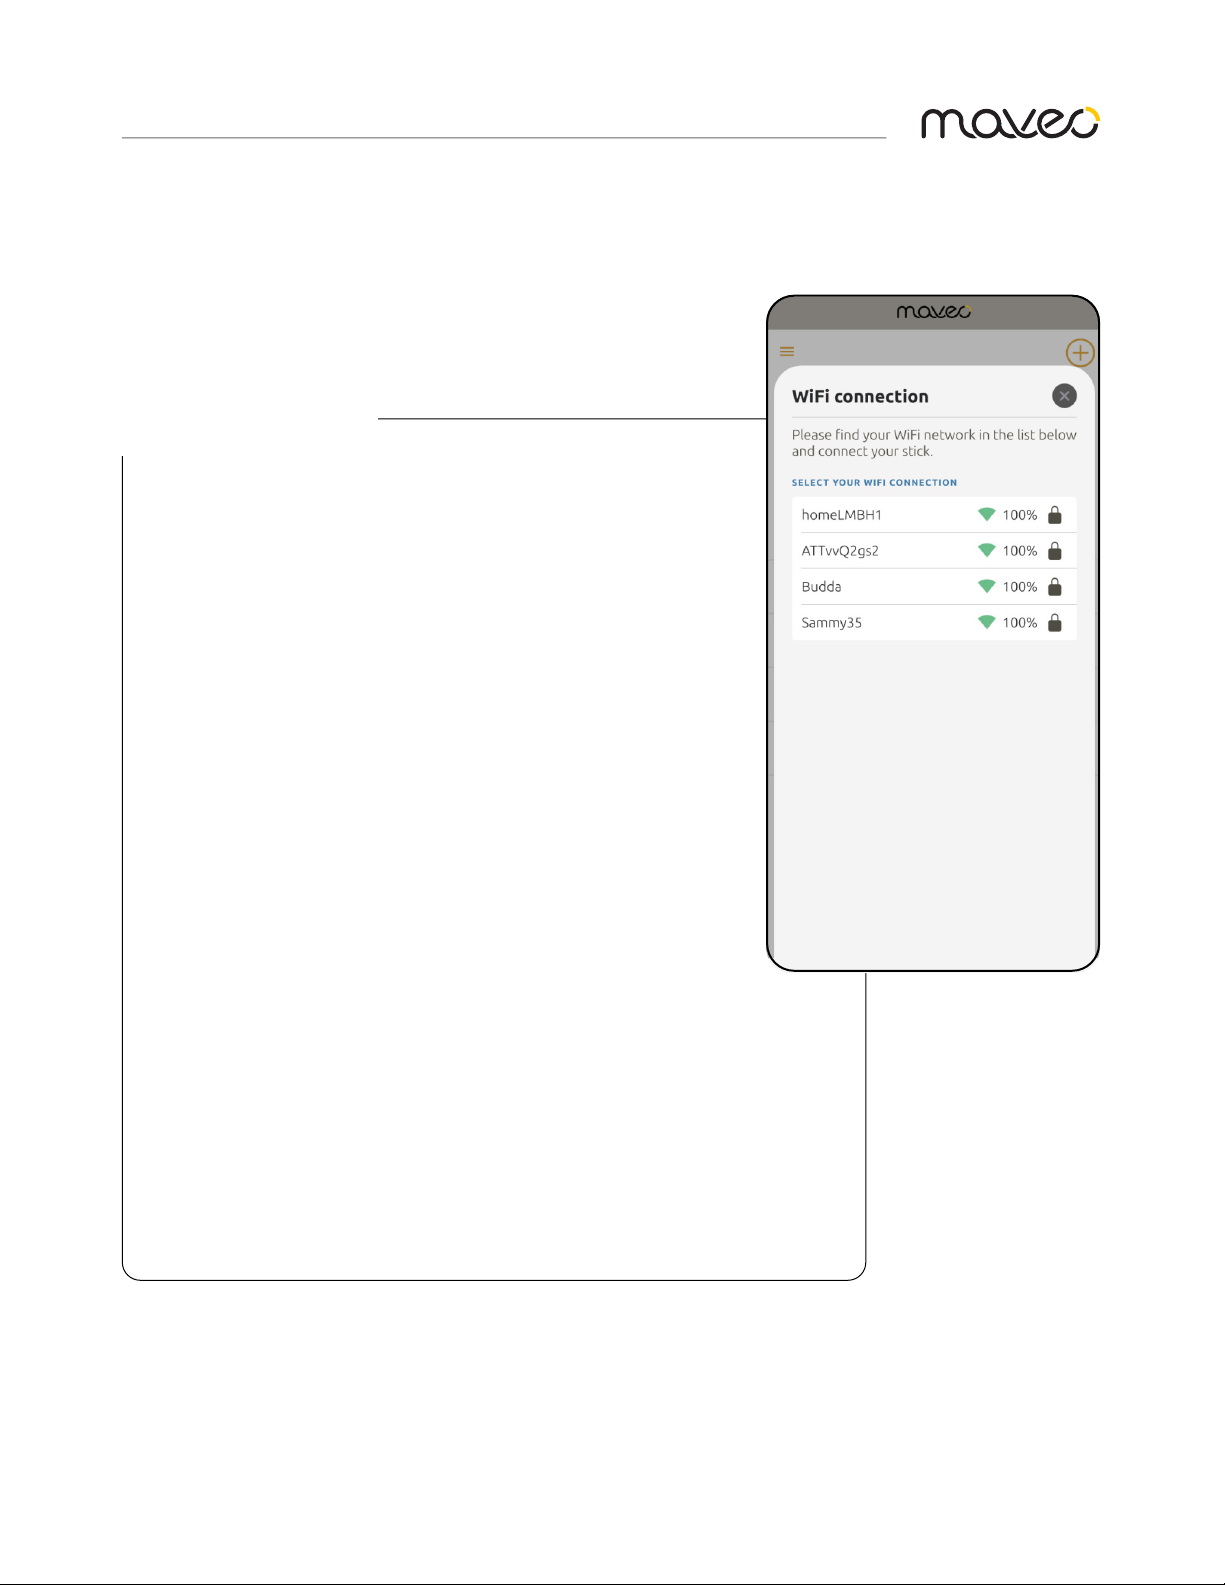
11. Tap the desired 2.4GHz Wi-Fi network then
enter your Wi-Fi password, the light on the
BlueFi™ stick will blink green while connecting.
Connecting may take a couple of minutes.
12. If the Wi-Fi connection is successful, you
will see the light on the maveo BlueFi™ stick
change to solid green.
13. (Optional) Tap the black check box if you
want to rename your Blue™ stick.
If Wi-Fi connection is not successful, repeat
steps 11-13.
CONNECT TO WI-FI
NOTE: An ‘Over The Air’ rmware update (if one
is available) may occur after an initial successful
connection to the maveo cloud. The stick will blink
red while the rmware is being updated. Once
complete, the stick will blink green while it connects
to the cloud, then the stick will change to a solid
green light when fully connected.

14. The maveo app is now ready to test.
Tap the red circle with the up arrow to
open the garage door.
TEST YOUR DOOR - OPEN
15. Click the green circle with the down
arrow to close the garage door. Note the
blinking lights and beeping sound - this is
normal.
16. Once the GDO lights turn o (default
setting is 255 seconds), tap the light icon to
turn o and on the lights on the GDO head.
TEST YOUR DOOR - CLOSE

17. Tap the 3 vertical bars in the upper left
corner and then tap ‘SETTINGS’.
Here you can rename your door, if desired, and
copy the stick’s serial number to your device’s
clipboard.
18. To setup Access Keys, tap ‘Manage Access
Keys’.
NAVIGATE TO SETTINGS
19. Tap one of the ve available access key
slots.
20. Select ‘Add Access Keys’ at the bottom.
ADD ACCESS KEYS
SETUP ACCESS KEYS
Table of contents


