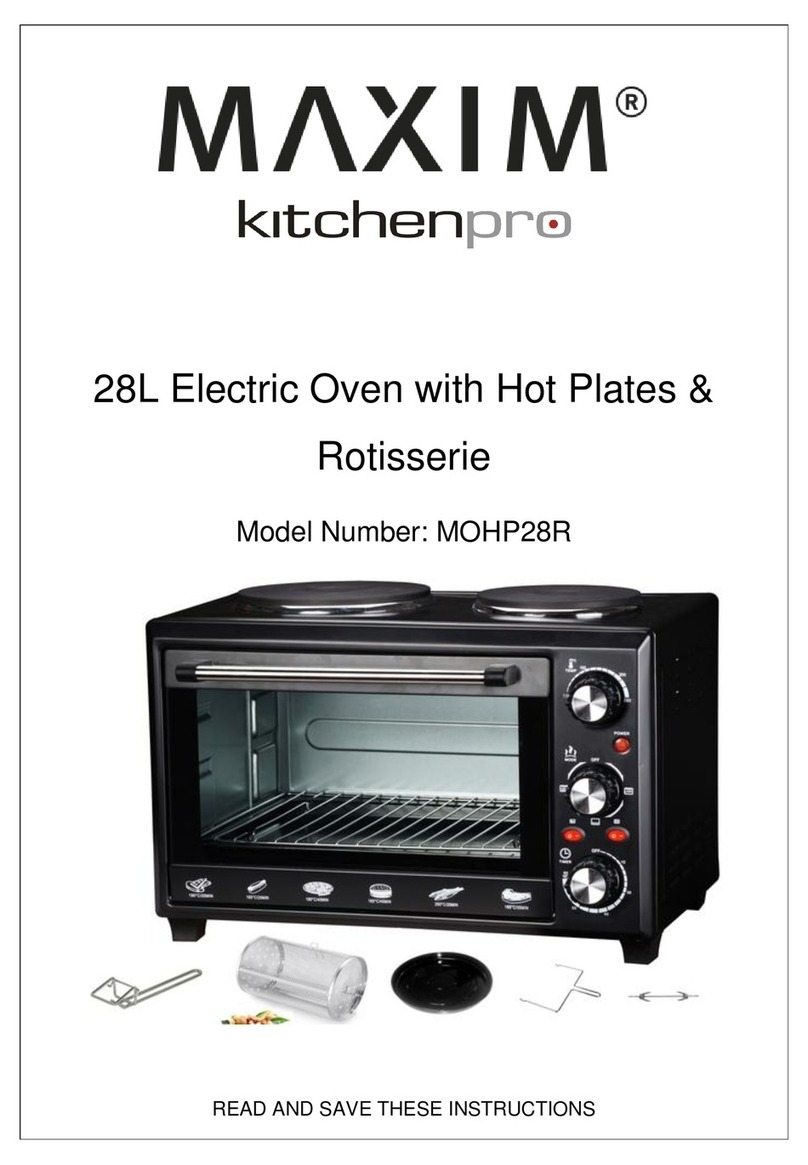
Maxim kitchenPRO MOHP28 User manual

28L Electric Oven with Hot Plates
Model Number: MOHP28
READ AND SAVE THESE INSTRUCTIONS
28L Electric Oven

IMPORTANT SAFEGUARDS
When using any electrically powered product, basic safety precautions should always
be followed, including the following:
PLEASE READ ALL INSTRUCTIONS CAREFULLY BEFORE USING THIS PRODUCT
WARNING!: - to reduce the risk of fire, electrical shock or injury to persons or property:
Always operate the product from a power source of the same voltage, frequency and
rating as indicated on the product identification plate.
Close supervision is necessary when the product is used by or near children or infirm
persons. Do not allow children to use it as a toy.
This appliance is not intended for use by persons (including children) with reduced
physical, sensory or mental capabilities, or lack of experience and knowledge, unless
they have been given supervision or instruction concerning use of the appliance by a
person responsible for their safety.
Do not operate this product with a damaged cord or plug, or after the product
malfunctions, or appears damaged in any manner. Return appliance to the nearest
authorized service facility for examination, repair or adjustment.
This appliance is intended to be used in household and similar applications such as:
- Staff kitchen areas in shops, offices and other working environments;
- Farm houses;
- By clients in hotels, motels and other residential type environments;
- Bed and breakfast type environments.
Do not touch hot surfaces. Always use the handles or knobs.
Close supervision is necessary when any appliance is used by or near children.
For protection against electric shock, do not immerse the cord, plug or any parts of
the oven in water or any other liquids.
Do not let the cord hang over the edge of table or counter, or touch hot surfaces.
The use of accessory attachments not recommended by the appliance manufacturer
may cause hazard or injury.
Do not place on, or near a hot gas or electric burner.
When operating the oven, keep at least four inches of free space on all sides of the
oven to allow for adequate air circulation.
Unplug from the power outlet when not in use and before cleaning. Allow to cool
completely before putting on or removing parts, and before cleaning.
To disconnect, turn the time control to OFF, then remove the plug. Always hold the
plug, and never pull on the cord.
Extreme caution must be used when moving a drip pan containing hot oil or other hot
liquids.
Do not cover the crumb tray or any part of the oven with metal foil. This may cause
the oven to overheat.
Use extreme caution when removing the tray, racks or disposing of hot grease or
other hot liquids.
Do not clean the inside of the oven with metal scouring pads, pieces can break off
the pad and touch electrical parts, creating a risk of electric shock.
Oversized foods or metal utensils must not be inserted in a toaster oven as they may
create a fire or risk of electric shock.
A fire may occur if the oven is covered or touching flammable material, including the
curtains, draperies, walls, etc, when in operation. Do not store any item on top of the
appliance when in operation.
Extreme caution should be exercised when using cooking or baking containers
constructed of anything other than metal or ovenproof glass.
Be sure that nothing touches the top or bottom elements of the oven.
Do not place any of the following materials in the oven: cardboard, plastic, paper, or
anything similar.

Do not store any materials other than the manufacturer’s recommended accessories
in this oven when not in use.
Always wear protective, insulated oven gloves when inserting or removing items from
the hot oven.
This appliance has a tempered, safety glass door. The glass is stronger than ordinary
glass and more resistant to breakage. Tempered glass can still break around the
edges. Avoid scratching the door surface or nicking the edges.
This appliance is OFF when the Timer Control button is in the “OFF” position.
Not suitable for use outdoors.
Do not use the appliance other than for its intended use.
PARTS AND FEATURES
A:Housing
B: Front panel
C: Upper door lath
D:Door handle
E:Glass door
F: Lower door lath
G: Oven feet
H: Temperature control knob
I: Oven indicator lamp
J: Oven function switch
K: Timer Control
L: Right hotplate Control Knob
M: Left hotplate Control Knob
N:Left (Bigger) Hotplate (1000W)
O: Right (Smaller) Hotplate (600W)
P: Bake Tray handle
R: Bake Tray
S: Wire Rack
P
S
R

BEFORE FIRST USE
Read and follow the instructions in this user manual even if you feel you are familiar with the
product, and find a place to keep it handy for future reference.
For your convenience record the complete model number (located on the product
identification plate) and the date you received the product, together with your purchase
receipt and attach to the warranty and service information. Retain in the event that warranty
service is required.
NOTE: The rating of this product (as marked on the product identification plate) is based on
specific loading tests. Normal use or the use of other recommended attachments may draw
significantly less power.
Before using your Appliance for the first time be sure to:
1. Read all of the instructions included in this manual.
2. Make sure that the oven is unplugged and the ‘Timer Control’ is in the ‘Off’ position.
3. Wash all of the accessories in warm, soapy water.
4. Thoroughly dry all accessories and re-assemble in the oven, plug oven into a power
outlet and you are ready to use your new appliance.
5. After re-assembling your appliance, it is recommended that you run it at the highest
temperature (250°C) on the toast function for approximately 15 minutes to eliminate
any packing residue that may remain after shipping. This will also remove any traces
of odours initially present.
OPERATION
1. Place the wire rack on the unit support guide.
2. Place food on the wire rack.
3. Brush food with sauces or oil, as desired.
4. Food should be placed as close as possible to the top heating element without
touching it.
5. Turn timer knob to the appreciate min.
6. Turn food over midway through the prescribed cooking time.
7. When broiling is complete, turn the time control to “OFF”.
Please note: The initial start up operation may produce a minimal amount of smell and
smoke. This is normal and harmless. This is due to burning off the protective substance
applied to the heating elements in the factory.
WARNING: TO AVOID RISK OF INJURY AND BURNS, DO NOT TOUCH HOT SURFACES WHEN
THE OVEN IS IN USE. ALWAYS USE OVEN MITTS.

USING YOUR APPLIANCE
Please familiarize yourself with the following oven functions and accessories prior to first
use.
Temperature Control: choose the desired temperature from 100°C - 250°C for
baking, grilling, broiling or toasting.
Timer Control:when you activate the timer segment of the control, turn to the right
(clockwise) to toast or use as a timer. The timer bell will ring at the end of the
programmed time.
Heating Control: There are four stages switch function to select from.
Stage 1 = OFF (Heating elements NOT working, while hot plates can be turned on
via rocker switch)
Stage 2 = Upper heater (only upper 2 heating elements working)
Stage 3 = Lower heater (only lower 2 heating elements working)
Stage 4 = Upper & Lower heater (upper & lower 4 heating elements working)
Neon Lamp: Choose the desired function and the neon lamp will correspondingly
light up.
Hot Plates: Press the left red rocker switch to turn on the left (bigger) hot plate; do
the right one to turn on the right (smaller) hot plate.
Please note that the oven cannot work with hot plates simultaneously.
Baking Tray: For use in broiling and roasting meat, poultry, fish and various foods.
Can also be used when using the rotisserie handle to catch the drippings.
Tray Handle: Allows you to pick up the wire rack, and baking tray when they are hot.
Wire Rack: Allows you to place food, snacks on it when cooking.
CAUTION: ALWAYS USE EXTREME CARE WHEN REMOVING THE BAKE TRAY,
WIRE RACK OR ANY HOT CONTAINER FROM THE HOT OVEN. ALWAYS USE THE TRAY
HANDLE, OR OVEN MITTS WHEN REMOVING HOT ITEMS FROM THE OVEN. ALWAYS
PLACE THE HOT ITEM ON A HEAT RESISTANT MAT ON A FLAT SURFACE.
NOTE: ALL ROASTING TIMES ARE BASED ON MEATS AT REFRIGERATOR TEMPERATURE.
FROZEN MEATS MAY TAKE CONSIDERABLY LONGER. THEREFORE, USE OF A MEAT
THERMOMETER IS HIGHLY RECOMMENDED.

HOW TO USE YOUR HOTPLATES
Left (Bigger) Hotplate (1000W)
Operation:
1. Place food to be cooked on the left hotplate.
2. Press the left rocker switch on.
3. When cooking is over, press the left rocker switch off.
Right (Smaller) Hotplate (600W)
Operation:
1. Place food to be cooked on the right hotplate.
2. Press the right rocker switch on.
3. When cooking is over, press the right rocker switch off.
HOW TO BAKE
1. Place the removable rack into the desired position.
2. Insert the baking tray and close the oven door.
3. Turn the timer knob to the desired cooking time.
4. Turn the heater selector knob to BAKE .
5. When finished baking, turn the timer to “OFF” position to switch off the oven.
HOW TO BROIL
1. Insert the removable rack and bake tray with food.
2. Keep the glass door half-open.
3. Turn the heat selector knob to BROIL .
4. When finished broiling, turn the timer to “OFF” position to switch off the oven.
HOW TO TOAST
1. Turn the function control knob to TOAST .
2. Place food to be toasted onto the wire rack.
3. Turn the timer control knob to “OFF”.
4. Bell will ring to signal the end of the toast cycle.

Note: Wire rack should be positioned in the middle of the oven with the indentations pointing
down.
CARE AND CLEANING
Any spattering that occurs whilst cooking and comes into contact with the continuous coating
is oxidized while the oven is in operation. If desired, wipe the walls with a damp sponge,
cloth or nylon scouring pad and mild detergent.
All accessories should be washed in warm soapy water. The door can be cleaned with a
damp sponge and wiped dry with paper towel or a cloth. Clean the outside with a damp
sponge.
WARNING: BE SURE TO UNPLUG THE OVEN AND ALLOW IT TO COOL BEFORE CLEANING
CAUTION: WHEN SLIDING TRAYS OUT OF OVEN, ALWAYS SUPPORT THE RACK.
DO NOT LET GO UNTIL YOU ARE SURE THE RACK IS HELD SECURELY.
NOTE: DO NOT USE STEEL WOOL SCOURING PADS, ABRASIVE CLEANERS, OR
SCRAPE THE WALLS WITH METAL UNTENSILS, AS ALL OF THESE METHODS MAY
DAMAGE THE CONTINUOUS CLEAN COATING.
NOTE:
DO NOT USE AN ABRASIVE CLEANER AS IT MAY DAMAGE THE EXTERIOR
FINISH.
DO NOT USE AN ABRASIVE CLEANER OR STEEL WOOL SCOURING PAD ON
THE DRIP PAN AS IT MAY DAMAGE THE PORCELAIN ENAMEL FINISH.
LET ALL PARTS AND SURFACES DRY THOROUGHLY PRIOR TO PLUGGING
OVEN IN AND USING.

SPECIFICATIONS
Model Number:MOHP28
Description: 28L Oven with Hot Plates
Voltage: 220-240V
Capacity:28L
Oven Power Consumption: 1600W
Frequency: 50Hz
Large (Left) Hot Plate: 1000W
Small (Right) Hot Plate: 600W
CUSTOMER SERVICE
Australian Customer Service
GAF Control (Sales) Pty Ltd & Maxim Housewares
P.O Box 19
Altona North Victoria 3025
Phone: 1300 659 489
Hours: 9am-5pm (EST) Mon-Fri
www.gafcontrol.com.au
*This product may vary slightly to the product illustrated due to ongoing product development.
READ AND SAVE THESE INSTRUCTIONS
Table of contents
Other Maxim Oven manuals
Popular Oven manuals by other brands

Thetford
Thetford S-OH70000 User and installation instructions

Blaupunkt
Blaupunkt 5BD3..50 series instruction manual

Wolf
Wolf DO30F Specifications

Award
Award WO701BS user manual

CDA
CDA DK951 Series Installation, use and maintenance

Bakers Pride
Bakers Pride VH-1620-E1 Installation and operating instructions