© Copyright 2013. MaxLite, Inc. All Rights Reserved.
12 York Ave, West Caldwell, NJ 07006 Tel: 973-244-7300 Fax: 973-244-7333 Email: info@maxlite.com
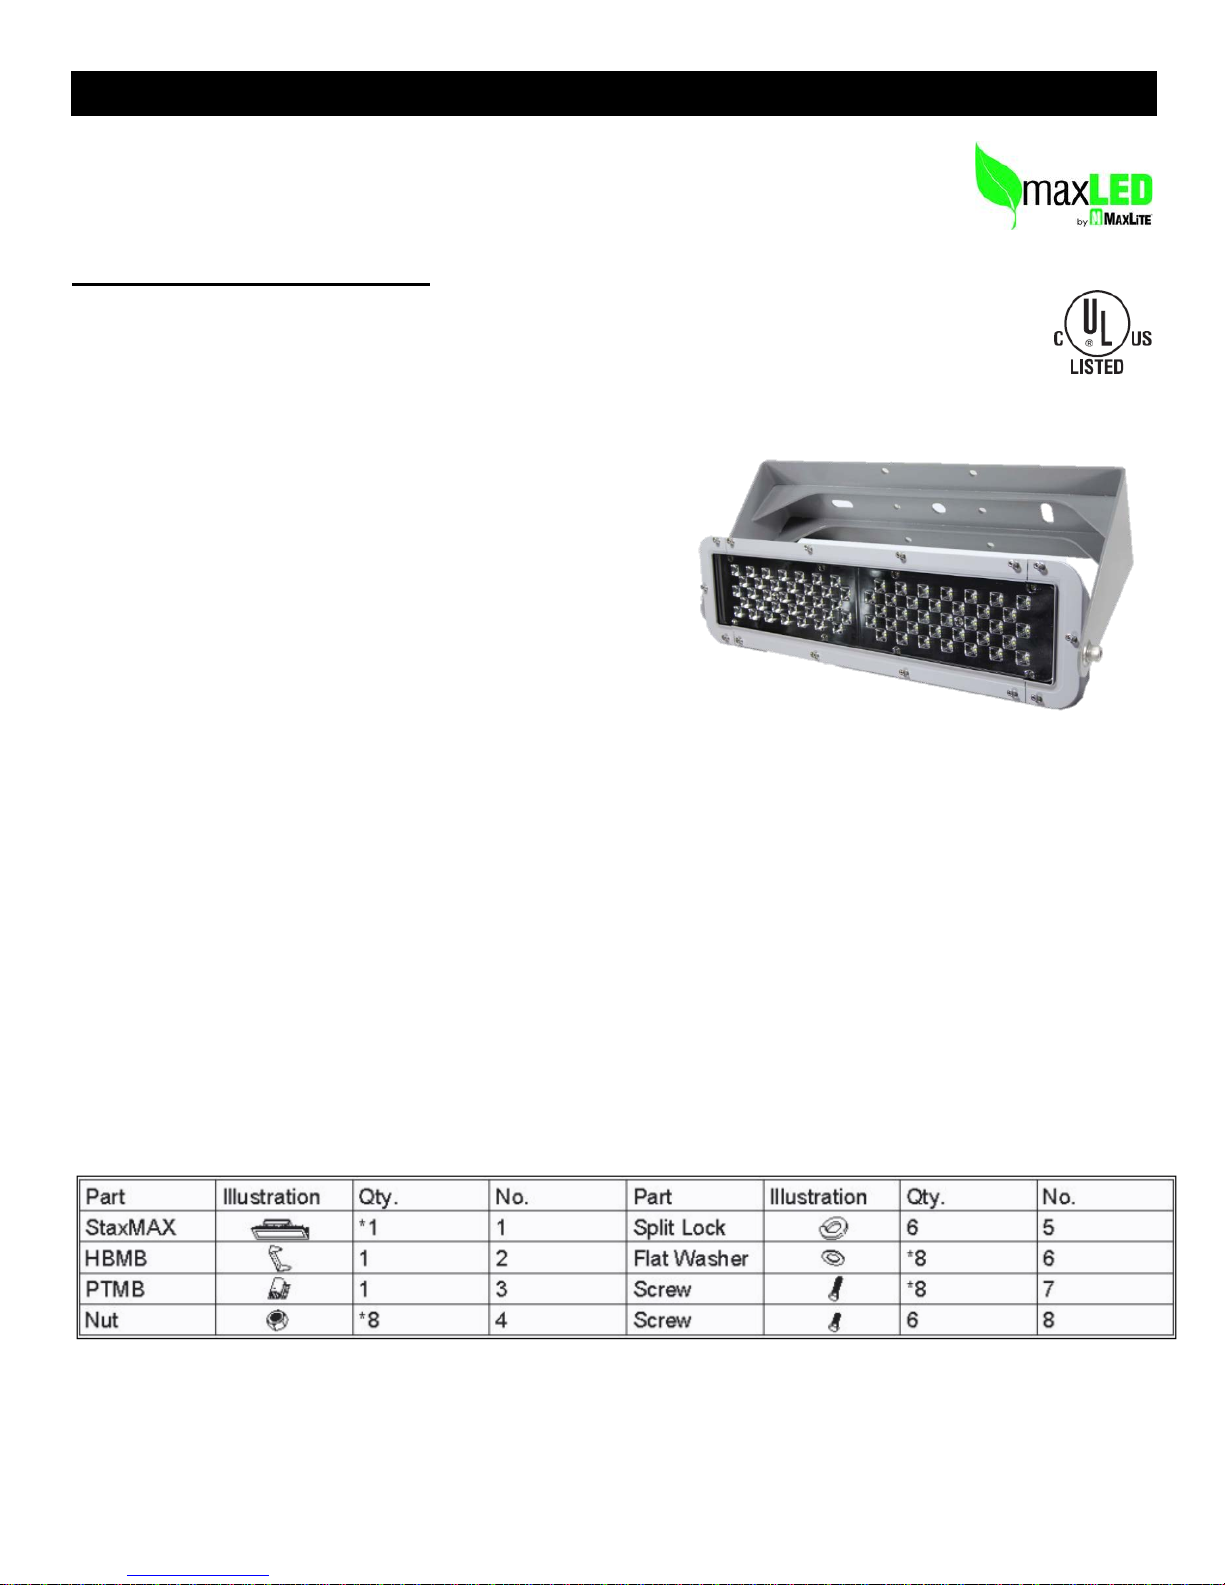
Warranty
CUSTOMER’S SOLE AND EXCLUSIVE REMEDY WITH RESPECT TO ANY CLAIM OR DAMAGE ARISING OUT OF, OR IN CONNECTION WITH,
THE SALE OF ANY PRODUCT, OR ANY BREACH BY MAXLITE OF ITS OBLIGATIONS WITH RESPECT THERETO, SHALL BE LIMITED TO
REPLACEMENTS OF THE PRODUCTS OR REFUND OF THE PURCHASE PRICE PAID BY CUSTOMER TO MAXLITE FOR THE PRODUCTS, AT
MAXLITE’S SOLE DISCRETION, PROVIDED, HOWEVER, MAXLITE SHALL HAVE NO LIABILITY WHATSOEVER TO CUSTOMER UNLESS (I)
CUSTOMER HAS COMPLIED WITH THE REQUIREMENTS HEREUNDER FOR MAKING A CLAIM, (II) THE PRODUCTS ARE FOUND TO BE
DEFECTIVE BY MAXLITE AND (III) CUSTOMER HAS PAID FOR THE PRODUCTS IN FULLWHEN DUE.
MAXLITE HEREBY EXPRESSLY DISCLAIMS ANY WARRANTY OF MERCHANTABILITY OR FITNESS FOR A PARTICULAR PURPOSE AND
MAKES NO OTHER WARRANTIES TO CUSTOMER, EXPRESS OR IMPLIED, EXCEPT AS SPECIFICALLYPROVIDED FOR HEREIN.
UNDER NO CIRCUMSTANCES SHALL MAXLITE BE LIABLE TO CUSTOMER FOR ANY PUNITIVE OR EXEMPLARY DAMAGES OR ANY
CONSEQUENTIAL, INCIDENTAL, INDIRECT, OR SPECIAL DAMAGES (INCLUDING, WITHOUT LIMITATION, DAMAGES FOR LOSS OF USE,
PROFITS, REVENUE OR BUSINESS) ARISING FROM, OR IN ANY WAY RELATED TO, THE SALE, USE OF, OR INABILITY TO USE THE
PRODUCTS, NOTWITHSTANDING ANY FAILURE OF ESSENTIAL PURPOSE OF ANY LIMITED REMEDY HEREIN. THIS EXCLUSION SHALL
APPLY REGARDLESS OF WHETHER SUCH DAMAGES ARE SOUGHT BASED ON BREACH OF CONTRACT, BREACH OF WARRANTY,
NEGLIGENCE,STRICT LIABILITY IN TORT, OR ANY OTHER LEGAL OR EQUITABLETHEORY.
MaxLite’s obligation under this warranty shall be limited to, at its sole option, repairing or replacing defective products at its discretion. All repairs must
be performed in MaxLite’s Factory. MaxLite will ship repaired/replacement drivers/fixtures to the Buyer at MaxLite’s expense.
This warranty is subject to the terms and conditions of sale applicable to the initial purchase of the product from MaxLite, which shall take precedent.
For questions about this warranty, please contact your local MaxLite Representative or MaxLite at 1-800-555-5629 or info@maxlite.com or visit
www.maxlite.com