Introducing Maxspect™ Mazarra LED Lighting System ............................................ 6
Innovative and Contemporary ............................................................................ 6
Customizable, state-of-the-art Technology .......................................................... 6
Unparalleled Efficiency ...................................................................................... 6
Optimized Performance ..................................................................................... 6
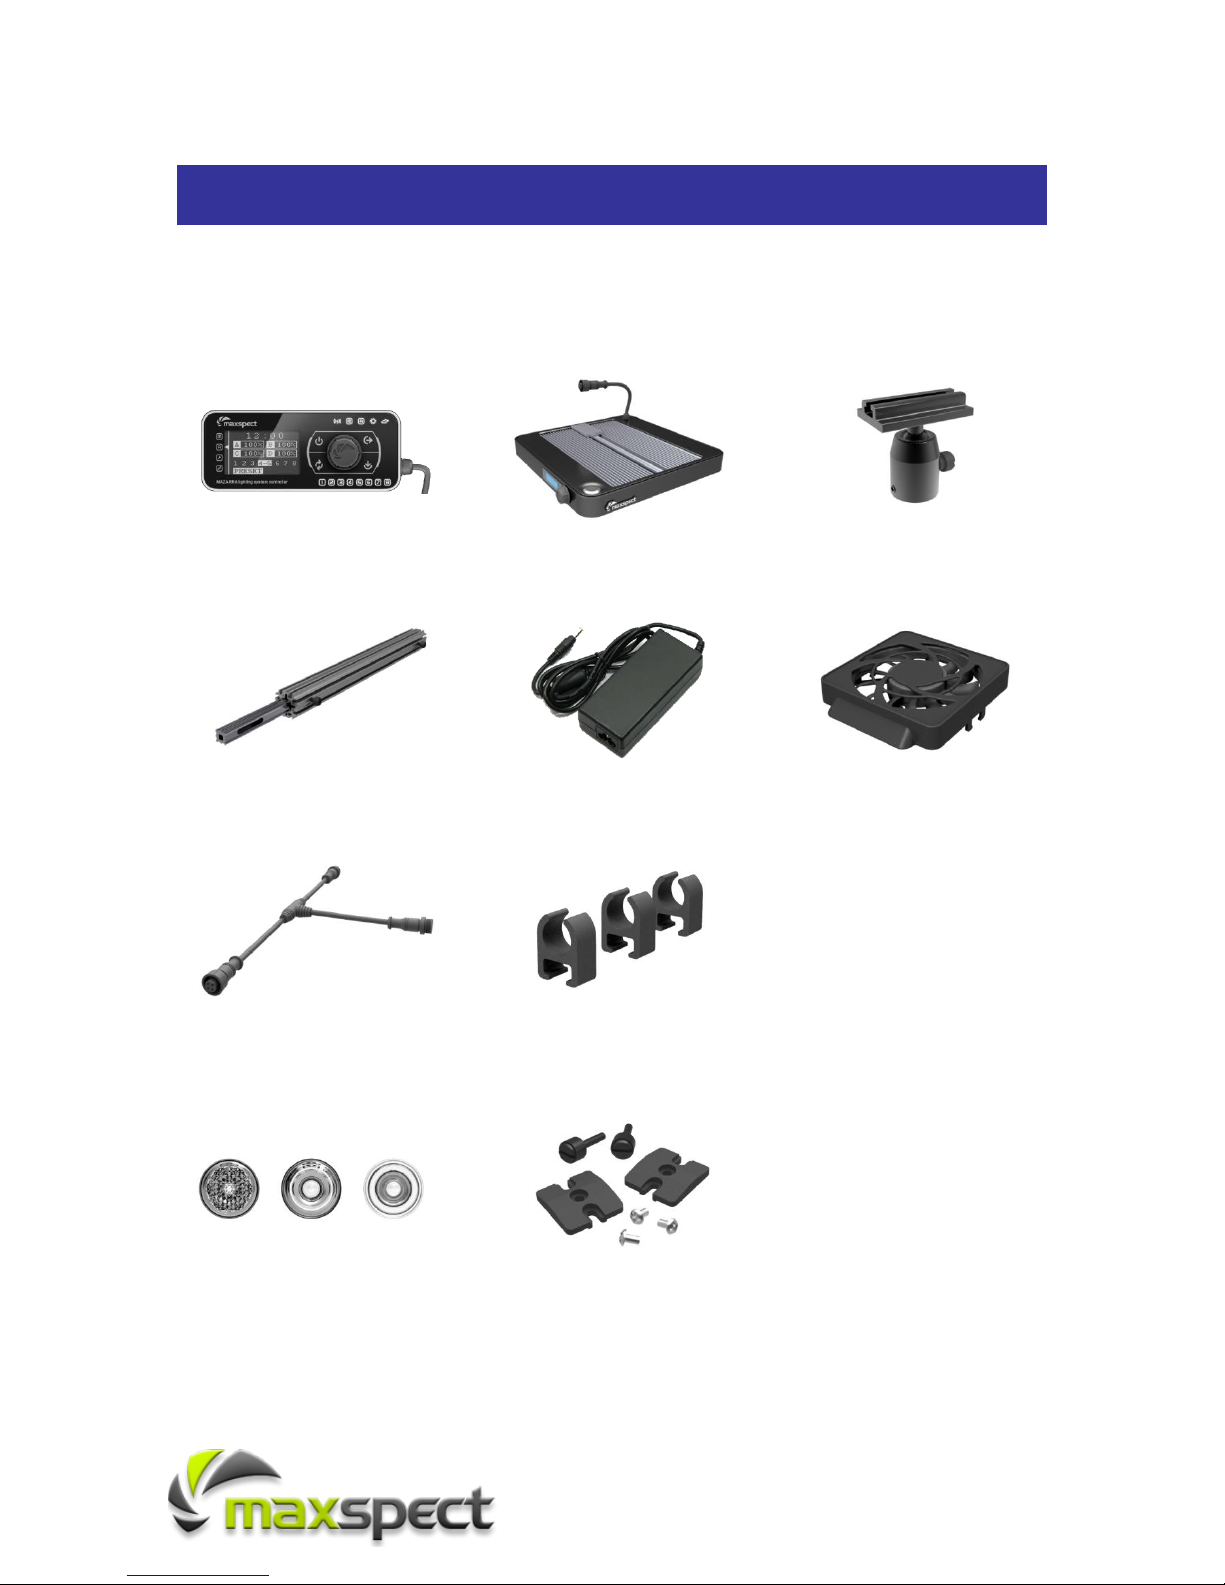
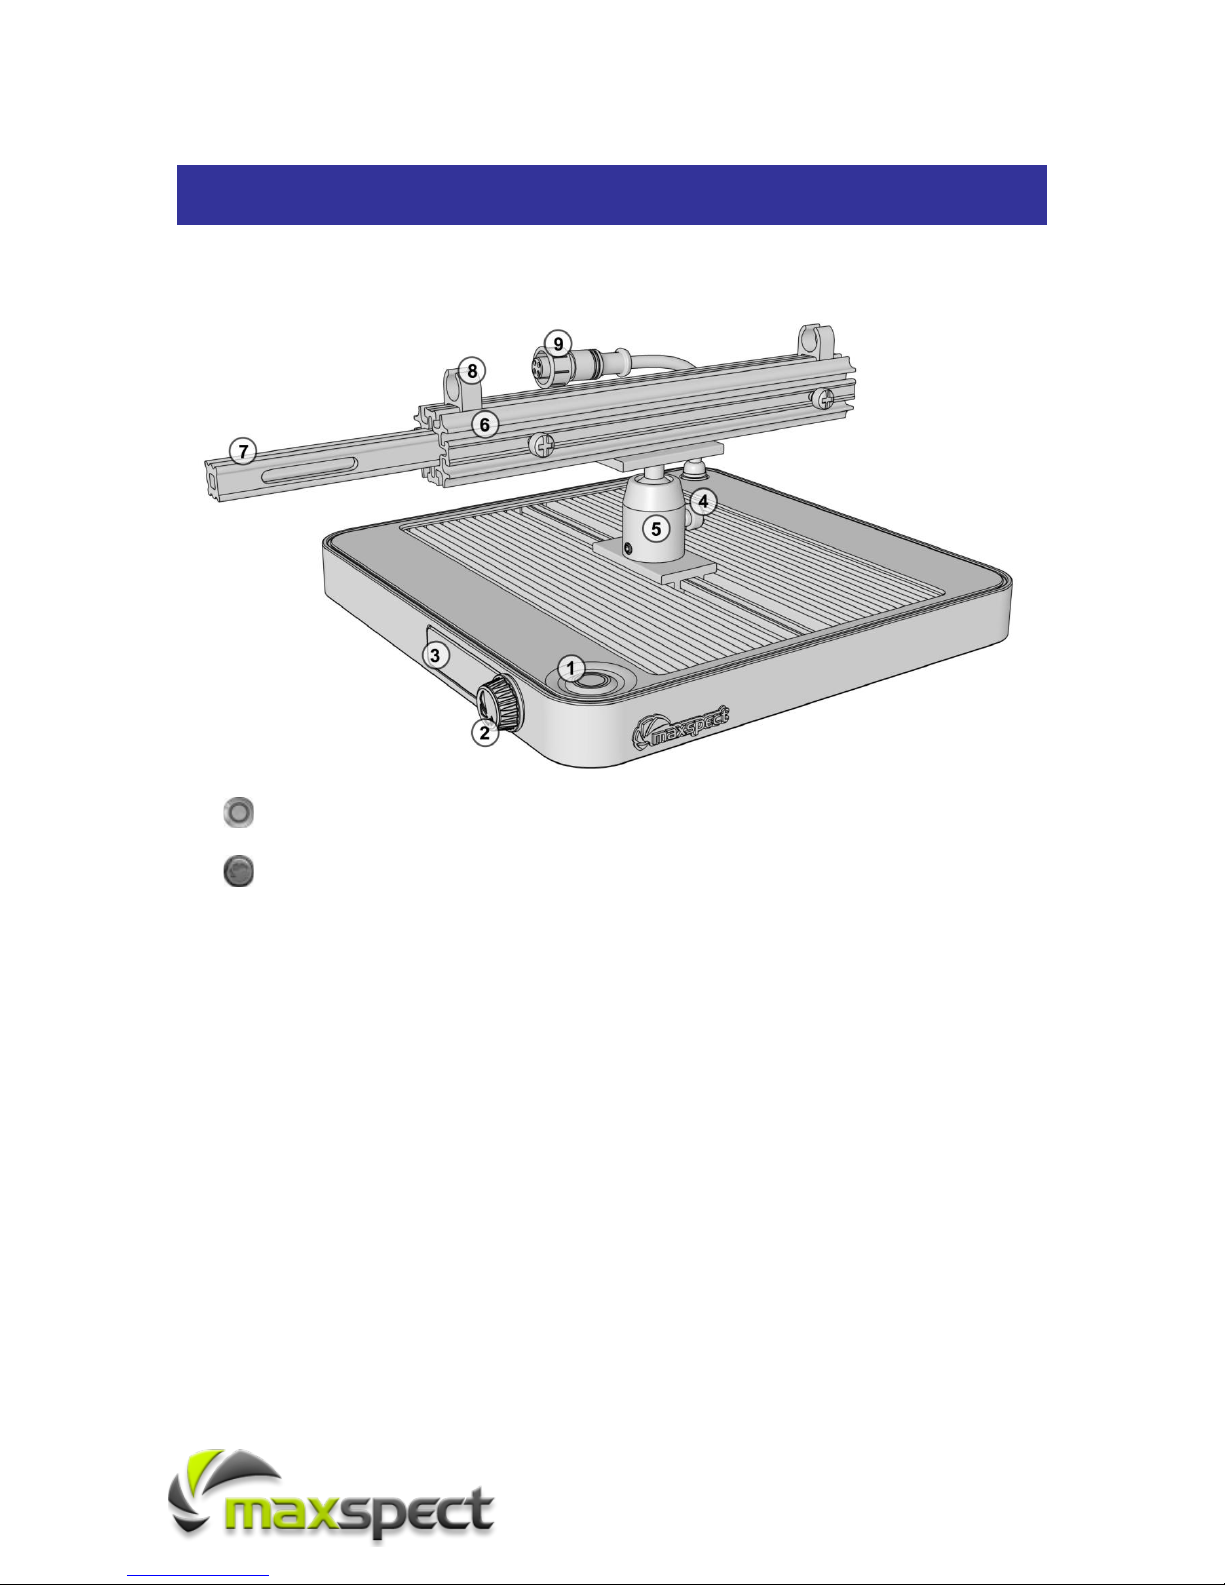
Controller Unit ..................................................................................................... 7
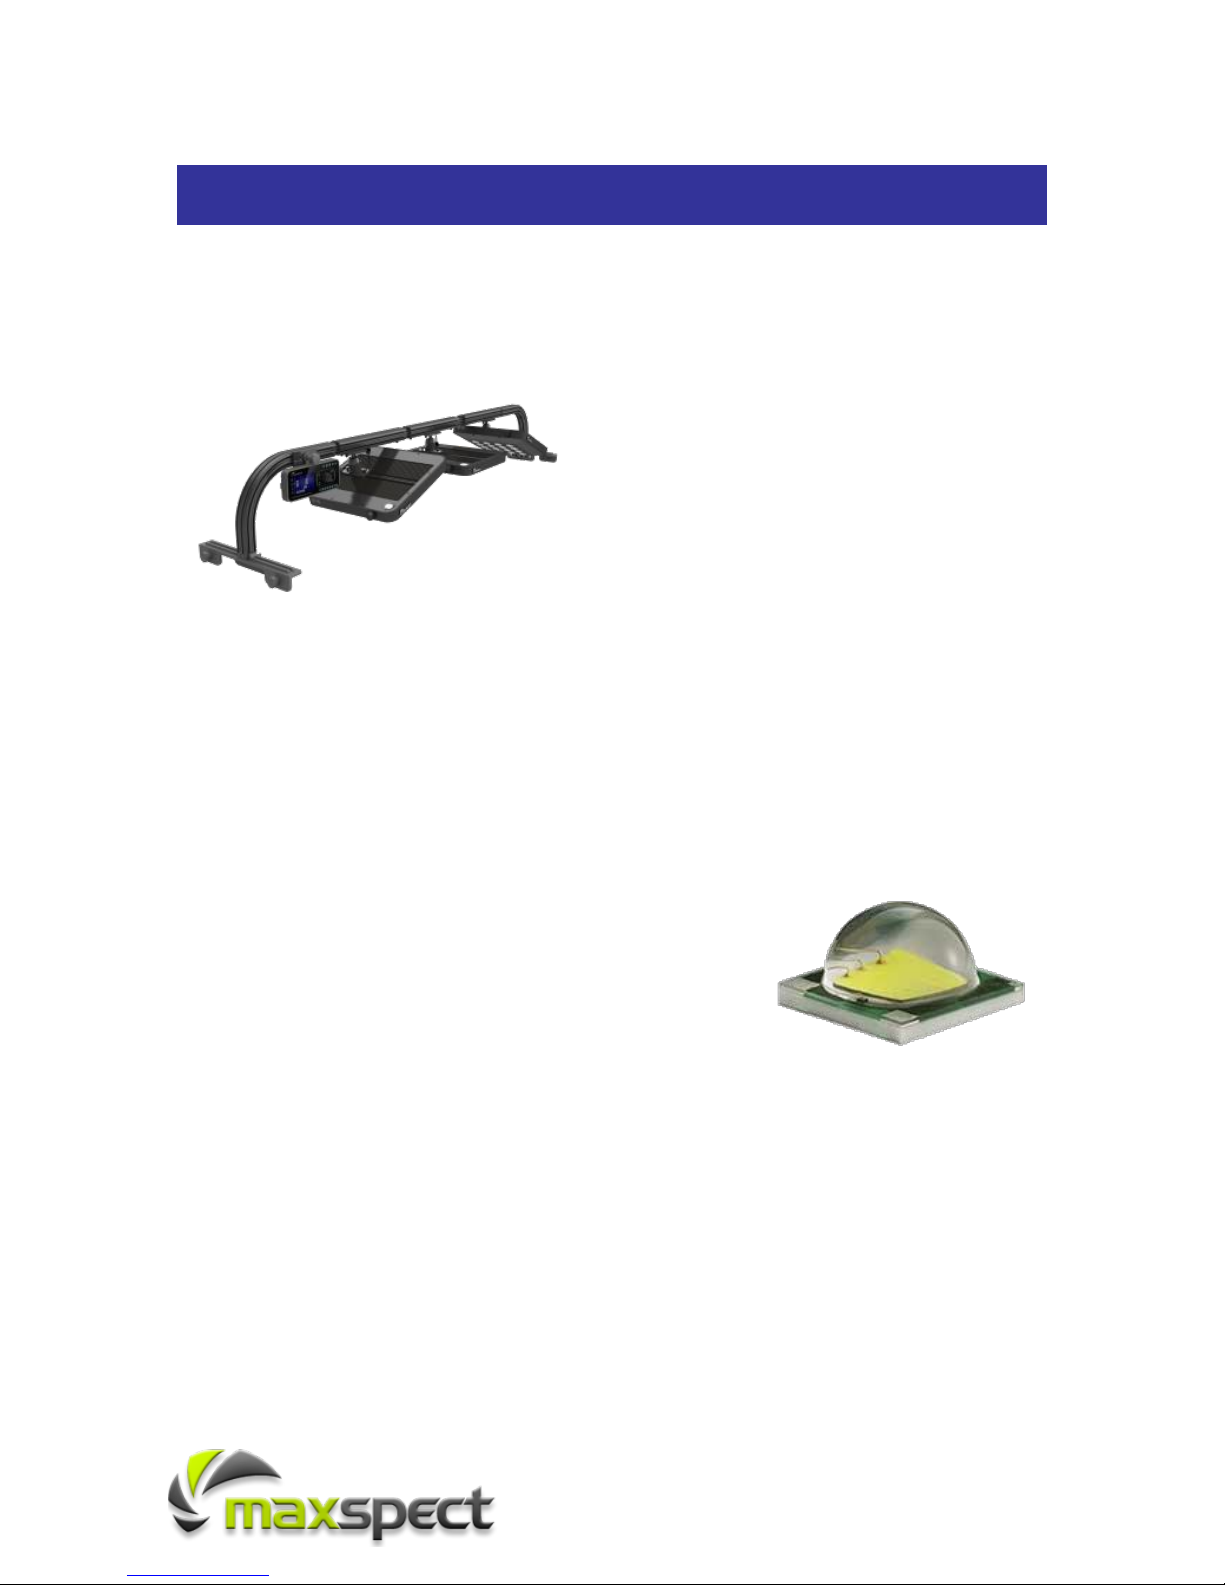
LED Module ......................................................................................................... 8
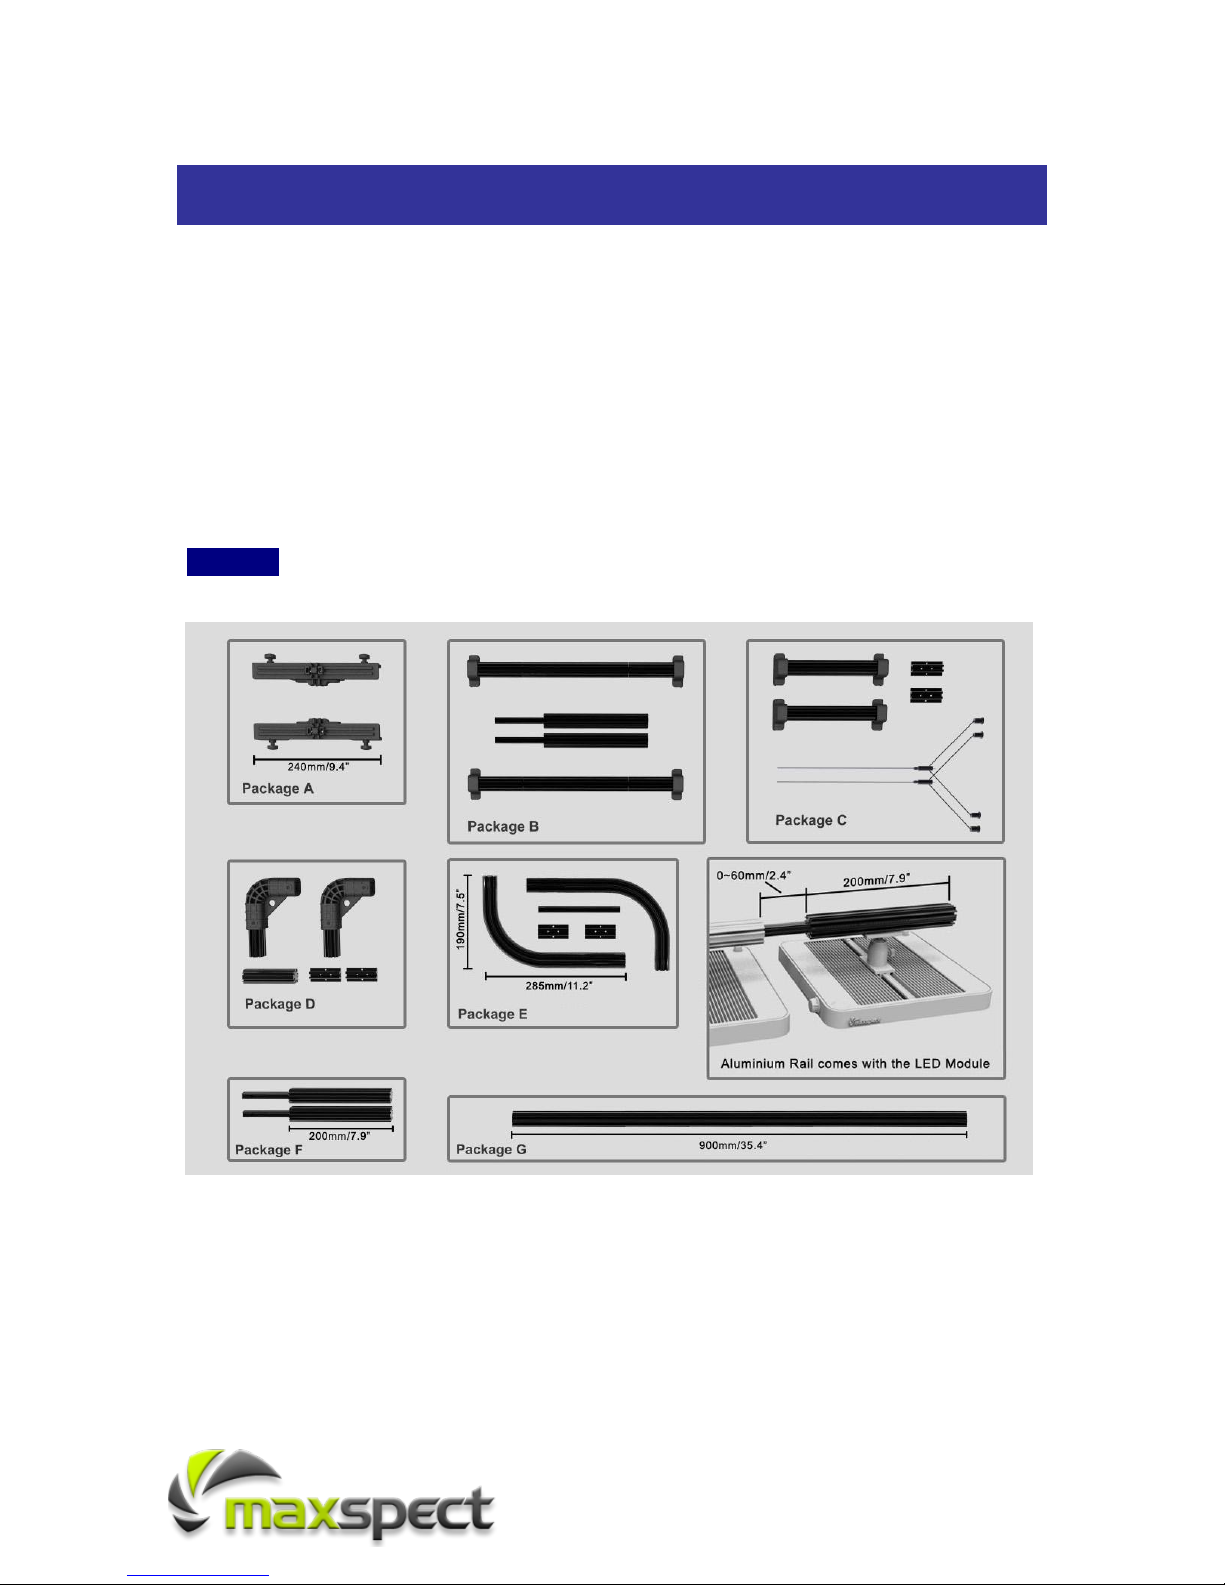
Mounting the Mazarra LED Lighting System ........................................................... 9
Powering the Mazarra LED Lighting System ......................................................... 14
Optics ............................................................................................................... 15
Installing / Changing Optics............................................................................. 16
Passive / Active Cooling...................................................................................... 17
Installing the Optional Fan............................................................................... 17
Changing / Replacing LED Bulbs ......................................................................... 18
The LED Module ................................................................................................ 19
Switching between Standalone and Connected Mode ........................................ 19
LED Module Status .......................................................................................... 19
LED Module –Standalone Mode.......................................................................... 20
Turning on the LED Channels........................................................................... 20
Control the LED Module in Standalone Mode..................................................... 20
LED Module –Connected Mode........................................................................... 21
Connecting LED Modules to the Controller Unit ................................................. 21
Adjusting the LED Sequence Number ............................................................... 22
Adjusting Wireless Frequency Channel.............................................................. 23
Adjusting Active Cooling Setting....................................................................... 24
The Controller Unit............................................................................................. 25
Turning on the Controller Unit.......................................................................... 25
Entering and leaving Setup Mode ..................................................................... 25
Setting the Clock............................................................................................. 26
Setting up Wireless Connection........................................................................ 27
Controller Function –Manual Mode ..................................................................... 28
Controller Function –Automatic Mode ................................................................. 29
Controller Function –Photoperiod Programs ........................................................ 30
Understanding Time Points .............................................................................. 30
Programming Time Points................................................................................ 30
Controller Function –Setting up Moon Light ........................................................ 31
Controller Function –Dawn/Dusk Mode............................................................... 32
Setting Dawn/Dusk Mode ................................................................................ 32
Controller Function –Weather Mode ................................................................... 34
Setting Weather Mode ..................................................................................... 34