UNCRATING
1. Lay
applianceonback.
2. Remove
bottomcap by cutting
band
and
pulling
cap
away.
3. Removecratebaseby removing
four
(4)
bolts.
4. Discardcratebase.
5. Return appliance to an upright
position
6. Liftcartonupandoff.
NOTE:
lf usinga hand
truckto move
refrigerator. NEVERPLACESTRAP
OVER THE HANDLES. Avoid
overtightening strap to prevent
misaligningdoors.
7. Remove
allexteriorand
interiortape,
carefully
retain
old
tape.Makeasmall
pad of this tape to pick off any
remainingtaperesidues.Thiswill
eliminate
theneedto usedangerous
solvents
of
any
kind.
8. Removeanddiscardcantilevershelf
packing
clipslocated
just
aboveeach
shelfwhere
it hooks
onto
theframe.
Toremove
aclip,
wiggle
sidewaysand
pull
straightout.
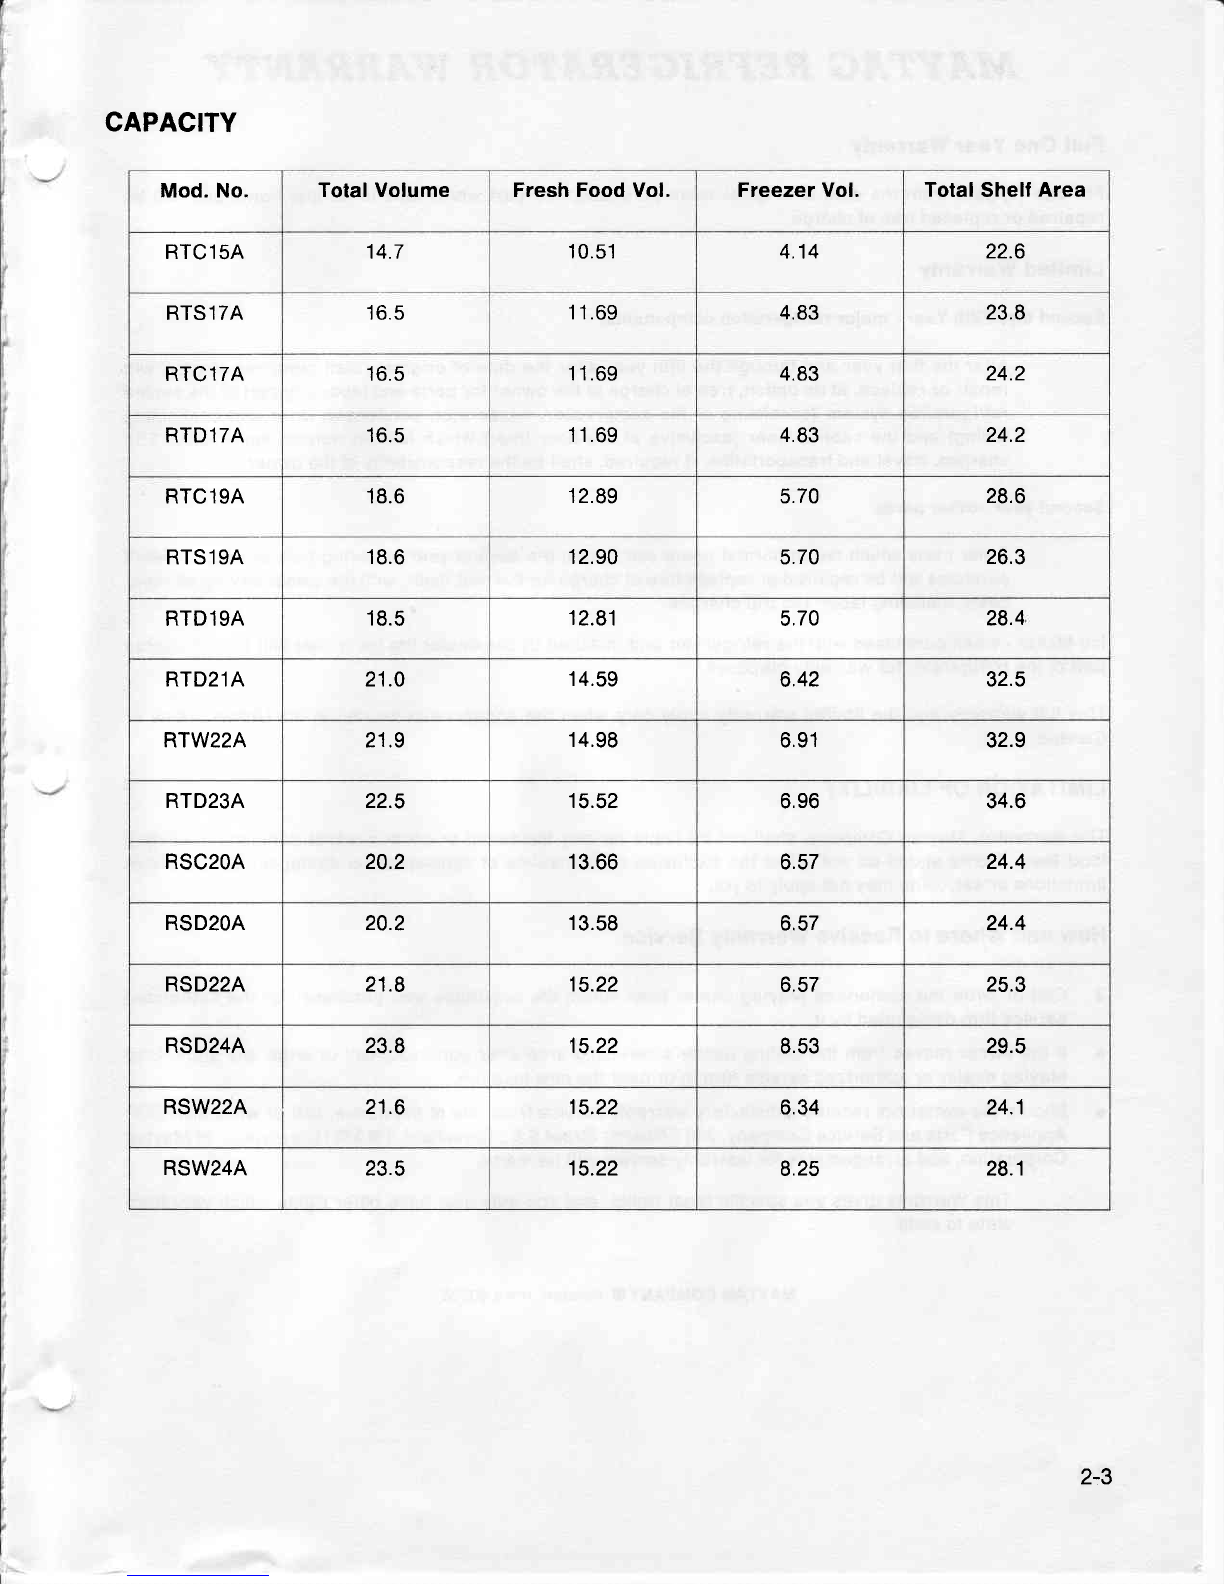
NOTE:Shoulditbenecessarytoremove
the doors
for installation
purposes,
see
page2-9. ln addition,
hingesmay be
removedif necessary. Care MUSTbe
takensincethewaterandelectricallines
will need
to be disconnected
on those
modelswithiceandwaterfountains.Both
can be disconnected
just behind the
hinge.
LOCATION
1. Select a location for your new
refrigerator away from any heat
sources. Allow a free flow of air
throughthefrontbase
grille.
2. Yourmodel
shouldNOT
be installed
wherethe temperaturewill go below
55"Fbecause
if will notrun frequently
enough to maintain proper
temperaturein thefreezer.
3. For easeof installation,
you should
leave
a spaceof aboutone-halfinch
between your refrigerator and
adjacentwallsorcabinets.
WATER
CONNECTION
ForthosemodelswithoutanlceMaker.
Most models are designed so an
automatic lce Maker can be easily
installed.ThelceMakerkits
come
with
installationinstructions.waterconnection
instructions and other information
concerningtheicemakeroperation.
For
thosemodels
withlce
Maker.
To
locatewatervalve:
For the 22 and 24 cubic foot models,
remove
the centerscrewfromthe right
endofthe
black
fiber
panel
thatcovers
the
machine compartmentwith a socket
driver,andfoldbacktheetchmarkedflap.
Savethescrewfor laterreinstallation
as
thisflap is requiredfor proper
andsafe
operationoftherefrigerator.
For
the20cubicfootmodel.followabove
sequencefor the left side of the fiber
panel.
Toconnect
water:
All installations
mustbe in accordance
withlocal
plumbing
coderequirements.
2-6