ACCELERATED WARM-UP SYSTEM (AWS)
Vehicle Starting:
Your vehicle is equipped with SKYACTIV combustion technology. This
technology includes AWS (Accelerated Warm-up System) for optimal
emission performance during cold starting conditions.
Cold Start (First start of the day on cold mornings):
Depress the brake (Automatic Trans.) or clutch (Manual Trans.), when the key
indicator light turns green (if equipped) push the START/STOP button.
What you will notice: On start-up, the engine speed and sound are
higher (1500 RPM) for 30 seconds to 1 minute to quickly bring the catalyst
to efcient operating temperature. The RPM will reduce to idle once the
temperature is achieved. This is normal engine operation under cold
start conditions.
NOTE: You can drive the vehicle during AWS activation, no need to wait.
Normal Start (Emission components within optimal
temperature range):
Depress the brake (Automatic Trans.) or clutch (Manual Trans.), when the
key indicator light turns green press the START/STOP button.
3
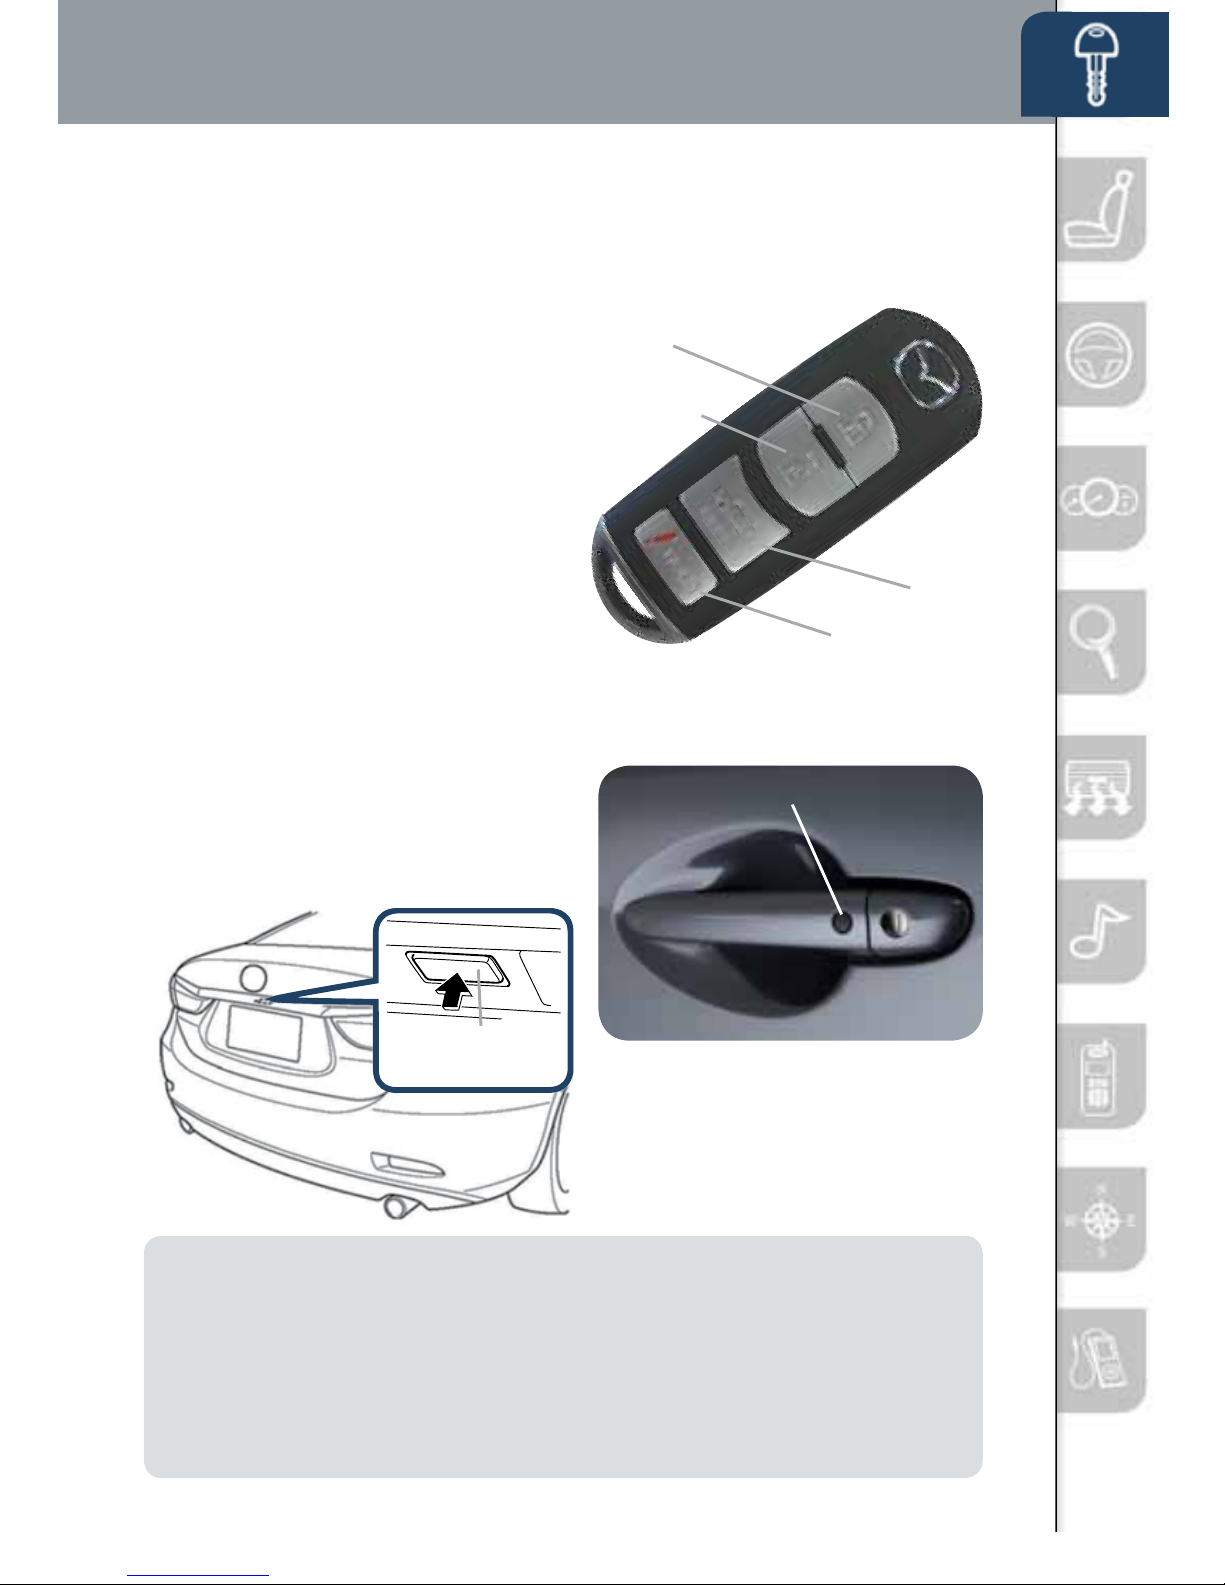
Key
STARTING THE ENGINE
While Carrying the Key…
• Start the engine by pushing the START/STOP button, while
pushing the clutch pedal (manual transmission) or the brake pedal
(automatic transmission).
• Shut the engine OFF by placing the vehicle in Park, then push the
START/STOP button.
• Activate Accessories (ACC) by pushing the START/STOP button
once without pushing the clutch or brake pedal.
• To turn the ignition to the ON position, push the START/STOP
button twice without pushing the clutch or brake pedal.
The key indicator light in the instrument cluster will show GREEN
(engine ready to start) when the key is detected and the clutch pedal (M/T)
or the brake pedal (A/T) is pushed. If the KEY warning light illuminates
RED, or the START/STOP button indicator light ashes AMBER, this
could indicate a problem with the engine starting system and the inability
to start the engine or switch the ignition to ACC or ON. Have your vehicle
inspected at an Authorized Mazda Dealer as soon as possible.
NOTE: RED Key Indicator Light may ash if the key is placed in the cup holder.
The cup holder is a dead zone for transmitter reception.
1389818_14b_Mazda6_SSG_011113.indd 3 1/11/13 4:46 PM