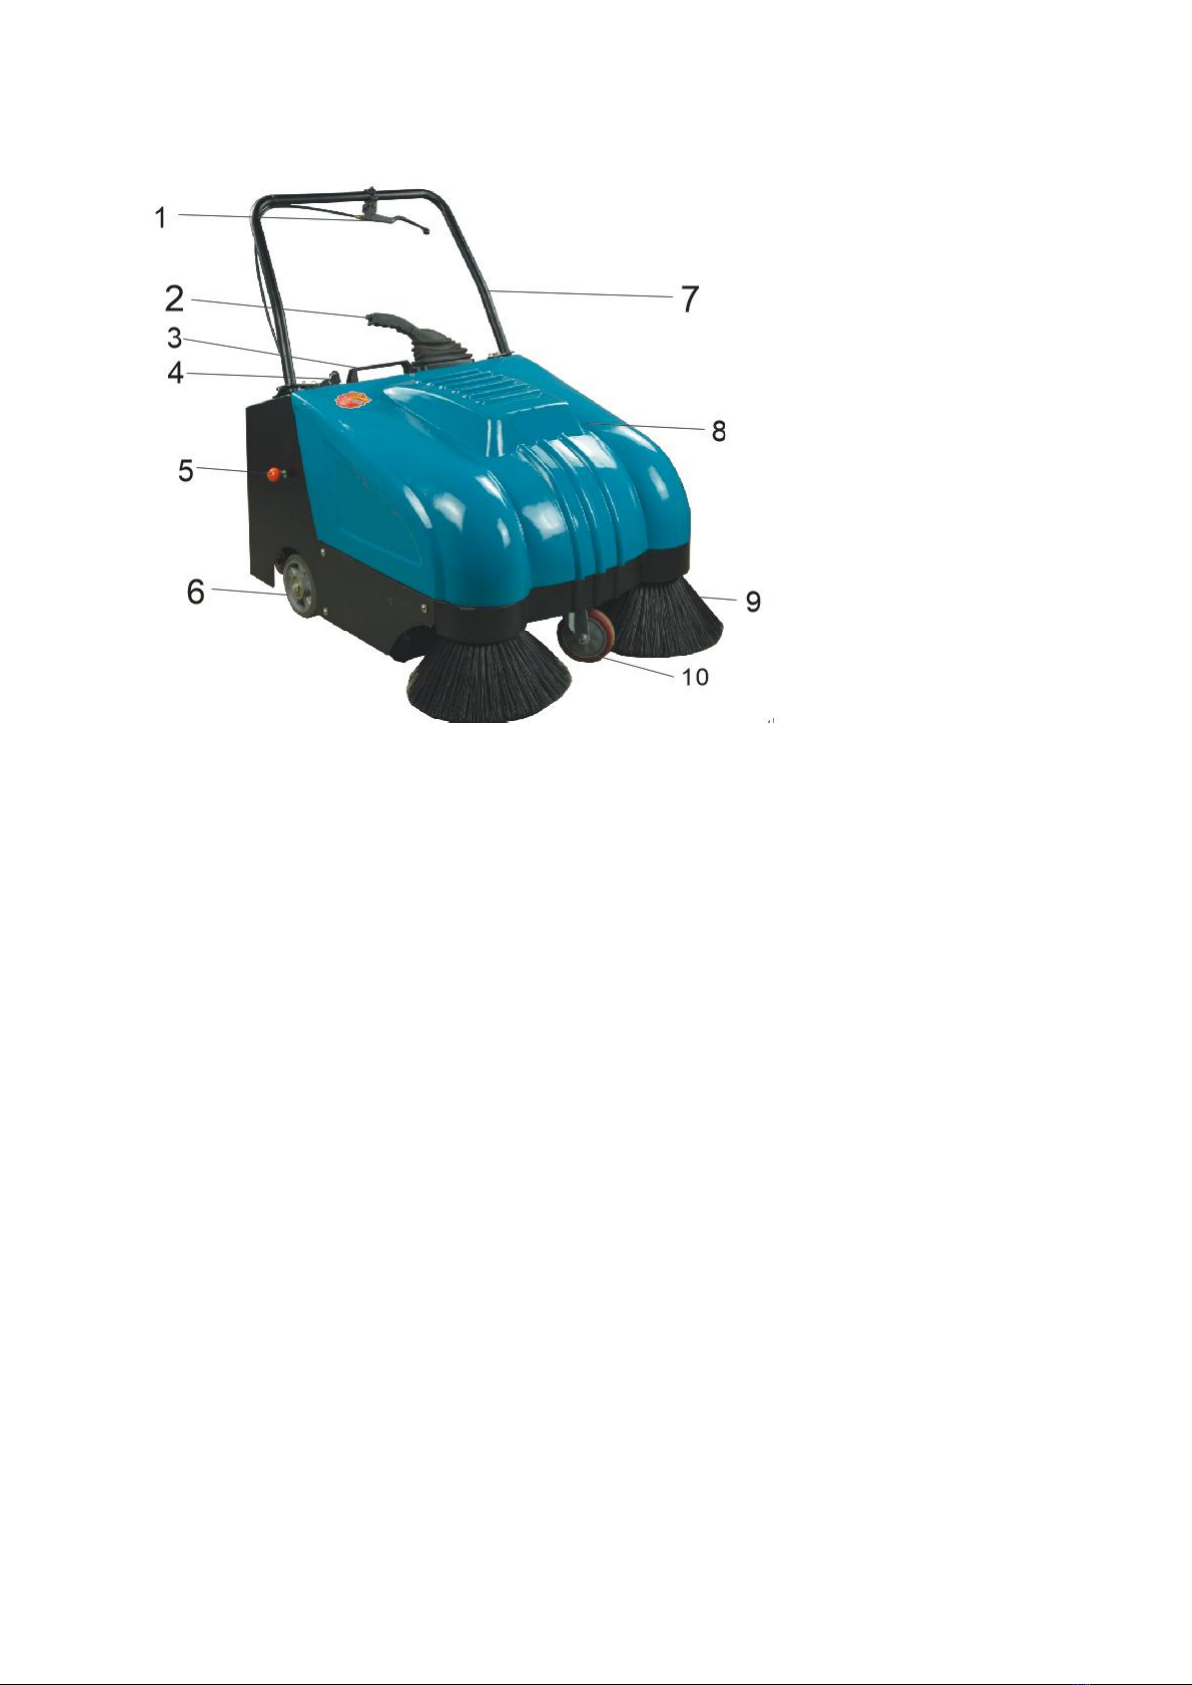
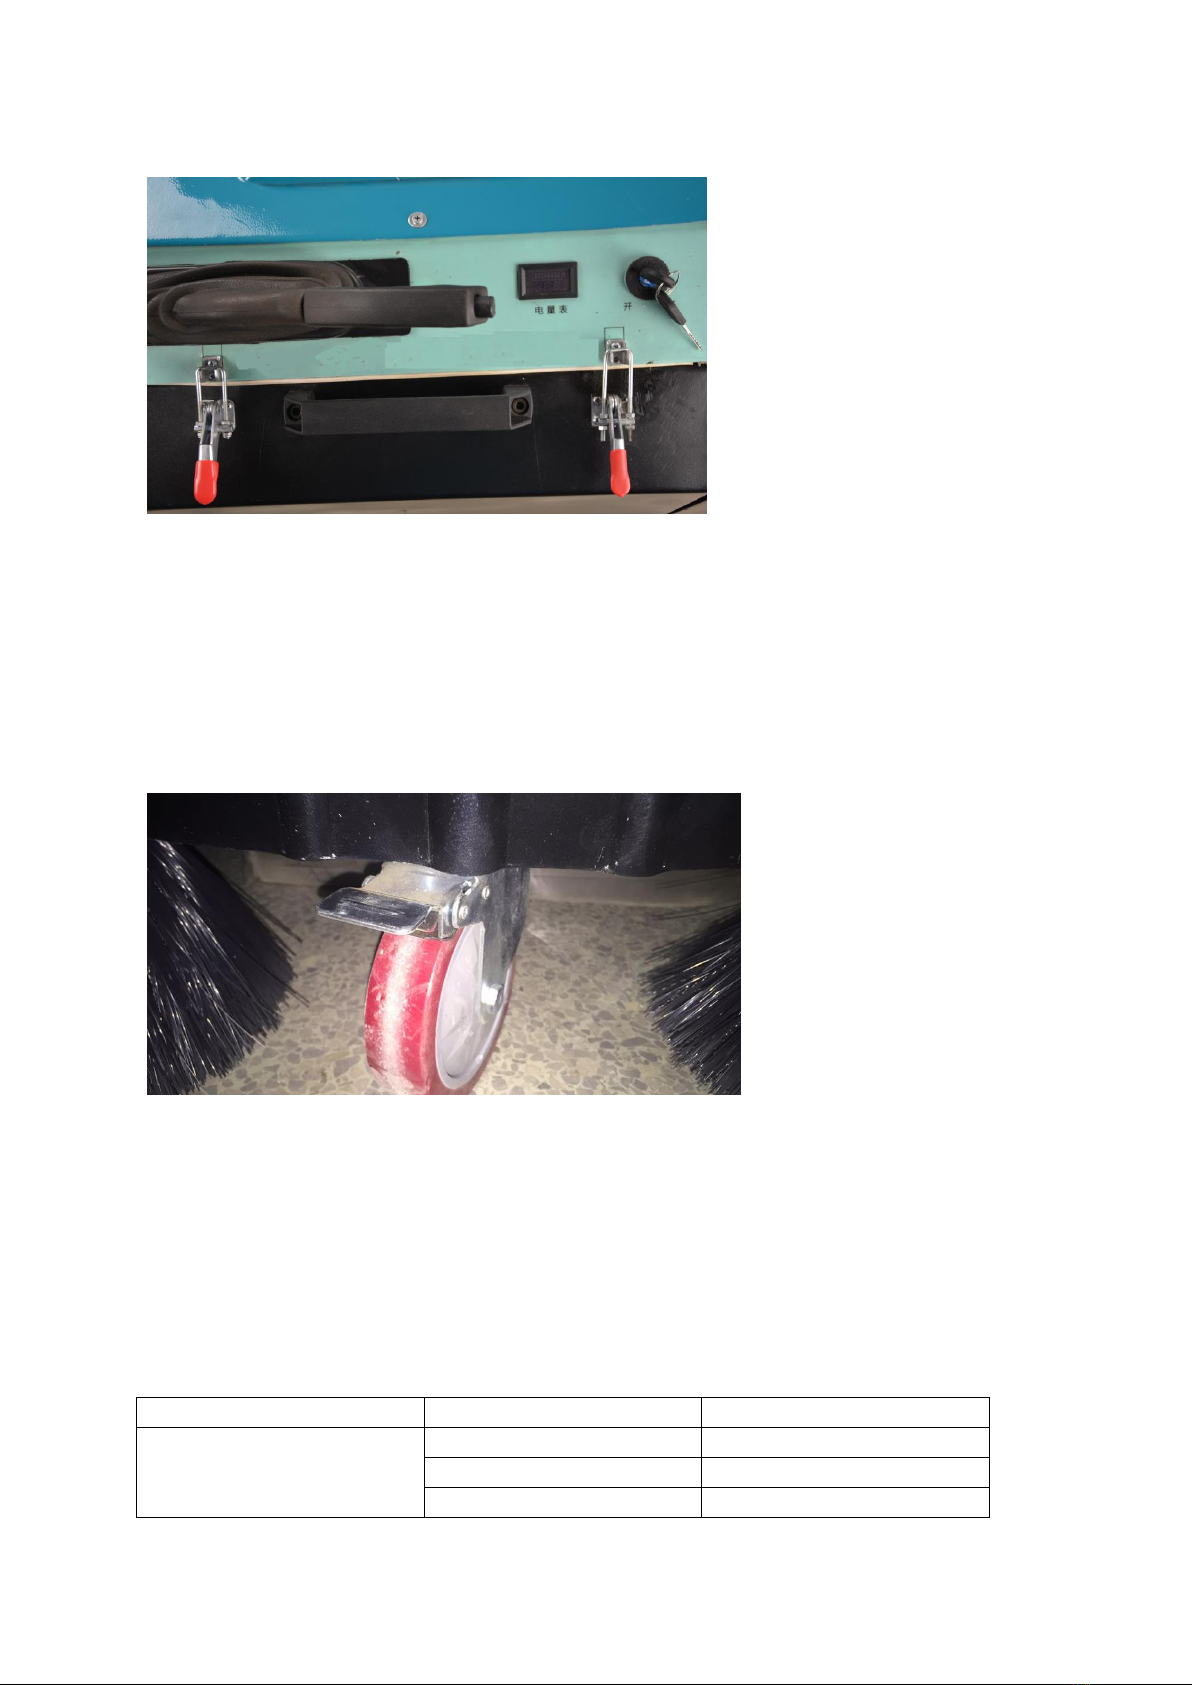
MC Clean+ S800 User manual

S800
Walk-behind Sweeper Manual
☆Safety Notice
☆This machine is walk-behind sweeper, special for
cleaning the big area floor, can not be used as other
USER MANUAL

- 2 -
purpose.
☆The safety of this machine is approved, please read this manual completely before your operation.
☆If you want to rent this machine, please introduce the safety of this machine in details, and rent this
manual together with the machine.
☆The notices on below, tell you how to use the machine properly and safely, to avoid any damage to you
and others.
☆This machine is special for dry floor surface, do not use the machine for wet floor and operate the
machine outside in raining day.
Thanks to select MC S800 sweeper,please read this manual completely before your operation.
MC preserves rights to improve the technology without prior notice. So, the machine may not match
this manual, figures completely.
Content
Pay attention to ・・・・・・・・・・・・・・・・・・・・・・・・・・・・・4
Technical Data ・・・・・・・・・・・・・・・・・・・・・・・・・・・・・・5
Notice: The possible accident and estate damage aroused by
disobeying the manual.

- 3 -
Machine description ・・・・・・・・・・・・・・・・・・・・・・・・・・6
Main brush height check and adjustment・・・・・・・・・・・・・・・・・・ 7
How to replace the main brush ・・・・・・・・・・・・・・・・・・・・・・ 8
How to replace the side brush ・・・・・・・・・・・・・・・・・・・・・・・・8
Filter ・・・・・・・・・・・・・・・・・・・・・・・・・・・・・・・ 9
How to brake ・・・・・・・・・・・・・・・・・・・・・・・・・・・・・・・・・9
Trouble shooting ・・・・・・・・・・・・・・・・・・・・・・・・・・・・・・・10
Pay attention to
〇Personnel protection equipment
Before your operation, please wear the personnel protection equipment ahead

- 4 -
Safety cap safety gloves protect glasses face mask safety shoes
〇In order to make sure long using time
Notice
During your operation, avoid the things, such as cable, button, iron wire.
During your operation, take care of the steps, protect the rubber blades from damage.
Add lubrication oil on the gear and oil seal frequently.
Use thinner or petrol to clean the resin part.
TECHNICAL
DATA
1. Dimensions
Length*width*height: 1100*850*1030 (unit: mm)
2. Main technical parameters
(1) Power: 48V battery
(2) Weight: 325lbs
(3) Turning radius: 800mm

- 5 -
(4) Cleaning width:
Roller brush + double side brushes 850mm
Roller brush 500mm
(5) Cleaning area: 4000m2/h
(6) Volume of waste container: 15.8Gal
(7) Continuous running time: 4(normal temperature)
(8) Obstacle-crossing height available: 5cm
(9) Filtering area: 2.25m2
MACHINE DESCRIPTION
OPERATION CAPABILITIES
This sweeper has been designed and built to clean (by sweeping and vacuuming) smooth and
solid floors, in civil and industrial environments and to collect dust and light debris under safe
operation conditions by a qualified operator.
DESCRIPTION

- 6 -
1,control level 2,side brush lift level 3,handle
4,power switch 5,filter vibration rod 6,big wheel
7,operation handle 8,shell 9,side brush
10,front wheel
MAIN BRUSH HEIGHT CHECK AND ADJUSTMENT
1, Check that the main brush is at the correct height from the ground, according to the
following procedure:
Drive the machine on a level ground.
Keep the machine stationary and rotate the main brush for a few seconds.
Stop and lift the main brush then move the machine.
Check that the main brush print, along its length, is 2 to 4 cm wide.
If the print is not within specifications, it is necessary to adjust the brush height.

- 7 -
Turn the wheel to right, low down the height of the main brush; turn the wheel to left, lift up
the height of the main brush.
When the brush is too worn and can no longer be adjusted, replace it according to the
instructions in the following paragraph.
CAUTION!
It is advisable to use protective gloves when replacing the main brush because
there can be sharp debris between the bristles.
How to replace the main brush

- 8 -
Open the side cover in the left of machine, loose the tight belt and the bolt, pull out the brush,
and replace a new brush.
How to replace the side brushes
1, Tilt back the machine, let the side brushes be lifted up.
2, Loose the screw, pull down the old brushes, and put on the new brushes, screw them tight.
Filter
CAUTION!
If any dust leaks, you need to use the filter vibration rod to beat down the dust from the filter.
1, How to detach the filter and clean the filter

- 9 -
Release the two locks
Loose the bolt on the press plate
Pull out the filter, clean or replace
How to brake
When you want to stop the machine, step down the brake on the front wheel;
When you want to move the machine and start your work, release the brake.
TROUBLESHOOTING
Trouble
Cause
Troubleshooting
Sweeper lefts out leaves or
other large sized debris in
sweeping
Working speed is too high
Slow down the working speed
Brush pressure is too low
Adjust the brush pressure
Brushes are of deformation or
Remove the rope of wire

- 10 -
twined by wires
Sweeper lefts out dust on
ground or there is dust coming
from side dust board
Air-filter is blocked
Clean the air-filter
Dust board is damaged
Check the dust board and
replace it if damaged
Sweeping incompletely,
lefts out papers, leaves or other
debris
The front dust board lifting
mechanism doesn’t work
Repair the dust board, press
down the pedal to make it up
and down
Garbage goes forward
Front dust board is damaged
Replace the front dust board
Roller brush rolls up the front
dust board
Front dust board is damaged
Replace the front dust board
Brush abrasion is too often
Brush pressure is too high
Lower the brush pressure
Ground is too rough
Large noise from roller brush
Rope or wire twining in brush
Remove them
Brushes don’t roll in working
Driving belt is damaged
Replace the driving belt
Brush and fan motor don’t
work
Fuse is blown
Replace the fuse
Waste container leakage
Waste container’s seals are
damaged
Replace the seals
Waster container is too full
Take the garbage away
neither moving forward nor
backward when starting the
motor
Motor’s cable damaged
Check the connection
Pedal tuner damaged
Repair the speed governor
Control switch damaged
Replace the switch
Fuse blown
Replace the fuse
Battery can’t be charged
Battery damaged
Replace the battery
Charger
Check the charger’s input
current
Battery connection loosen
Check and tighten the
connection
Battery overload
Reduce brush’s pressure
(tighten the cable)
Excessive battery discharge
Charging time insufficient
Prolong the charging time
Battery damaged
Replace the battery
MAINTENANCE IS NOT INCLUDING THE CIRCUMSTANCES AS
FOLLOWS:
1. Operators do not do according to the maintenance manual, causes the machine damaged or
broken down.
2 .If manipulate in wrong ways, it will cause machine surface appearance or structure damaged

- 11 -
3. If take apart or modification the machine not under our permission;
4. Damaged because of natural conditions or force majeure reasons;
5. Consumptive accessory (such as Main brush/side brush /belt/belt pulley/filter gauze…etc)
6. 1 year warranty period exceeded or put to use more than 1500 hours.
Table of contents