manuals.online logo
Brands
  1. Home
  2. •
  3. Brands
  4. •
  5. McCulloch
  6. •
  7. Lawn Mower
  8. •
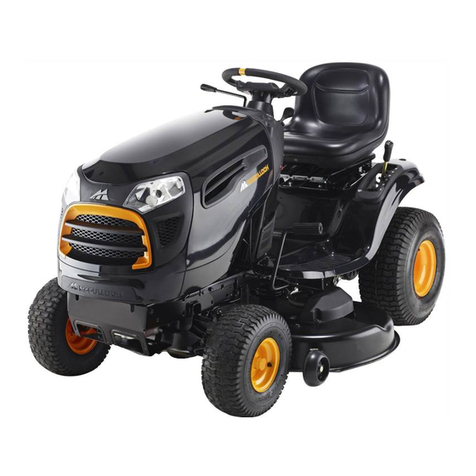
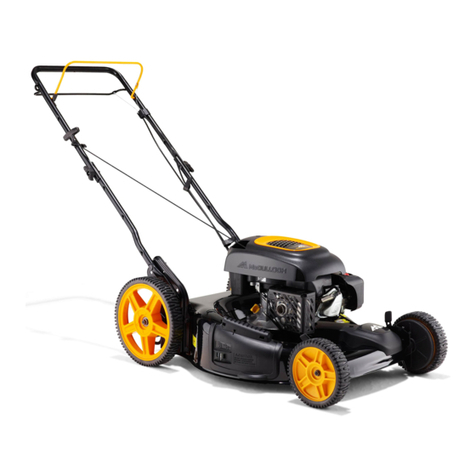
  9. McCulloch 532 42 41-96 User manual

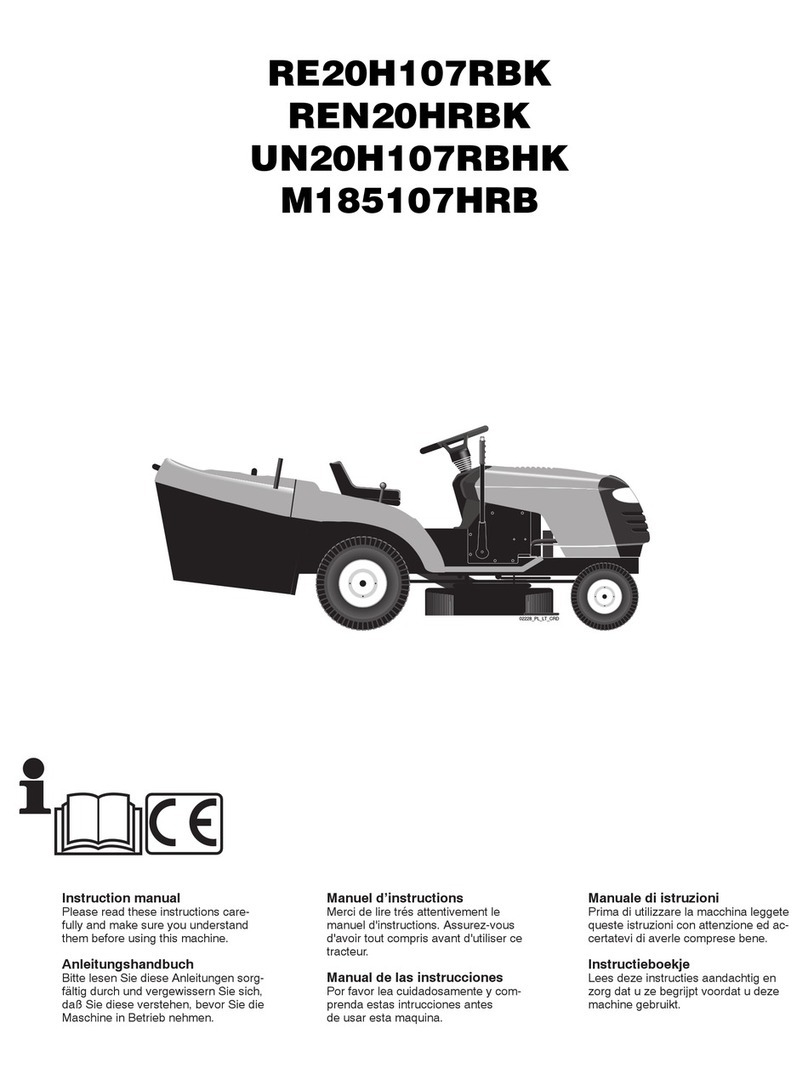
McCulloch 532 42 41-96 User manual

532 42 41-96 Printed
12.10.08 BY in U.S.A.
www.mcculloch.biz
EDITION 1XXL
Manuel d’instructions
Lisez très attentivement et soyez
certain de comprende ces instruc-
tions avant d’utiliser cette machine.
Manual de las
instrucciones
Por favor lea cuidadosamente y
comprenda estas intrucciones antes
de usar esta maquina.
Instruction manual
Please read these instructions carefully
and make sure you understand them
before using this machine.
Anleitungshandbuch
Bitte lesen Sie diese Anleitungen sorg-
fältig durch und vergewissern Sie sich,
daß Sie diese verstehen, bevor Sie die
Maschine in Betrieb nehmen.
Instructieboekje
Lees deze instructies aandachtig
en zorg dat u ze begrijpt voordat
u deze machine gebruikt.
Manuale di istruzioni
Prima di utilizzare la macchina
leggete queste istruzioni con at-
tenzione ed accertatevi di averle
comprese bene.
2
INDICE
REGLAS DE SEGURIDAD ......... SIVU 3-8
ESPECIFICACIONES TÉCNICAS...........9
SUMARIO..............................................10
MONTAJE.........................................11-13
REGULACIÓN..................................14-15
ARRANQUE Y PARADA...................16-17
APLICACIÓN DEL CORTACÉSPED..17-18
MANTENIMIENTO ...........................19-22
INFORMACIONES GENERALES..........23
INHOUD
VEILIGHEIDSMAATREGELEN.... PAG.3-8
TECHNISCHE GEGEVENS.....................9
OVERZICHT ..........................................10
MONTEREN .....................................11-13
INSTELLEN ......................................14-15
STARTEN EN STOPPEN..................16-17
GEBRUIK VAN DE MAAIER.............17-18
ONDERHOUD ..................................19-22
ALGEMENE INLICHTINGEN ................23
INDICE DEL CONTENUTO
NORME DE SICUREZZA ...... PAGINA 3-8
CARATTERISTICHE TECNICHE ............9
SOMMARIO...........................................10
MONTAGGIO ...................................11-13
REGOLAZIONE................................14-15
AVVIAMENTO ED ARRESTO...........16-17
USO DELLA FALCIATRICE..............17-18
MANUTENZIONE .............................19-22
INFORMAZIONI GENERICHE ..............23
CONTENTS
SAFETY RULES ........................PAGE 3-8
TECHNICAL DATA..................................9
OVERVIEW............................................10
ASSEMBLY.......................................11-13
ADJUSTMENTS ...............................14-15
START AND STOP...........................16-17
USE ..................................................17-18
MAINTENANCE ...............................19-22
GENERAL INFORMATION....................23
INHALTSVERZEICHNIS
SICHERHEITSREGELN ............SEITE 3-8
TECHNISCHE DATEN.............................9
ÜBERSICHT..........................................10
MONTIEREN ....................................11-13
EINSTELLUNG.................................14-15
START UND ABSTELLEN................16-17
GEBRAUCH DES RASENMÄHERS...17-18
WARTUNG .......................................19-22
ALLGEMEINE ERLÄUTERUNGEN .......23
TABLE DES MATIERES
MESURES DE SÉCURITÉ......... PAGE 3-8
DONNÉES TECHNIQUES.......................9
APERÇU................................................10
MONTAGE........................................11-13
RÉGLAGE.........................................14-15
MARCHE ET ARRÊT........................16-17
UTILISATION DE LA TONDEUSE....17-18
ENTRETIEN......................................19-22
RENSEIGNEMENTS GÉNÉRAUX.........23
23
GENERAL INFORMATION
Transport
Remove spark plug lead. Empty the petrol tank. Before public
transporting, engine oil and petrol must be removed.
ALGEMEINE ERLÄUTERUNGEN
Transport
Zienhen Sie das Zündkerzenkabel ab. Entleeren Sie den
Benzintank. Bei Transport mit öffentlichen Verkehrsmittein ist
der Benzin und Öltank zu entleeren.
RENSEIGNEMENTS GENERAUX
Transport
Débrancher la bougie. Vider le réservoir d'essence. En cas
de transport par un service public, il faut vider et l'essence et
l'huile.
INFORMACIONES GENERALES
Transporte
Desconexióndel cable de bujía. Vacíeseeldepósitode gasolina
y, si se trata de transporte público, también el de aceite.
ALGEMENE NFORMATIE
Vervoer
Debougiekabellosmaken. Ledig de benzinetank. Bij openbaar
vervoer dienen zowel olie-als benzinetank geledigd te worden.
INFORMAZIONI GENERALI
Transporto
Staccare il cavo d'accensione dalla candela. Svuotare il
serbatoio della benzina. In caso di transporto su mezzi pubblici,
si deve svuotare sia la benzina che l'olio.
22
Cleaning of air filter. Remove the lid and remove the filter
cartridge.
Reinigung des Luftfilters. Deckel abnehmen und Filtereinsatz
herausnehmen.
Nettoyage du filtre à air. Enlevez le capot et retirez la cartouche
filtrante.
Limpieza del filtro de aire. Quitar la tapa y extraer el elemento
filtrante.
Het schoonmaken van het luchfilter. Verwijder de deksel en
haal het filter eruit.
Pulizia del filtro. Togliere il coperchio ed estrarre il filtro.
3
I. Training
• Read the instructions carefully. Be familiar with the
controls and the proper use of the equipment.
• Never allow children or people unfamiliar with the
instructions to use the lawnmower. Local regulations
may restrict the age of the operator.
• Never mow while people, especially children, or pets
are nearby.
• Keep in mind that the operator or user is responsible
for accidents or hazards occurring to other people or
their property.
II. Preparation
• While mowing, always wear substantial footwear and
long trousers. Do not operate the equipment when
barefoot or wearing open sandals.
• Thoroughly inspect the area where the equipment
is to be used and remove all objects which may be
thrown by the machine.
• WARNING - Petrol is highly flammable.
- Store fuel in containers specifically designed for
this purpose.
- Refuel outdoors only and do not smoke while refu-
eling.
- Add fuel before starting the engine. Never remove
thecapof the fuel tank or add petrol whiletheengine
is running or when the engine is hot.
- If petrol is spilled, do not attempt to start the engine
but move the machine away from the area of spill-
age and avoid creating any source of ignition until
petrol vapors have dissipated.
- Replace all fuel tanks and container caps se-
curely.
• Replace faulty silencers.
• Before using, always visually inspect to see that the
blades, blade bolts and cutter assembly are not worn
or damaged. Replace worn or damaged blades and
bolts in sets to preserve balance.
• On multi-bladed machines, take care as rotating one
blade can cause other blades to rotate.
III. Operation
• Do not operate the engine in a confined space where
dangerous carbon monoxide fumes can collect.
• Mow only in daylight or in good artificial light.
• Avoid operating the equipment in wet grass, where
feasible.
• Always be sure of your footing on slopes.
• Walk, never run.
• For wheeled rotary machines, mow across the face
of slopes, never up and down.
• Exercise extreme caution when changing direction
on slopes.
• Do not mow excessively steep slopes.
• Use extreme caution when reversing or pulling the
lawnmower towards you.
• Stop the blade if the lawnmower has to be tilted for
transportation when crossing surfaces other than
grass, and when transporting the lawnmower to and
from the area to be mowed.
• Neveroperate the lawnmowerwithdefective guards, or
without safety devices, for example deflectors and/or
grass catchers, in place.
• Do not change the engine governor settings or over-
speed the engine. Operating the engine at excessive
speed may increase the hazard of personal injury.
• Disengage all blade and drive clutches before starting
the engine.
• Start the engine or switch on the motor carefully ac-
cording to instructions and with feet well away from
the blade.
• Do not tilt the lawnmower when starting the engine or
switching on the motor, except if the lawnmower has
to be tilted for starting. In this case, do not tilt more
than absolutely necessary and lift only the part which
is away from the operator.
• Do not start the engine when standing in front of the
discharge chute.
• Do not put hands or feet near or under rotating parts.
Keep clear of the discharge opening at all times.
• Never pick up or carry lawnmower while the engine
is running.
• Stop the engine and disconnect the spark plug
wire:
- before cleaning blockages or unclogging chute;
- before checking, cleaning or working on the lawn-
mower;
- afterstrikinga foreign object. Inspectthelawnmower
for damage and make repairs before restarting and
operating the lawnmower;
- ifthelawnmowerstartstovibrateabnormally(check
immediately).
• Stop the engine:
- whenever you leave the lawnmower;
- before refuelling.
• Reduce the throttle setting during engine shut down
and, if the engine is provided with a shut-off valve,
turn the fuel off at the conclusion of mowing.
• Go slow when using a trailing seat.
IV. Maintenance and Storage
• Keep all nuts, bolts and screws tight to be sure the
equipment is in safe working condition.
• Neverstore the equipment with petrol inthetankinside
a building where fumes may reach an open flame or
spark.
• Allow the engine to cool before storing in any enclo-
sure.
• To reduce the fire hazard, keep the engine, silencer,
battery compartment and petrol storage area free of
grass, leaves, or excessive grease.
• Check the grass catcher frequently for wear or dete-
rioration.
• Replace worn or damaged parts for safety.
• If the fuel tank has to be drained, this should be done
outdoors.
Safe Operation Practices for Pedestrian-Controlled Rotary Lawnmowers
IMPORTANT: This cutting machine is capable of amputating hands and feet and throwing objects.
Failure to observe the following safety instructions could result in serious injury or death.
4
I. Schulung
• Die Anleitungen sorgfältig durchlesen. Mit den Bedien-
ungselementen und der vorschriftsmäßigen Bedienung
der Maschine vertraut machen.
• Auf keinen Fall Kindern oder Erwachsenen, die mit der
Bedienungsanleitung des Mähers nicht vertraut sind,
den Betrieb der Maschine gestatten.Das Mindestalter von
Fahrern ist womöglich gesetzlich geregelt.
• Auf keinen Fall mähen, solange sich andere, besonders
Kinder oder Haustiere, im Arbeitsbereich befinden.
• Bitte denken Sie daran, daß der Fahrer oder Benutzer für
jegliche Unfälle oder Gefahren, denen andere oder deren
Eigentum ausgesetzt werden, verantwortlich ist.
II. Vorbereitung
• Während dem Mähen immer festes Schuhwerk und lange
Hosen tragen. Die Maschine nicht barfuß oder mit offenen
Sandalen in Betrieb nehmen.
• Das Arbeitsgelände sorgfältig untersuchen und alle Ge-
genstände,die von derMaschine aufgeschleudert werden
könnten, entfernen.
• WARNUNG - Benzin ist äußerst leicht entzündlich.
- Kraftstoff in speziell dafür ausgelegten Behältern
lagern.
- Nur im Freien tanken und währenddessen nicht
rauchen.
- Kraftstoff nachfüllen, bevor der Motor angelassen
wird. AufkeinenFall den Tankdeckelentfernen oder
Benzinnachfüllen, solange der Motor läuft oder heiß
ist.
- Falls Kraftstoff verschüttet wurde, nicht versuchen,
den Motor anzulassen, sondern die Maschine
vom verschütteten Benzin wegschieben und das
Verursachen jeglicher Zündquellen vermeiden, bis
die Benzindämpfe sich verflüchtigt haben.
- Alle Deckel wieder fest auf Kraftstofftanks und
Kraftstoffbehältern anbringen.
• Schadhafte Schalldämpfer ersetzen.
• VordemGebrauchimmer mit einerSichtprüfung sicherstel-
len,daß Mähmesser, Messerschraubenund dieMäheinheit
nicht abgenutzt oder beschädigt sind. Abgenutzte oder
beschädigte Messer und Schrauben ersetzen, um Aus-
wuchtung zu gewährleisten.
• Bei Maschinen mit mehreren Mähmessern ist Vorsicht
geboten, da beim Drehen eines Mähmessers die anderen
Mähmesser sich womöglich mit drehen.
III. Betrieb
• Maschinenicht ineinem geschlossenenBereich betreiben,
in dem die gefährlichen Kohlenmoxydgase sich sammeln
können.
• Nur bei Tageslicht oder guter künstlicher Beleuchtung
mähen.
• Vermeiden Sie den Gebrauch des Geräts auf nassem
Gras, soweit möglich.
• Achten Sie bei geneigten Böden stets auf Ihr Gleichge-
wicht.
• Gehen Sie (nicht rennen).
• BewegenSie sich mitfahrbaren Motor-Rasenmähernstets
quer zur Neigung der Fläche, gehen Sie nie auf und ab.
• GehenSie beim Richtungswechselaufgeneigten Flächen
besonders vorsichtig vor.
• Mähen Sie nicht auf besonders steilen Abhängen.
• Genen Sie besonders vorsichtig vor, wenn Sie den Mäher
ziehen oder zu sich hin drehen.
• Stoppen Sie die Klinge, wenn der Rasenmäher für den
Transport überFlächen ohneGras angekipptwerden muss,
bzw. auf dem Hin-/Rückweg zur/von der zu mähenden
Fläche.
• BenutzenSie den Rasenmähernie mit defektenSchutzab-
deckungen, oder nicht in Position befindlichen Schutz-
vorrichtungen, wie beispielsweise Leitblechen und/oder
Grasfänger.
• Die Einstellung des Drehzahlreglers nicht ändern, und die
Drehzahl des Motors nicht über die Werkspezifikationen
heraufsetzen. Der Betrieb des Motors bei zu hohen
Drehzahlen kann die Gefahr von Körperverletzungen
vergrößern.
• Vor dem Starten der Maschine alle Blockierungen der
Klingen und des Antriebs lösen.
• Beim Starten der Maschine und Einschalten des Motors
vorsichtig vorgehen. Halten Sie sich an die Gebrauchsan-
leitung und achten Sie darauf, dass Ihre Füße weit genug
von der Klinge entfernt sind.
• Kippen Sie den Rasenmäher nicht während des Starts
oder Einschalten des Motors, es sei denn, dass dies für
den Start erforderlich ist. Kippen Sie ihn n diesem Fall
nicht mehr als unbedingt nötig und heben Sie nur den
vom Bediener entfernteren Bereich an.
• Starten Sie die Maschine nicht, wenn Sie nahe an der
Entladevorrichtung stehen.
• Bringen Sie Ihre Hände und Füße nicht in die Nähe der
rotierenden Organe. Halten Sie die Entladeöffnung stets
sauber.
• Den Rasenmäher bei laufendem Motor nie anheben oder
tragen.
• Den Motor stoppen und das Kabel der Zündkerze tren-
nen:
- vor dem Entfernen von Verstopfungen aus dem
Mähwerk oder dem Auswurf;
- vor dem Prüfen, Reinigen oder Reparieren des
Rasenmähers;
- nachdem auf ein Fremdkörper gestoßen wurde.
Den Rasenmäher auf Schäden untersuchen und
die Reparaturen durchführen, bevor die Maschine
wieder angelassen und in Betrieb genommen
wird;
- falls die Maschine anfangen sollte, ungewöhnlich
zu vibrieren (sofort prüfen).
• Den Motor stoppen:
- immer wenn Sie den Mäher zurücklassen;
- vor dem Auftanken.
• Die Drosselklappe während des Auslaufens des Motors
schließen und, falls der Motor mit einem Absperrventil
ausgestattet ist, dieses bei Beendigung der Mäharbeiten
schließen.
• Fahren Sie langsam, wenn Sie einen Sitz benutzen.
IV. Wartung und Lagerung
• Daraufachten, daßalle Muttern,Bolzen undSchrauben fest
angezogen sind, um zu gewährleisten, daß die Maschine
für den Betrieb sicher ist.
• Die Maschine auf keinen Fall mit Benzin im Tank in einem
Gebäude lagern, in dem die Benzindämpfe ein offenes
Feuer oder einen Funken erreichen könnten.
• Den Motor abkühlen lassen, bevor er in einem geschlos-
senen Raum gelagert wird.
• Umdie Feuergefahrherabzusetzen, denMotor, den Schall-
dämpfer, den Batteriekasten und das Kraftstofflager von
Gras, Laub und übermäßigem Schmierfett freihalten.
• Den Grasfänger häufig auf Abnutzung oder Verschleiß
prüfen.
• Abgenutzte oder beschädigte Teile zur Sicherheit immer
sofort ersetzen.
• Falls der Kraftstofftank entleert werden muß, sollte dies
im Freien getan werden.
Sicherheitsvorkehrungen für Handgeführte Rasenmäher mit Rotationsklinge
WICHTIG: Diese mähmaschine kann hände und füsse abtrennen und gegenstände mit hoher geschwin-
digkeit schleudern. Nichtbeachtung der folgenden sicherheitsvorschriften könnte schwere oder tödliche
verletzungen zur folge haben.
21
(1) OIL DRAIN PLUG
(1) ÖLABLASSSCHRAUBE
(1) BOUCHON DE VIDANGE
D'HUILE
(1) TAPON DE DRENAJE PARA
ACEITE
(1) AFTAPPLUG OLIE
(1) TAPPO DI SCARICO
DELL'OLIO
Change oil after each season or after 25 hours running time.
Run the engine warm, remove the spark plug lead. Remove
the drain plug from bottom of engine and drain oil. Fill with new
oil. SAE 30 can be used.
Ölwechsel einmal pro Jahr oder nach 25 Betriebsstunden. Den
Motor warm laufen lassen, abstellen und das Zündkerzenkabel
abziehen. Die Ölablaßschraube an der Unterseite des Motors
entfernen und das Öl ablassen. Danach neues Öl auffüllen
SAE 30.
Changezl'huileàchaquesaisonouaprès25heuresde marche.Al-
lumezle moteur, arrêtez-le etenlevezle câble d'allumage.Enlevez
le bouchon de vidange sous le moteur et vider l'huile. Puis rem-
plissez avec de l'huile neuve (les huiles SAE 30 sont utilisables).
Cambiar el aceite cada temporada, o después de 25 horas de
funcionamiento. Dejar funcionar el motor hasta que se caliente,
pararloyquitar el cable de encendido. Quitar el tapón dedrenaje
del lado inferior del motor y dejar salir el aceite. Poner después
aceite nuevo. Pueden utilizarse los aceites SAE 30.
Ververs de olie elk seizoen, of na 25 u rijden. Laat de motor
warmlopen, schakel de motor uit en demonteer de ontsteking-
skabel. Verwijder de aftapplug op de onderkant van de motor
en tap de olie af. Vul daarna met verse olie: SAE 30.
Sostituire l'olio al termine di ogni stagione, oppure dopo 25 ore
di esercizio. Scaldare il motore, spengerlo e staccare il cavo
della candela. Togliere il tappo di scarico sotto il motore e far
uscire tutto l'olio. Rifornire con olio nuovo SAE 30.
1
20
Annually (After end of season)
Grinding and balancing the cutter blade. Remove the spark
plug lead. Fitting and removing the blade require the use of
protective gloves. Unscrew the cutter blade and deliver it to a
service workshop for grinding and balancing. Tighten the screw
properly when reassembling.
Jährlich (nach Beendigung der Saison)
Schleifen und Auswuchten des Messers. (Achtung: Vor
Demontage des Messers Zündkabel von der Zündkerze
entfernen). Die Klinge nur mit Schutzhandschuhen einsetzen
und entfernen. Schrauben Sie das Messer ab und bringen die-
ses in eine Service-Werkstatt. Bei der Montage die Schrauben
richtig anziehen.
Annuellement (à fin de la saison)
Aiguisage et équilibrage de la lame. Débrancher la bougie.
Mettre des gants de protection avant de mettre en place ou
d’enlever la lame. Démontez-la et donnez-la à aiguiser à un
professionnel. Bien resserer la vis après remontage.
Revisión anual (Al terminar la estación)
Afilado y equilibrado de la cuchilla. Se desconecta el cable
del encendido de la bujía. El ajuste y la sustitución de la hoja
requiere el uso de guantes protectores. Se desmonta leugo la
cuchilla que es entrega a un taller mecánico para su afilado y
equilibrado. Apriétese bien la tuerca al volver a montar.
Jarlijks (na einde van het seizoen)
Slijpen en balanceren van het maaimes. De bougiekabel los-
maken. Bij het afstellen en verwijderen van het mes moeten
altijdbeschermende handschoenen worden gedragen. Schroef
het mes er af en breng het naar de werkplaats voor slijpen
en balanceren. Bij het weer aanbrengen de schroef goed
vastdraaien.
Controllo annuale (All fine della stagione)
Rettifica e bilanciamento della lama. Rimuovere il cavo di ac-
censione. Inserire e rimuovere la lama solamente indossando
guanti di protezione. Smontare la lama e consegnarla ad una
officina di servizio per la rettifica ed il bilanciamento. Stringere
bene le viti nel rimontaggio.
5
I. Précautions d’utilisation
• Lisez toutes les instructions soigneusement. Famil-
iarisez vous avec les commandes pour apprendre à
utiliser efficacement cette machine.
• Ne jamais autoriser les enfants ou les personnes
qui n’auraient pas lu ce manuel d’utilisation à utiliser
cete tondeuse. La règlementation locale peut de plus
interdirel’utilisation de telle machine au-dessous d’un
certain âge.
• Ne jamais tondre à proximité de personnes, d’enfants
ou d’animaux.
• Ne pas oublier que tout utilisateur ou propriétaire d’un
tondeuse à gazon est responsable des accidents ou
dommages causés à une personne ou a ses biens.
II. Préparation
• Pendantlatonte,ne portez quedeschaussures solides
et des pantalons longs. Ne jamais tondre pieds nus
ou chaussés de sandales.
• Contrôlez systématiquement et soigneusement l’état
de la surface à tondre et retirer tous les objets sus-
ceptibles de devenir des projectiles lors du passage
de la machine.
• ATTENTION – Le carburant est très inflammable.
- Pour transporter ou stocker le carburant, utilisez
exclusivement des récipients conçus et approuvés
pour ces usages.
- Toujours remplir le réservoir de carburant à l’air libre
et ne pas fumer pendant le remplissage.
- Remplir le réservoir de carburant avant de démarrer
le moteur. Ne jamais retirer le bouchon du réservoir
etnejamais rajouter de carburant tant que le moteur
est en foctionnement ou qu’il est encore chaud.
- Si du carburant a été renversé, ne pas tenter de
démarrer la tondeuse, mais la pousser hors de la
zoneoùlecarburantaété renversé et éviter de créer
une quelconque source de chaleur avant que les
vapeurs de carburant ne se soient dissipées.
- Refermez avec précautions les bouchons des rés-
ervoirs ou des récipients contenant du carburant
pour garantir la sécurité.
• Remplacez les pots d’échappement défectueux.
• Avant d’utiliser un tondeuse à gazon, toujours vérifier
que les lames, les boulons de lame et le carter de
coupe ne sont pas usés ou endommagés. Toujours
remplacer les lames et les boulons simultanément de
façon à éviter tout problème d’équilibrage.
• Sur les machines de multi-lames, ne pas oublier que
la rotation d’une lame peut entraîner celle des autres.
III. Utilisation
• Ne jamais démarrer un moteur à l’intérieur dans un
espace confiné où des émanations dangereuses de
monoxyde de carbone pourraient s’accumulées.
• Tondez uniquement à la lumière du jour ou avec une
bonne lumière artificielle.
• Évitez de faire fonctionner l’équipement sur le gazon
mouillé, si possible.
• Soyez toujours sûrs de bien prendre pied sur les
pentes.
• Marchez, ne courrez jamais.
• Pour les machines rotatives à roues, tondre à travers
les surfaces des pentes, jamais de haut en bas.
• Soyeztrès prudents lorsquevouschangez de direction
sur les pentes.
• Ne tondez pas excessivement les pentes escarpées.
• Soyez extrêmement prudents lorsque vous faites
marche arrière ou tirez la tondeuse à gazon vers vous.
• Utilisez une butée d’arrêt afin de maintenir la lame
immobile si la tondeuse à gazon doit être inclinée
pour le transport lorsqu’elle traverse des surfaces
autres que le gazon, et lorsque vous transportez la
tondeuse à gazon d’un endroit à l’autre.
• N’utilisez jamais la tondeuse à gazon avec des pro-
tections défectueuses ou sans dispositif de sécurité,
comme par exemple des déflecteurs ou bacs à herbe,
en place.
• Conserverle régime de rotation dumoteuretne jamais
le faire fonctionner au dessus de son régime nominal
car cela peut être dangereux.
• Débrayer toutes les lames et actionner l’embrayage
avant de mettre le moteur en marche.
• Mettez le moteur en marche ou mettez le contact
avec soin selon les instructions, les pieds éloignés
des lames.
• N’inclinez pas la tondeuse à gazon lors de la mise en
marche ou de contact du moteur, sauf si la tondeuse
à gazon doit être inclinée pour ce faire. Dans ce cas,
n’inclinez pas plus que nécessaire et soulevez seule-
ment la partie éloignée de l’opérateur.
• Nemettezpaslemoteuren marche lorsque vous vous
trouvez devant la goulotte d’éjection.
• Ne mettez pas les mains ou les pieds près ou sous
les parties rotatives. Tenez-vous toujours à l’écart de
l’orifice de sortie
• Ne ramassez ou ne transporter jamais la tondeuse à
gazon pendant son fonctionnement
• Arrêtez la machine et débrancher le câble de bougie.
- avant de retirer l’insert broyeur ou avant de retirer
la goulotte d’éjection pour la nettoyer.
- avant de contrôler, nettoyer ou travailler sur le carter
de coupe,
- avant de retirer un objet coincé dans le tondeuse.
- si la machine commence à vibrer anormalement.
• Arrêtez la machine.
- en tous temps lorsque vous vous éloignez de la
tondeuse à gazon
- avant le ravitaillement en combustible.
• Lorsquela tonte estterminée,réduisez les gazavantde
couper le moteur et, si le tondeuse à gazon est équipé
d’un robinet d’arrêt du carburant, fermez celui-ci.
• Ralentissez lorsque vous utilisez un siège arrière.
IV. Entretien et Entreposage
• Assurez-vous que tous les écrous, boulons et vis
sont bien serrés pour être certain que l’équipement
est prêt à fonctionner de nouveau, dans de bonnes
conditions.
• Ne jamais entreposer le tondeuse à gazon avec du
carburant dans le réservoir, dans un bâtiment où les
vapeurs pourraient s’enflammer au contact d’une
flamme ou d’une étincelle de l’allumage.
• Attendre le refroidissement du moteur avant
d’entreposer la tondeuse dans un espace fermé.
• Pour supprimer les risques d’incendie s’assurer que
le moteur, le pot d’échappement, le logement de
la batterie et du réservoir de carburant ne sont pas
encrassés par de l’herbe, des feuilles ou des surplus
de graisse.
• Vérifier souvent le bac ou le collecteur pour vous as-
surer qu’il est propre et qu’il n’est pas endommagé.
• Pour plus de sécurité, remplacer systématiquement
les pièces usées ou détériorées.
• Sile réservoir de carburant doit être vidangé,procéder
à cette opération à l’extérieur.
Mesuresdesécuritéd'utilisation d'une tondeuse à hélice horizontaleàconducteurmarchant
ATTENTION:Cettetondeuseest capable d’amputer mainsoupieds et deprojeterdes objets. l’inobservation
des règles de sécurité ci-dessous peut être la cause de blessures sérieuses voire mortelles.
6
Normas de funcionamiento seguro para cortacéspedes giratorios de pie
IMPORTANTE: Esta maquina cortadora es capaz de amputar las manos y los pies y de lanzar objetos.
Si no se observan las instrucciones de seguridad siguientes se pueden producir lesiones graves o la
muerte.
• Parar la hoja en caso de que se tenga que inclinar
el cortacésped para transportarlo por una superficie
que no sea de hierba, o cuando se transporte de un
área a otra por cortar.
• Nuncahacer funcionarelcortacésped con lasprotecci-
onesdefectuosas,osinlosdispositivosdeseguridad,por
ejemplodeflectores y/o las tomas dehierbaensu sitio.
• Nunca cambie los ajustes del regulador o no haga
que el motor tenga una velocidad excesiva.
• Desembragar todos los embragues de la hoja y de la
transmisión antes de arrancar el motor.
• Arrancar el motor o encender el motor eléctrico con
cuidado según las instrucciones y con los pies bien
lejos de las hoja.
• Noinclinarelcortacéspedcuando se arranca el motor
o se enciende el motor eléctrico, a menos de que el
cortacésped no se tenga que inclinar para poderlo
poner en marcha. En este caso, no inclinarlo más de
lo absolutamente necesario y levantar solamente la
parte más lejos del operador.
• No arrancar el motor cuando se está frente del pasillo
de inyección.
• No poner las manos o los pies cerca o debajo de
partes rotatorias. Mantenerse siempre lejos de la
abertura de descarga.
• Nunca levantar o transportar el cortacésped cuando
el motor está en marcha.
• Parar el motor y desconectar el cable de la bujía:
- antes de limpiar bloqueos o desatrancar del con-
ducto;
- antes de inspeccionar, limpiar o trabajar sobre la
segadora;
- después de golpear un objeto extraño. Inspec-
cione la segadora cuidadosamente, para verificar
si hay daños y haga reparaciones antes de volver
a arrancar y a operar el equipo;
- si la maquina empieza a vibrar anormalmente
(verifíquela inmediatamente).
• Parar el motor:
- siempre cuando se deja el cortacésped;
- antes de abastecer el carburante.
• Reduzcalos ajustesdela aceleraciónduranteel tiempo
que el motor se apague, si el motor viene diseñado
con una válvula de apagado, sierre el combustible
cuando halla terminado de segar.
• Ir despacio cuando se utiliza un asiento posterior.
IV. Mantenimiento y Almacenamiento
• Guarde todos las tuercas, los pernos y los tornillos
apretados para asegurarse que el equipo esta en
condiciones de buena operación.
• Nunca guarde la máquina con combustible en el
estanque de combustible dentro de un edificio en
donde hay fuentes de ignición presente.
• Permita que ese enfríe el motor antes de guardarlo
en algún lugar cerrado.
• Para reducir el riesgo de encendido, guarde el motor,
el silenciador, el comportamiento de la batería limpios
de césped, hojas, y de demasiado grasa.
• Verifique frecuentemente el recogedor del césped
para ver si hay uso o deterioración.
• Para la seguridad reemplace las partes que estén
usadas o dañadas.
• Si el tanque del combustible debe ser vaciado hágalo
afuera.
I. Instrucción
• Lea todas las instrucciones cuidadosamente. Famil-
iarícese completamente con los controles y con el
uso adecuado el equipo
• Nunca permita que los niños o las personas sin los
conocimientosadecuados operen la segadora. Leyes
locales pueden restriñir la edad del operador.
• Asegúrese que el área esté despejada de personas
antes de segar, especialmente de niños o animales
domésticos.
• El operador o el usuario es el responsable por ac-
cidentes o daños ocurridos a otras personas o a su
propiedad.
II. Preparación
• Cuando este segando, siempre use zapatos adec-
uados y pantalones largos. No opere el equipo sin
zapatos o usando sandalias.
• Inspeccione cuidadosamente el área en donde se
va a utilizar el equipo y remueva los obstáculos que
puedan ser lanzados por la maquina.
• ATENCIÓN - los combustibles son muy inflamables.
- Almaceneel combustible enenvasesespecialmente
diseñados para este propósito.
- Agregue combustible a la máquina afuera y no
fume cuando este agregando combustible.
- Agregue el combustible antes de arrancar el motor.
Nunca remueva la tapa del depósito de gasolina
o agregue combustible con el motor fusionando o
cuando el motor este caliente.
- Siderrama combustible, nointentearrancar el motor
pero mueva la maquina lejos del área de derrame
y no arranque el motor hasta que los vapores se
hallan evaporado.
- Vuelva a poner todas las tapas de los tanques y
de los envases con seguridad.
• Reemplace los silenciadores defectuosos.
• Antes de usarlo, siempre inspeccione visualmente
para ver que las cuchillas, los pernos de las cuchillas
y el conjunto cortador no estén gastados o dañados.
Reemplace las cuchillas y los pernos gastados o
dañados de dos en dos para mantener el equilibro.
• En maquinas de más de una cuchilla, tenga cuidado
puesto que la rotación de una cuchilla puede causar
la rotación de otras cuchillas.
III. Operación
• Nunca haga funcionar la máquina dentro de un área
cerradadondegases peligrosos de óxido de carbono
pueden acumularse.
• Siegue solamente con luz de día o con una buena
luz artificial.
• Si es posible evitar el uso del aparato sobre hierba
mojada.
• Encaso de pendientes, asegurarse de estarbienfirme
en los pies.
• Caminar, nunca correr.
• Con las máquinas giratorias con ruedas, cortar hori-
zontalmente con respecto al frente de las pendientes,
nunca arriba y abajo.
• Tener mucho cuidado, cuando se cambia dirección
en las pendientes.
• No cortar demasiado las pendientes muy fuertes.
• Tener mucho cuidado cuando se hace marcha atrás
o se empuja el cortacésped hacia sí mismos.
19
Maintenance
Always remove the spark plug lead before repair, cleaning or
maintenance work. After 5 hours running time, tighten screws
and nuts. Check the oil. The spark plug must be at the highest
point on the mower when it is tilted up.
Wartung
Ziehen Sie immer das Zündkerzenkabel ab, bevor Sie mit
der Reparatur, Reinigung oder mit Wartungsarbeiten beginnen.
Nach den ersten 5 Betreibstunden alle Schrauben und Muttern
überprüfen. Ölstand kontrollieren. Wenn der Rasenmäher
gekippt wird, müssen sich die Zündkerze an der höchsten
Stelle befinden.
Entretien
Toujours debrancher la bougie avant réparation nettoyage
entretien. Après 5 heures d'utilisation, resserrer vis et écrous.
Vérifier l'huile. Lorsque la tondeuse est inclinée sur le côtc, il
faut que la bougie occupent la position la plus élevée.
Inspeccion
Desconéctesesiempre el cabledelencendidode la bujíaantes
de hacer una reparación, limpieza o trabajo de mantenimiento.
Vovler a apretar tuercas y tornillos después de cinco horas de
trabajo. Contrólose el aceite. Si se coloca el cortacésped de
lado, el punto más alto debe ser la bujía.
Onderhoud
Voordag u begint met schoonmaken, reparaties of afstellen,
altijd eerst de bougiekabel losmaken. Bouten en moeren
kontroleren ma vijf draaiuren. Oliepeil kontroleren en zonodig
bijvullen. Als de maaier op de zijkant wordt gelegd, zorg dan
dat de bougie naar boven zign gericht.
Manutenzione
Staccare sempre il cavo di accensione prima di riparazioni,
pulizie o lavori di menutenzione. Dopo 5 ore di funzionamento
stringere viti e dadi. Controllare l'olio. Piegando la falciatrice sul
fiancolare attenzione che la candela sia il punto più alto.
Regularly
Stop the engine and unscrew the dipstick. The level should be
between FULL and ADD. Avoid filling with too much oil.
Regelmässig
Stellen Sie den Motor ab und schrauben Sie den Ölpeilstab
heraus. De Ölstand soll swischen FULL and ADD liegen. Ver-
meiden Sie zu viel Öl einzufüllen.
Régulièrement
Arrêter le moteur et vérifier la jauge à julie. Le niveau doit être
situé entre FULL (plein) et ADD (ajoutez). Evitez de mettre
trop d'huile.
Periódicamente
Parar el motor para controlar el nivel de aceite del motor. Debe
estar entre FULL y ADD. Evitar relleno excesivo de aceite.
Regelmatig
Kontroleer het oliepeil bij voorkeur bij een koude motor. Het
niveau moet tussen FULL en ADD staan. Nooit beneden de ADD
mar ook nooit boven FULL. Niet teveel olie bijvullen.
Periodicamente
Arrestare il motore e controllare l'asta dell'olio. Ll livello deve
trovarsi fra FULL e ADD. Evitare di versare troppo olio.
18
Before mowing, objects such as twigs, toys and stones should
be removed from the lawn.
Bevor mit dem Mähen begonnen wird, sollten Zweige, Spiel-
zeuge, Steine usw. von der Rasenfläche entfernt werden.
Avant de commencer à tondre, il faut débarrasser la pelouse
des branches, des jouets, des pierres etc... qui pourraient s'y
trouver.
Antesde cortar el césped, recoger ramas, juguetes, piedras,etc.
Voordat u paat maaien, stenen, takken, speelgoed etc. verwij-
deren van het gazon.
Prima di iniziare la falciatura, si devono allontanare dal prato
rami, giocattoli, pietre etc.
Mow the lawn twice weekly during the most active periods of
growth. Never cut more than 1/3 of the length of the grass,
especially during dry periods. Mow with a high cutting height
setting the first time. Examine the result and lower the mower
to the desired setting. Mow slowly or mow the grass twice if
it is very long.
MähenSie das Grasbeistarkem Wachstumzweimal wöchentlich.
Mähen Sie niemals mehr als 1/3 der Graslänge. Dies gilt be-
sonders für trockene Perioden. Mähen Sie danach das Resultat
und stellen Sie dann die erwuunschte Schnitthöhe ein. lst das
Grasbesonders hoch, fahren Sie langsam mitdemRasenmäher.
Mähen Sie gegebenenfalls zweimal.
Aucours de la périodedecroissanceintensive, coupez l'herbe au
moins deux fois par semaine. Ne jamais couper plus de 1/3 de
lahauteur de l'herbe, particulièrement enpériodede sécheresse.
Tondez la première fois avec la tondeuse réglée sur une posi-
tion haute de coupe. Vérifiez le résultat et abaissez ensuite à la
hauteur souhaitée. Si l'herbe est très haute, passez la tondeuse
lentement, éventuellement, la passer deux fois.
Cuando la hierba crece rápidamente es necesario cortar el
césped doa veces por semana. No es conveniente cortarla en
más de una tercera parte de su largo, sobre todo en perfodos
secos. El primer corte se hace con el cortacésped en una de
sus posiciones más altas y, después de obsérvar el resultado,
se ajusta a la altura deseada. Si la hierba está muy alta se
recomienda pasar el cortacésped a poca velocidad o cortar el
césped dos veces seguidas.
Maai het gazon twee maal per week in de grootste groeiperiode.
Niet meer dan 1/3 van de totale lengte maaien, vooral niet in een
droge periode. Indien het gras erg lang is, eerst in de hoogste
maaistand maaien, daarna oop de gewenste maaihoogte instel-
len. Eventueel twee maal maaien.
Falciare l'erba 2 volte la settimana nel periodo della massima
crescita. Non tagliare mai più di 1/3 della lunghezza dell'erba,
specialmente nei periodi di siccità. La prima volta, faciare con
il tosaerba regolato ad una delle maggiori altezze. Controllare
il risultato e portare quindi il tosaerba all'altezza desiderata. Se
l'erba è molto alta, falciare lentamente, eventualmente faciare
2 volte.
MAX 1/3
7
Veilig werken met handbediende grasmaaimachines
BELANGRIJK: Deze maaimachine kan handen en voeten amputeren en voorwerpen wegslingeren. Het
niet opvolgen van deze veiligheidsinstructies kan ernstig of dodelijk letsel tot gevolg hebben.
• Werk niet met de grasmaaier als de beschermkap-
pen of veiligheidsmechanismen niet in orde of niet
aangebracht zijn (bijv. beschermkappen of grasvan-
gmechanismen).
• Verander de instelling van de motorregelaar niet en
laat de motor niet met te hoge toeren draaien. Als de
motor met te hoog toerental draait, kan het risico van
lichamelijk letsel groter worden.
• Zetalle mes- en aandrijfkoppelingen inhunvrijvoordat
u de machine start.
• Start de machine of de motor voorzichtig en volgens
de gebruiksaanwijzingen en houd uw voeten uit de
buurt van het mes.
• Til de grasmaaier niet op terwijl u deze start of de
motor ervan aanzet, tenzij de grasmaaier dient te
worden opgetild om deze te kunnen starten. Til de
machine in dit geval niet hoger op dan nodig en til
alleen het gedeelte op dat het verst van de bediener
is verwijderd.
• Zet de machine niet aan terwijl u voor de afvoer
staat.
• Steek uw handen of voeten nooit onder of in de buurt
van draaiende delen. Houd de afvoeropening altijd
vrij.
• Til de grasmaaier nooit op en draag deze nooit terwijl
de motor draait.
• Zet de machine uit en maak de bougiedraad los:
- voordat u opgehoopt materiaal weghaalt of een
verstopte afvoer leeg maakt;
- voordatu demaaimachine controleert,schoonmaakt
of eraan werkt;
- nadat u een ongewenst voorwerp heeft geraakt.
Inspecteer de maaimachine op schade en voer
reparaties uit voordat u de machine weer start en
gebruikt;
- als de machine abnormaal begint te trillen (onmid-
dellijk controleren).
• Zet de machine uit:
- als u de grasmaaier achterlaat;
- voordat u brandstof bijvult.
• Minder gas tijdens het uitlopen van de motor, en als
de motor met een afsluitklep is uitgerust, moet u
de brandstoftoevoer aan het einde van het maaien
afsluiten.
• Rijd langzaam als u een meeloopstoeltje gebruikt.
IV. Onderhoud en Opslag
• Houdallemoeren, bouten en schroeven goed vastge-
draaid zodat u er zeker van kunt zijn dat de machine
in een veilige bedrijfsstaat verkeert.
• Slademachine nooit in een gebouw op, waar dampen
een open vlam of vonk kunnen bereiken, terwijl zich
benzine in de tank bevindt.
• Laat de motor afkoelen voordat u hem in een besloten
ruimte opbergt.
• Beperk brandgevaar: houd de motor, geluiddemper,
accuruimte en benzine-opslagruimte vrij van gras,
bladeren of een overmaat aan smeervet.
• Controleer de opvangzak vaak op slijtage of verwer-
ing.
• Vervang versleten of beschadigde onderdelen om
veiligheidsredenen.
• Als de brandstoftank afgetapt moet worden, moet dit
buiten worden gedaan.
I. Training
• Lees de instructies aandachtig. Zorg dat u vertrouwd
bentmet de bedieningselementenenhet juiste gebruik
van de machine.
• Laat kinderen of mensen die niet bekend zijn met de
instructies, de maaimachine niet gebruiken. Het is
mogelijk dat plaatselijke voorschriften een beperking
stellen aan de leeftijd van de bestuurder.
• Maai nooit terwijl mensen, vooral kinderen, of huis-
dieren in de buurt zijn.
• Bedenk dat de bestuurder of gebruiker verant-
woordelijk is voor ongelukken of risico’s die andere
mensen of hun eigendommen kunnen overkomen.
II. Voorbereiding
• Draag tijdens het maaien altijd stevige schoenen en
eenlangebroek. Gebruik de machine niet blootsvoets
of terwijl u open sandalen draagt.
• Inspecteer de plek waar de machine zal worden
gebruikt, grondig en verwijder alle voorwerpen die
door de machine kunnen worden weggeslingerd.
• WAARSCHUWING - Benzine is licht ontvlambaar.
- Bewaar brandstof in blikken die speciaal voor dat
doel zijn bestemd.
- Tank alleen buiten en rook niet tijdens het tanken.
- Tank voordat u de motor start. Draai de dop nooit
van de benzinetank af of tank nooit terwijl de motor
draait of heet is.
- Als benzine is gemorst, probeer de motor dan niet
te starten maar haal de machine van de plaats
vandaan waar u benzine heeft gemorst en zorg
dat u geen ontstekingsbron teweeg brengt totdat
de benzinedampen zijn verdreven.
- Draai de dop van alle brandstoftanks en -blikken
weer goed vast.
• Vervang defecte geluiddempers.
• Inspecteer vóór het gebruik altijd of de messen,
mesbouten en maai-inrichting niet versleten of
beschadigd zijn. Vervang versleten of beschadigde
messen en bouten in sets om het evenwicht in stand
te houden.
• Op machines met meerdere messen dient u eraan te
denken dat het draaien van één mes andere messen
kan doen draaien.
III. Bediening
• Laat de motor niet draaien in een besloten ruimte
waar gevaarlijke koolmonoxydedampen zich kunnen
verzamelen.
• Maai alleen bij daglicht of goed kunstlicht.
• Ook om nat gras te maaien, waar mogelijk.
• Loop voorzichtig op hellingen.
• Loop normaal, ren niet.
• Maaimet een grasmaaier met wielen altijddwarsop de
helling, nooit van boven naar onder of omgekeerd.
• Wees bijzonder voorzichtig als u op een helling van
richting verandert.
• Maai niet op erg steile hellingen.
• Wees bijzonder voorzichtig als u de grasmaaier naar
uzelf toe duwt of draait.
• Zet het mes uit als u de grasmaaier moet optillen om
deze over plaatsen zonder gras of van het ene naar
het volgende gazon te vervoeren.
8
I. Addestramento All’uso
• Studiare attentamente le istruzioni. Acquisire dimes-
tichezza con i comandi e conoscere a fondo l’uso
corretto dell’equipaggiamento.
• Non consentire mai l’uso dei trattorini tosaerba ai
bambini né agli adulti che non abbiano dimestiche-
zza con le istruzioni sull’uso. Le normative locali
possono stabilire l’età minima per operare i trattorini
tosaerba.
• Non operare mai con i tosaerba in caso vi siano per-
sone, specialmente bambini, o animaletti domestici
nella zona di lavoro.
• Tenere presente che in caso di incidenti, rischi o
pericoli provocati a persone o a beni, la responsabilità
dell’operato ricade sull’operatore, od utilizzatore.
II. Preparazione
• Indossaresempre scarperobusteda lavoro epantaloni
lunghi.Non usare i tosaerba a piedi nudi oindossando
soltanto sandali.
• Controllare scrupolosamente l’area in cui verrà utiliz-
zato l’equipaggiamento e togliere tutti gli oggetti che
potrebbero venire scagliati dal macchinario.
• ATTENZIONE - La benzina è infiammabilissima.
- Conservare il carburante in contenitori appositi.
- Fare rifornimento soltanto all’aperto. E’ vietato
fumare durante il rifornimento.
- Fare rifornimento prima di avviare il motore. Non
svitaremai il tappodelserbatoio, né fare rifornimento
con il motore acceso o caldo.
- Incaso di fuoriuscita di benzina,nonmetterein moto
il motore. Spostare l’equipaggiamento dall’aerea
in cui si è verificata la fuoriuscita del carburante ed
evitare di provocare qualsiasi tipo di accensione
fino a quando i vapori non si siano dissipati.
- Reinserire e serrare bene il tappo del serbatoio e
del contenitore.
• Sostituire le marmitte che non funzionino bene.
• Prima di iniziare il lavoro ispezionare visualmente le
lame, i bulloni delle lame e il gruppo falciante per
verificare che non vi siano tracce di usura o danneg-
giamenti. In caso di lame e bulloni danneggiati od
usurati, installate un nuovo set completo in modo che
il macchinario rimanga bilanciato.
• In caso di trattorini tosaerba a lame multiple prestare
la massima attenzione in quanto ruotando una lama
si può provocare la rotazione delle altre.
III. Funzionamento
• Non accendere il motore in spazi ristretti dove vi si
possa accumulare ossido di carbonio, un gas inodore
ma letale.
• Usarei tosaerba soltanto con la lucedelgiornooppure
in presenza di buona luce artificiale.
• Sepossibile, evitare diutilizzare l’apparecchio sull’erba
bagnata.
• Stare sempre bene in equilibrio nei tratti scoscesi.
• Camminare sempre, non correre mai.
• Permacchine rotantiaruote, nei tratti scoscesi,falciare
l’erba seguendo la costa del pendio, non salendo e
scendendo.
• Prestare estrema attenzione al cambio di direzione
su un tratto scosceso.
• Non falciare tratti eccessivamente ripidi.
• Prestare estrema attenzione girando o tirando la mac-
china verso di sé.
• Fermare le lame nel caso in cui la macchina debba
essere trasportata su superfici non erbose, oppure
verso la zona da falciare.
• Non utilizzare mai la macchina con protezioni difet-
tose, oppure in assenza di dispositivi di sicurezza, ad
esempio, deflettori e/o separatori di erba.
• Non modificare le impostazioni del regolatore del
motore né far operare il motore a velocità eccessive.
Le velocità eccessive possono aumentare il pericolo
di infortuni.
• Disinnestare tutte le lame e le frizioni prima di avviare
il motore.
• Avviare o accendere il motore ponendo molta at-
tenzione, attenendosi alle istruzioni e con i piedi ben
lontani della lame.
• Non inclinare mai la macchina avviando o accen-
dendo il motore, con la sola eccezione dei casi in
cui questo sia assolutamente necessario. In questo
caso, comunque non inclinarla mai oltre quanto sia
strettamentenecessario e sollevare solamentelaparte
distante dall’operatore.
• Nonavviare il motore stando davanti al tubodiscarico.
• Nonavvicinare maniopiedi allepartirotanti. Mantenersi
a distanza dal tubo di scarico, sempre aperto.
• Non rimorchiare o trasportare mai la macchina con il
motore in funzione.
• Arrestare il motore e staccare il cavo della candela:
- prima di pulire eventuali intasamenti e prima di
stasare lo scivolo;
- prima di interventi o controlli sul tosaerba e prima
delle operazioni di pulizia;
- dopo aver colpito un oggetto estraneo. Control-
lare che il tosaerba non sia stato danneggiato ed
effettuare le riparazioni del caso prima di riavviare
e mettere in funzione l’equipaggiamento;
- se il tosaerba, o trattorino, vibra in modo anomalo
(in qual caso eseguire immediatamente dei con-
trolli).
• Arrestare il motore:
- ovunque sia stata lasciata la macchina;
- prima di fare carburante.
• Ridurre la velocità, con la leva dell’acceleratore, per
rallentare il motore prima dello spegnimento. Se il
motore è provvisto di valvola di arresto, chiudere
l’alimentazione del carburante alla fine del lavoro.
• Guidarelentamentequalorasiutilizziilsedileposteriore.
IV. Manutenzione e Periodi di Inattivita’
• Verificare che tutti i dadi, i bulloni e le viti siano sempre
ben stretti per assicurare che l’equipaggiamento sia
in buone condizioni operative.
• Non lasciare mai l’equipaggiamento, con benzina
nel serbatoio, in locali chiusi dove i vapori possano
raggiungere fiamme libere o scintille.
• Lasciare raffreddare il motore prima di riporre i
tosaerba, o trattorini, in qualsiasi spazio stretto e
chiuso.
• Perridurrei pericoli d’incendioassicurarsi che ilmotore,
lamarmitta,ilvanobatteriaelazonadistoccaggiobenzina
sianoliberidaerba,foglieoquantitàeccessivedigrasso.
• Controllare spesso il raccoglitore dell’erba tagliata
per individuare eventuali segni di usura o di danneg-
giamento.
• Per maggiore sicurezza, sostituire le parti usurate o
danneggiate.
• Ilserbatoio delcarburanteva vuotatoall’aperto,qualora
necessario.
Misure operative di sicurezza per tosaerba controllate da pedoni
ATTENZIONE: Questo trattorino tosaerba ha una potenza sufficiente ad amputare mani e piedi e a
scagliare oggetti. La mancata osservanza delle seguenti istruzioni antinfortunistiche potrebbe causare
lesioni gravi e persino il decesso della vittima.
17
2
1
3
Drive
• Forward drive is engaged (1) and disengaged (2) with the
clutch bar at the top of the handle.
• Selectground speedwithgear shiftlever(3). The farthertoward
the handle the lever is pulled, the faster the unit will travel.
Lauf
• Das Ein- (1) und Asschalten (2) des Antribes geschieht mit
Hilfe des Kupplungsbügels zuoberst am Handgriff.
• MitHilfe des Schalthebels(3)die Fahrgeschwindigkeitwählen.
Jeweiter der Hebelnachvorn geschobenwird,desto schneller
bewegt sich die Einheit.
Mise en service
• La mise en fonction (1) et l'arrât (2) se font grâce au guidon
d'embrayage fixé à la partie supérieure du mancheron.
• Sélectionnez la vitesse avec le levier du changement de vi-
tesse (3). Plus le levier est tiré vers la poignée plus l’appareil
circule rapidement.
Funcionamiento
• El embrague y (1) el desembrague (2) de la propulsion son
manejados con la abrazadera de embrague situada en la
parte superior de la guia.
• Seleccione la velocidad con la palanca de cambio de la
velocidad (3). Cuanto más lejos se tira la palanca hacia el
mango, más rápida irá la unidad.
Aandrijving
• Het aan- (1) en uitschakelen (2) van de aandrijving
geschiedt met de koppelingsbeugel bovenop het stuur.
• Selecteer de rijsnelheid met de versnellingshendel (3). Hoe
dichter de hendel naar de handgreep wordt ingedrukt, hoe
sneller het voertuig zal rijden.
Guida
• L'innesto (1) ed il disinnesto (2) della marcia avviene
a mezzo della leva della frizione in alto sul manubrio.
• Selezionare la velocità al suolo con la leva del cambio (3).
Più la leva viene tirata verso l’impugnatura, maggiore sarà
la velocità di spostamento dell’unità.
Use
The mower should not be used on ground that slopes more than
15°. This could cause engine lubrication problems.
Gebrauch
Der Rasenmäner solite nicht in einem Gelände benützt werden,
das eine Neigung von mehr als 15° Grad hat. In solchen Fällen
können Schmierungsprobleme im Motor auftreten.
Utilisation
La tondeuse ne doit pas être utilisée sur un terrain dont la pente
dépasse 15°. Il pourrait se produire des problèmes avec le
graissage du moteur.
Aplicacion
Paraevitarproblemasde engrase se recomiendanousarel corta-
césped en terrenos de inclinaciones mayores de 15° grados.
Gebruik
De grasmaaier niet gebruiken op hellingen of taluds met een
hoek groter dan 15°. Anders komen er problemen met de
smering van de motor.
Uso
Perevitare problemi dilubrificazione,iltosaerbanon deve essere
usato su terreno in pendenza di oltre 15°.
MAX
15°

16
(2) UPPER HANDLE
(3) BRAKE YOKE
(4) STARTER HANDLE
(2) OBERER FÜHRUNGSHOLM
(3) BEDIENUNGSHEBEL
(4) STARTHANDGRIFF
(2) GUIDON SUPÉRIEUR
(3) COMMANDE
(4) POIGNÉE DE STARTER
(2) MANILLAR SUPERIOR
(3) MANDO
(4) MANGO DE ARRANQUE
(2) OVERSTE STUUR
(3) BEDIENINGSHENDEL
(4) STARTHENDEL
(2) MANUBRIO SUPERIORE
(3) COMANDO
(4) MANIGLIA DI AVVIAMENTO
Starting and Stopping
Place the mower on a flat surface. Note: not on gravel or similar.
Fill the tank with petrol, not oil-blended. Both lead-free and
lead-containing petrol may be used. Do not fill with petrol
while the engine is running.
• Open the petrol cock (1) by turning it anti-clockwise.
• Set the throttle to the “CHOKE” position (starting a cold
engine).
• Hold engine brake yoke to the handle and pull on starter
handle quickly. Do not allow starter rope to snap back.
• To “STOP” engine, release engine brake yoke.
Start und Stopp
Stellen Sie den Rasenmäher auf ebenen Untergrund, Füllen
Sie den Kraftstofftank mit reinem Benzin, (keine Benzin-Öl-
gemisch verwenden). Sowohl bleifreies als auch verbleites
Benzin kann verwendet werden. Nie bei laufendem Motor
Benzin nachfüllen.
• Benzinhahn durch Drehen (1) nach links öffnen.
• Bringen Sie den Gashebel in die Position “CHOKE” (start bei
kaltem motor).
• Den Bedienungshebel gegen den Holm drücken und kräftig
amStarthandgriff ziehen. DasStartseilnichteinfach loslassen,
sondern sich langsam wieder aufrollen lassen.
• Der Motor wird durch Loslassen des Bedienungshebels
abgestellt.
Marche et Arrêt
Placez la tondeuse sur une surface bien plane. Attention, ni
gravier ni gravillons. Remplissez le réservoir d'essence pure
pas de melange 2 temps. Vous pouvez utiliser de l'essence
avec ou sans plomb. Ne pas faire le plein quand le moteur
est en marche.
• Ouvrez le robinet d'essence (1) en le tournant vers la
gauche.
• Placer la manette des gaz sur la position “CHOKE” (mise en
marche du moteur froid).
• Maintenez la commande contre le guidon et tirez vivement
sur le starter. Puis lâchez doucement la ficelle.
• Coupez le moteur en lâchant la commande.
Arranque y Parada
Colocar el cortacésped en una superficie llana (sin gravilla,
guijarros, etc.). Rellenar el tanque de gasolina pura, sin aceite.
Se peude usar gasloina sin plomo o con plomo. No rellenar el
tanque mientras está funcionando el motor.
• Abrir la llave la gasolina (2) girándola hacia le izquierda.
• Colocar el regulador de velocidad en “CHOKE” (arranque
del motor en frio).
• Presionar el mando contra el manillar y tirar rápidamente
del mango de arranque. Soltar lentamente el cordón de
arranque.
• Poner en marcha el motor soltando el mando.
Starten en Stoppen
Zetde maaier op eenvlakkeondergrond. Niet op een grindpadof
iets dergelijks. Vul de benzinetank met benzine, geen oliemeng-
sel. Ukunt zowel loodvrije als loodhoudendebenzinegebruiken.
Nooit benzinetank vullen terwijl de motor draait.
• Benzenedop linksom (1) draaien voor obenen.
• Degashendel op “CHOKE” zetten (het starten van een koude
motor).
• Houd de bedieningshendel tegen het stuur en trek kort en
krachtig aan de starthendel. Laat het startsnoer langzaam
vieren.
• Schakel de motor uit door de bedieningshendel los te
laten.
CHOKE
( )
1
2
3
4
Avviamento e Arresto
Portare il tosaerba su fondo piano (non su ghiaia, sassi o simili). Riempire il serbatoio con benzina pura. Si
può usare sia bezina senza piombo che benzina contenente piombo. Non versare bezina nel serbatoio
mentre il motore è in marcia.
• Aprire il rubinetto della benzina (1) girandolo verso sinistra.
• Mettere il regolatore del gas in posizione “CHOKE” (avviamento del motore freddo).
• Tenere il comando contro il manubrio e tirare velocemente la maniglia di avv iamento. Rilasciare la
cordicella lentamente.
• Fermare il motore rilasciando il comando. 9
56
25 –
108
0 –
6,75
These symbols may appear on your machine or in the literature supplied with the product. Learn and
understand their meaning.
Diese Symbole finden Sie auf Ihrer Maschine oder in Unterlagen, die mit dem Produkt ausgehändigt wurden.
Bitte machen Sie sich mit deren Bedeutung vertraut.
Ces symboles peuvent se trouver sur votre machine ou dans les publications fournies avec le produit. Ap-
prenez à comprendre la signification de ces symboles.
Estos símbolos pueden aparecer sobre su unidad o en la literatura proporcionada con el producto. Aprenda
y comprenda sus significados.
Deze symbolen kunnen op uw machine of in de bij het produkt geleverde documentatie aanwezig zijn. Lees
en begrijp de betekenis.
Simboli utilizzati sull'apparato di taglio o nella documentazione fornita unitamente al prodotto. E' importante
conoscerne bene il signifi cato.
190
43
10
2
1
3
9
5
46
7
15
Adjustment
The mower can be set to different cutting levels. Adjust to
desired cutting level by means of the lever at each wheel.
Move the lever towards the wheel and set the cutting level. All
wheels must be in the same height positions, otherwise uneven
cutting will result.
Einstellung
DerMäher ist inverschiedenenSchneidhöhen einstellbar. Erwün-
schte Schneidhöhe mit dem Hebel am jeweiligen Rad einstellen.
Hebel gegen das Rad drücken und Schneidhöhe regeln. Alle
Rädermüssen auf gleicher Höhe montiert sein;andernfallsergibt
sich eine ungleichmäßige Schnitthöhe.
Reglage
La tondeuse peut être réglée pour des hauteurs de coupe dif-
férentes. Choisissez la hauteur de coupe désirée au moyen
du levier de chaque roue. Appuyez le levier contre la roue et
réglez la hauteur de coupe. Toutes les roues doivent être réglées
identiquement, sinon la coupe sera inégale.
Ajuste
El cortacésped puede ser ajustado a cinco alturas de corte dis-
tintas. Ajústese a la altura de corte que se desee con la palanca
situadajunto a cada rueda. Presiónese lapalancacontrala rueda
y regúlese la altura de corte. Las ruedas tienen que estar todas
ajustadas a la misma altura, pues si no el corte es desigual.
Het instellen
De maaimachine kan op verschillende maaihoogtes worden
ingesteld. Stel de gewenste maaihoogte in d.m.v. de hendel bij
het respectievelijke wiel. Druk de hendel tegen het wiel en regel
demaaihoogte. Alle wielen moeten op dezelfdehoogteingesteld
zijn, anders maait de machine ongelijkmatig.
Regolazione
Il tosaerba può essere regolato su diverse altezze di taglio.
Scegliere l'altezza di taglio voluta agendo sulla leva in prossimità
della routa. Premere la leva verso la ruota e selezionare l'altezza
voluta. Tutte le ruote devono essere alla stessa altezza, altrimenti
il taglio non è uniforme.
Filling with Oil
Fill the engine with engine oil. SAE30 can be used. (Read the
enclosed motor operating instructions as well.)
Ölaffülling
Füllen Sie Öl in den Motor. Es kann SAE30 verwendet werden.
(Lesen Sie auch die beiliegende Gebrauchsanweisung für den
Motor.)
Remplissage d’huile
Remplissez le moteur avec de l'huile pour moteur. Les huiles
SAE30 peuvent être utilisées. (Lisez aussi les instructions ci-
jointes concernant le moteur.)
Relleno de aceite
Rellenar el motor de aceite. Se pueden usar SAE30. (Léase
también las instrucciones anexas para el uso del motor.)
Bijvullen van olie
Vul het carter met de bijgeleverde motorolie. Multi-grade zo-
als bijv SAE30. (Lees tevens de bijgevoegde instructie voor
de motor.)
Riempimento dell ‘olio*
Versare l'olio nel motore. Si possono usare le qualità SAE30.
*Solo per gli U.S.A. (Leggere anche le unstruzioni per il motore
allegate.)
14
To Convert Mower
FOR REAR BAGGING -
• Grass catcher installed.
FOR MULCHING -
• Rear door (1) closed.
FOR DISCHARGING -
• Rear door (1) closed.
• Discharge guard (2) installed.
Umrüsten des Mäweks
VERWENDEN DES HECK-GRASFÄNGERS -
• Grasfänger montiert.
KOMPOSTIEREN DES SCHNITTGUTES -
• Hintere Klappe (1) geschlossen.
HECKAUSWURF (Deflektor) -
• Hintere Klappe (1) geschlossen.
• Frontgehäuse (2) montiert.
Pour Convertir la Tondeuse
POUR LE RAMASSAGE ARRIÈRE -
• Le ramasse-herbe est installé.
POUR LE BROYAGE -
• La volet arrière (1) est fermé.
POUR ÉJECTER -
• La volet arrière (1) est fermé.
• Le déflecteur de décharge (2) est installé.
Para Convertir la Segadora
PARA EL ENSACADO TRASERO -
• El recogedor del césped instalado.
PARA EL ACOLCHAMIENTO -
• La tapa posterior (1) cerrado.
PARA NO RECOGER LA HIERBA -
• La tapa posterior (1) cerrado.
• La protección contra la descarga (2) instalada.
De Maaier Veranderen
VOOR GRASOPVANG ACHTER DE MAAIMACHINE -
• De grasopvangbak moet geïnstalleerd zijn.
VOOR VERSPREIDEN VAN MULCH -
• De achterluik (1) moet gesloten zijn.
OMBOUWEN NAAR ACHTERUITWORP -
• De achterluik (1) moet gesloten zijn.
• Voorplaat (2) moet geïnstalleerd zijn.
Per Convertire il Tosaerba
PER L’ INSACCAMENTO POSTERIORE -
• Il raccoglierba va installato.
PER LA PACCIAMATURA -
• La portello di sicurezza (1) si chiuso.
PER LO SCARICO A TERRA -
• La portello di sicurezza (1) si chiuso.
• Scocca anteriore (2) va installata.
1
2
11
ASSEMBLING
Handle
Pull up the handle in direction of the arrow. With the handle in
up-turned position, tighten the wing-nuts.
MONTAGE
Griff
Griff in Pfeilrichtung hochklappen. Anschließend Flügelmuttern
anziehen.
MONTAGE
Manche
Déployez le manche dans la direction de la flèche. Une fois le
manche déployé, serrez les écrous à oreilles.
MONTAJE
Empuñadura
Levantar le empuãdura en el sentido de la flecha. Cu-
ando la empuãdura esté levantada, apretar las palomillas.
MONTAGE
Hendel
Klap de hendel om, in de richting van de pijl. Wanneer de
hendel omgeklapt is, worden de veugelmoeren aangedraaid.
MONTAGGIO
Impugnatura
Sollevare l'impugnatura nel senso dell afreccia. Quando
l'impugnatura è sollevato, stringere i galletti.
Install Rear Foot Guard
• Position guard as shown and secure with fasteners supplied.
NOTE: The foot guard must be installed for the safe operation
of this machine.
Hinteren fuss-schutz montieren
• Den Schutz der Abbildung entsprechend anbringen und mit
mitgelieferten Befestigungsteilen sichern. HINWEIS: Die
Montage des Fußschutzes ist für den sicheren Betrieb dieser
Maschine erforderlich.
Installez le protecteur de pieds arrière
• Placez le protecteur comme montré et assurez-le avec les
attaches fournies. REMARQUE: Vous devez installer le
protecteur de pieds arrière pour que l’usage de la machine
soit sûr.
Instalar la protección de pies trasera
• Ponga la protección como mostrado y asegúrela con las amarras proporcionadas. NOTA: Para el
funcionamiento en seguridad de esta máquina hay que instalar la protección para los pies.
Achterste voetbeschermer monteren
• Plaats beschermer zoals afgebeeld en zet hem met bijgeleverde bevestigers
vast. N.B.: De voetbeschermer dient te worden geïnstalleerd voordat deze machine veilig
kan worden gebruikt.
Montaggio: Protezione posteriore piedi
• Posizionare la protezione come illustrato nella figura. Bloccare in posizione con i dispositivi di fissaggio
forniti con il prodotto. NOTA: A garanzia di un funzionamento sicuro della macchina, è basilare installare
la protezione posteriore piedi.
12
(1) CATCHER FRAME
(2) VINYL BINDING
(3) FRAME OPENING
(1) RAHMEN FÜR
DEN.GRASFANGBEUTEL
(2) KUNSTSTOFFKAPPEN
(3) RAHMENÖFFNUNG
(1) CADRE DU COLLECTEUR
(2) CRANS DE FIXATION
(3) OUVERTURE DU CADRE
(1) MARCO PARA EL
COLECTOR DE HIERBA
(2) GANCHOS DE PLASTICO
(3) ABERTURA DEL MARCO
(1) FRAME VOOR
GRASVERGAARBAK
(2) PLASTIC HAKEN
(3) FRAME-OPENING
(1) TELAIO DEL CESTELLO
(2) AGGANCI DI PLASTICA
(3) APERTURA DEL TELAIO
(1) REAR DOOR
(2) GRASS CATCHER FRAME
(1) HINTERE KLAPPE
(2) RAHMEN FÜR DEN
GRASFANGBEUTEL
(1) VOLET ARRIÈRE
(2) CADRE DU COLLECTEUR
(1) TAPA POSTERIOR
(2) MARCO PARA COLECTOR
DE HIERBA
(1) ACHTERLUIK
(2) FRAME VOOR
GRASVERGAARBAK
(1) PORTELLO DI SICUREZZA
(2) TELAIO DEL CESTELLO
DI RACCOLTA
2
1
3
To Assemble and Attach Grass Catcher
• Put grass catcher frame into grass bag with stiff part of bag
on the bottom.
• Slip vinyl bindings over frame.
• Thegrass catcher is secured tothelawnmower housing when
the rear door is lowered onto the grass catcher frame.
Zusammensetzung und Montage des Grasfang-
beutels
• Den Rahmen in den Grasfangbeutel einsetzen; der steife Teil
des Beutels nach unten.
• Die Kunststoffkappen auf den Rahmen aufsetzen.
• Der Grasfangbeutel wird durch den Druck der Klappe gegen
den Rahmen in der korrekten Stellung festgehalten.
Assemblage et montage du collecteur d'herbe
• Mettez en place le collecteur d'herbe avec sa partie dure vers
le bas.
• Passez les fixations plastiques par dessus le cadre.
• Le collecteur se met en place en appuyant le volet au cadre.
Armado y montaje del colector de hierba
• Montar el marco en el colector de hierba con la parte dura
de éste hacia abajo.
• Poner los ganchos de plástico alrededor del marco.
• El colector de hierba se mantiene en su sitio por la presión
de la tapa sobre el marco del colector.
Assembleren en monteren van de grasvergaarbak
• Zet het frame in de grasvergaarbak met het harde gedeelte
van de grasvergaarbak naar onderen.
• Trek de plastic haken over het frame.
• Degrasvergaarbak wordtopzijn plaatsgehoudendoor dedruk
die het luik uitoefent op het frame van de grasvergaarbak.
Assemblaggio e montaggio del cestello di raccolta
• Porre il telaio nel cestello, con il lato rigido del cestello verso
il basso.
• Serrare gli agganci di plastica intorno al telaio.
• Il cestello di raccolta viene tenuto a posto dal portello.
1
2
13
To Empty Grass Catcher
• To remove grass catcher, release engine brake yoke to stop
engine.
• Lift up rear door and remove the grass catcher by the handle.
• Donotdrag the bag when emptying, it will cause unnecessary
wear.
Leeren des Grasfangbeutels
• DurchLoslassen des Bedienungshebels den Motor abstellen.
• Die Klappe anheben und den Grasfangbeutel mit Hilfe des
Handgriffs entfernen.
• Den Beutel beim Leeren nicht über den Boden schleifen;
dadurch entsteht unnötiger Verschleiß.
Vidage du collecteur d'herbe
• Couper le moteur en lâchant la commande.
• Lever le volet arrière et enlever le collecteur au moyen de sa
poignée.
• Ne pas le traîner au sol, ce qui risque d'user inutilement le
tissu du sac collecteur.
Vaciado del colector de hierba
• Levantarlatapaposterioryquitarelcolectorutilizandoelmango.
• No dejar caer el colector al suelo al vaciarlo, pues podría
desgastarse la tela de la bolsa.
• No permita que el recogedor sea arrastrado cuando lo vacié;
puede ocasionarse daños.
Legen van de grasvergaarbak
• Schakel de motor uit door de bedieningshendel los te
laten.
• Til het achterluik op en verwijder met behulp van het handvat
de grasvergaarbak.
• Laat de grasvergaarbak niet over het gras slepen wanneer u
hem leegt. Dit kan onnodige slijtage van het weefsel van de
verzamelzak veroorzaken.
Vuotatura del cestello di raccolta
• Spengere il motore rilasciando il comando.
• Sollevareilportelloedestrarreilcestelloconl'aiutodellamaniglia.
• Non trascinare il cestello sul terreno, onde evitare l'inutile
usura del tessuto.

This manual suits for next models

2

Other McCulloch Lawn Mower manuals

McCulloch BA12592RBA Owner's manual

McCulloch

McCulloch BA12592RBA Owner's manual

McCulloch 960410377 User manual

McCulloch

McCulloch 960410377 User manual

McCulloch Edition 1-R Owner's manual

McCulloch

McCulloch Edition 1-R Owner's manual

McCulloch 96141011700 User manual

McCulloch

McCulloch 96141011700 User manual

McCulloch M65B56SDK User manual

McCulloch

McCulloch M65B56SDK User manual

McCulloch MCM2013 User manual

McCulloch

McCulloch MCM2013 User manual

McCulloch HURRICANE 125 RB User manual

McCulloch

McCulloch HURRICANE 125 RB User manual

McCulloch BLISTAR BE24/107 PRO User manual

McCulloch

McCulloch BLISTAR BE24/107 PRO User manual

McCulloch ROB S400 User manual

McCulloch

McCulloch ROB S400 User manual

McCulloch 532 43 20-26 User manual

McCulloch

McCulloch 532 43 20-26 User manual

McCulloch MC1236ST User manual

McCulloch

McCulloch MC1236ST User manual

McCulloch M53-190AWFEPX User manual

McCulloch

McCulloch M53-190AWFEPX User manual

McCulloch M19542H User manual

McCulloch

McCulloch M19542H User manual

McCulloch M46-125M User manual

McCulloch

McCulloch M46-125M User manual

McCulloch 96041018000 User manual

McCulloch

McCulloch 96041018000 User manual

McCulloch ZM3016 BF User manual

McCulloch

McCulloch ZM3016 BF User manual

McCulloch MCM2011 Guide

McCulloch

McCulloch MCM2011 Guide

McCulloch M185107H User manual

McCulloch

McCulloch M185107H User manual

McCulloch 966564101 User manual

McCulloch

McCulloch 966564101 User manual

McCulloch 11597SD User manual

McCulloch

McCulloch 11597SD User manual

McCulloch Edition 1-R Owner's manual

McCulloch

McCulloch Edition 1-R Owner's manual

McCulloch M145-97HRB User manual

McCulloch

McCulloch M145-97HRB User manual

McCulloch 14596 Owner's manual

McCulloch

McCulloch 14596 Owner's manual

McCulloch ROB R1000 User manual

McCulloch

McCulloch ROB R1000 User manual

Popular Lawn Mower manuals by other brands

Flymo Flymo Original instructions

Flymo

Flymo Flymo Original instructions

AGCO Allis 800 series Accessories

AGCO Allis

AGCO Allis 800 series Accessories

Craftsman 917.273320 owner's manual

Craftsman

Craftsman 917.273320 owner's manual

Land Pride Accuz Z52 features and benefits

Land Pride

Land Pride Accuz Z52 features and benefits

Sears Craftsman 944.601131 owner's manual

Sears

Sears Craftsman 944.601131 owner's manual

Craftsman 917.276350 owner's manual

Craftsman

Craftsman 917.276350 owner's manual

Yard-Man 114-808L401 owner's manual

Yard-Man

Yard-Man 114-808L401 owner's manual

Husqvarna AUTOMOWER 550 EPOS Operator's manual

Husqvarna

Husqvarna AUTOMOWER 550 EPOS Operator's manual

Craftsman C459-36201 Operator's manual

Craftsman

Craftsman C459-36201 Operator's manual

Poulan Pro LO45N22SA Operator's manual

Poulan Pro

Poulan Pro LO45N22SA Operator's manual

Craftsman 917.258543 owner's manual

Craftsman

Craftsman 917.258543 owner's manual

Snapper ECLP21602KWV Safety instructions & operator's manual

Snapper

Snapper ECLP21602KWV Safety instructions & operator's manual

Worx Landroid Series Get started

Worx

Worx Landroid Series Get started

Lawn-Boy 10797 Operator's manual

Lawn-Boy

Lawn-Boy 10797 Operator's manual

AS MOTOR AS 901 SM Operator's manual

AS MOTOR

AS MOTOR AS 901 SM Operator's manual

Craftsman 917.376402 owner's manual

Craftsman

Craftsman 917.376402 owner's manual

Rocks GRASS 1400 manual

Rocks

Rocks GRASS 1400 manual

Land Pride Accu-Z Razor Z48 Operator's manual

Land Pride

Land Pride Accu-Z Razor Z48 Operator's manual

manuals.online logo
manuals.online logoBrands
  • About & Mission
  • Contact us
  • Privacy Policy
  • Terms and Conditions

Copyright 2025 Manuals.Online. All Rights Reserved.