Meadow Creek BBQ Series User manual
Operator’s Manual
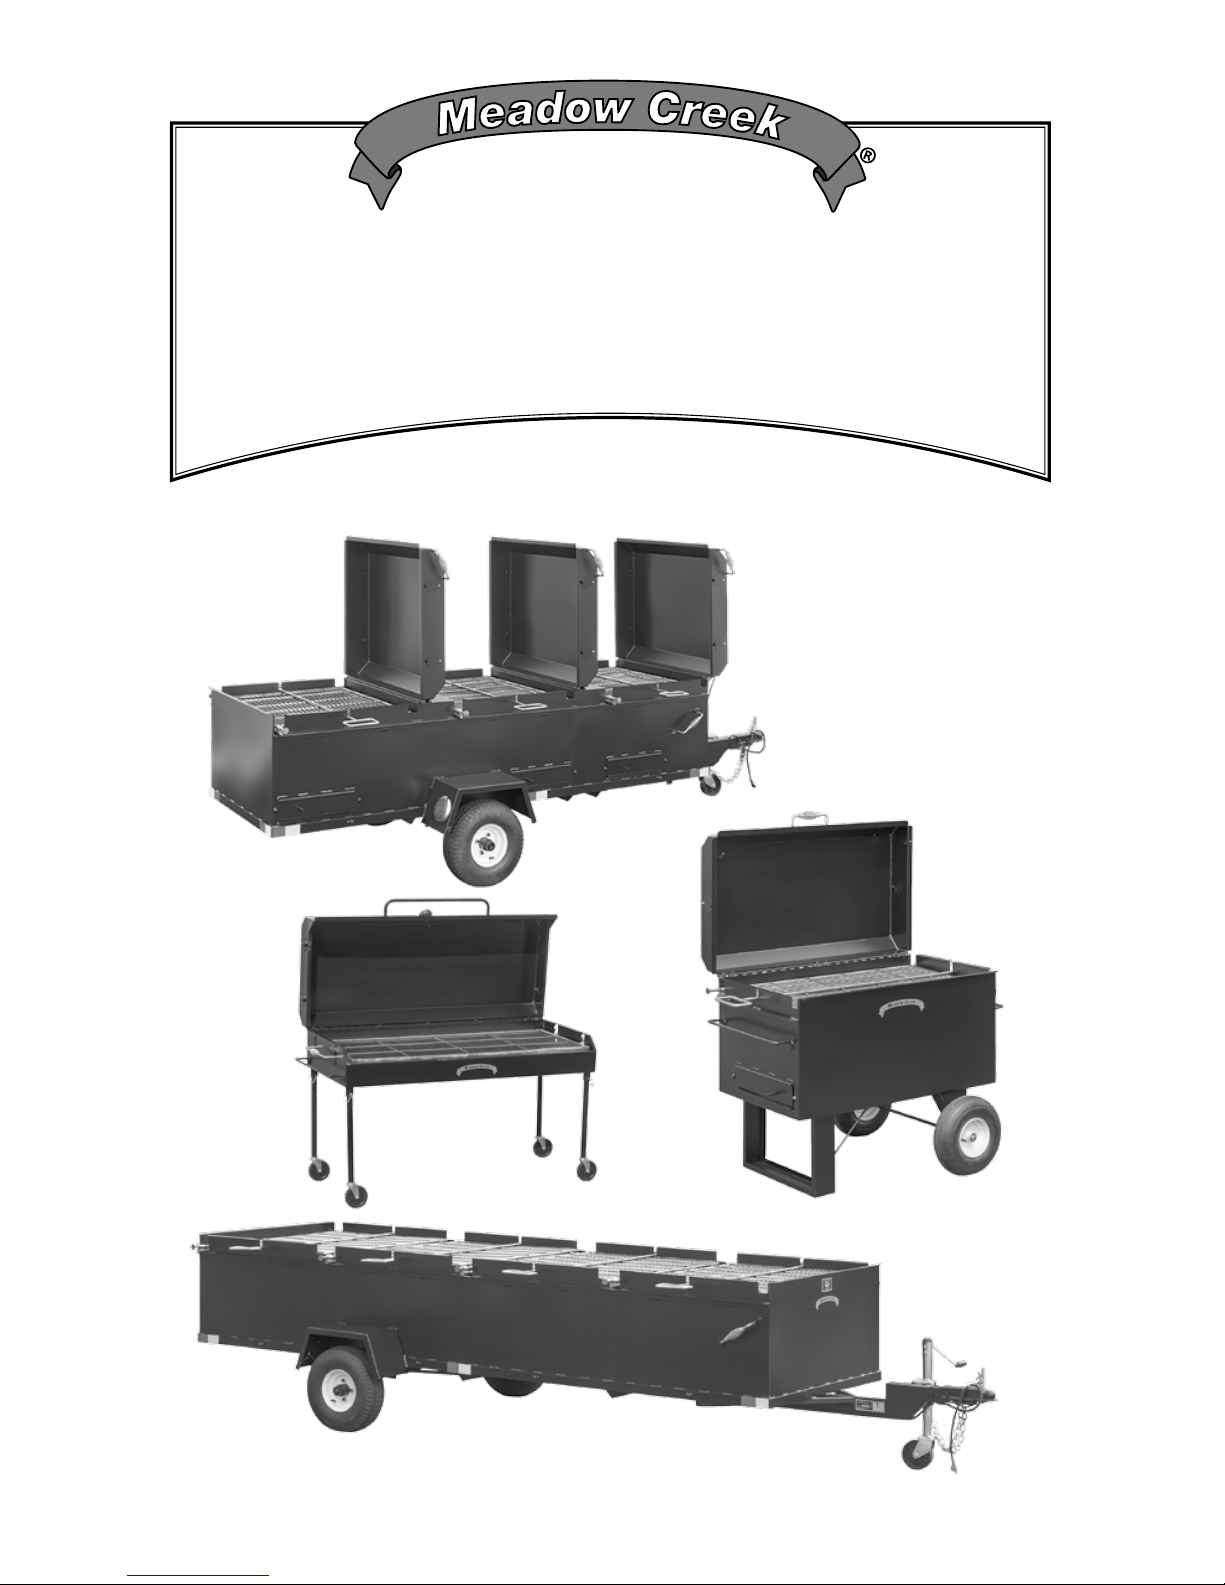
BBQ Series
Chicken Flippers & Flatbeds

2
Thank you for purchasing a Meadow Creek BBQ cooker. It has been
built for rigorous use, with features designed for maximum results in
all venues. Following the guidelines found in this document should
provide you with years of use, and many hours of pleasure.
Overview
This document covers the use and maintenance of the BBQ Pits
(Chicken Flippers) and BBQ Flatbeds.
Meadow Creek (BBQ Series) cookers are constructed of 13 gauge
steel which has been finished with high heat paint except for food
bearing surfaces which are made of USDA approved #T304 stainless
steel.
All trailer units are road worthy and comply with standards
established by the American Trailer Association. Most trailer units
can be licensed for travel on state highways, however a certificate of
origin may be required which can be obtained from Meadow Creek.
All of the trailer units have “easy lube” hubs, which will be discussed
later.
A number of options are available for Meadow Creek equipment
and in the event that you believe that you could enhance the use or
performance of the unit that you purchased, check with your dealer
for the possibility of a factory built add-on.
“Break-In” Before First Use
Due to dust or soil from fabrication and/or shipping, racks should be
cleaned with a general purpose cleaner and hot water before food is
placed on them. Inspect the inside of the cooker and if it appears to
have dust on it, clean it as well.
To season a BBQ grill with a lid, first remove the stainless steel grate
from the cooker. Next spray the whole inside of the cooker with
cooking oil (Pam or similar). Add a small amount of charcoal, and light
using a torch or light your burner on gas models. We recommend

3
not to use lighter fluid. After charcoal is well lit, close the lid and let
charcoal burn out. Your cooker should be ready to go. For chicken
flippers with no lid, simply burn off approximately 10 lbs. of charcoal.
Maintenance
Typically, the most important thing that an owner can do following
using a cooker, regardless of which model, is to thoroughly clean
the inside and out. We use a 3500 lb. pressure washer, which
has sufficient pressure and volume to effectively clean surfaces
quickly. A common myth, which is totally incorrect, is that allowing
a build up on cooker grates enhances the flavor. Clean racks
thoroughly, removing all food and build-up from smoke and basting.
A household oven cleaner can be used on the stainless steel
grates if necessary, but should not be used on painted surfaces.
If a pressure washer is used, a good general-purpose household
cleaner is all that is necessary. Spray all surfaces of the unit
with the cleaner while it is still warm before washing with the
pressure washer. Thoroughly rinse and allow the unit to dry
before storing. Wet wood and charcoal ash create acid, which
will corrode steel over time. After coals are thoroughly cooled,
dispose of them in a responsible way. If they are still hot,
coals should be put into a safe, covered metal container.
Please Note: the inside of your cooker is painted to inhibit rusting.
Over time the paint might break down and the bare steel will start to
rust. This is normal and should be touched up as needed.
Check your unit for any loose hardware and tighten before storing.
This is especially important for trailer units. Lug nuts must be kept
tight to prevent a loose wheel from becoming a hazard in travel.
While it is infrequent that screws or nuts will become loose, it is
prudent to inspect your cooker before storing it. Common hardware
can be obtained from your local hardware store, if needed.
Check tire pressure on trailer units monthly. Under inflated tires
are not only potential hazards in travel but wear more quickly
as well. Push around units with tires need to be checked as
well to insure ease of movement and stability when in use.
Check tire wear in both units and replace when required. New
tires are usually available from your local tire source or can be
ordered mounted on rims through your Meadow Creek dealer.

4
Depending on use (once or twice per year), the dust cap covering
the wheel hub should be removed and hubs lubricated using
high quality gear grease. Pump grease into the grease fitting
until you observe excess coming out of the outer seal.
Clean cookers should always be stored in a dry place, in a storage
building or covered. If you have not purchased a cover specific to
your cooker from your dealer, cover the unit with a waterproof tarp.
Make sure to secure the tarp so that wind will not blow it off.
Touch Up
Before storing your cooker during the off season, perform all of the
steps outlined above and, using a piece of fine sandpaper, buff out
any rust spots and wipe away the dust using a clean cloth. Touch up
the area with heat resistant paint available in spray cans from your
nearest Meadow Creek dealer. After a few years, you might want to
have your whole cooker repainted by Meadow Creek or your local
dealer.
Perfect Chicken Every Time!
While it is always difficult to make concrete statements regarding
cooking on a grill, the following will provide guidelines, which in the
absence of experience, will get the job done.
Make sure you work with clean equipment and keep the chicken
refrigerated, or on ice, until you are ready to cook. It is important
that you touch the meat only with clean hands or that you wear latex
gloves.
Cooking on commercial equipment such as the Meadow Creek®
BBQ96 or BBQ144 will require approximately ¾ to 1 lb. of charcoal
per pound of chicken. Translated into terms that are useful – use
between ¾ and 1 whole 40 lb. bag of hardwood charcoal per section
in the cooker.
!WARNING! Never use lighter fluid on a cooker that has a lid.
With the ash pans relatively dry, pile the charcoal into the center of
each pan. Drench the briquettes with lighter fluid, approximately ½
to ¾ bottle per section. Allow the fluid 5–10 minutes to soak in and

5
carefully light the coals from the center first then the outside edges.
Use a long-handled lighter or propane torch.
While waiting for the coals to reach the level of usefulness, place
the chicken on the grates. Keep the skin side all facing the same
direction. This provides greater control to prevent charring. Sprinkle
seasoning on the meat, conservatively (1 lb. of seasoning will do
approximately 40–50 lbs.), and close the grate. Turn the assembly
over and season the other side. Make sure that each grate is securely
locked on both sides. This process takes place on a table, not on a
cooker.
Allow the charcoal to burn for approximately 15–30 minutes until the
majority of the coals are white around the edges. Don’t be overly
concerned that all of the coals are not lit. They will be. When the
coals are ready, spread them across the bottom of the ash pans. Mix
the unlit coals in with the other coals.
We spread less coals in the middle and more coals towards the outer
edges of the pit.
Place the grates on the cooker in the turn slots. Within 10 minutes
or so you’ll notice the chicken start to cook. Keep an eye on the
side close to the fire and turn the grates frequently to guard against
charring. 1–1½ hours later you’ll have the finest chicken you could
expect. Because the inside chambers cook hotter than the outside
you may want to move the grates mid-way through cooking, bringing
the inside ones to the outside and vice versa.
During the cooking process, there could be flare-ups in the firebox.
Although many cooks allow this as part of the process, you can
use a clean, low-pressure (Hudson type) sprayer to keep the flame
well under control. This method leaves the finished product with a
beautiful golden color, which earns compliments before people even
begin to eat.
Usually no additional charcoal is required unless more chicken is to
be cooked. Add more as needed without increasing the temperature
to a point where the meat chars before it is thoroughly cooked. The
absolute worst thing that can happen is to serve a chicken that is
not done. It is wise to remember that the weather may create some
variables, so these guidelines may vary.

6
With the grill “broken in,” make sure it is sitting level. Hook up a 30 lb.
or larger LPG tank to the grill. We recommend a 42 lb. tank with no
OPD valve.
Check all the gas valves to ensure they’re all in the off position.
Slowly turn on the tank valve. Remove the SS grate and SS burner
covers. Wait a few minutes, then use a long stemmed lighter & hold
flame to pilots.
When all pilots are lit, replace burner covers. Replace SS grate.
If your grill has a lid, open lid, then open burner valves as needed 1,
2, or 3. Listen for the whooshing sound as burners light.
Turn burner valves up or down as needed to control temperature. You
can also raise or lower grate for additional temperature control.
When done, turn all valves to the off position. Close LPG tank, &
clean up using the maintenance guidelines on page 3 of this manual.
With the grill “broken in,” make sure it is on a level surface, and
remove the grate. Add approximately 20 lbs. charcoal, depending
which size grill you’re using. Fix charcoal on a pile, then light safely.
We recommend using a torch. Lighter fluid can contaminate your
grill lid, if it has one. Let charcoal burn 15-30 minutes or until most
charcoal has white edges. Spread out & let burn another 15 minutes.
Spread charcoal as evenly as possible.
You should be ready to go.
When done, let all charcoal burn out. Then clean up using the
maintenance guidelines on page 3 of this manual.
To Grill with the BBQ Gas Flatbeds
Grilling with your BBQ Flatbed using Charcoal
7
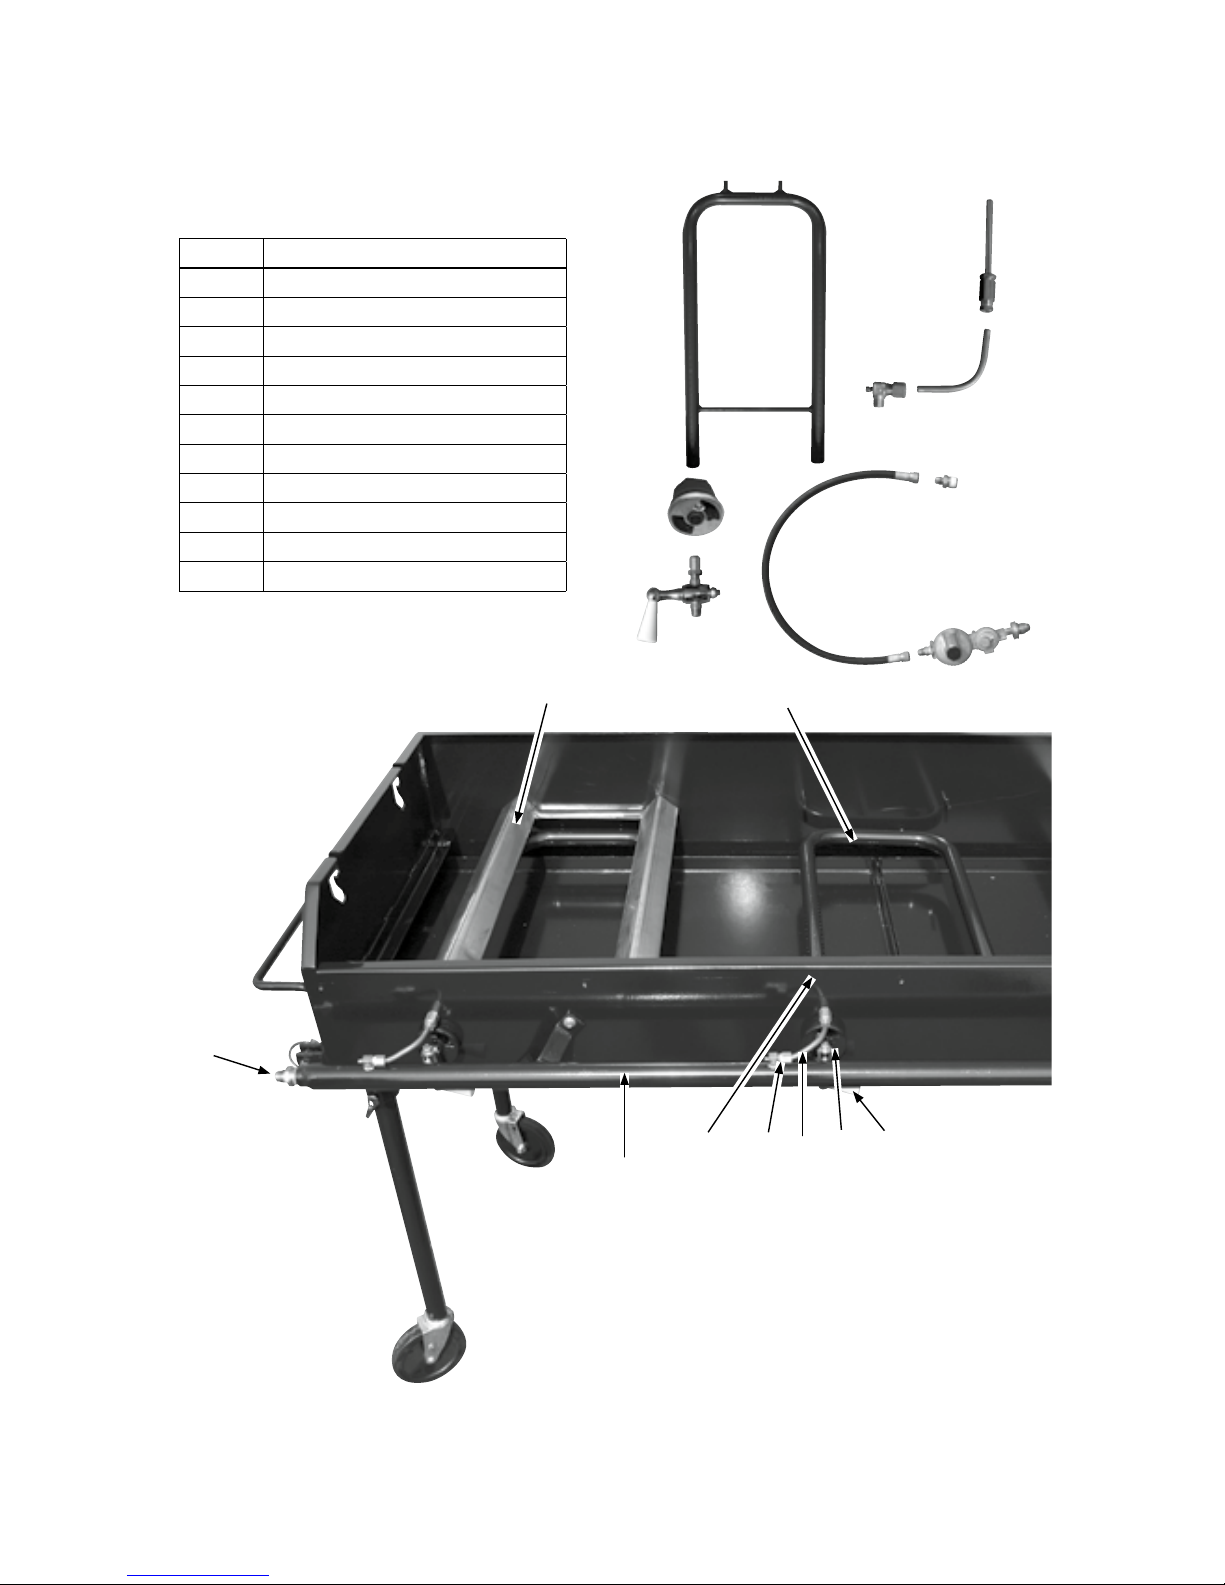
Item # Description
1 Stainless Steel Burner Shields
2 Loop Burner
3 Gas Valve
4 Air Mixing Chamber
5 Copper Tubing
6 Pilot Valve
7 Pilot Assembly
8 Manifold
9 Brass Reducer
10 ¼" Hose
11 2-stage Regulator
BBQ60G Gas Parts Breakdown
12
3
3
4
4
5
6
56
7
7
8
9
2
9
10
11

8
Meadow Creek Welding, LLC
Equipment Warranty
Meadow Creek Welding, LLC (Meadow Creek) warrants to the purchaser and
the ultimate original retail purchaser that the product manufactured by Meadow
Creek is free from defects in material and workmanship under normal use and
service for a period of one year from the date of original sale (the “Warranty
Period”). All Stainless Steel grates on Meadow Creek units are warranted for 25
years against rust and weld failure that may occur under normal use.
THIS WARRANTY IS EXPRESSLY IN LIEU OF ALL OTHER
WARRANTIES AND REPRESENTATIONS, EXPRESSED OR IMPLIED,
AND ALL OTHER OBLIGATIONS OR LIABILITIES ON THE PART OF
MEADOW CREEK WELDING, LLC, INCLUDING BUT NOT LIMITED
TO ANY WARRANTY OR MERCHANTABILITY OR FITNESS FOR A
PARTICULAR PURPOSE OR USE.
Meadow Creek’s liability and obligation is limited to repair or replacement
of the product, at Meadow Creek’s option, provided the purchaser returns the
claimed defective product to Meadow Creek, or Authorized Distributor, with
transportation charges prepaid within the Warranty Period, and an examination
of the product by Meadow Creek discloses the product is defective. If the
product is not returned within the Warranty Period, Meadow Creek will have
no further liability or obligation to the purchaser and the ultimate original retail
purchaser.
Meadow Creek makes no warranty with respect to tires, wheels, brake systems,
axle assemblies, hitches, burners, valves, regulators, tanks, rotisserie motors,
other than the Warranty offered by the respective manufacturer of those items.
Meadow Creek makes no warranty with respect to paint and its longevity.
This warranty does not cover said product which has been repaired or altered
outside of the factory of Meadow Creek Welding, LLC. in any way as to, in the
judgment of Meadow Creek, affect the stability, reliability, safety or performance
of the product. This warranty does not cover damage or product failure caused
by accident, misuse, negligence, tampering, act of war, overloading, improper
attachment, or improper maintenance. Meadow Creek is held harmless for any
injury or death caused by the misuse of this product.
This warranty excludes any and all liability for incidental or consequential
damages.
This warranty gives you specic legal rights providing said product is put to its
proper designated use.
This manual suits for next models
3
Table of contents
Popular Grill manuals by other brands

tepro
tepro KEY WEST 1065N instruction manual

AMPTO
AMPTO SACL-85.212.0P225-A instruction manual

höfats
höfats CRATE quick start guide

tepro
tepro KEANSBURG 6 user manual

Dansons Group
Dansons Group Pit Boss Austin XL PB1000XLW1 Assembly and operation instructions

Tramontina
Tramontina TCP 320 Safety and instruction manual

Taylor
Taylor C820 Original operating instructions

Viking
Viking VGRT242T installation instructions

Linea 2000
Linea 2000 DOMO JUST US DO1005G Instruction booklet

Royal Catering
Royal Catering RC-EG001 user manual

Oster
Oster panini maker/grill user guide

Gastroback
Gastroback Raclette Fondue Set Family and Friends operating instructions


