Mechdyne Corporation TGX User manual

TGX
User Guide
Version 2.2
Mechdyne Corporation
June 2021

TGX User Guide V2.2 ii
TGX USER GUIDE VERSION 2.2
Copyright© 2021 Mechdyne Corporation
All Rights Reserved. Purchasers of TGX licenses are given limited permission to reproduce this manual,
provided the copies are for their use only and are not sold or distributed to third parties. All such copies
must contain the title page and this notice page in their entirety.
The TGX software program and accompanying documentation described herein are sold under license
agreement. Their use, duplication, and disclosure are subject to the restrictions stated in the license
agreement. Consistent with FAR 12.211 and 12.212, Commercial Computer Software, Computer
Software Documentation, and Technical Data for Commercial Items are licensed to the U.S. Government
under vendor's standard commercial license.
This publication is provided “as is” without warranty of any kind, either express or implied, including, but
not limited to, the implied warranties of merchantability, fitness for a particular purpose, or non-
infringement. Any Mechdyne Corporation publication may include inaccuracies or typographical errors.
Changes are periodically made to these publications, and changes may be incorporated in new editions.
Mechdyne may improve or change its products described in any publication at any time without notice.
Mechdyne assumes no responsibility for and disclaims all liability for any errors or omissions in this
publication. Some jurisdictions do not allow the exclusion of implied warranties, so the above exclusion
may not apply.
TGX is a trademark of Mechdyne Corporation. Windows® is registered trademarks of Microsoft
Corporation. Linux® is registered trademark of Linus Torvalds. NVIDIA® are registered trademarks of
NVIDIA Corporation. Red Hat® and Red Hat Enterprise Linux® are registered trademarks of Red Hat, Inc.
Third-party source code and licenses are redistributed, if required, with TGX.
TGX User Guide v 2.2 1
WELCOME TO TGX
We created TGX for the designer, engineer, scientist, creative, or other power user with graphic
intensive applications, large data sets, and a desire to visualize their data at extreme resolutions.
TGX is:
Perfect for the Hybrid IT ecosystem. Connect to physical workstations, Virtual machines, or the
Cloud across the enterprise.
Workforce mobility. Connect from the office, home, conference room, partner site, your boss’s
office, coffee shop, airport, or from the field.
Multi-user collaboration. Connect with your team down the hall or across the globe with a like-
local experience providing greater productivity.
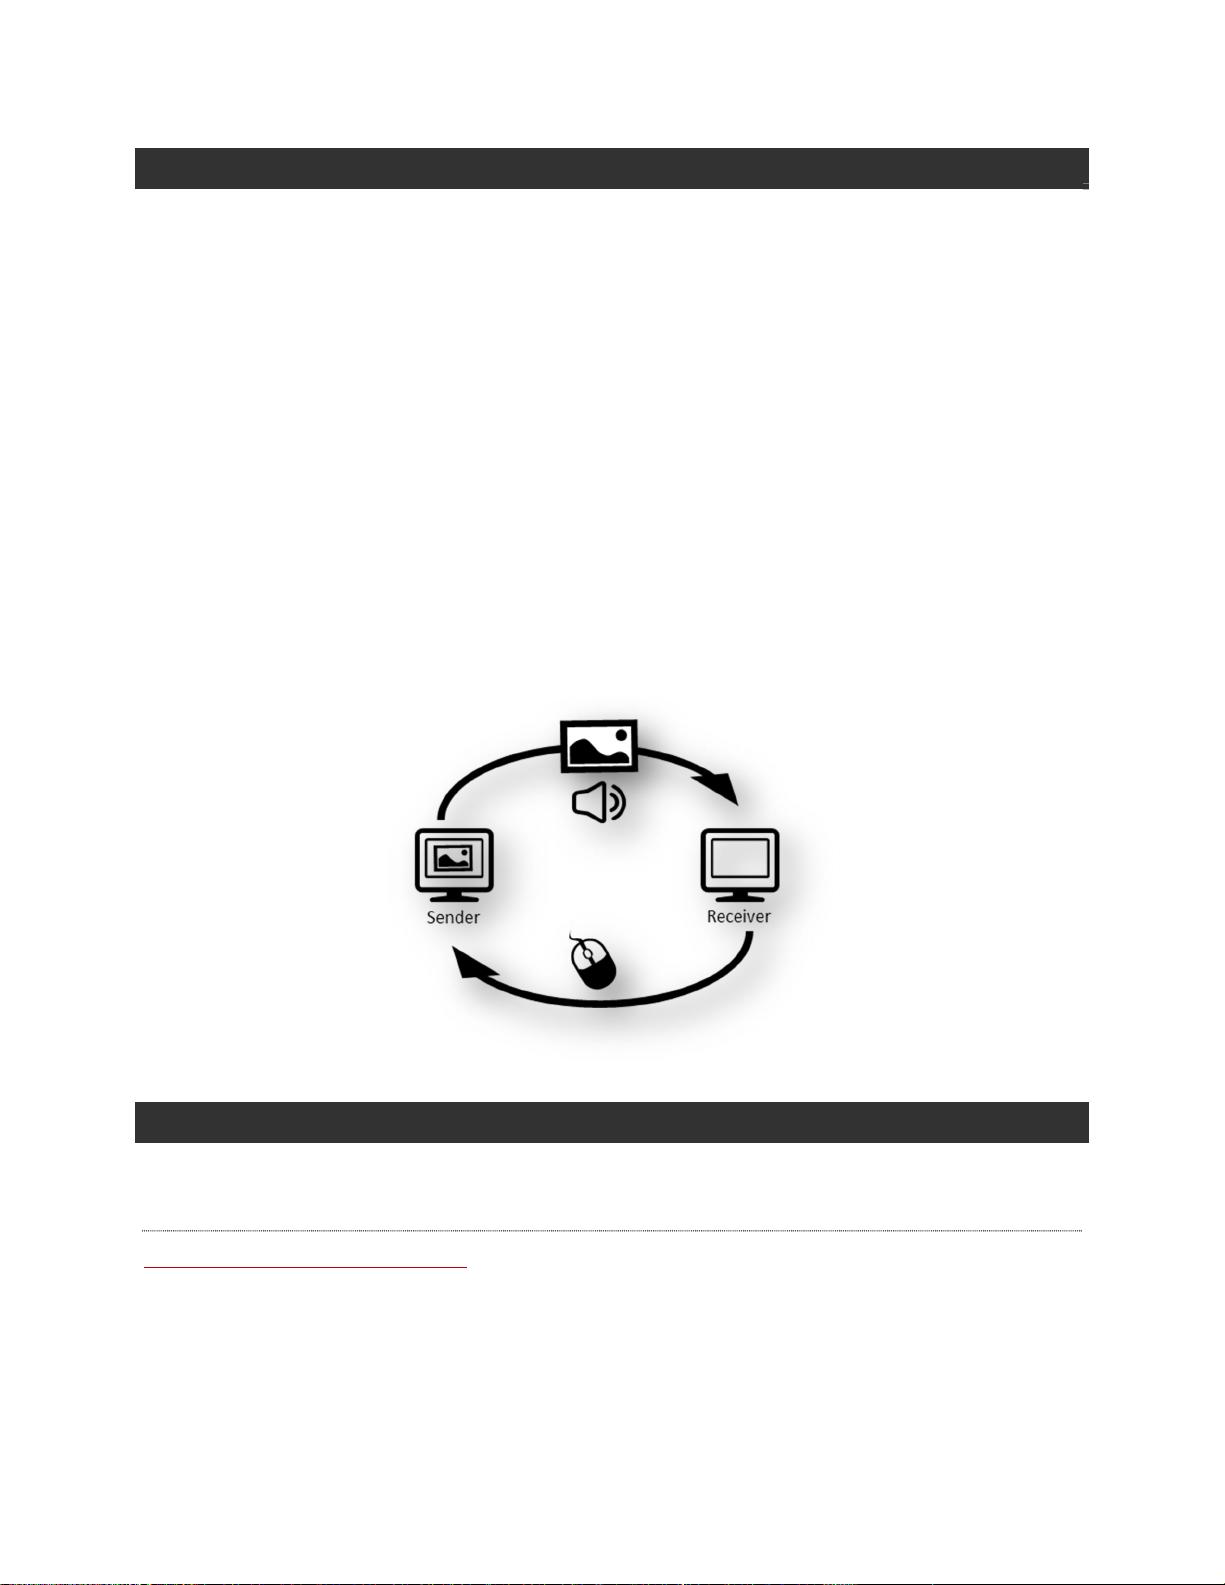
Utilizing a remote desktop protocol requires two components: a TGX sender and a TGX receiver. The
TGX sender resides on a remote workstation that runs powerful applications, located in the office, or the
data center, or the cloud. The TGX receiver resides on the user’s laptop, desktop computer, or thin
client. The sender provides video/audio to the receiver which in turn provides control using keyboard,
mouse, or USB device.
TECHNICAL SUPPORT
Please submit questions and issues by email. A ticket will be created in the TGX support portal.
EMAIL
software_support@mechdyne.com

TGX User Guide v 2.2 2
TERMINOLOGY
COLLABORATORS
Users other than the desktop owner that are connected to a sender via TGX.
CREDENTIALS
The information (Domain, Username, and Password) required by TGX to authenticate the user and
initiate (log on) or reconnect to a desktop session.
CROSS-PLATFORM
If the sender operating system is different than the receiver operating system, it is considered a
cross-platform connection.
DESKTOP LAYOUT
The number, resolution, and relative position of the logical displays comprising the desktop session.
DESKTOP SESSION
The displays, environment, and applications managed by the operating system for a user.
DESKTOP OWNER
The user that owns the current desktop session, typically the first user to login to the sender either
directly through the sender console or indirectly, via a TGX connection.
DPI
The "dots per inch" measurement of a display or desktop.
FINGERPRINT
A unique number which is a reduced representation of a TLS certificate. If using a self-signed certificate,
the receiver will prompt the user to accept the fingerprint.
MINIMAP
The MiniMap is a miniature image of the full desktop of the sender. If the desktop resolution of the
sender is larger than the visible region managed by the TGX Receiver application, the MiniMap will
appear allowing the user to select the portion of the desktop to show on the receiver.
RECEIVER
The local computer that receives the desktop (with audio) from the sender and provides
keyboard/mouse control.
SENDER
The remote workstation which shares desktop and applications to a receiver.

TGX User Guide v 2.2 3
SINGLE LOGON
TGX will use the receiver user's credentials on the local device to automatically authenticate the TGX connection
and initiate (log on) or reconnect to a desktop session. When single logon is deactivated, the user has to enter his
credentials twice: first during TGX connection then on the Windows login screen.
TGX LAUNCHER
A GUI application that initiates TGX connections from a receiver to a sender.
TGX RECEIVER
A GUI application, installed on the receiver, that shows the sender desktop and provides keyboard,
mouse to the sender. This application includes the TGX Toolbar for real-time control of the connection.
TGX SESSION
The period where at least one user (desktop owner or collaborator) is connected to the sender’s active
desktop session.
TGX TOOLBAR
An interactive menu that allows the user to control the experience provided by the TGX Receiver
application.
CONNECTING TO A REMOTE DESKTOP
All connections are initiated by the receiver to the sender. The sender is passively listening on the
default port waiting for a connection request. The receiver must be able to reach the sender via
hostname or IP address. This requires both computers to be on the same network or be joined by a
Virtual Private Network or use of a third-party Gateway to manage port forwarding.
TGX provides three ways to initiate a connection:
Use the TGX Launcher GUI which is installed on the receiver as described in the next section.
Use a TGX connection file as described in the TGX Connection File and Broker Integration Guide. A
connection file is identified by a ‘.tgx’ suffix and contains the information necessary to establish a
session with the sender without requiring the Launcher GUI. The connection file can be manually
created as a desktop icon.
Use a third-party Connection Broker which is integrated with TGX using a connection file. See
documentation provided with third-party software (e.g., Leostream, DELFI, others) and the TGX
Connection File and Broker Integration Guide.

TGX User Guide v 2.2 4
TGX LAUNCHER APPLICATION
MAKING A CONNECTION
Start TGX Launcher.
On Windows, the Launcher can be found as a desktop icon or in the Start menu.
On Linux, Click Applications -> Internet -> Mechdyne TGX
On Mac, Open Finder, select Applications, then double click the TGX Icon.
Computer: enter the hostname or IP address of the computer running the TGX Sender or use the
chevron to select from a list of previously visited senders (stores up to 10). With each sender,
the following preferences are also stored: Display settings, Toggle value to start TGX in full
screen mode, Image Quality setting, and Username. Each stored sender item has an X to delete
the sender from the list.
Display settings: identify the setup of the sender’s desktop layout (number of displays,
resolutions, and positions) according to the following options:
Match All monitor(s) – The sender desktop will be reconfigured to match all the
monitors of the Receiver.
Match selected monitor(s) - Select monitors visually using the Launcher GUI. When
selecting a subset of monitors, the monitors must be next to each other. In the picture
above, the left and middle monitors could be selected or the middle and right monitors,
but not the left and right monitors. When a monitor is selected, it turns blue. If a
monitor cannot be selected, it appears greyed out.
Use Sender’s monitors – The existing desktop configuration on the Sender is used.
Note: Requests to modify the sender desktop will be ignored if any of the following are true:
a) The user connects as a collaborator,
b) The sender is configured to disable display configuration,
c) The sender does not have an NVIDIA Quadro or GRID GPU. Currently TGX does not
support reconfiguration of Sender with NVIDIA Geforce GPU.
TGX User Guide v 2.2 5
Start TGX full screen: Select this box if you want TGX to launch in full screen mode. Leaving it
unchecked TGX will start in windowed mode.
Other settings: click on the chevron next to Other Settings to expand the option group. By
default, the group is collapsed. Currently Other Settings includes the image quality slider.
The image quality can be set in increments of 16 over the range of 4-100. The default image
quality setting of 68 is highly recommended to produce great image quality at good frame rates
for the majority of use cases and network conditions. The maximum TGX image quality is
approximately that of a Blu-ray video. TGX will adjust performance accordingly to fit within the
available network bandwidth and latency conditions. Currently, image quality can only be
adjusted when initiating a new TGX session. The higher the image quality setting, the higher the
bandwidth usage which could lead to lower frame rates on a high latency or bandwidth
constrained network.
Connect options – there are four actions available from the connect button
Connect – default connection to sender to start a TGX session
Connect with debug logging – connection to sender using debug logging
Get Logs – If you encounter any failures or issues running TGX, it is important to send
logs by email to the TGX support team at software_support@mechdyne.com with a
brief description of the problem. The log collection process will connect to the sender,
request user authentication, combine the sender and receiver logs into a ZIP file for the
user to email to the TGX support team.
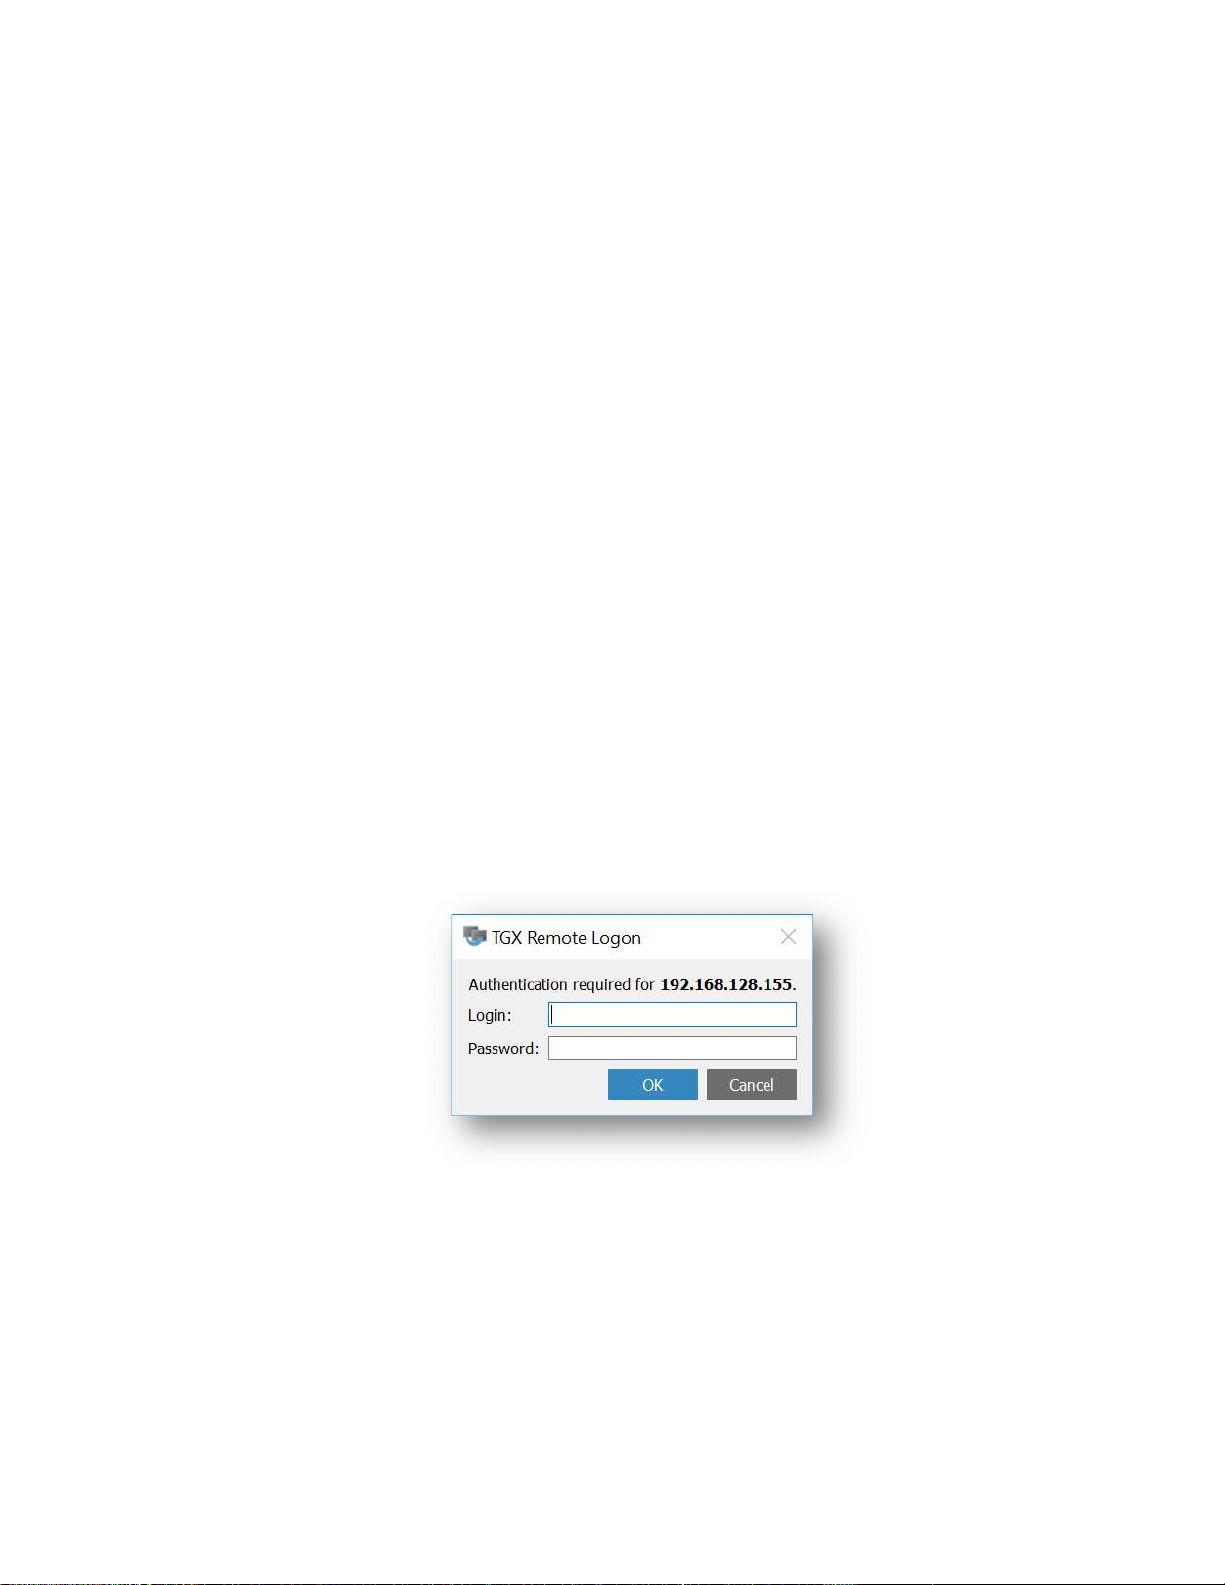
Click Connect. An authentication dialogue is provided.
Enter the login credentials required to access the remote desktop. Click OK.
Upon successful connection, the TGX Launcher GUI is replaced by the TGX Receiver GUI which shows
the Sender desktop according to the requested View Mode and Remote Display settings.
Upon closing the TGX Receiver GUI, the Launcher GUI will be displayed again.
TGX User Guide v 2.2 6
HELP MENU
The Help menu on the TGX Launcher can be accessed by clicking the question mark. The following
options will display:
DOCUMENTATION
Opens the folder that contains the user documentation for TGX.
ABOUT
Provides the software version and product support contact information.
POPUP DIALOGUES DURING CONNECTION PROCESS
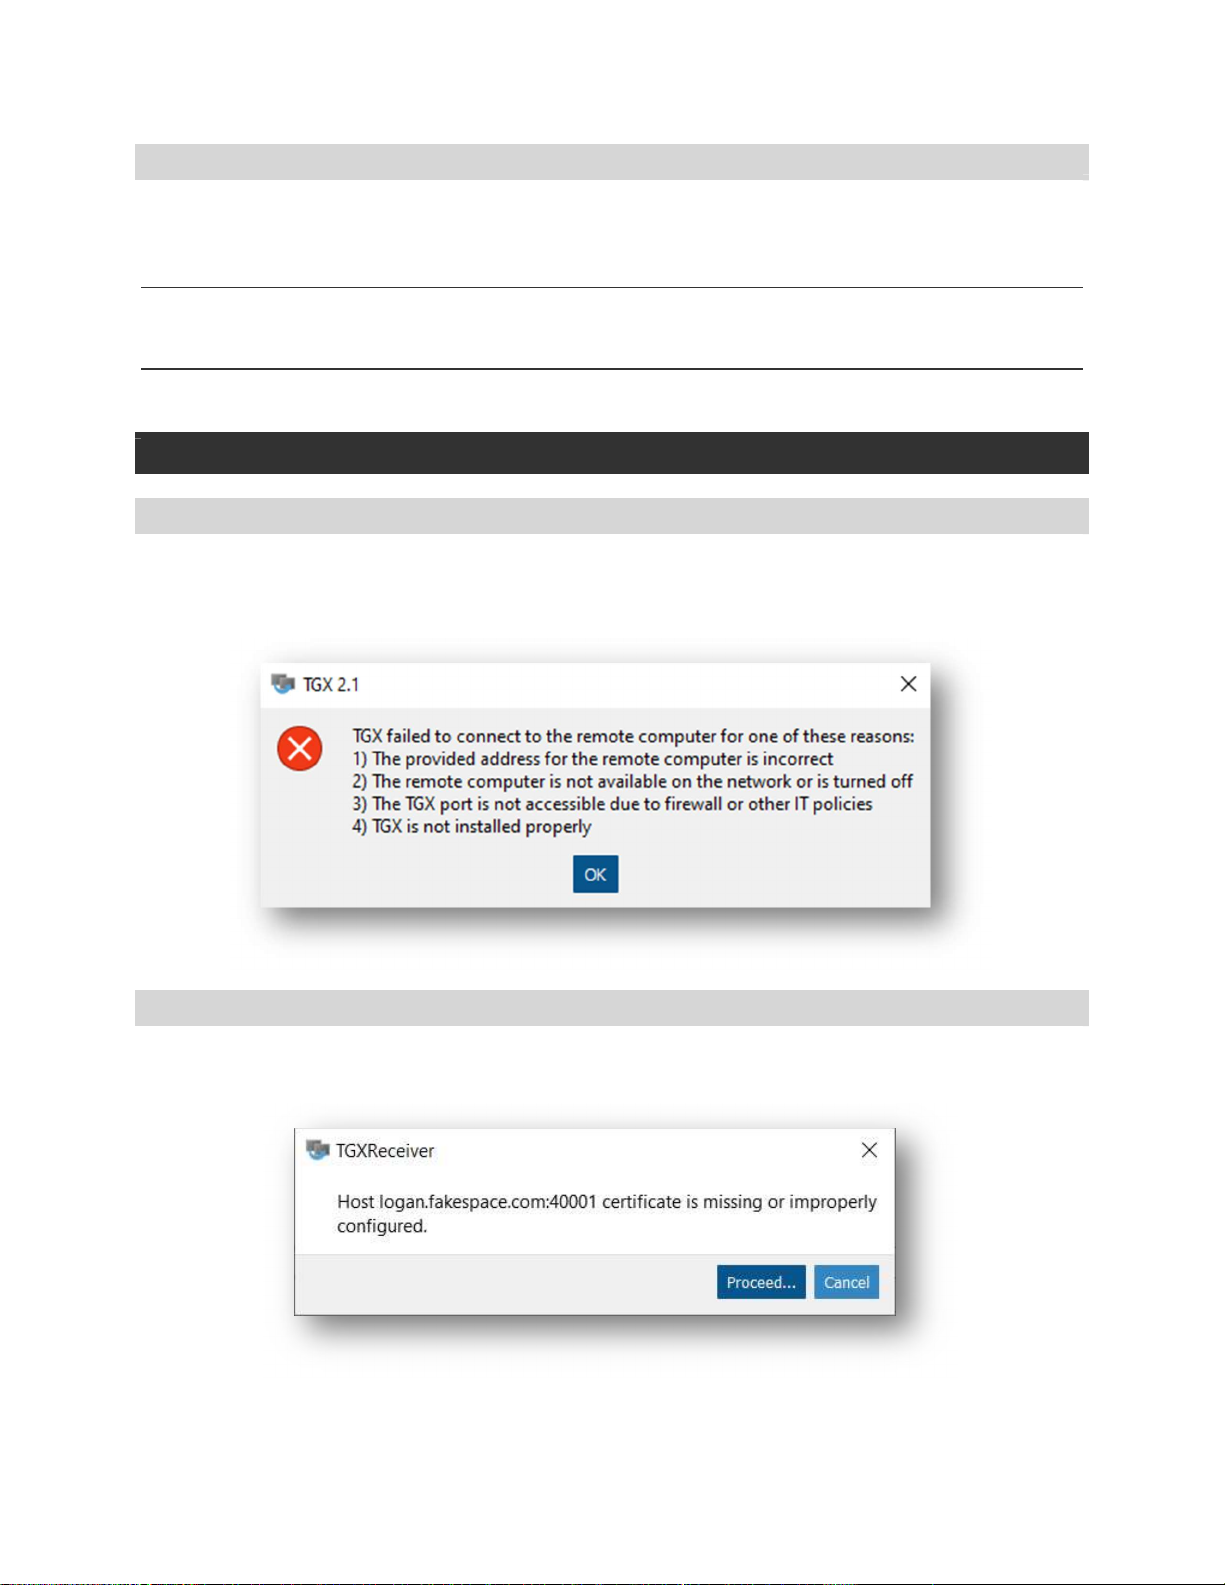
CONNECTION FAILED OR CLOSED
If the Receiver is not able to successfully connect to the Sender on the default port within the specified
timeout duration (default is 20 secs), a dialogue box is shown and must be accepted to close TGX. This is
typically the result of network issues.
NO CERTIFICATE ON SENDER
If the Sender has not been configured either with a self-signed or trusted certificate, the Receiver will
inform the user as follows:
If you are certain you are connecting to the correct host, you may choose to proceed. Please contact
your IT group to correct the TGX Sender installation.
TGX User Guide v 2.2 7
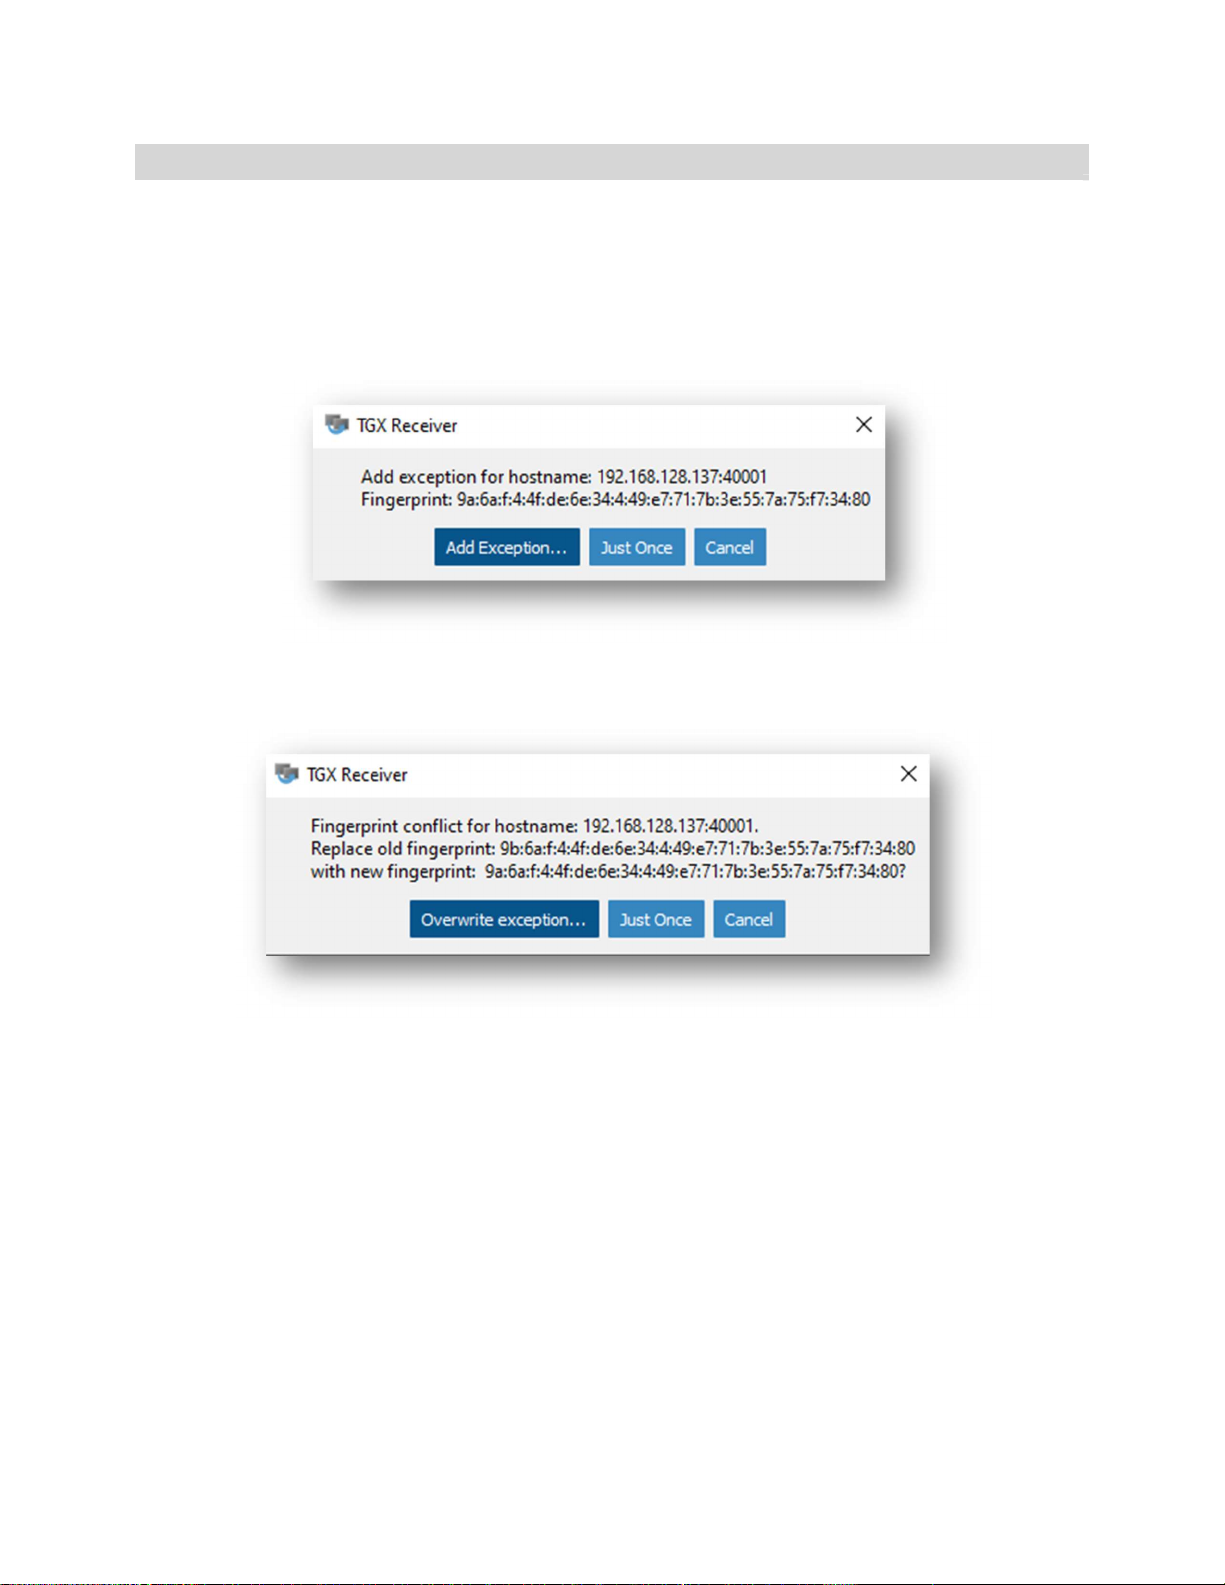
FINGERPRINT EXCEPTION
If this is a first-time connection to a specific sender and you are using a self-signed SSL certificate
(installed by TGX or your IT group), a fingerprint exception may occur.
Select Add Exception to permanently store the fingerprint of the sender for this receiver.
Select Just Once to temporarily accept the fingerprint - this exception will appear again on the
next connection.
Select Cancel to terminate the connection.
If a Fingerprint Conflict appears, the Overwrite Exception should only be selected after the newly
identified fingerprint has been validated by your IT group.

TGX User Guide v 2.2 8
TGX RECEIVER APPLICATION
Upon successful connection, the TGX Receiver application will be displayed according to the settings
specified during the connection initiation. It consists of a graphical area that contains the desktop of the
sender and a Toolbar. If your mouse is within the graphical area, all inputs will be sent to the sender.
Move your mouse out of the TGX Receiver application to interact with the Receiver PC, this may require
changing the window mode to Restore. If the TGX Toolbar is not visible, move your mouse to top of the
screen and the TGX Toolbar will drop down.
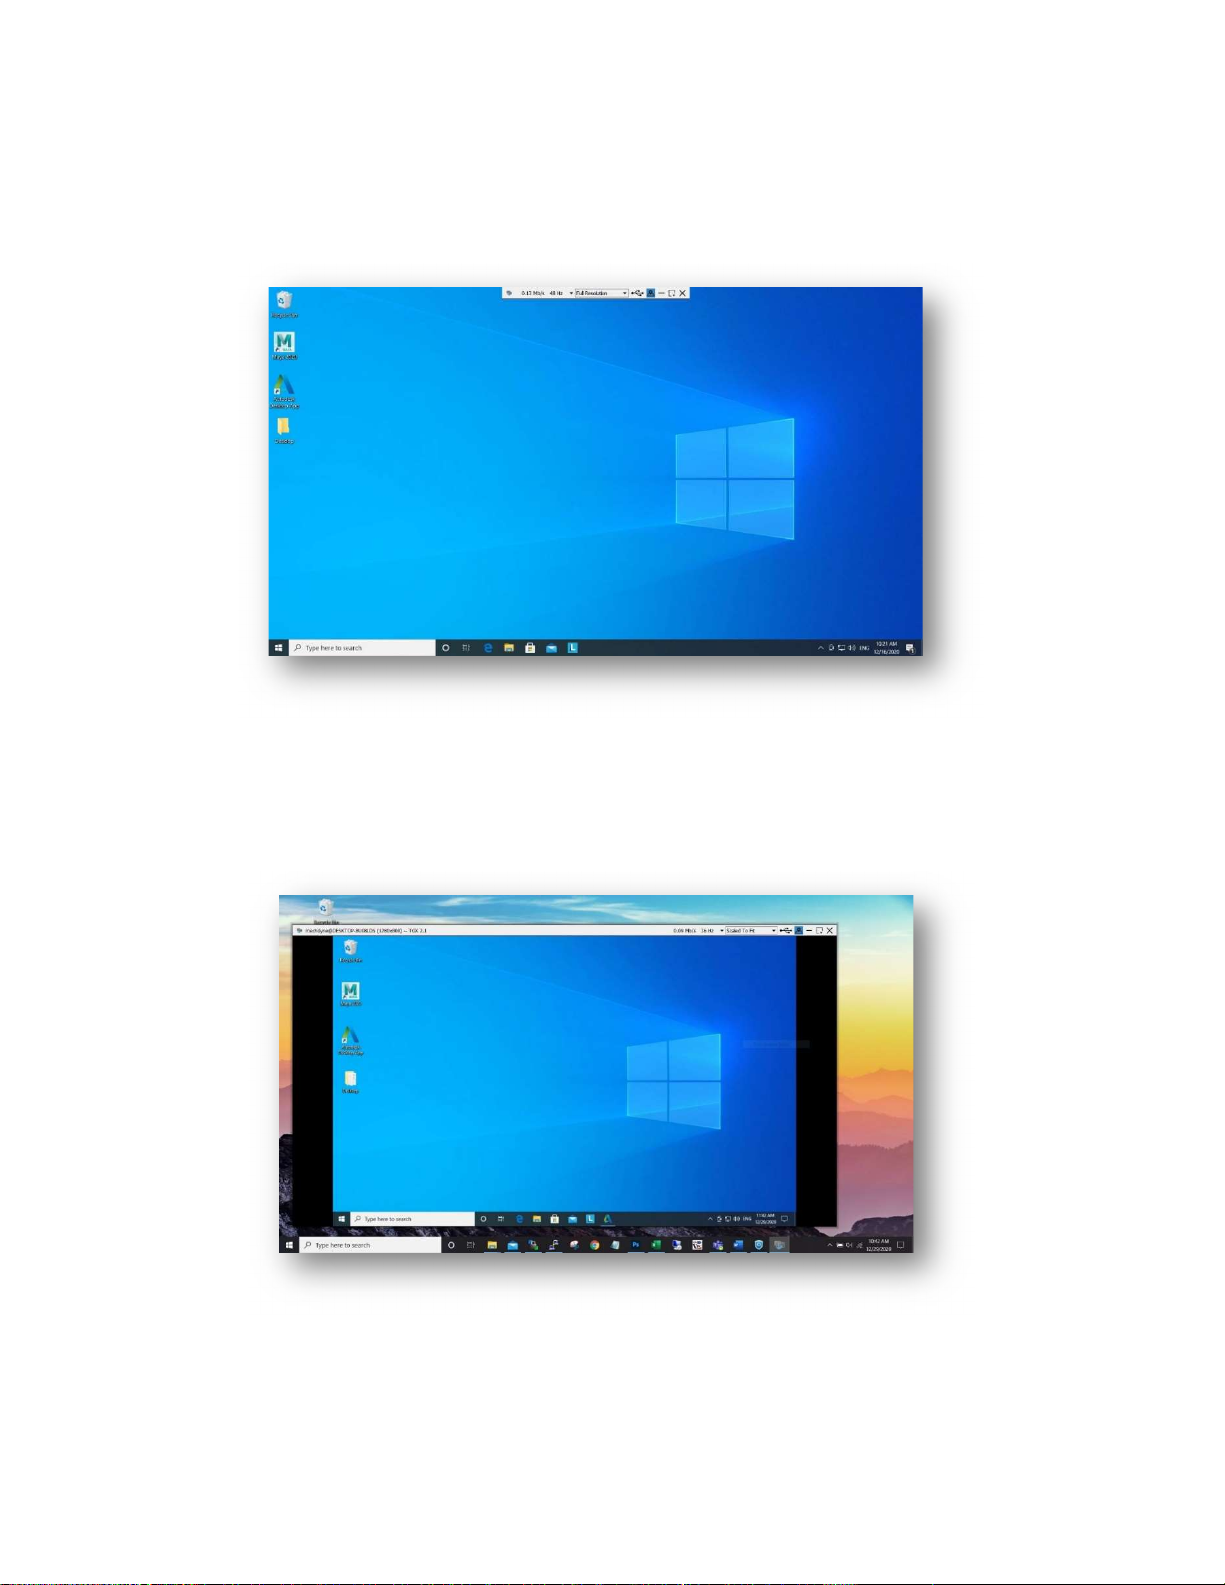
In the example shown below, the TGX Receiver is in “windowed” mode so the Microsoft Windows
border is shown and contains the Username (mechdyne), the Sender hostname (DESKTOP-BUO8LDS),
the Sender desktop resolution (1920x1080), current bandwidth (0.12 Mb/s), current framerate (48Hz),
and TGX version (TGX 2.1). In windowed mode, TGX Receiver window can be moved and resized as
provided by the operating system.
Since the sender desktop is larger than the window of the TGX Receiver, the MiniMap is visible and
illustrates that the lower left portion of the sender is visible.
The MiniMap controls the portion of the Sender desktop shown within the graphical area of the TGX
Receiver. To select a region, left click inside the MiniMap and move the mouse. The MiniMap does
occlude a portion of the Sender desktop. To move the MiniMap to a different location, right click inside
the MiniMap and move the mouse. There is a toggle button on the Toolbar to show or hide the
MiniMap.
TGX User Guide v 2.2 9
In the example below, the TGX Receiver is in Full-Screen mode so that the Sender desktop totally covers
the Receiver desktop. The MiniMap and Window border are unnecessary because the resolutions
match. The Toolbar will collapse upward and be hidden until the user moves the mouse over the top of
the screen. To access the Receiver desktop, TGX can be minimized or switched to Windowed mode.
In the example below, the TGX Receiver is in Windowed mode using “Scaled to Fit” instead of “Full
Resolution”. TGX scales the sender desktop to fit within the Window. The scaling does not distort the
image. In this case the aspect ratio of the window is a little taller than the aspect ratio of the sender
desktop which results in black bars above and below the sender desktop. The MiniMap is unnecessary
in “Scaled to Fit” mode.

TGX User Guide v 2.2 10
TGX TOOLBAR
The TGX toolbar is always visible in window or maximize modes. When in full-screen or multi-screen
modes, the toolbar is visible only when the mouse is positioned at the top of the screen. The TGX
toolbar shows the current bandwidth usage (in Mb/s) and frame rate (Hz). It provides an options menu,
manages disconnections, and allows changes to the target frame rate, USB redirection, view mode,
resolution mode and MiniMap visibility.
OPTIONS MENU
The TGX icon on the left of the TGX toolbar opens the Toolbar options menu.
Ctrl+Alt+Del - Select this item to access the Windows lock screen or Task Manager on the
sender desktop, Windows only.
Enable Input – Toggles the keyboard/mouse input to the sender. By default, input is enabled as
shown by the blue highlight. Click on the entry to disable input (removes blue highlight) which
may be useful during a collaboration session to prevent inadvertently taking over the mouse
during a session.
Enable Large Clipboards – By default, TGX limits synchronization of clipboards between
sender/receiver for clipboard sizes of less than 1MB. Select this function to allow sync of
clipboards up to 32MB. These settings are changeable by your IT group, see Administrator
Guide.
Enable keyboard shortcuts – Toggles the availability of keyboard shortcuts to switch between
window mode states. By default, keyboard shortcuts are not enabled. The keyboard actions are
described below under the View Mode section.
About – Provides dialog box with version information about TGX.
Audio volume slider – Control volume for audio received from the sender. This is a separate
menu on the menu bar on a Mac. This option is only displayed if the sender and receiver have
the necessary hardware to support audio.

TGX User Guide v 2.2 11
FRAMERATE CONTROL
The target framerate can be adjusted by selecting the chevron next to the bandwidth/framerate
statistics. The default target is 48 Hz, but it can be set as low as 24 Hz or as high as 60 Hz.
Note: Lower frame rates will use less bandwidth compared to higher frame rates for the same Image Quality
setting. The number to the right of the slider bar indicates the current selection.
RESOLUTION
The resolution options are Full Resolution and Scaled to Fit.
The Full Resolution mode displays the sender’s remote desktop at a one-to-one (1:1) pixel mapping.
TGX sessions initially open in this mode. The Scaled to Fit mode scales the sender desktop to fit within
the TGX Receiver window without changing aspect ratio of the sender desktop.
MINIMAP
MiniMap visibility is controlled by the toggle button located to the left of the minimize button. By
default, the MiniMap is visible and the icon has a blue highlight. To hide the MiniMap, toggle the button
and the blue highlight is removed indicating that the MiniMap is disabled. The MiniMap is never visible
if the desktop from the Sender fits within the TGX Receiver application window.

TGX User Guide v 2.2 12
MINIMIZE
Minimize the TGX Receiver to the taskbar. The keyboard shortcut is: Ctrl+Alt+N
VIEW MODE
The view mode options are available from the Square icon as shown below.
Note: For the Mac receiver, use the standard Mac title bar buttons to switch between windowed and full screen
modes.
Maximize– Select this option to change the TGX Receiver Application to Maximize mode
according to the standard Operating System convention. Only available when current view is in
Window mode. The keyboard shortcut is Ctrl+Alt+M
Restore– Select this option to restore the TGX Receiver Application to Window mode according
to the standard Operating System convention. The keyboard shortcut is Ctrl+Alt+W
Full-Screen – Select this option to expand the TGX Receiver Application to cover one monitor on
the receiver computer. The keyboard short cut is Ctrl+Alt+S
Multi-screen – Select this option to expand the TGX Receiver Application across more than one
monitor on the receiver computer. Only available if receiver has more than one monitor. The
keyboard short cut is Ctrl+Alt+D
CLOSE TGX
The X icon in the upper right corner prompts the user to Disconnect or Log Out of the TGX session.

TGX User Guide v 2.2 13
Disconnect – User will remain logged into the sender, all applications will remain open, and the
sender screen will be locked. The user can later reconnect to the sender and resume the session.
Logout – User will be logged out of the sender, all applications will close, and sender returns to
the login screen. Note button is not available when connected as a collaborator.
Cancel - Continue the TGX session.

TGX User Guide v 2.2 14
USB (WINDOWS TO WINDOWS ONLY)
To view the USB Selection GUI, Click on the USB icon from the TGX toolbar.
TGX provides support for redirecting USB devices from the receiver to the sender. This is currently only
supported for human interface device (HID) class devices, though others may work. The USB component
must be selected during install for both the sender and receiver to support this feature. This feature is
only supported on Windows (Sender and Receiver). If the feature is not installed on either the receiver
or the sender, the USB icon won’t be visible. When connected as a collaborator, the icon will be
disabled. Please contact your IT group if you need more information or assistance with configuring USB
redirection.
The USB Selection window will display the list of all USB devices connected to the receiver. Some
options will be greyed out as they are not available for redirection based on USB classes disabled in the
configuration file. For information on configuring which USB devices can be shared see the TGX
Administrator Guide – USB Redirection Configuration section.
Select the desired USB device from the list. Click Connect. A plug icon will indicate if the connection was
successful, and the device background will change to green.
Once connected, the selected USB device will no longer be available for use on the receiver until it is
disconnected
To disconnect a device, again Select a connected device from the list then click Disconnect.
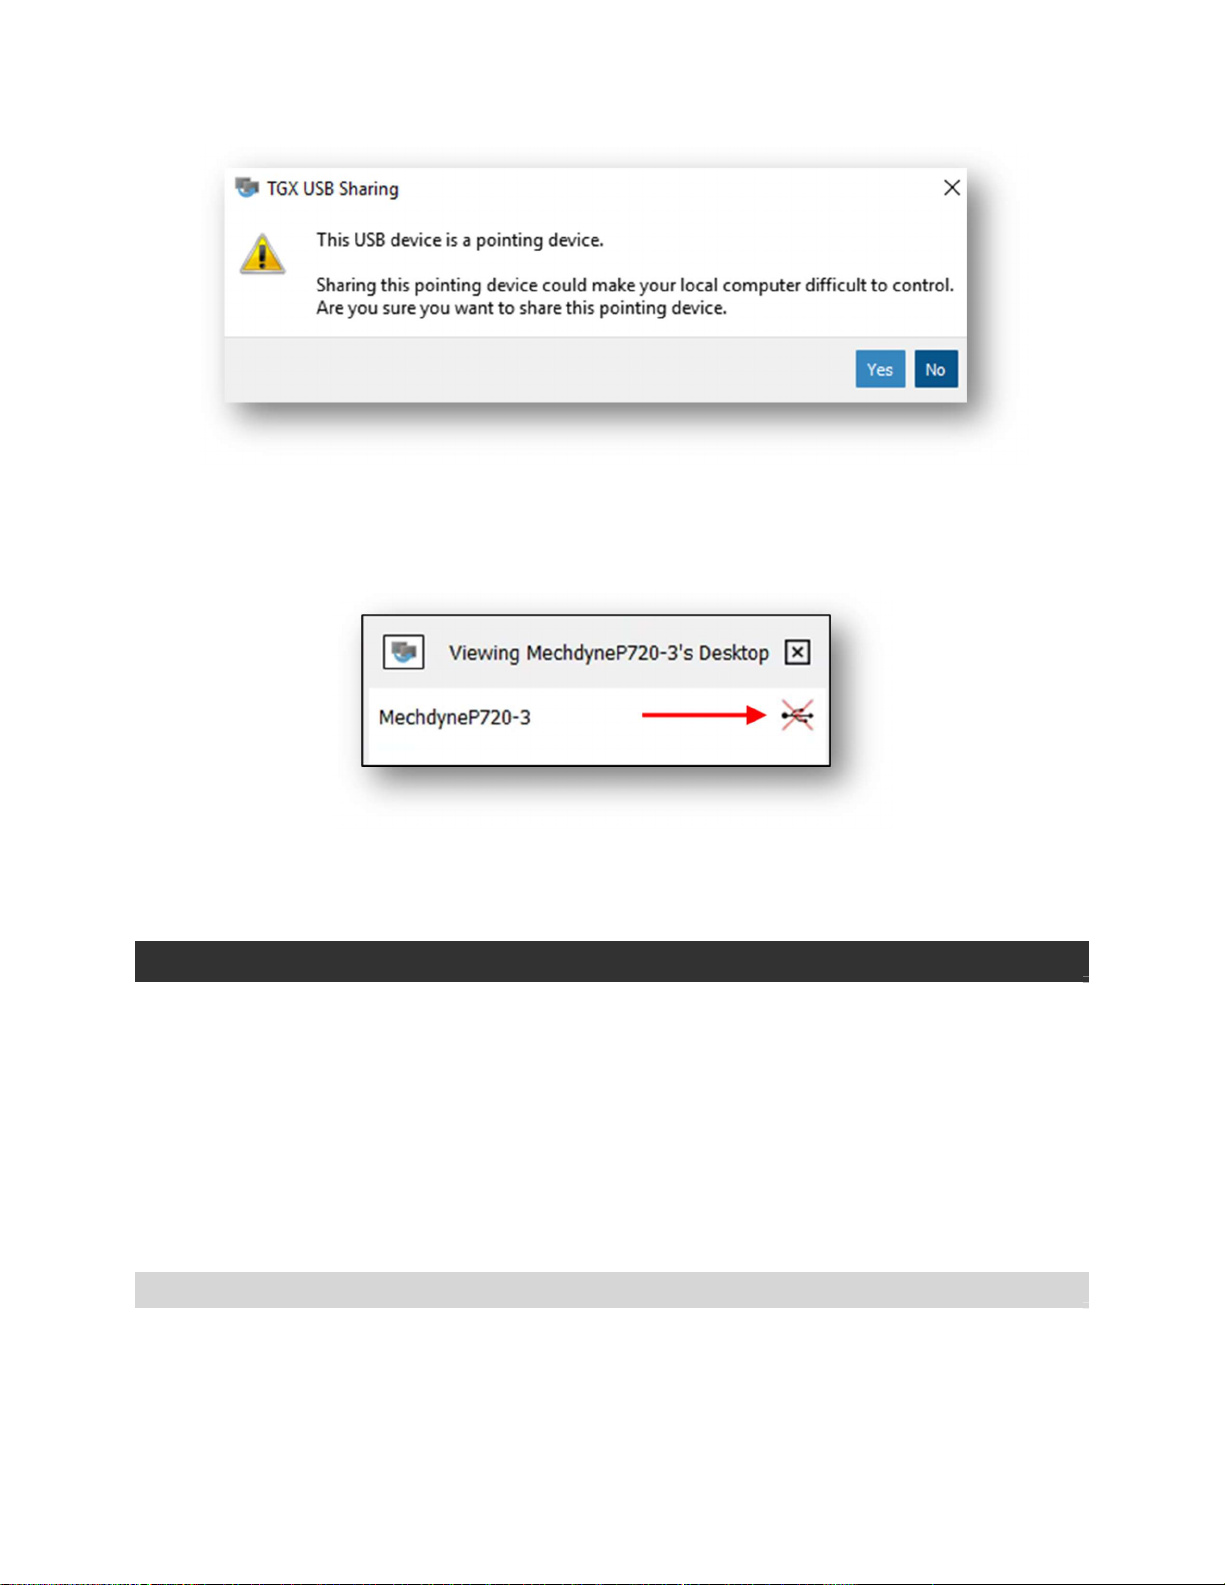
When attempting to connect a local keyboard or pointing device (i.e. mouse, tablet, touch screen) to the
remote host, a warning will appear. This is a reminder that sharing your only Input USB device could
make your local computer difficult to control.
TGX User Guide v 2.2 15
If you wish to disconnect all USB shares, especially if you have shared a device that leaves the local
computer difficult to control, open (click) the TGX icon in the system tray of the Sender. If a user is
authorized to share USB devices, clicking the USB symbol with a red X to the right of their username will
disconnect all devices.
If your device doesn’t work on the local machine after disconnecting the device from the remote host,
or after disconnecting the TGX session, run the “Reset USB” tool which is located on the Start Menu of
the receiver under Mechdyne TGX.
COLLABORATION
The first user to login to a TGX sender either directly through the console or indirectly via a TGX
connection is called the owner of the session. Anyone else that is approved by the owner to join their
TGX session is called a collaborator. The desktop owner has administrative privileges over the session
with the ability to disconnect collaborators at any time and to allow or deny keyboard and mouse input
from each collaborator. If the desktop owner disconnects then all collaborators are automatically
disconnected as well.
TGX supports multiple, concurrent collaborators. The default collaboration limit is 4, one owner and
three collaborators, but the default can be increased or collaboration can be disabled by your IT Group
(See Administrator Guide).
CONNECTION REQUESTS
Collaboration sessions are initiated from a receiver. Upon initial connection, the collaborator must
provide credentials to authenticate on the sender. If successful, a notification popup is presented to the
owner requesting their permission for the collaborator to join.

TGX User Guide v 2.2 16
Select Allow to permit the collaborator to connect
Select Deny to prevent the connection.
Check Enable input for this collaborator to automatically enable input.
If no response is selected before the timeout (15 seconds by default), the connection will be
denied. There is an exception, if the user attempting to connect has the same
authentication ID as the owner, the connection will be granted. The original session will be
disconnected and a new connection established based on the selected connection
parameters, including desktop reconfiguration. This allows the owner to reconnect from
another receiver while an existing session is active (connected) but the owner is no longer
physically available to accept the prompt.
TGX User Guide v 2.2 17
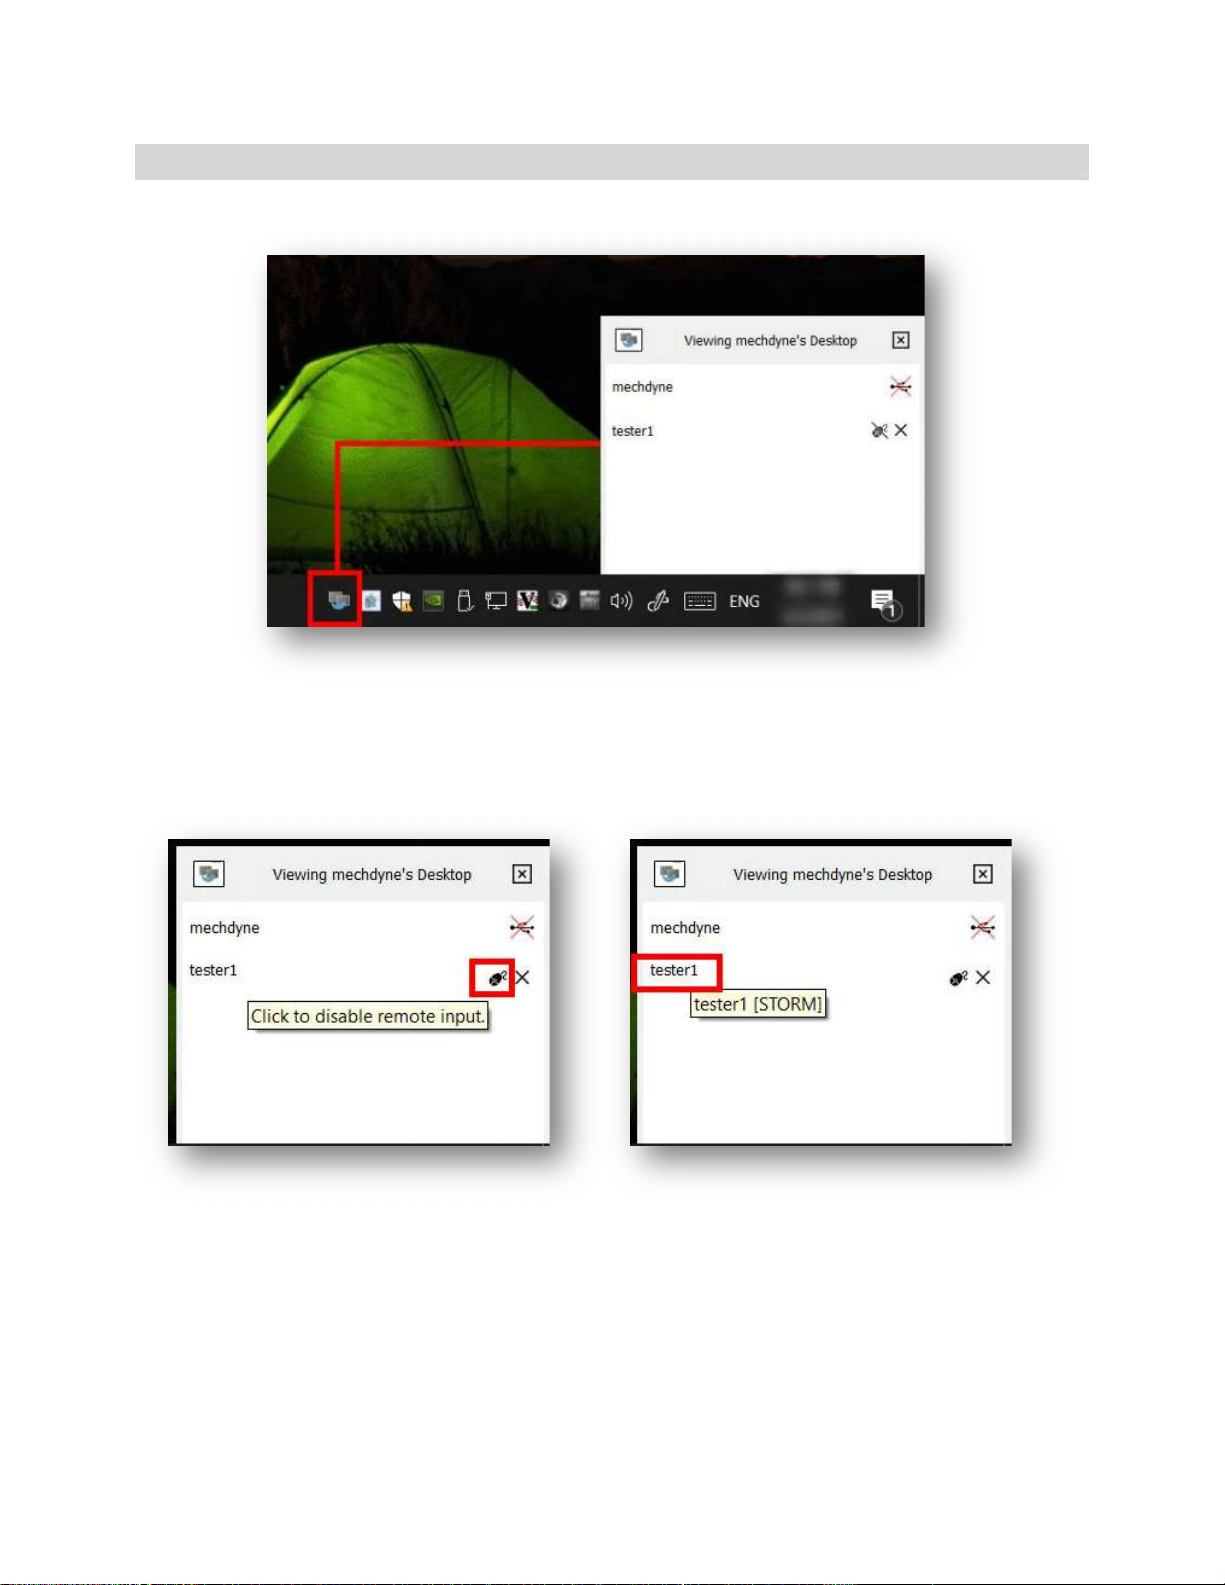
COLLABORATORS LIST
To view a list of collaborators, left click on the TGX icon in the system tray.
In this example tester1 is the collaborator and the owner (mechdyne) can click on the mouse icon to
deny this collaborator keyboard/mouse control or click on the X to disconnect them from the session. If
you hover the mouse over the collaborator name, a tooltip will be shown with the name of the
computer for this collaborator.

TGX User Guide v 2.2 18
OTHER ITEMS
AUTO-RECONNECT
If the network connection between the Receiver and Sender is lost, the Receiver will attempt to
reconnect to the Sender automatically. There may be a period of up to 30 seconds before the Receiver
detects the disruption and during this time the Receiver video will be frozen. Once detected, the
Receiver renders a semi-transparent gray overlay on the video indicating that it is in auto-reconnect
mode.
By default, TGX will attempt to reconnect five times over a period of 2-3 minutes. There is a blue banner
drawn at the bottom of the Receiver to indicate the current attempt #, as shown here:
If the network is reestablished during the auto-reconnect period, the video and audio from the Sender
desktop will automatically become live in the Receiver window. No input is required by the user as part
of the reconnect attempts or the successful connection.
At any time during the auto-reconnect period, the user may disconnect from the Sender by selecting the
“X” on the Receiver per the standard TGX disconnect process or chose to change window modes
between multi-screen, full screen, or restore. Auto-reconnect is intended for recovery from short
duration common network interruptions (e.g., VPN restart, network adapter switch, etc.)
If the VPN goes down, the user must restart the VPN connection manually as that is outside of TGX
control. If TGX connections go through a port forwarding gateway, the auto-reconnect period is only
valid for the length of time that the port remains open per the policy of the network administrator of
the client organization.
REMOTE CLIPBOARD
TGX supports copy/paste of plain text, formatted text, Excel tables, and images as part of the Clipboard
function. TGX does not support copy/paste of a file. The desktop owner is able to access the clipboard of
both the sender and the receiver and has bi-directional control between both clipboards. Collaborators
have one-way copy/paste functionality from the receiver to the sender, if the desktop owner enabled
their input. For cross-platform clipboard operation, only plain text, formatted text, and images are
supported.
AUDIO
Audio output from a sender is shared with the receiver(s). The volume of the audio from the sender is
controlled using the volume control slider in the TGX toolbar on each receiver. If the TGX window is
minimized, the sound is paused on the receiver until the TGX window is restored. TGX sends the audio
associated with the sender’s default speaker, so ensure your applications are set to use this speaker.
KEYBOARD AND MOUSE
When the receiver’s mouse cursor is over the TGX window, the cursor icon of the sender’s mouse will be
displayed. The mouse cursor of a collaborator that does not have mouse/keyboard control will be
indicated by an X.
Table of contents


