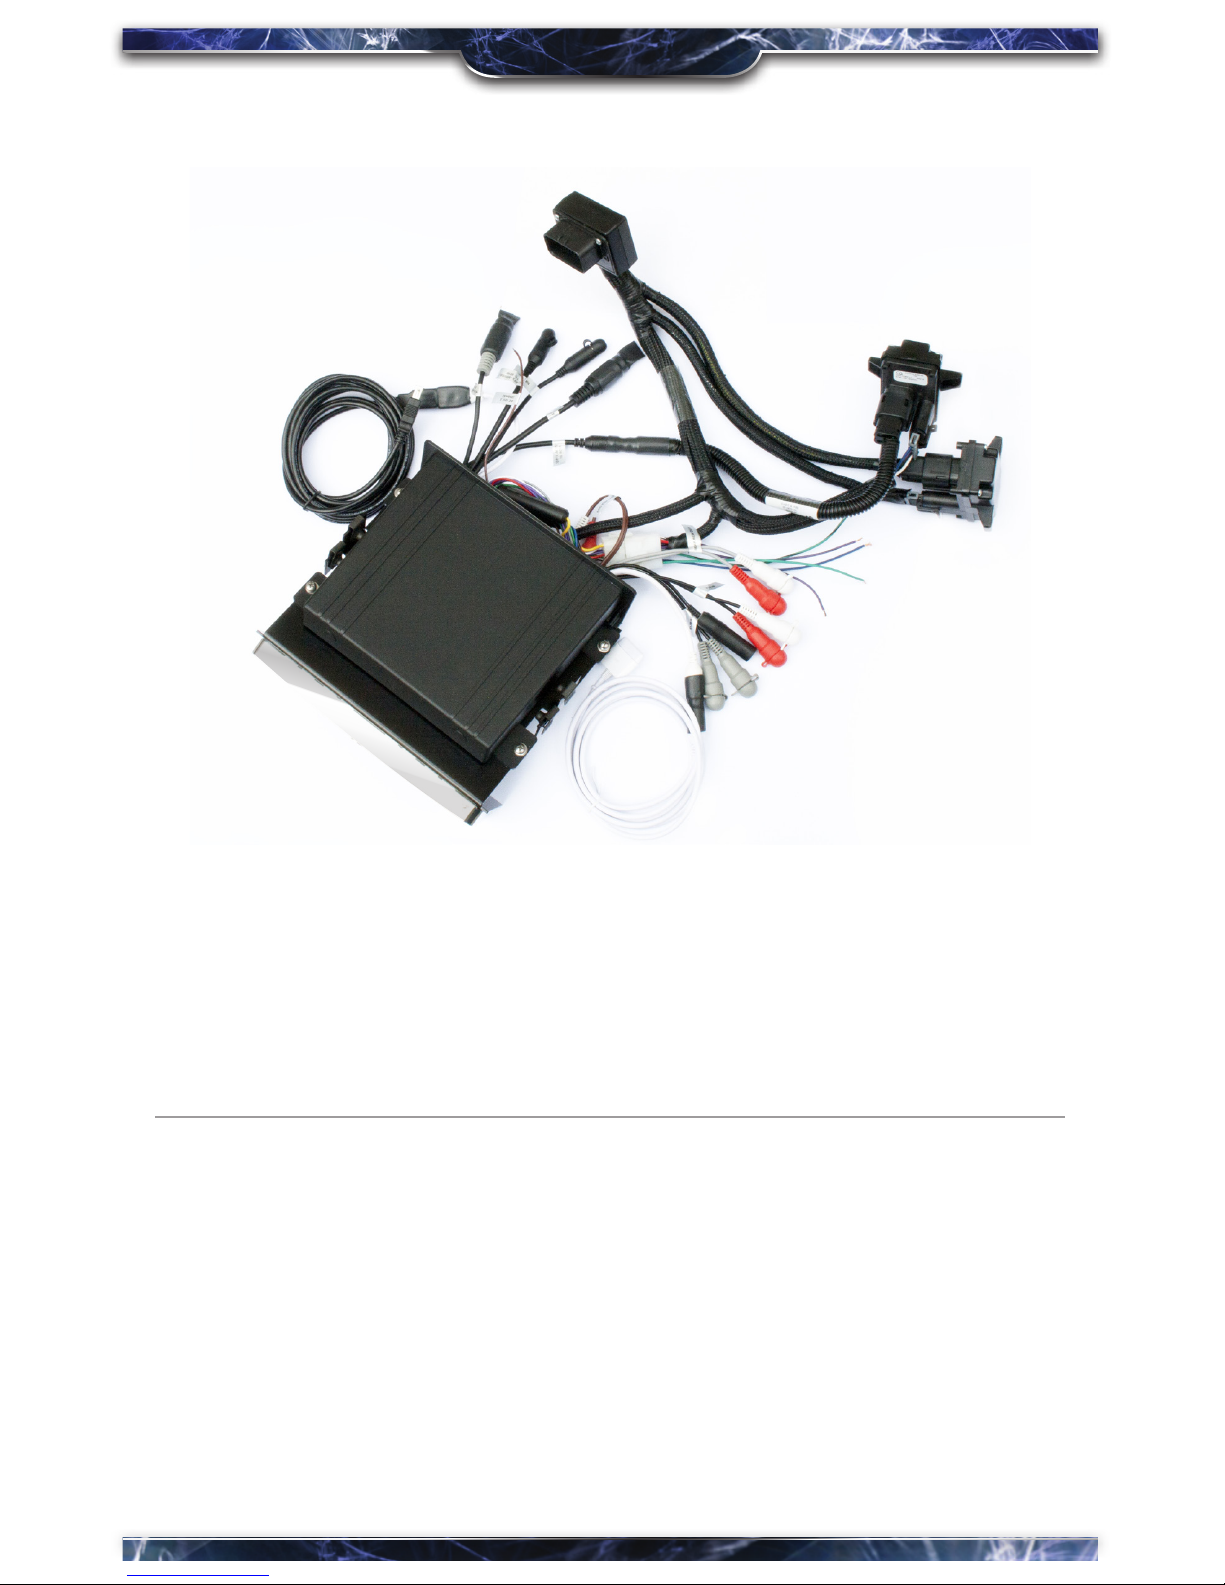
Most of the assembly has been done at our factory in order to make the installation
go as smoothly as possible. Kit does not include a radio antenna. Depending on the
type of connector on the end of your stock antenna, a replacement antenna or adapter
might be needed. Refer to stock radio manual for further information and instructions
for connecting optional equipment such as an audio amplier, Sirius Satellite Radio, or
speakers. The Green and Purple wires on the Medallion wire harness are for optional
speakers. This kit is Sirius Satellite Radio “ready”. Sirius equipment is not included.
The (4) screws used to fasten the stock radio will be used to fasten the Medallion
Stereo. If you need to replace them, use ¼”-20 x ¾” long SHCS (Socket Head Cap
Screws) with a at washer and lock washer. A longer screw will damage the radio unit.
Common tools and supplies needed:
•T27Torx®driver
•#2Phillipsscrewdriver
•5/16”nutdriver
•1”open-endwrench
•Hexwrenchset
•Wirecutters
•Wirecrimpers
•Wireties
•Electrician’stape
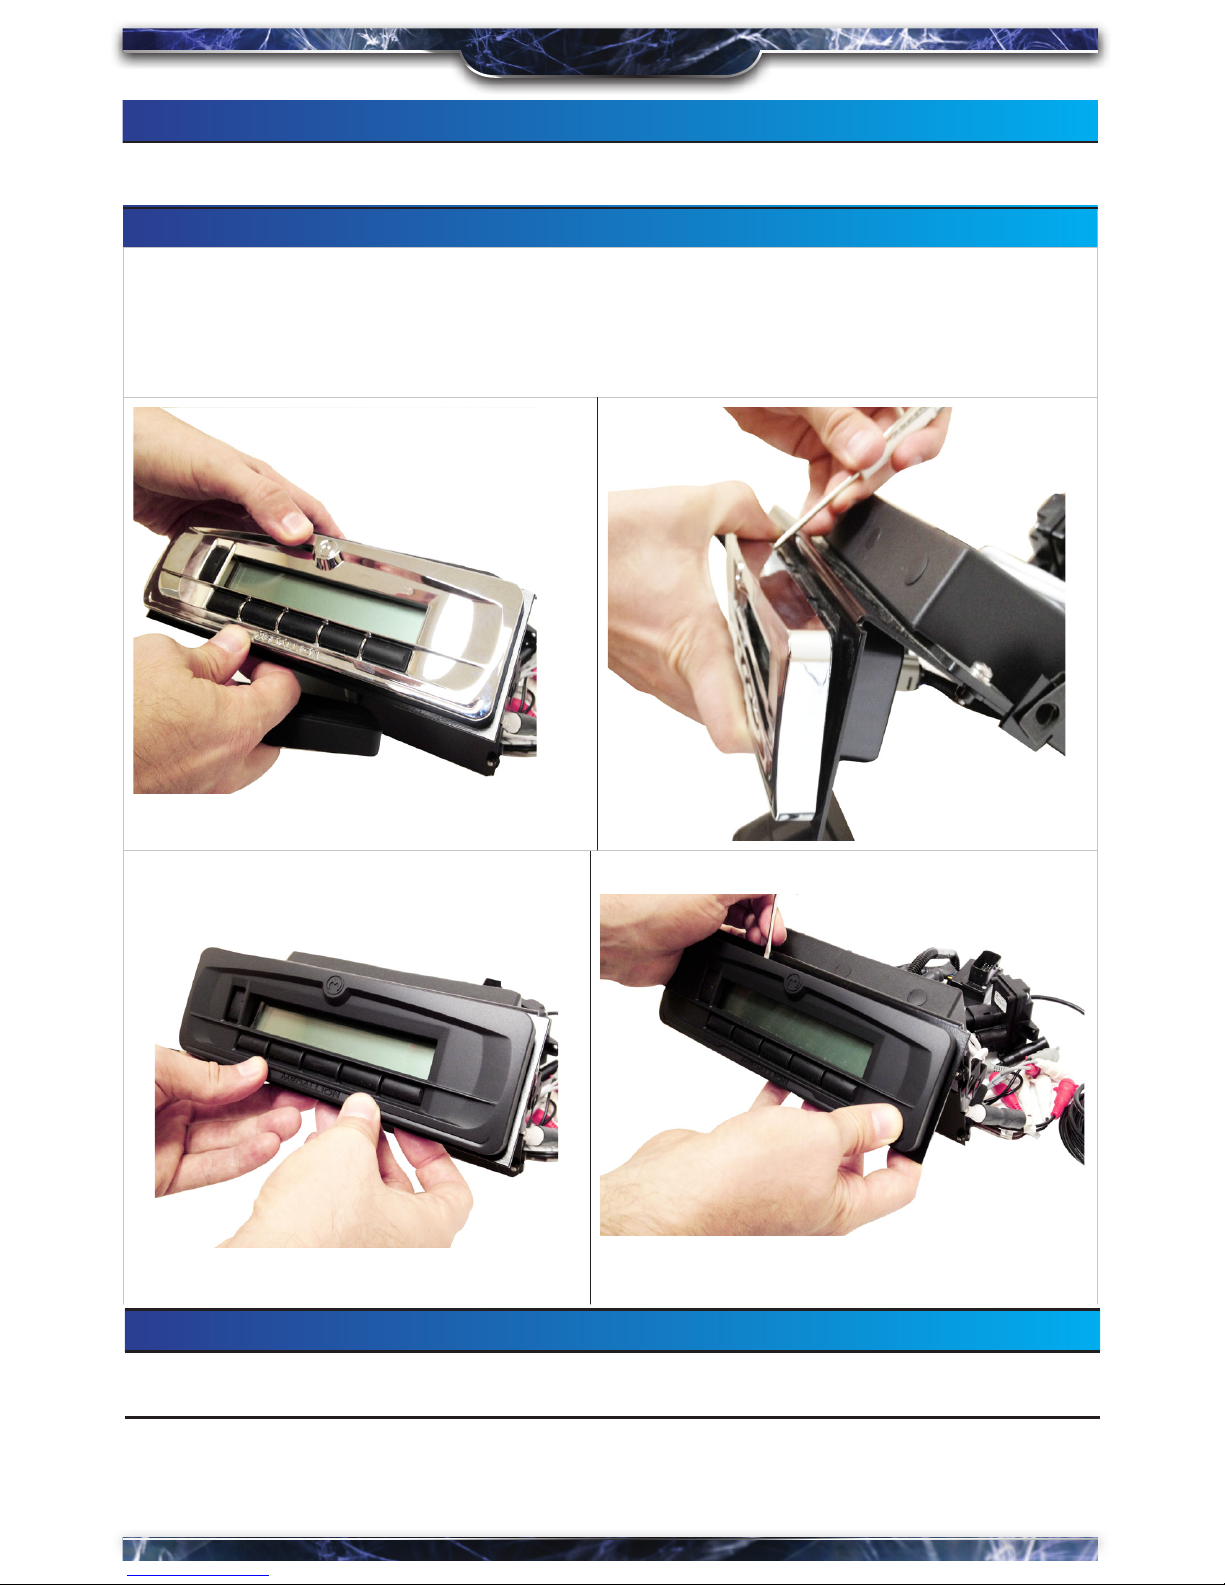
Step 1:
Remove the inner fairing screws.
TIP: Sometimes these are hard to nd. FLT Road Glide® inner fairings have (8),
FLH Street Glide® inner fairings have (7).
Protect the fender & tank with a cover before you begin disassembly to avoid accidental damage!
Screws
INSTALLATION
3
_
12